Introduction
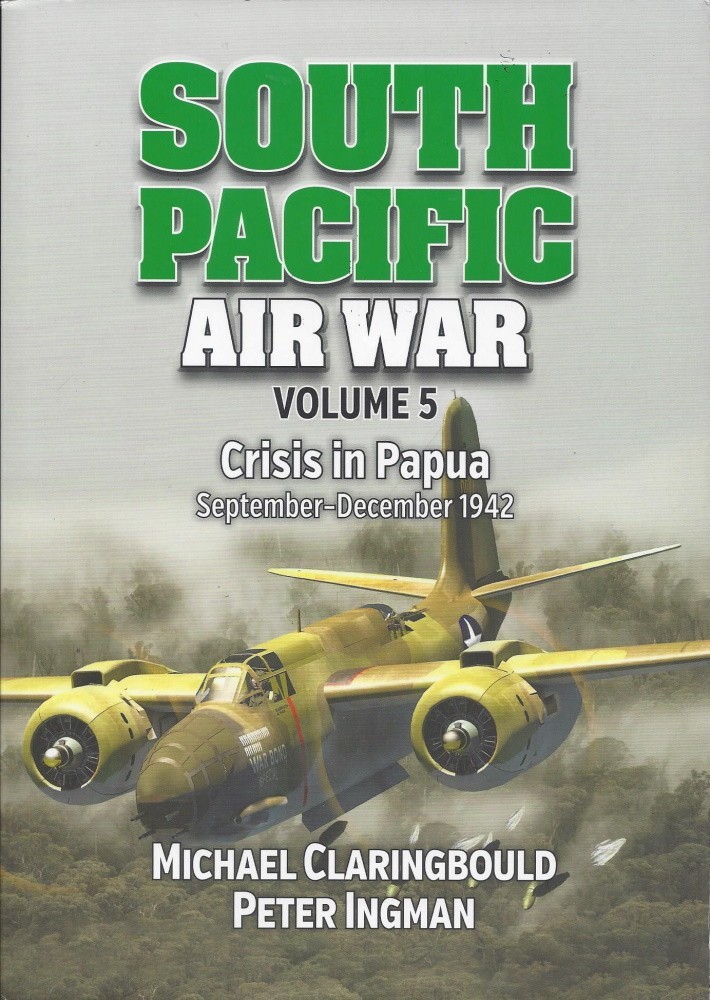
South Pacific Air War Volume 5: Crisis in Papua September -December 1942
Authored by Peter Ingman and Michael Claringbould, this softcover fully illustrated title from Avonmore Books is catalogued with ISBN 9780648926290.
South Pacific Air War Volume 5: Crisis in Papua September - December 1942 is a recent title from Avonmore Books, who specializes in high-quality printing of titles focusing on the early part of the air war in the southwestern Pacific. Based on primary sources, it is authored and illustrated by world-renowned wartime Japanese aviation expert and former diplomat Michael John Claringbould, who was raised in Port Moresby. This subject is a life-long passion for him. Composed of 236 pages including the index, it is catalogued with ISBN 9780648926290. In the author’s own words:
Volume Five of this series chronicles aerial warfare primarily in the New Guinea theatre in the critical period between September and December 1942. It can be read alone or as a continuation of the previous four volumes which span the first nine months of the Pacific War.
Never before has this campaign been chronicled in such detail, with Allied and Japanese accounts matched together for a truly factual account of the conflict.
The seeds for author Claringbould’s passion were planted in 1976 when, "...an irritable priest at Alexishafen, on New Guinea's north coast, reluctantly allowed me to scour and photograph Japanese aircraft wrecks on the mission's land," where he found a Ki-43-II. "Curiosity caused me to start collecting all material on this arcane subject, but it was frustrating. Few publications, including Japanese-language ones, agreed on interpretations..." Thus he began decades of research to learn and clarify the subject.
Mr. Claringbould has authored more than 20 other titles in several ranges of interests. Most concern the South Pacific air war. His series South Pacific Air War begins with The Fall of Rabaul, December1941-March 1942; focusing on operations by fighters, bombers, transports and miscellaneous types of both sides, including the ground and sea forces they supported, the series is forging an exceptionally detailed account of the war in the New Guinea and Solomon Islands region.
Personally, I am effusive about this series because I have been fascinated by the air war over the South Pacific for 50 years, and it seems that each new book opens as many questions as it answers. Thanks to Avonmore Books, those questions are being answered.
Contents
South Pacific Air War Volume 5 is told through 23 chapters and sections in 230 pages:
- Introduction
Chapter 1. Allied Overview
Chapter 2. Japanese Overview
Chapter 3. Crisis in Papua I: 9-16 September 1942
Chapter 4. Crisis in Papua II: 17-24 September
Chapter 5. Horii Withdraws: 25-30 September
Chapter 6. Allied Flanking Operations: 1-10 October
Chapter 7. Mountain Warfare: 11-20 October
Chapter 8. IJA Defeat in the Mountains: 21-31 October
Chapter 9. Arrival of the JAAF and the IJN Restructure
Chapter 10. Kokoda Recaptured: 1-11 November
Chapter 11. The Battle of Buna Begins: 11-21 November
Chapter 12. Stalemate at the Beaches: 22-30 November
Chapter 13. Gona’s Gone! 1-9 December
Chapter 14. Madang Move: 10-20 December
Chapter 15. Enter the JAAF: 21-31 December
Chapter 16. Conclusion
Appendices
Appendix 1 – Allied Aircraft Losses & Fatalities
Appendix 2 – Japanese Aircraft Losses & Fatalities
Appendix 3 – Cumulative Aircraft Losses & Fatalities
Sources & Acknowledgements
Index
While South Pacific Air War titles are deeply researched specialist military histories and not modeling books, they are inspirational to me as a modeler per the old 'chicken or the egg' analogy - the first page triggered a desire to start a Lockheed Hudson while the cover reminds me that I want to build my A-20 soon. The narrative is detailed and absorbing as is the graphic content: exciting photographs; original color artwork presenting what the camera missed; maps; informational charts and tables distilling pages of information into easily digested data. Pages 8-9 present a glossary and abbreviations, explanatory notes, and addendums to Volume 3 and 4.
I am gratified that first-person accounts reinforce the content, as included below.
The authors have organized and presented the complex stories of that stage of the war chronologically. Each chapter recounts the topic and aerial activity day-by-day to the extent that records are available:
On the afternoon of September 8, thew last flyable Zeros left Buna for good. These were No. 2 Ku's last airworthy Model 32s, which withdrew to Lae. The abandoned and wrecked aircraft left behind on the edge of the field were repeatedly strafed and bombed by the Allies, in the mistaken belief they were active aircraft.
Expenditures of ammunition is also frequently presented:
...half a dozen 408th BS B-26s drop 72 x 300-pound bombs over Buna airfield. They were followed...when 15 A-20As were flown mainly as strafers, dropping 25 x 100-pound bombs and expending 6,000 x 50-inch and 1,200 x 0.30-inch caliber machine gun rounds.
You will find "gee whiz" technical subjects, operational discussions and profiles of prominent personnel. The authors describe and explain a multitude of subjects, including:
- Differences between Allied and Japanese theater delineation.
- Deployment of Allied and Japanese air, land, and sea forces.
- Japanese Army Air Force agreement to participate in the South Sea Area.
- Composition of air units.
- Details the building of airfields by units involved, including POWs and their conditions and fates.
- Supply and reinforcement situations.
- Ferrying of aircraft and basing.
- Diversions of reinforcements to other theaters.
- Influence of USAAF Major General George Kenney in tactics, leadership and administration.
- Attacks detailed with accounting of size and number of bombs dropped, and number and caliber of bullets fired.
- Accurate accounts of attrition of forces, matching the claims and losses of the opposing sides.
- Saga of Japanese marines marooned on Goodenough Island.
So much more than that fills this book such as aspects of the various campaigns, including revelations of Japanese intentions for what became the Kokoda Track Campaign, and bomber air drops of supplies to them. Recounted is how the newly formed Fifth Air Force engaged in ground support along the Kokoda Trail, aerial defense of Port Moresby, and its role in the pivotal battle of Buna. The Fifth was also diverted to attack Rabaul and the Shortland Islands in support of the critical battle of Guadalcanal. Seemingly eclipsed by American sorties, the Royal Australian Air Force (RAAF) was more active than I realized with Beaufighters, Beauforts, Catalinas, Kittyhawks, Hudsons, and even Wirriaways. Daily accounts of the air war reveal that while the Shortland Islands were out of reach of Allied attack aircraft from Guadalcanal, Beaufighters sortied to attack those bases from Milne Bay, as did other RAAF aircraft from other locales. Previously unknown and exciting to me are accounts of Allied PBY and Japanese flying boat formations sallying forth into the night to attack enemy bases in New Guinea and the Solomons. Unexpected aircraft in the theater include Japan's J1N Gekkō "Irving," one of which actually flew a bombing mission over the Solomons. The challenges and tactics of attacking nearly invisible Japanese positions in the swamps and jungles of New Guinea is made clear.
From first-hand accounts and official or informal reports we learn of administration, daily life, ground combat and air battles. Narratives of air battles are plentiful and the author’s research is apparent:
Most of the Zeros scrambled, which were in any case preparing to take-off to patrol over the convey as it approached Buna. A number of these managed to intercept the returning A-20As and eight escorting P-40s about ten miles south of Lae. A flight of four P-40Es led by Lieutenant Dick Dennis was bounced by an estimated 15-20 Zeros. The Americans dropped their belly tanks, before diving to gain speed and counterattacking. First Lieutenant William Day’s #43 Jerry received three bullet hits in the first pass, while the inexperienced pilot Second Lieutenant Glenn Wohlford’s P-40E was last seen trailing smoke while being pursued by two Zeros. He never returned to base and remains missing in action. After the remaining American pilots turned into the Zeros, Day fired at a Zero from head on which burst into flames. This was No. 251 Ku’s FPO1c Kaneko Toshio who was killed. Seven other Zeros received minor damage…
On a skip-bombing mission to Rabaul Pilot Lt James Murphy of:
B-17F 41-24543 Pluto, recalled:
Everything around d the harbor seemed to be firing at us. I had a good 20-second run, straight and level. The bombs went exactly as we hoped – one hit the ship directly, with the other three very close to it. Major fires broke out all over the ship.
Still another account of an A-20 attack demonstrates the results of poor planning and carelessness:
This mission was one we didn’t like to talk about. Somebody had goofed up on the distance there and back. We lost some planes by running out of gasoline ditching in the water. The others barely got to the landing strip. One had to be towed from the end of the runway back to the revetment. The pilots were out of gasoline and with all the excitement of the first mission, got back to Kila about dark. Naturally all of the personnel had gathered to welcome them back. One pilots hadn’t safetied his guns. On his approach to the strip he accidentally hit the trigger and a 50 cal in the nose shot a burst causing quite a stampede of personnel...
Accounts of high command friction is included such as Gen. MacArthur's criticisms of Australian and American commanders, and fighting units. Conditions for Japanese forces are fascinating, i.e., 3rd Battalion, 144th Infantry Regiment:
With the unfavorable climate and severe cold, combined with the lack of supplies, casualties in the unit continue to mount. The conditions of the battle are extremely harsh.
Furthermore, the decision to withdraw is explained:
The strength of the force continued to deteriorate owing to the constant heavy rain and depletion of supplies... the commander realized that attacks from enemy planes had disrupted the traspostation of supplies further forwatd than the bridge at Papaki [Wairopi]. He consequentionally makde the inevitable decision on 27 October to withdraw the force to the north bank of the Kumusi River...
This book is an extraordinary account of the South Pacific air war. Beyond the air war, the authors include an exceptional amount of specific and general information about many aspects of the war in the South Pacific - air, sea, and land.
Photographs, Artwork, Graphics
Visual support of the text is equally remarkable. Rarely when turning a page is there not some visual component on at least one of the pages. Modelers will find a gallery of reference material to build their models and make dioramas, and artists and historians are sure to find gratifying images, too.
Photographs
I am amazed at the photographs the authors have in the book. All are black-and-white and vary from high quality exposures to amateur 'grab shots,' and all present exceptional scenes of the subjects. A few images that particularly impress me are:
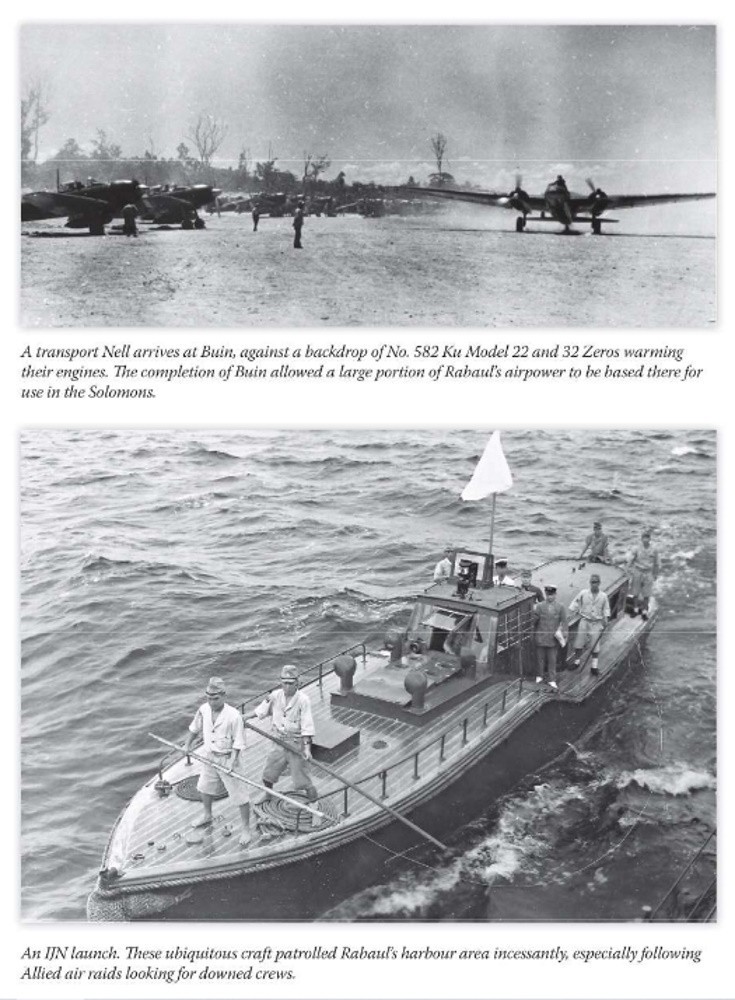
- High-quality view of an IJN motor launch and crew, often used to patrol seeking downed airmen.
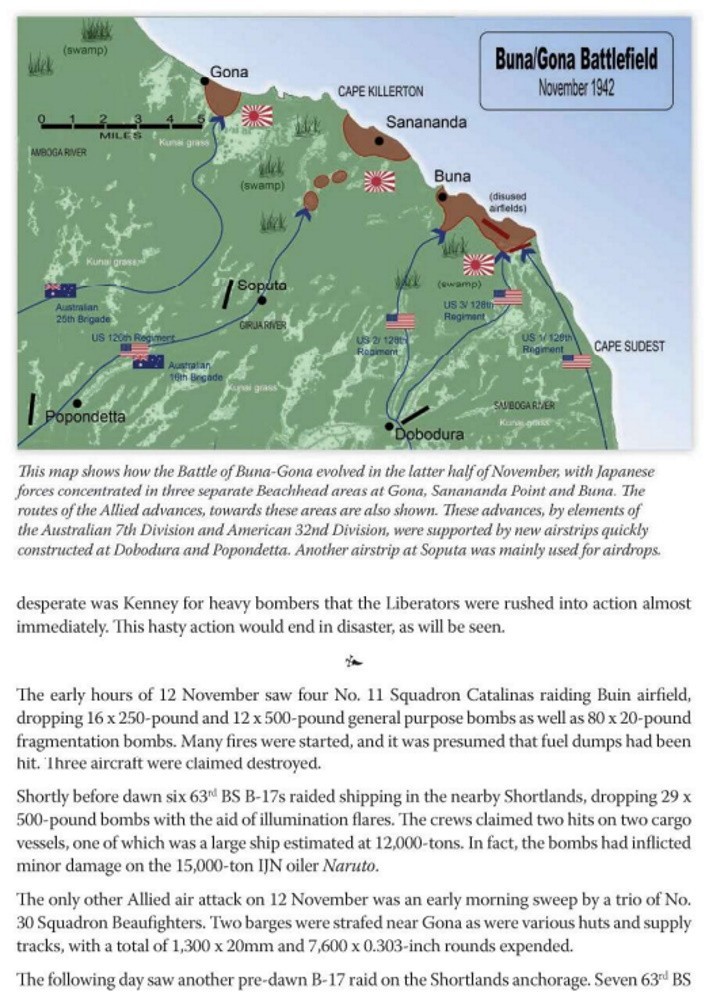
- Transport taxiing past Zeros at Buin.
- Rufe floatplane preparing to launch for take-off. (Crude field camouflage apparent.)
- Beaufort taking off ahead of a hurricane of mud spray.
- Engineers maintaining floatplanes near Rabaul.
- Offloading machine guns from an H6K flying boat.
- Ki-46 Dinah being manhandled into a camouflaged parking area at Ropopo.
- Bombing-up a P-40E for a mission.
- Aerial photograph of the Kumusi River bridge, mortar and machine gun positions identified.
- Heavy maintenance on a B-17 in primitive conditions.
- Japanese manhandling 250-kg bombs.
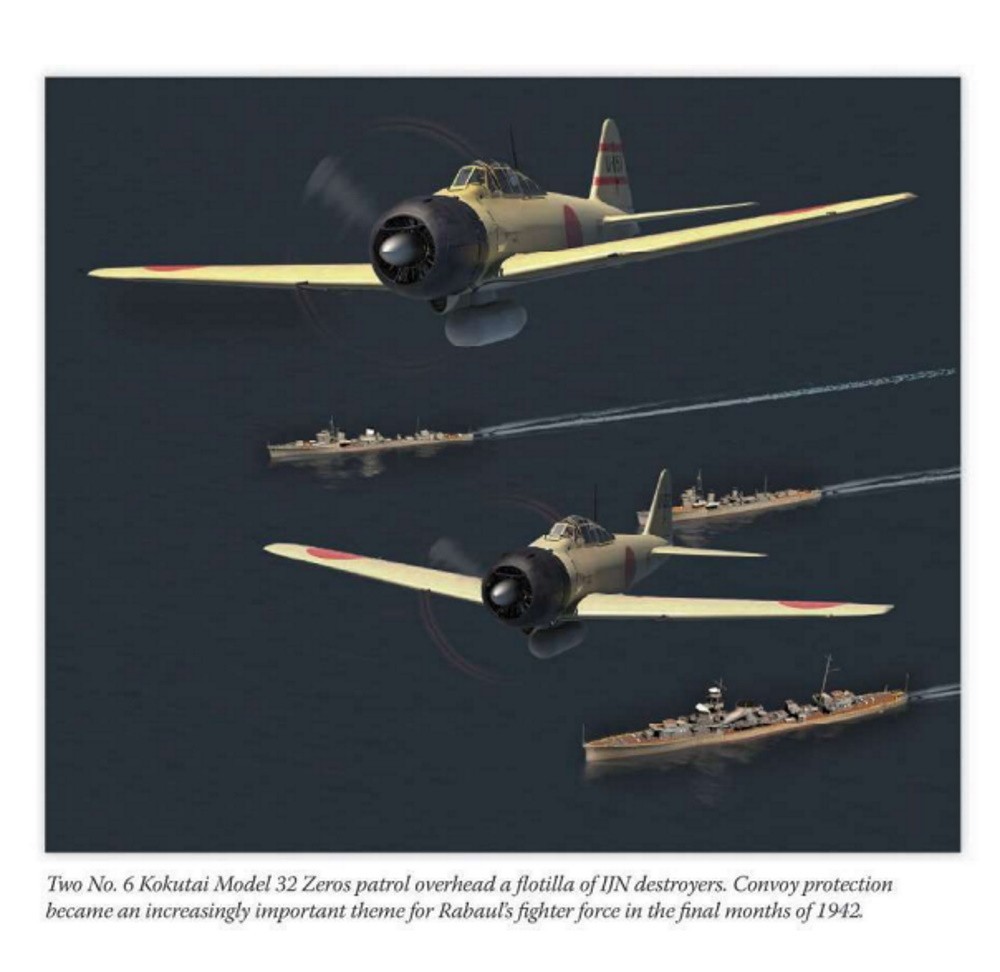
Mr. Claringbould digitally created a gallery of original artwork to capture what the cameras missed, profiles of aircraft and dynamically viewed "in action" scenes.
1. No. 6 Squadron Hudson loosing bombs- in-action scene.
2. No. 6 Kokutai Zeros patrolling over destroyers- in-action scene.
3. Kittyhawks preparing to attack Japanese marines on Goodenough Island - in-action scene.
4. USAAF C-47 descending into stormy Port Moresby - in-action scene.
5. A6M3 Zero and P-39 Airacobra head-on pass- in-action scene.
6. A6M3 Model 32, No. 2 Ku, Rabaul, September: profile.
7. B-25 Battlin' Biffy under attack by Tainan Zeros racing for the Owen Stanleys - in-action scene.
8. B-26 Shittenengitten, 33rd BS: profile.
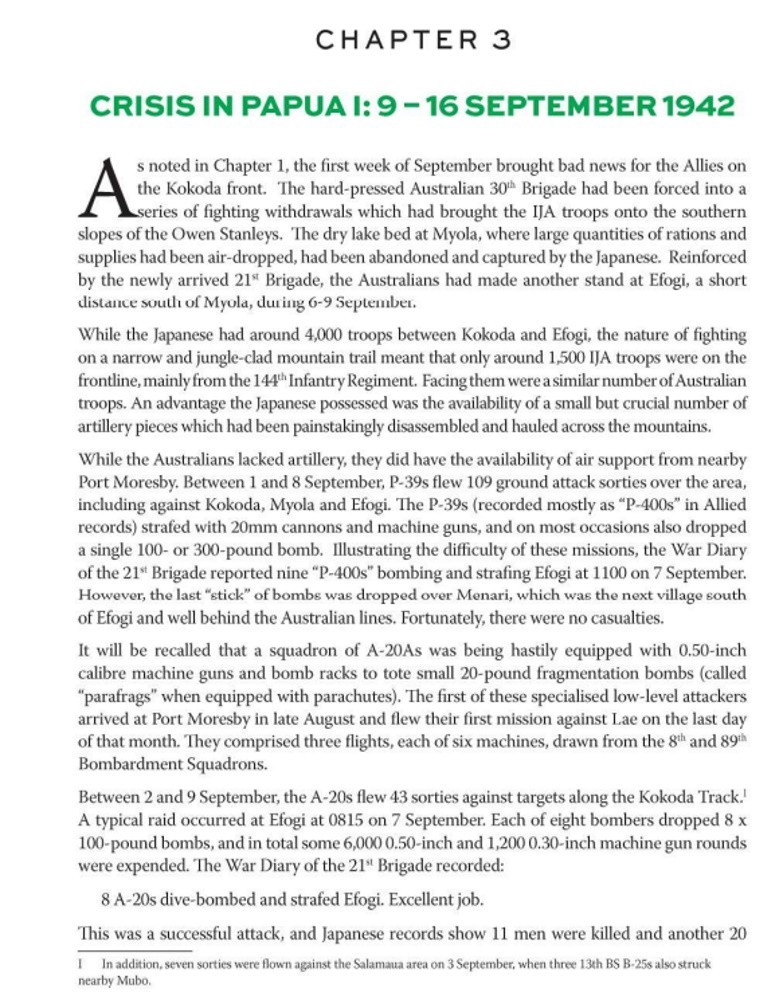
9. D3A Val overflies an IJN destroyer - in-action scene.
10. No. 751 Ku Zero in Kanoya markings verses B-17 over Rabaul - in-action scene.
11. Tainan Ku A6M2 V-108, buntaicho Lt Jg Kurihara, Lae: profile.
12. D3A1 Val, No. 31 Ku, white 31-212, Lakunai, October: profile.
13. Ki-46, 76th Dokuritsu Chutai, over Rapopo - in-action scene.
14. D3A Val releasing bomb during dive as a P-40 pulls out ahead - in-action scene.
15. A-20A Old Man being stripped of parts after belly landing - in-action scene.
16. Betty returning to Kavieng at dawn.
17. C-47 41-38601 Swamp Rat, 6th TCS: profile.
18. P-40E-1 Jerry II, 8th FS: profile.
19. B-24 Little Eva - in-action scene.
20. D3A2 Val, MN3125, No. 582 Ku: profile.
21. Zero and P-40 in head-on pass - in-action scene.
22. P-38F Loi, 39th FS: profile with closeup of center nacelle.
23. P-38F, 39th FS: warming up for take-off -in-action scene.
24. Ki-43 Model I Hayabusa, Fuji'i Hirochi, Headquarters chutai: profile.
25. D3A2, force-landed at Salamaua - in-action scene.
Not reproduced inside the book are two other scenes, an A-20 releasing parafrags at low altitude (cover art), and my favorite artwork on the back cover - a pair of H6K "Mavis" flying boats over a broken undercast with the sun low on the horizon.
Maps
Each is explained with captions.
- Key Locations, September - December 1942: bases and airfields in eastern New Guinea, the Solomon Islands, New Hebrides, New Caledonia, northeastern Australia.
- New Guinea Theater/Kokoda Campaign, Sept. 1942
- Port Moresby Airfields, Sept. 1942
- Rabaul Area, Airfields and Defense, Dec. 1942: airfields, roads, and anti-aircraft gun batteries.
- Japanese Aerial Search Sectors, Sept. 1942
- Gona to Wanigela, late 1942: coastal route and airfield construction.
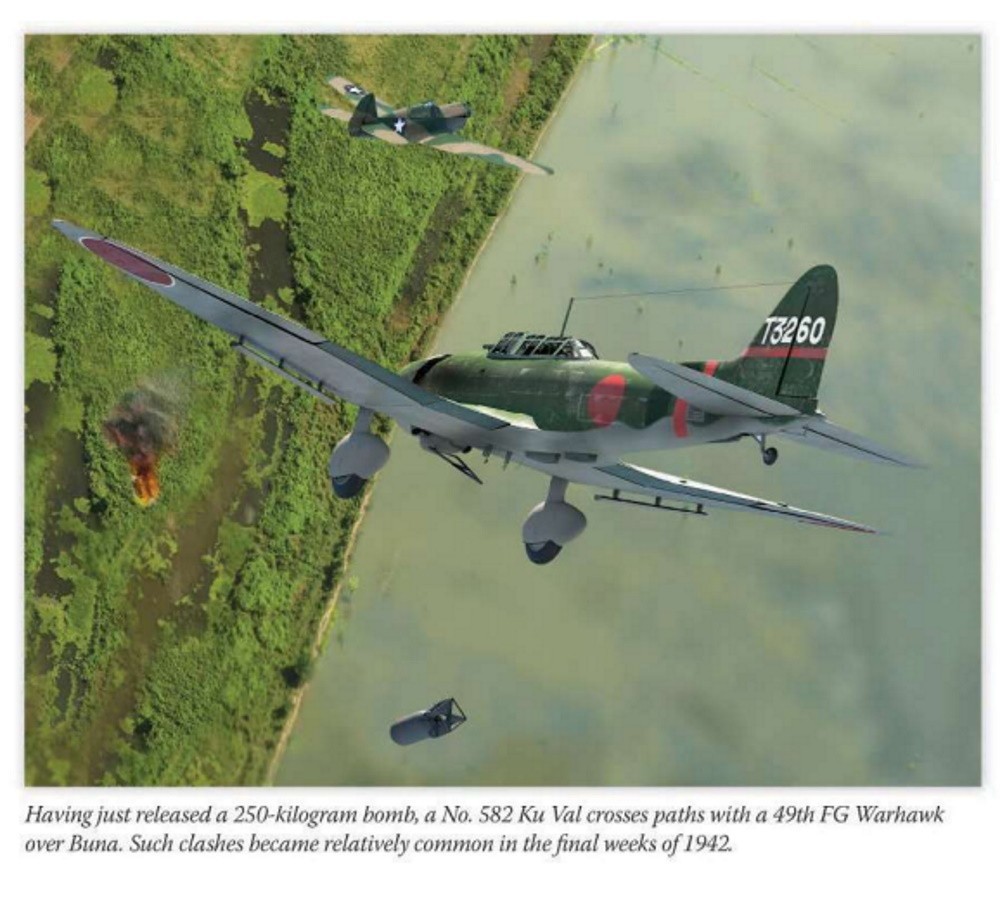
- Buna/Gona Battlefield, Nov. 1942: Japanese defenses and Allied advances.
- Gona area: Cape Ward Hunt to Oro Bay.
Tables and Charts
1. 5th Air Force, USAAF, North Queensland and Papua, 9 September 1942: three fighter groups and five bomb groups and a recon squadron by squadron numbers; aircraft type; base.
2. Fifth Attack Force: eight Japanese operational commands by designation; Commander; Units in each Force; Main Base.
3. Sixth Attack Force: three Japanese operational commands by designation; Commander; Units in each Force; Main Base.
4. Japanese operational strength of nine bomber and fighter units by: Unit; Serviceable Aircraft/inventory; Available aircrew.
5. Japanese Southeast Area Deployment late 1942: three Japanese Army Air Force air units; 13 ground support units (Meteorology; Navigation Aid; Radio, etc.).
6. IJN restructuring tail code - designation meaning of first, second and third digits.
7. Rabaul Base Force administrative nomenclature: 12 units by Old Name; New Designation; Inventory (of aircraft by type).
8. Allocation of the above into forces: Force; Commander; Units; Main Base.
9. US aircraft losses by bomber and fighter: total number and number of each type lost.
10. Appendix 1 – Allied Aircraft Losses & Fatalities, Confirmed Allied Military Aircraft Losses 9 September to 31 December 1942: by Date; Type; Serial; Unit; Comments; Fatalities; total losses by aircraft types. Names and circumstances listed in comments.
11. Appendix 2 – Japanese Aircraft Losses & Fatalities, Confirmed Allied Military Aircraft Losses 9 September to 31 December 1942: by Date; Type; Serial; Unit; Comments; Fatalities; total losses by aircraft types. Names and circumstances listed in comments.
12. Appendix 3 – Cumulative Aircraft Losses & Fatalities, Confirmed Allied Military Aircraft Losses 9 September to 31 December 1942 – Allied and Japanese losses broken down by series volume and dates, and aircraft type.
Conclusion
South Pacific Air War Volume 5 is the second title in the series I have read. With it Avonmore Books continues an amazingly comprehensive and detailed chronicle of the war in the sky of the South Pacific of 1941-1942. Focusing on primary sources, the authors recount not only the air war but also the ground and sea forces of the campaign. An exceptional gallery of photographs and original artwork enhances the text, and smart tables distill thousands of words into easily comprehended data.
Modelers and historians of the South Pacific war should find this to be an extraordinary resource for knowledge and inspiration. I can hardly wait for volume 6. Absolutely recommended.
Please remember to mention to retailers and Avonmore Books that you saw this product here - on Aeroscale.