Background
The Hawker Hurricane Mk IID was armed with two 40 mm Vickers S anti-tank cannons each fitted in a gondola under each wing. Each cannon had 15 rounds. The internal wing armament was removed and replaced with a couple of Browning machine gun firing tracers. The first aircraft flew on 18 September 1941 and deliveries started in 1942. The Hurricane IID had additional armour fitted to protect the pilot, radiator, and engine. The weight of guns and armour protection marginally impaired the aircraft's performance. The outer wing tips were strengthened so that 4G could be pulled. For use in North Africa the Hawker Hurricane Mk IIB (and other variants) were tropicalised. For operations in the desert and tropical regions the Hurricane Mk.IID were fitted with Vokes and Rolls-Royce engine filters. The Hurricane Mk.IID’s were nicknamed 'Flying Can Openers'. A total of 296 Mark IID’s were built by Hawker from January 1942 to February 1943.
[Source: Wiki]
The Kit
Arma Hobby’s 1:72 scale Hurricane Mk.II was first released as a new tool in 2019 [Scalemates]. It’s been released separately in the form of Mk.IIb, Mk.IIb trop, Mk,IIc and the Mk.IIc trop. This is the first time that Arma Hobby has released the Hurricane Mk.IID. The contents are all packed within one bag inside a side opening box. The masks and decals are placed inside the instructions. The block of 3d parts is wrapped separately and are additionally protected by bubble wrap. Some of the kit parts, particularly the wing, will need modifying, the instructions walk you through the relatively straightforward process.
Contents of this 1:72 scale kit includes:
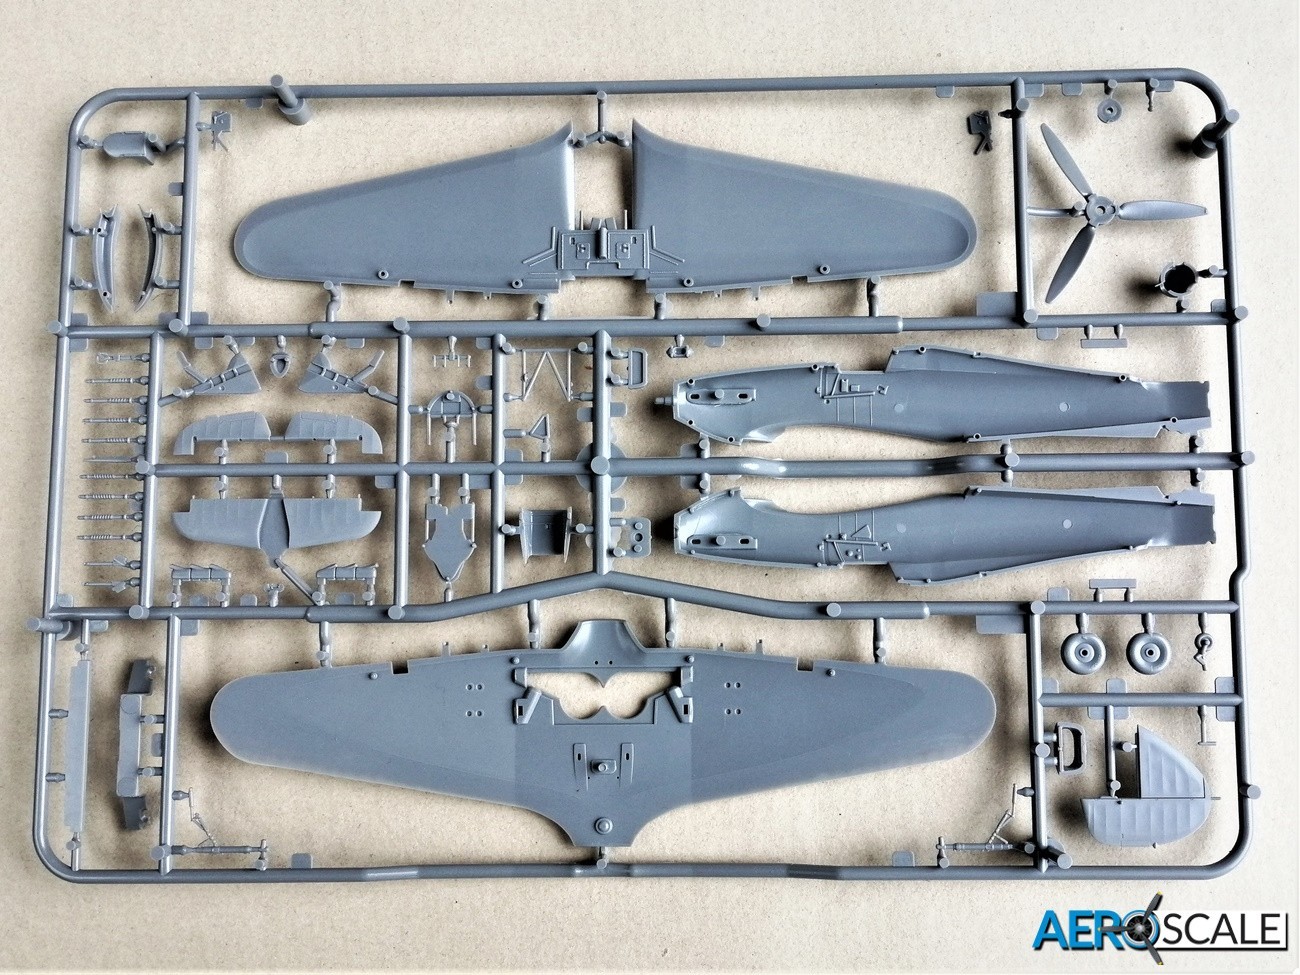
- 1 x grey plastic sprues
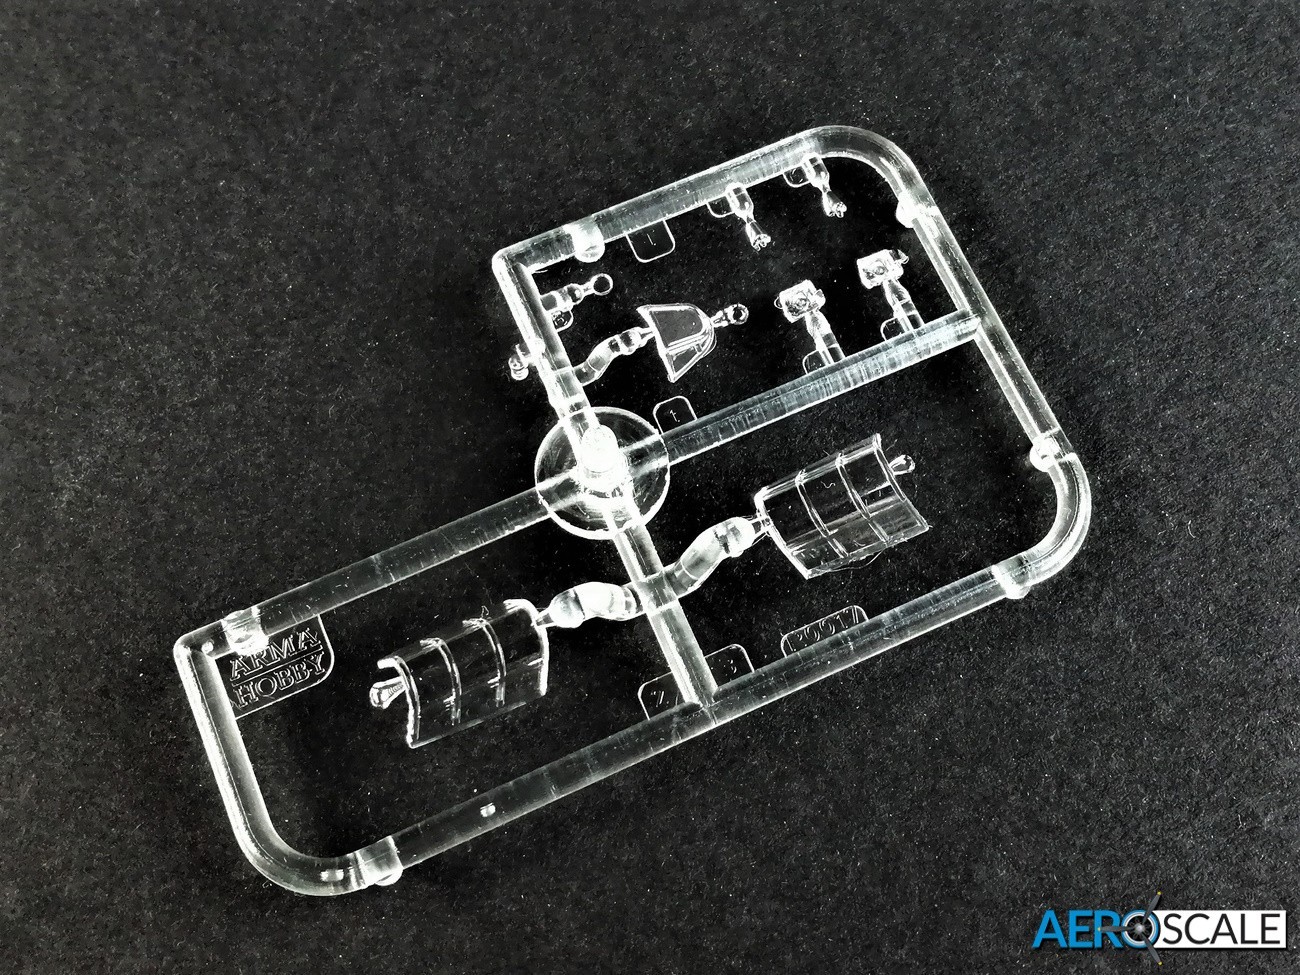
- 1 x clear plastic sprues
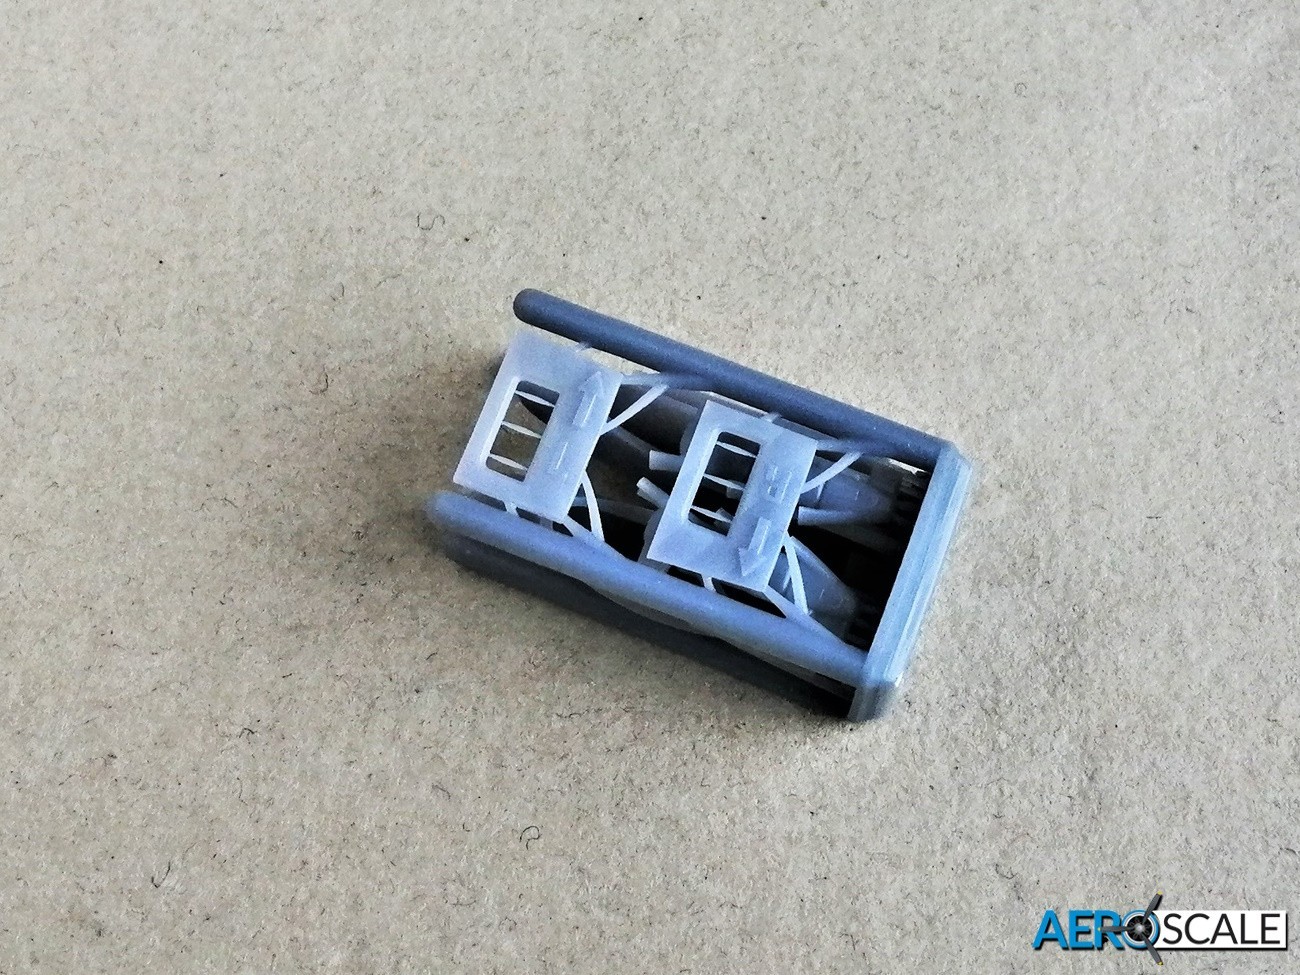
- 1 x set of 3D printed parts
- 1 x sheet of paint masks
- 1 x sheet of decals
- Instructions
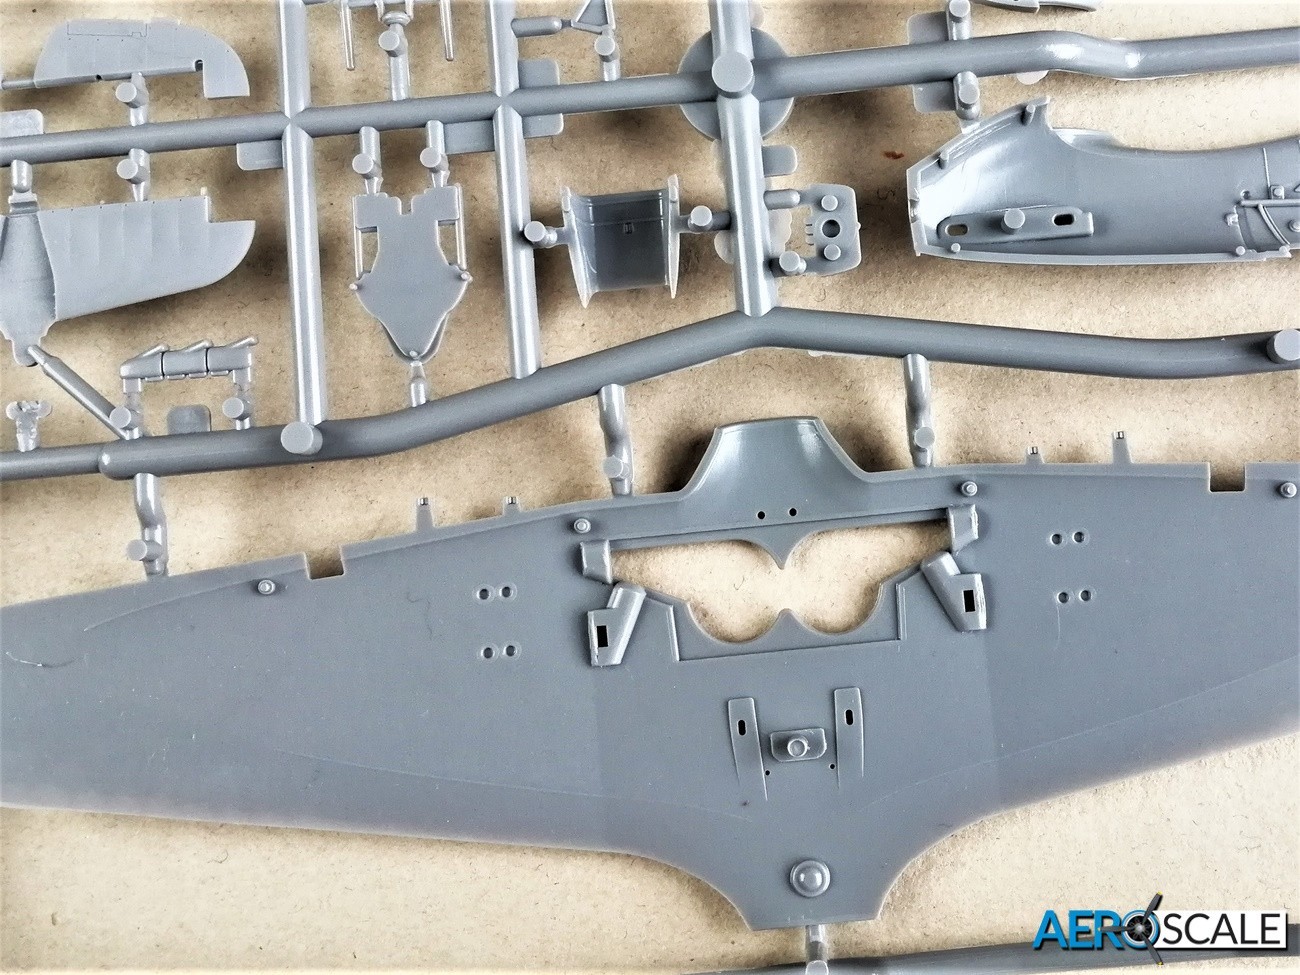
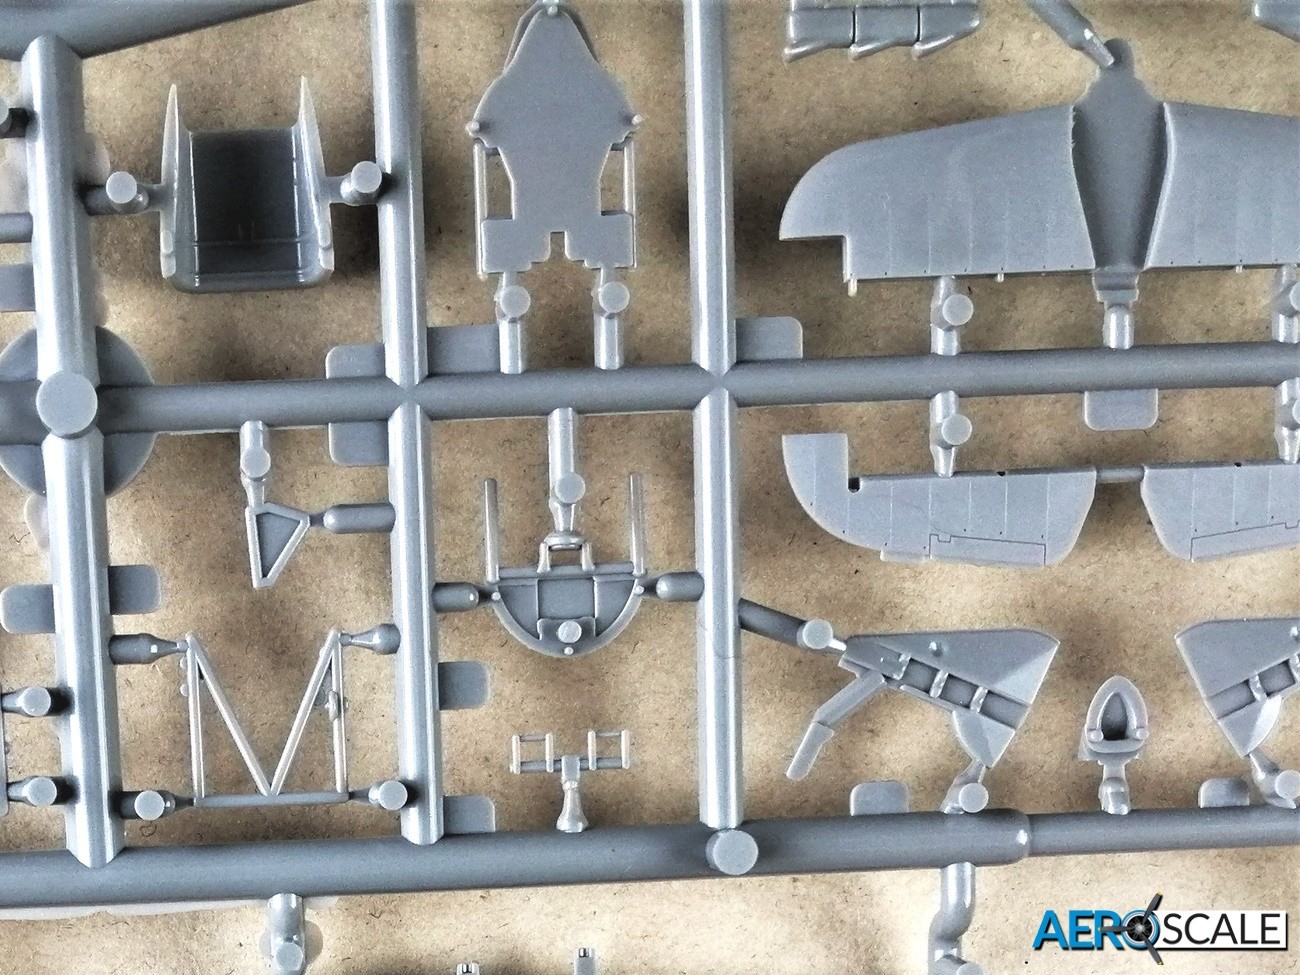
There are several parts making up the cockpit and the detail is superb. The moulded detail on the plastic instrument panel [IP] and compass looks pretty good. A decal provides instrument and compass face detail. The sidewalls on the fuselage walls are nicely detailed and there are additional plastic parts and decals to add. The floor of the cockpit is formed on the bridge between the two upper wings. The runner boards are moulded onto it and there are rudder pedals and the control stick to add. Not to be left out detail wise is the armoured bulkhead to the rear of the cockpit, onto which is attached the seat. There is also a one-piece brace that fits between the armoured bulkhead to just under the IP. The four-piece decal harness completes the detail for the cockpit.
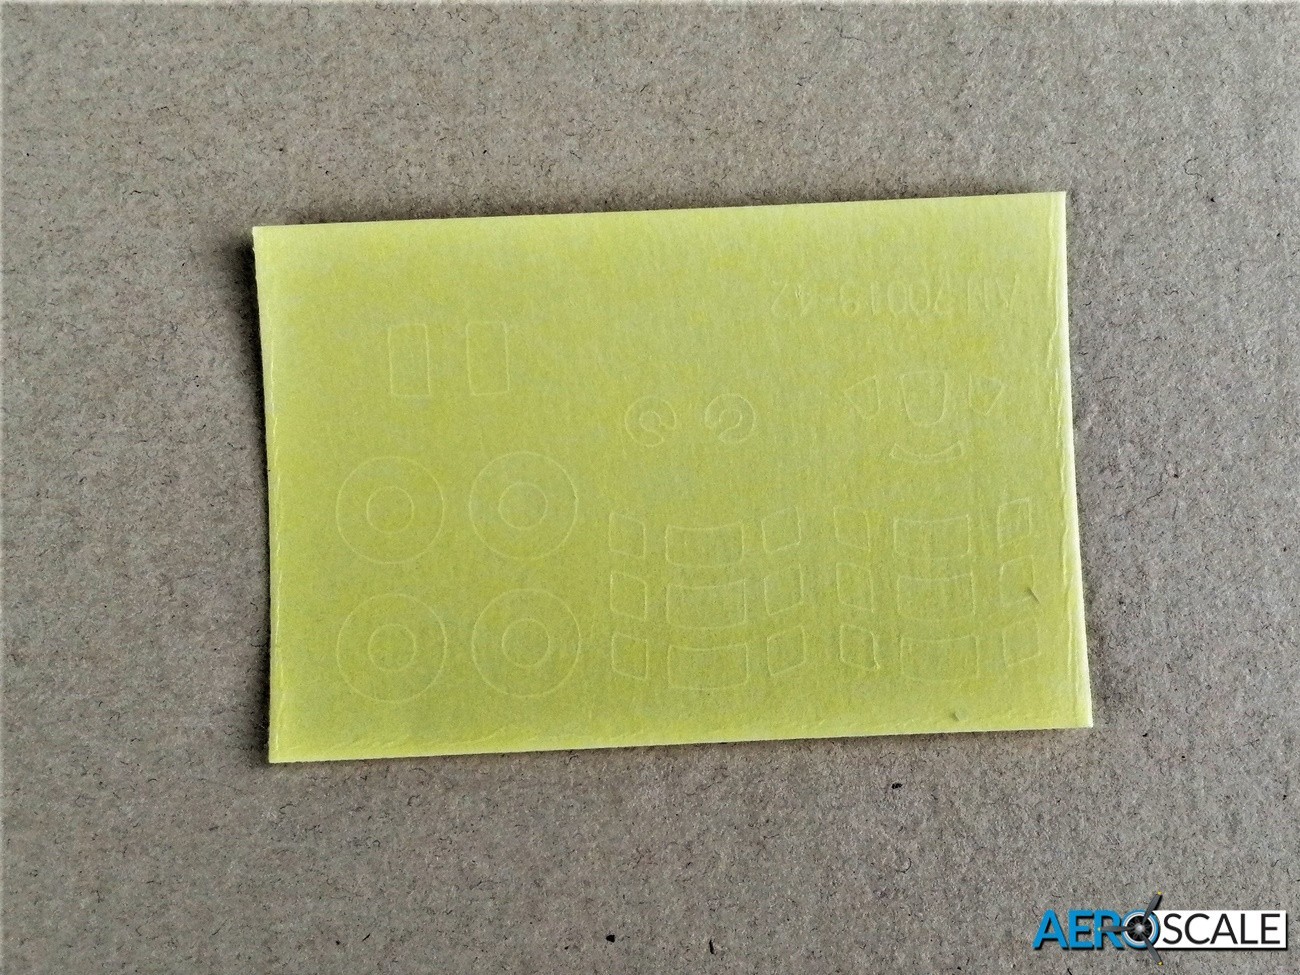
There are two canopies one for it to be displayed in the closed position and the other open. There are pre-cut kabuki type paint masks for the canopy and windscreen included.
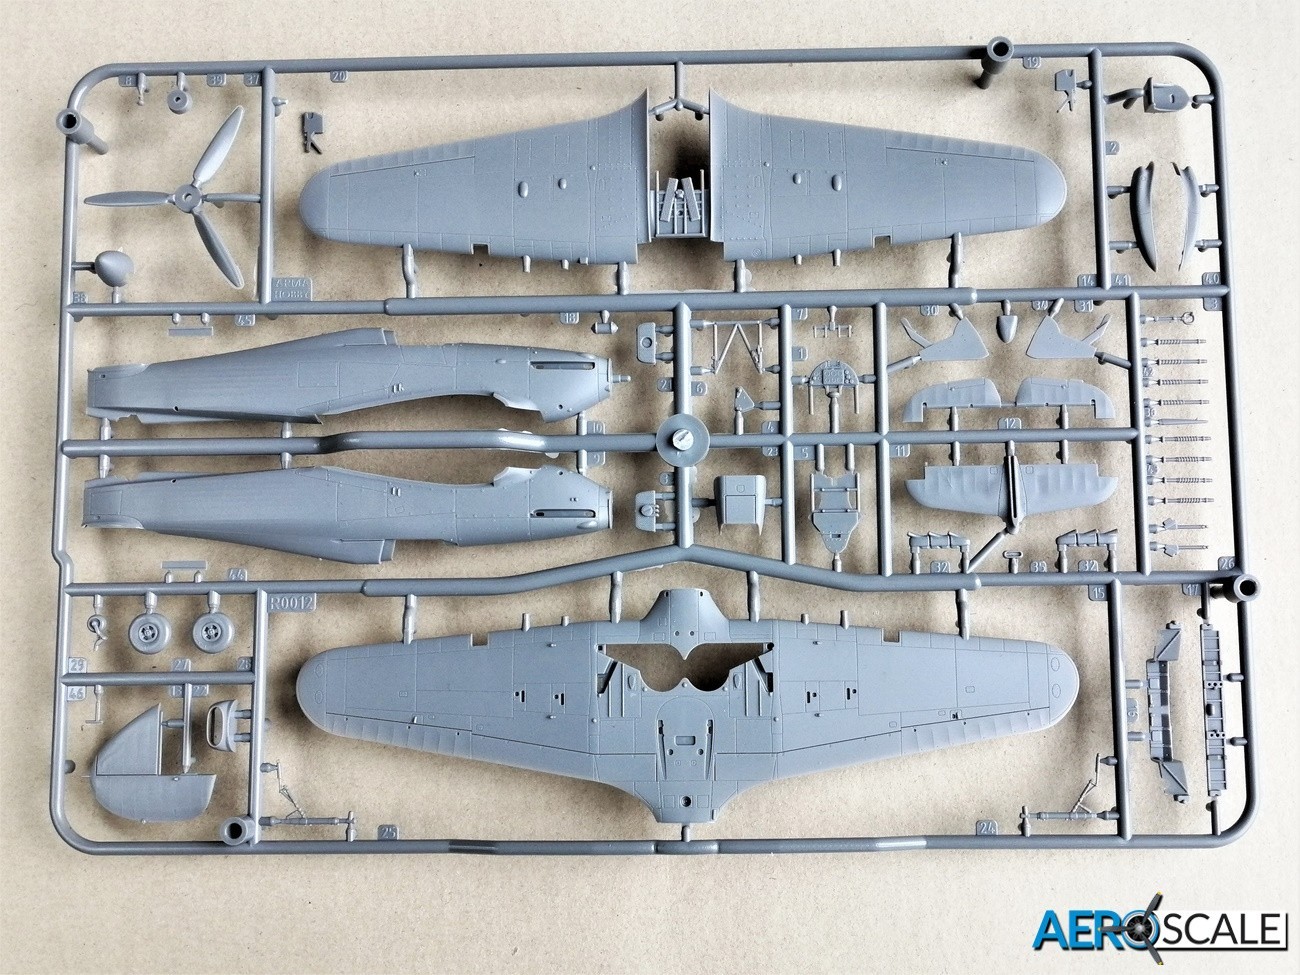
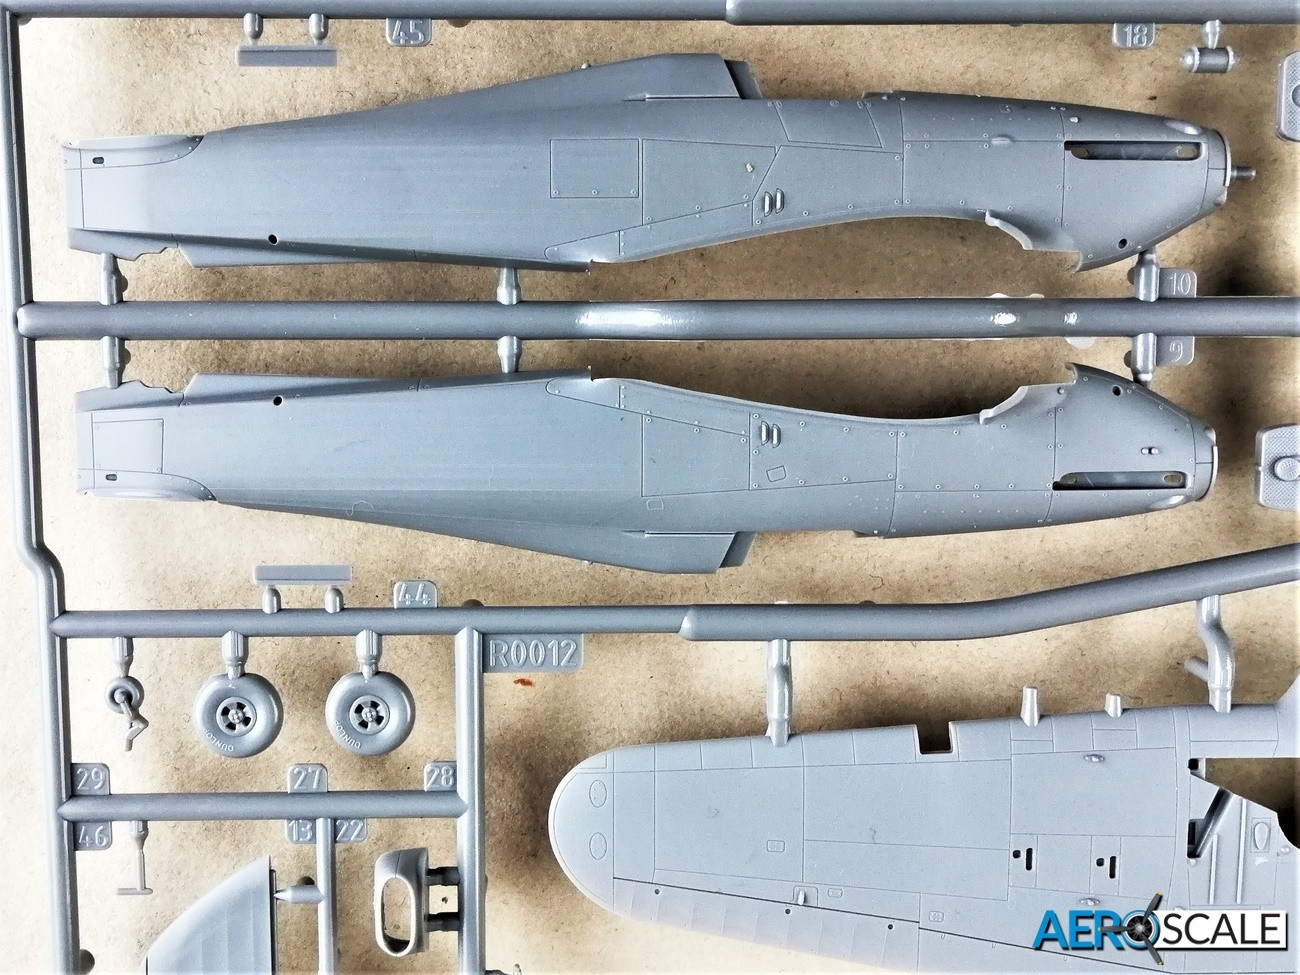
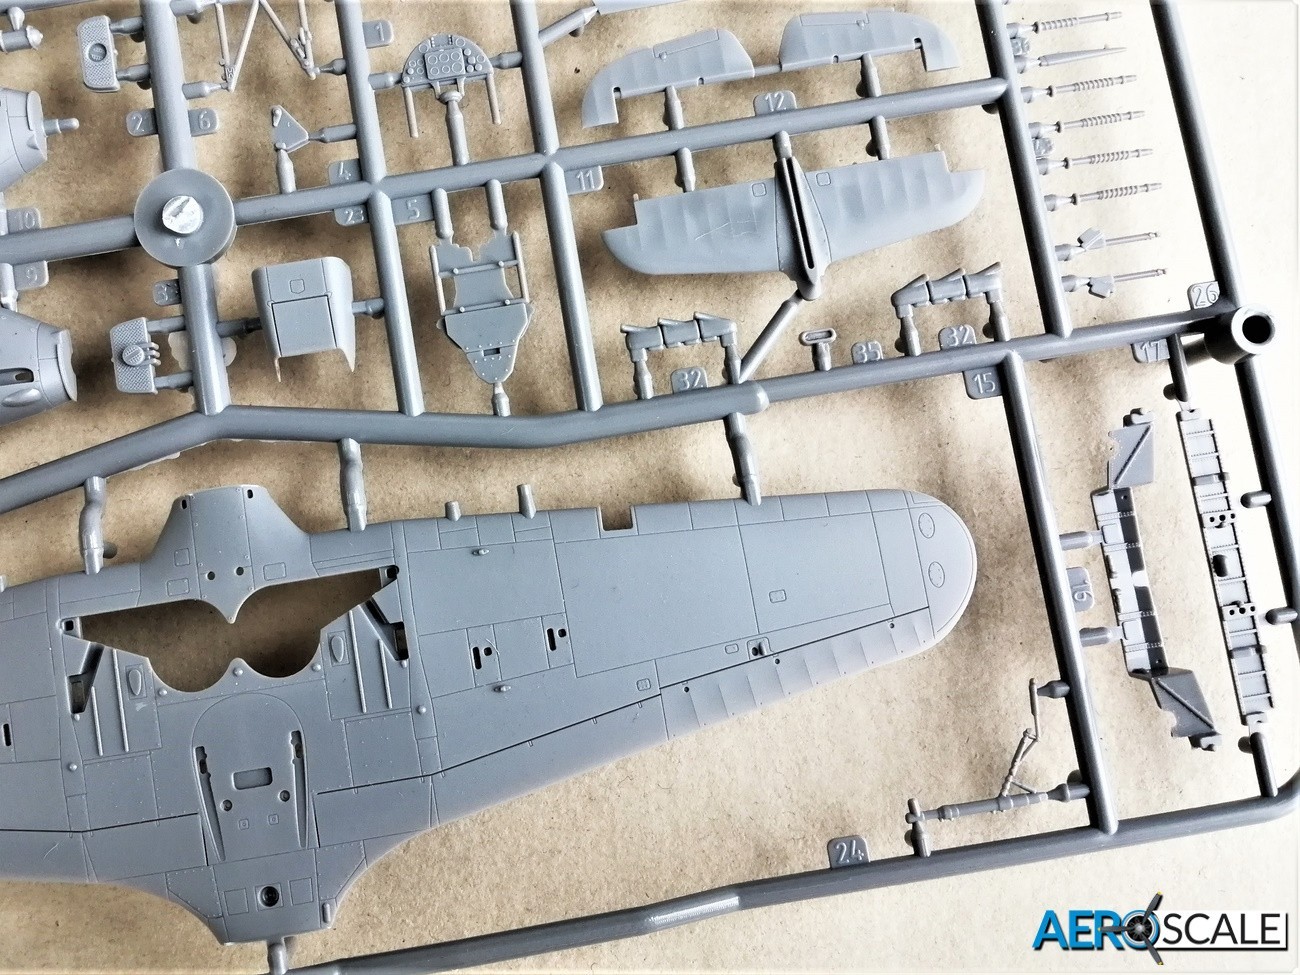
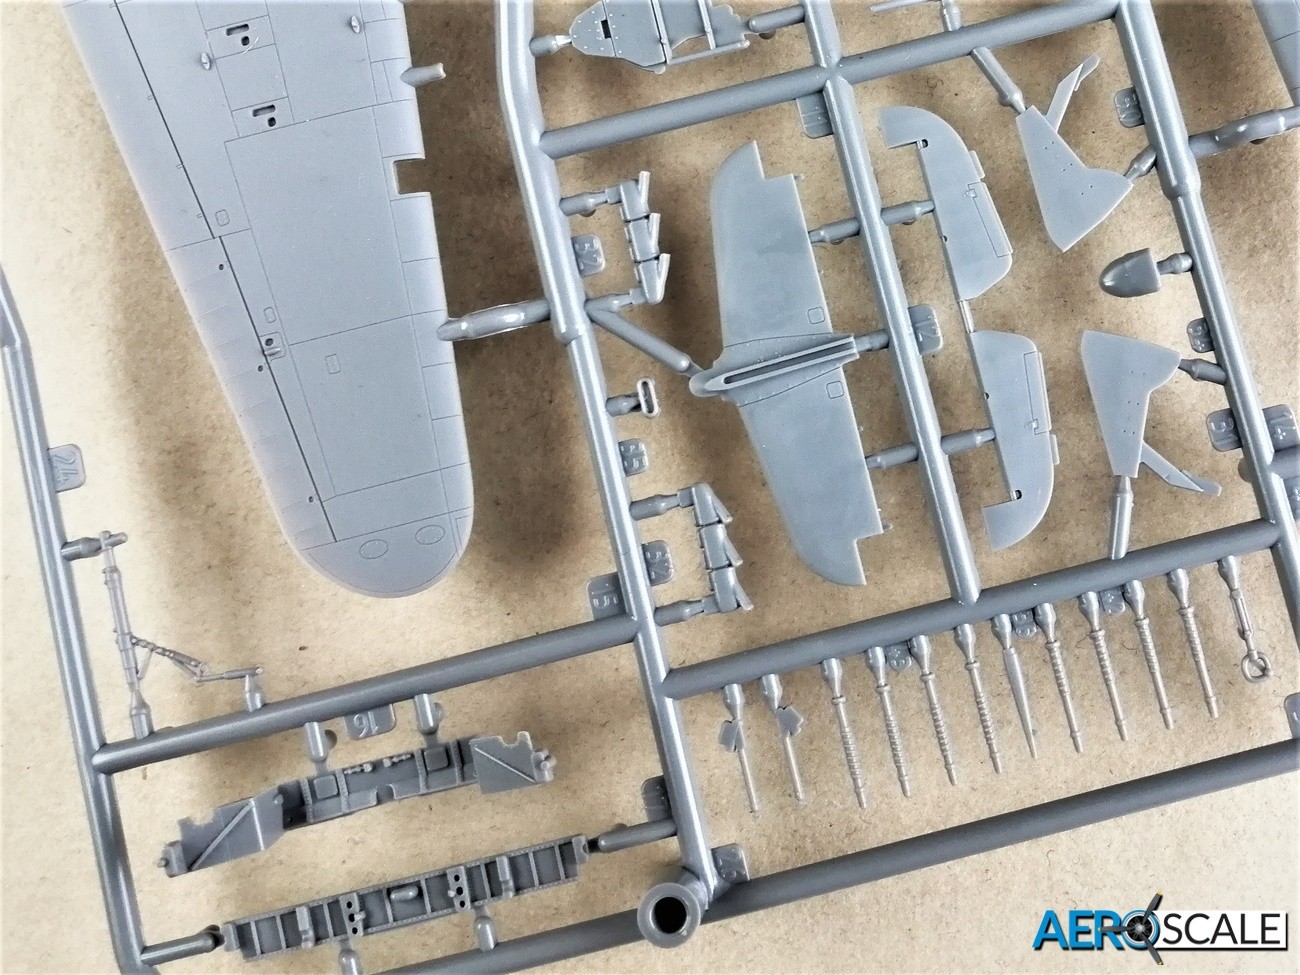
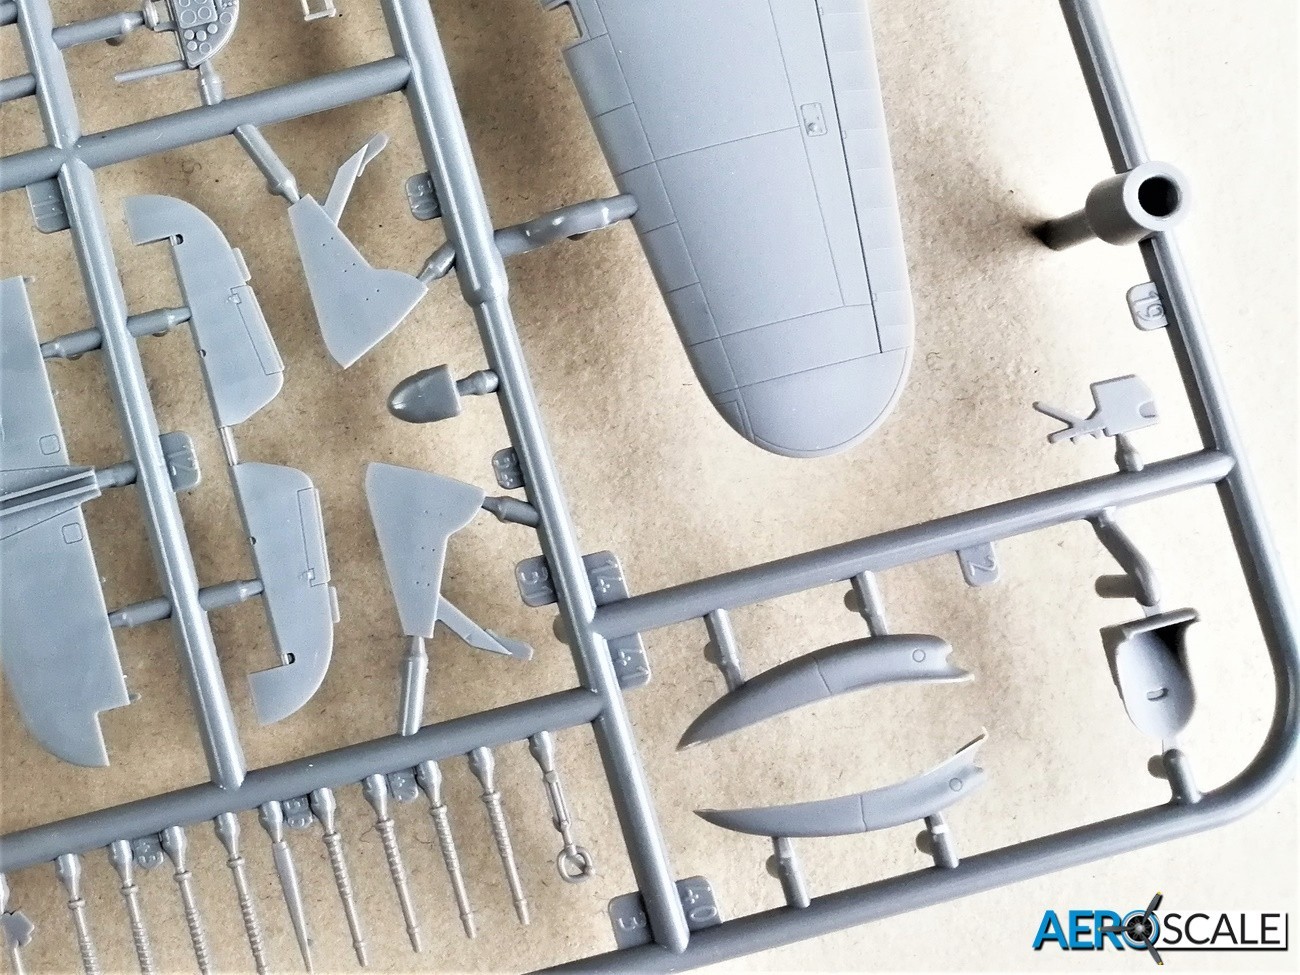
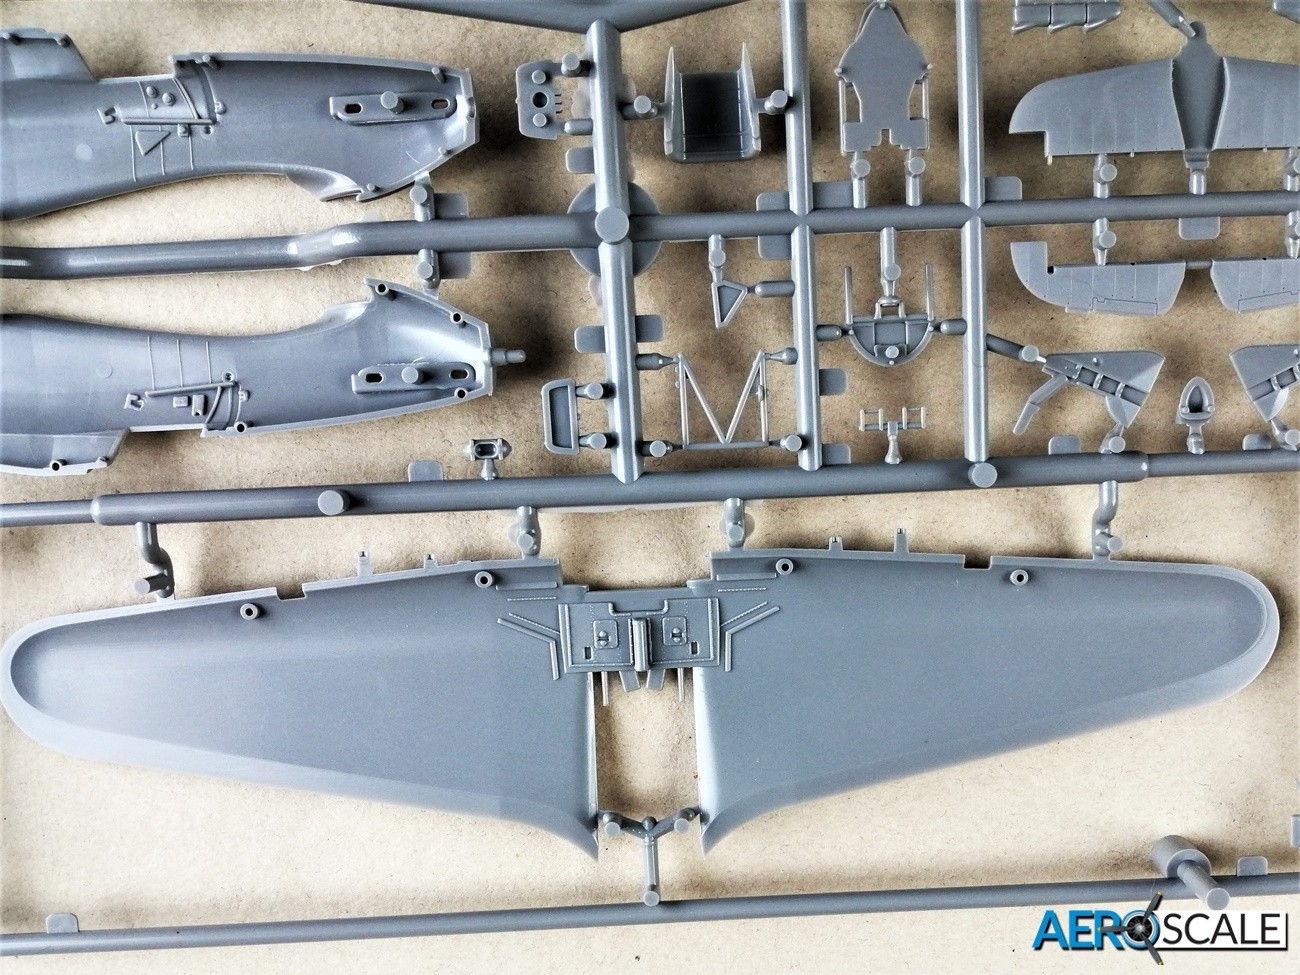
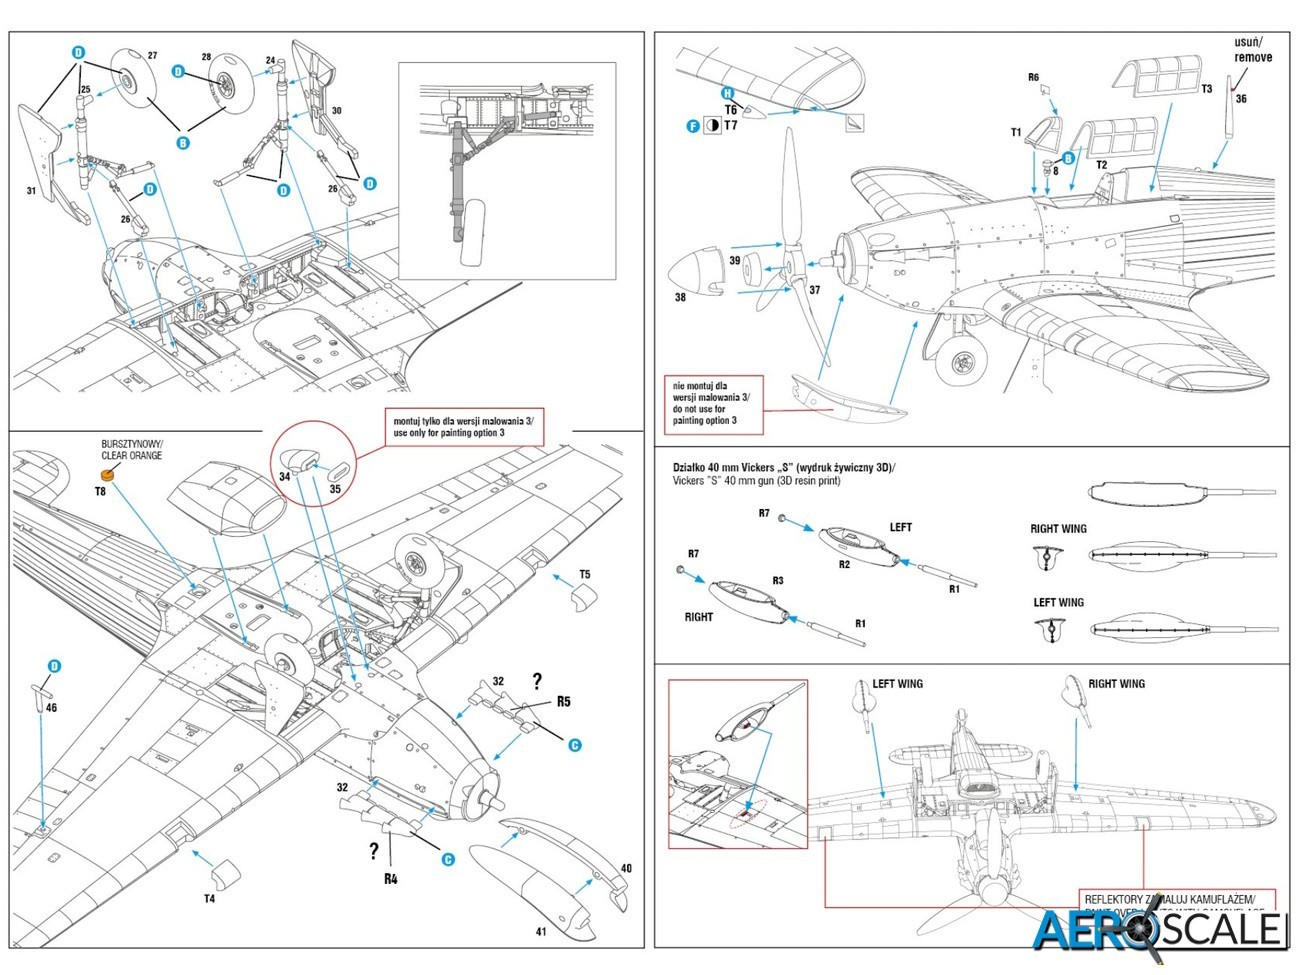
The fuselage is conventionally split left and right with a separate one-piece vertical tail surface and rudder. The distinctive humped look of the fuselage is well represented. The surface detail is superb particularly the depiction of the canvas rear half of the fuselage and tail. The representation of the fasteners looks superb and in scale. The radiator fairing on the under surface is also separate and made up from four parts. There is some fine detail representing the mesh of the radiator face. The flap at the rear is closed. The rotol propeller is one piece with a separate spinner. The Vokes filter is two piece and is fitted to four of the five marking options. There is a choice of plastic or 3d printed exhausts.
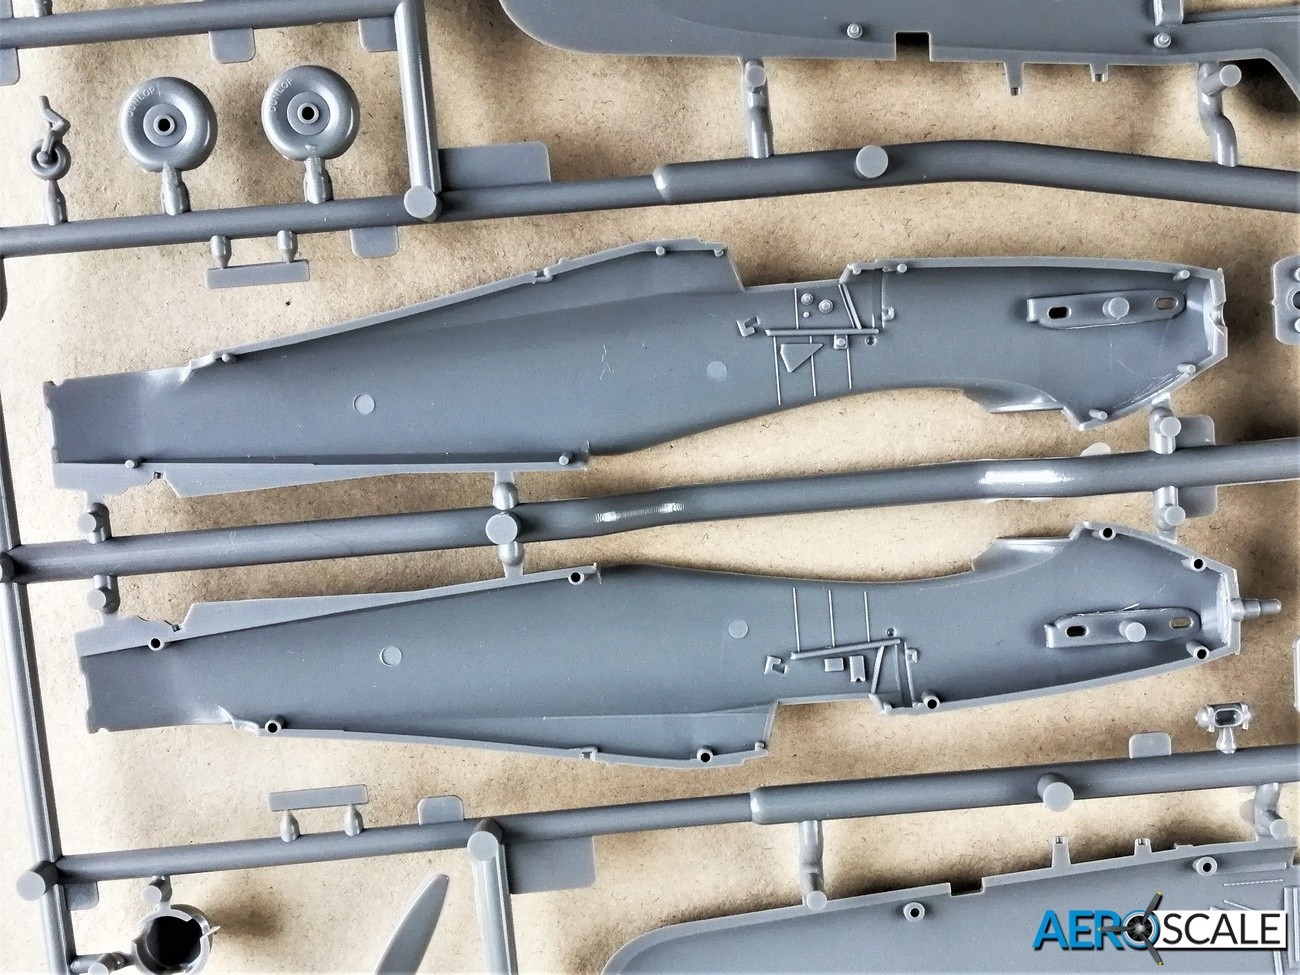
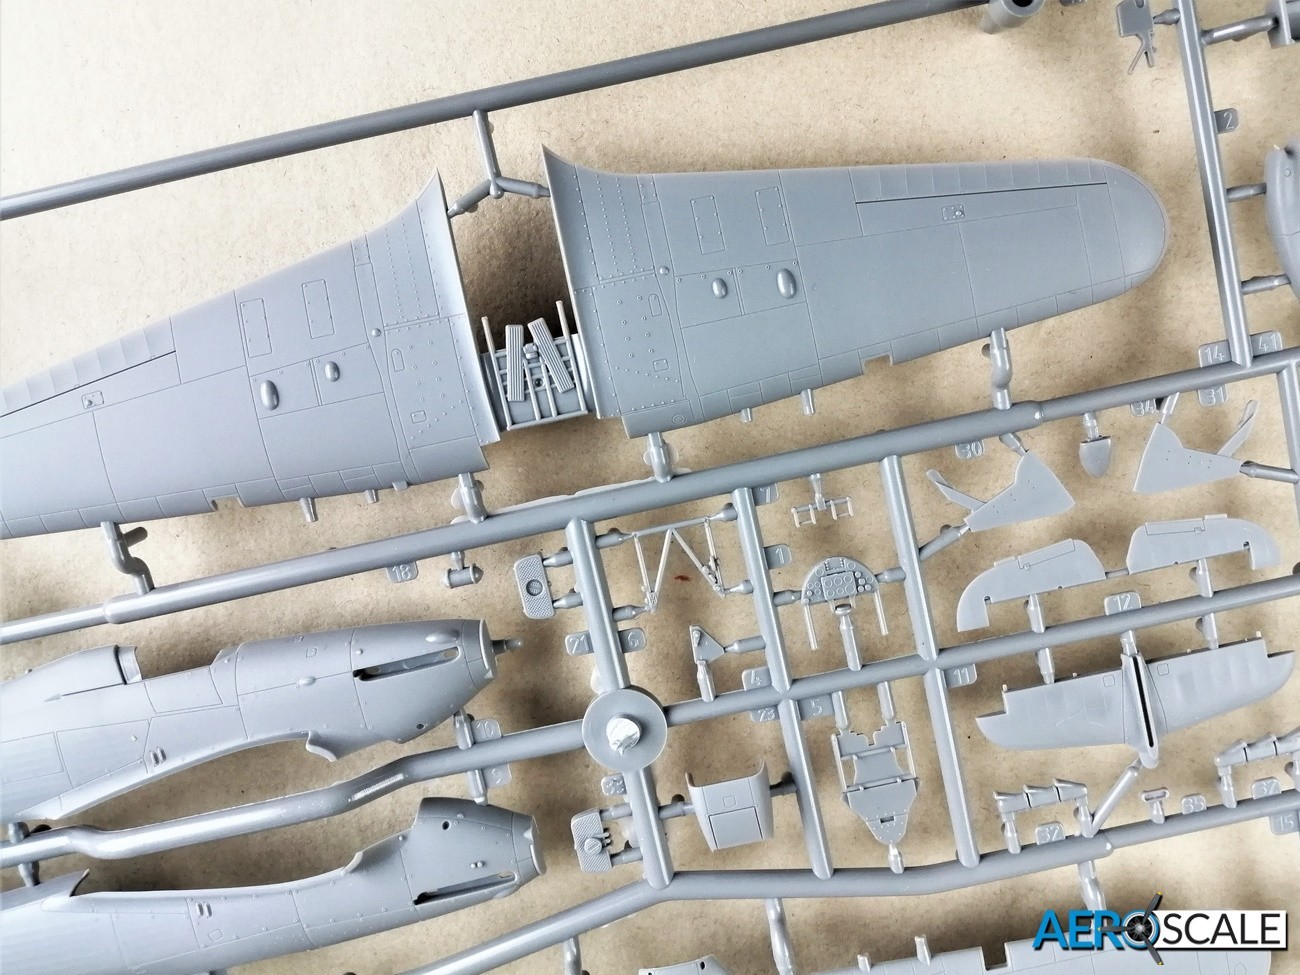
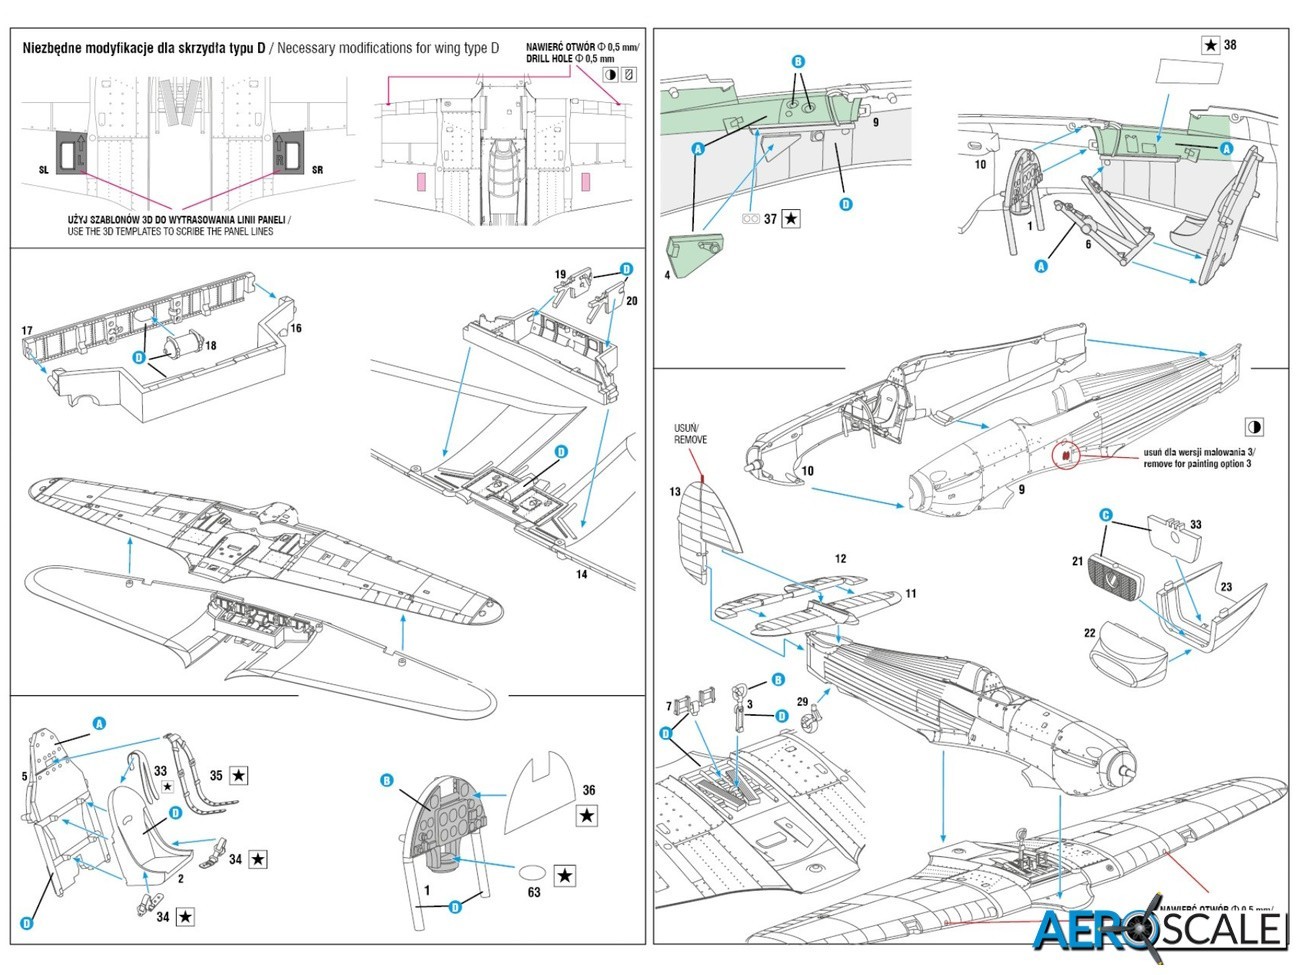
The separate upper and lower wing are full span. The cockpit floor joins both port and starboard upper wing. The recessed panel lines of the wing panels look excellent. The ailerons and flaps and flaps are not separate. There are clear parts for the landing though these are painted over with all five marking options. There are clear plastic navigation lights which will require you to cut s tiny piece of plastic from the wing to fit them. The wing needs some modifications for the MK. IID. All signs of the Hispano Mk II cannons need to be removed. The detail to be removed include upper wing blisters and the outer cartridge ejector holes under the wing need filling. The stumps of the gun barrels on the leading edge need to be removed and the resulting void need filling. A couple of 0.5mm holes need to be drilled in the leading edge to represent the tracer firing machine guns. A couple of additional panels need to be etched, there are 3d templates to help you with this. The instructions provide full details of the modifications. The 3d canon gondolas are sided left and right. There is a stub on the inside of the gondola that fits into the inner cartridge ejector hole. The horizontal tailplane is one piece and has separate one-piece positionable elevators.
The main undercarriage bay is made up from five parts and once constructed fits onto the upper wing. The detail on the sidewall and on the roof of the bay is superb. The Vickers built undercarriage legs include the retraction strut though understandably the locking arm are a separate. The detail looks very good with attachment points to the spar creating a pretty strong joint. The undercarriage doors are nicely detailed and will provide extra strength for the undercarriage legs. The main wheels are one piece with the raised manufactures name moulded on the sidewall of the tyre and excellent hub detail. The tyres are weighted at the attachment point of the sprue. A head on diagram of the undercarriage is a useful inclusion in the instruction, showing the angle of the wheel relative to the ground. The tail wheel is one piece and nicely moulded. There are paint masks for the main and tail wheels.
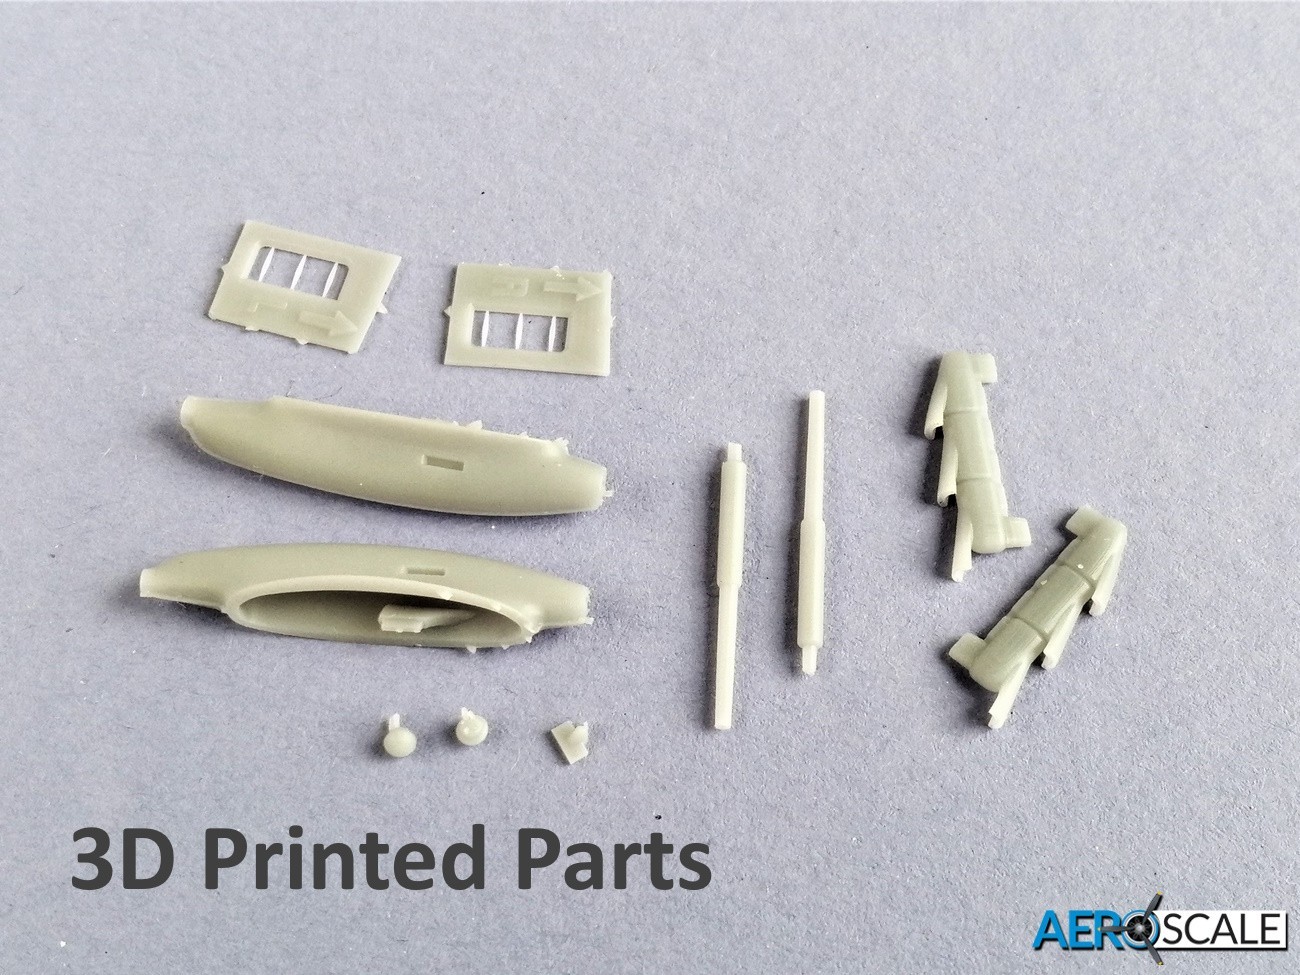
The 3d printed parts are formed in a small compact block. They include exhaust pipes, 40mm Vickers S anti-tank cannon barrels, cannon gondolas, plugs for the rear of the canon gondolas, rear looking mirror and a couple of templates for scribing additional panels. The parts are very easy to remove, though care should be used with the smaller items.
Kabuki paint masks are included for both styles of canopy, windscreen, main and tail wheel and landing light covers. Instructions are included for their placement.
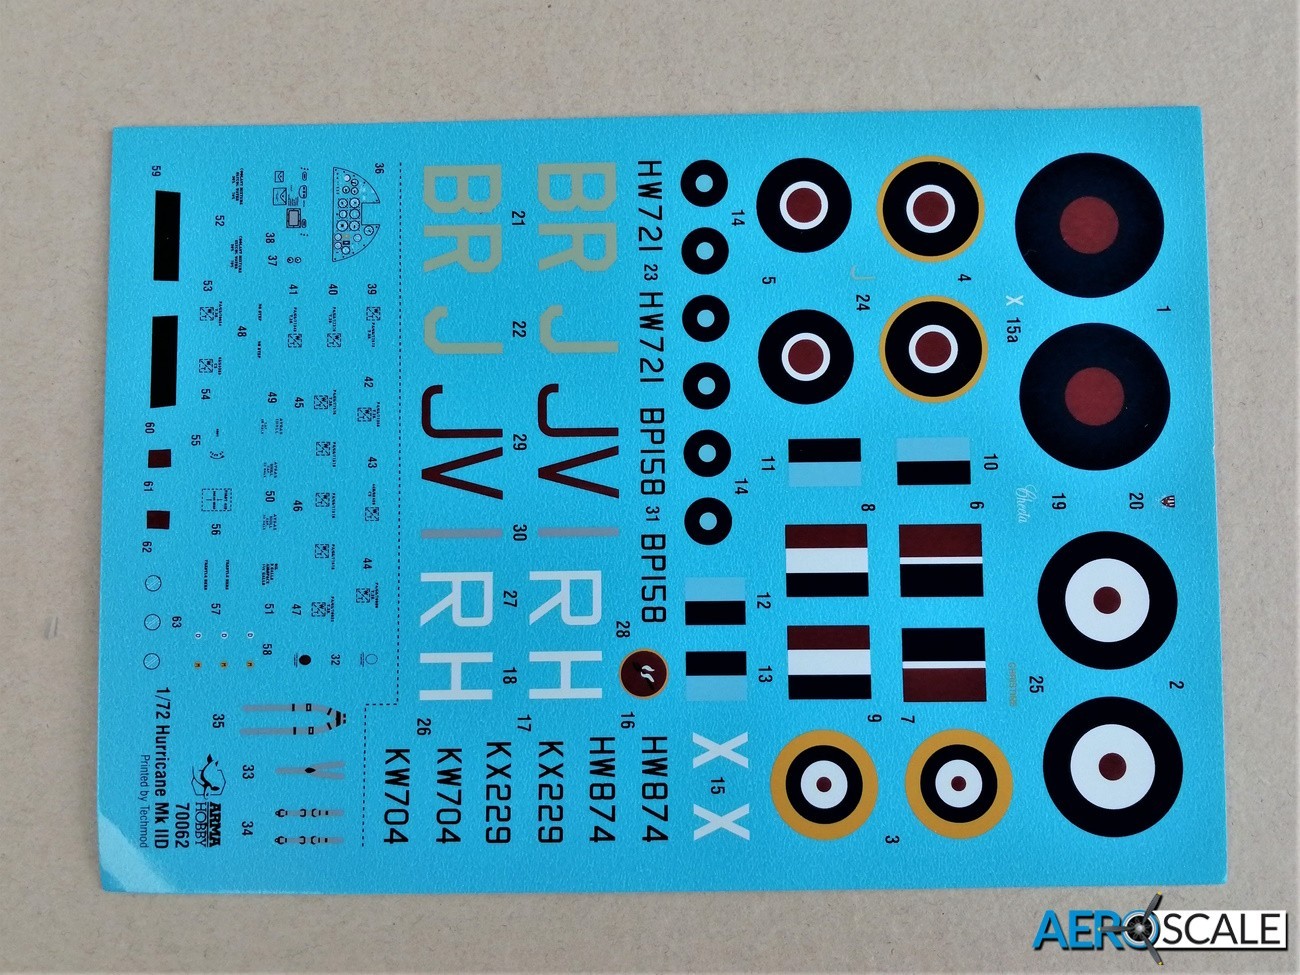
The decals printed by Techmod look superb: glossy, with good colour density and the definition is superb. Included are all the various tail markings. Cockpit instruments and seat harness are provided.
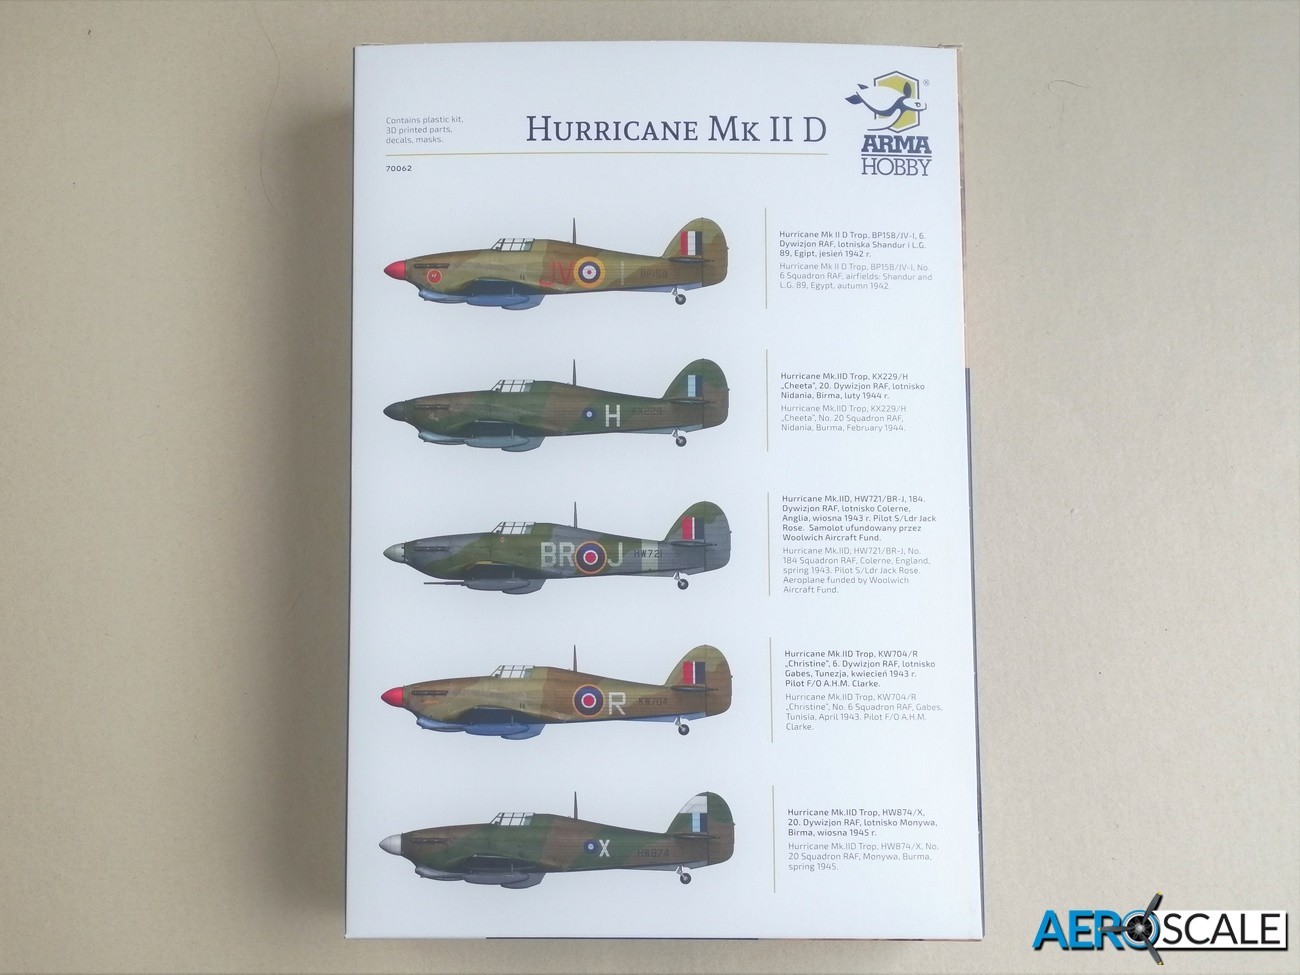
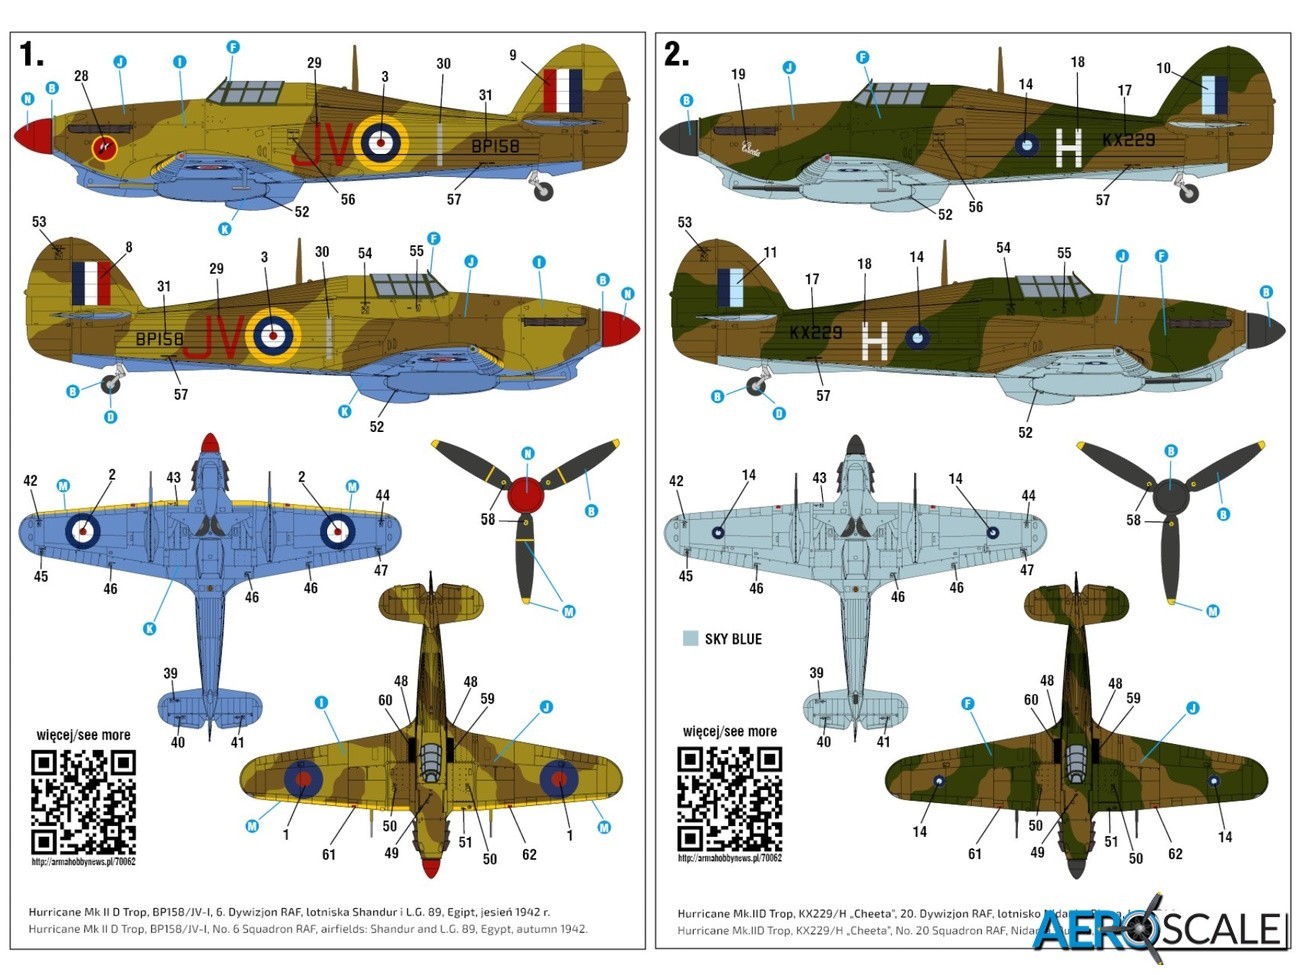
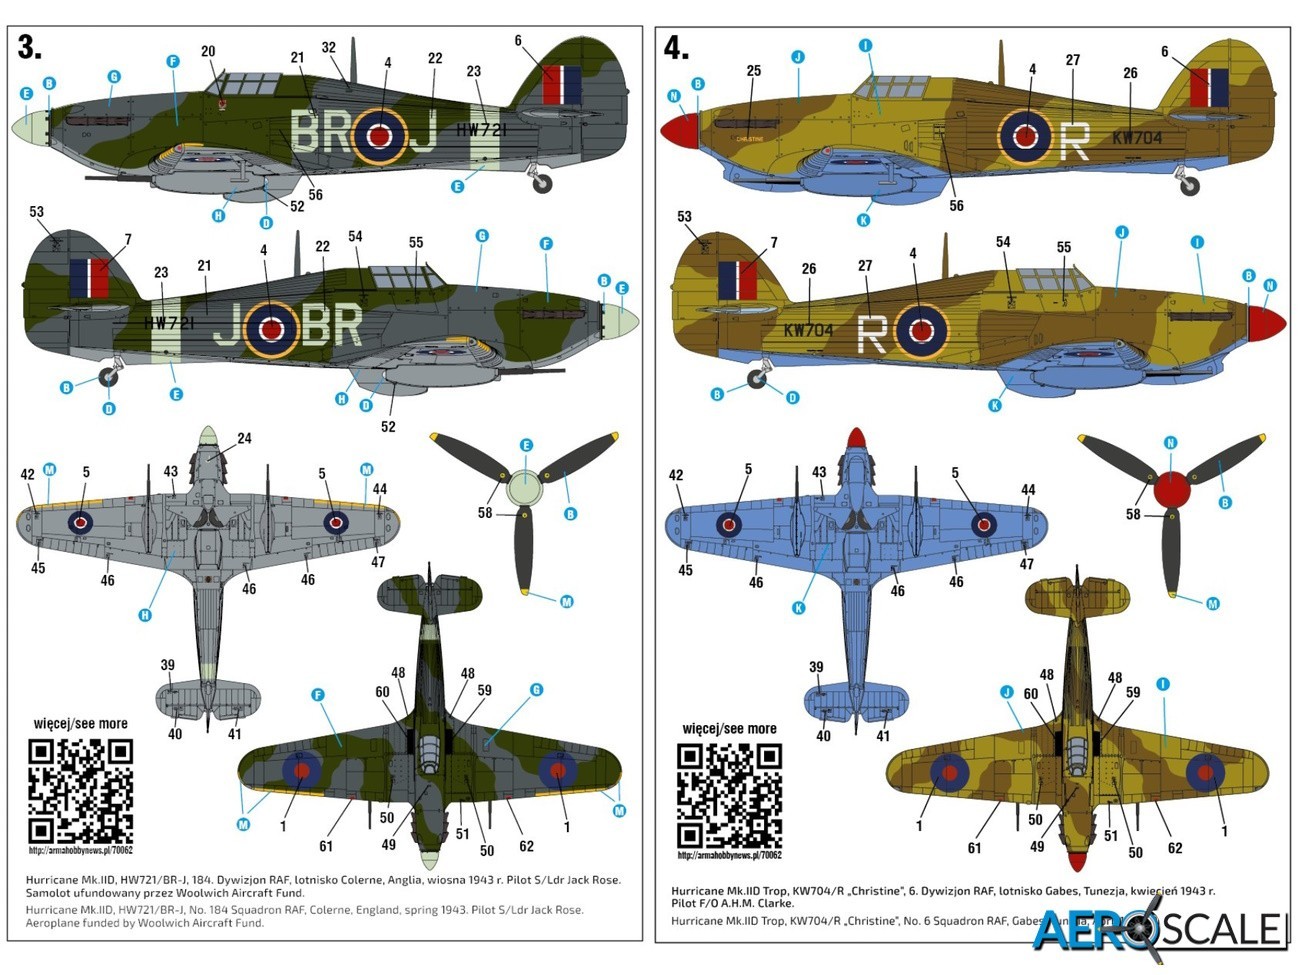
The five marking options include:
- BP158/JV-I, No. 6 Squadron RAF, airfields: Shandur and L.G. 89, Egypt, autumn 1942.
- KW704/R „Christine", No. 6 Squadron RAF, Gabes, Tunisia, April 1943. Pilot F/O A.H.M. Clarke.
- HW721/BR-J, No. 184 Squadron RAF, Colerne, England, spring 1943. Pilot S/Ldr Jack Rose. Aeroplane funded by Woolwich Aircraft Fund.
- KX229/H "Cheeta", No. 20 Squadron RAF, Nidania, Burma, February 1944.
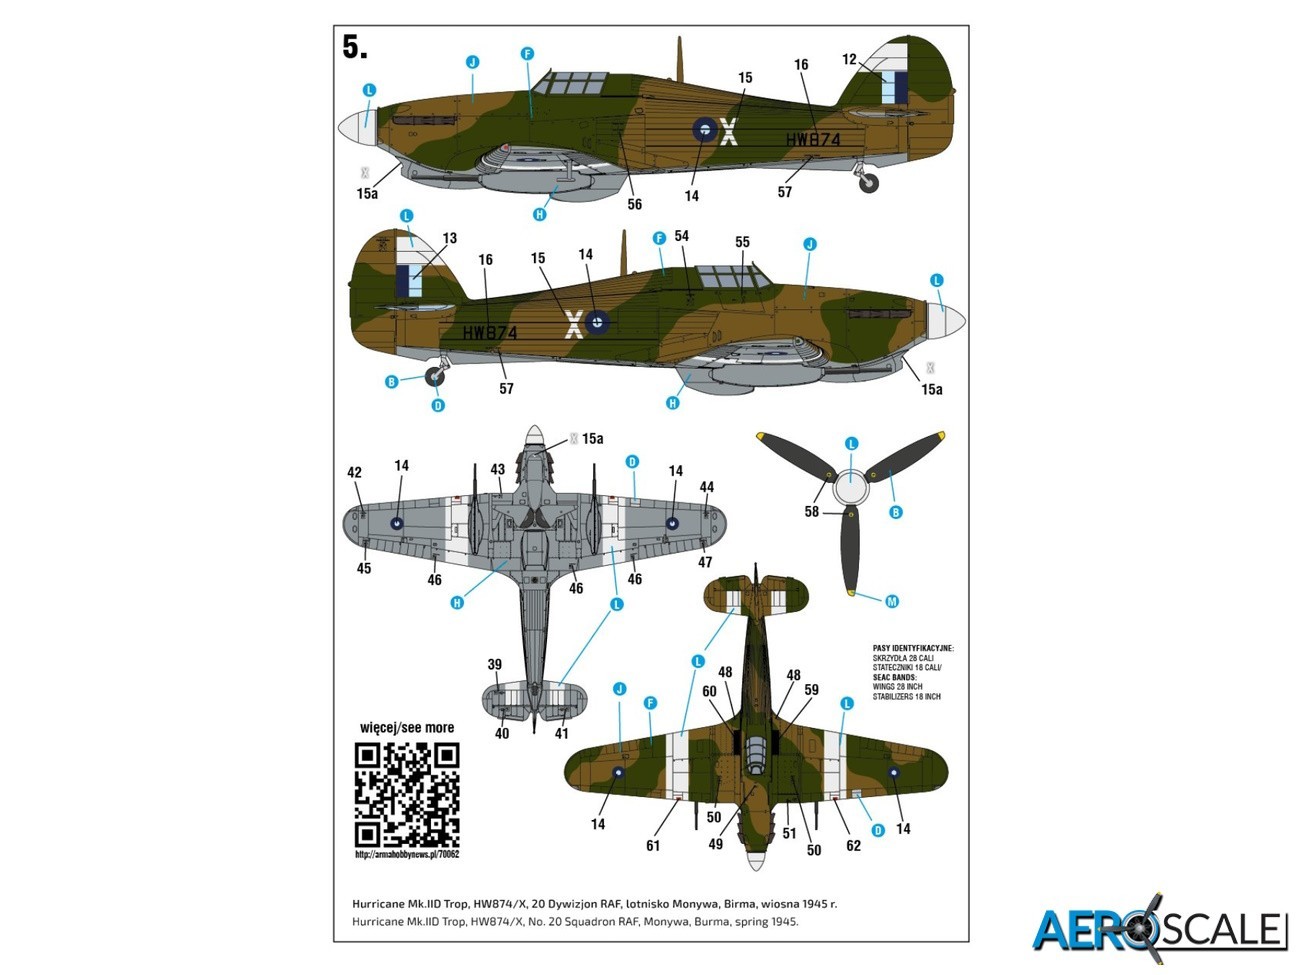
- HW874/X, No. 20 Squadron RAF, Monywa, Burma, spring 1945.
There are four distinct camouflage schemes:
- Mid stone/dark earth/azure blue
- Dark green/dark earth/sky blue
- Ocean grey/dark green/medium sea grey
- Dark green/dark earth/medium sea grey
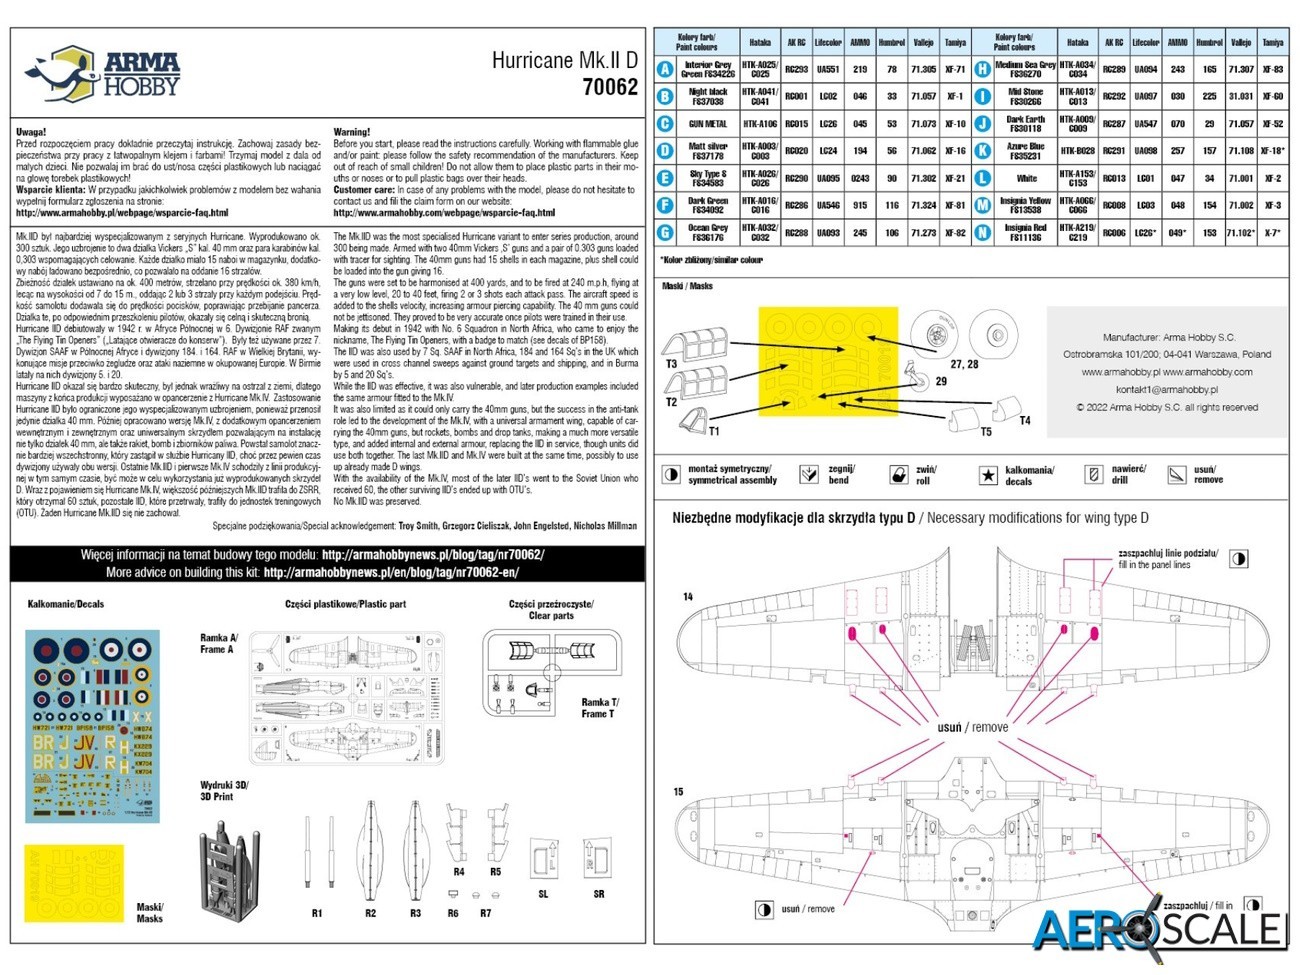
The twelve-page A5 format instructions is mostly in colour. Construction instructions are colour coded and a useful aid are the CAD images of the finished items: engine and undercarriage bays and the undercarriage itself. There are several paint manufactures referenced in the instructions including: Hataka, AK RC, Lifecolor, Ammo, Humbrol, Vallejo and Tamiya.
Conclusion
Its great to see the Hurricane Mk.IID and it certainly will look different and impressive alongside the other Hurricanes Arma Hobby has produced in 1:72 scale. The modifications look simple enough to carry out using the 3D printed parts. If you haven’t done a conversion project before, this would be an excellent one to start off with. The selection of marking options is crucial with any kit and Arma Hobby has come up with some great choices. Highly recommended.
Available now from Arma Hobby price €27.25
70062 - Hurricane Mk IID – 1:72
Our thanks to Arma Hobby for this review sample.
Please remember, when contacting retailers or manufacturers, to mention that you saw their products highlighted here – on AEROSCALE.