Background
The Sea Hurricanes Mk IB was a marked improvement over the Hurricane Mk.Ia [Hurricat]. The Mk.Ia was interim naval fighter designed to be launched by catapult abord a merchant ship [CAM]. The fighter was not recoverable if out of range of any landing facilities. So, most sorties launched from the catapult meant the pilot had to bale out over the ocean. The Sea Hurricane Mk.Ib was designed for use on fleet and escort carriers as well as Merchant Aircraft Carriers [MAC]. MAC’s were large cargo vessels with a flight deck fitted enabling aircraft to be launched and recovered. There was no hangar space and the aircraft were left on the flight deck exposed to the elements. The Mk.Ib was equipped with catapult spools plus an arrester hook. From the summer of 1941 the Mk.Ib operated from HMS Furious, a converted Courageous-class battlecruiser. The flat deck fleet was increased from the Autumn of 1941 with several MAC ships going into service. The first Sea Hurricane Mk.Ib kill occurred on 31 July 1941. Sea Hurricanes of 880 Squadron operating from HMS Furious shot down a Do 18 flying-boat. The Fleet Air Arm preferred the de Havilland propellers over the Rotol types; it was found during tests that the Rotol unit could lead to the nose dipping during arrested landings, causing the propeller blades to ‘peck’ the carrier deck. The lighter de Havilland units avoided this problem. The Sea Hurricane Mk.Ib took part in some crucial Royal Navy operations in the Atlantic, Indian Ocean, Arctic and Mediterranean. Their greatest achievements occurred during the escort of two very important operations: Convoy PQ-18 in the Arctic (17 kills) September 1942, and Operation Pedestal to Malta (25 kills), August 1942.
A total of 340 Hurricanes were converted for use at sea.
Source: Wiki, Naval Encyclopaedia & Arma Hobby
The Kit
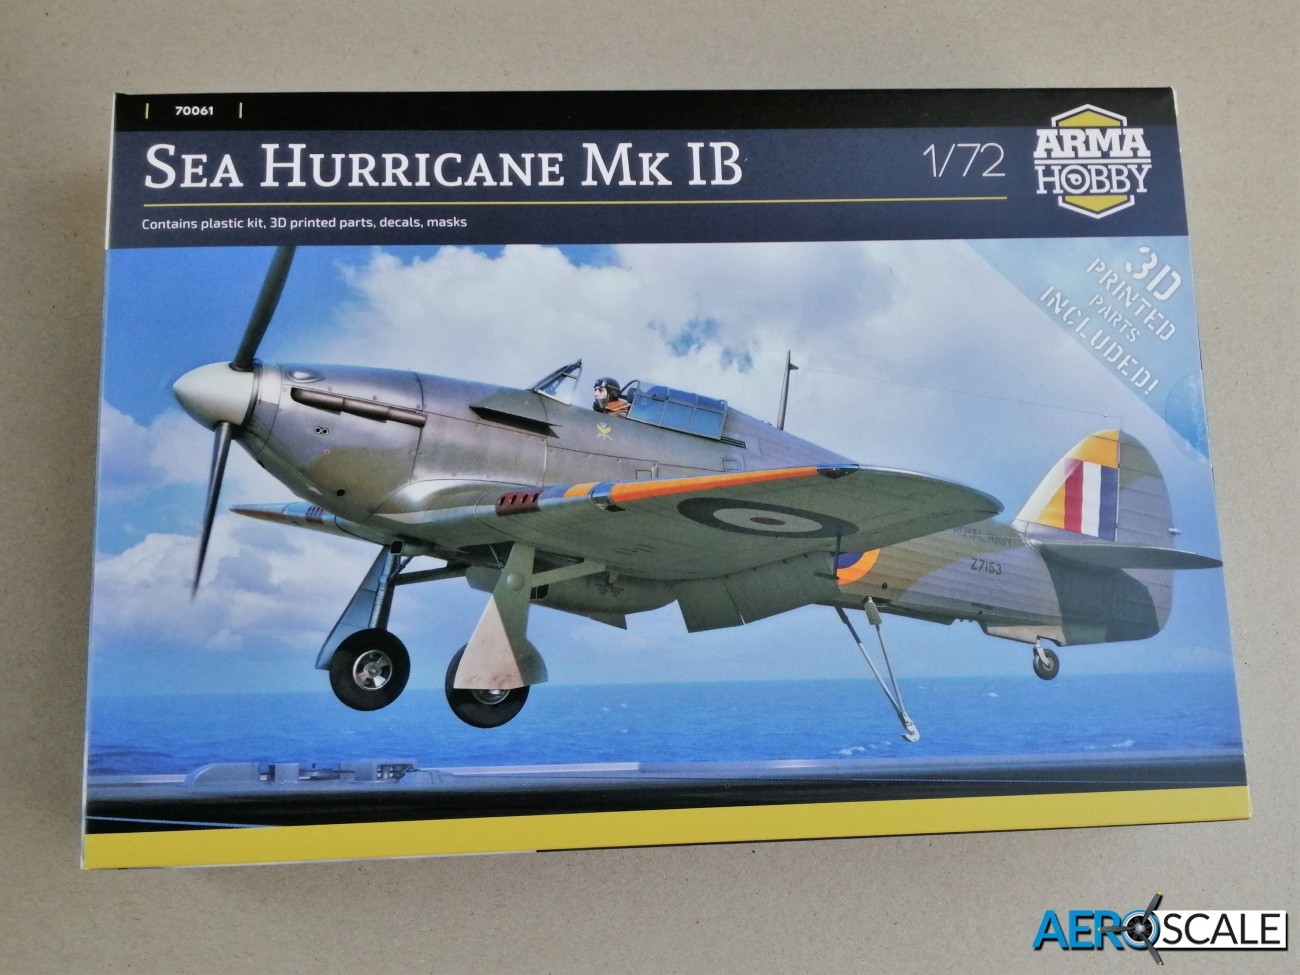
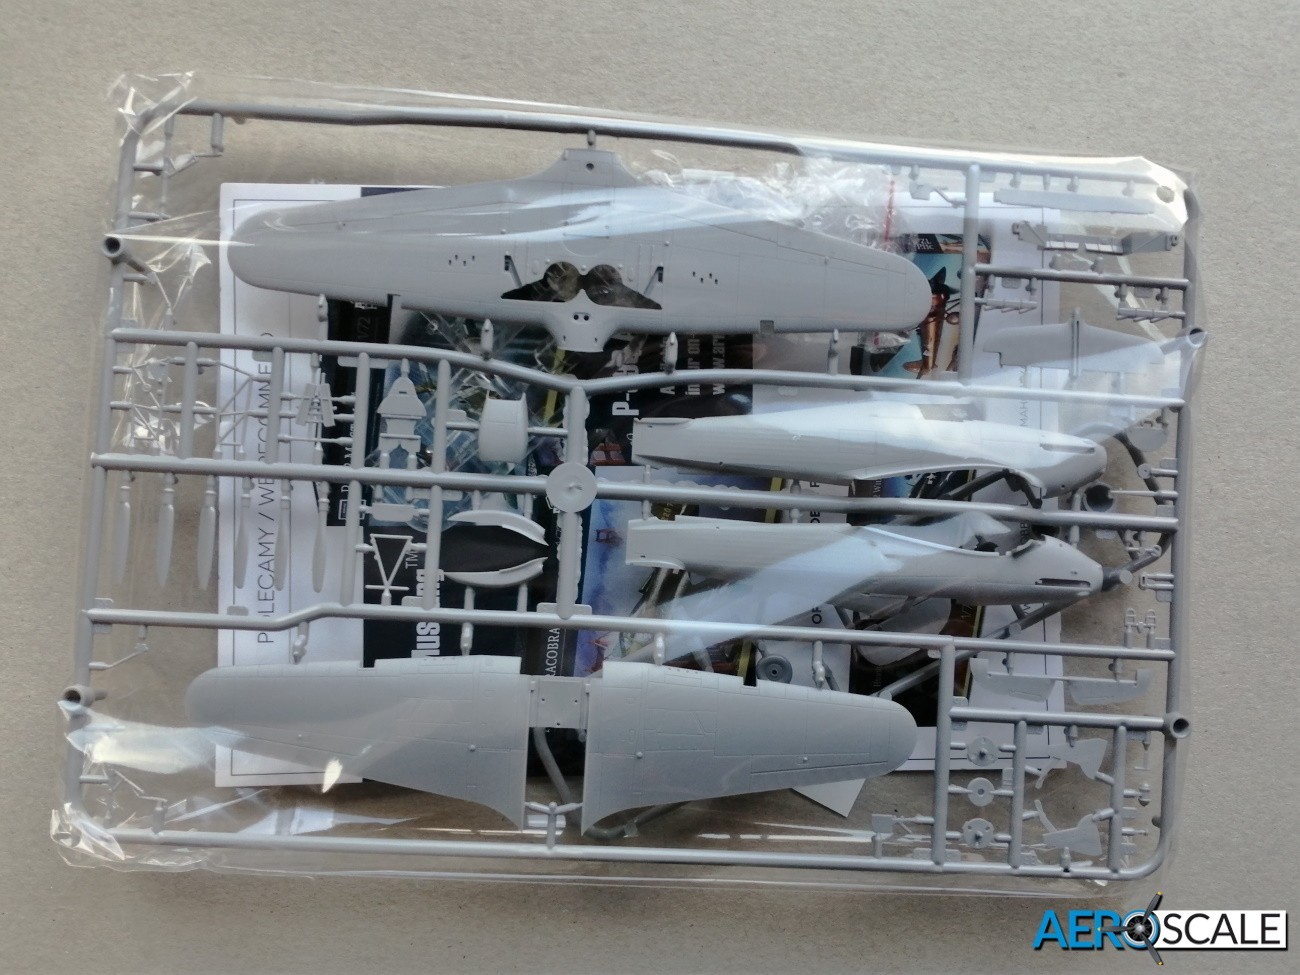
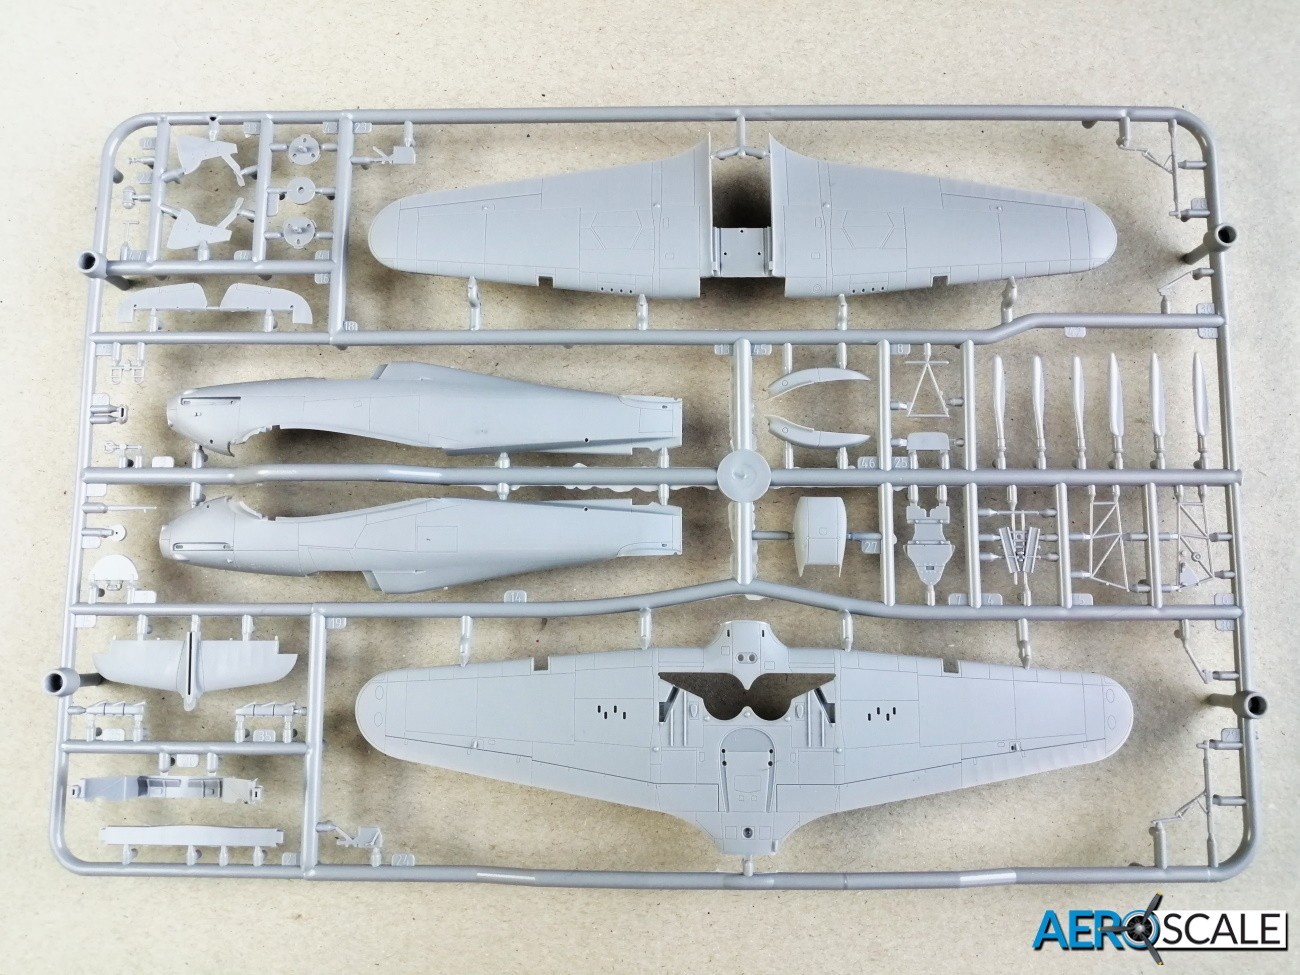
All the contents are placed in a single bag for security and packed in the side opening box. Decals and masks are tucked into the instructions. This release is based on Arma Hobby’s 1:72 scale Hawker Hurricane Mk.I, which was a new tool released in 2018 [Scalemates]. To depict the Sea Hurricane Mk.Ia does involve some surgery notably removing the lower rear [ventral] fuselage and replacing it with the provided 3D printed part. Arma Hobby provide 3D printed parts for additional detail and as replacements for some plastic parts. The 3D printed parts are contained within the same matrix, so some care is needed separating the items. The recessed and raised detail on the surface of the plastic is superb. There are locating pins for the major structures of the kit. Many of the attachment point are quite big so some care will be needed removing the more delicate and smaller parts. There is some flash on the sprues, but none on the parts.
Contents of this 1:72 scale kit includes:
- 2 x grey plastic sprues
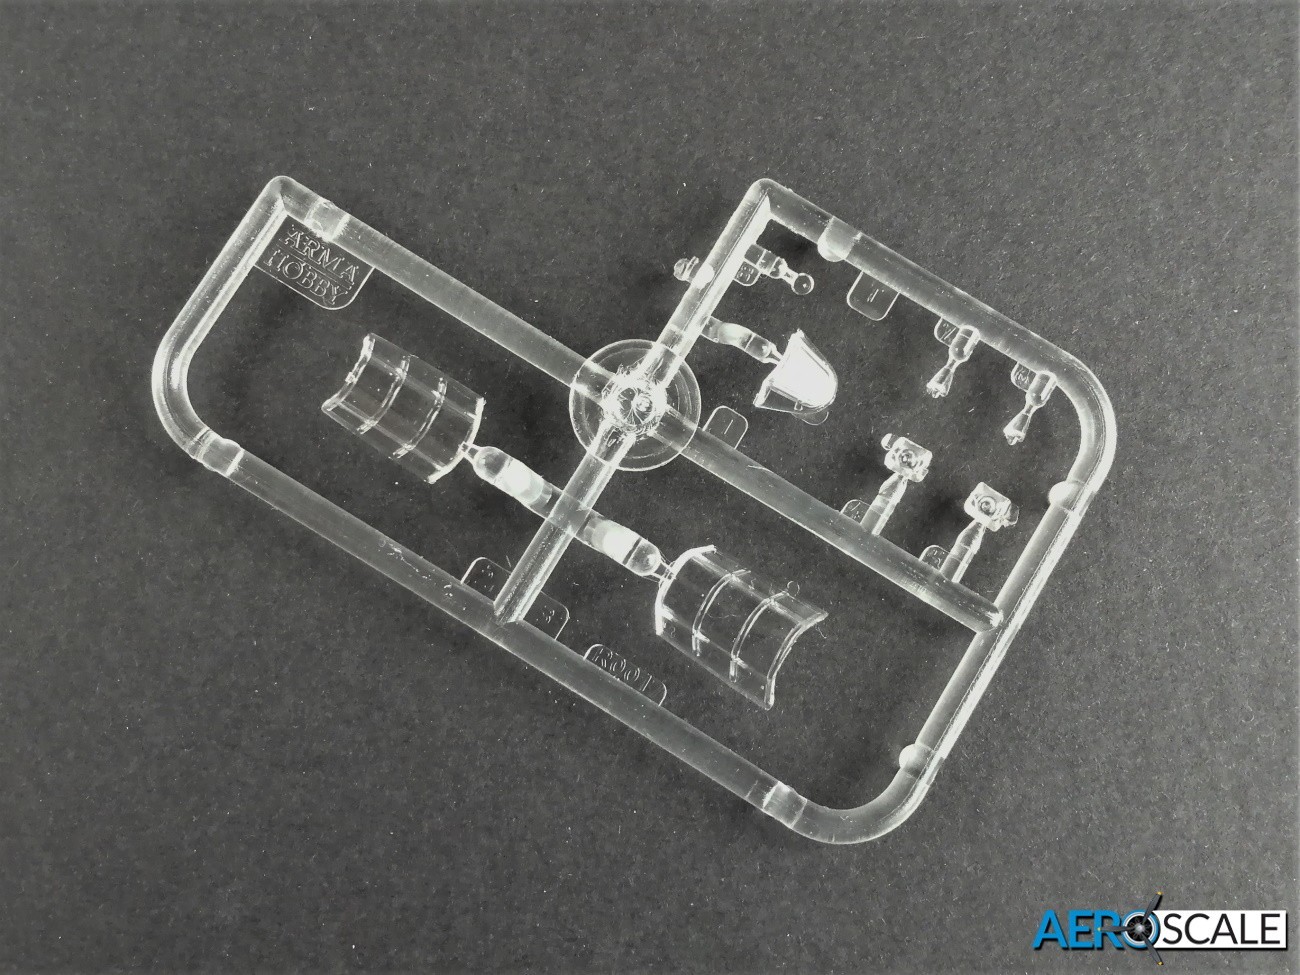
- 1 x clear plastic sprues
- 14 x sets of 3D printed parts
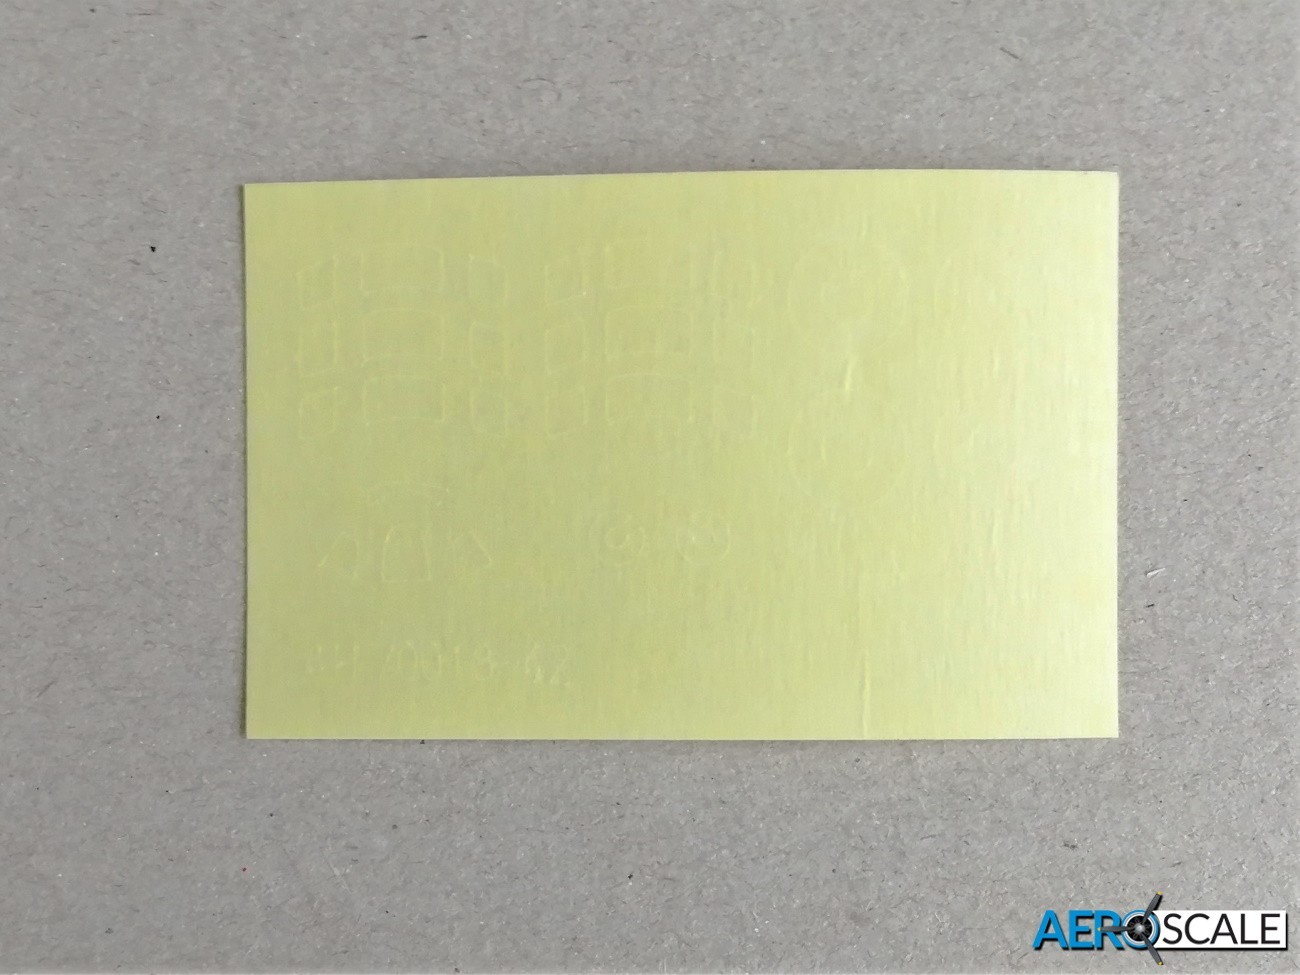
- 1 x sheet of pre-cut kabuki paint masks
- 1 x sheet of vinyl masks
- 1 x sheet of decals
- Instructions
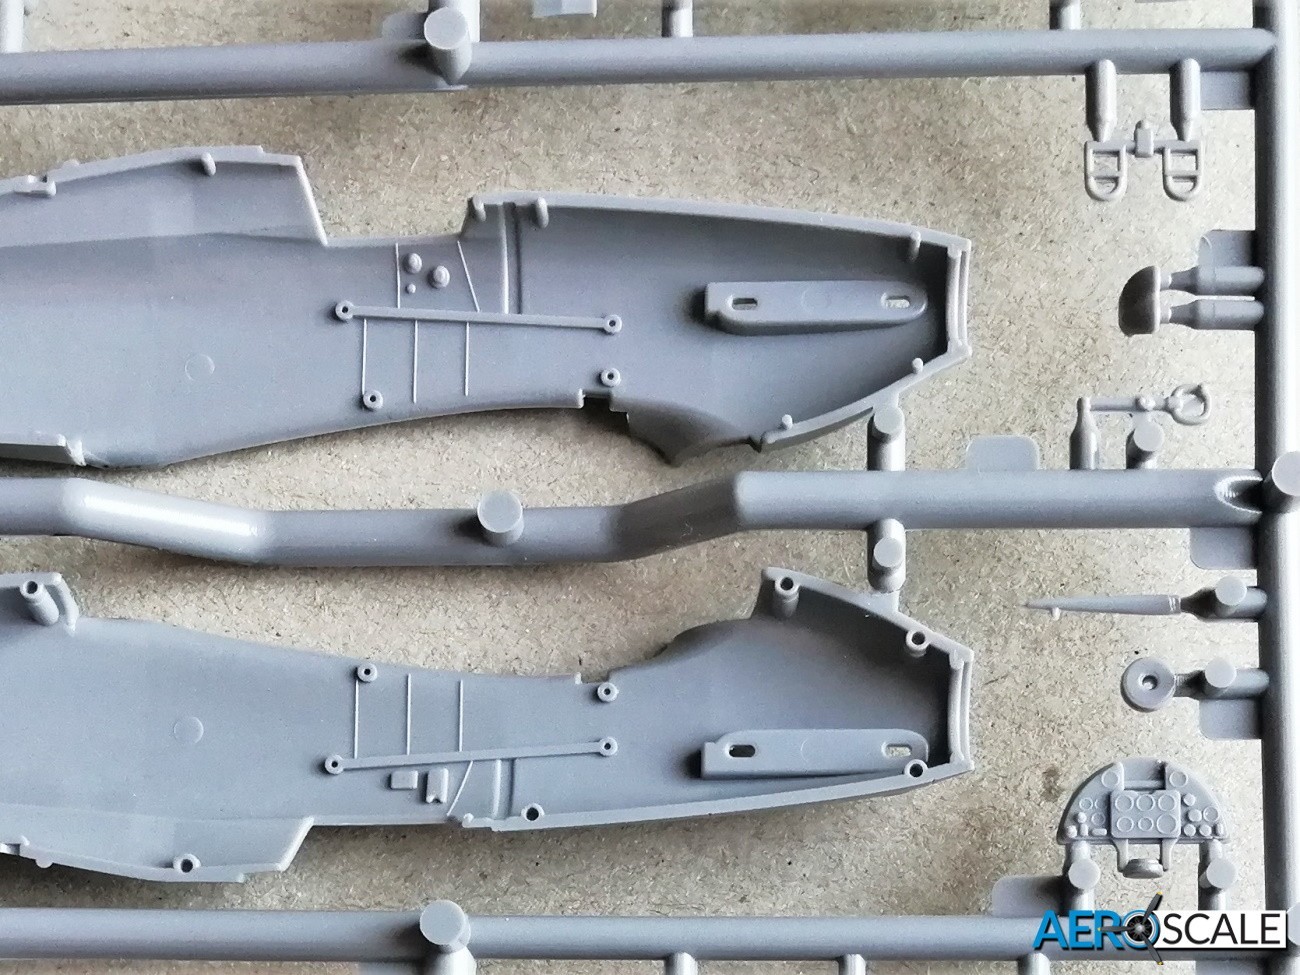
There are several parts to detail the cockpit. The raised detail on the plastic instrument panel [IP] and compass looks pretty good. You can dry brush the detail and/or use the decal instrument face. The sidewalls on the fuselage walls are nicely detailed and there are additional plastic parts representing the tubular framework. The floor of the cockpit is formed on the bridge between the two upper wings. The runner boards are separate and there are rudder pedals and the control stick to add. Not to be left out detail wise is the armoured bulkhead to the rear of the cockpit, onto which is attached the seat. A 3D printed extended headrest is included. There is also a one-piece brace that fits between the armoured bulkhead to just under the IP. The decal harness completes the detail for the cockpit.
There are two canopies one for it to be displayed closed and the other open. Pre-cut kabuki masks are provided for the windscreen and both canopies.
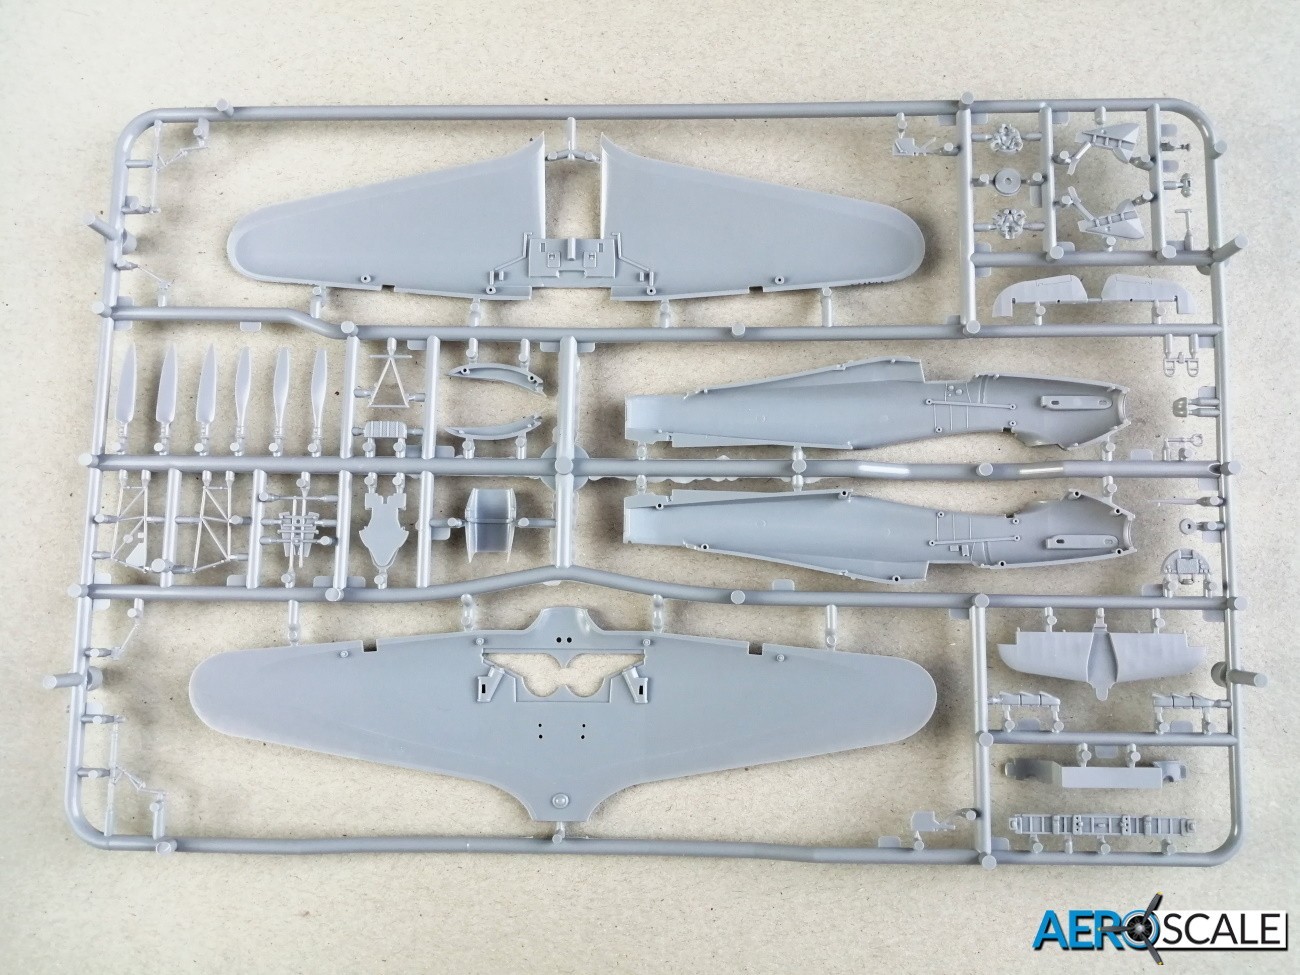
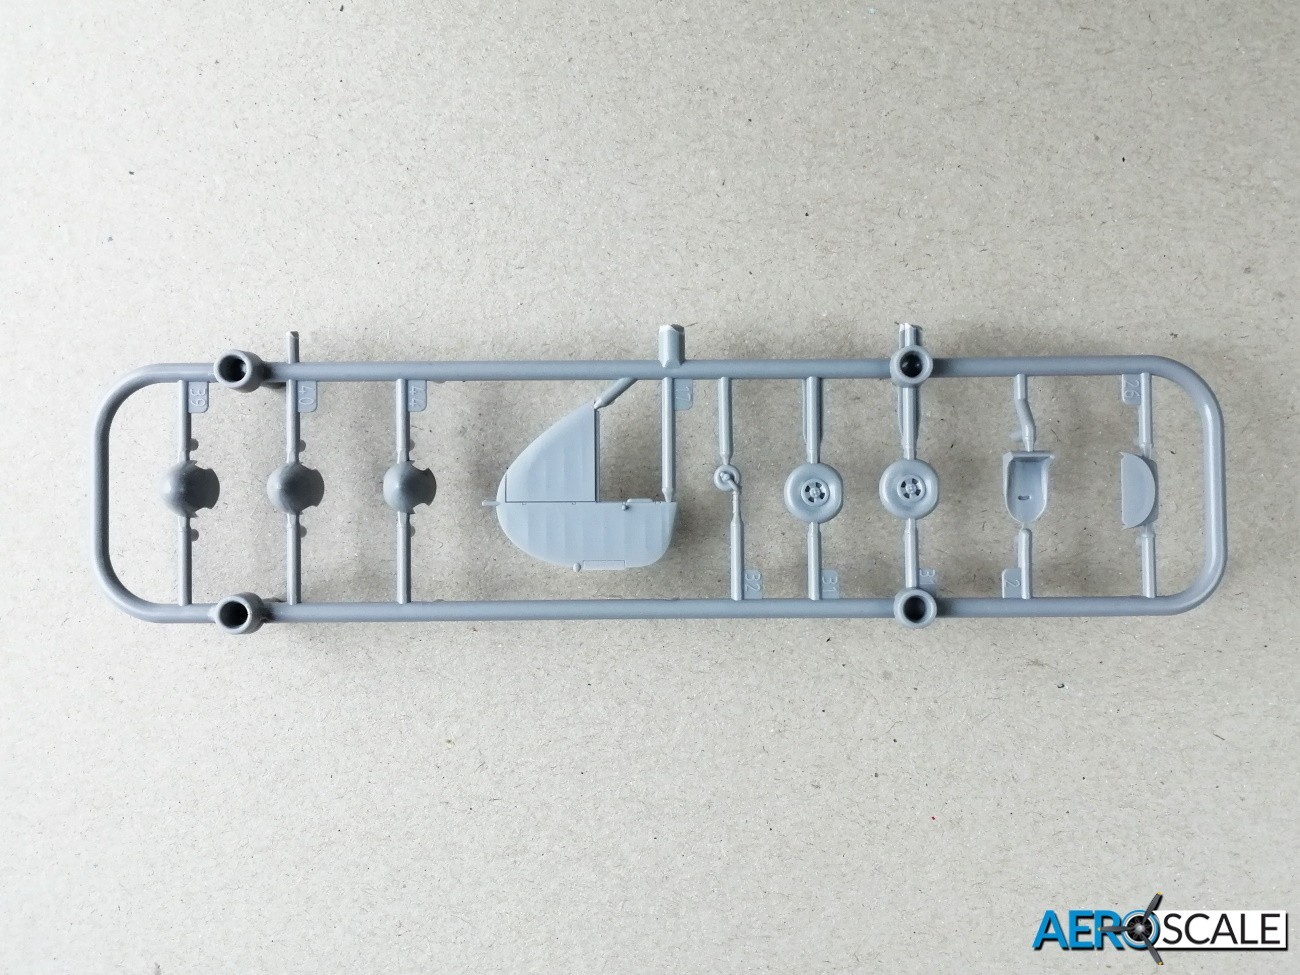
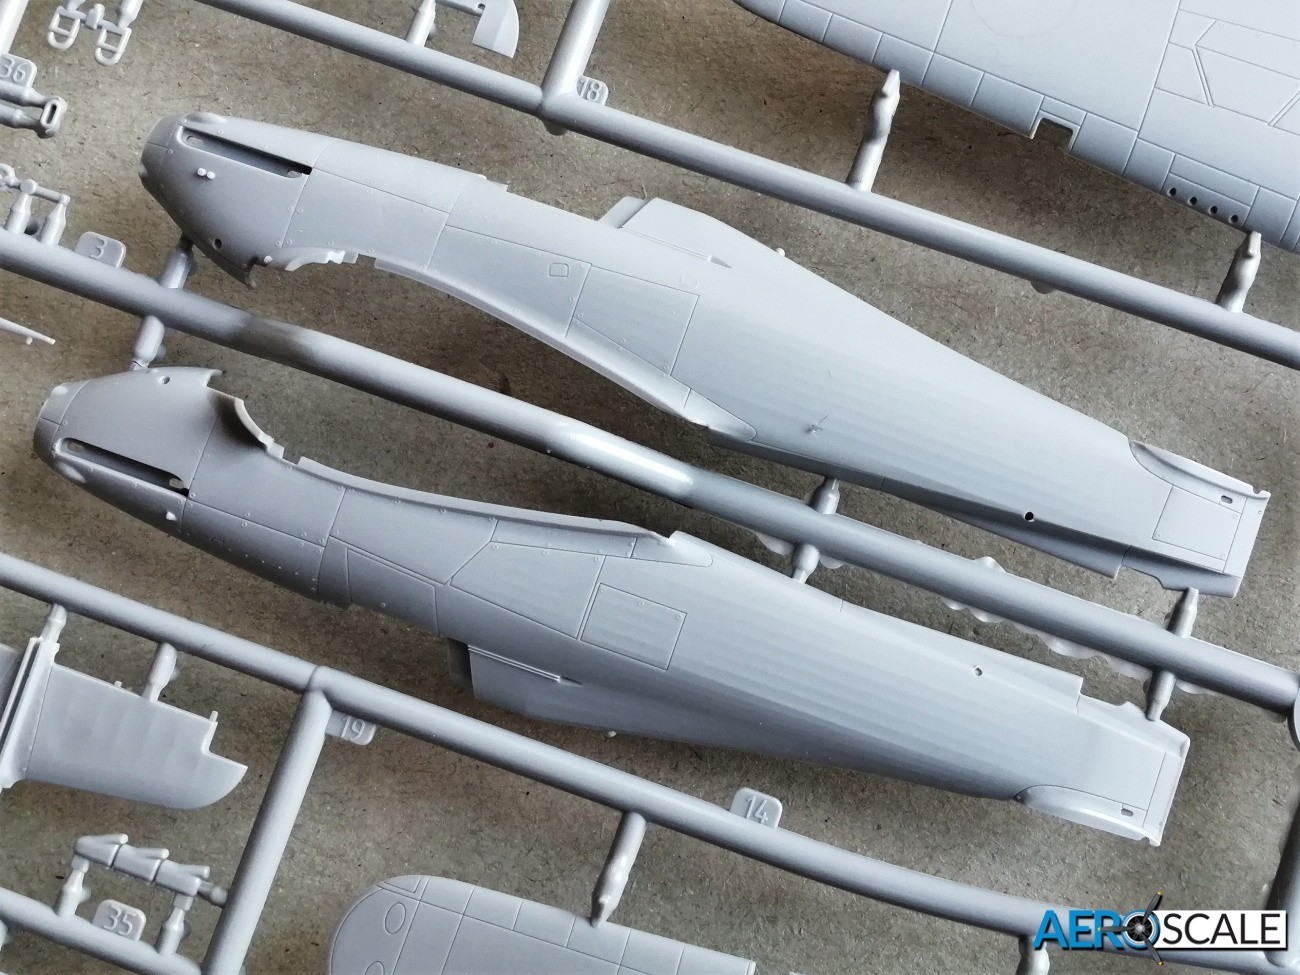
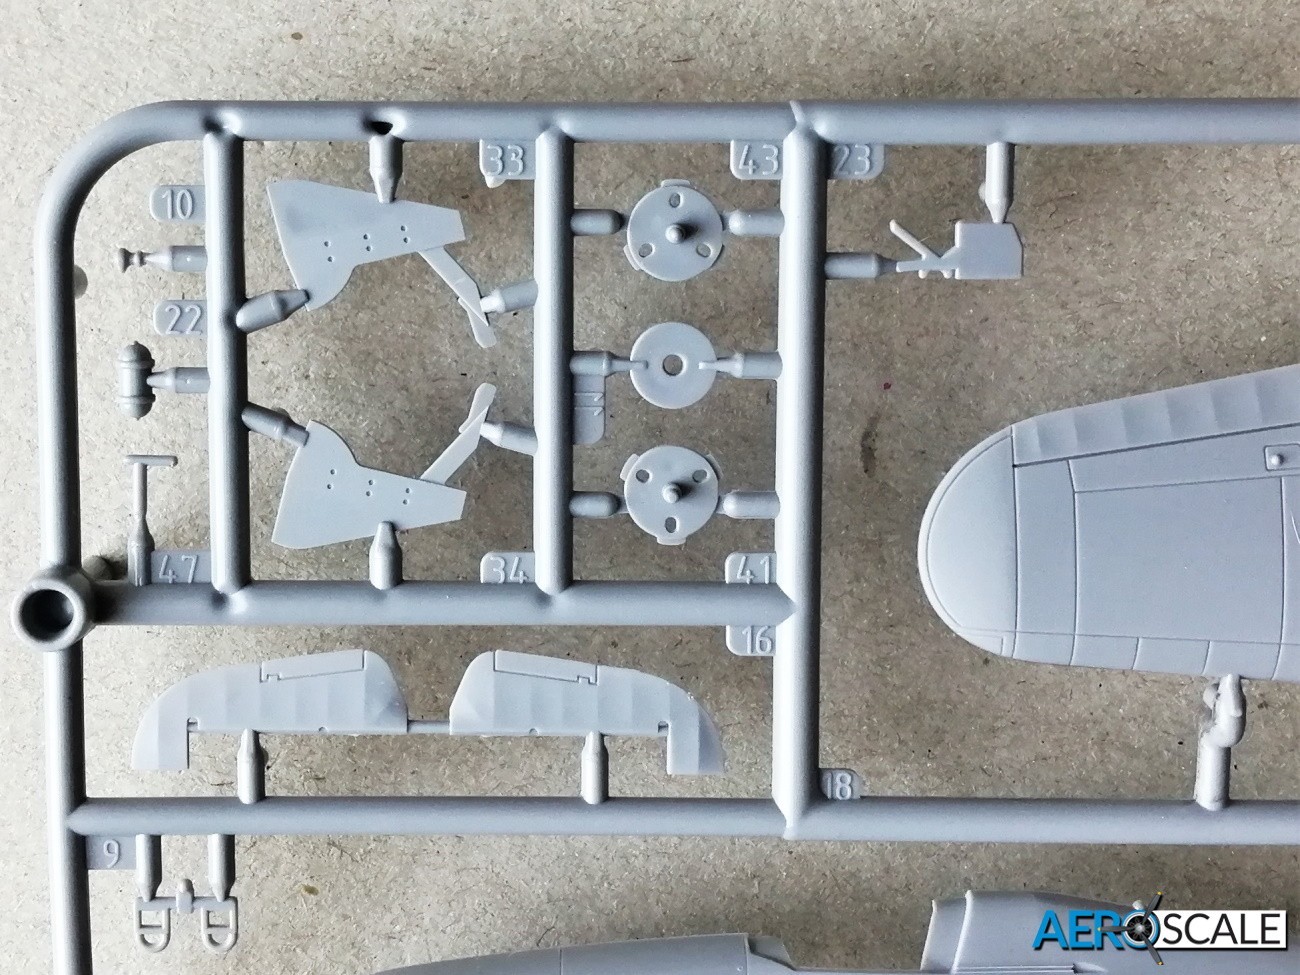
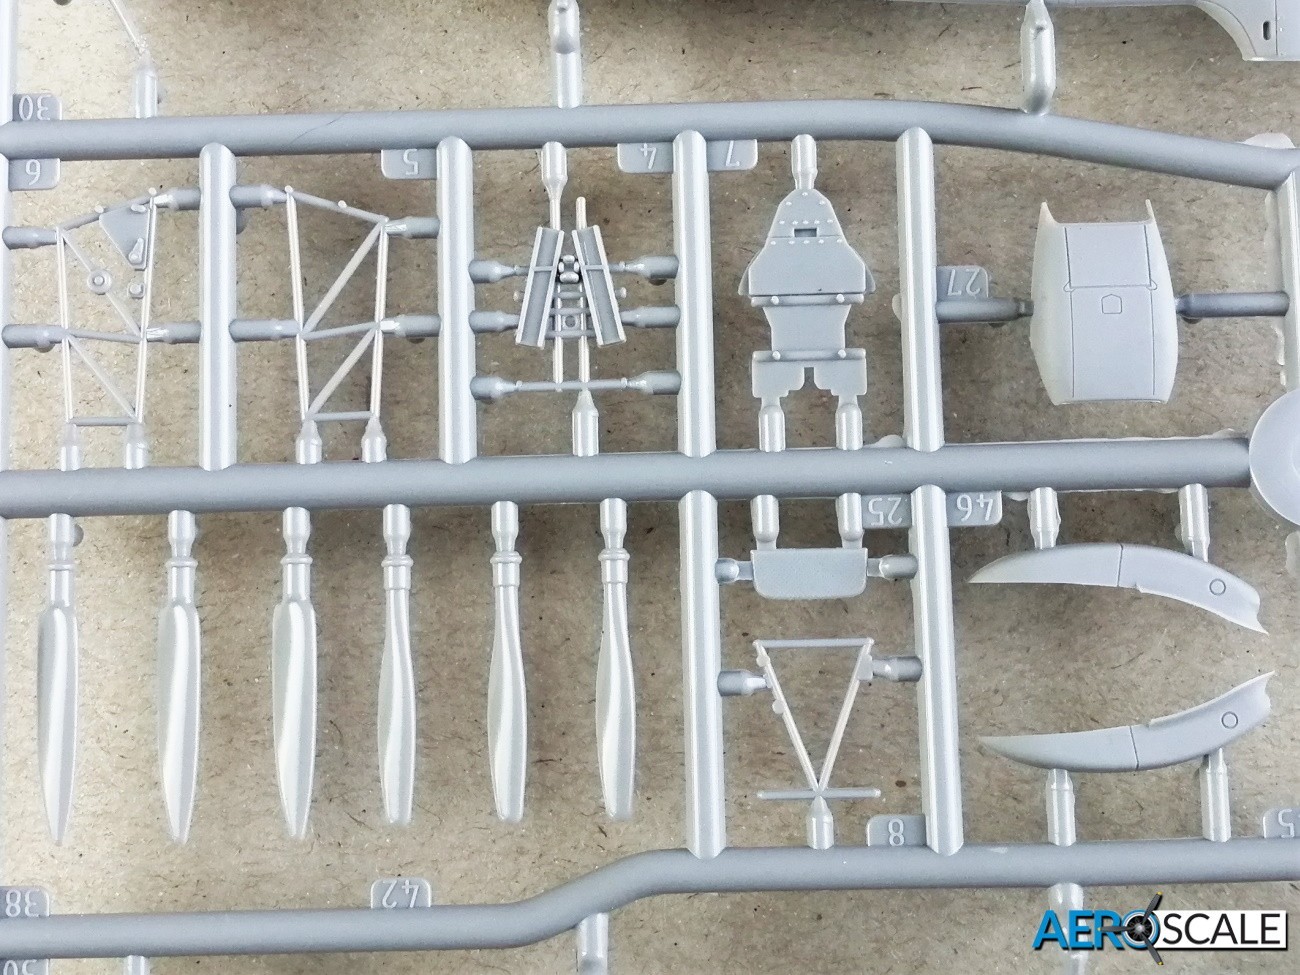
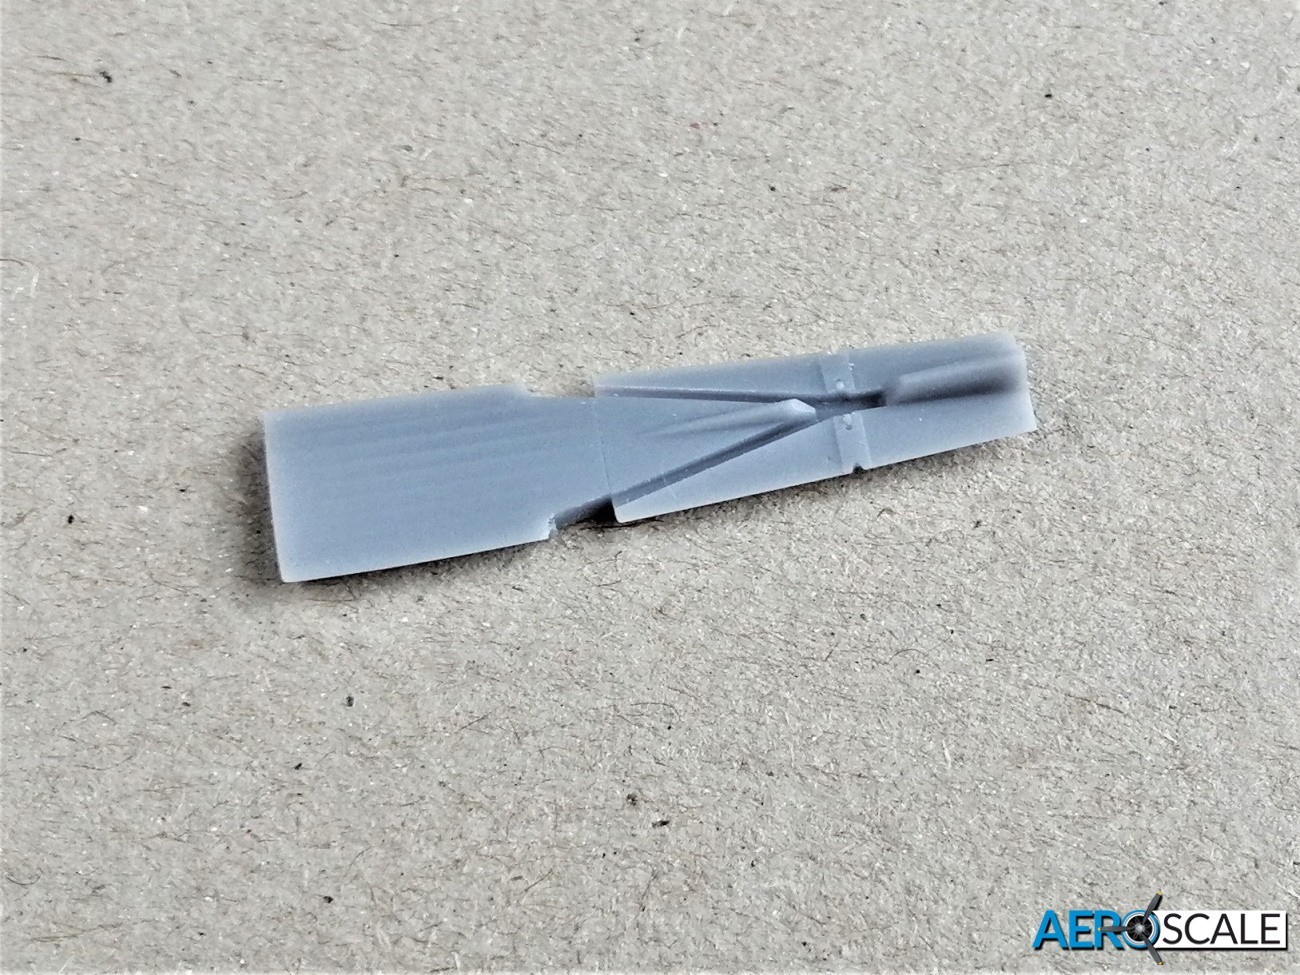
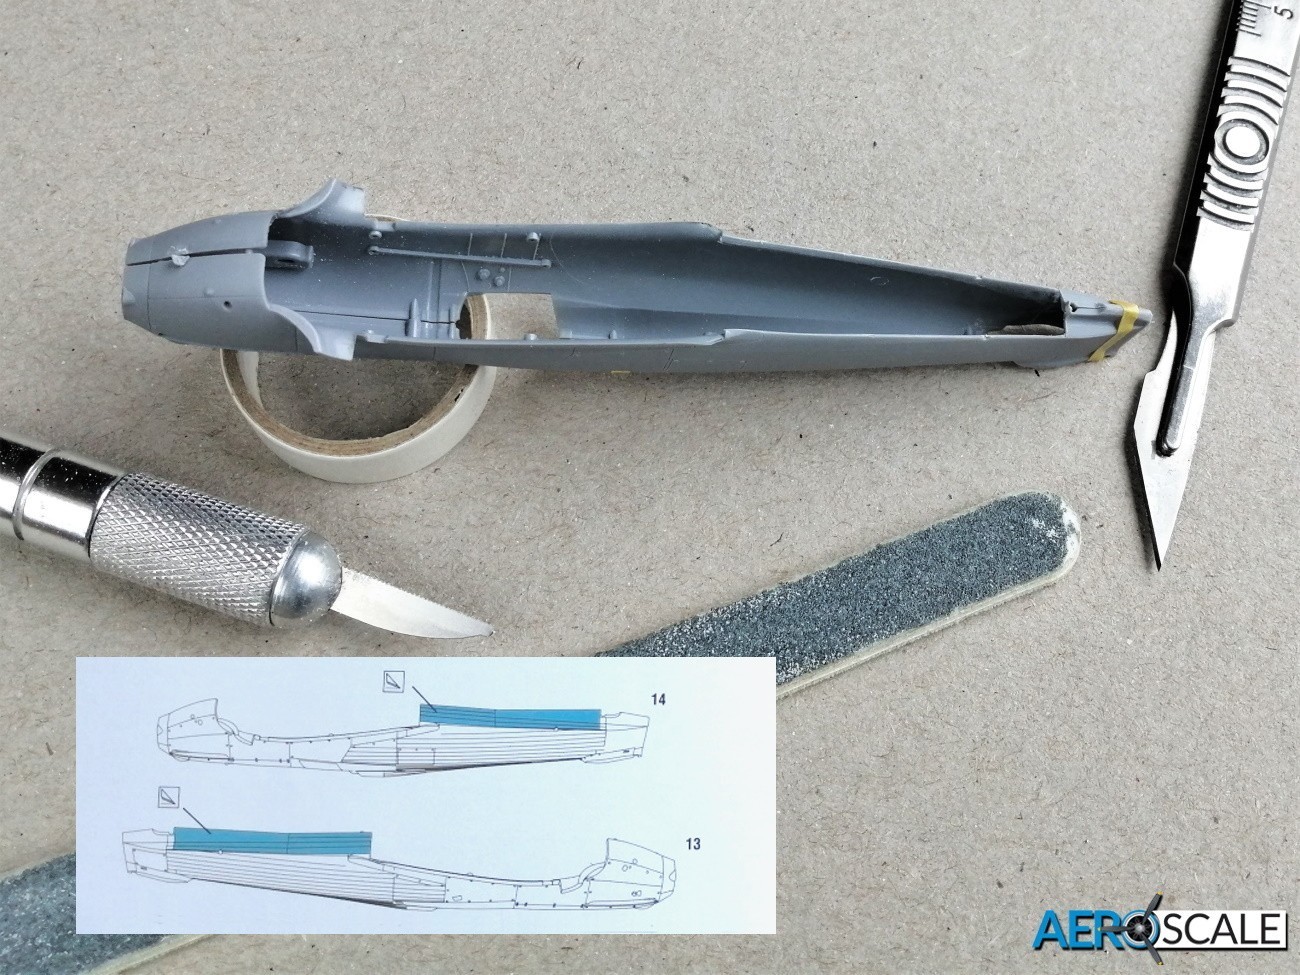
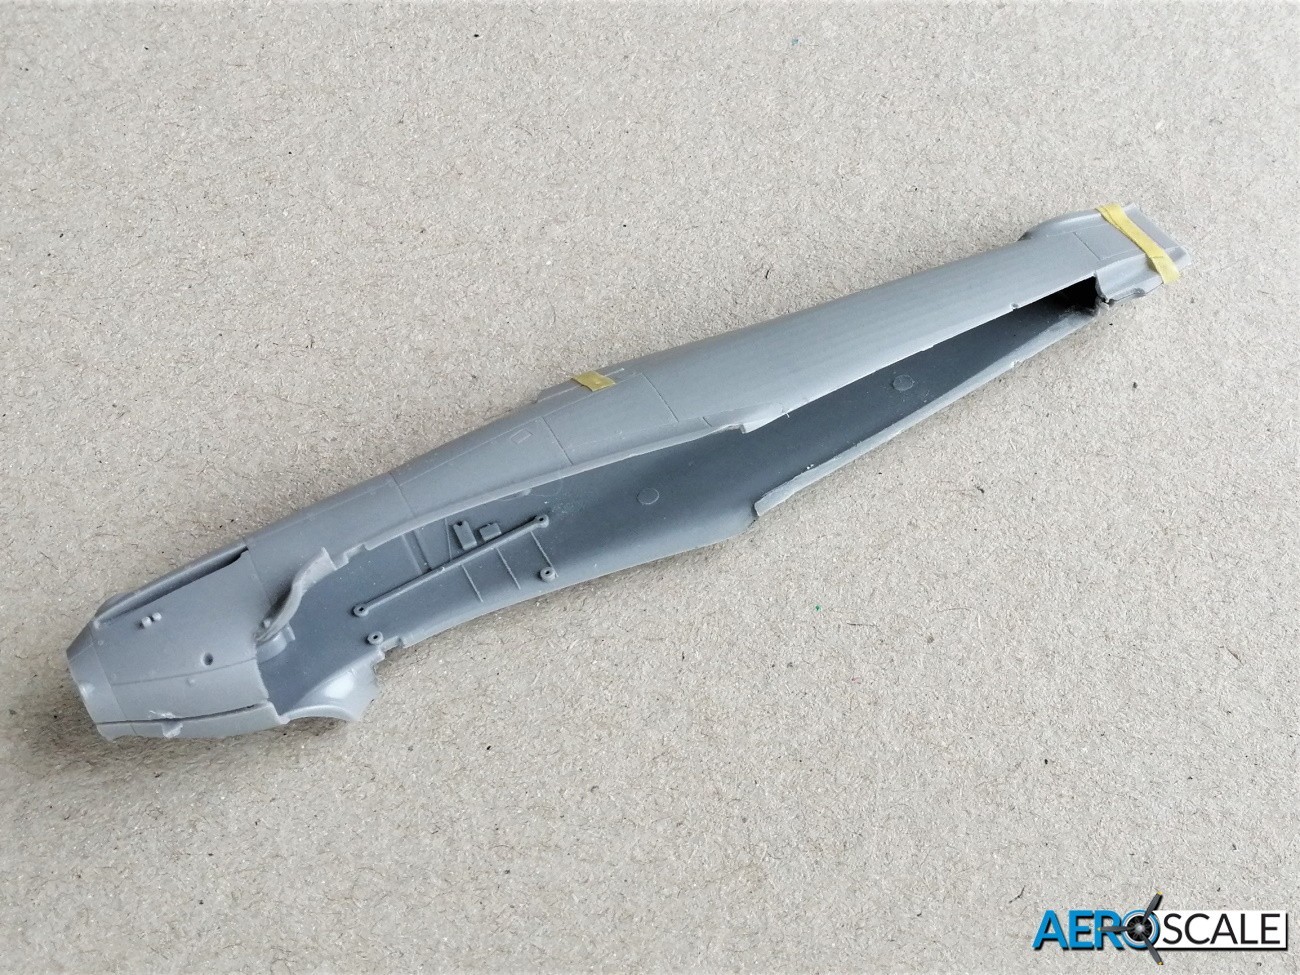
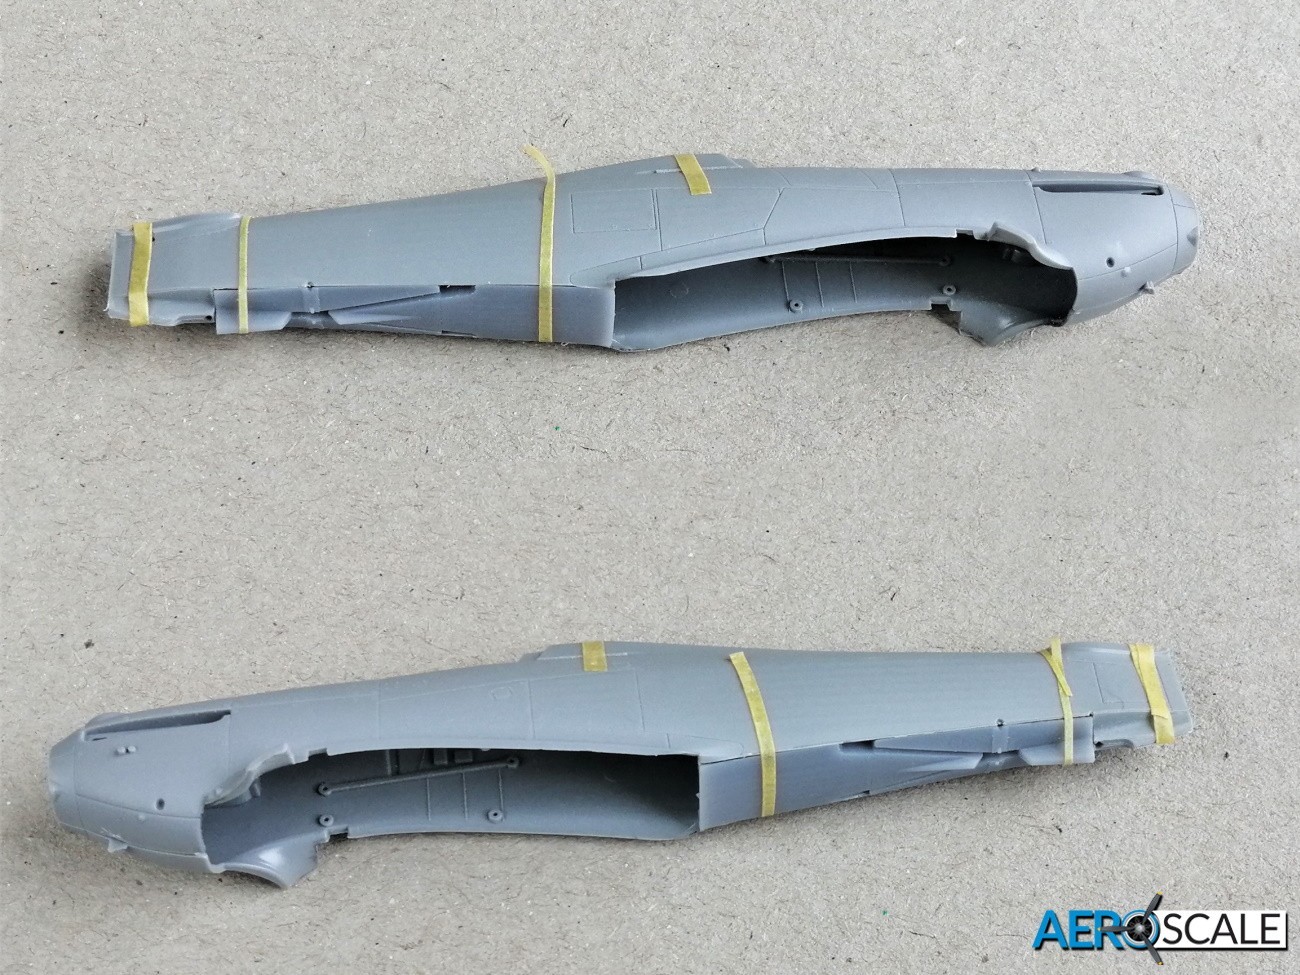
The fuselage is conventionally split left and right with a separate one-piece vertical tail surface with rudder. The distinctive humped look of the fuselage is well represented. The surface detail is superb particularly the depiction of the canvas rear half of the fuselage and tail. If you are modelling option’1’ then the fuselage panel just above the right wing trailing edge needs filling. The vertical tail surface is separate and incorporates the rudder, the trailing edge of which is sharp. The appearance of the fasteners on the metal covered parts of the fuselage look superb and in scale. The 3D printed dorsal section looks excellent, the detail looks consistent with the plastic parts. The task of cutting out the dorsal part of the fuselage and the fitting the 3D printed part is detailed in the instructions. A little more about this modification later. There is also a 3D printed one piece arrestor hook. The large coolant radiator and the oil cooler fairings on the under surface are separate. The coolant radiator fairing is made up from three parts. The flap at the rear is depicted in the closed position, though it would not take too much effort to remove it and replace with a plasticard replacement in the open position. There is a Vokes filter included for the oil cooler, but it is not applicable to the choice of aircraft with this edition. The de Havilland propeller has separate spinner. A 3D printed part represents the oil ring fitted behind the spinner. There are two types of 3D printed triple ejector exhausts with fishtail and nozzle outlets. There is also a set of exhaust flare shields included with the 3D printed items.
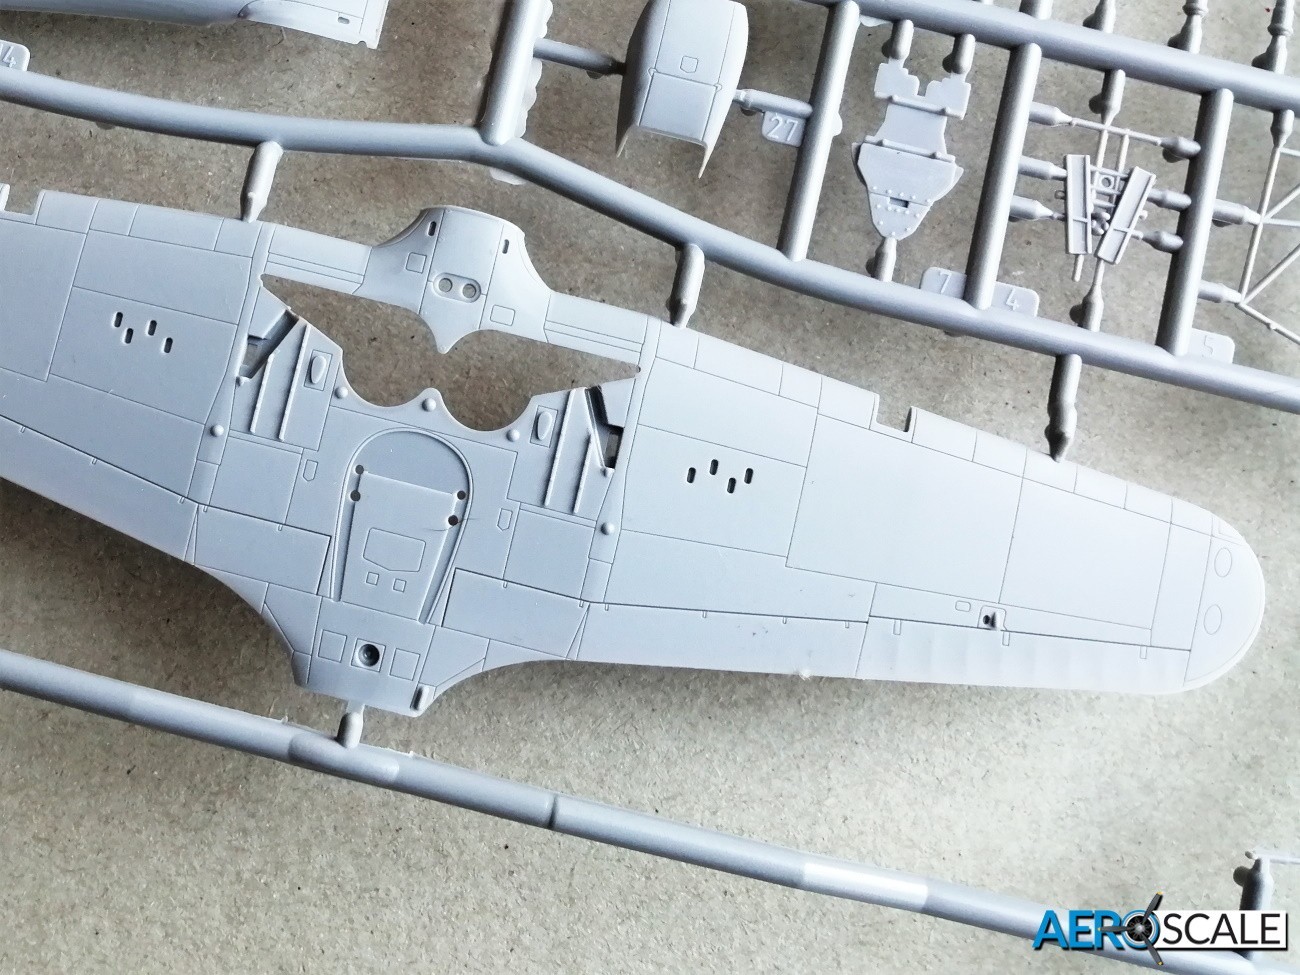
Just a note on fitting the 3D dorsal tail hook section of the fuselage. The instructions show the panel line to cut along to remove the original dorsal section. The panel line is very fine towards the tail and difficult to follow with a scalpel. I found it easy to cut the section away from the inside of the fuselage. Cutting on the inside avoided any chance of the scalpel slipping and damaging the fine surface detail. Then trim down the excess plastic for the 3D part to fit. The plastic just forward of the tail wheel fairing was cut with a fine tooth saw. There is a generous lip on the 3D part making for a positive fit. The dry fit is very good and will look even better when glued in place. Once I had decided my plan of attack, the whole operation was straightforward and took around 20 minutes.
I had no issues cutting the 3D parts with a scalpel blade from their attachment point. Cut over a box lid or tray to catch any of the small pieces that might inadvertently fall off.
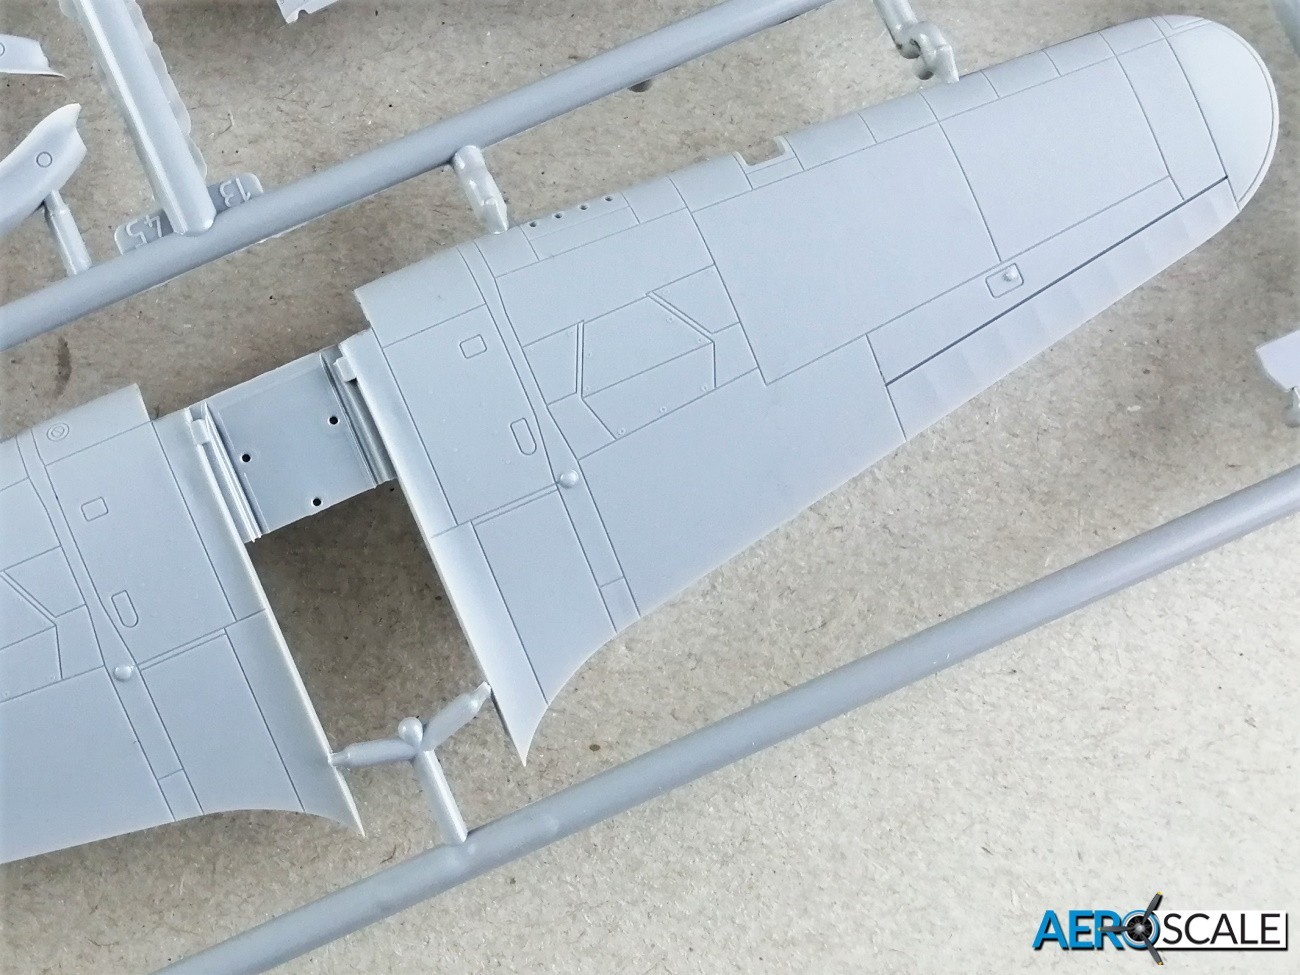
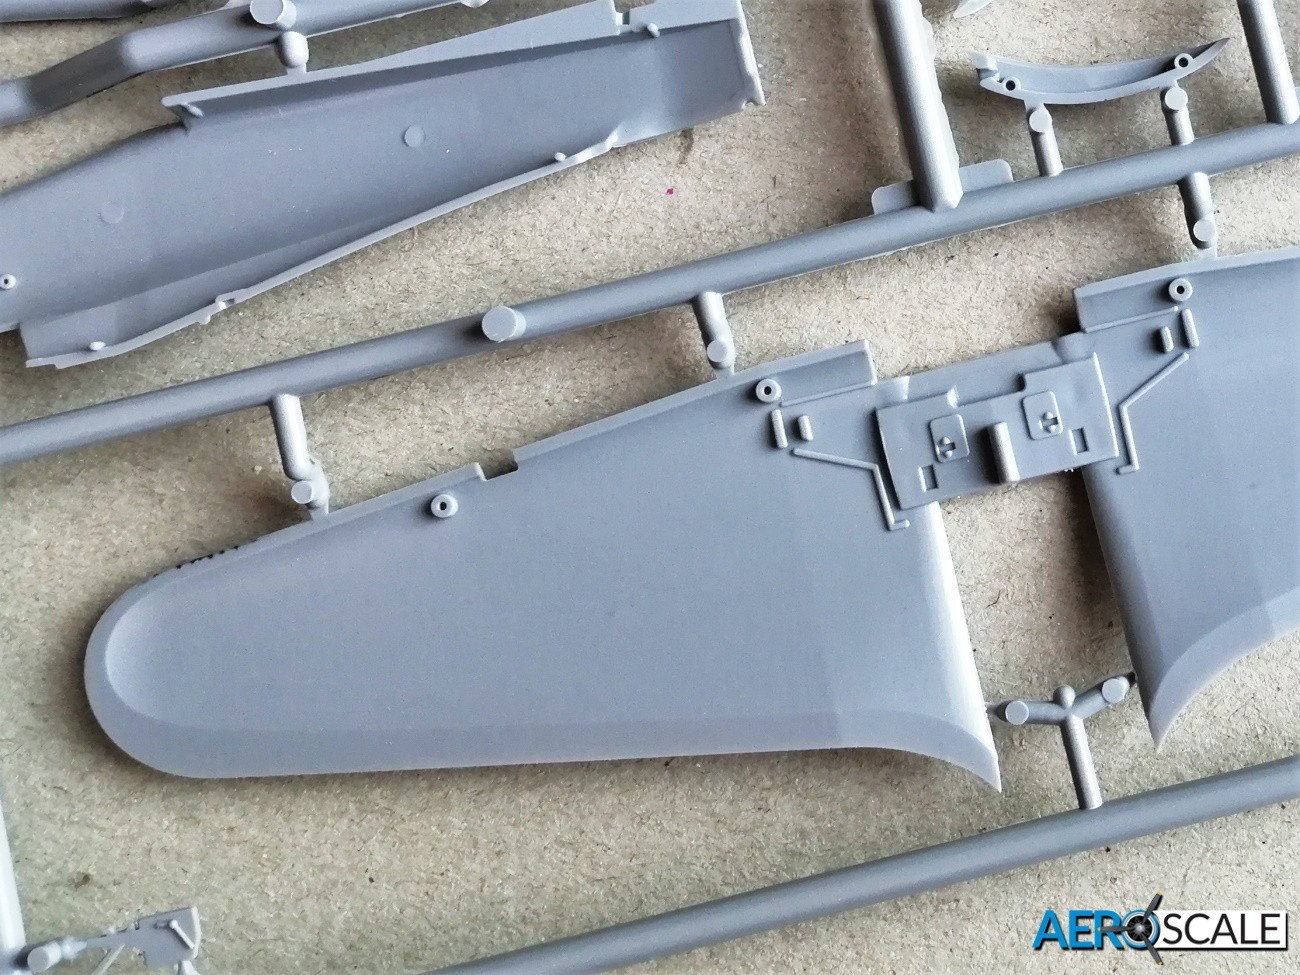
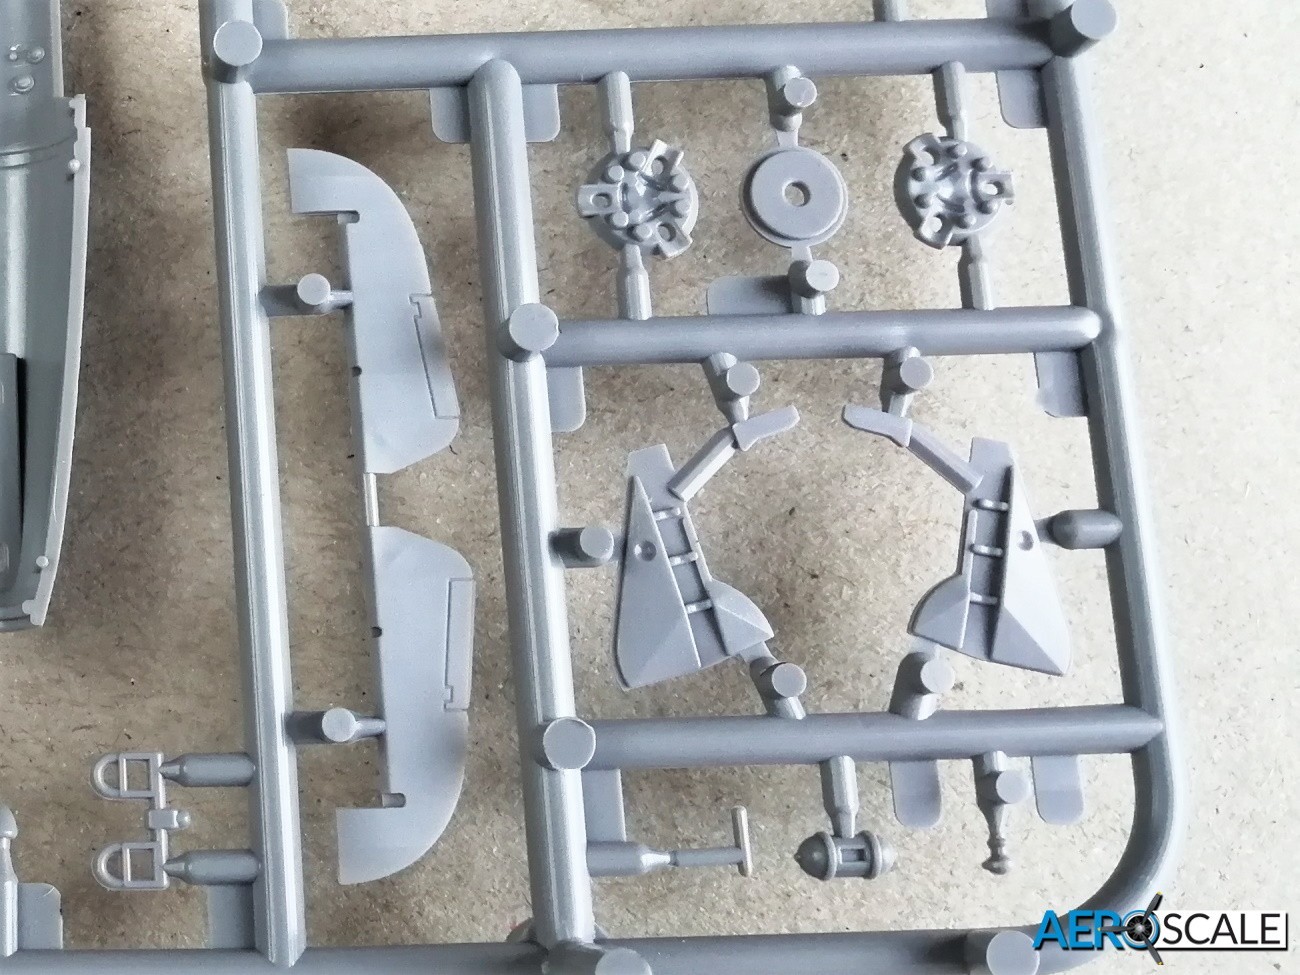
The Sea Hurricane was fitted with metal-covered wings wing containing the 8 x .303 browning machine guns. The upper and lower wing are full span and each are one piece. The cockpit floor joins both port and starboard upper wing. The recessed panel lines of the wing panels look excellent as does the fabric effect on the ailerons. The ailerons and flaps and flaps are not separate. There is the option of adding clear plastic parts for the wingtip navigation lights, though you need to cut the plastic to accommodate the clear parts. A 3D printed gun camera is included for the right wing.

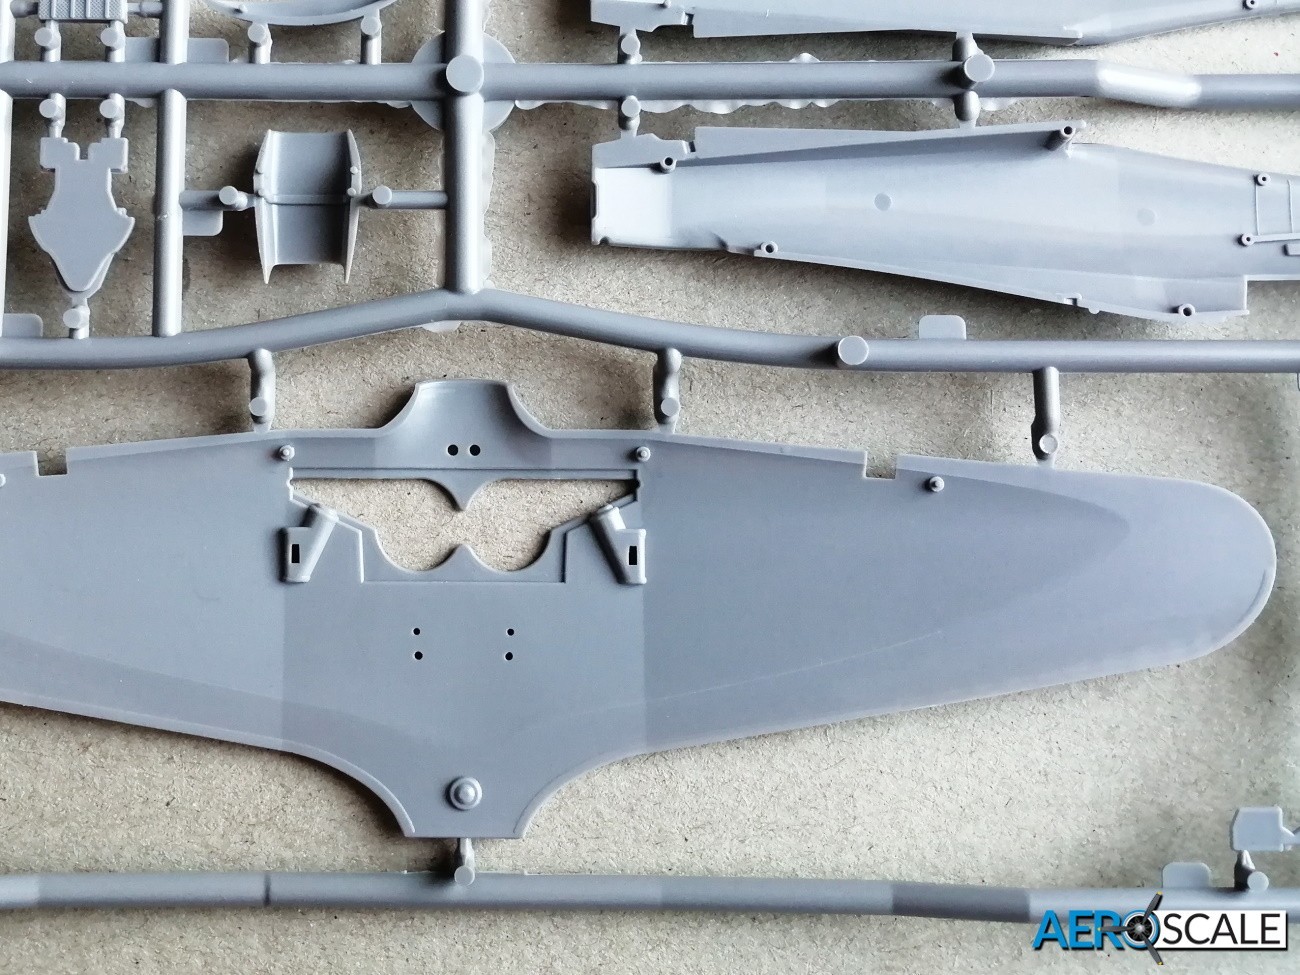
The horizontal tailplane is one piece as are the elevators. The elevators can be dropped to give a more representative look to the Hurricane at rest on dry land. The trailing edges of the elevators are nice and sharp. There are a couple of vinyl masks to attach the flaps., not sure what the purpose of them is.
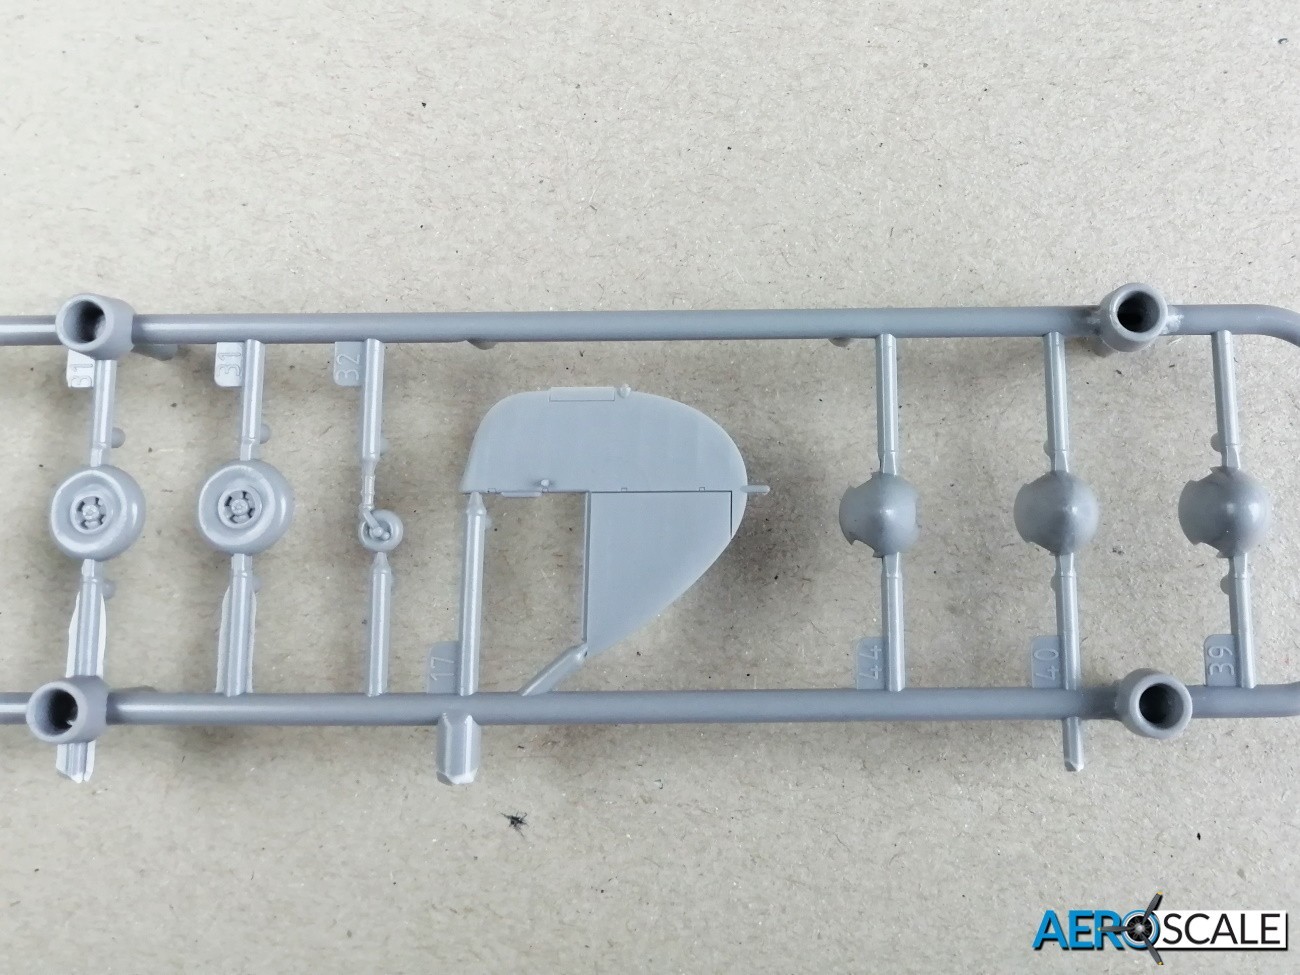
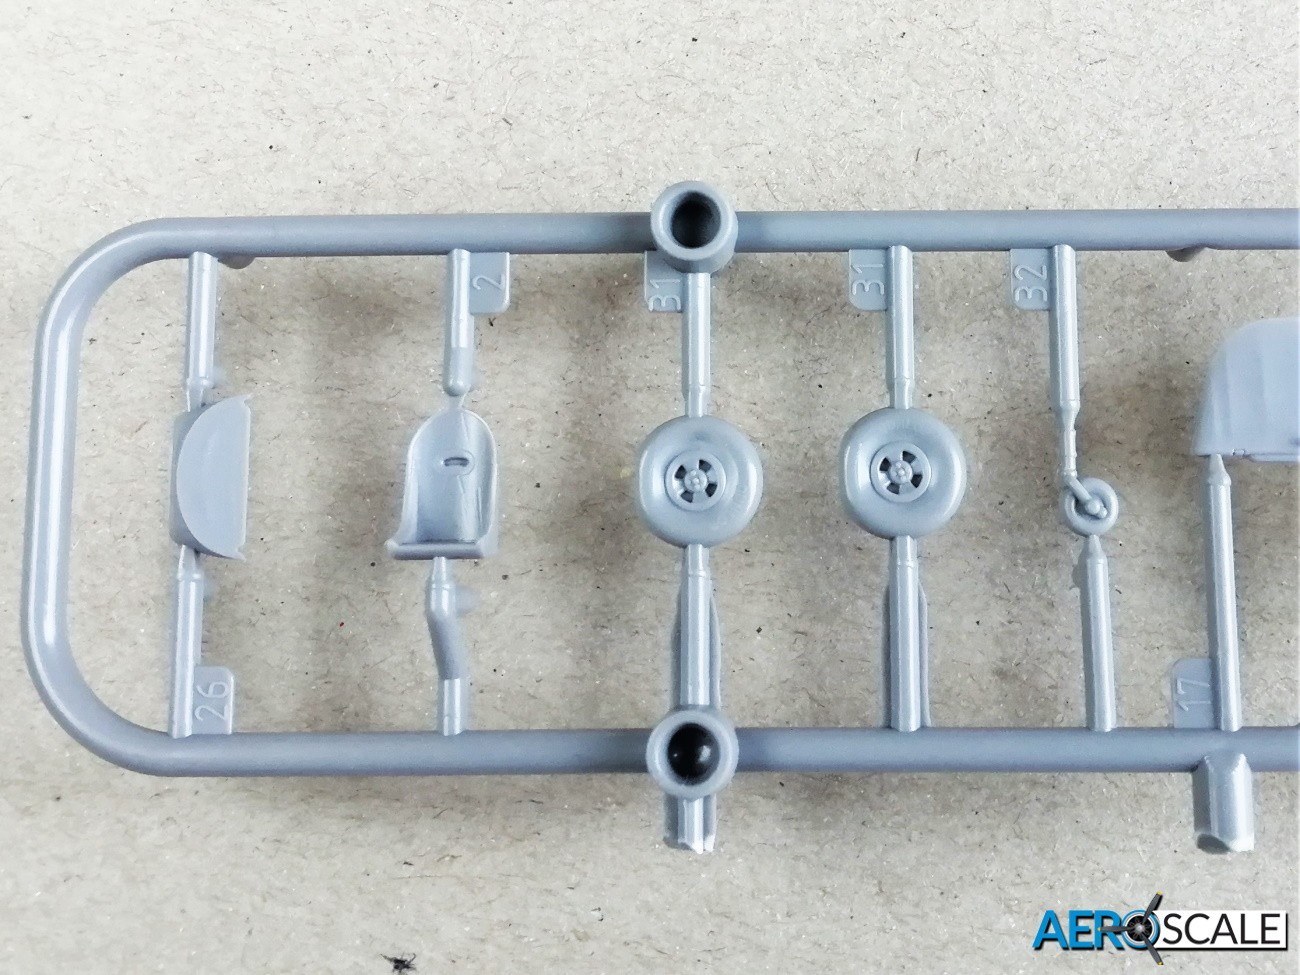
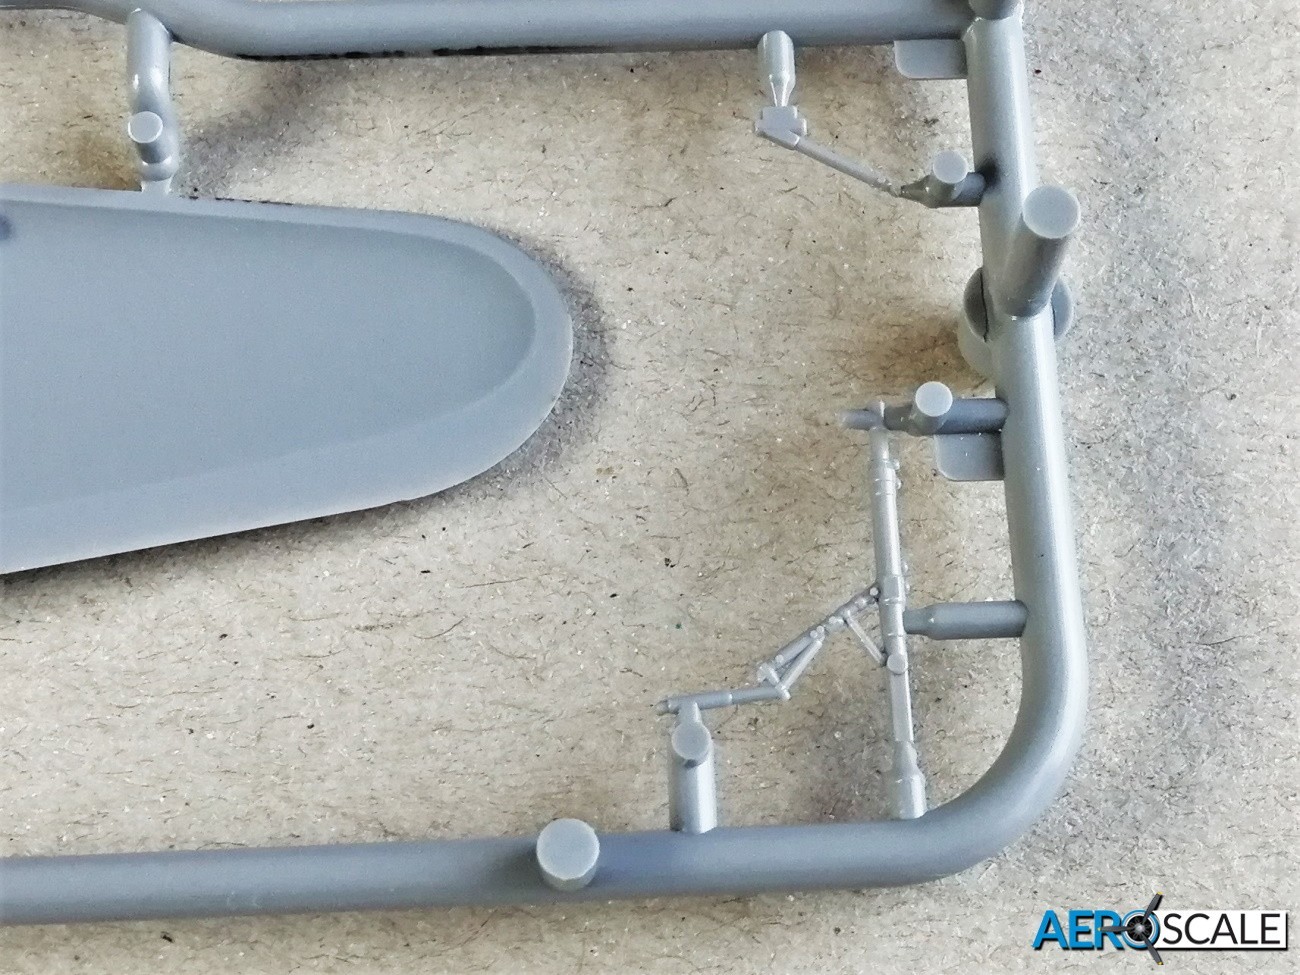
The main undercarriage bay is made up from six parts and once constructed fits into the inside of the upper wing. The detail on the sidewall and the roof of the bay is superb. The Vickers built undercarriage legs include the retraction struts, though understandably the locking arm are a separate. The detail looks very good with attachment points to the spar creating a strong joint. The undercarriage doors are nicely detailed and will provide extra strength for the undercarriage legs. The group of six indentations on the outside of the doors are I think sink marks, so need filling. The main wheels are one piece and weighted with the raised manufactures name moulded on the sidewall of the tyre and excellent hub detail. A diagram providing a head on look of the undercarriage is a useful inclusion in the instruction. It shows the angle of the wheel relative to the ground. The tail wheel is one piece. All the wheels have paint masks.
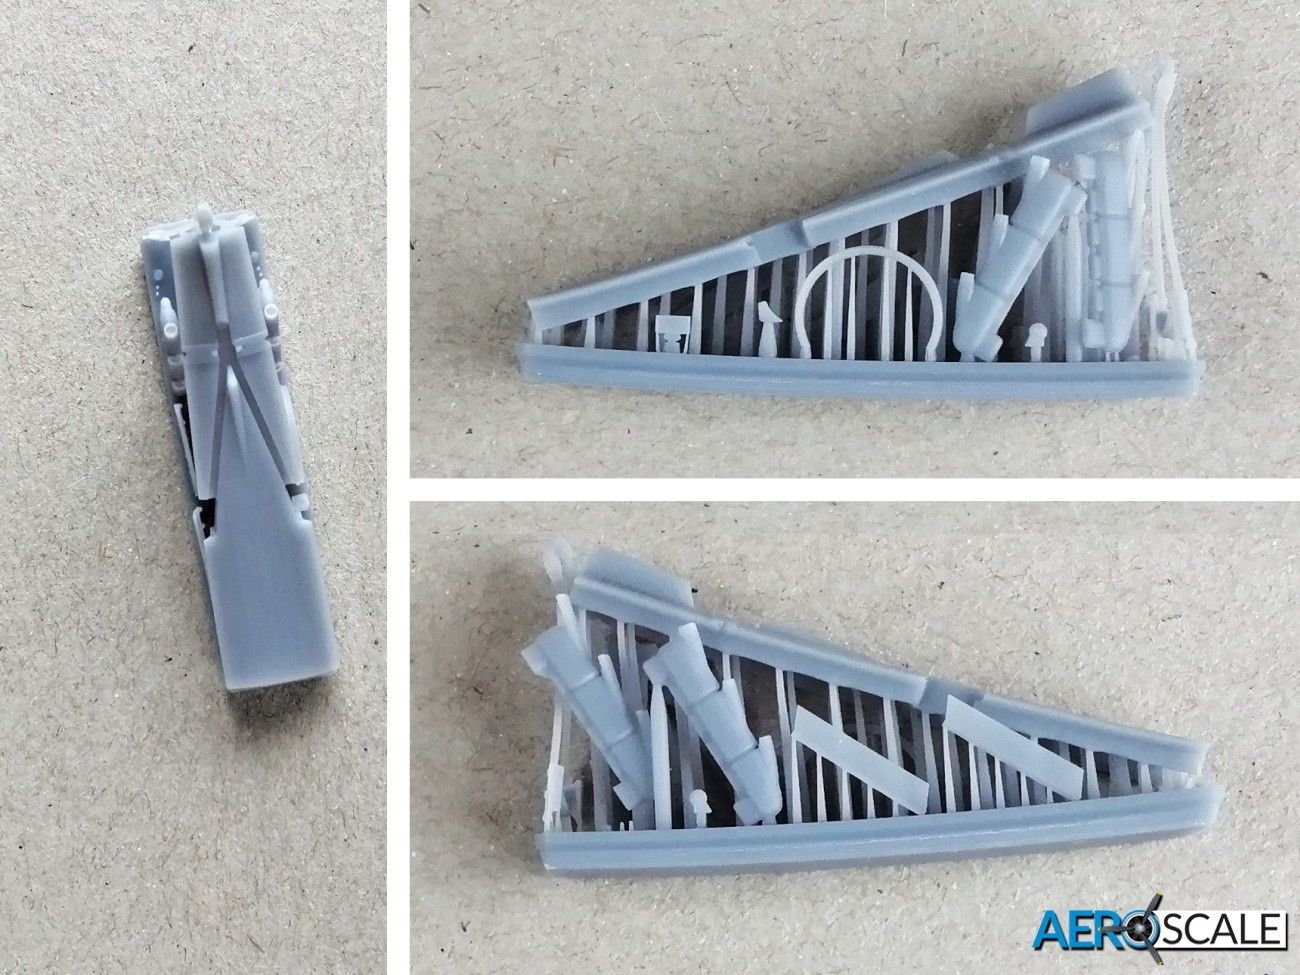
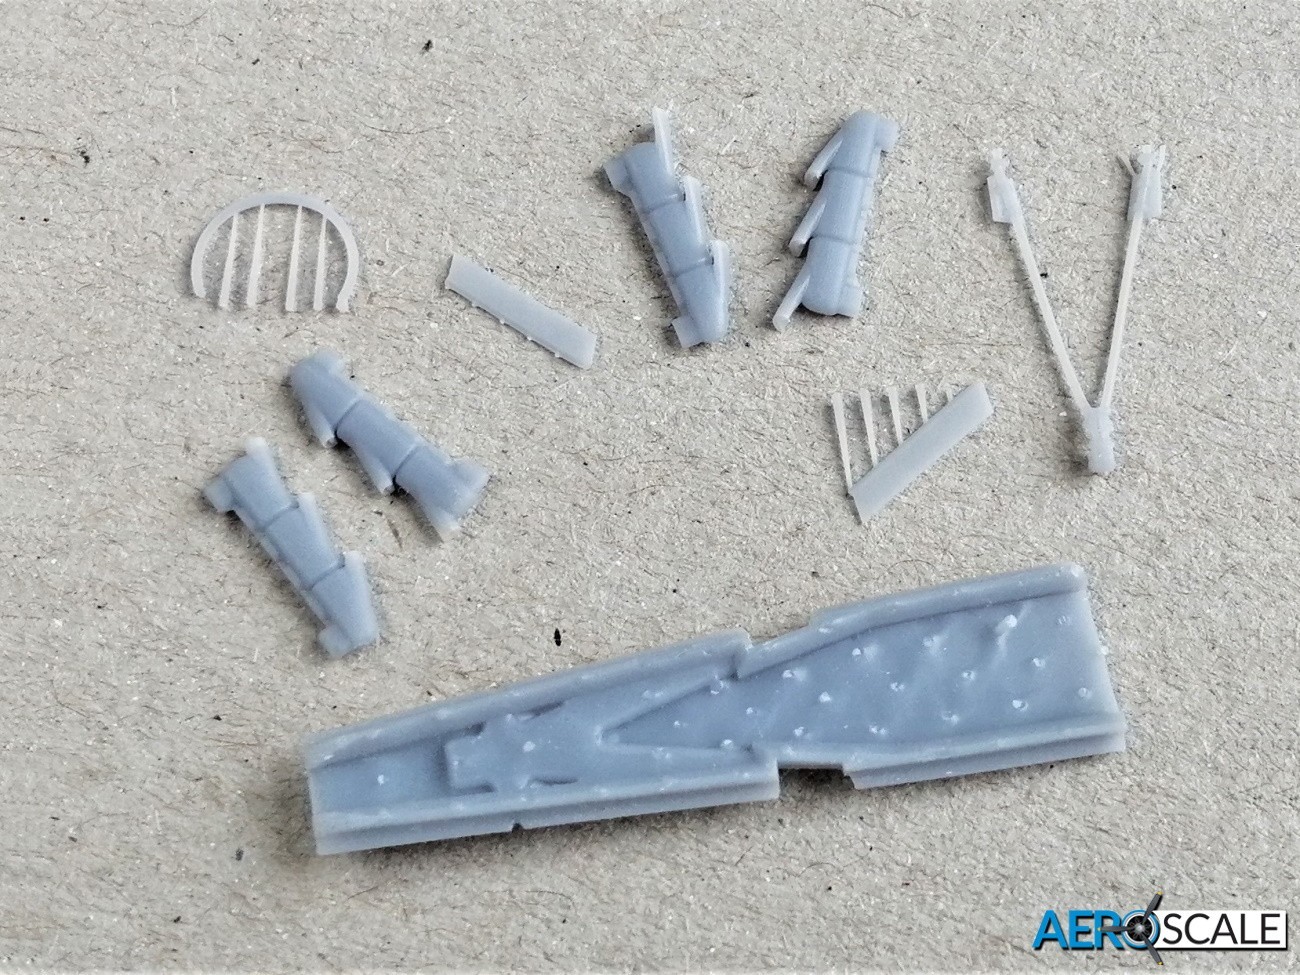
The 3D printed parts include ventral fuselage, arrestor hook, catapult or tie down hooks, two styles of exhaust pipes, exhaust flare shields, oil ring, rear looking mirror, head rest, gun camera
Kubuki paint masks are included for both styles of canopy, windscreen, main and tail wheels and landing light covers.
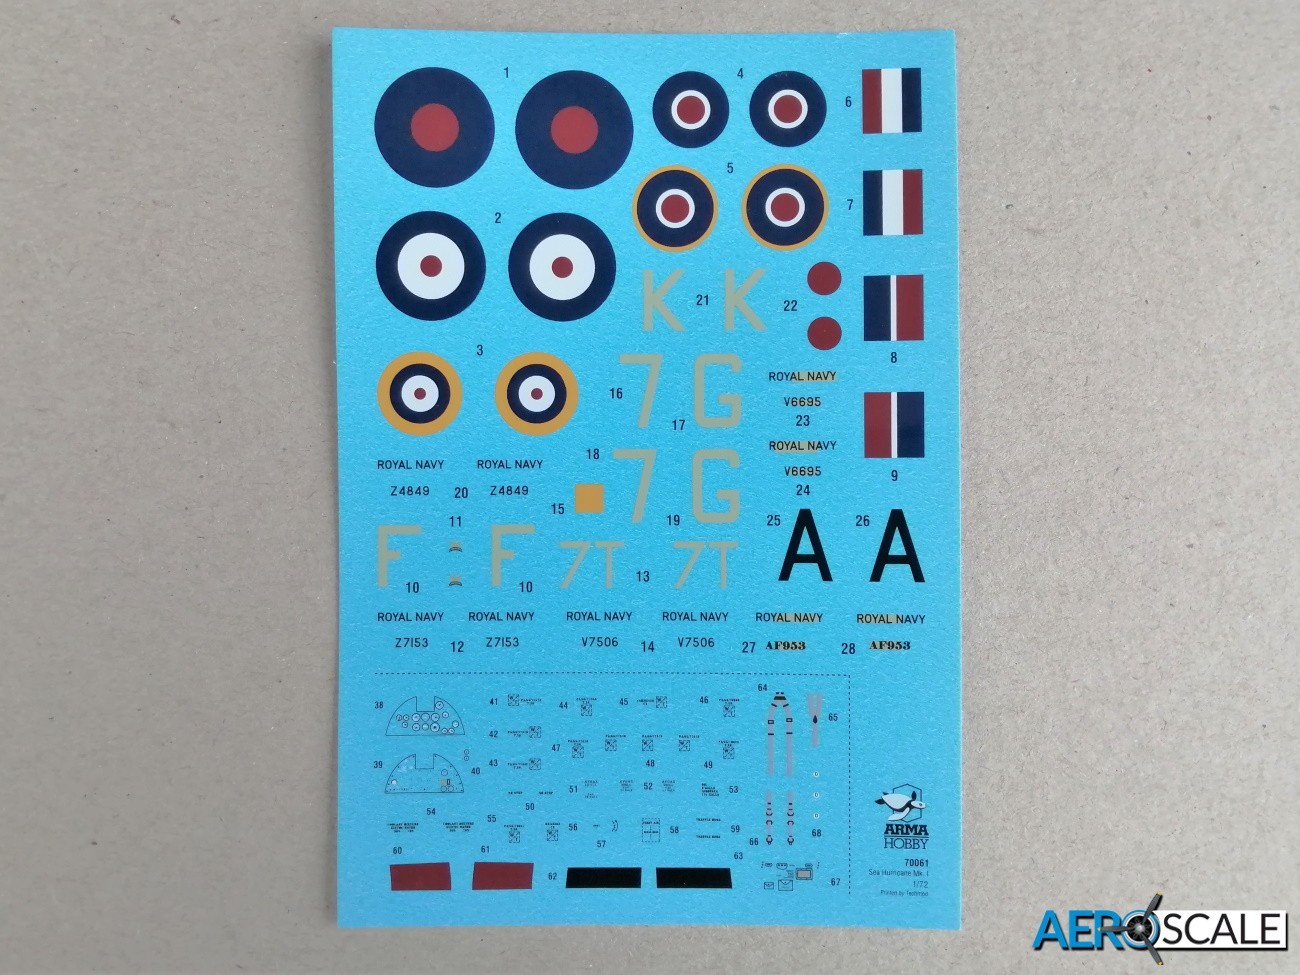
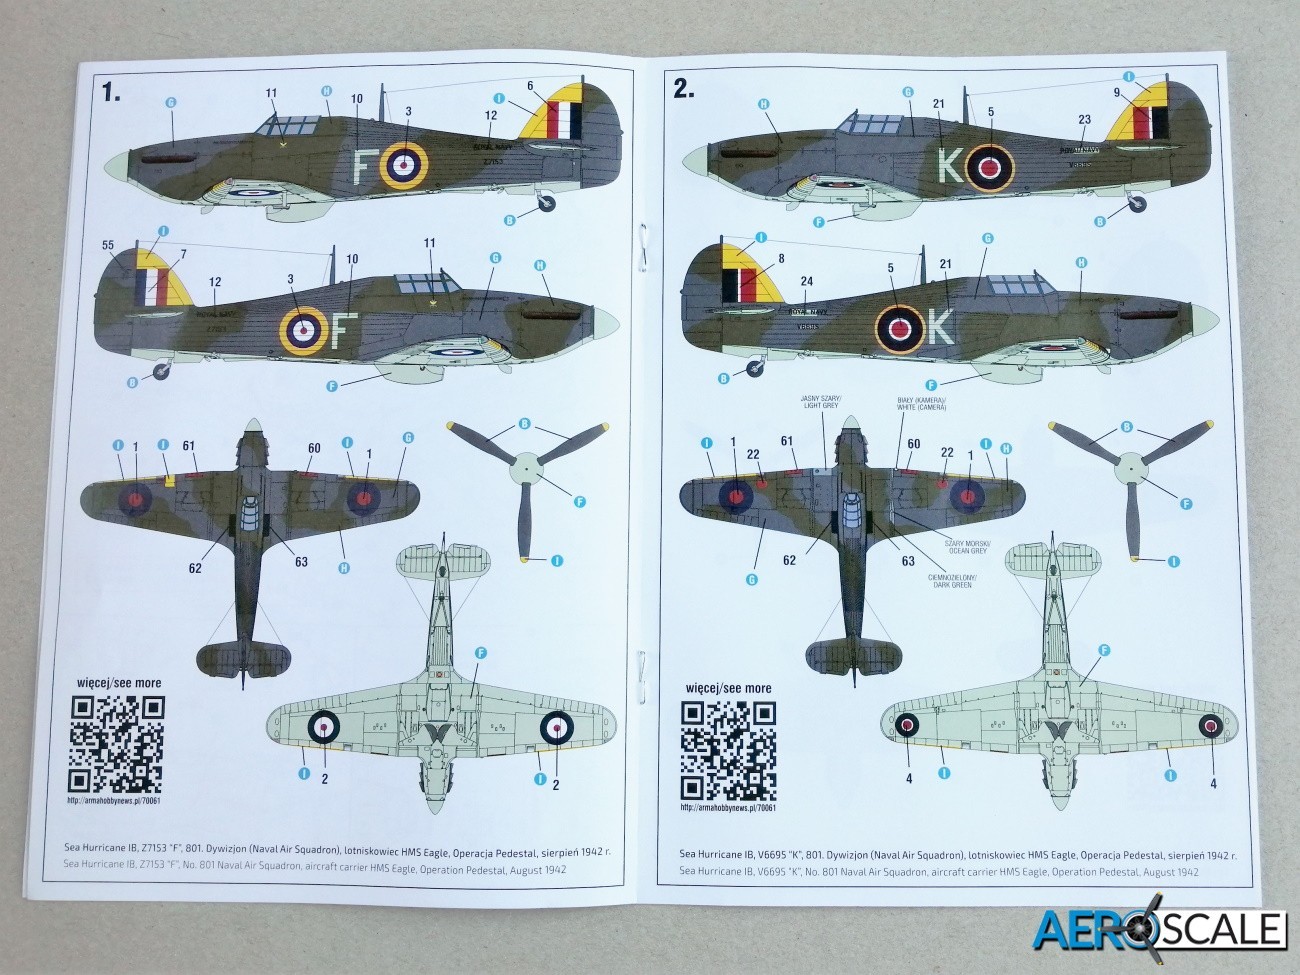
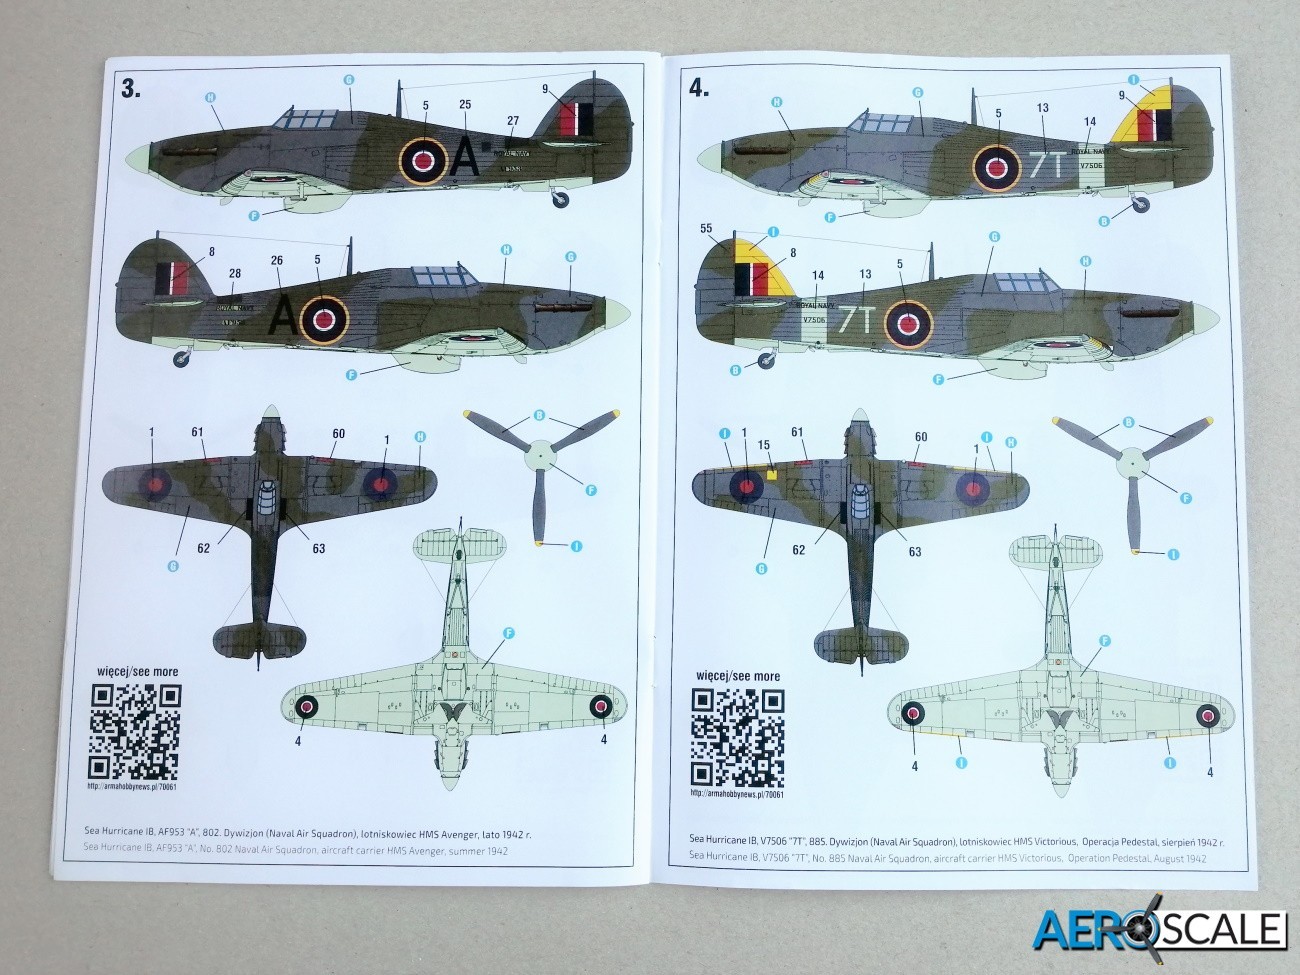
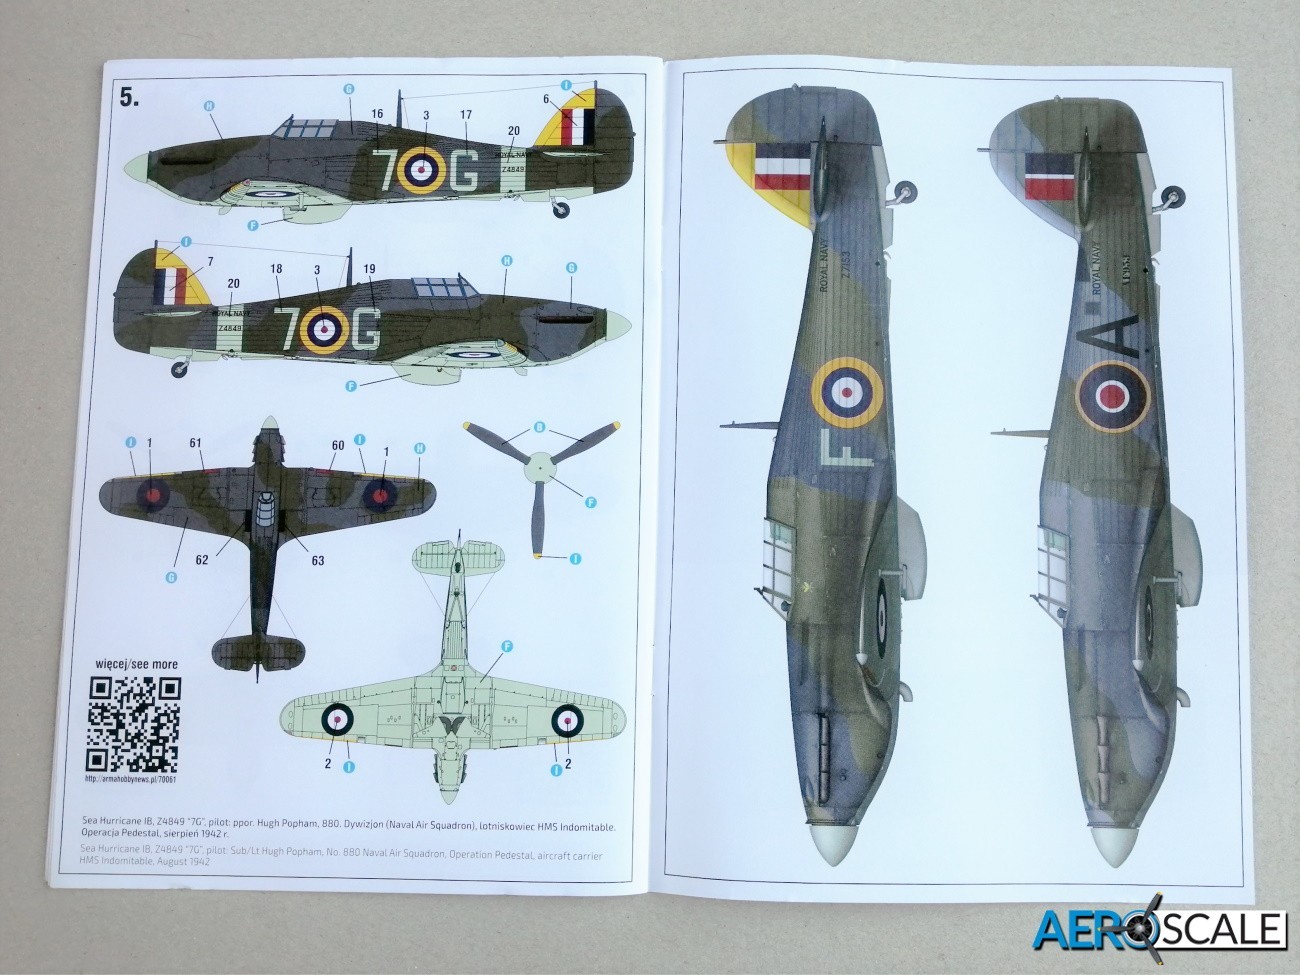
The decals printed by Techmod look superb: glossy, with good colour density and the definition is superb. Included are all the various tail markings. Instruments and other cockpit detail as well as seat harnesses are provided.

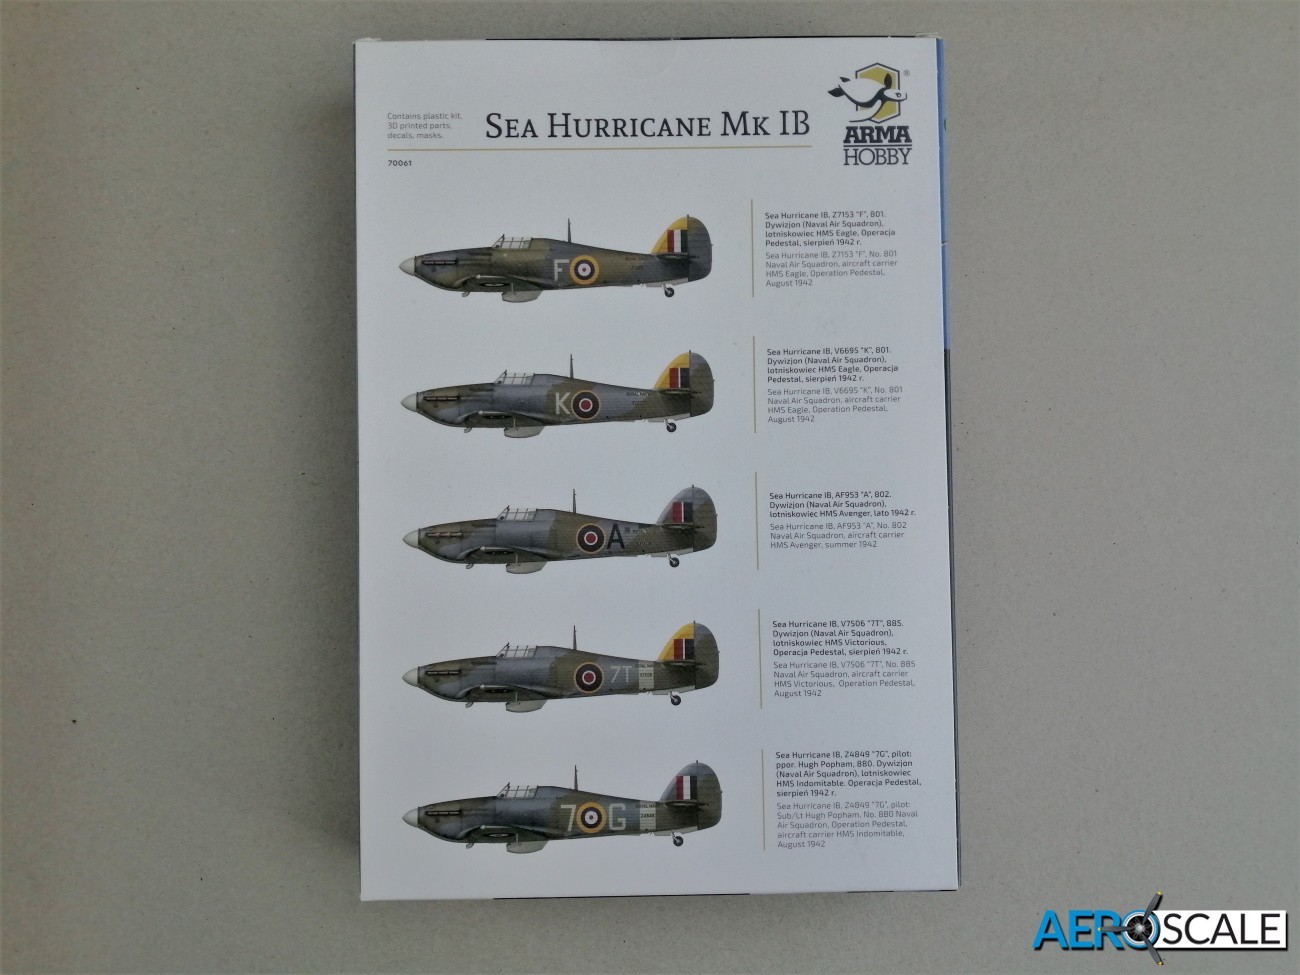
Marking options:
- Sea Hurricane Mk.Ib, Z7153 “F”, No. 801 Naval Air Squadron, aircraft carrier HMS Eagle, Operation Pedestal, August 1942
- Sea Hurricane Mk.Ib, V6695 “K”, No. 801 Naval Air Squadron, aircraft carrier HMS Eagle, Operation Pedestal, August 1942
- Sea Hurricane Mk.Ib, AF953 “A”, No. 802 Naval Air Squadron, aircraft carrier HMS Avenger, summer 1942
- Sea Hurricane Mk.Ib, V7506 “7T”, No. 885 Naval Air Squadron, aircraft carrier HMS Victorious, Operation Pedestal, August 1942
- Sea Hurricane Mk.Ib, Z4849 “7G”, pilot: Sub/Lt Hugh Popham, No. 880 Naval Air Squadron, Operation Pedestal, aircraft carrier HMS Indomitable, August 1942
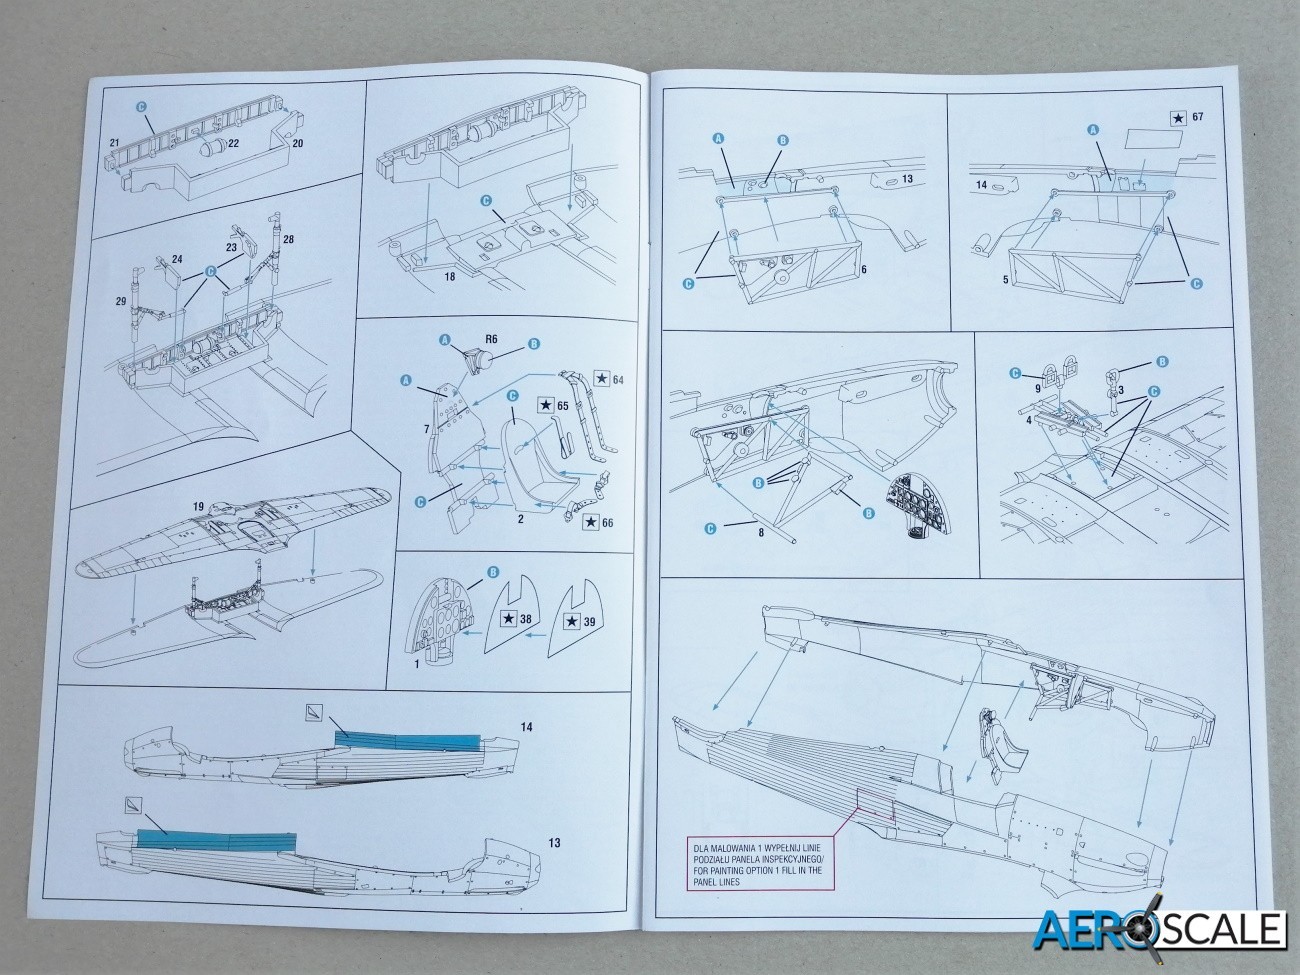
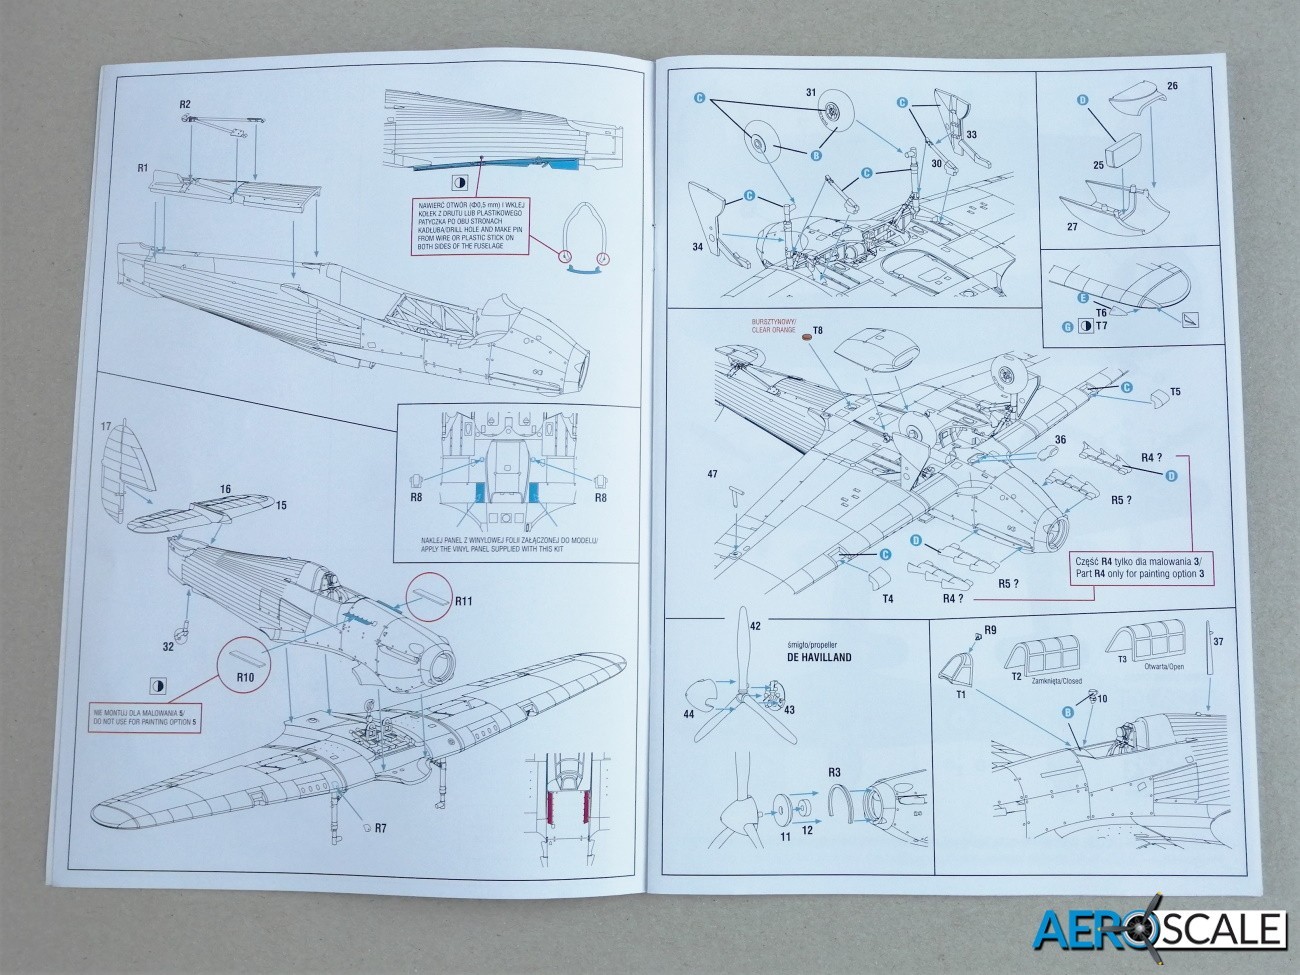
The twelve-page A5 format construction guide is excellent with plenty of line drawings. Instructions are colour coded and a useful aid are the CAD images of the finished items: engine and undercarriage bays and the undercarriage itself. There are several paint manufactures referenced in the instructions including: Hataka, AK RC, Lifecolor, Ammo, Humbrol, Vallejo and Tamiya.
The Shuttleworth Collection has a Hawker Sea Hurricane Mk.Ib [G-BKTH] still in airworthy condition. There are some great images of it on the net if you care to look for them.
Conclusion
This is the first time I have seen the Arma Hobby Hurricane Mk.I and I am bowled over with the quality and the detail of this 1:72 scale kit. Rather than creating a new expensive mould especially for the fuselage, Arma Hobby has gone for a separate 3D printed ventral area. Some modelling skill will be required to create the Sea Hurricane Mk.Ib, but Arma Hobby has tried to make the conversion as painless as possible. It is an important and welcome addition to the Arma Hobby range of 1:72 scale Mk.I and Mk.II Hurricanes. Highly recommended
My thanks to Arma Hobby for this review sample
70061 – Hawker Sea Hurricane Ib – 1:72
Please remember, when contacting retailers or manufacturers, to mention that you saw their products highlighted here – on AEROSCALE.