Background
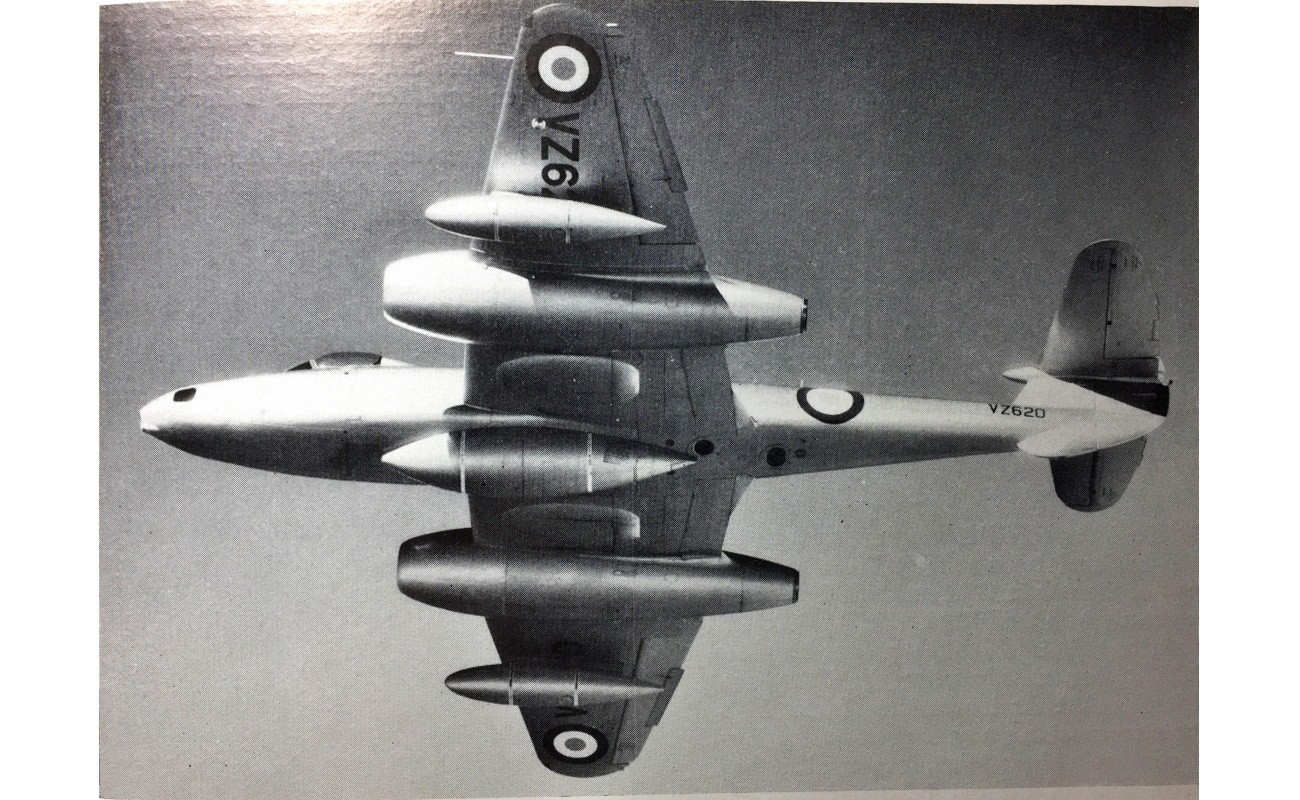
The Gloster Meteor first flew in 1943 and went into service with No. 616 Squadron RAF on 27 July 1944. The Meteor was prevented from operating on the frontline in the Second World War due to fears of the aircraft being captured. Meteors of the Royal Australian Air Force (RAAF) Meteors fought in the Korean War and the Meteors of Argentina, Egypt and Israel were involved in regional conflicts. Although the Meteor looked somewhat unsophisticated, it turned out to be very adaptable design. Specialised variants of the Meteor were developed for use in photographic aerial reconnaissance, as a night fighter and research and development.
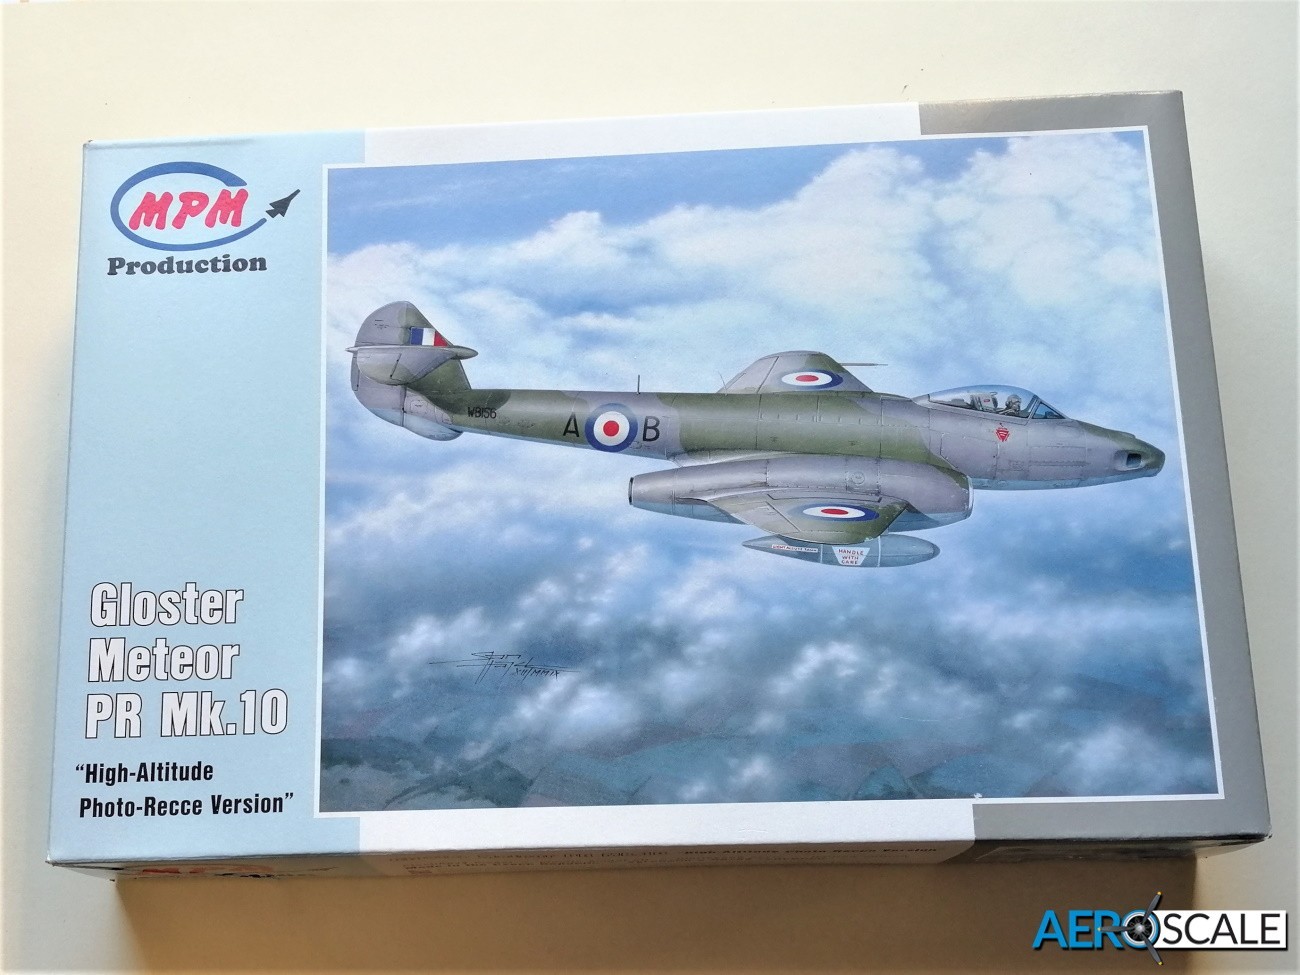
This release from MPM, the Meteor PR Mk.10 was an oddity utilising parts of the airframe from the Meteor Mk.4 [tail], Mk.8 [fuselage] and FR Mk.9 [nose] and the longer wings of the F Mk.3. It was powered by two Rolls-Royce Derwent 8 engines. Three cameras were fitted: one F.24 in the nose and two F.52s in the rear fuselage. It served with No. 2, No 13 and No. 541 Squadrons, the former two Squadrons based in Germany. It was used extensively for peeping east over the iron curtain until replaced by the EE Canberra.
The Kit
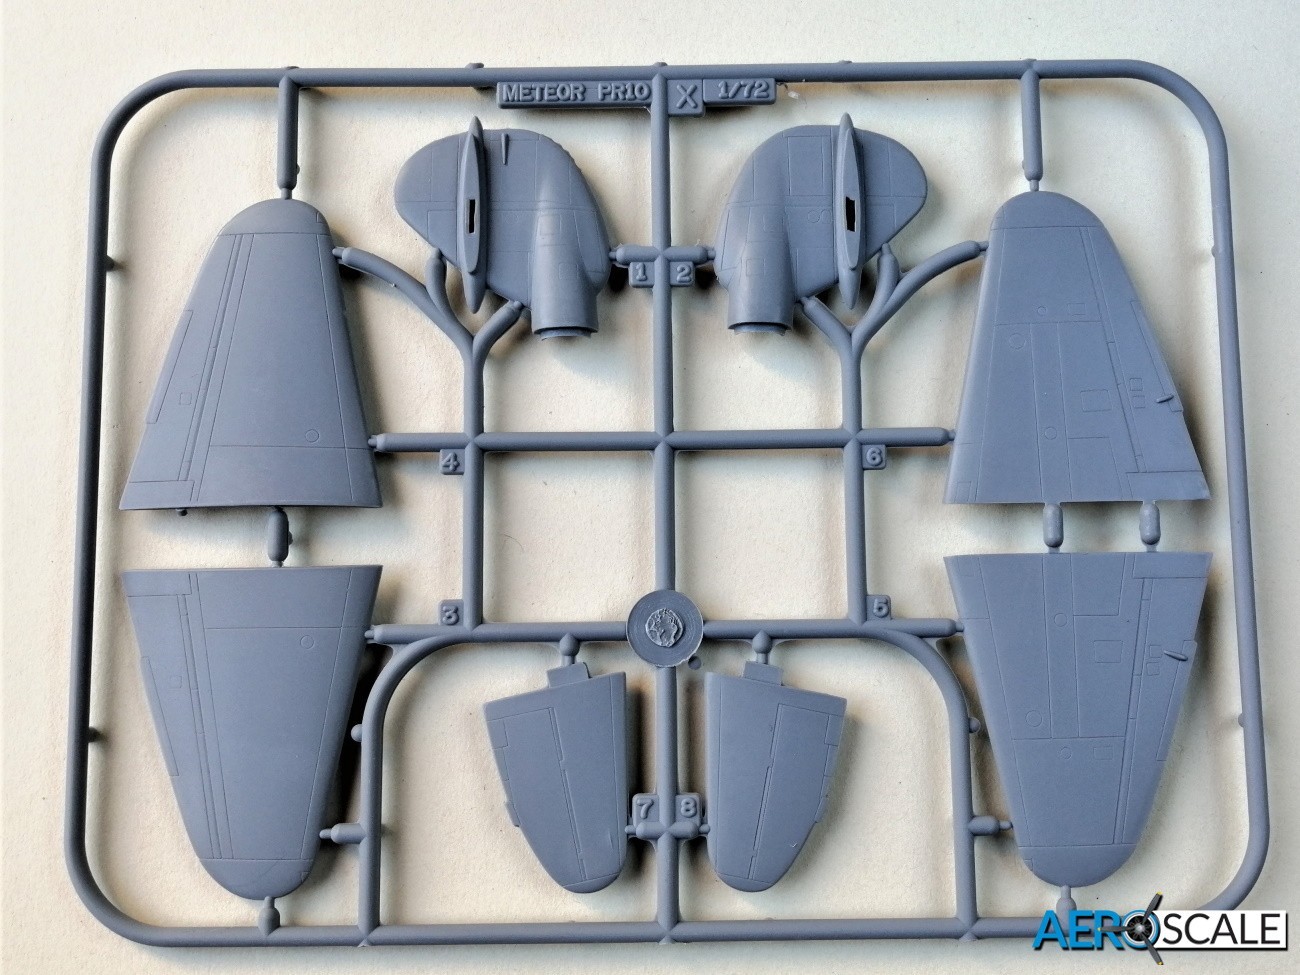
MPM first released the 1:72 scale Gloster Meteor FR.Mk.9 as a new tool in 2008 [Scalemates] The MPM moulding for the Meteor has been utilised since them by Xtrakit, Airfix, Revell and Special Hobby [Scalemates]. So, the chances are it’s going to be a decent kit. The Meteor PR Mk.10 was an odd bird with parts from other marks making up the high-altitude reconnaissance aircraft. This is reflected in the fact you will need to cut off the tail, and part of the nose and the trailing edge of the wing root and replace them with the alternative parts included with this release.
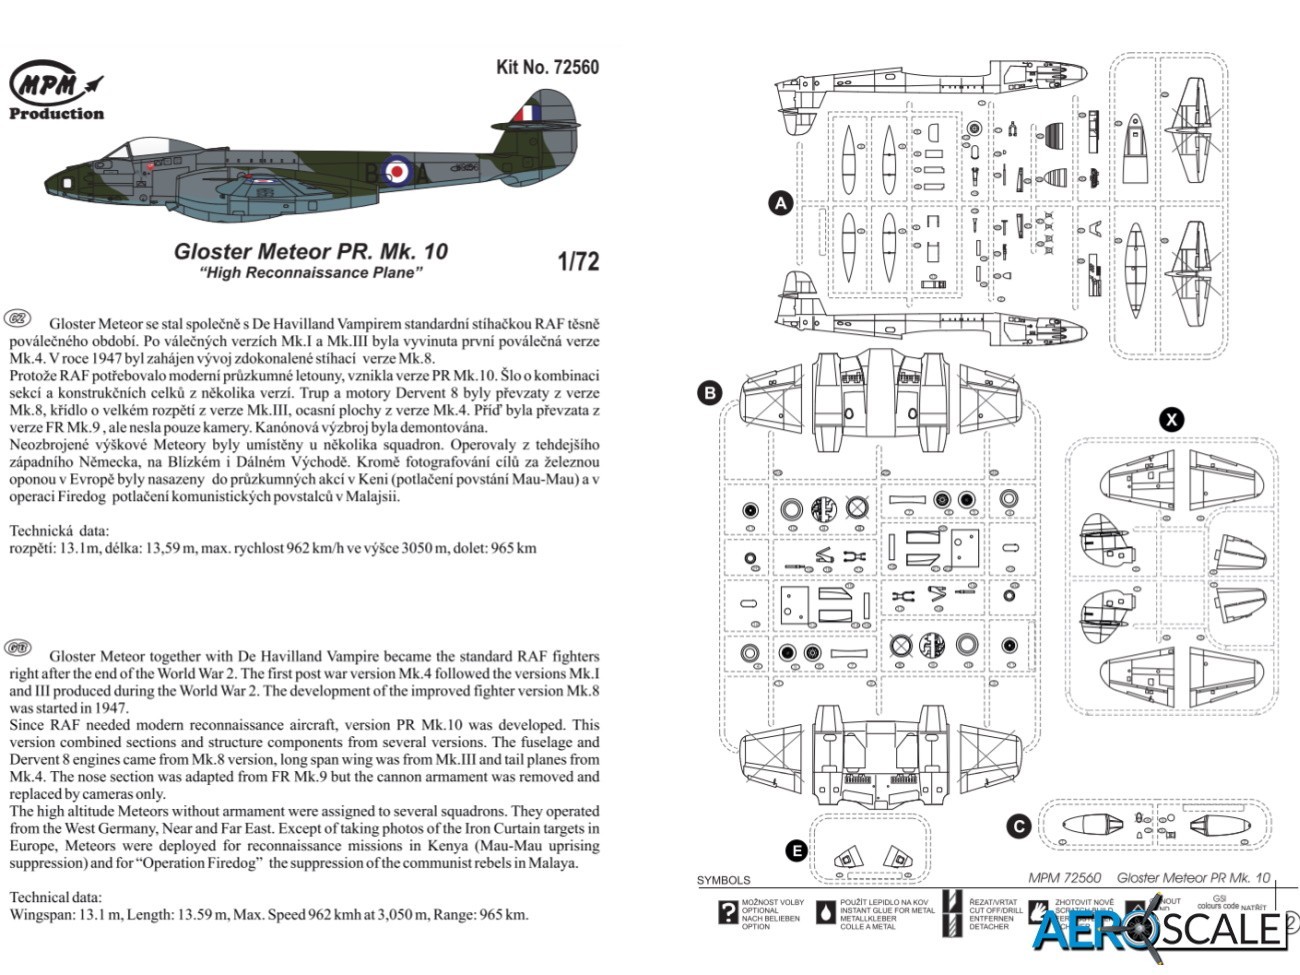
All the contents are packed in one bag, though the clear and resin parts have preferential treatment being in their own bags as are the decals.
Contents include:
- 3 x grey plastic sprues
- 1 x clear plastic sprue
- 2 x resin parts
- 1 x sheet of decals
- 1 x 12 page instruction manual
- 1 x addendum sheet.
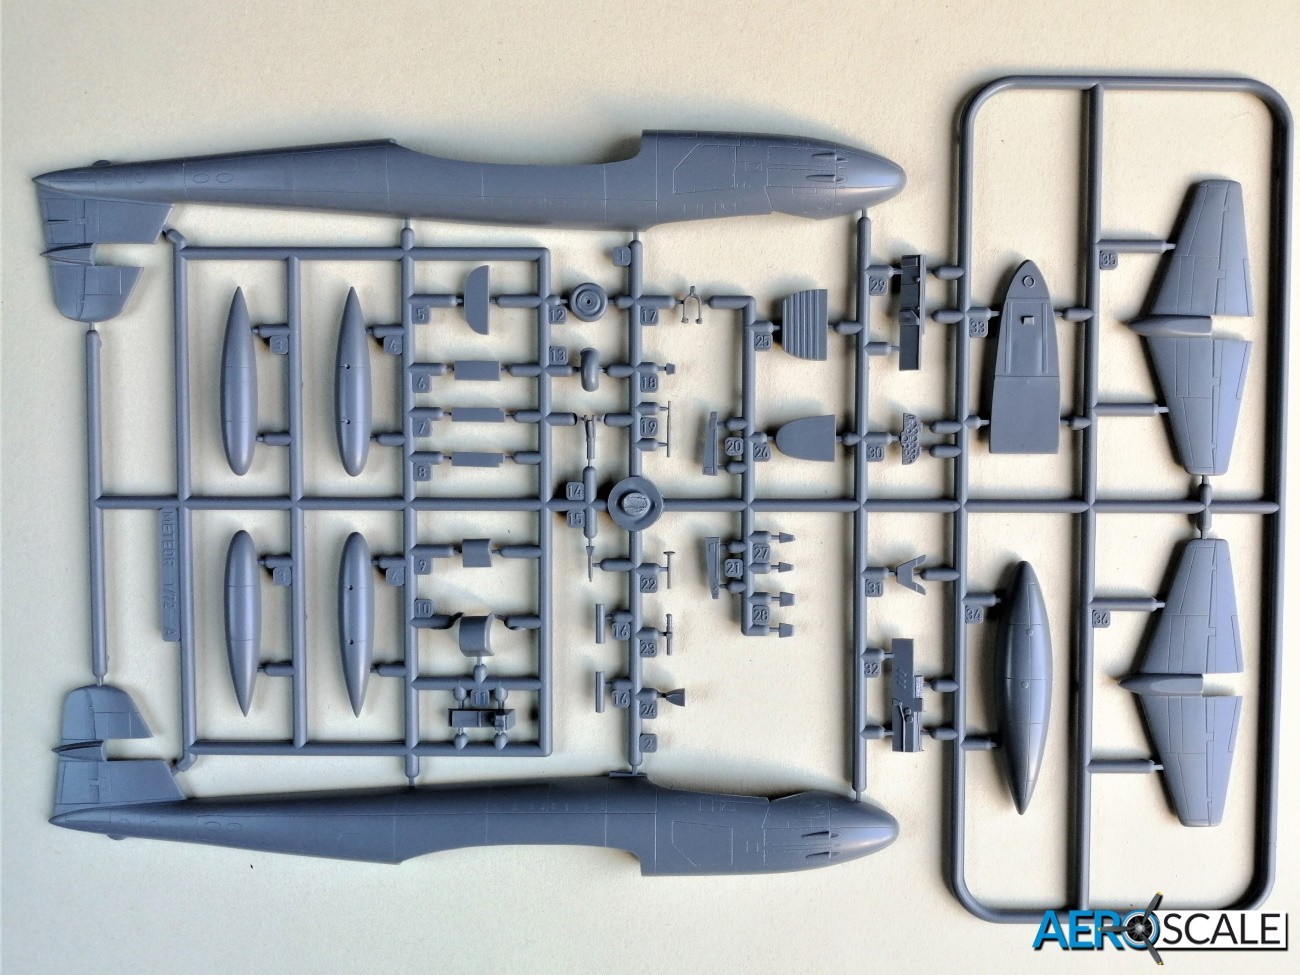
The recessed and raised detail generally looks good, though there is flash evident and a few sink marks on the thicker parts.
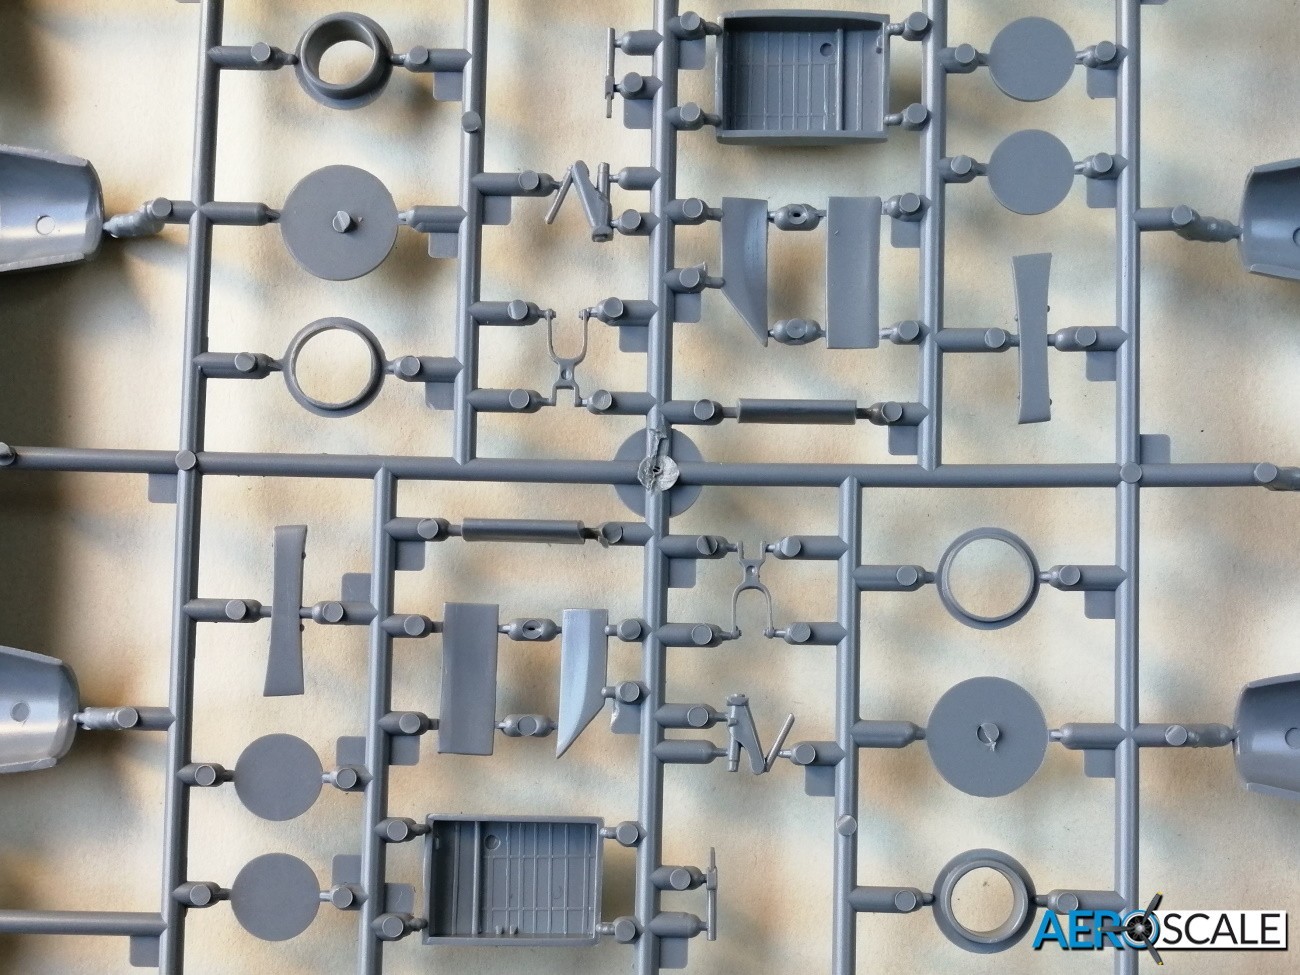
There are thirteen plastic parts making up the cockpit and three parts to build the ejector seat. You will need to create or source some seat belts though. There is a deep recessed ejector mark inside the seat that will need filling or covering. The instrument panel has adequate instrument detail as does the side panels. Rudder pedals and control stick are included.
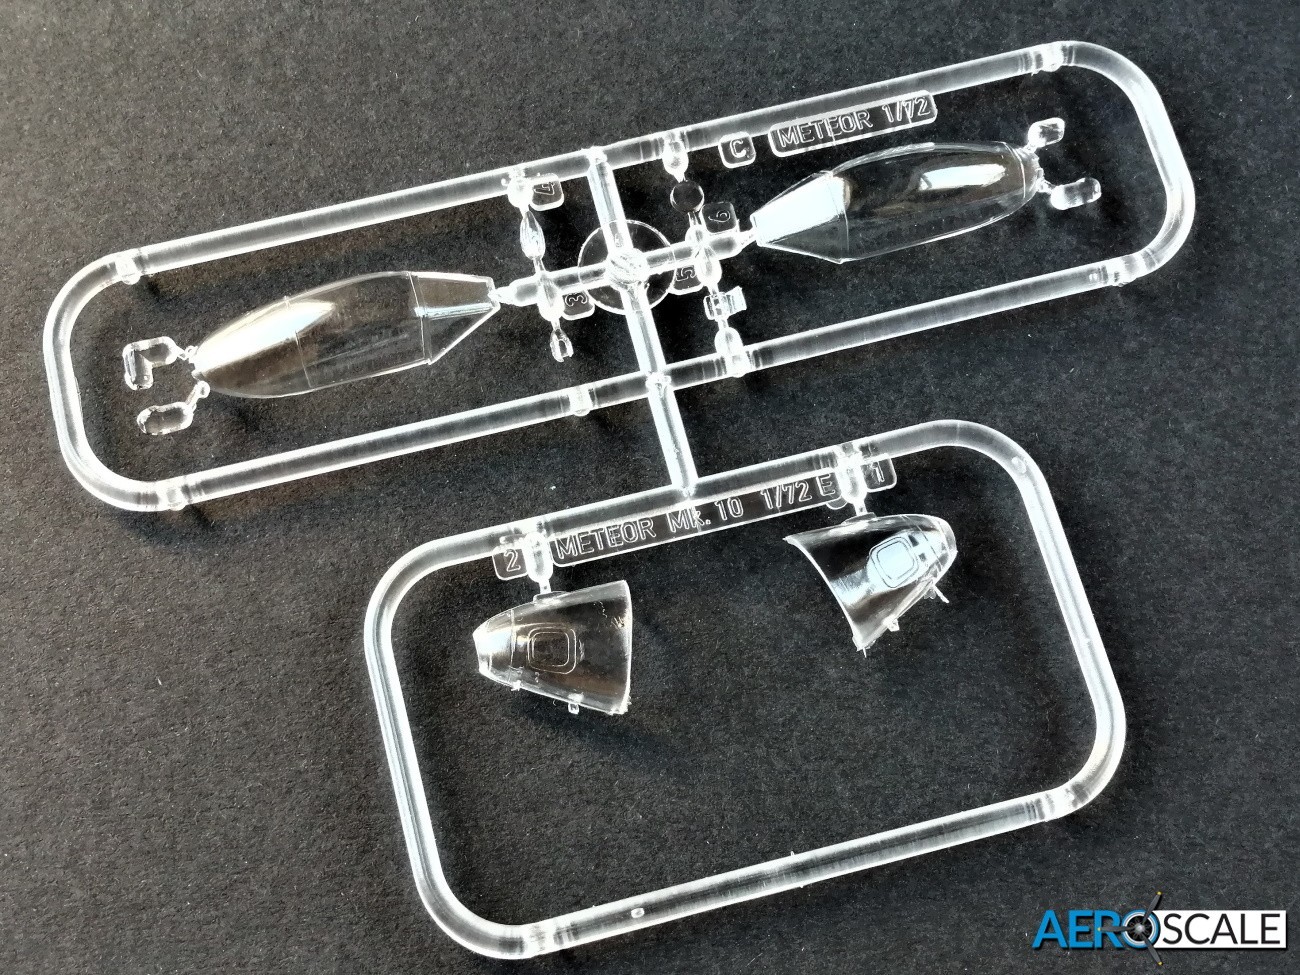
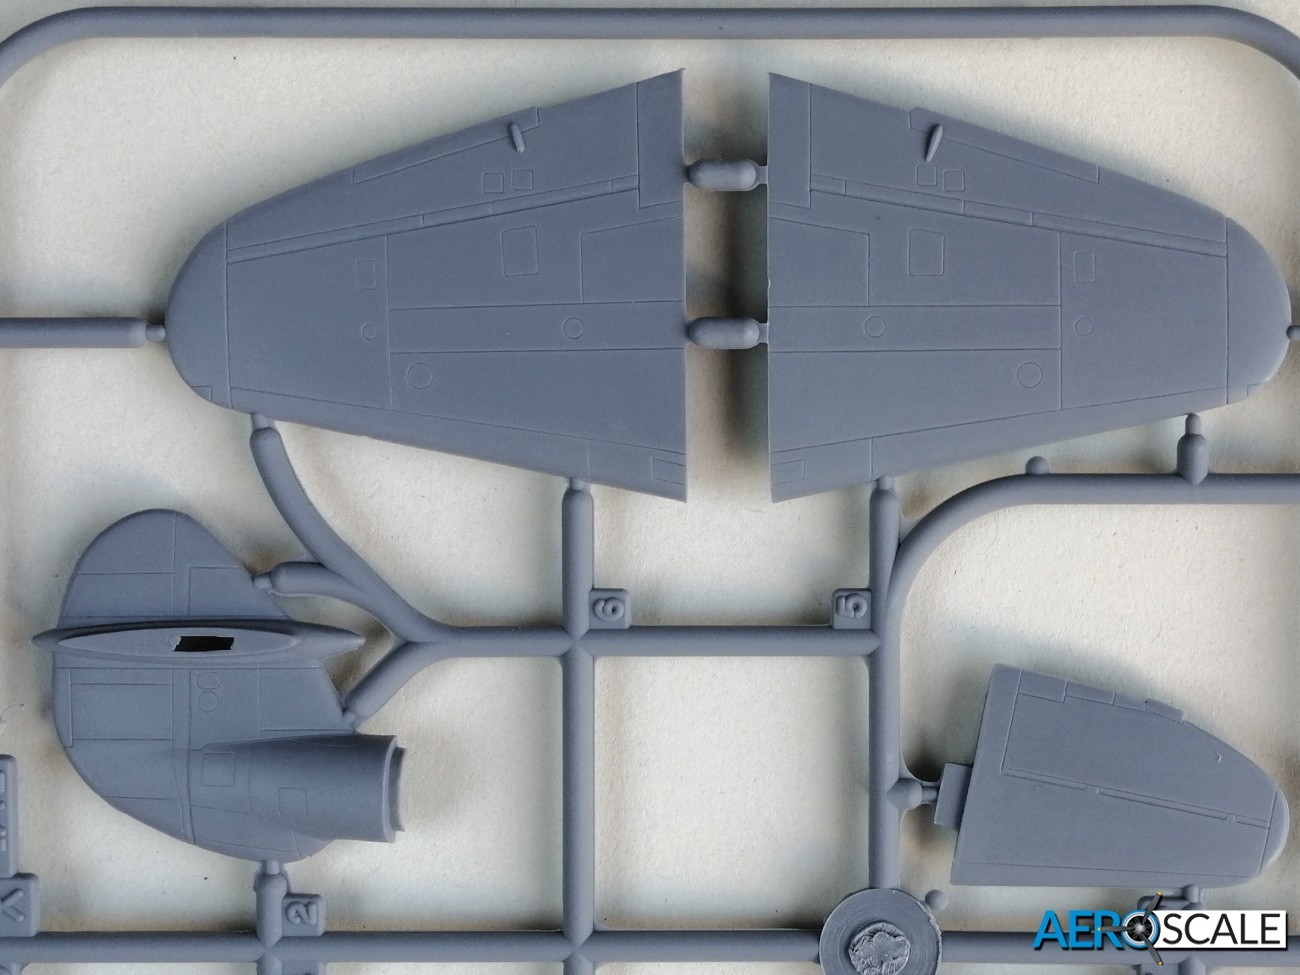
Clear plastic parts are crystal clear. The nose section is made up from three clear parts, so you can mask out the three camera windows. There’s no camera included so fabricate your own. There are two styles of canopy depending which marking option you go for.
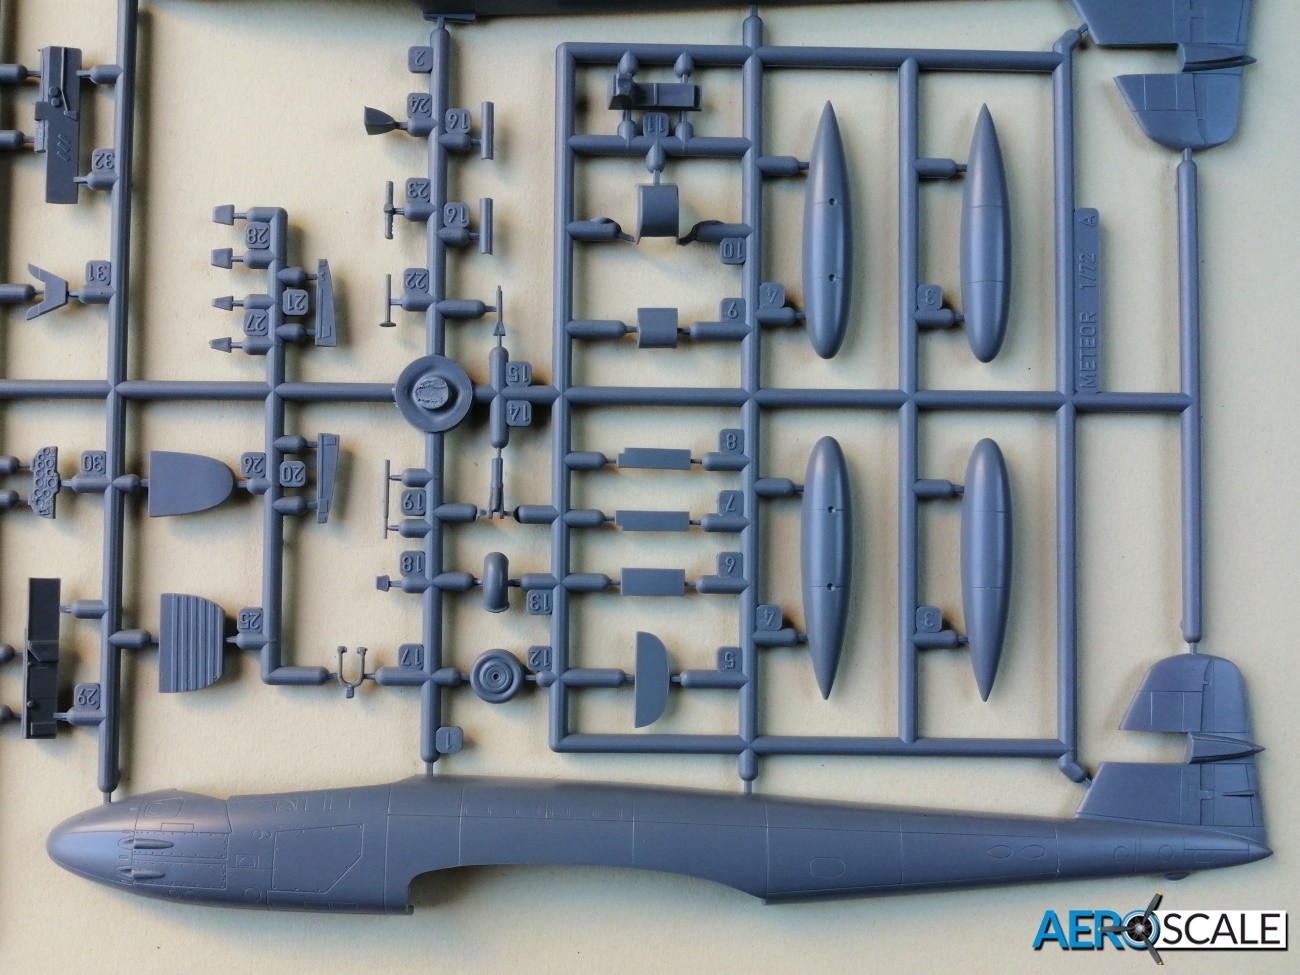
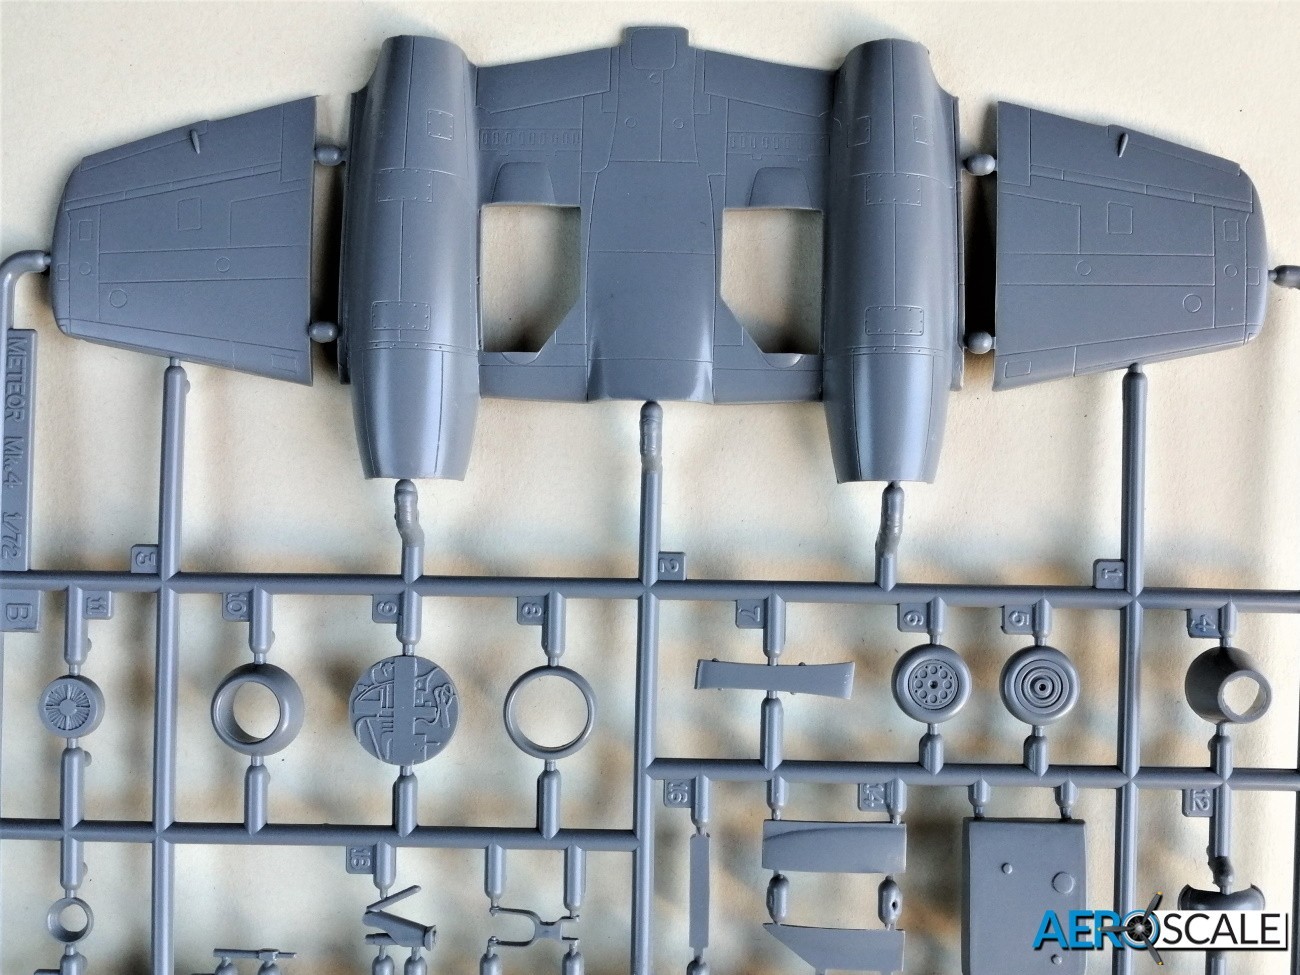
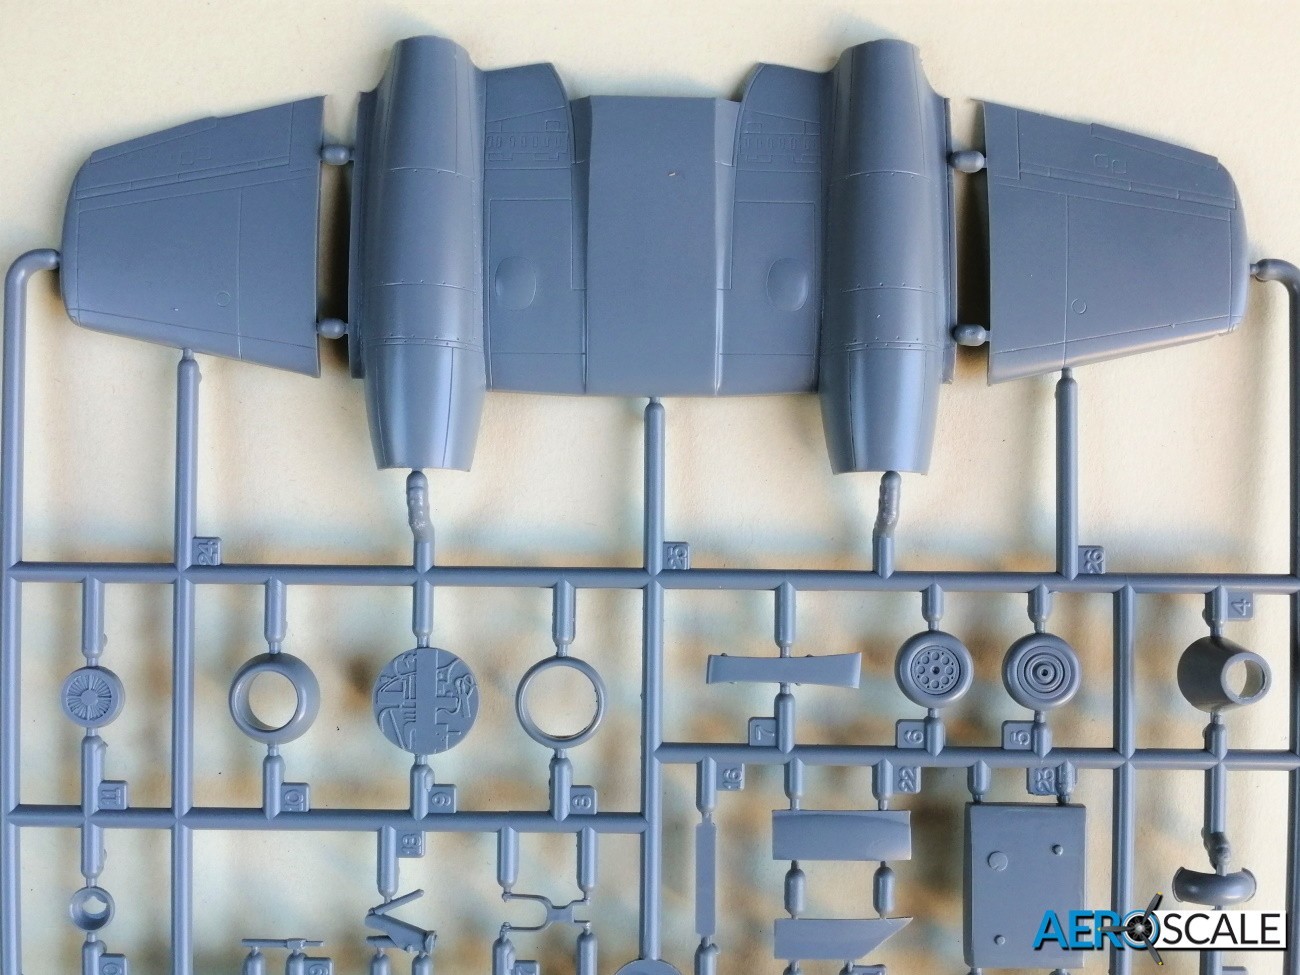
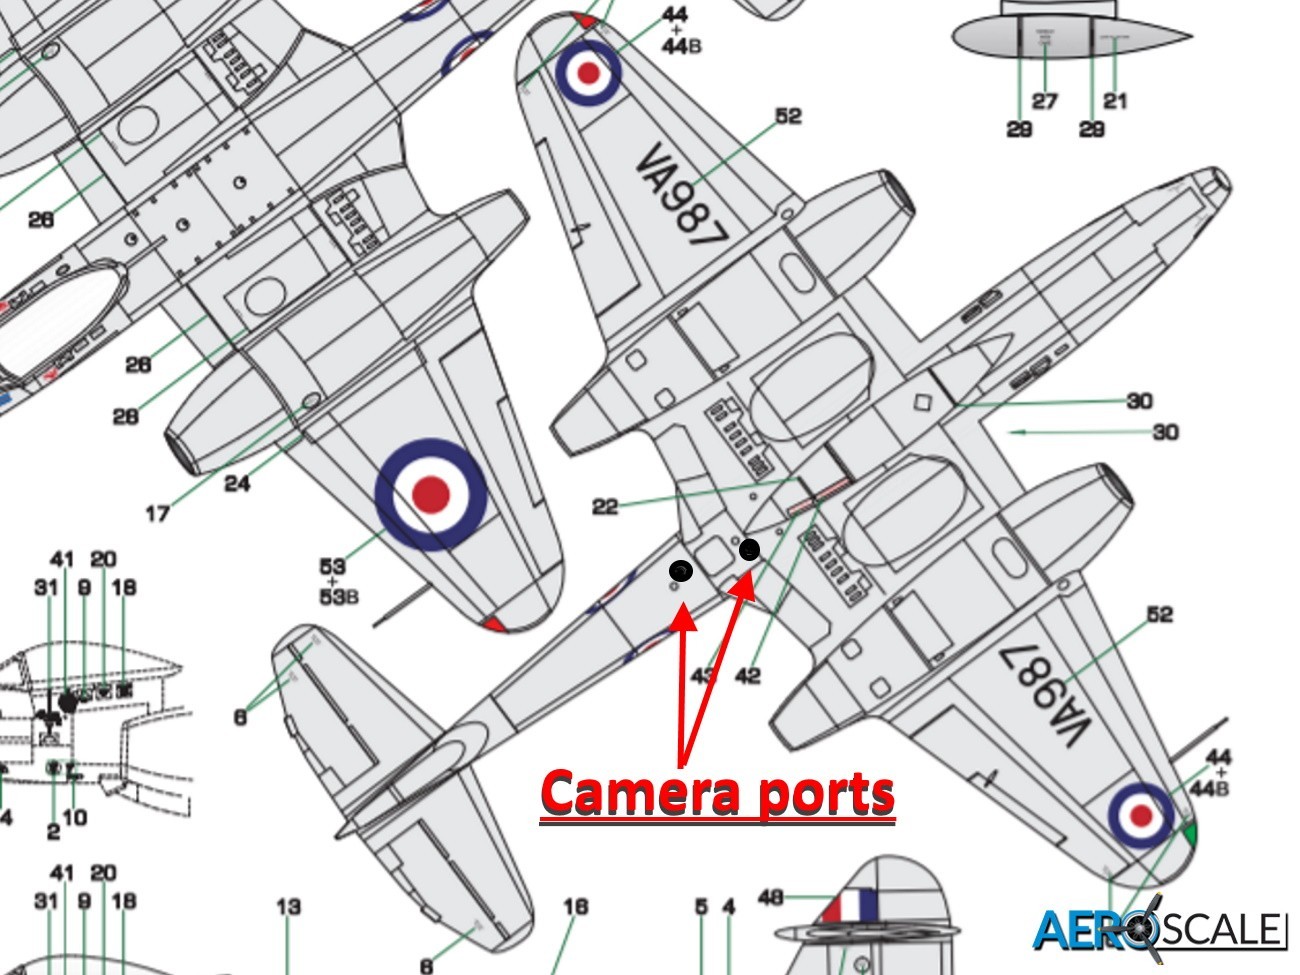
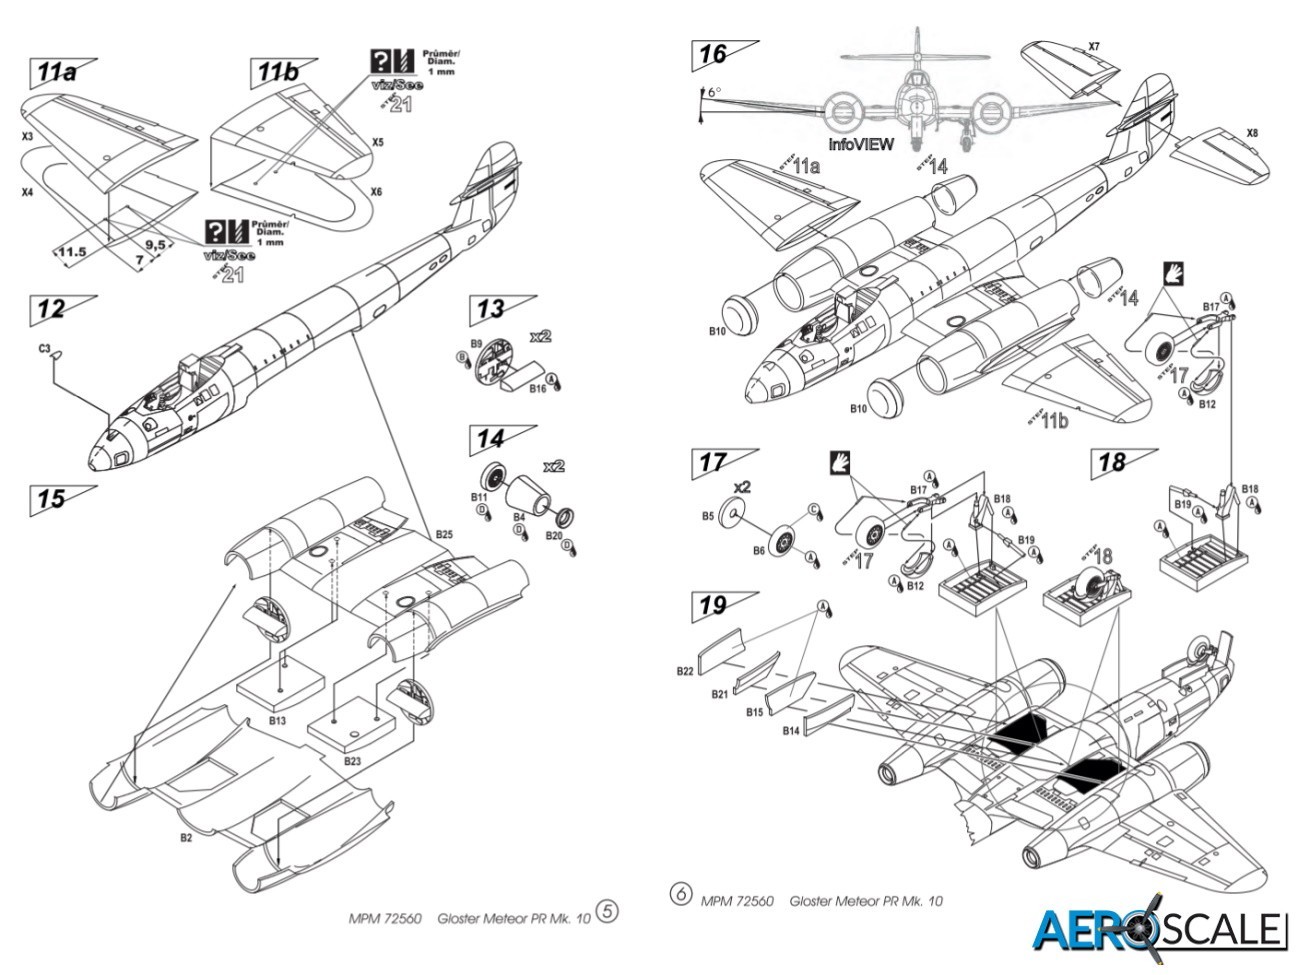
The fuselage as already mentioned needs the tail and nose sections cutting off as well as a small part of the wing root at the trailing edge. So, it might be useful investing in a good quality razor or fine tooth saw if you haven’t one in your tool box. The instruction provides full details of where to cut. Sounds daunting, but it looks pretty straightforward. There is an additional sprue that provides the replacement tail, extended outer wing sections and horizontal tail surfaces. Unfortunately, the locating pins in the unmodified fuselage are not replicated in the alternative parts, so extra care is needed when joinging the fuselage halves. The separate tail has an extended lip for the join to the fuselage, providing plenty of gluing surface. One thing not covered is the location of the two camera ports in the fuselage. I’ve checked references and have sketched out their location on one of the included images.
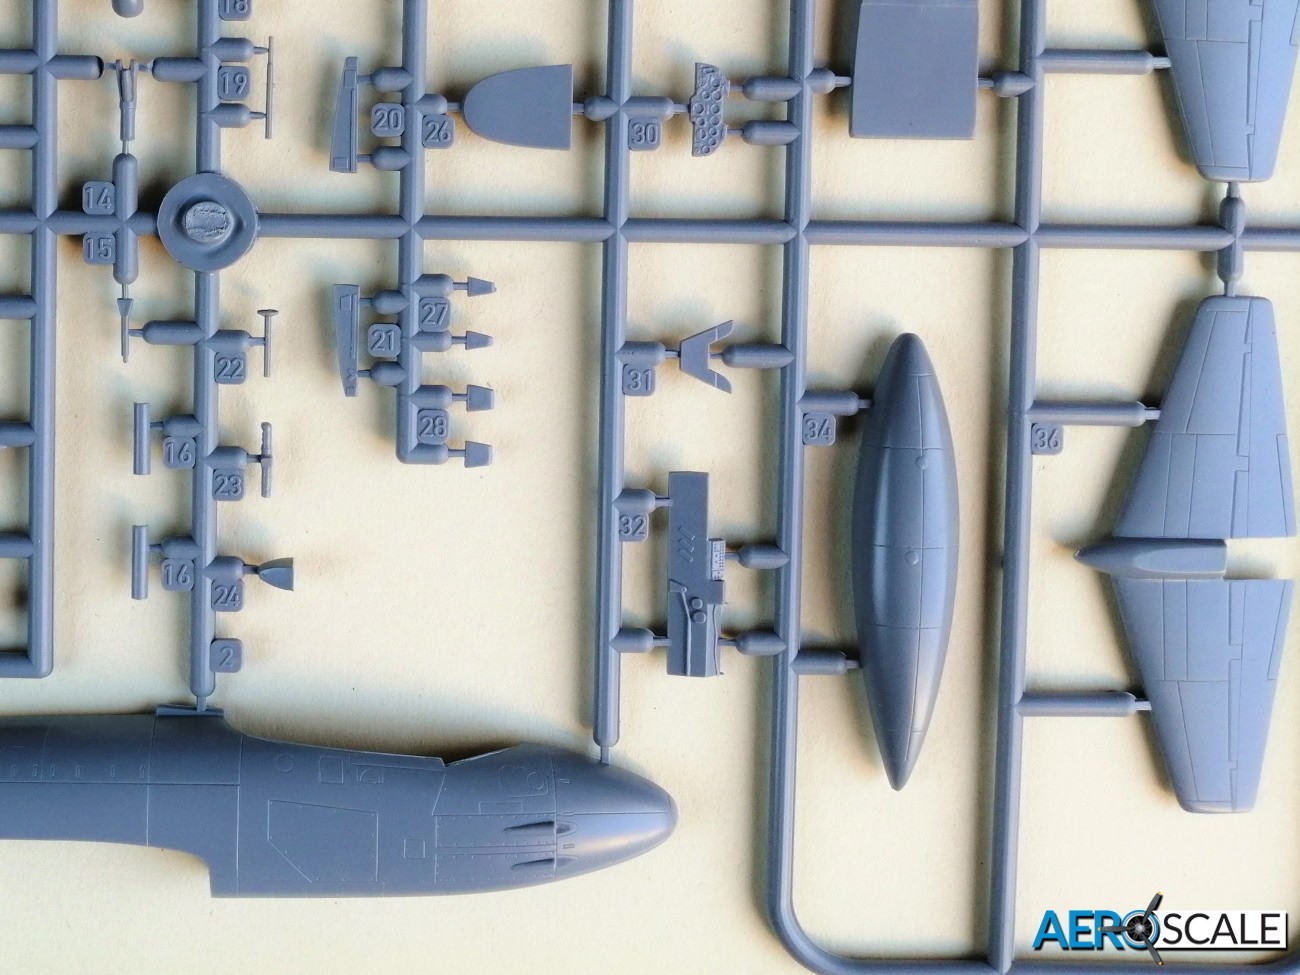
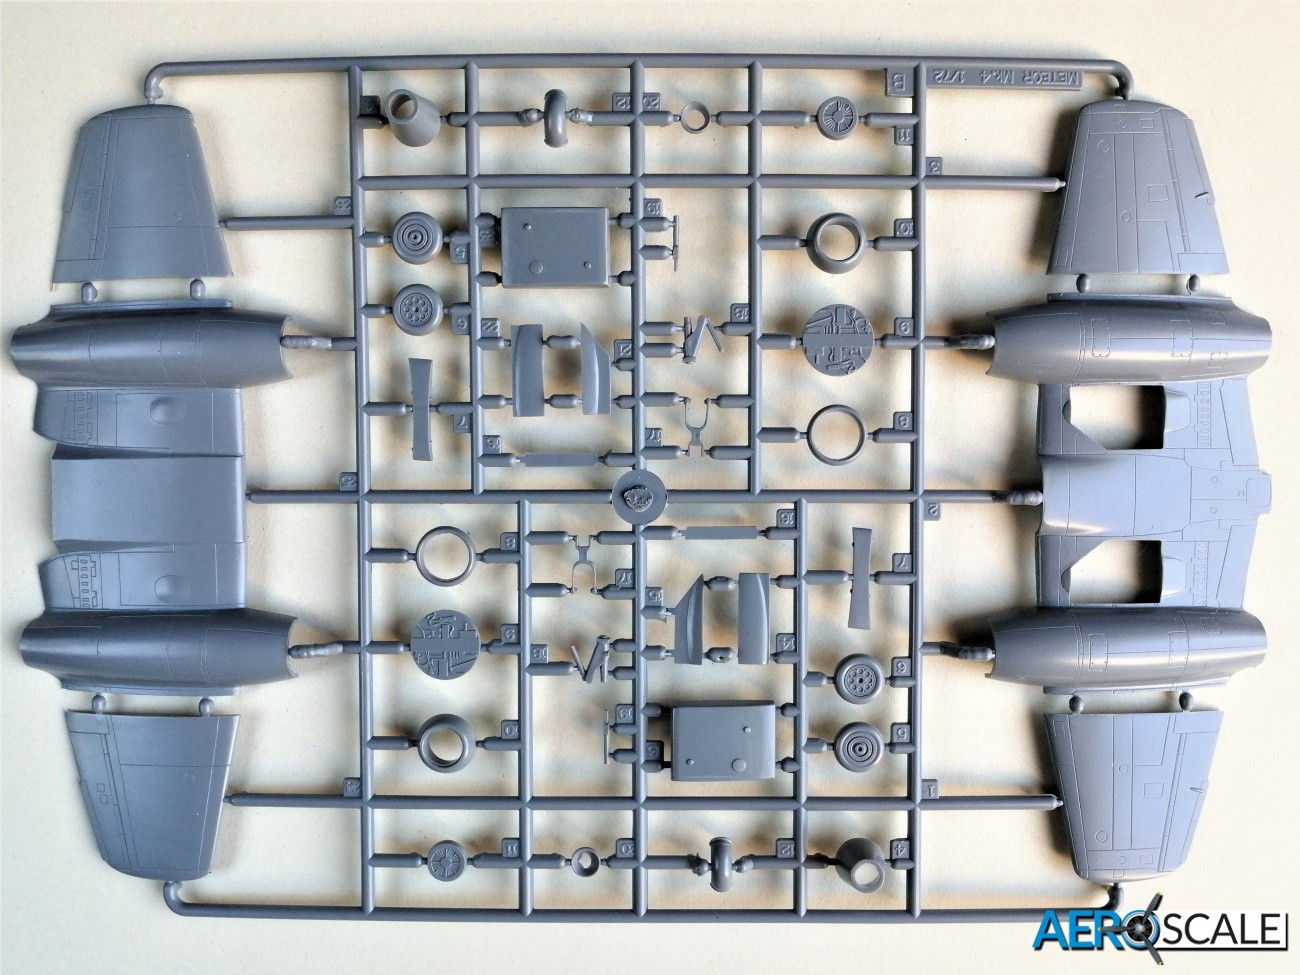
The wings are created in six parts. The central section includes the engine nacelles and has locating pins. The lower outer wing section needs holes drilling if you are fitting the fuel tanks. There is no indication in the plastic where to drill holes, just some measurements in the instructions. The outer wing pieces have no locating pins. The instructions have a useful head on view showing the incidence of the outer wings. Unfortunately, the join between the outer wings and the nacelles is a butt join.
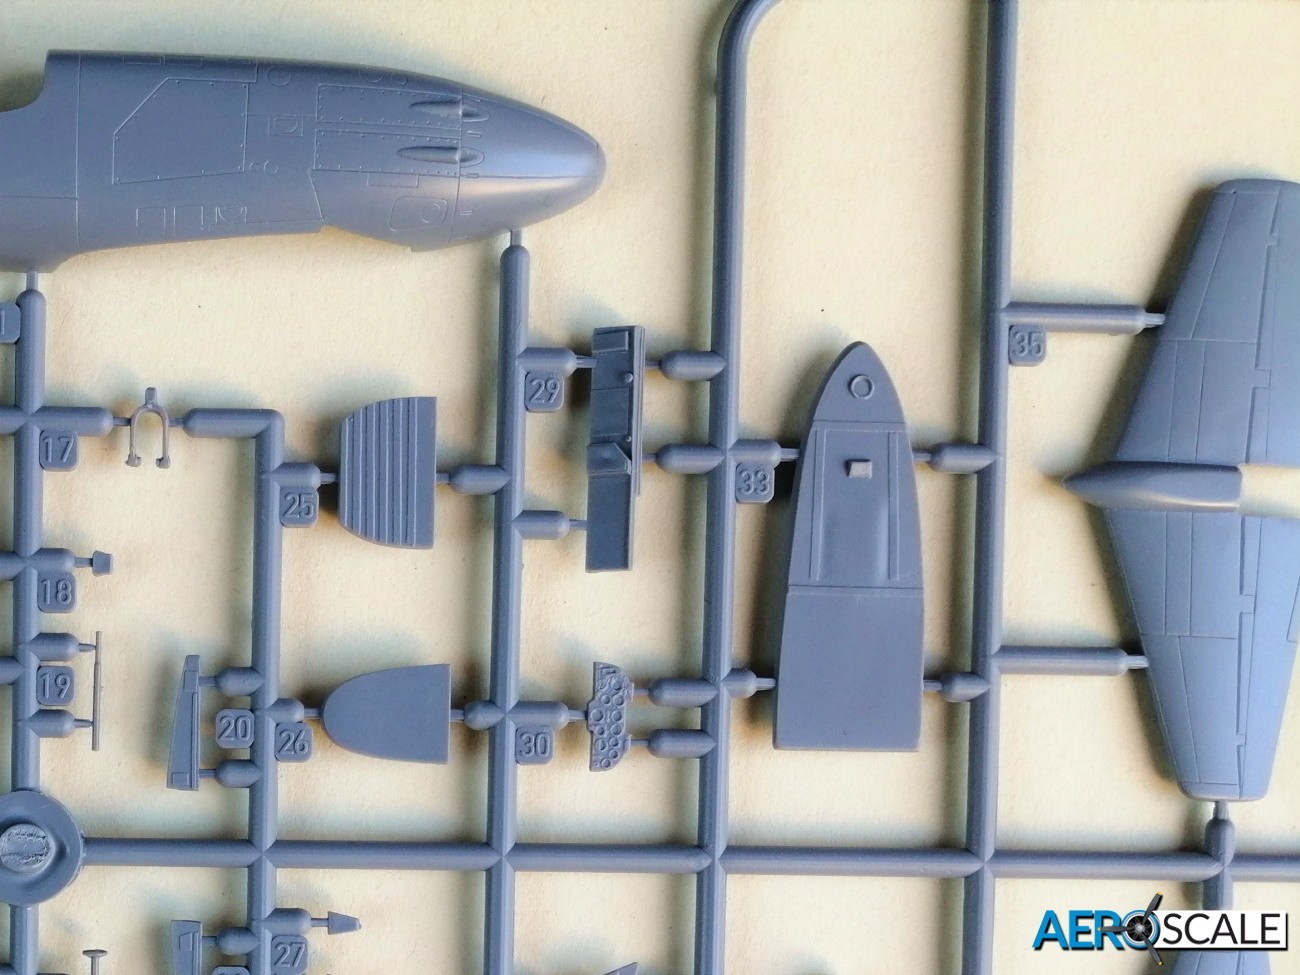
The detail inside the front of the engine nacelle containing the Rolls-Royce RB.37 Derwent engine might look a bit odd compared to modern engines. There is no fan, instead there is a lot of raised detail representing the plumbing. Detail is completed up front with a section of the wing spar and a one-piece air intake lip. To the rear of the nacelle is a one-piece nozzle with a separate one-piece lip. To the fore of the nozzle is a representation of the rearmost turbine.
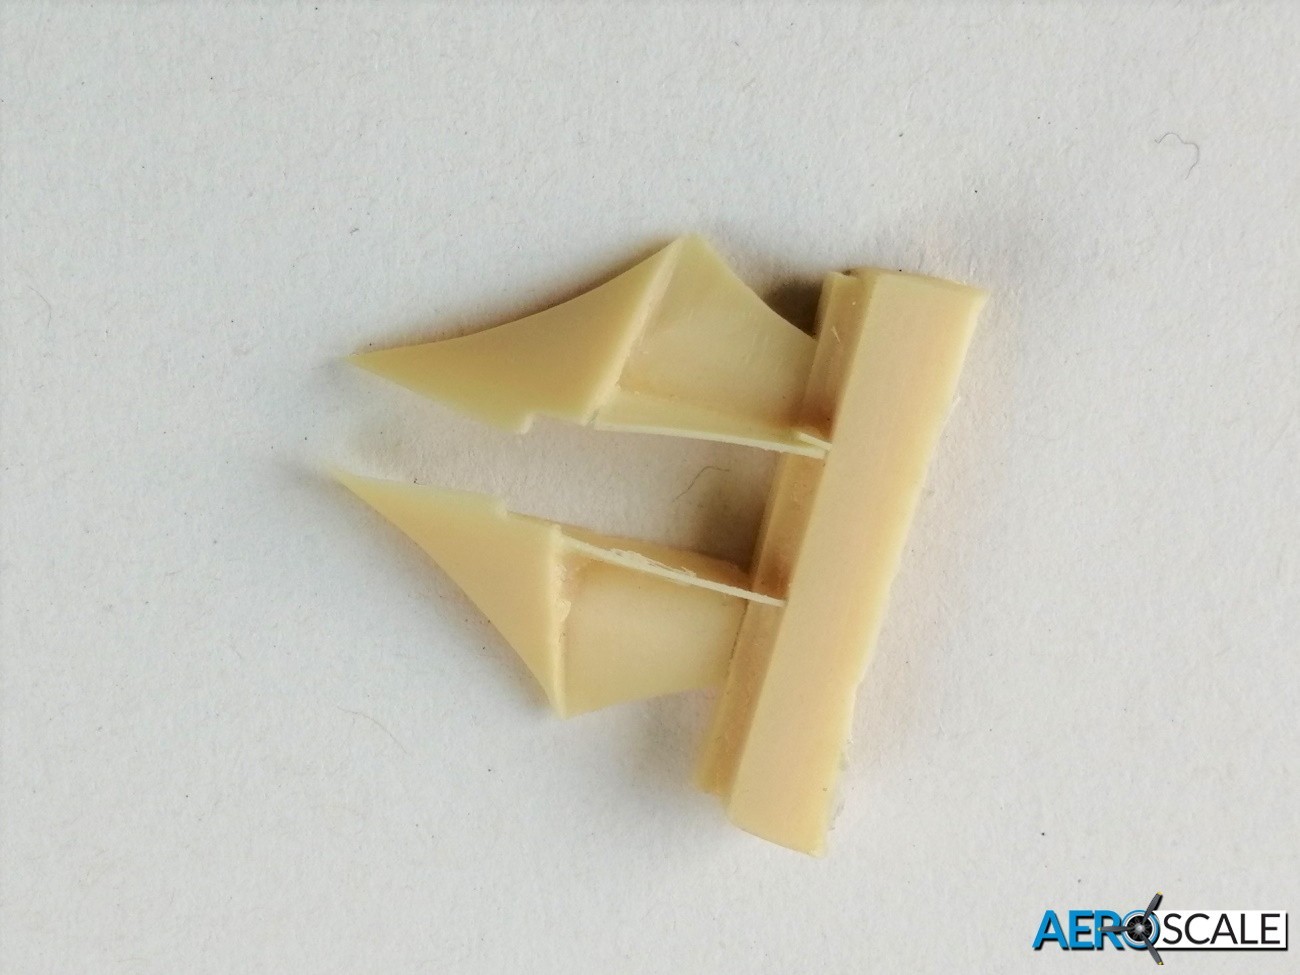
The two-resin replacement trailing edge sections share the same casting block. The reason for these replacement parts is that the trailing edge of the PR Mk. 10 is extended at the wing root.
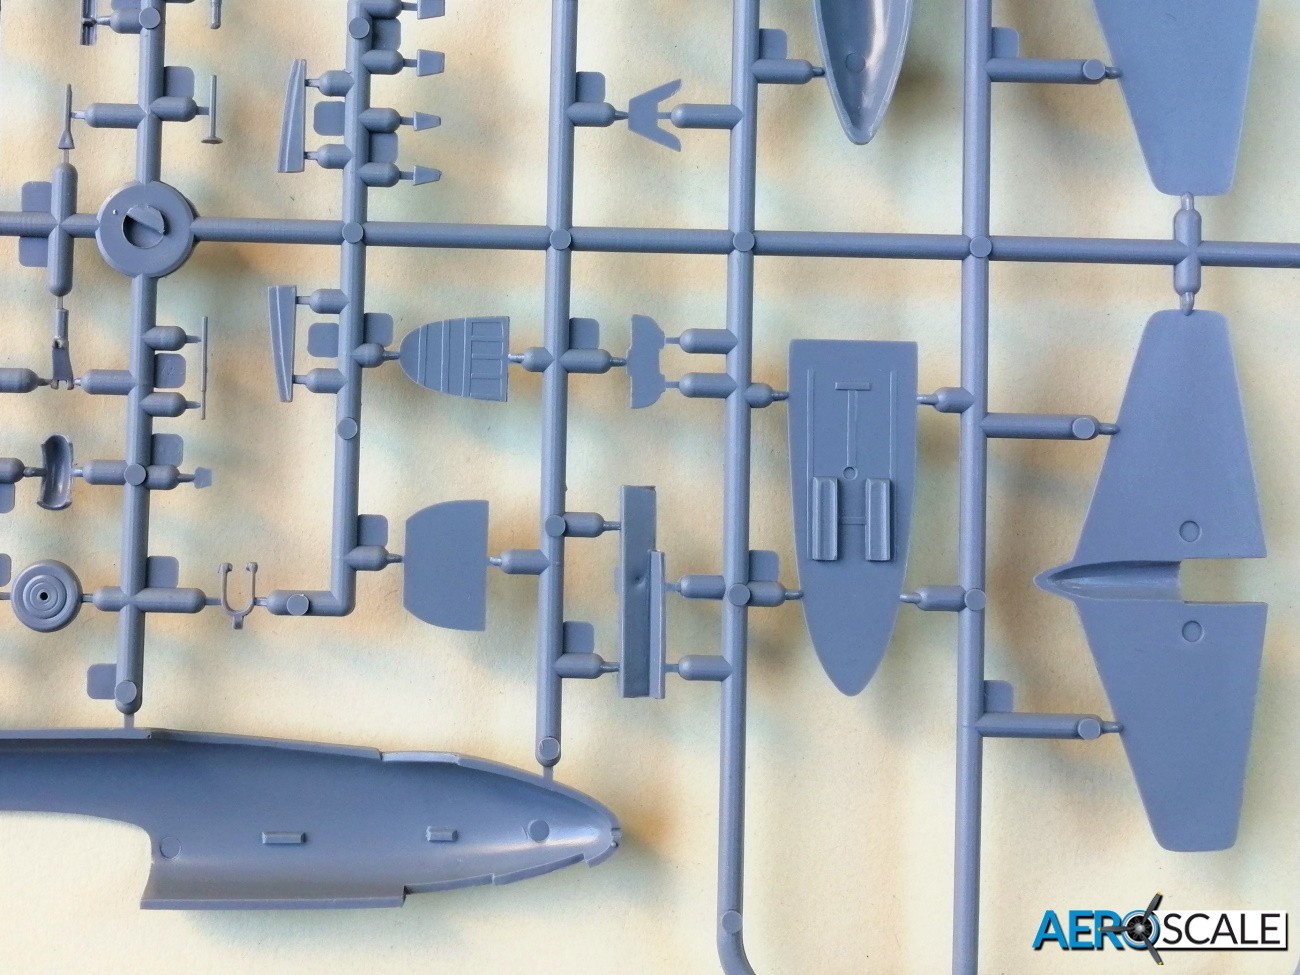
All three undercarriage legs are made up from two parts. The main gear has additional retraction jacks. The mudguards for each leg are separate and nicely formed and look pretty thin. The front wheel is one piece while the two main wheels are two pieces. The hubs of the main wheels have some good detail on them. There are two one-piece parts representing the main undercarriage bays. Detail comprises of raised framework and a dimple in the plastic indicating where the legs are attached. Make sure that you fit the bays before joining the wings together. Looking at stage 19 you could misinterpret the instructions and mistakenly think you can fit them after gluing together the wings. Well, I did! The front wheel bay has some detail on the underside of the cockpit tub. There is a partial bulkhead to the rear stopping any possibility of seeing into the fuselage.
There is the possibility of fitting three fuel tanks: two under the wing and a large belly tank.
In the best traditions of the RAF, the photo reconnaissance Meteor has no armament. Though there are two large fuel tanks to fit under the wings and an enormous fuel tank fitted under the fuselage.
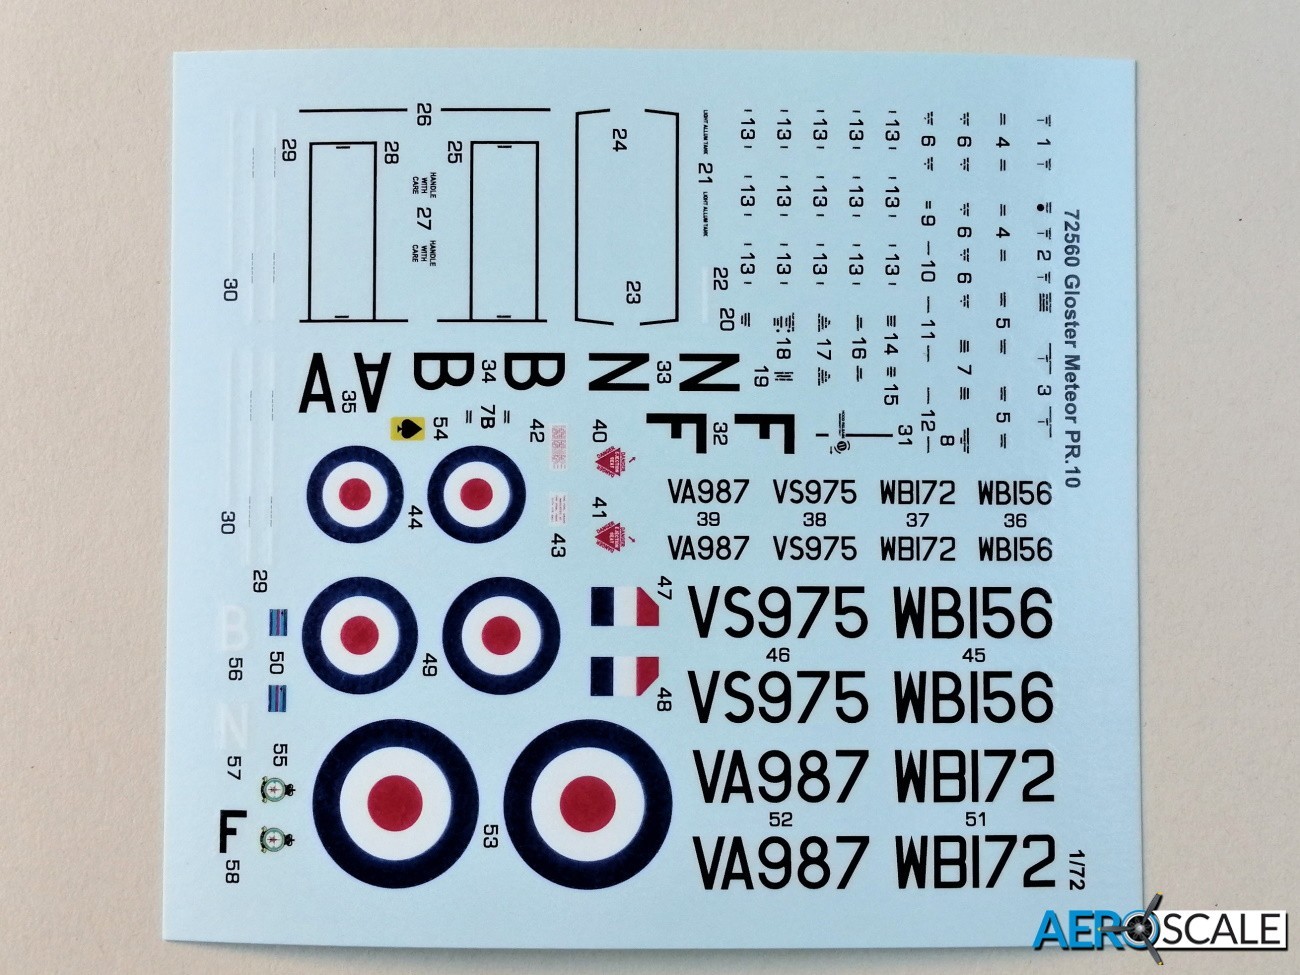
The decals look superb, good colour density, glossy with minimal carrier film. The wing walkways are one piece, so should be easy enough to apply. There are quite a few stencils, though the definition is so good you can almost read the smallest of them.
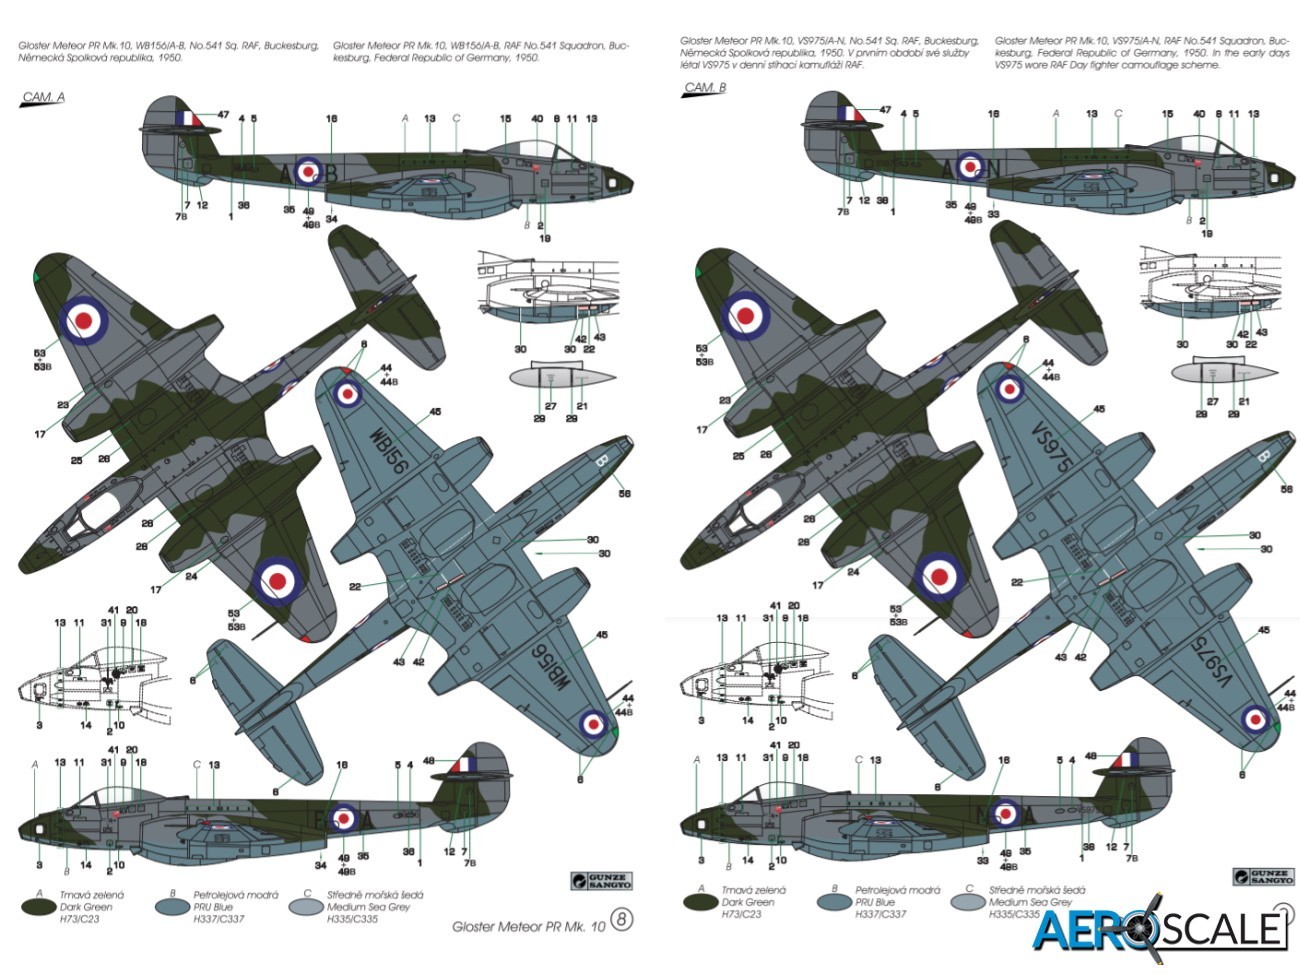
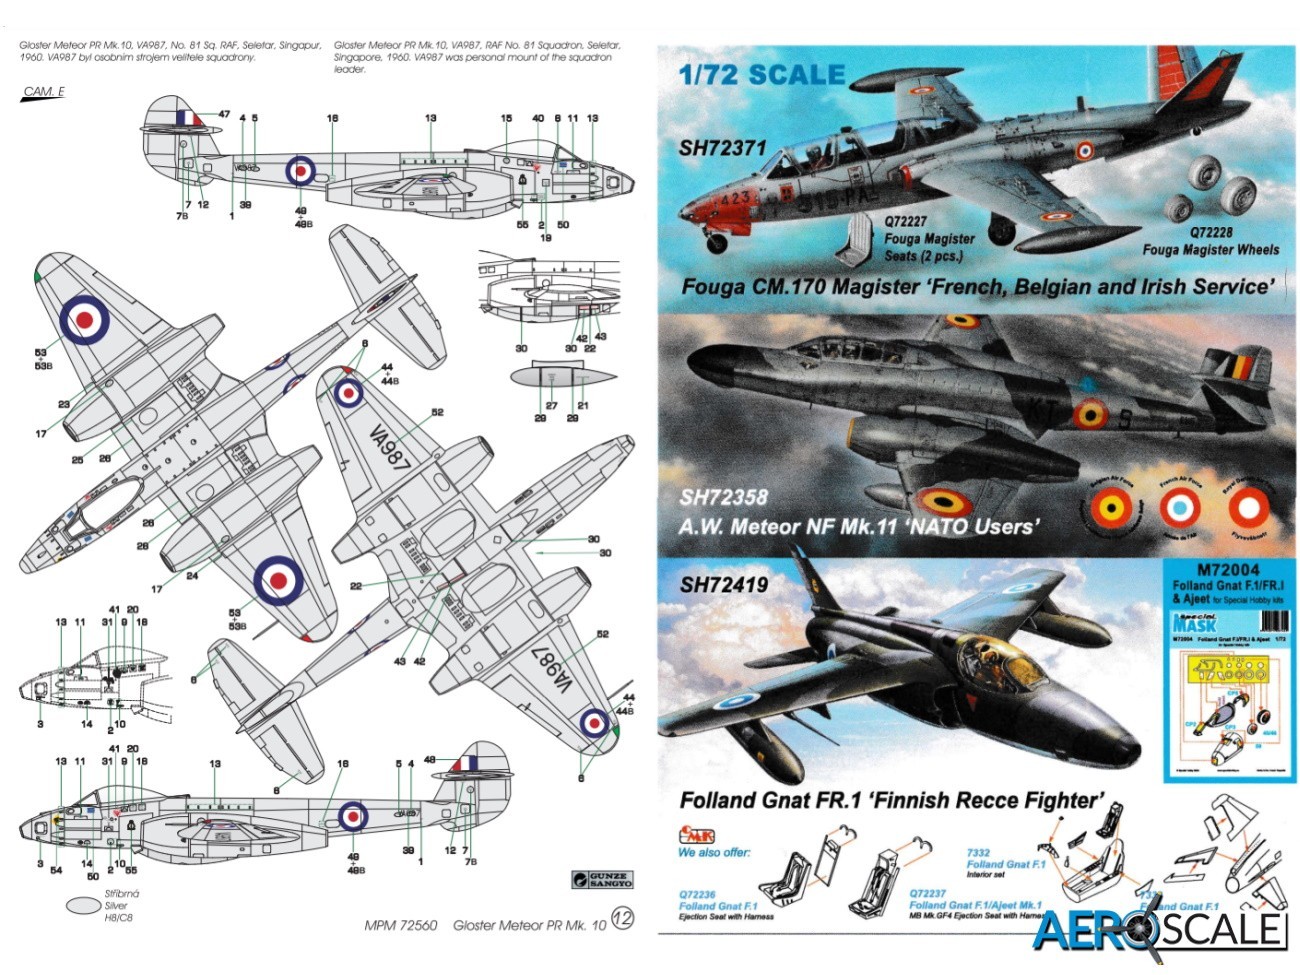
There are five marking options, two finished in high-speed silver. Don’t confuse it with a natural metal finish, they were actually painted silver. There are two with dark green and medium grey disruptive upper surface camouflage with PR blue under surfaces. Finally, there is the Meteor with medium grey upper surfaces and PR blue lower surfaces. The blue extends quite high up on the fuselage sides.
- [A] WB156/A-B, No.541 Sq. RAF, Buckesburg, Federal Republic of Germany, 1950
- [B] VS975/A-N, No 541 Sq. RAF, Buckesburg, Federal Republic of Germany, 1950
- [C] VS975/A-N, No 541 Sq. RAF, Buckesburg, Federal Republic of Germany, 1951-53 and RAF Benson, Great Britain, 1957
- [D] WB172/F, No. 13 Sq. RAF, Kabrit AB, Egypt, 1951-53
- [E] VA987, No 81 Sq. Seletar, Singapore, 1960
Options B and C is the same aircraft
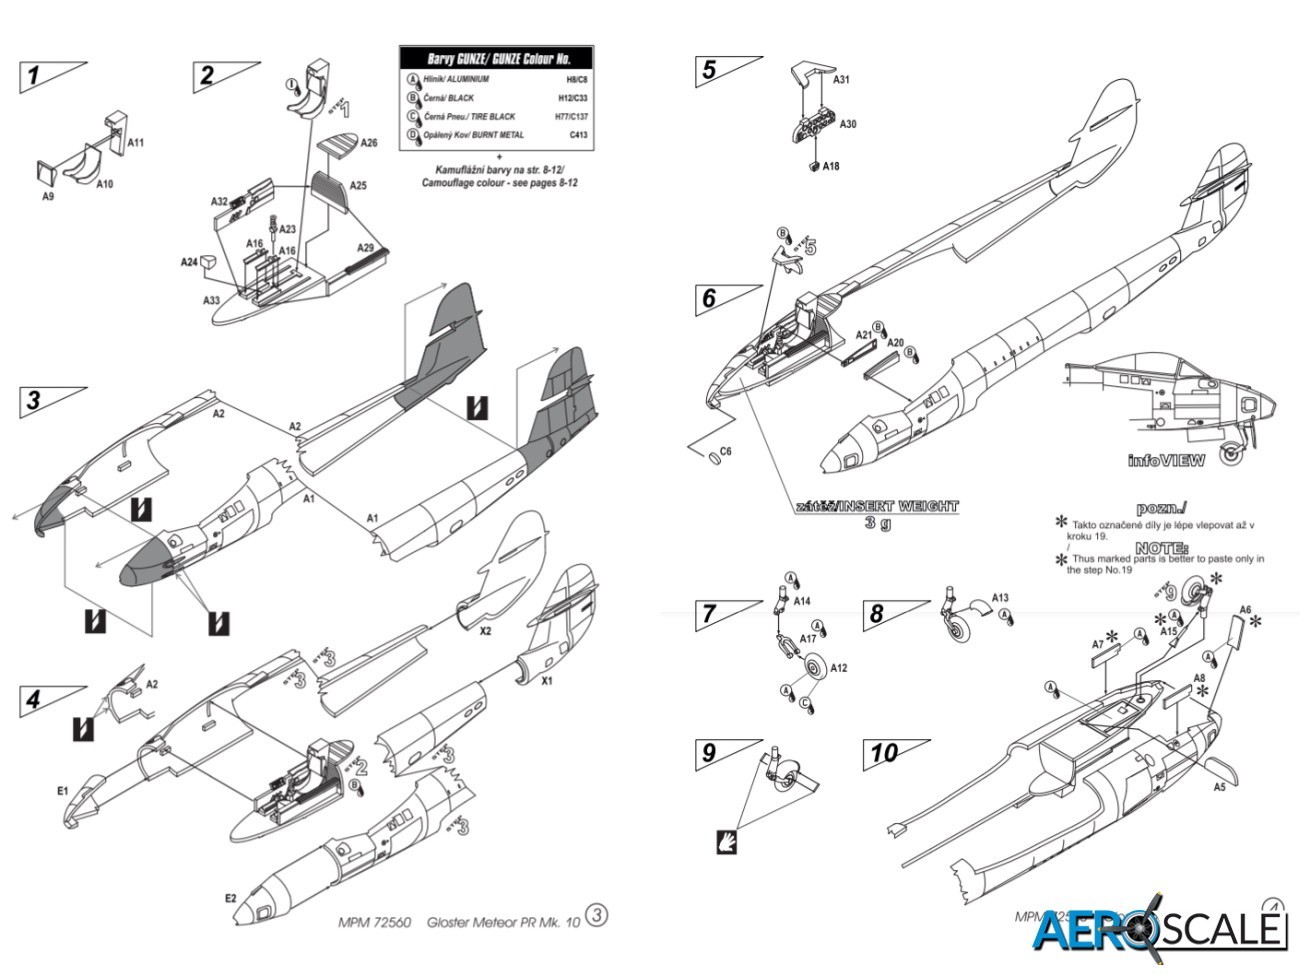
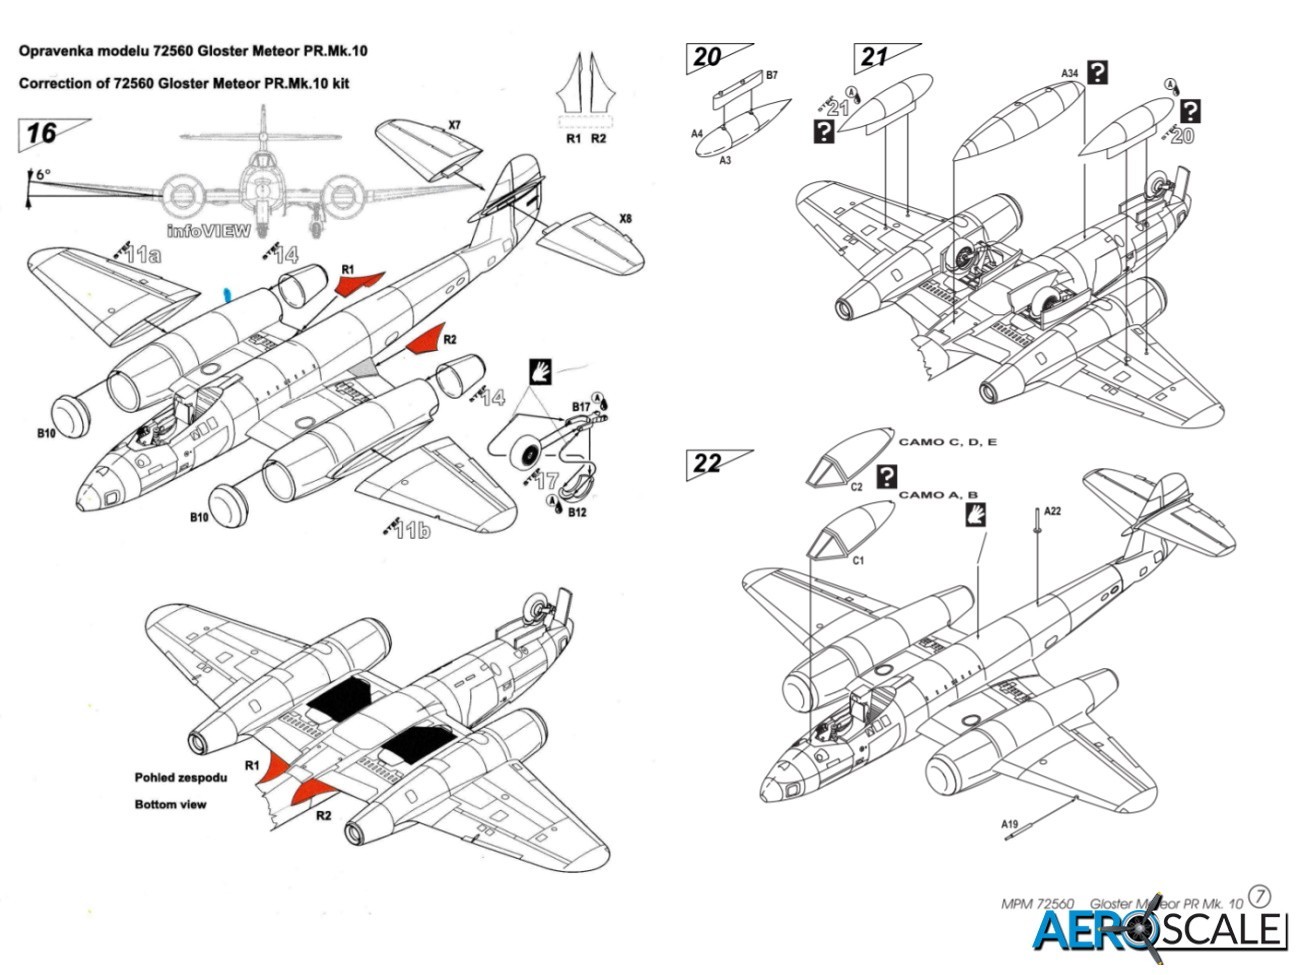
The black line drawings in the instructions seems clear enough and the build is covered in twenty-two stages. There is a supplemental sheet replacing the instructions of stage sixteen. It provides instructions for cutting out the trailing edge of the wing root and fitting the extended resin replacement. There is a supplemental sheet showing the fitting of the resin trailing edge inserts.

Conclusions
It’s good to see MPM’s range of Meteor’s being re-released as it’s such an important aircraft being the first serving jet powered RAF aircraft as well as many other Air forces. If you have a penchant for Meteors or photo reconnaissance aircraft, then this release is well worth considering. With the amount of surgery required this is certainly not a project for the beginner.
Many thanks to Special Hobby for providing this sample for review. Available from the Special Hobby online shop https://www.specialhobby.eu/
72560 – Gloster Meteor PR Mk.10 “High Reconnaissance Plane” – 1:72
Please remember, when contacting retailers or manufacturers, to mention that you saw their products highlighted here – on AEROSCALE.