Background
The Wildcat stemmed from a line of Grumman aircraft that served with the US Navy. Initially the US Navy ordered a limited number of the XF4F-1 Wildcat as a backup in case the preferred choice of the Brewster Buffalo did not live up to expectations. Grumman went back to the drawing board and came up with the much-improved XF4F-3, with the new wings and tail and a supercharged version of the Pratt & Whitney R-1830 "Twin Wasp" radial engine. The improvement led to orders of the production model [F4F-3] from the US Navy, British Fleet Air Arm [FAA] and France. With the fall of Europe the aircraft bound for France were delivered to Britain and were subsequently named the Martlet. Later the FAA adopted the US Navy and Marine name Wildcat. It proved to be successful in the air war over the north Atlantic, shooting down many Luftwaffe raiders. Out in the Pacific against the Japanese Zero the Wildcat was very successful, despite the Zeros superior performance. Taking advantage of its better performance at altitude enabled it to be used successfully in the tactic of diving – hitting - running. In defence the Beam Defence Position or the Thatch weave was devised by John S. Thatch, a tactic that provided a highly effective against Japanese fighters.
This kit by Eduard of the Grumman F4F-4 Wildcat was the first version to have folding wings. A huge advantage particularly on the small escort carriers from which the F4F-4 would operate.
One of the finest test pilots of the era Eric M. "Winkle" Brown had high praise for the Wildcat
“I would still assess the Wildcat as the outstanding naval fighter of the early years of World War II ... I can vouch as a matter of personal experience, this Grumman fighter was one of the finest shipboard aeroplanes ever created”.
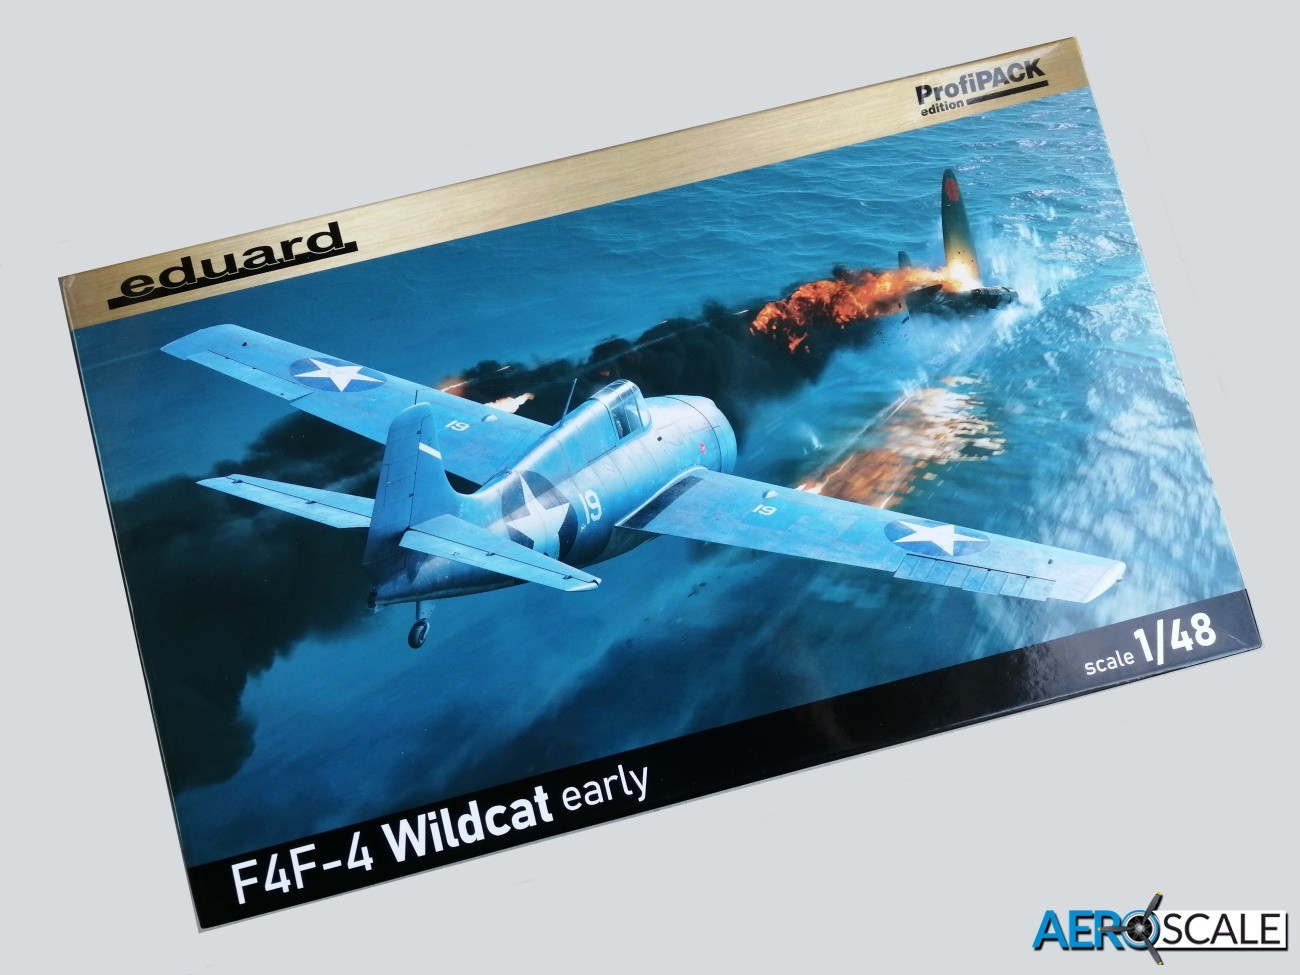
The Kit
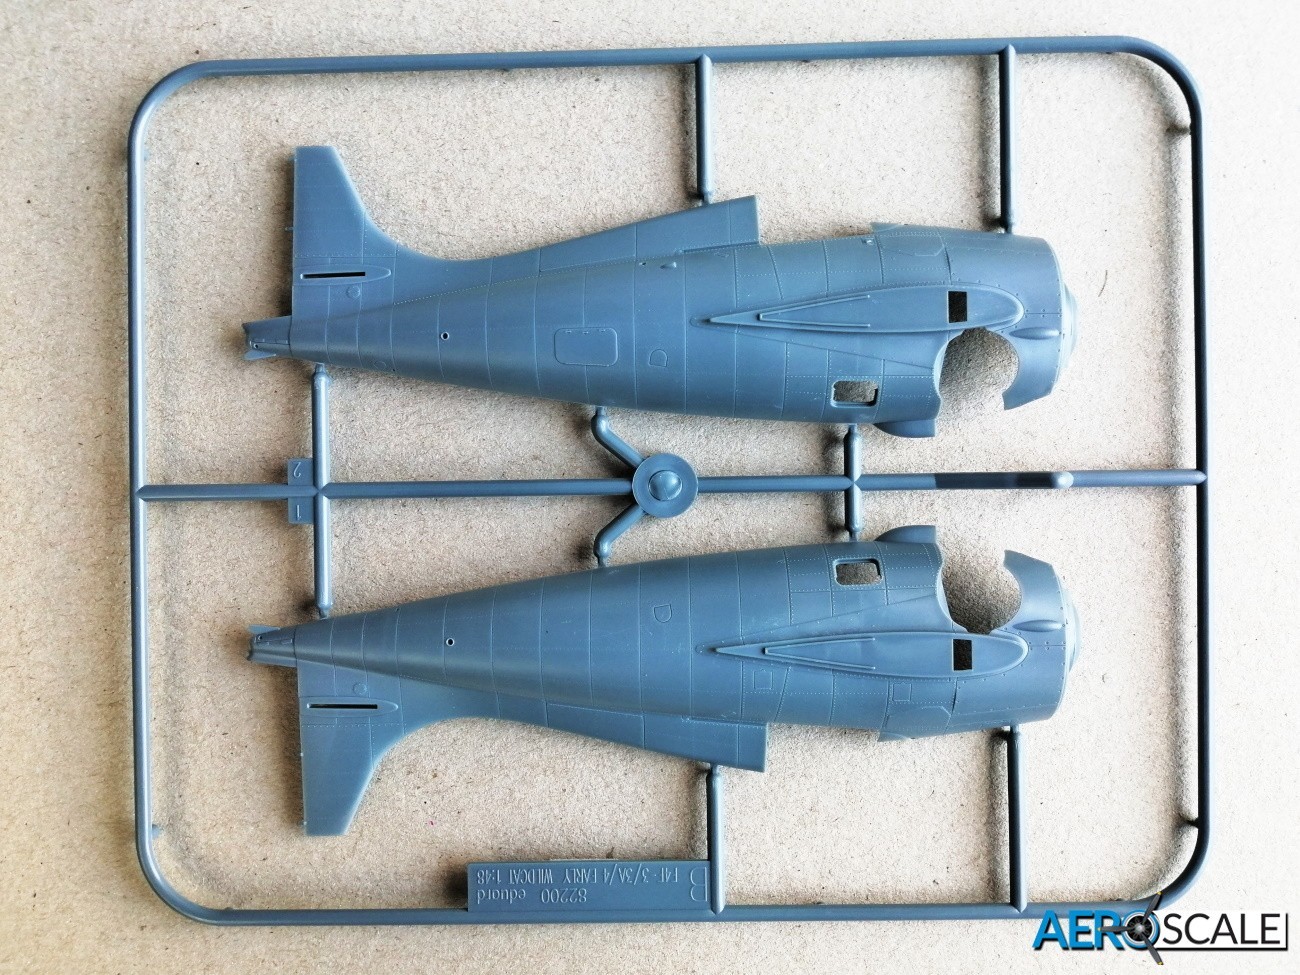
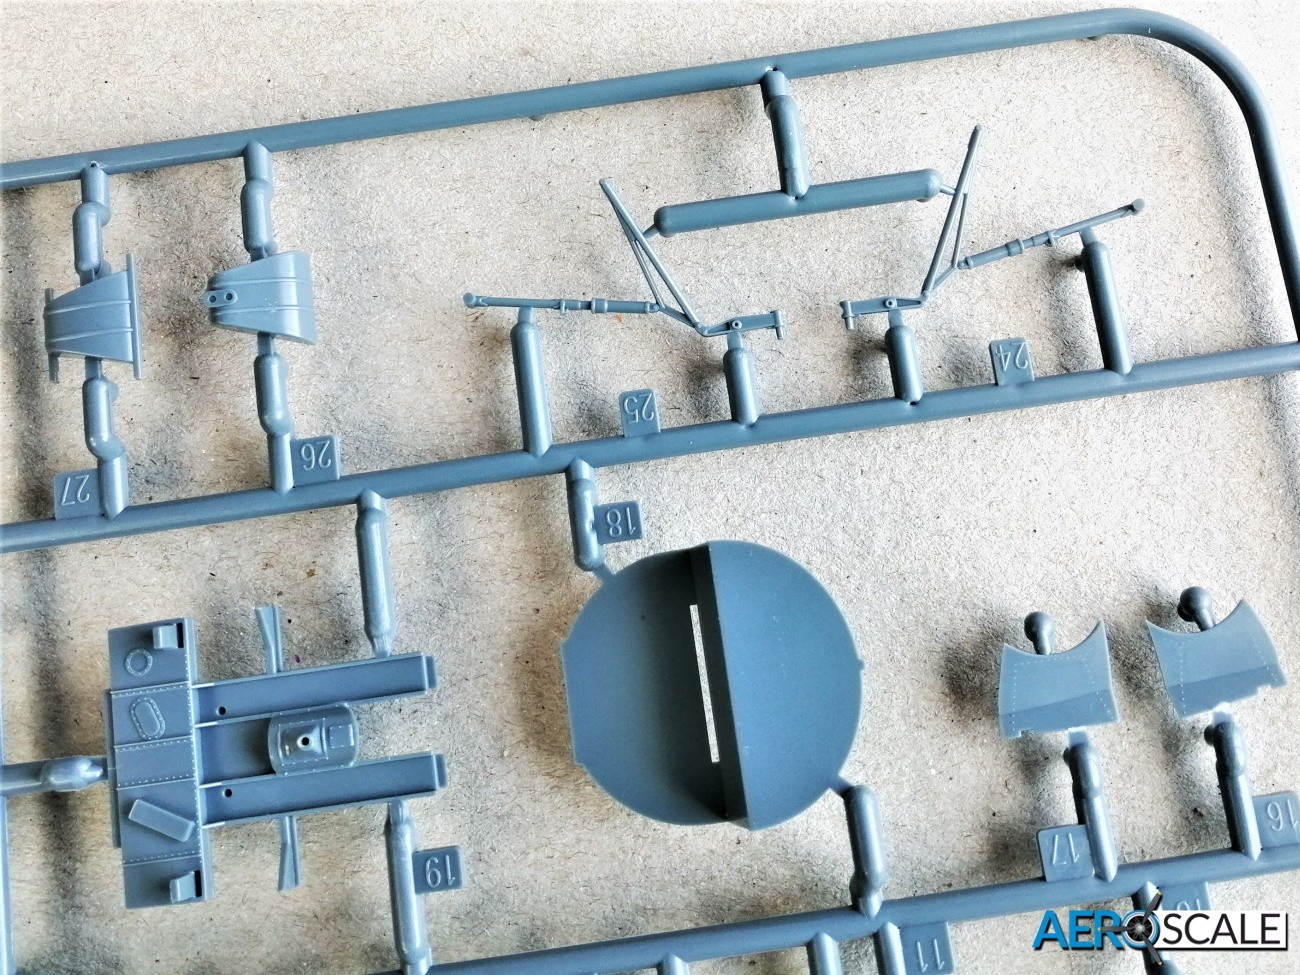
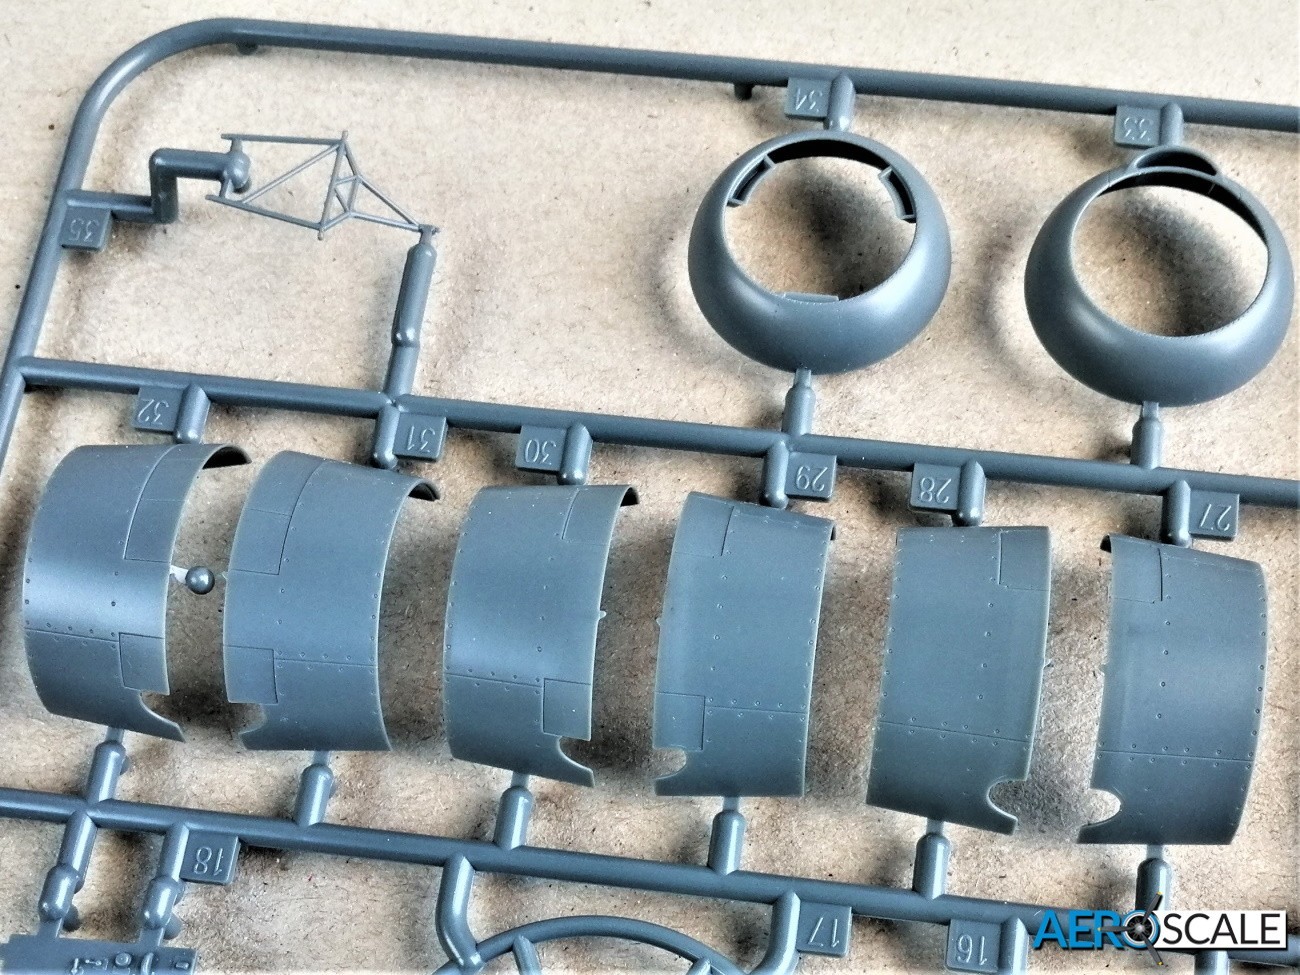
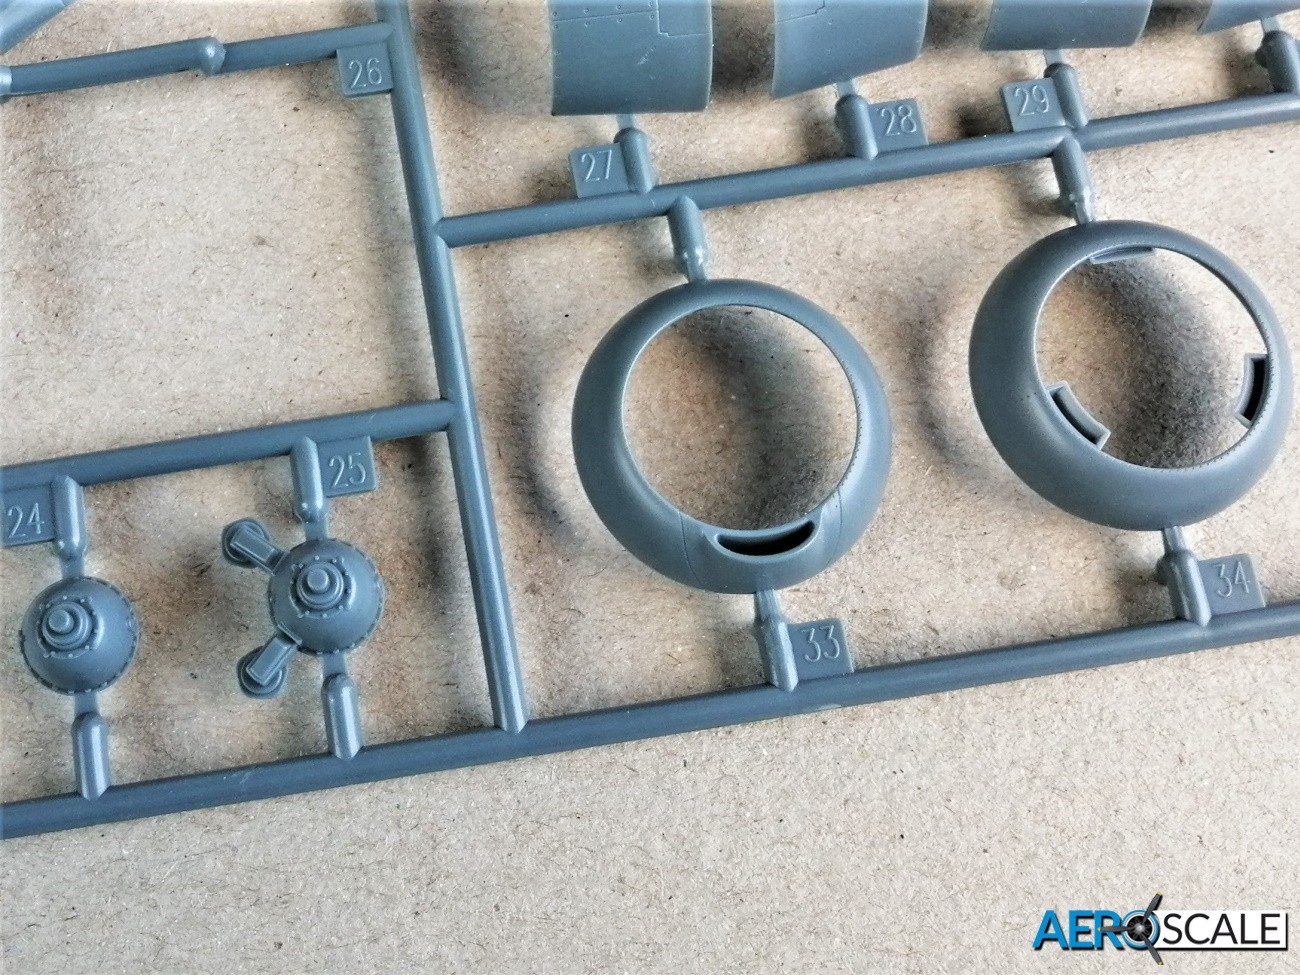
It is always exciting to see a how much detail will be included with new Eduard releases. This release, their first quarter scale F4F-4, looks as if it will not disappoint. The detail is exceptional, with fine recessed fasteners and piano hinges as well as a mix of recessed and raised rivets. The fabric covered control surfaces has fine raised areas representing the taping over the ribs. The parts that make up the airframe have locating pins to aid the building experience. The delicate parts making up the undercarriage structure will need to be removed from the sprue carefully.
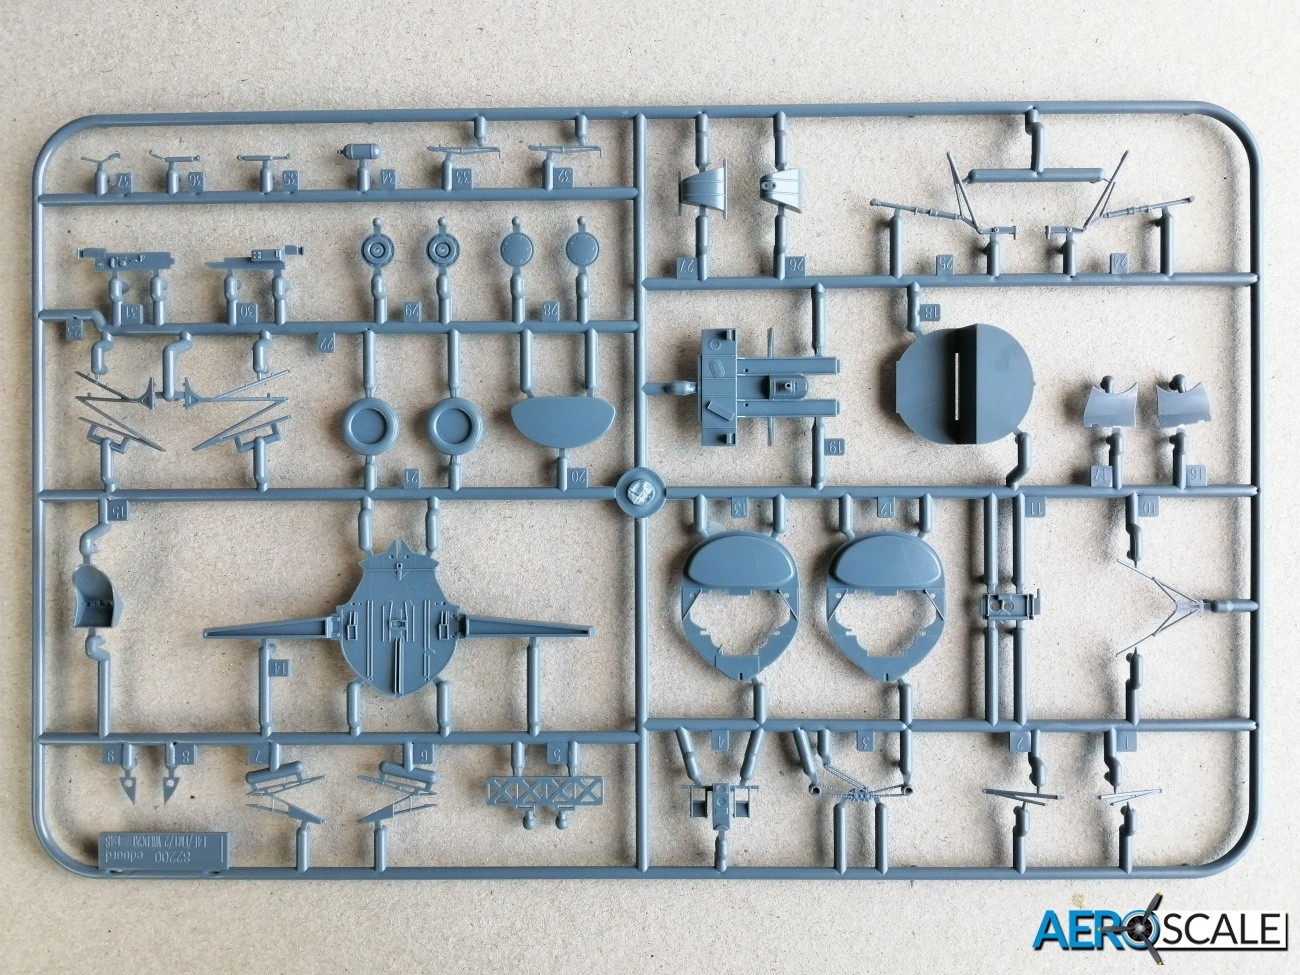
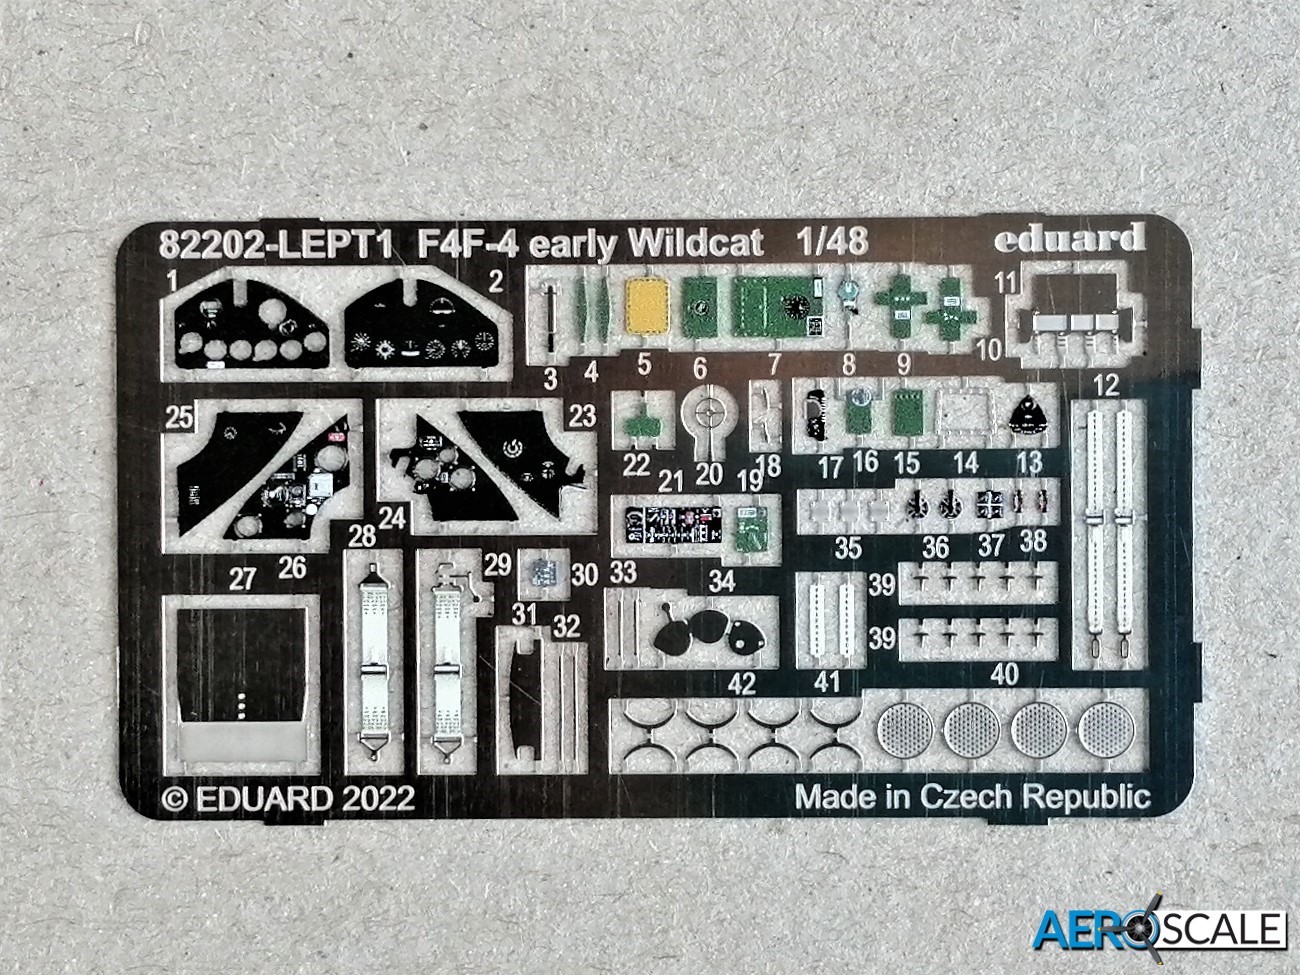
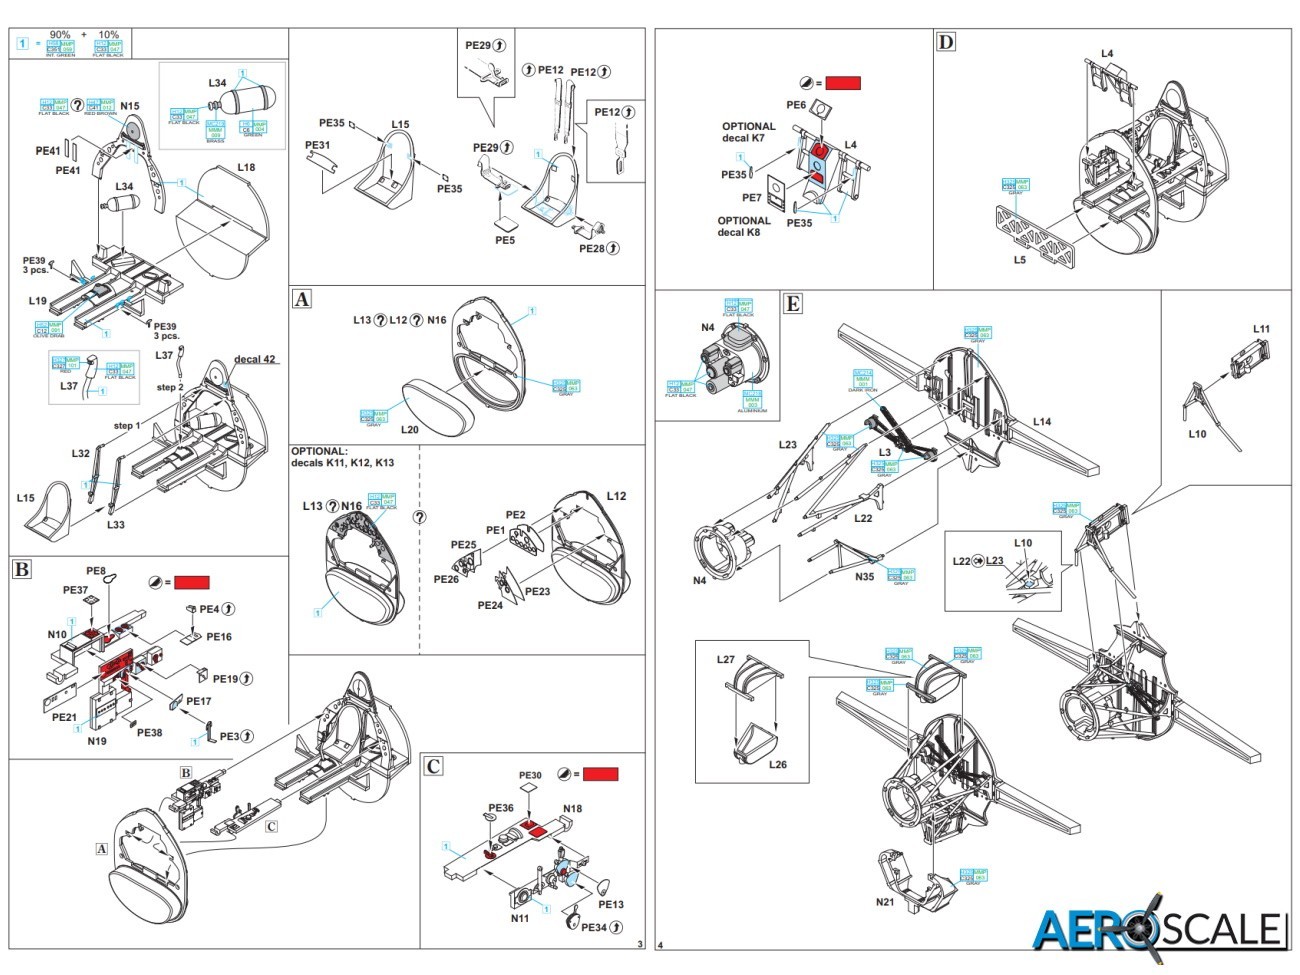
The cockpit is as you would expect from Eduard is highly detailed. I counted around 16 plastic and 41 photo etched [PE] parts to create a self-contained unit. The detail on the plastic parts is excellent and this extends to the inside of the fuselage. Eduard provides alternate detail for the instrument panel in the way of decals. The pre-painted PE parts will certainly add a different dimension in detailing the office that includes PE seat harness. There are two styles of reflector gun sight as well as a PE ring and bead gun sight. A very useful feature is the wing supports extending from the cockpit/wheel bay firewall. It will certainly make attaching the wings a simpler task.
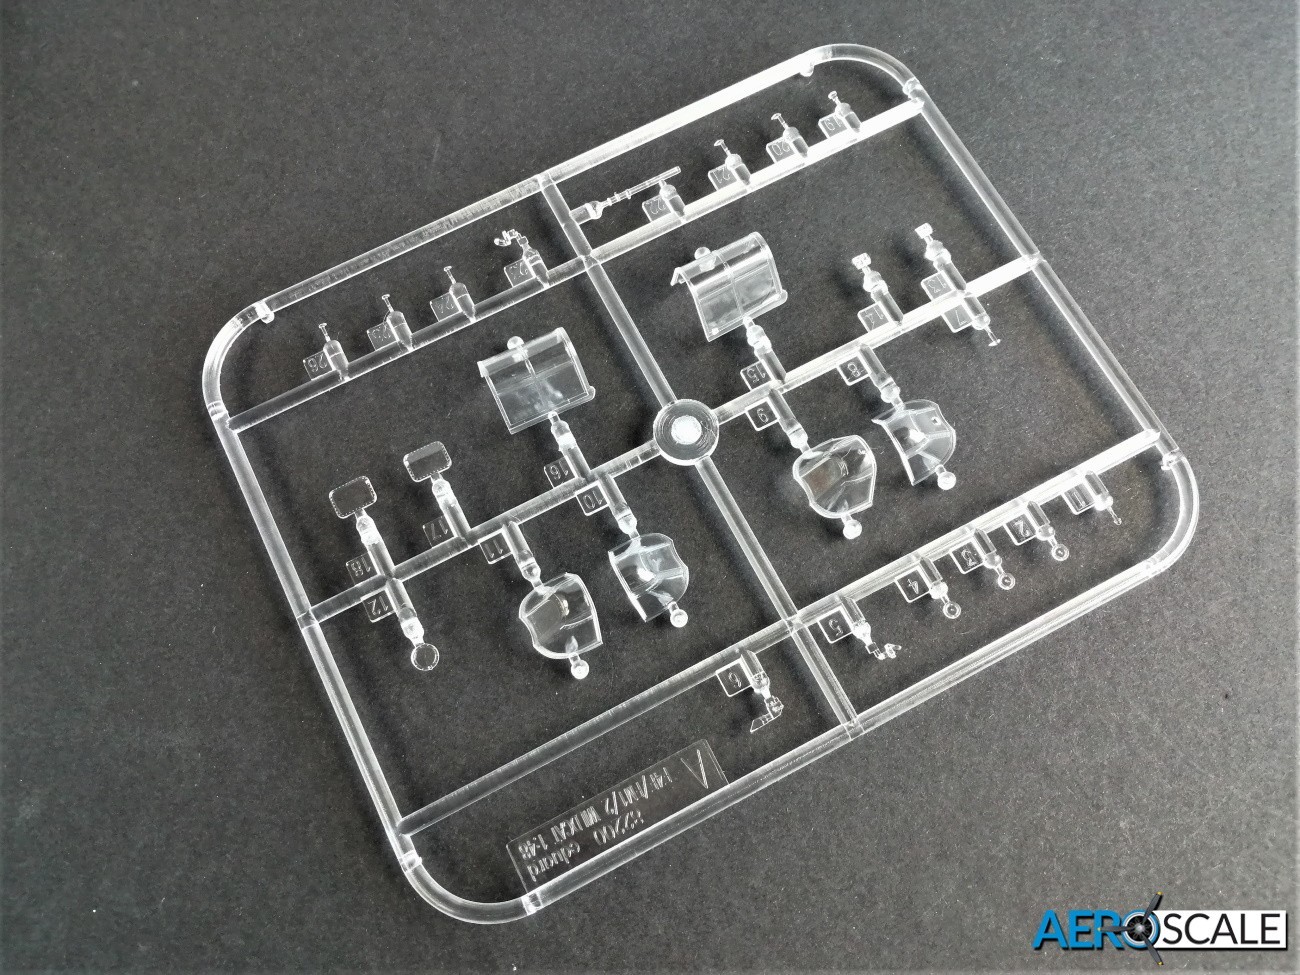
The windscreen and canopy are separate. Eduard has included two canopies one for the open position and the other closed. There is a PE part to attach to replicate the rear-view mirror attached to the windscreen.
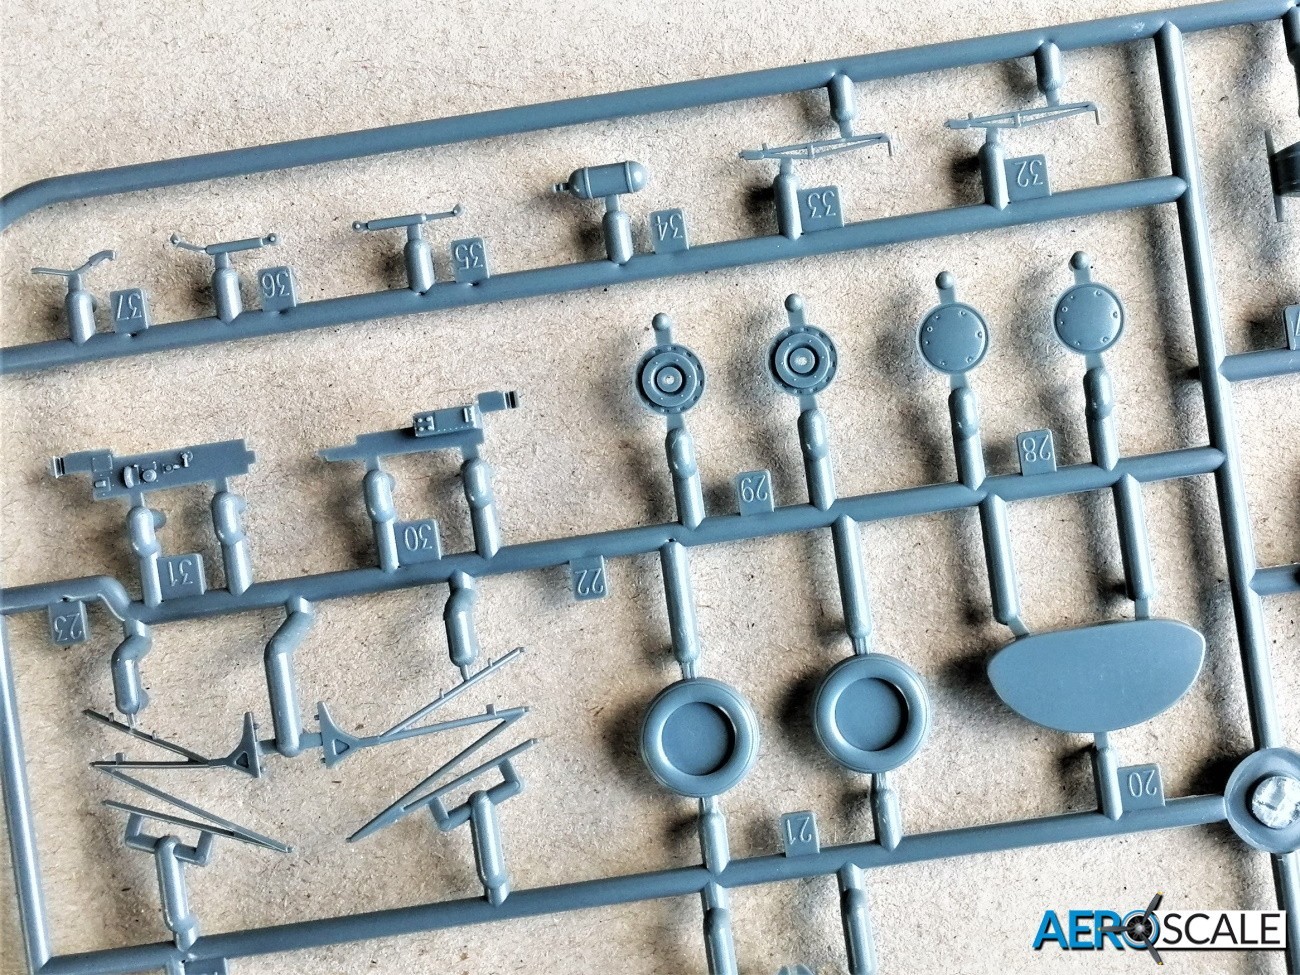
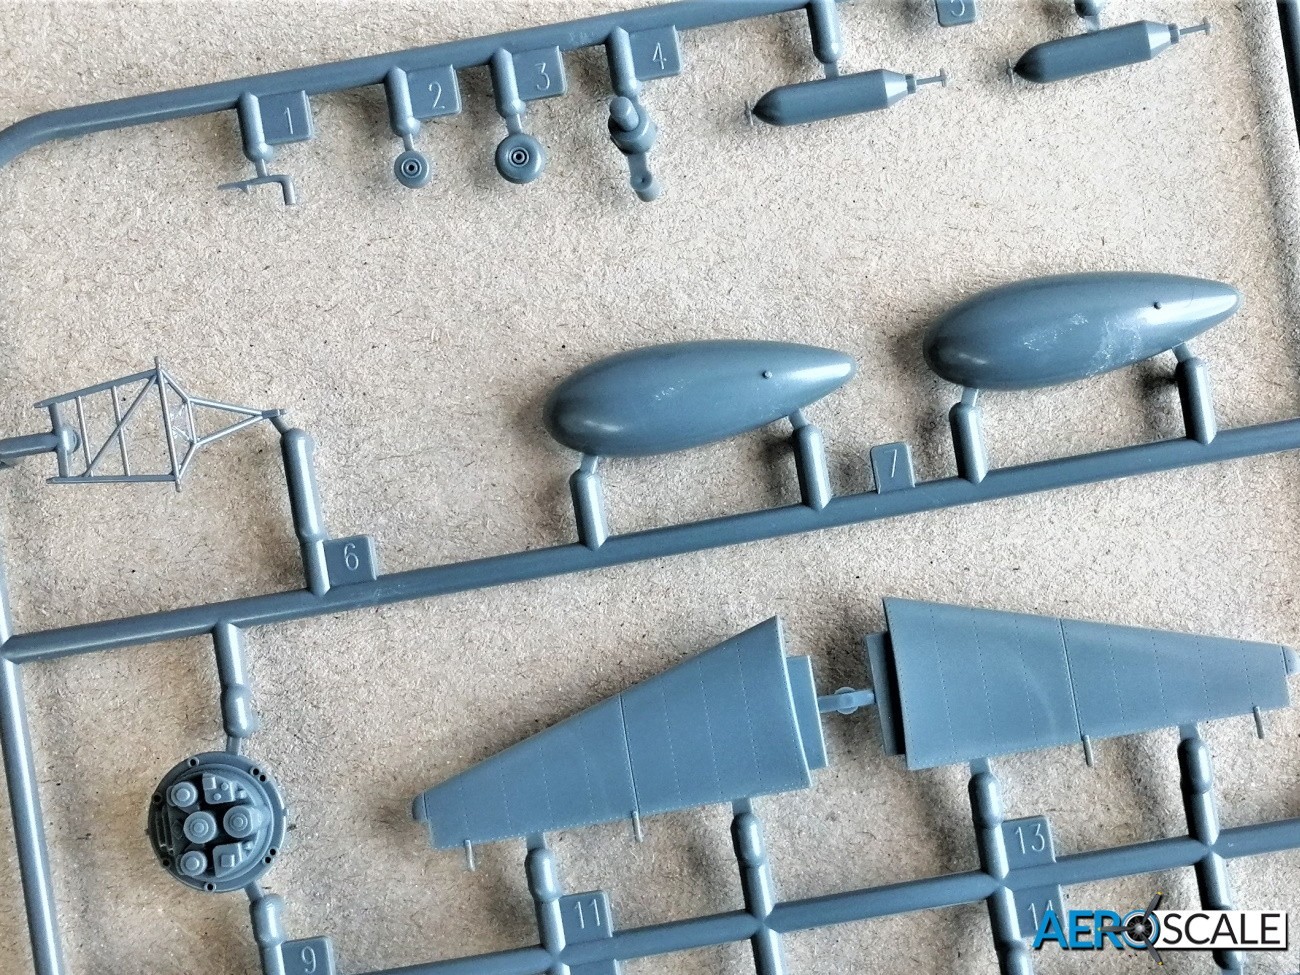
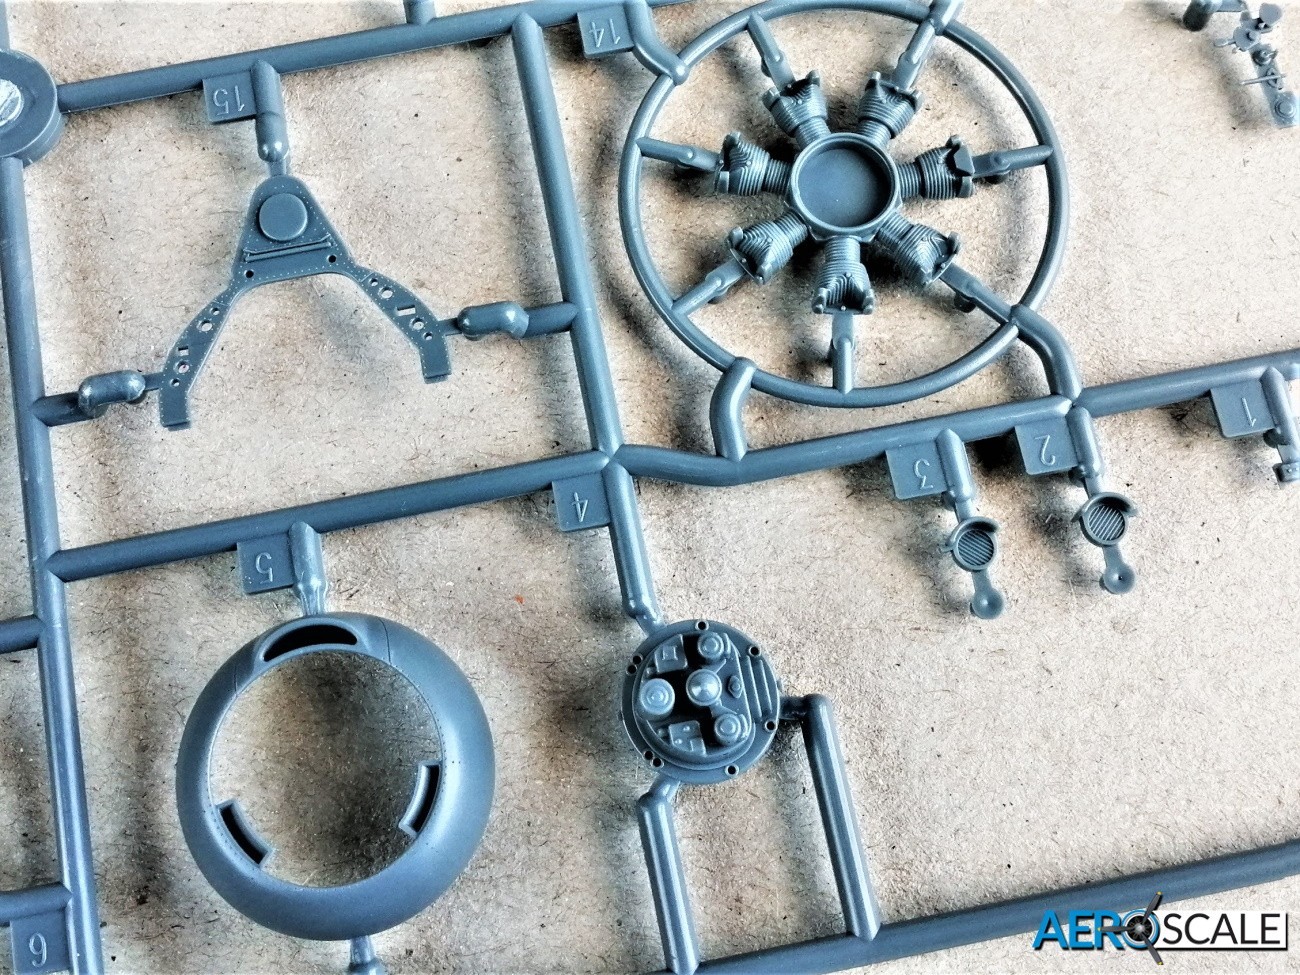
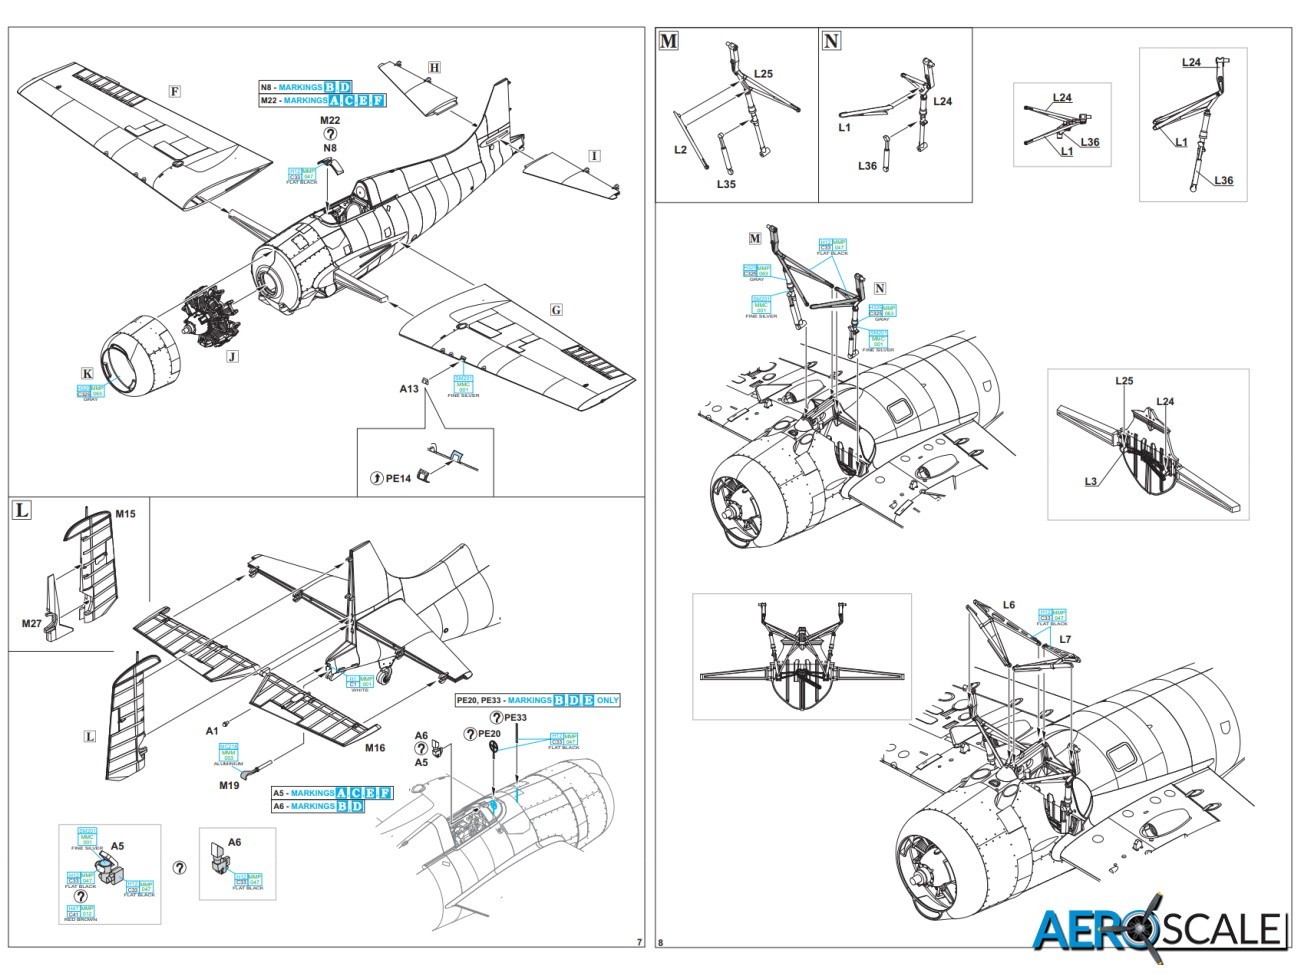
The main undercarriage bay is worthy of a special mention. It replicates the complexity of the real thing very well. The engine bearer adds somewhat to the business in the undercarriage bay. Detail as you would expect is very good. Particularly with the additional detail on the firewall including oil tank and the plastic cogs and chains of the retraction gear. The detail of the plastic chain sufficiently detailed that Eduard has not included a PE alternative. The instructions have multi view images of the various phases of construction of the complex gear, and it will look very impressive when completed. Tyres do not have a weighted look and the separate hubs are superbly detailed. There are paint masks for the wheels. In contrast to the complexity of the main gear, the tail wheel unit is made up from three pieces with a choice of a one-piece wheels.
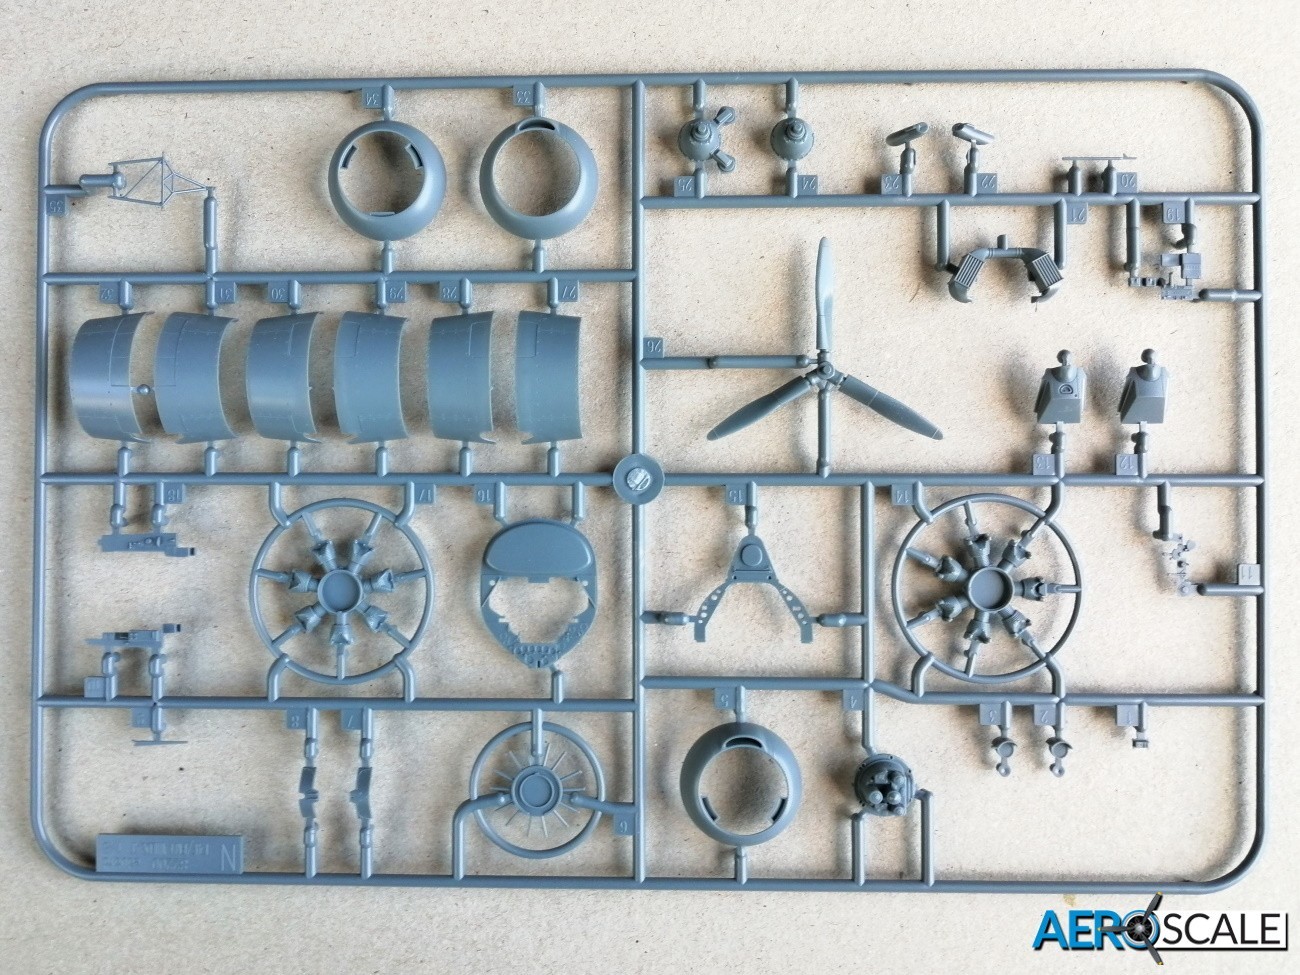
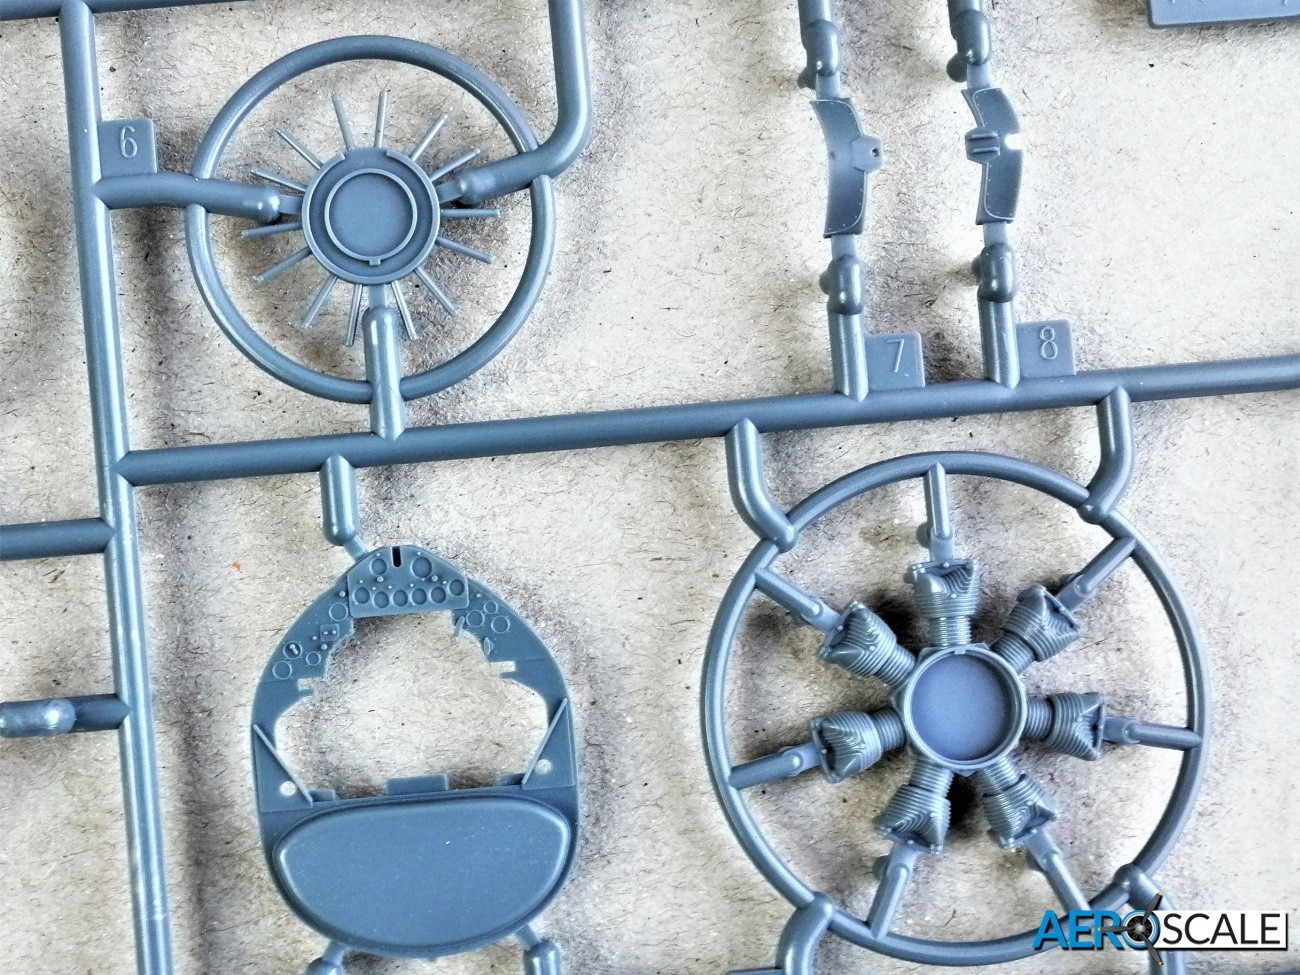
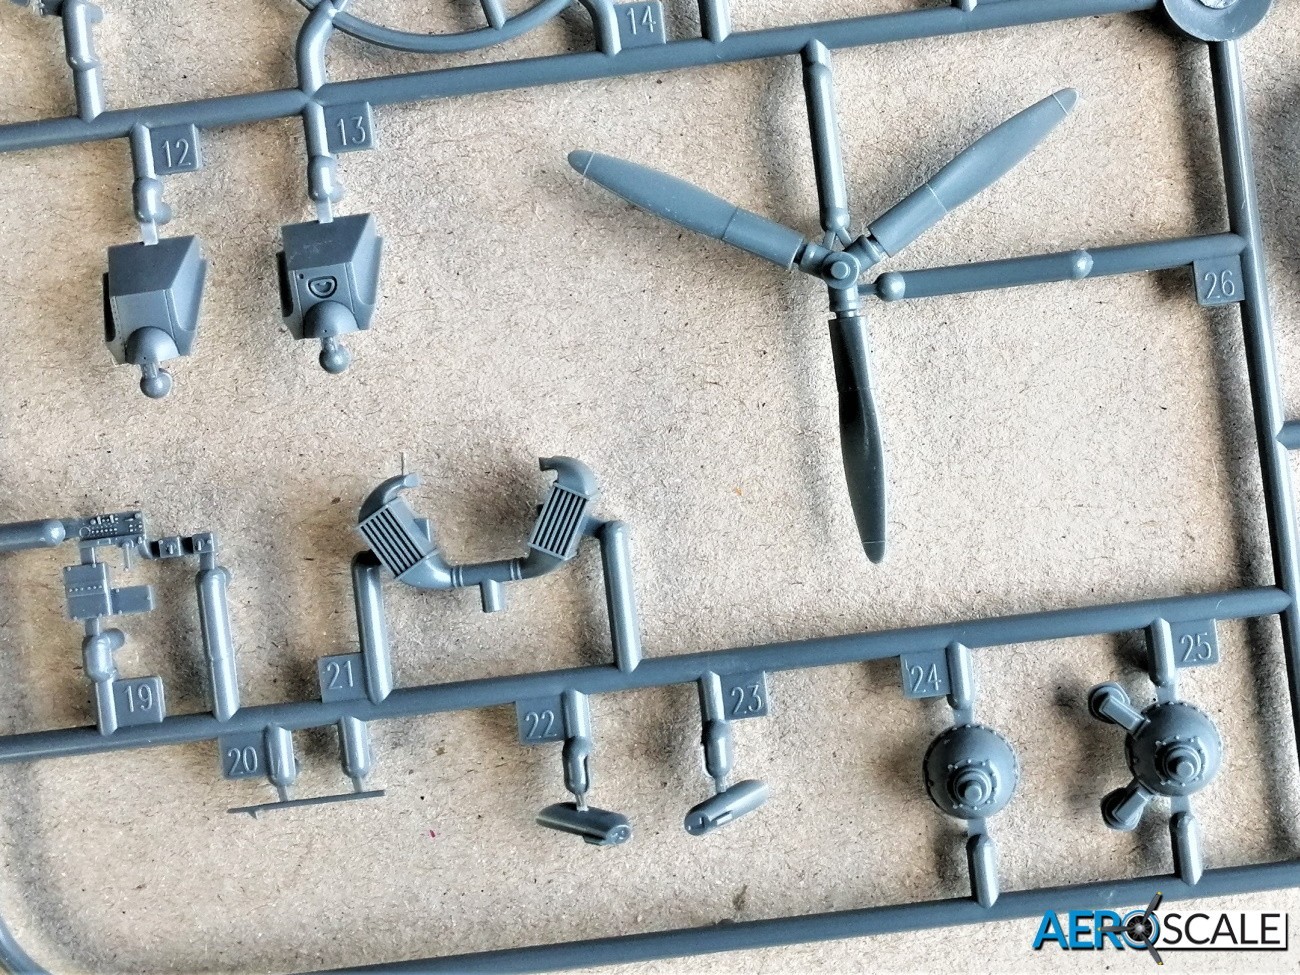
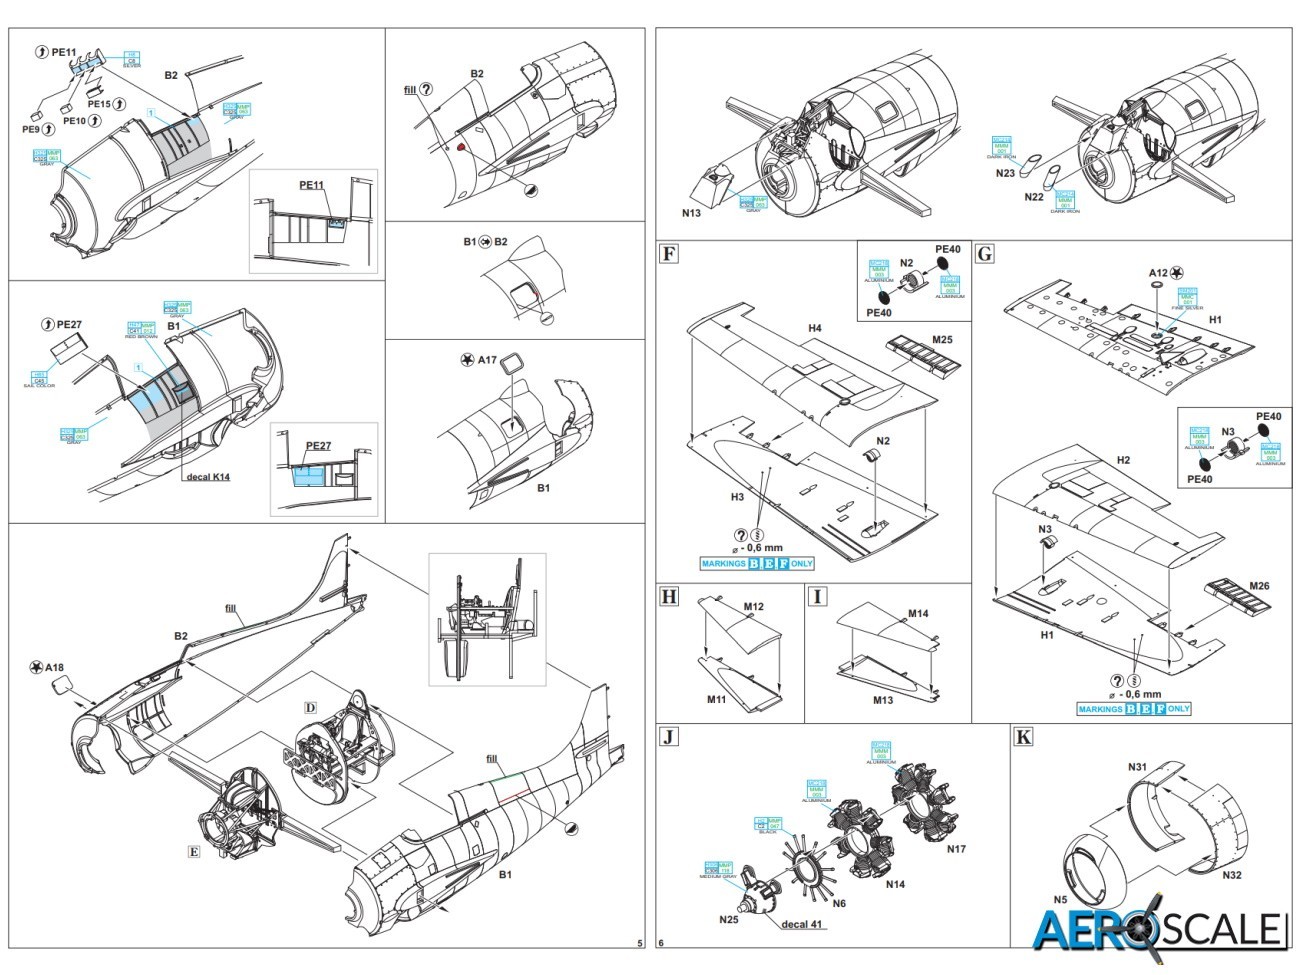
The detail in the engine bay is equally impressive. The two banks of cylinders of the Twin Wasp are nicely represented. Additional detail includes separate reduction gear casing and push rods for the forward bank of cylinders. The engine is fitted onto the firewall, rather than the completed engine bearer. The completed cowl is fitted over it. The prop is one piece with separate spinner. On my sample the surface of the blades is a little rough, so they will need a light sanding. So, check the prop before you commit to painting.

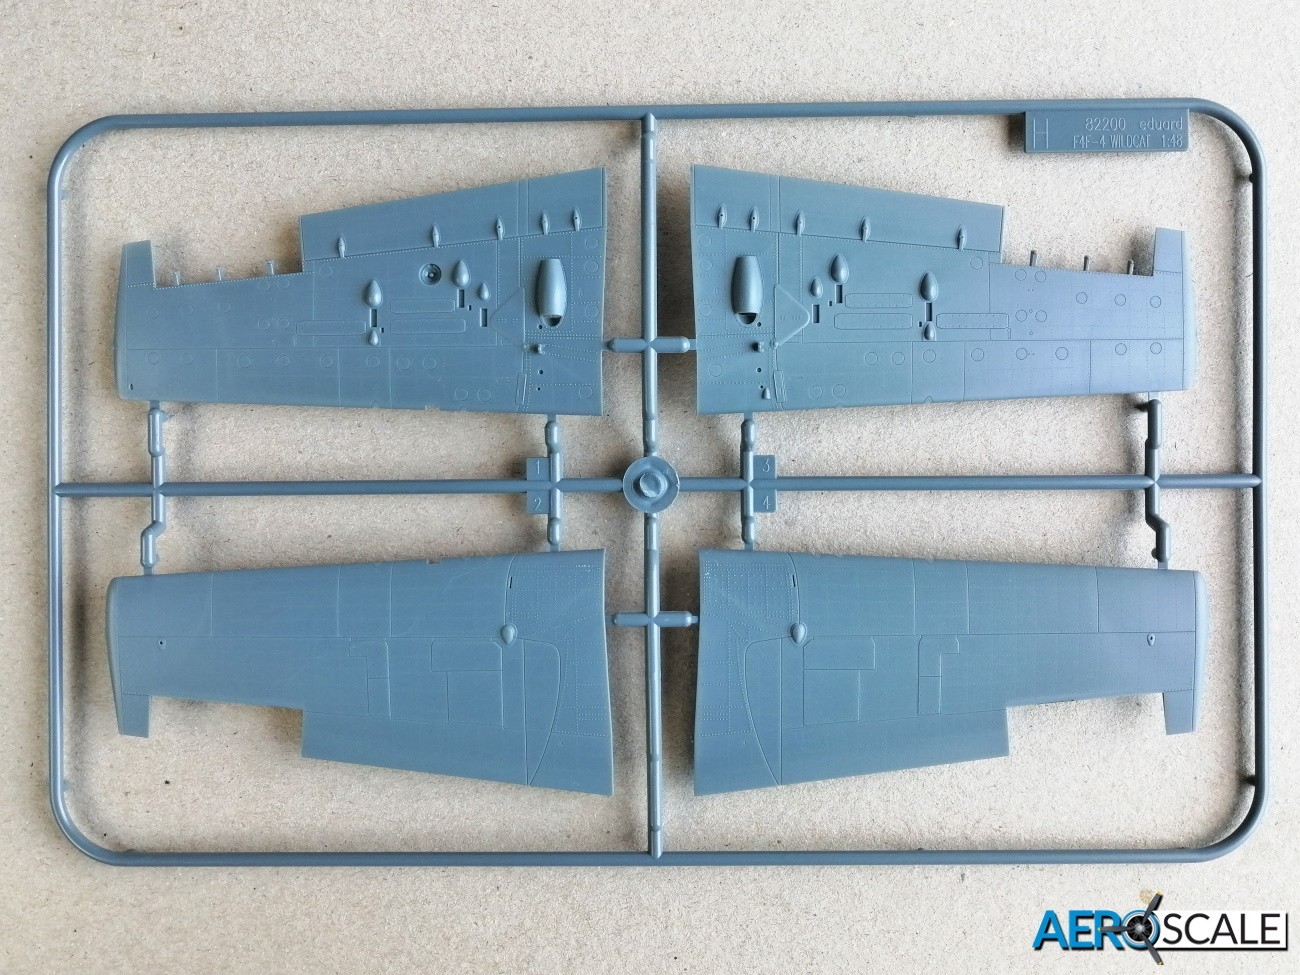
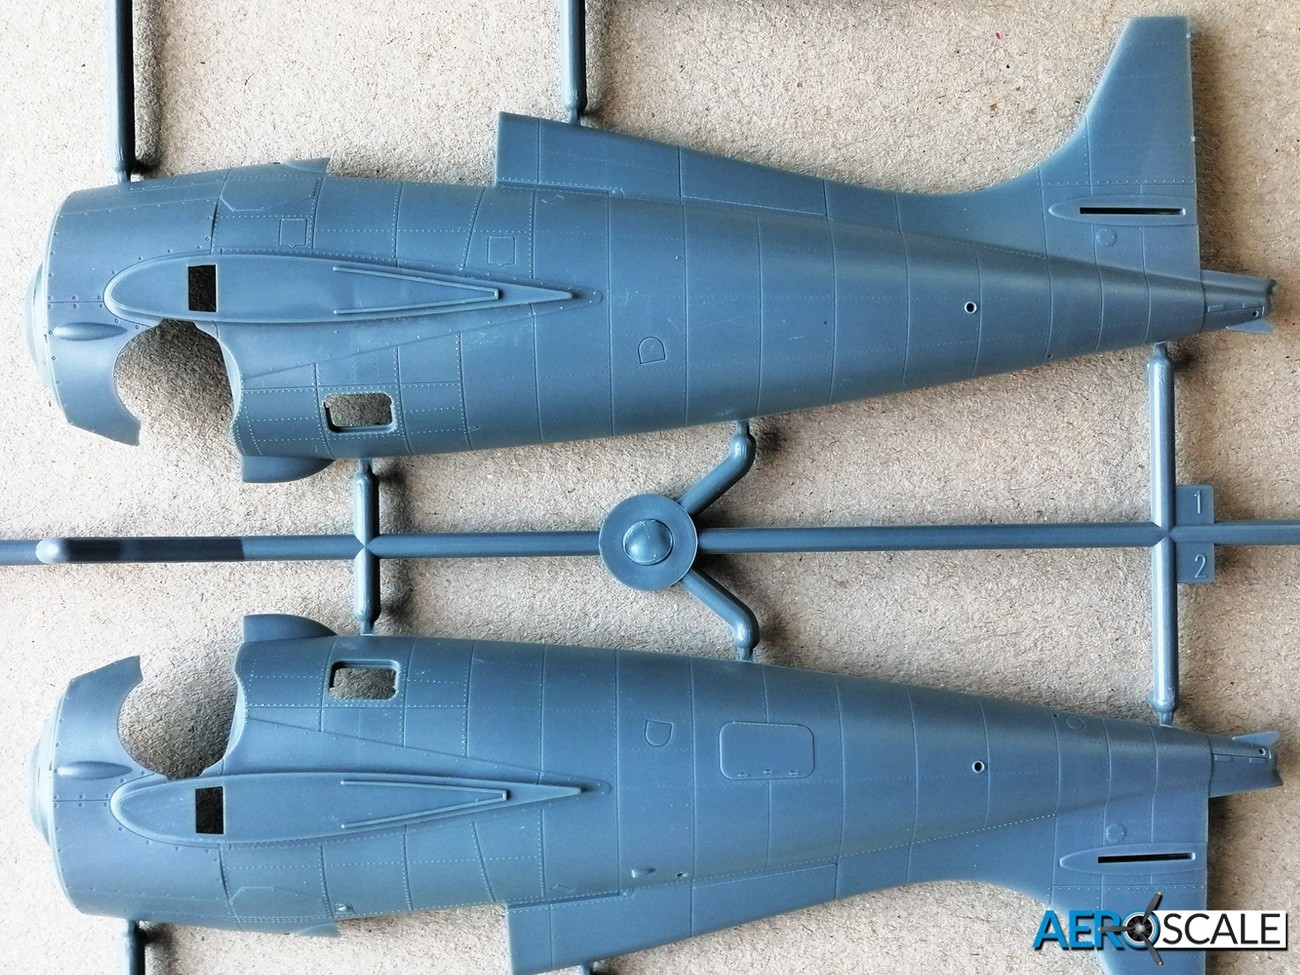
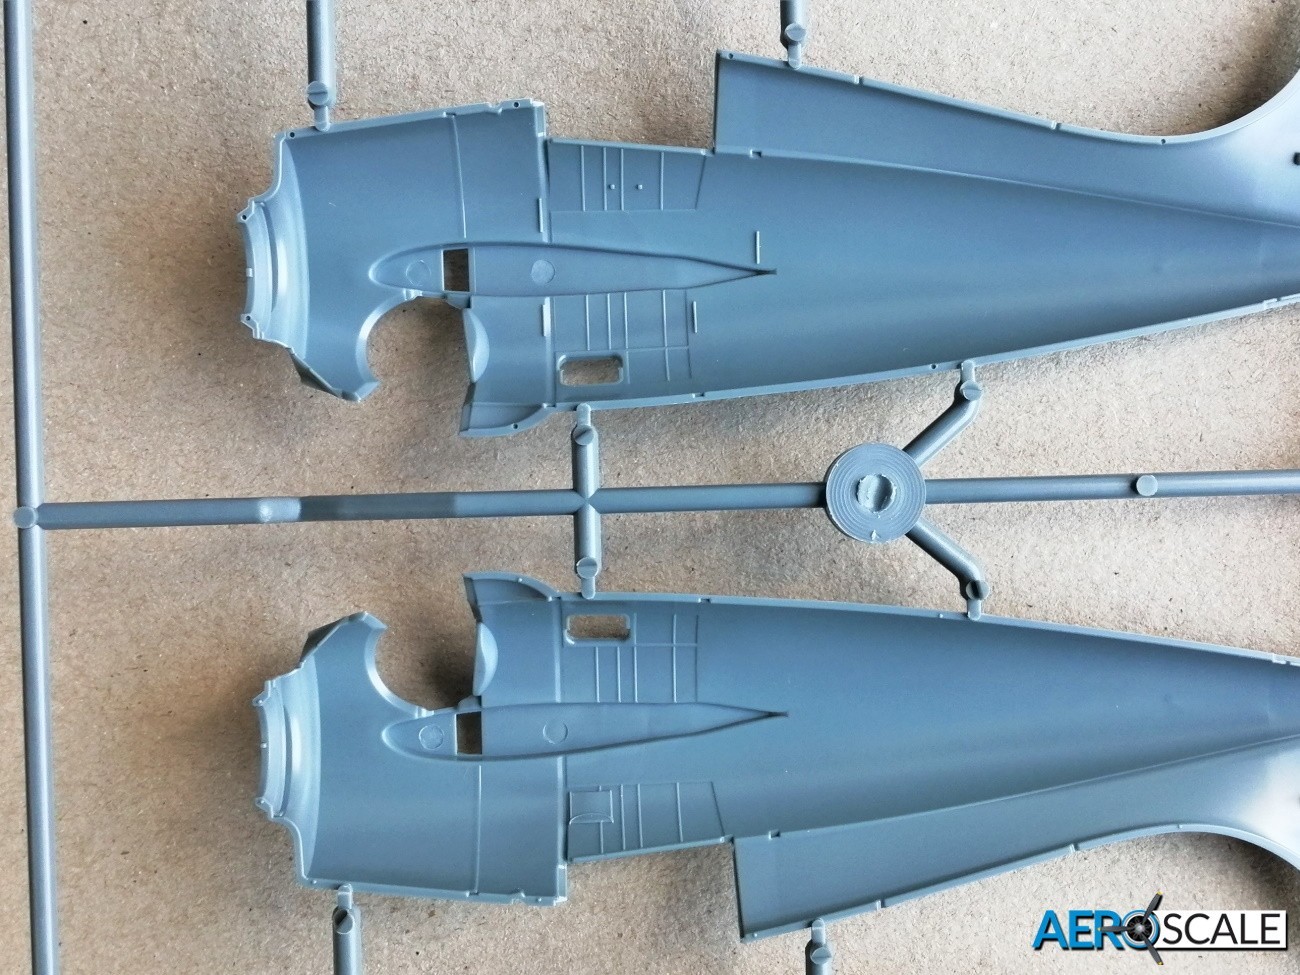
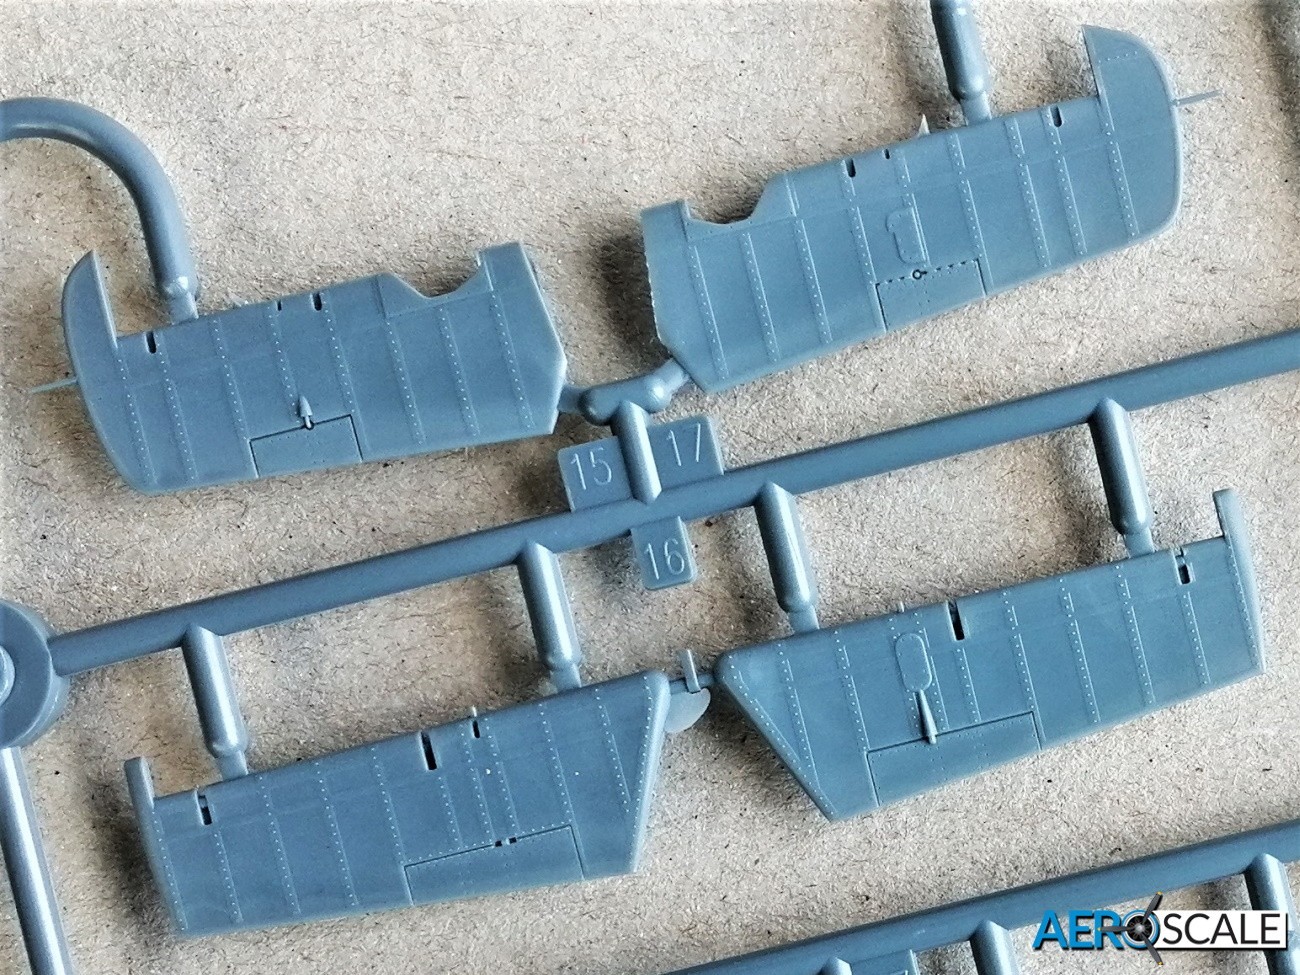
The two-part fuselage has separate engine cowl. The cowl is made up from three parts with separate lip. A small intake needs to be removed and a hole needs filling. Instructions supply the detail on this task. The exhaust pipes are marked ‘L’ and ‘R’ to aid in their correct positioning. The end of the pipes has deep recesses. The small belly windows are added after the fuselage halves are joined. The piano hinges on some of the access hatches are beautifully done. To fully represent the F4F-4 then the piano hinge on the left side of the spine [life raft storage] need sanding down and alternate panel lines scribed in. The rudder is separate and one piece.

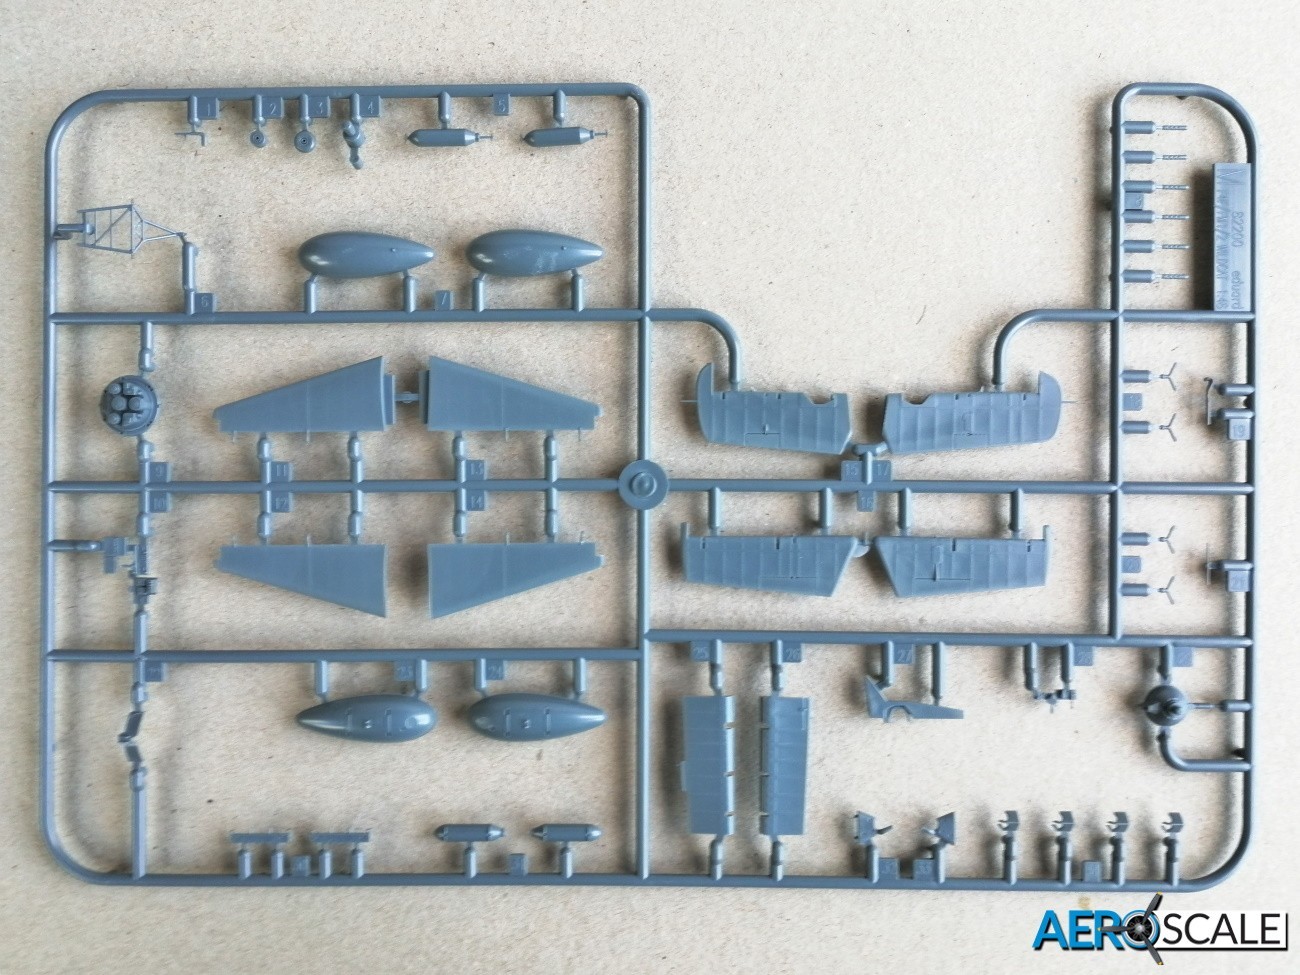
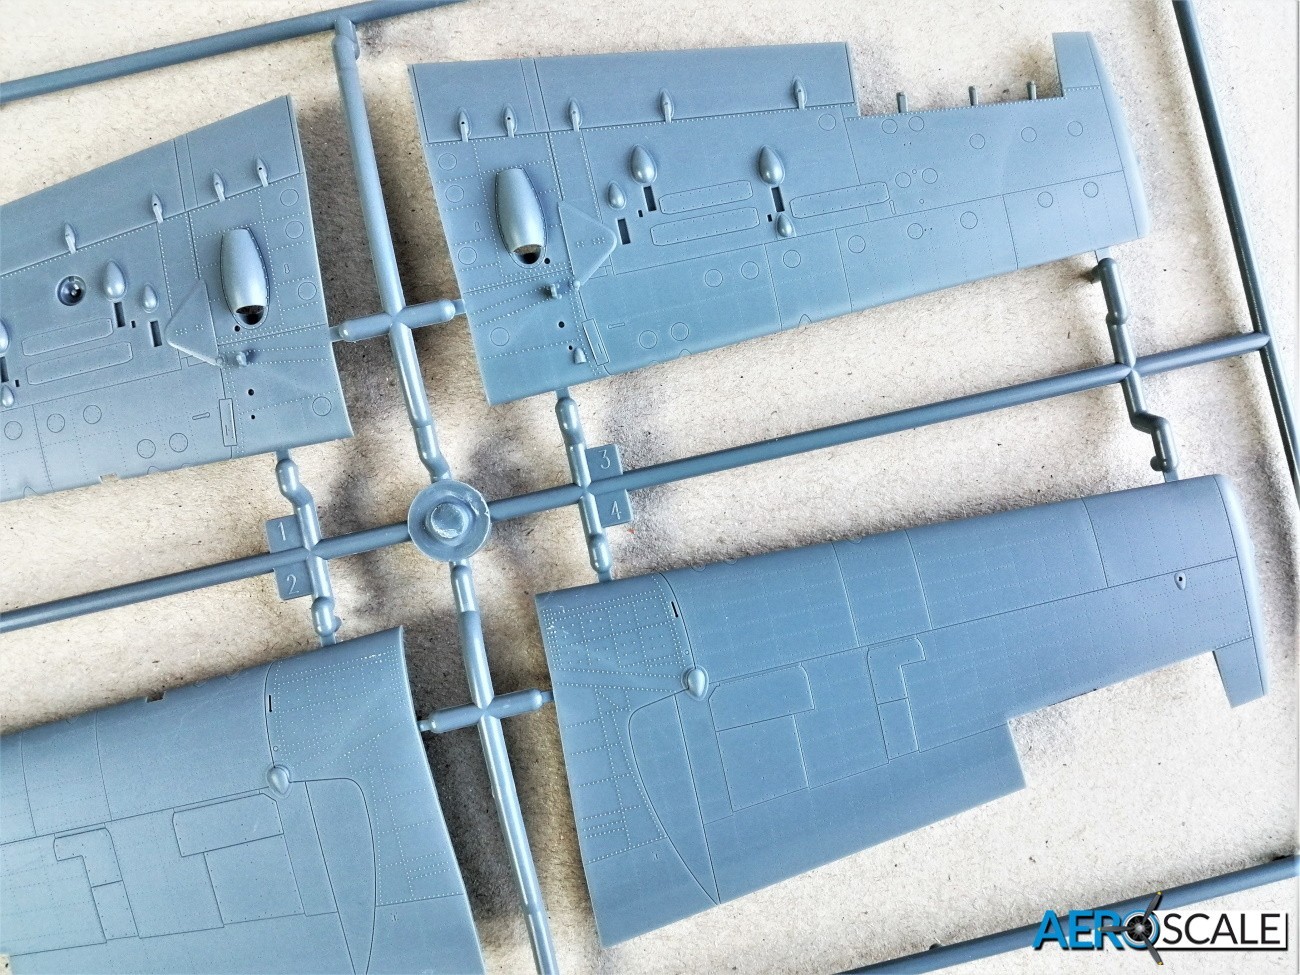
As the wing is mounted mid-section on the fuselage, it is made up from four parts. Normally the fitting of the mid-section wings can be a bit of a pain, but Eduard has incorporated into the undercarriage bay fire wall a spar support for the wings. The ailerons are separate and positionable. The flaps are moulded integrally with the lower wings. There is no option for displaying the wings folded, though Eduard has released a folded wing detail set [648818].
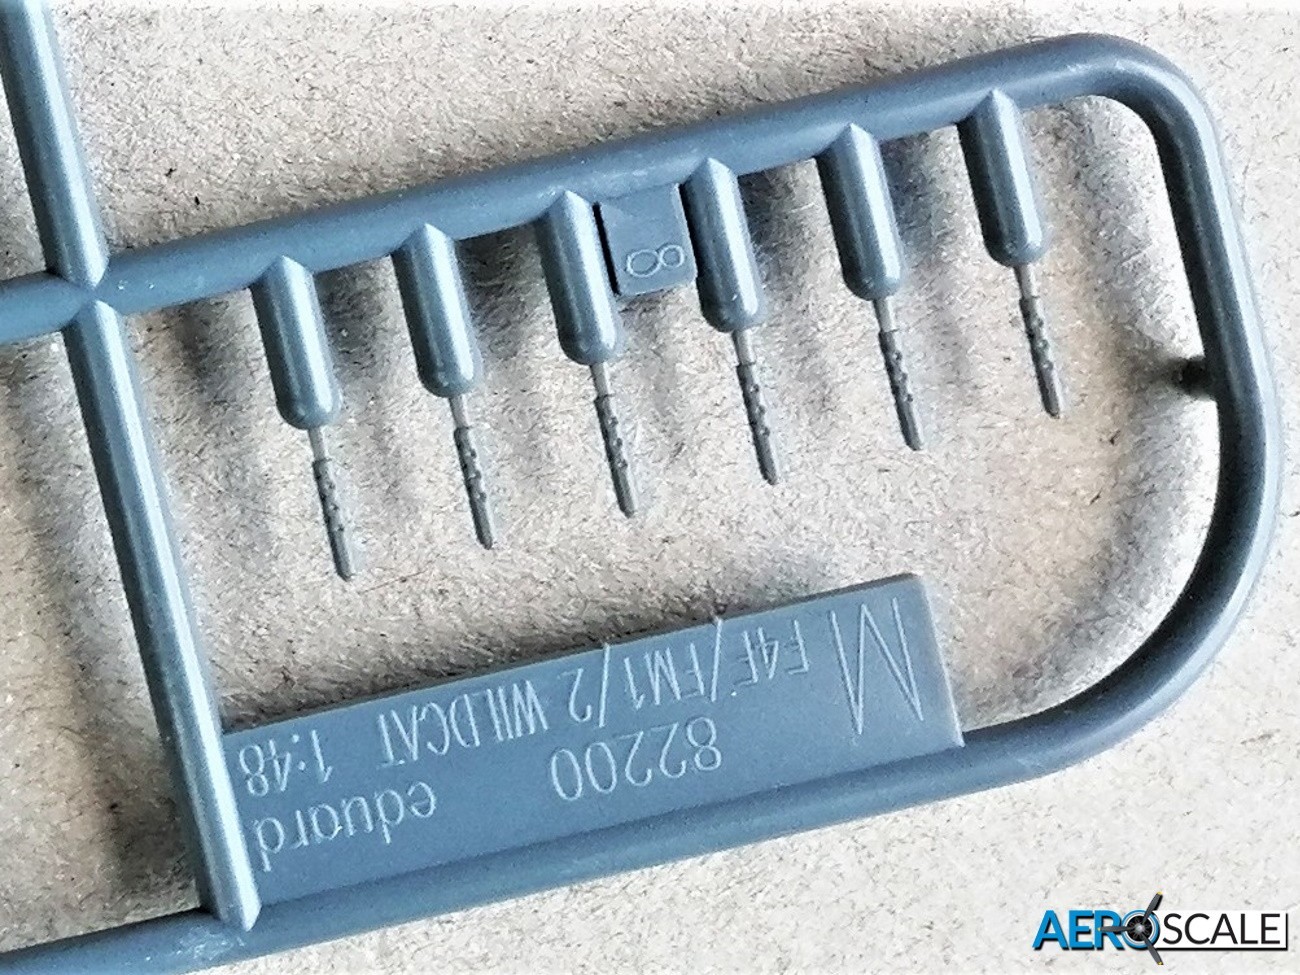
The two separate oil coolers in the wing have PE grills for that bit of extra detail, though there is good detail on the plastic parts. Holes will need to be drilled in the lower wing surface if you are fitting the bomb carriers [no bombs included]. Eduard has provided a partially drilled out holes, cutting out any guesswork. The six machine gun barrel muzzles are separate parts.
The two horizontal stabilisers are each two piece and both elevators are moulded as one. The elevator is set to neutral and some adjustment will be necessary to show them dropped.
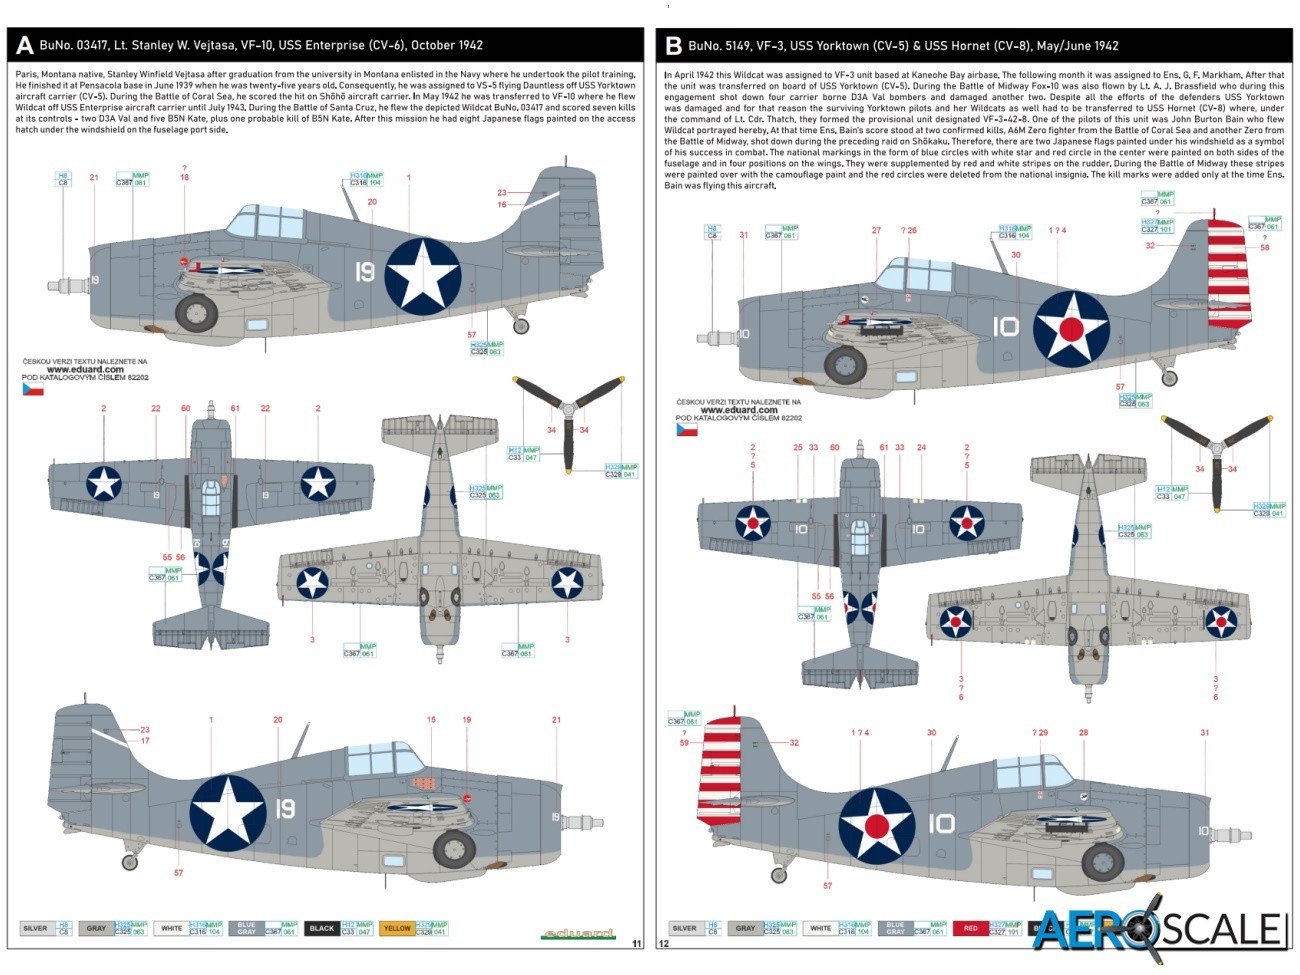
Five of the six marking options reflect its service with the US Navy in the second half of 1942:
- BuNo. 03417, Lt. Stanley W. Vejtasa, VF-10, USS Enterprise, [CV-6], October 1942
- BuNo. 5249, VF-3 USS Yorktown [CV-6] & USS Hornet [CV-8], May/June 1942
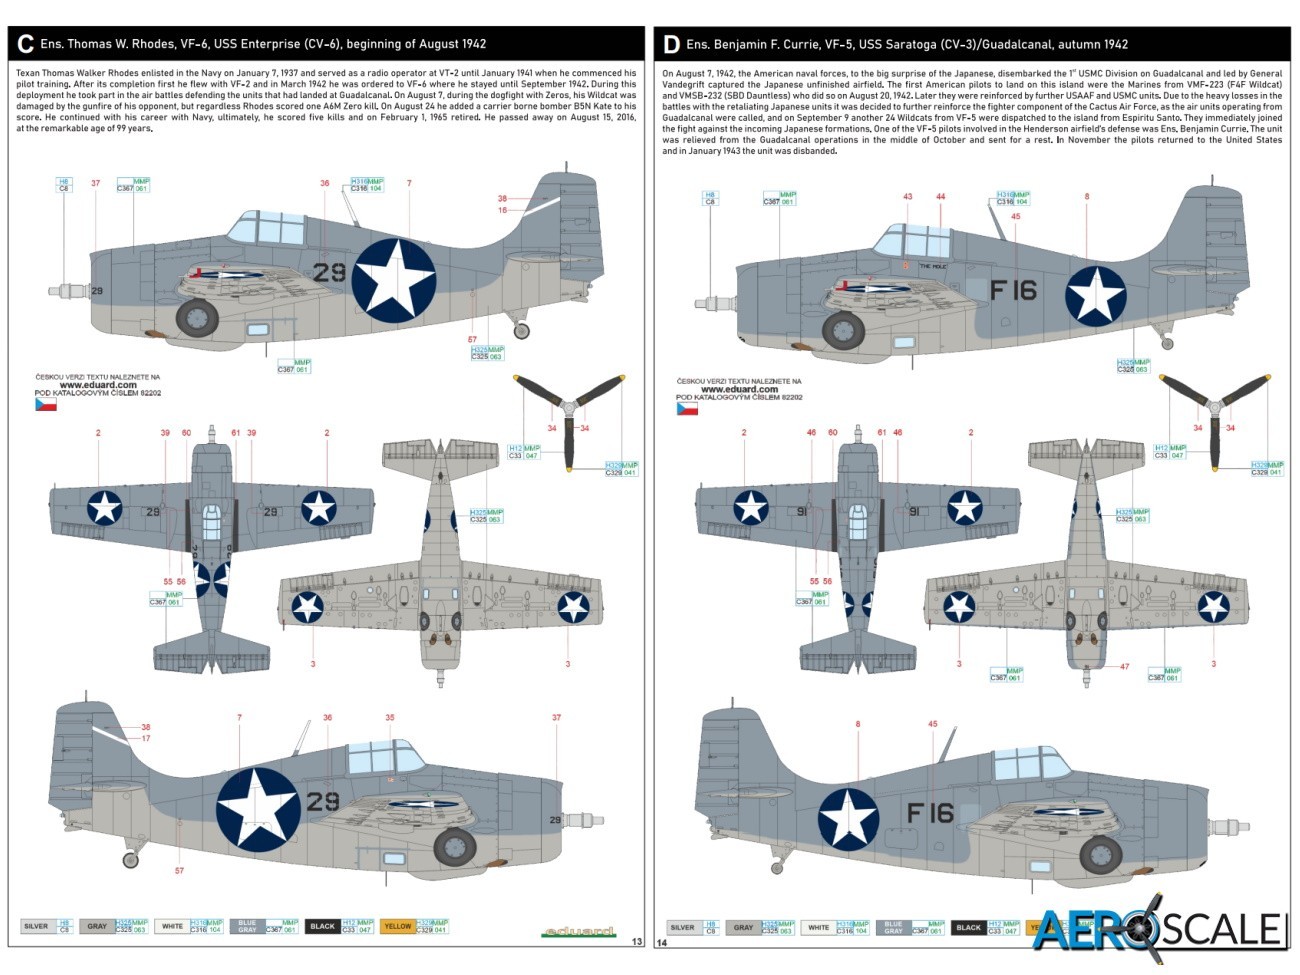
- Ens. Thomas W. Rhodes, VF-6, USS Enterprise, CV-6, beginning of August 1942
- Ens. Benjamin F. Currie, VF-5, USS Saratoga [CV-3] & Guadacanal, Autumn 1942
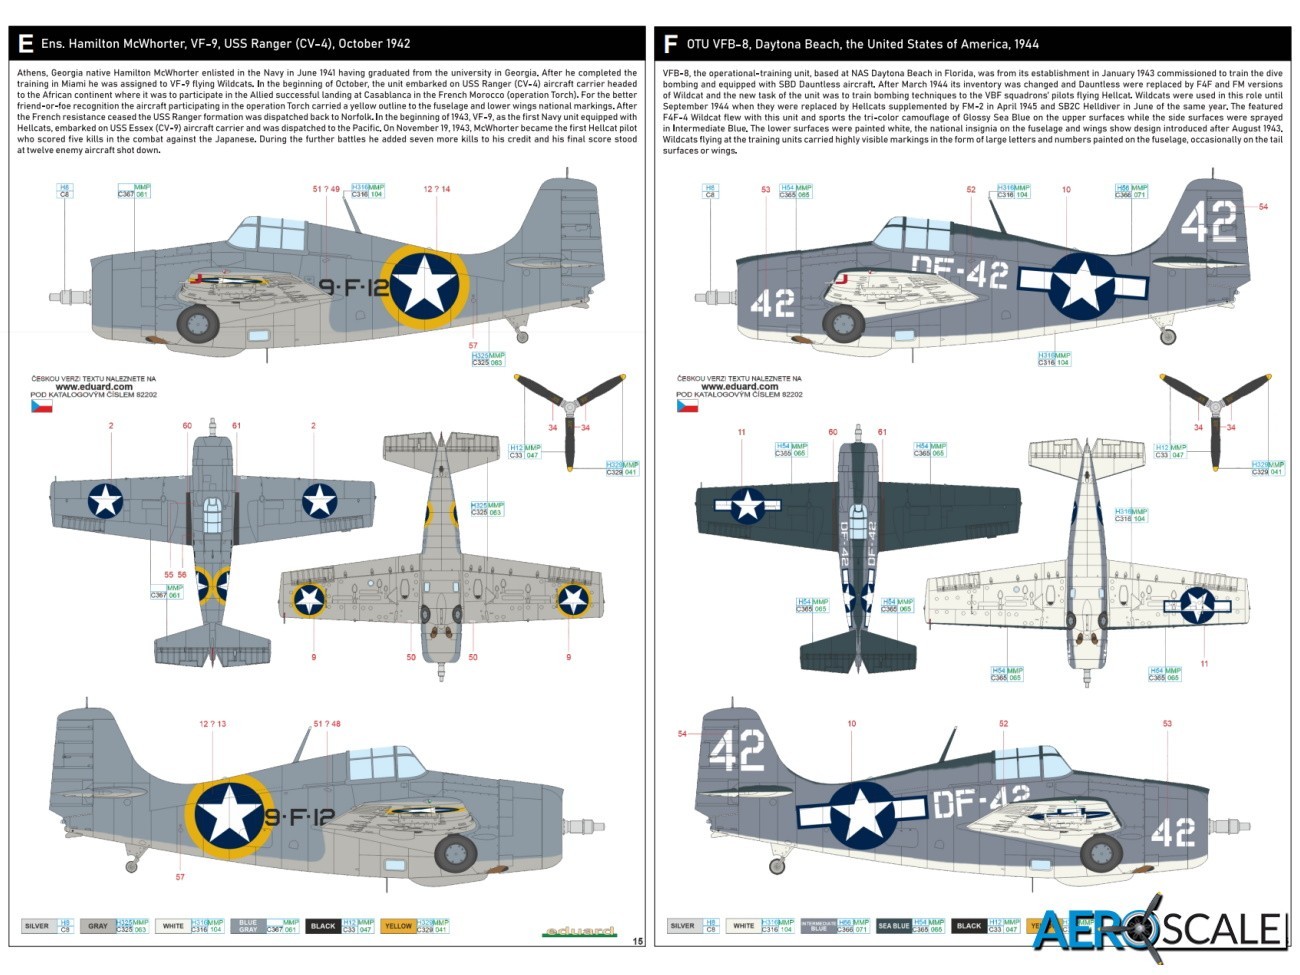
- Ens. Hamilton McWhorter, VF-9, USS Ranger [CV-4], October 1942
- OTU VFB-8, Dytona Beach, USA, 1944
Five of the options are painted blue grey [FS 35189] on the upper surface and light grey [FS26440] on the undersides. The last option is painted sea blue [FS25042], intermediate blue [FS35164] and insignia white [FS37875].
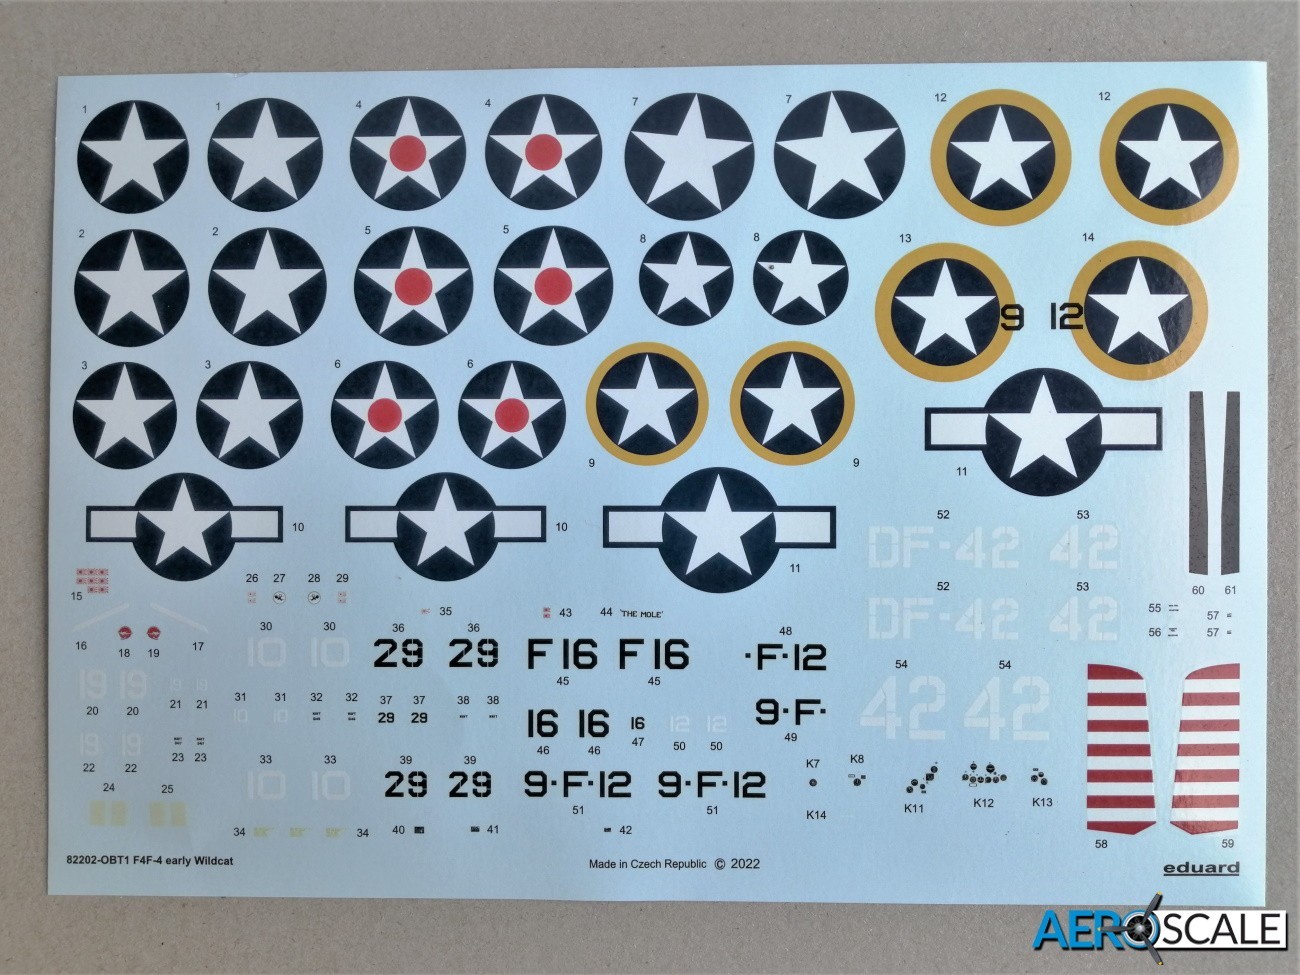
Decals are printed in house on one large sheet. The colour density and registration look superb. The carrier film has been kept to a minimum. The four different forms of the insignia reflect the rapidly evolving appearance during the first year in conflict. You will be pleased to learn that the stripes of the rudder of option ‘B’ are included on the decal sheet. If you are not a fan of stencils, then this is the perfect for you. There are barely any.
Most of the pre-painted photo etched parts are for the cockpit.

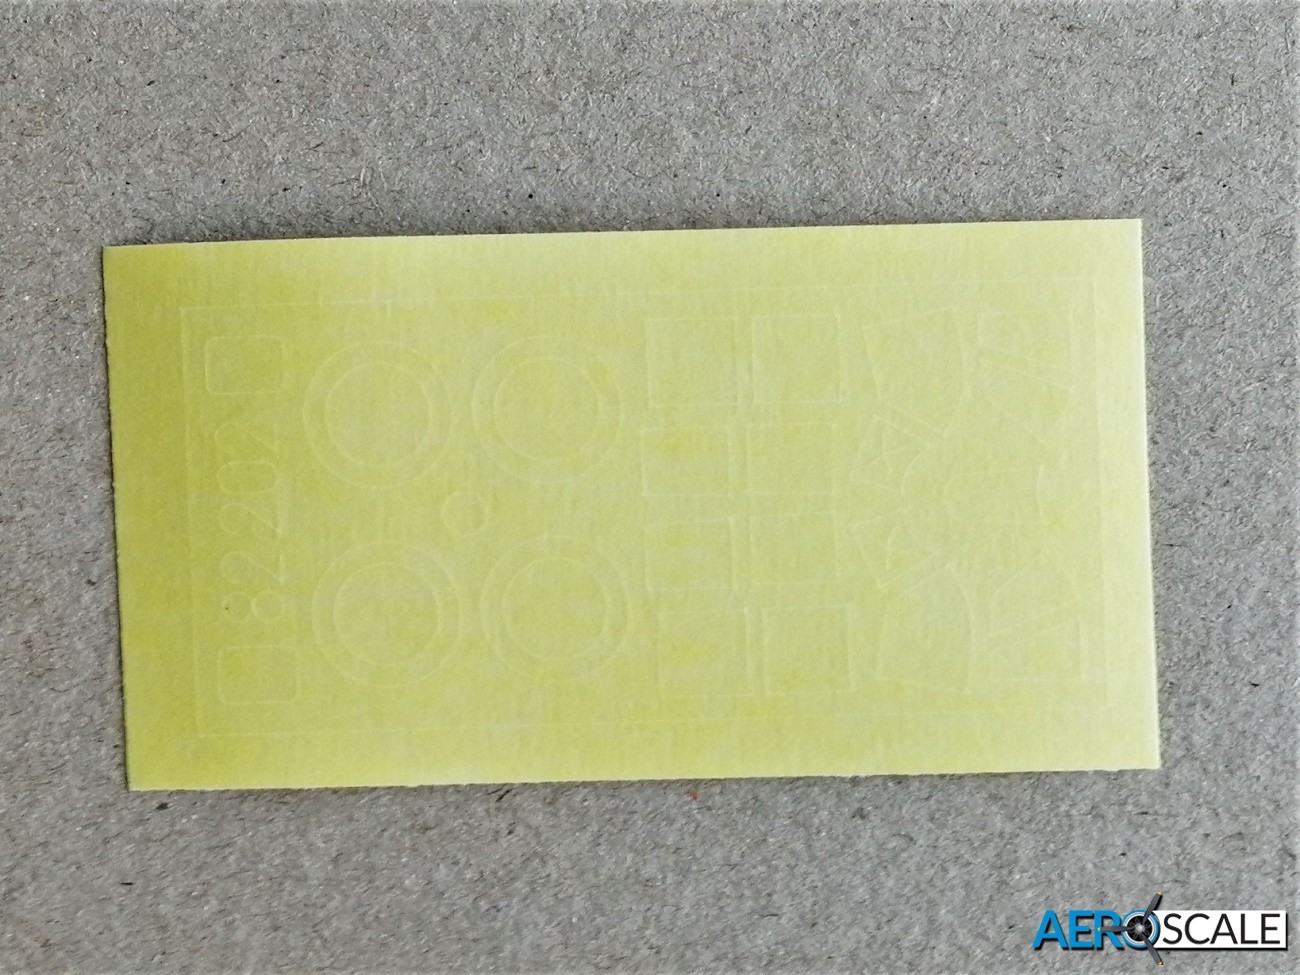
The paint masks are for the external surfaces of the windscreen, canopy, lower observation windows, and all the wheels. Some liquid mask is needed for the top of the convex windscreen. There is a good diagram illustrating the location of each mask.
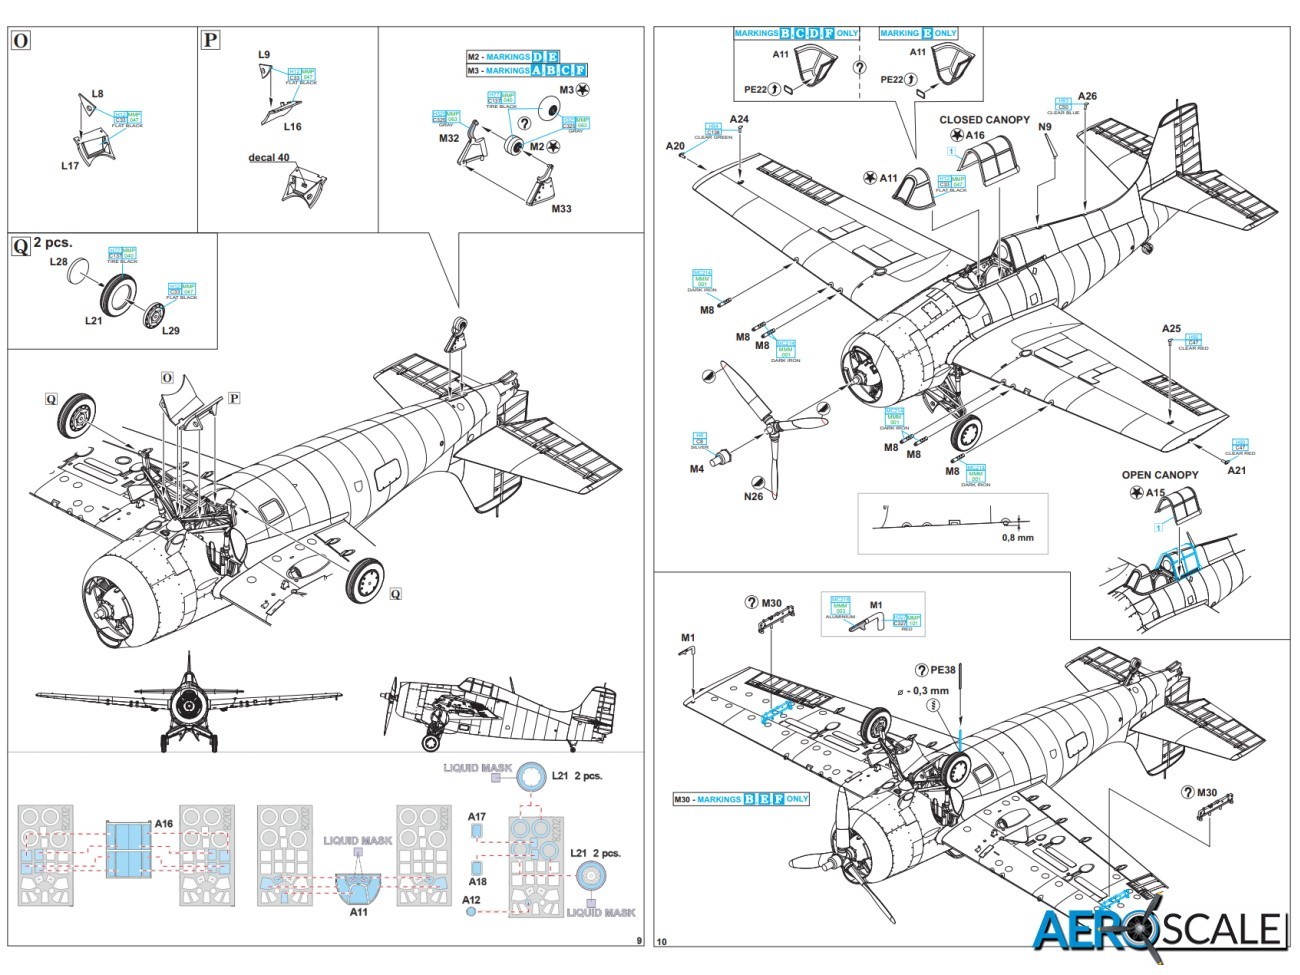
The A4 format sixteen-page manual has plenty of black line drawing illustrating the build process. It would be worth your while studying the build process for the undercarriage. The complexity means that winging it is not really an option. The painting guide has notes on each aircraft and four view colour illustrations plus a head on view of the prop. There is no stencil guide as there are hardly any stencils.
Conclusion
As you can see from the images the detail is off the very highest standard. As the undercarriage is so well detailed and complex it probably is not a kit for beginners. Most modellers will be more than satisfied with the detail in this ProfiPACK Edition. Future Weekend Editions won’t look too shabby if your willing to wait and save a bit of money. Eduard has surpassed themselves in the amount of aftermarket detail sets for the Wildcat if you want to push the boat out. As the F-4F was the first Wildcat with folding wings, Eduard has understandably released a separate wing fold set [648818]. Highly recommended
Thank you to Eduard for supplying the kit for review
82202 - Grumman F4F-4 Wildcat early ProfiPACK – 1:48
Please remember, when contacting retailers or manufacturers, to mention that you saw their products highlighted here – on AEROSCALE.