Intro
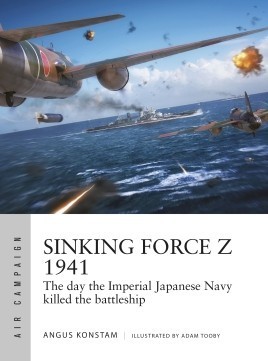
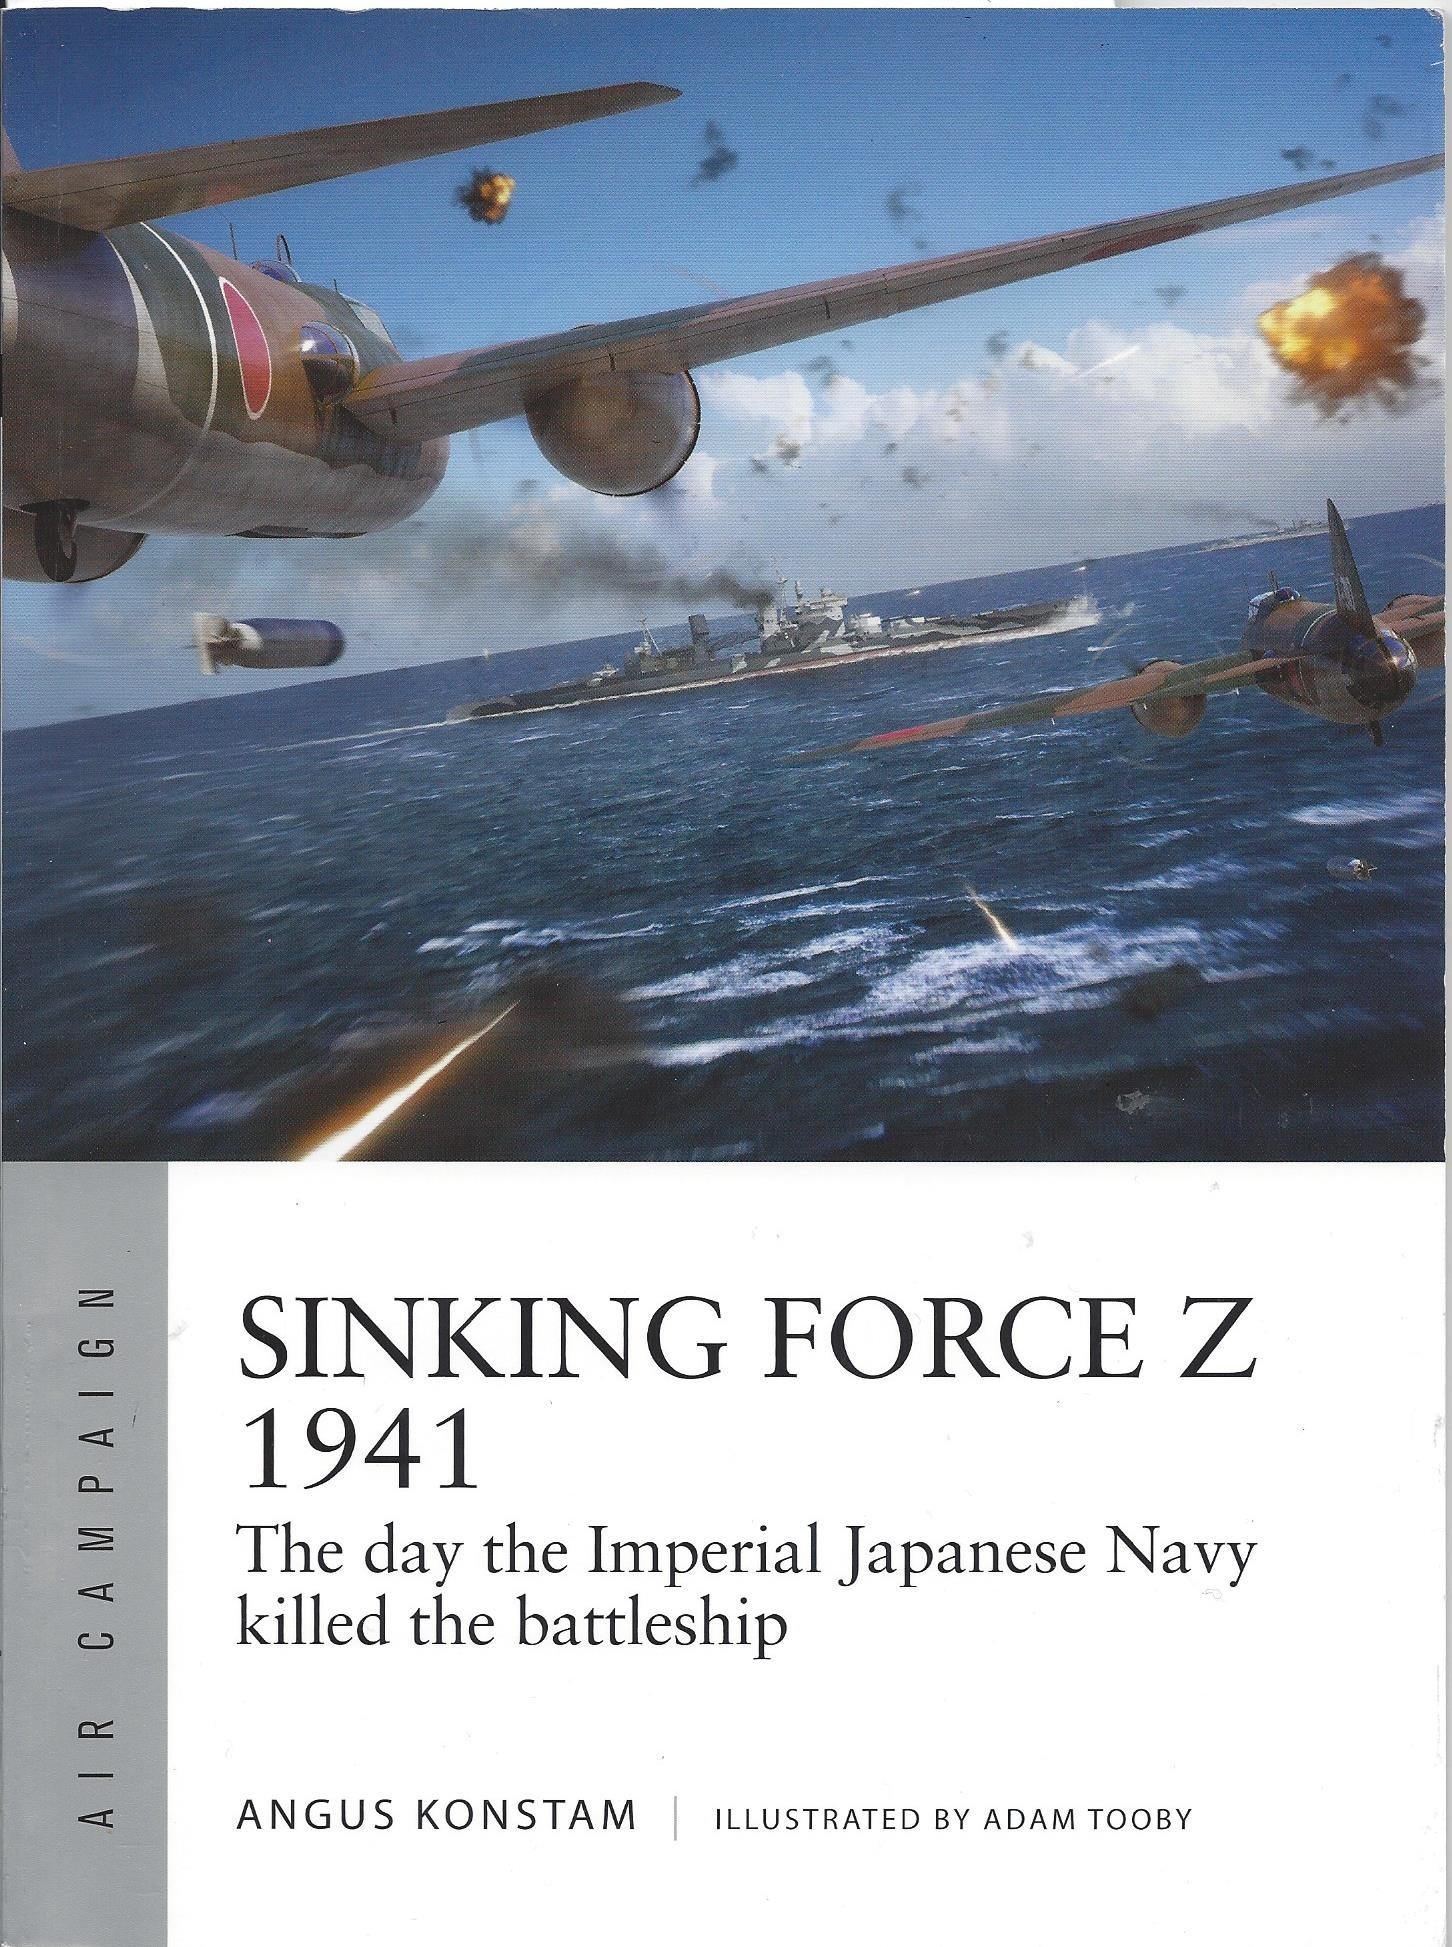
Sinking Force Z 1941, The day the Imperial Japanese Navy killed the battleship is the 20th title in Osprey's series Air Campaign. Authored by Angus Konstam and illustrated by Adam Tooby, it is 96 pages in length. It is catalogued with the Osprey Short code ACM 20 and with ISBN 978147284660. Formats available are paperback, PDF, and ePUB. You can visit it on the Osprey site: Sinking Force Z 1941
Considering the Royal Navy's aerial devastation of the Italian battle fleet at Taranto and the aerial devastation of the Royal Navy off Dunkirk and Crete, this disaster should never have happened. Osprey explains:
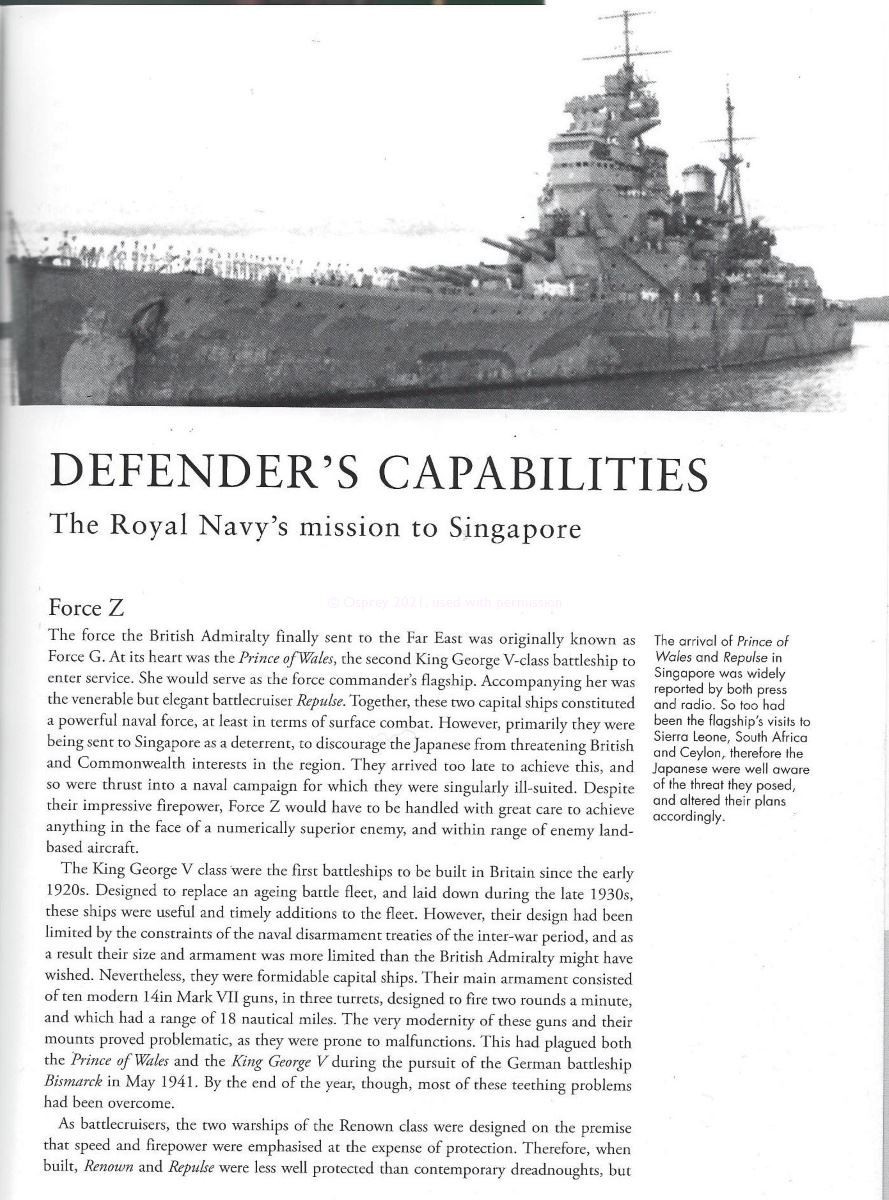
In late 1941, war was looming with Japan, and Britain's empire in southeast Asia was at risk. The British government decided to send Force Z, which included the state-of-the-art battleship Prince of Wales and the battlecruiser Repulse, to bolster the naval defences of Singapore, and provide a mighty naval deterrent to Japanese aggression. These two powerful ships arrived in Singapore on 2 December - five days before the Japanese attack on Pearl Harbor. But crucially, they lacked air cover. On 9 December Japanese scout planes detected Force Z's approach in the Gulf of Thailand. Unlike at Pearl Harbor, battleships at sea could manoeuvre, and their anti-aircraft defences were ready. But it did no good. The Japanese dive-bombers and torpedo-bombers were the most advanced in the world, and the battle was one-sided.
Strategically, the loss of Force Z was a colossal disaster for the British, and one that effectively marked the end of its empire in the East. But even more importantly, the sinking marked the last time that battleships were considered to be the masters of the ocean. From that day on, air power rather than big guns would be the deciding factor in naval warfare.
You are reading this book on Aeroscale but it could easily be part of Model Shipwrights. Thoroughly researched, this book both presents new information and concepts to me, and aha moments for facts previously learned. Let's delve into the text.
Content
Sinking Force Z 1941 is presented through the Air Campaign standard format of nine chapters and sections in 96 pages:
- Introduction
Chronology
Attacker's Capabilities
Defender's Capabilities
Campaign Objectives
The Campaign
Analysis and Conclusion
Bibliography
Index
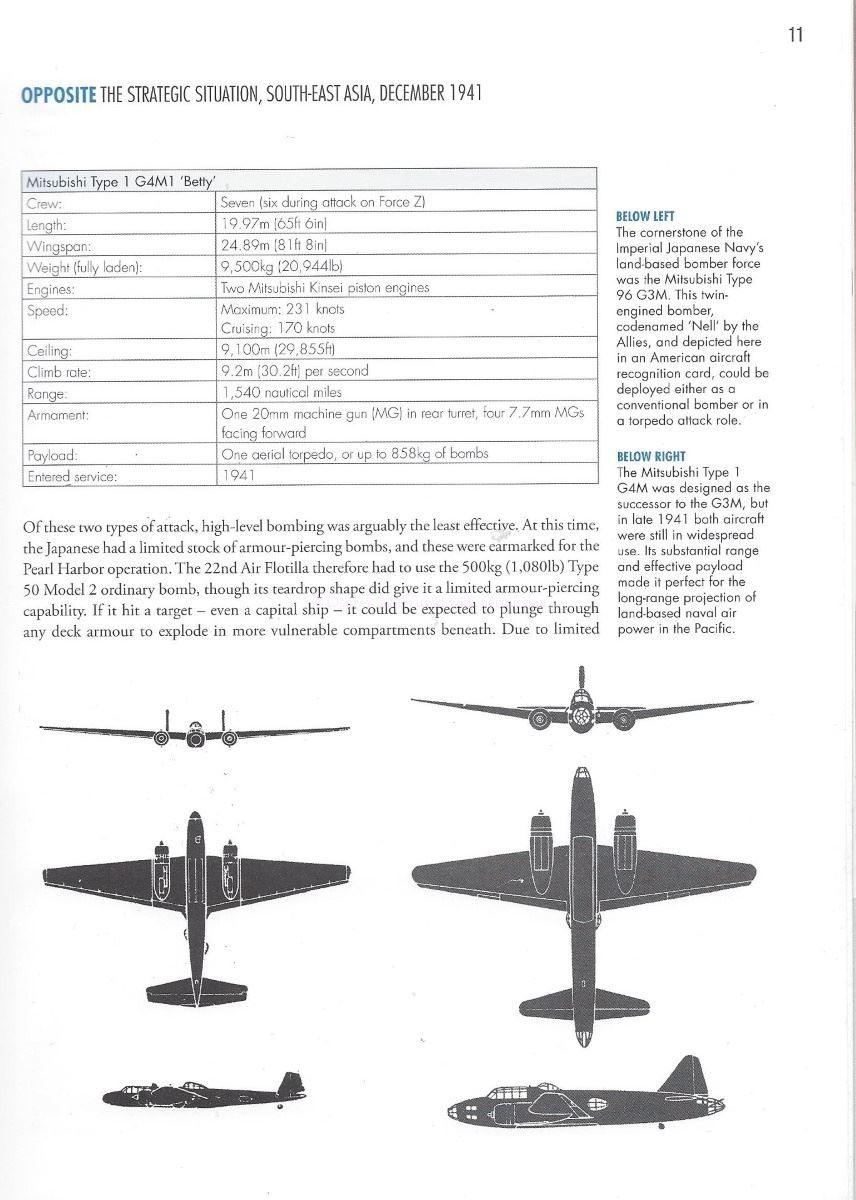
I think the content is well organized and smartly presented. There are a couple of excerpts from Japanese pilots about the search for the ships. The wet blanket I'll slap down early - two factual errors and misidentified photo captions. Two Japanese bomber types were the executioners of the ships, the Mitsubishi's G3M Type 96 Rikko (Allied code name "Nell") and the G4M Type 1 Isshikirikko (Allied code name "Betty"). They are summarized in information tables, and both table present incorrect armament information, describing the machine guns of the bombers as "facing forward." Next, two photographs of a Type 96 Nell are misidentified as a Type 1 Betty (pages 12 & 59). And this one is easy to slip past the goalie - the Mogami-class cruisers are referred to as light cruisers. Other than those, I found nothing to gripe about.
Introduction and Chronology are only four pages but tells the backstory of the sinkings, and the repercussions. Attacker's Capabilities uses nine pages to describe Japan's assets and capabilities, including ships. Defender's Capabilities is 11 pages and focuses not only on the ships, but air and land forces. It presents detail about the weapons the Royal Navy equipped these ships with, and their High Angle Control System. Campaign Objectives describes the intentions, preparations, and actions of both sides, as well as the formation and deployment of Force Z.
The main event, The Campaign, begins with the Japanese invasion of Malaya and Force Z's sortie. It includes Japanese subs and aerial reconnaissance, Allied and Axis maneuverings, measures and countermeasures, Japanese fears of Force Z, British refueling concerns, and the British commander's belief in an inevitable traditional naval gun duel, without concern of air attack. Then in three subchapters about the battle, each air attack upon Force Z is recounted in detail, including technical details such as:
- 1. Speed of torpedoes and the time until impact based upon drop range
2. Rate of fire of the ships anti-aircraft weapons
3. Torpedo bomber attack profiles
4. Effectiveness of AA fire
5. Radar effectiveness
6. Effect of hits upon ships
7. Damage control
Commonwealth and Japanese quotes and anecdotes narrate the battle and aftermath. The author offers critiques and praise for the commanders of the warships and the Japanese air commanders. Before the force sallied from England, the force commander, Admiral Sir Tom Phillips, was given a formal send-off dinner. Amongst the guests were those versed in the anti-ship capabilities of aircraft, including future Bomber Command commander, "Bomber" Harris, who tried to warn Adm. Phillips to take bombers seriously, 'Tom, when that first bomb hits, you'll say, "My God - what a hell of a mine!"' The flight commander leading the too-late fighter cover reported men in the water waving and cheering the fighters, when in reality they were jeering and booing the flyboys.
Obviously, Analysis and Conclusion explains the ramifications of the disaster. Not only was the Royal Navy eliminated as a threat to Japan's conquest of Malaya and Singapore, the balance of power across the ocean shifted from the big gun steel battleship to the aluminum airplane.
Photographs, Artwork, and Graphics
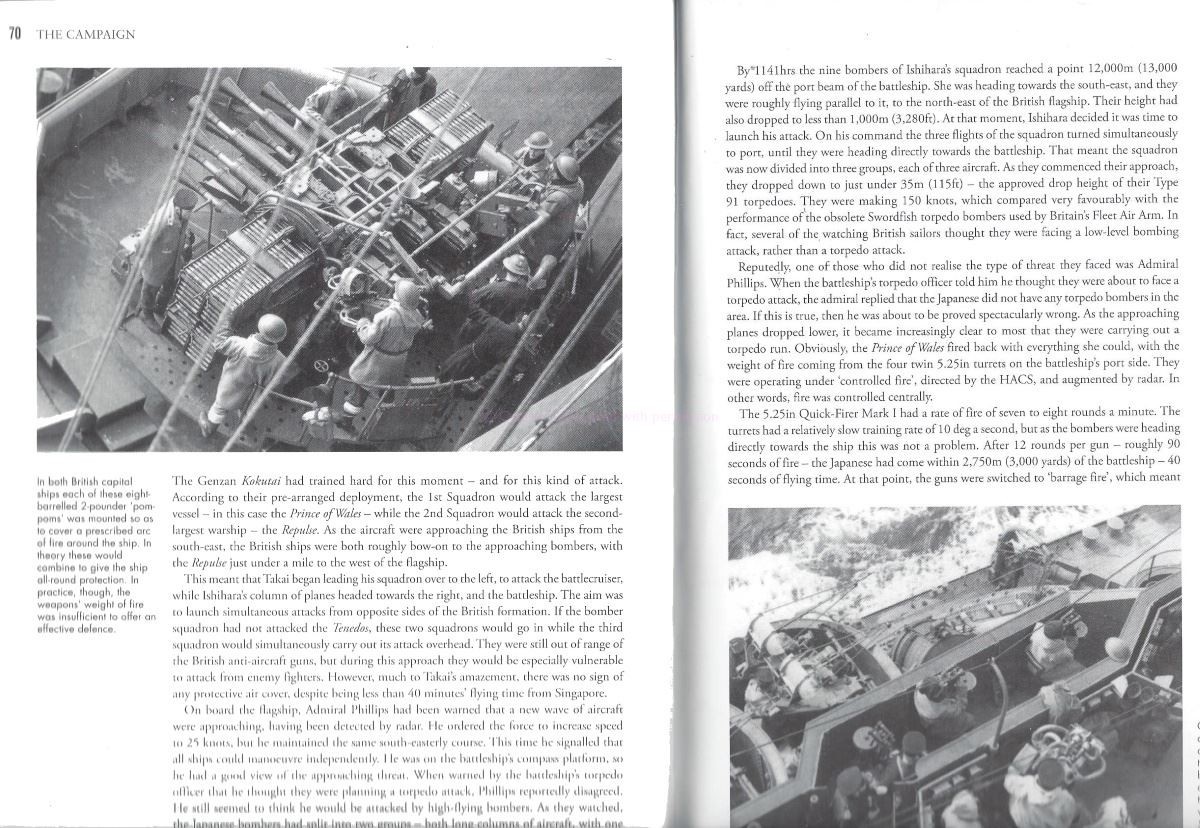
Photographs are found on most of the pages. They are a mix of warships, aircraft, key personnel, and specific weaponry. Several are in-action shots made during the battle- or at least the sinkings. As mentioned above, some of the captions are incorrect. Modelers can glean useful information fro the photos, specifically concerning the appearance of the ships before, and after their arrival at Singapore. There are some good images of the octuple 2-pounder "pom pom" anti-aircraft systems.
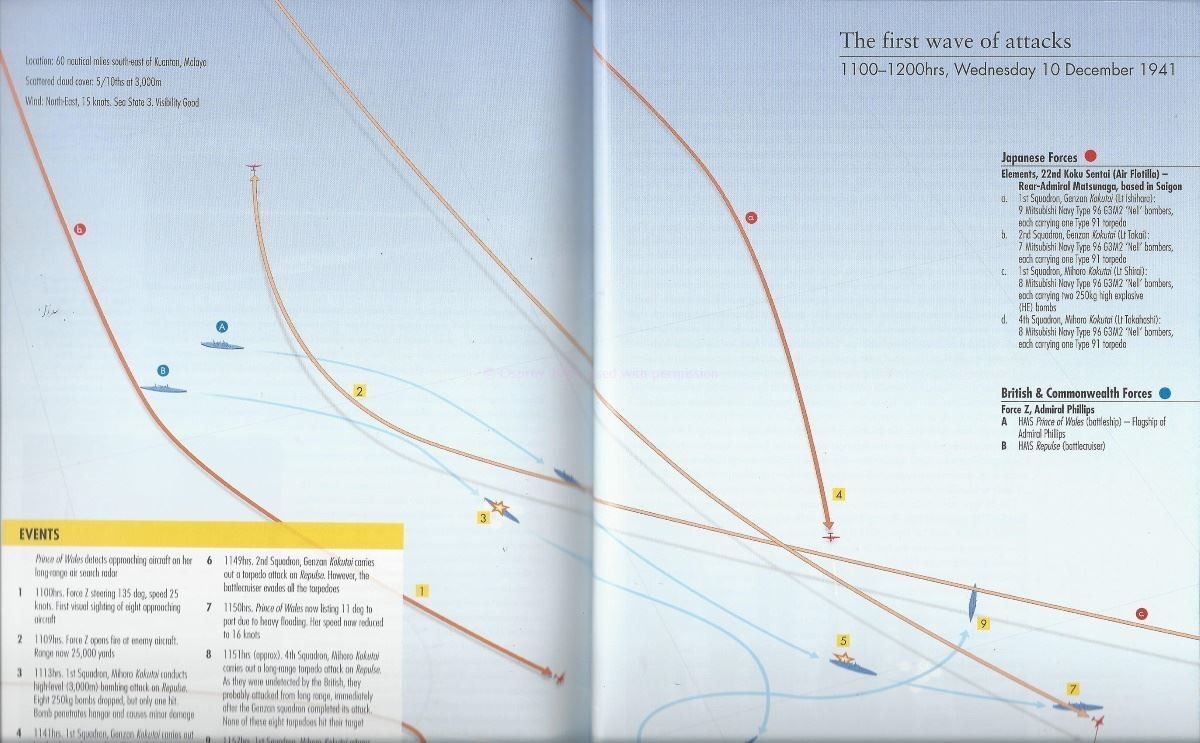
Artist Adam Tooby created several color illustrations for the book. Several bird's-eye views detail the complex and confusing aerial attacks upon the naval units, effectively helping the reader understand the events. I am a fan of maps to help orient the reader, and several maps are provided.
Artwork
- Hits to Prince of Wales and Repulse: two 3-quarter views of each ship showing both bomb and torpedo impact points, keyed to time of hit.
- Departure of Force Z from Singapore: in-action two-page scene of the ships entering open ocean.
- Prince of Wales under attack, early afternoon: in-action two-page Betty-eye view of Kanoya Kokutai Type 1 torpedo bombers releasing their fish at the battleship through flak.
- HMS Repulse under attack, late morning: two-page in-action waterline view of the battlecruiser under level bomber attack.
- First wave of attacks: bird's-eye view keyed to nine events; four Japanese units; the British ships.
- The second wave: bird's-eye view keyed to 11 events; five Japanese units; the British ships.
- Prince of Wales in profile and planform, line art showing layout and armor protection.
- Repulse, profile line art showing layout and armor protection.
- Force Z underwater protection against torpedoes: cross section of each ship showing torpedo bulges and internal compartments; keyed to 10 components and three types of barriers.
- Map: Operations in the Gulf of Siam, Dec. 8-10, 1941, keyed to eight events; five forces; airfields.
- Anti-aircraft defences of Prince of Wales and Repulse: 3-quarter color-coded views keyed to seven types of anti-aircraft weapons and seven types of sensors.
- Wartime diagram of King George V-class anti-aircraft defenses and directors.
- Attack techniques employed against Force Z: level bombing and torpedo bombing profiles; deployment and armament of bombers.
- Map: The strategic situation, South-East Asia, December 1941, Indochina, Siam, Malaya, Sumatra, Borneo - route of Japanese invasion forces, Commonwealth and Japanese airfields, landing beaches.
Tables
A. British Far Eastern Fleet, 10 December 1941: listing commanders; Force Z composition; Other Forces including squadrons, bases, deployments.
B. Japanese Naval Forces, Malaya Theater, 8-10 December 1941: five Japanese naval invasion forces and their covering forces, by ships, location, units, commanders.
C. Japanese Naval Air Units, 10 December 1941: four units with their commanders; aircraft; armament.
D. Important data for HMS Prince of Wales and Repulse:
- Laid Down
- Launched
- Displacement
- Length
- Beam
- Draught
- Propulsion
- Maximum speed
- Range
- Armament
- Armour
- Sensors
- Aircraft
- Compliment
E. Technical data Mitsubishi Type 1 G4M1 "Betty".
F. Technical data Mitsubishi Type 96 G3M2 "Nell".
These galleries greatly enhance the text by converting the written concepts into the visual.
Bird's-Eye View
Conclusion
For the cost of 18 airmen and 62,000 pounds of warplanes, the Japanese eliminated 76,000 tons of warships and 840 sailors. It also affected a seminal change upon any navy facing airpower, and an effect which lead to one of England's worse military disasters. Sinking Force Z 1941 provides a detailed story of those events. Osprey created an informative and inspirational account for modelers and historians interested in this campaign. Not only is the text detailed and well organized, the visual support is excellent. Whether one is only interested in the ships, or aircraft, or combinations, one will find plenty to help with modeling these subjects.
Unfortunately, the otherwise excellent potential of this book is marred by faulty technical information, as noted above. I am certain that Osprey will correct the errors for the next printing.
This is a story I have not read in detail and I was excited when Osprey announced the title. It has taught and confirmed things for me about the battle. I am enthusiastic about the book and recommend it.
Please remember to mention to Osprey and retailers that you saw this product here - on Aeroscale.