


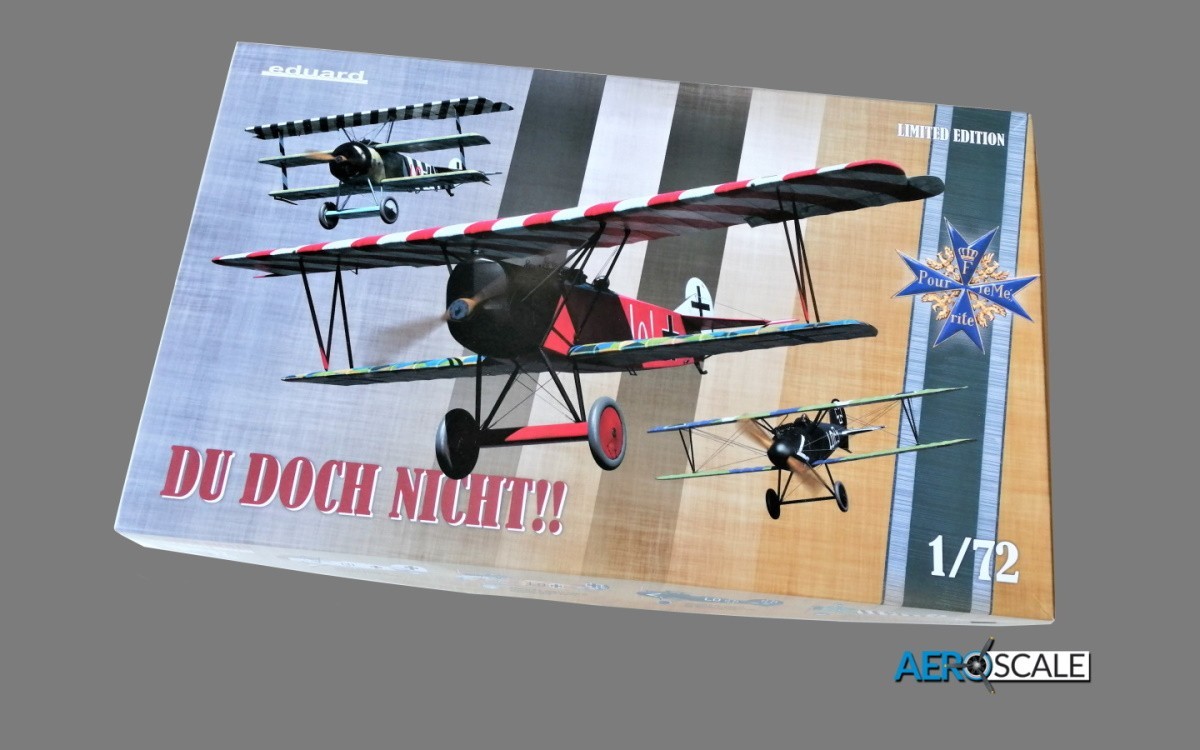
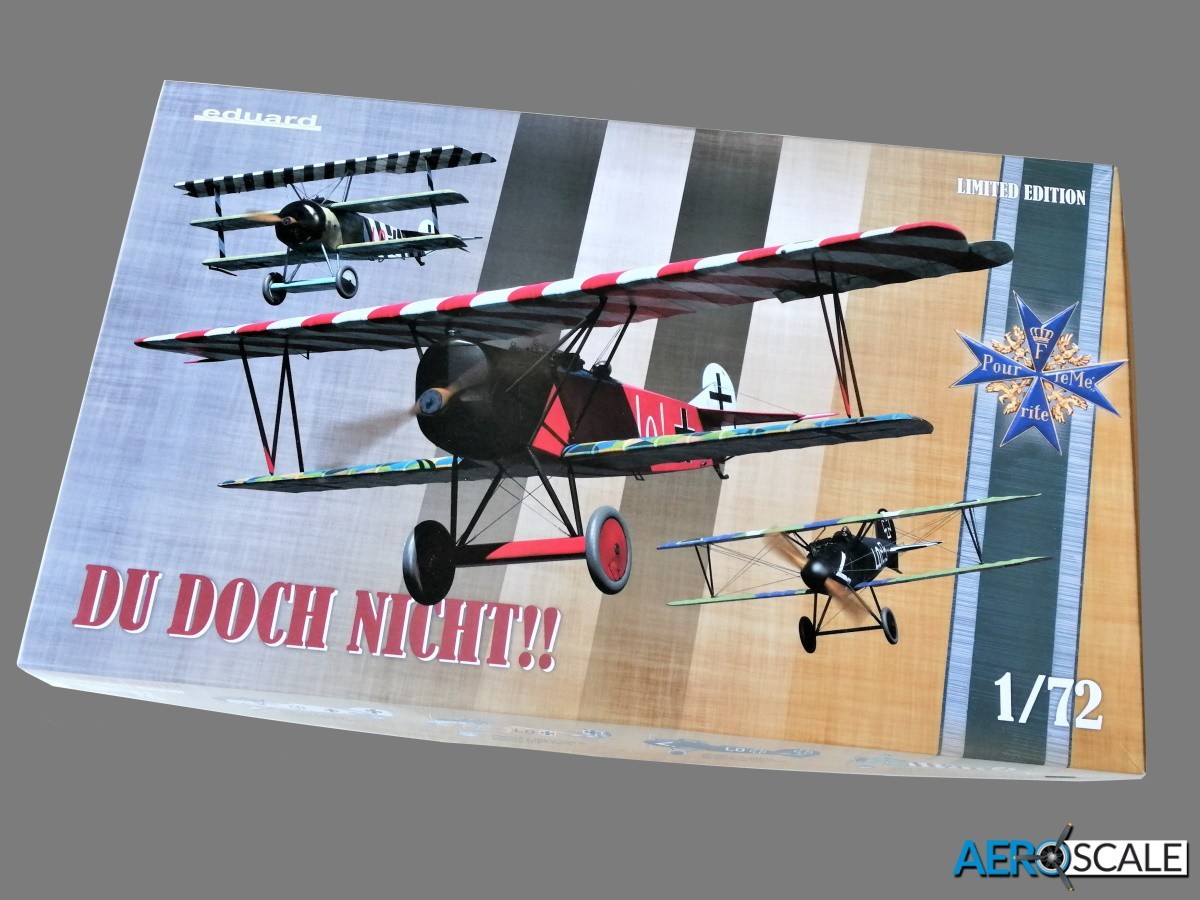
Du, Doch, Nicht is a tribute to Germany's highest scoring surviving pilot in World War I and recipient of the Pour le Mérite Ernst Udet. The 1:72 scale Limited edition features three of his mounts: the Albatross D.V/D.Va, Fokker Dr.I and Fokker D.VII. Eduards Albatross and Fokker Dr.I first appeared in 1999, the 1/72 scale Fokker D VII was initially released in 2019.
This Limited 1:72 scale Edition contains:
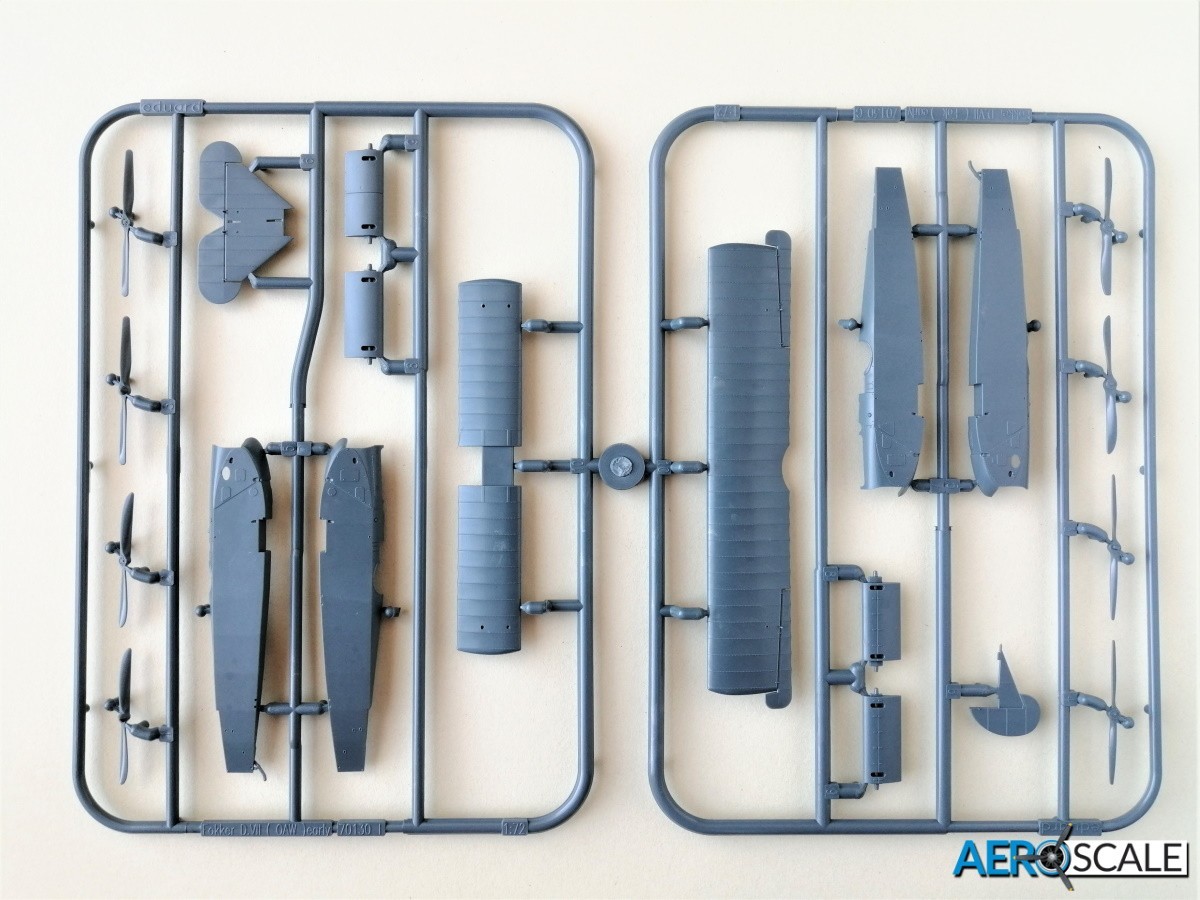
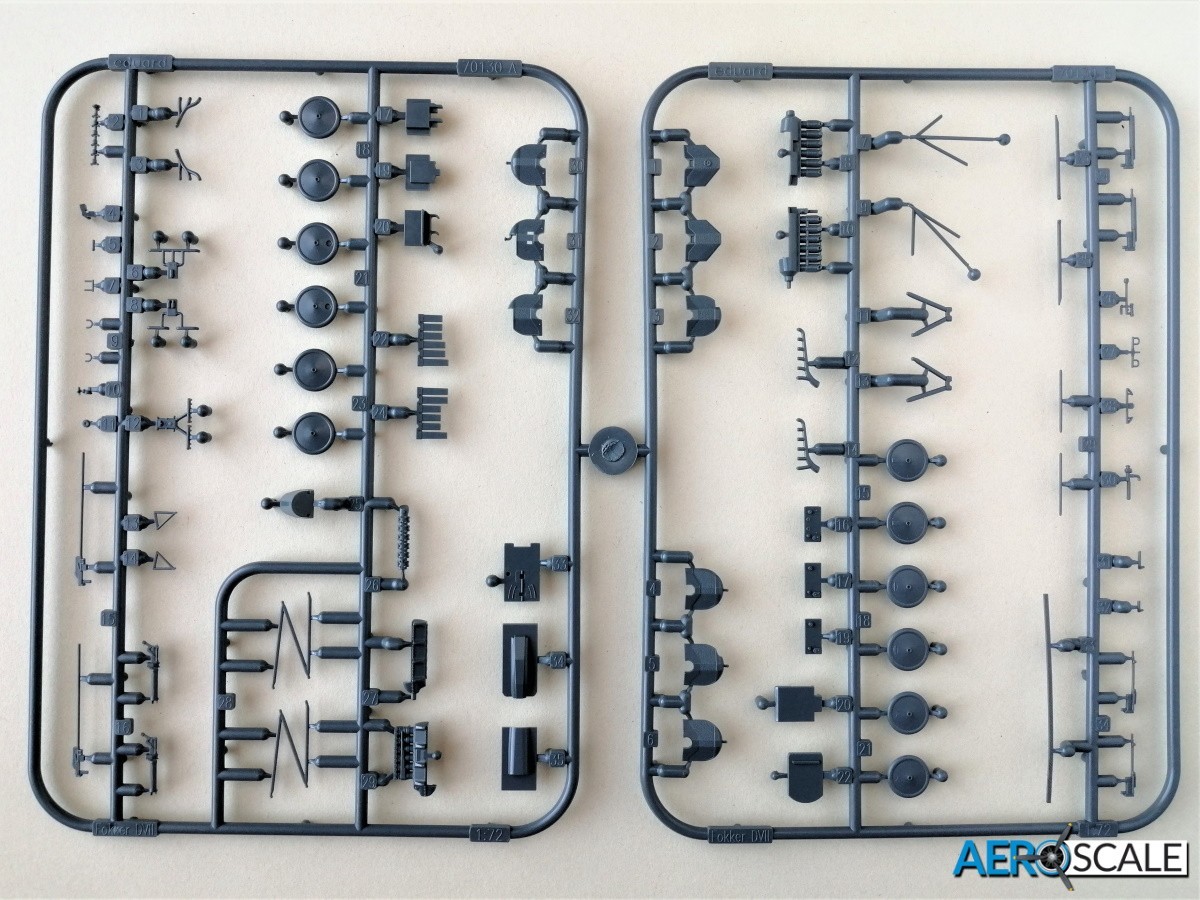
- 4 x Plastic Sprues
- 8 x Marking options
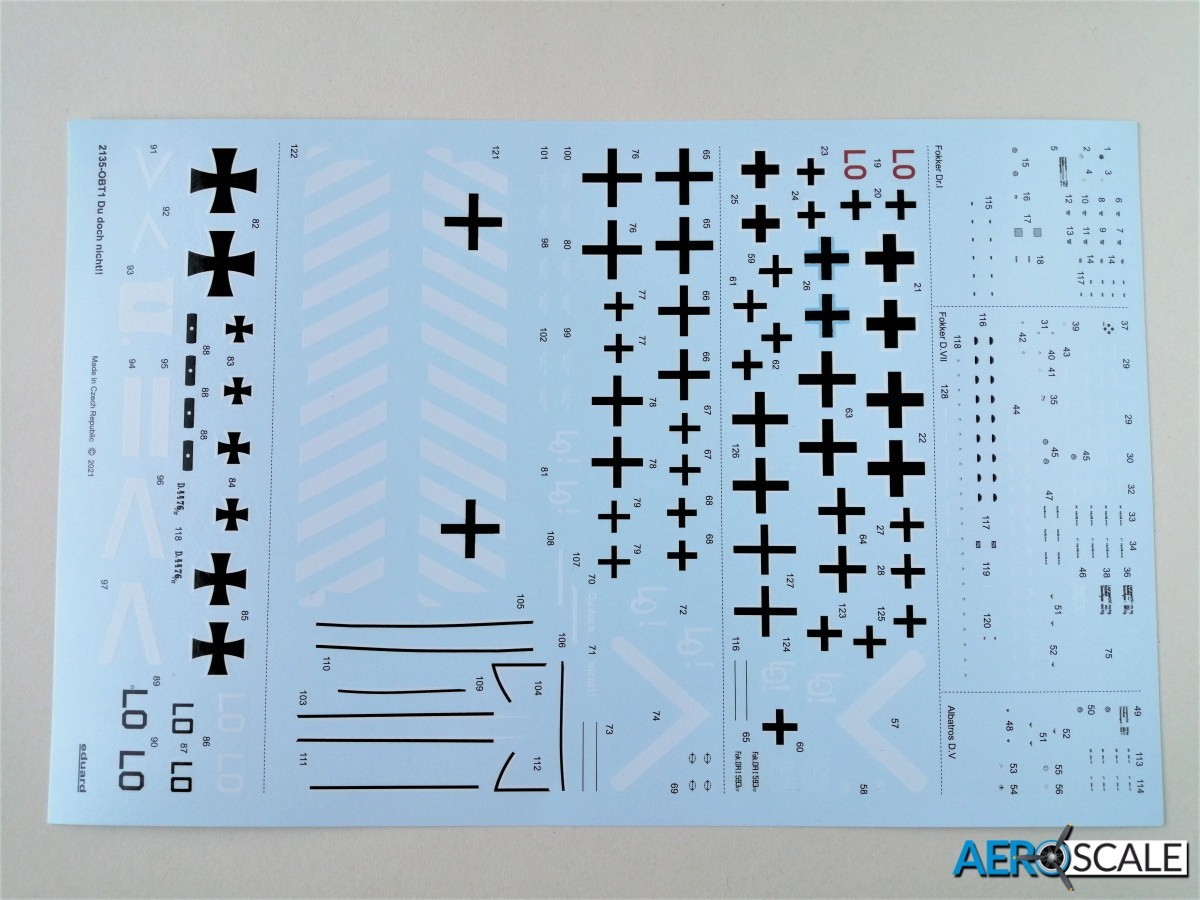
- 3 x Large decals sheets produced by Eduard
- 3 x Photo etched frets
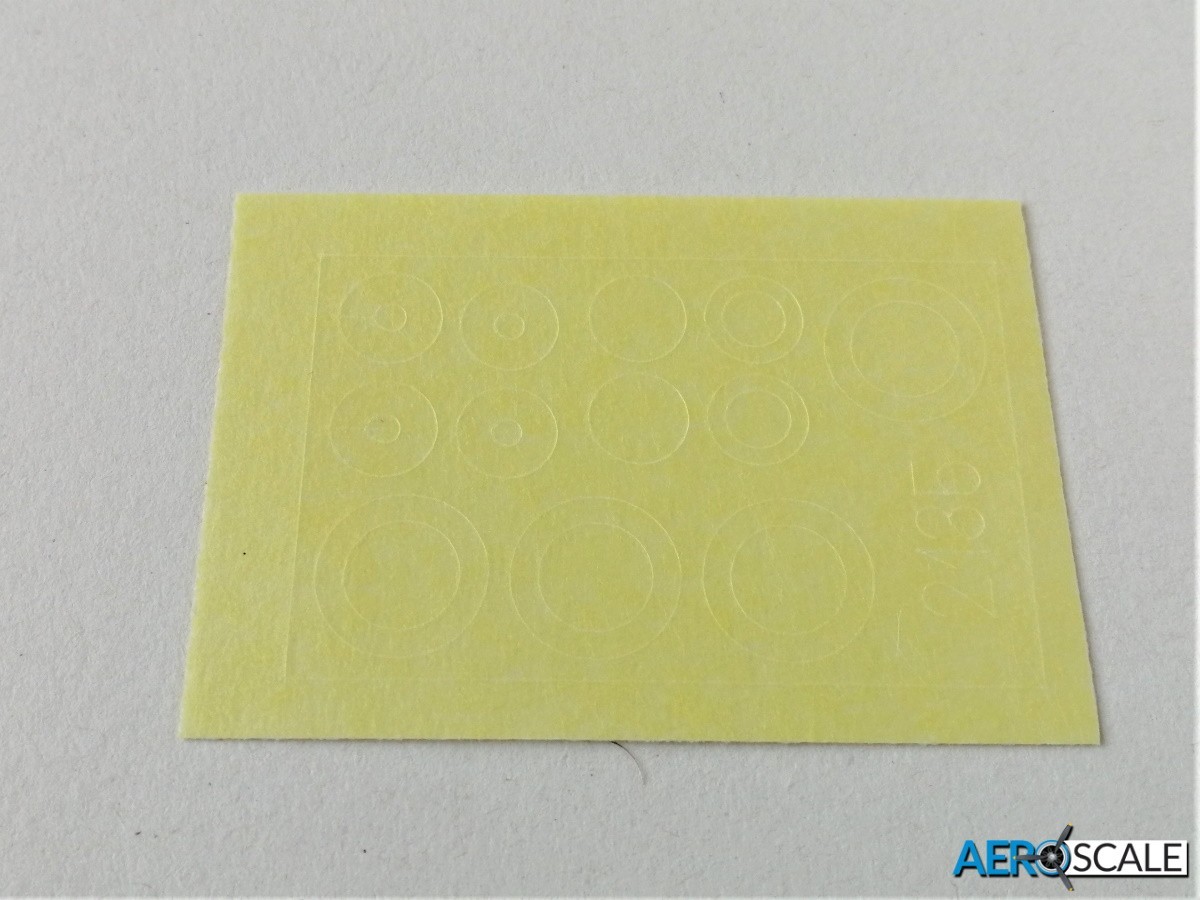
- 1 x Painting mask
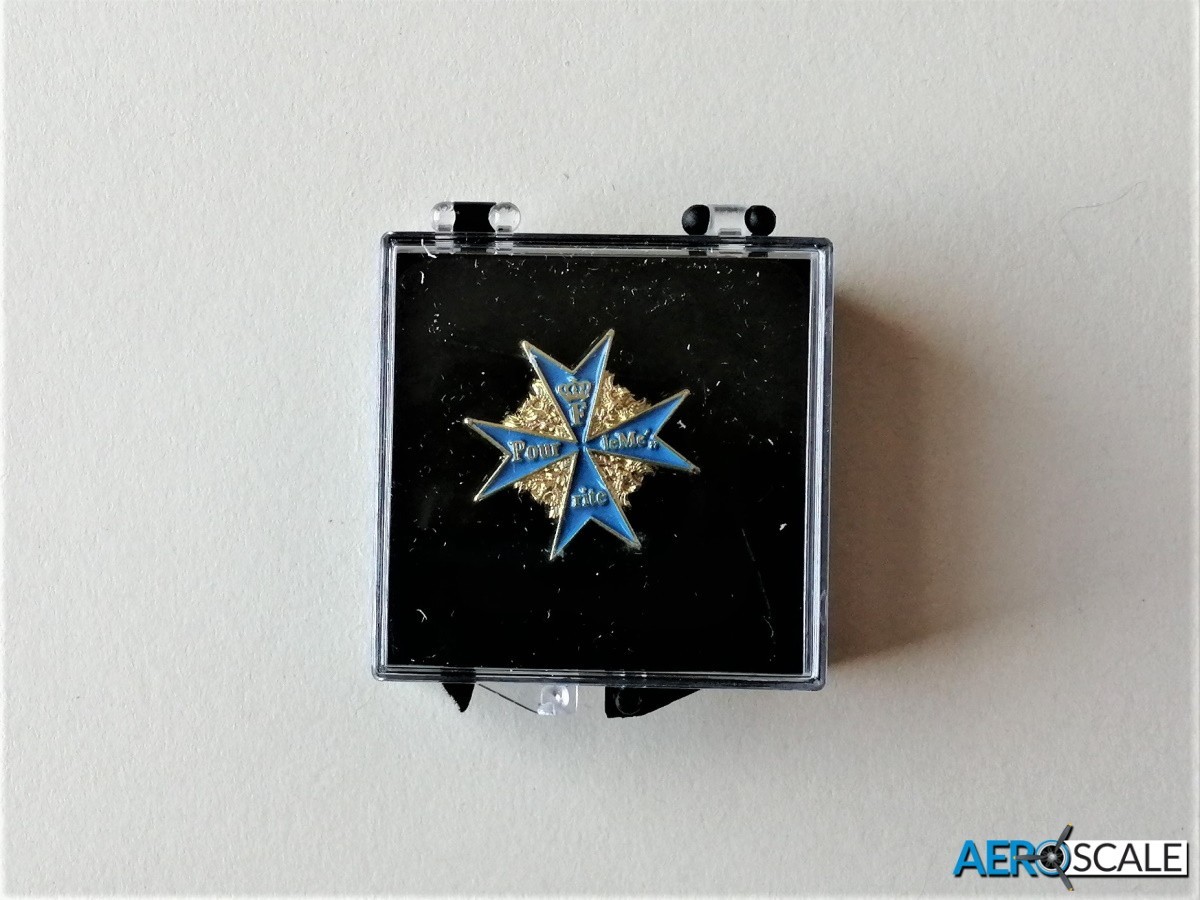
- 1 x Pour le Mérite pin
- 1 x Instructions
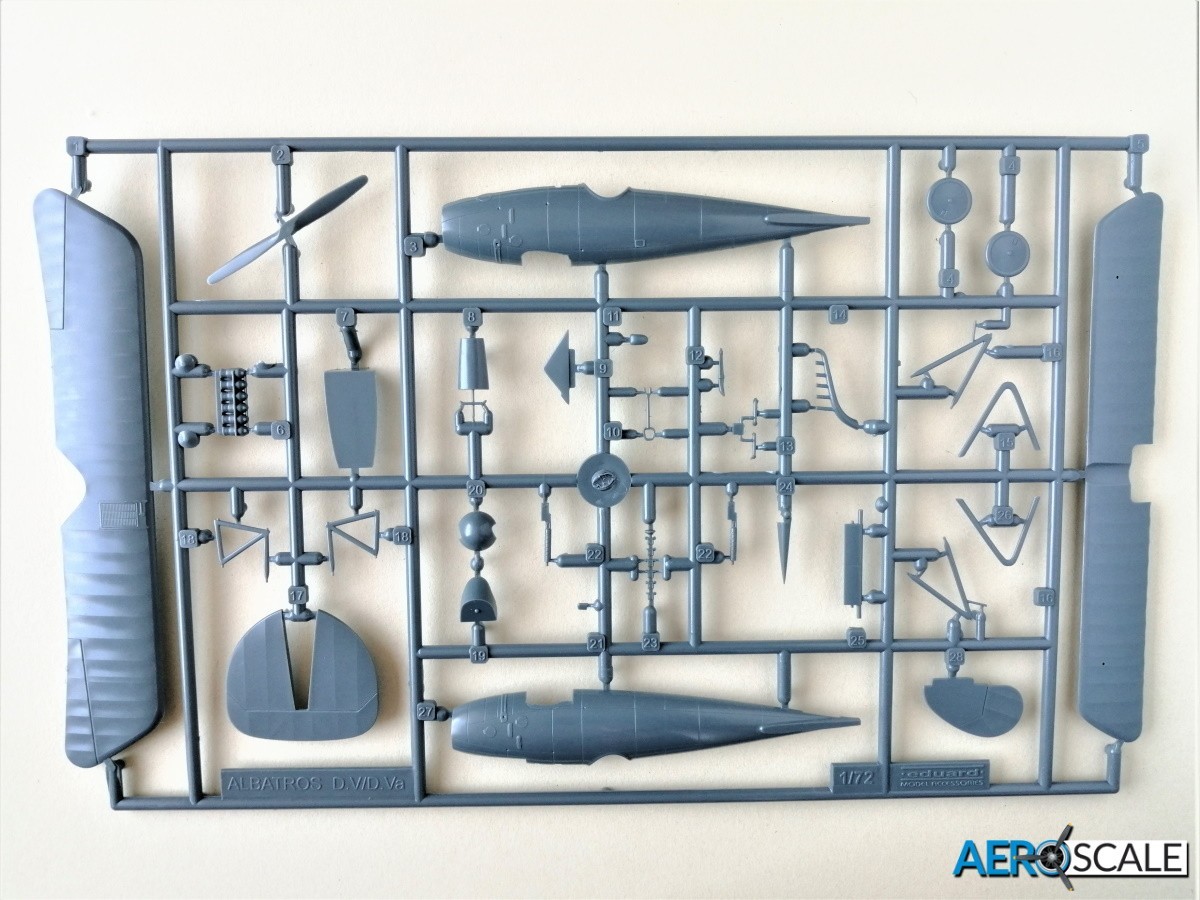
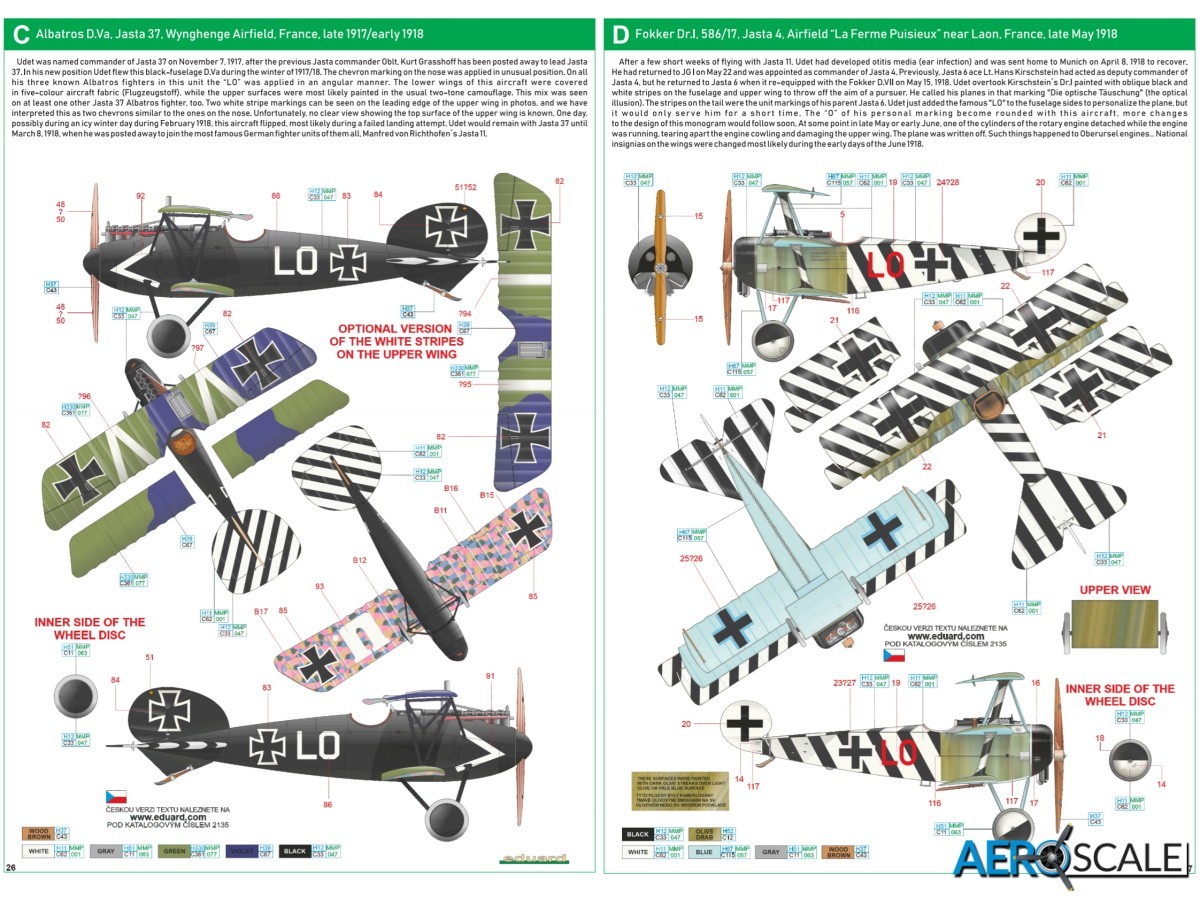
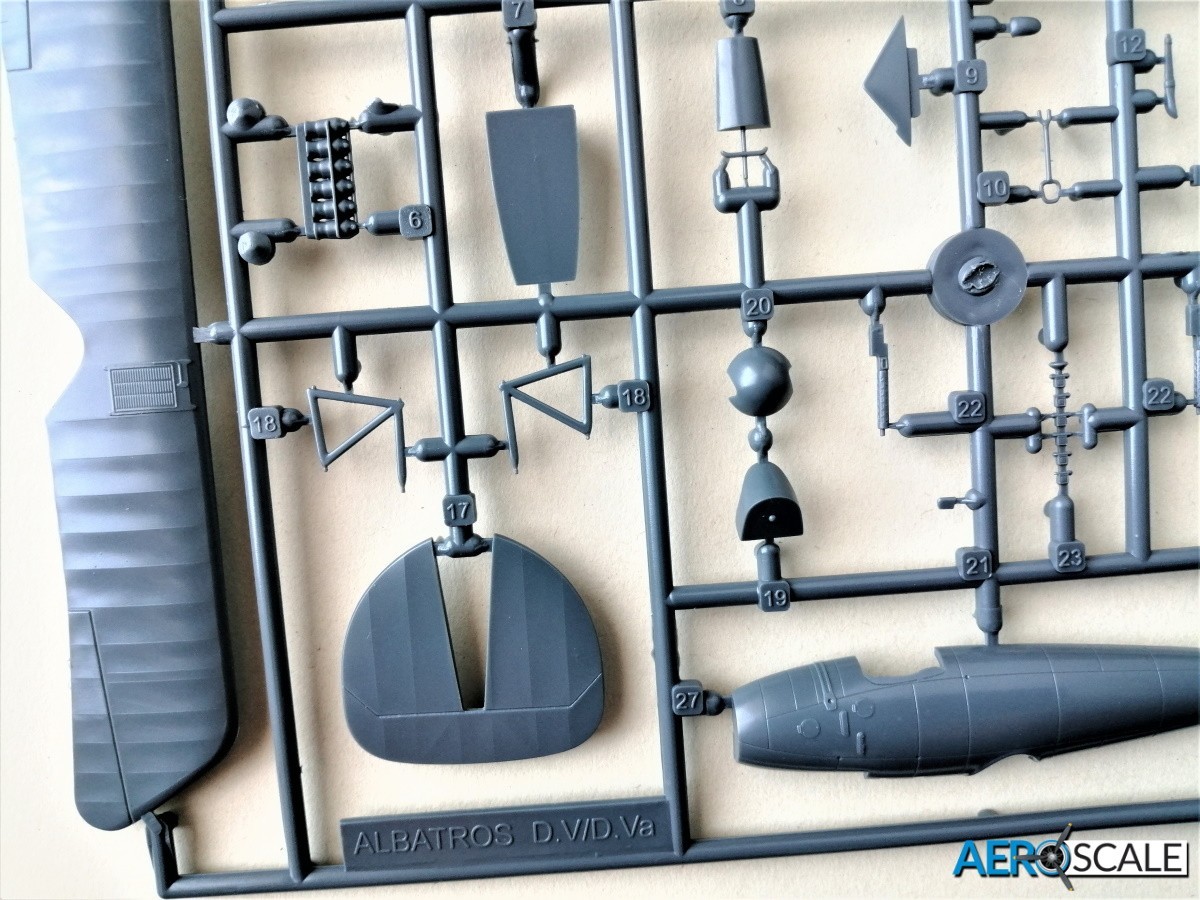
Albatross D.V/D.Va
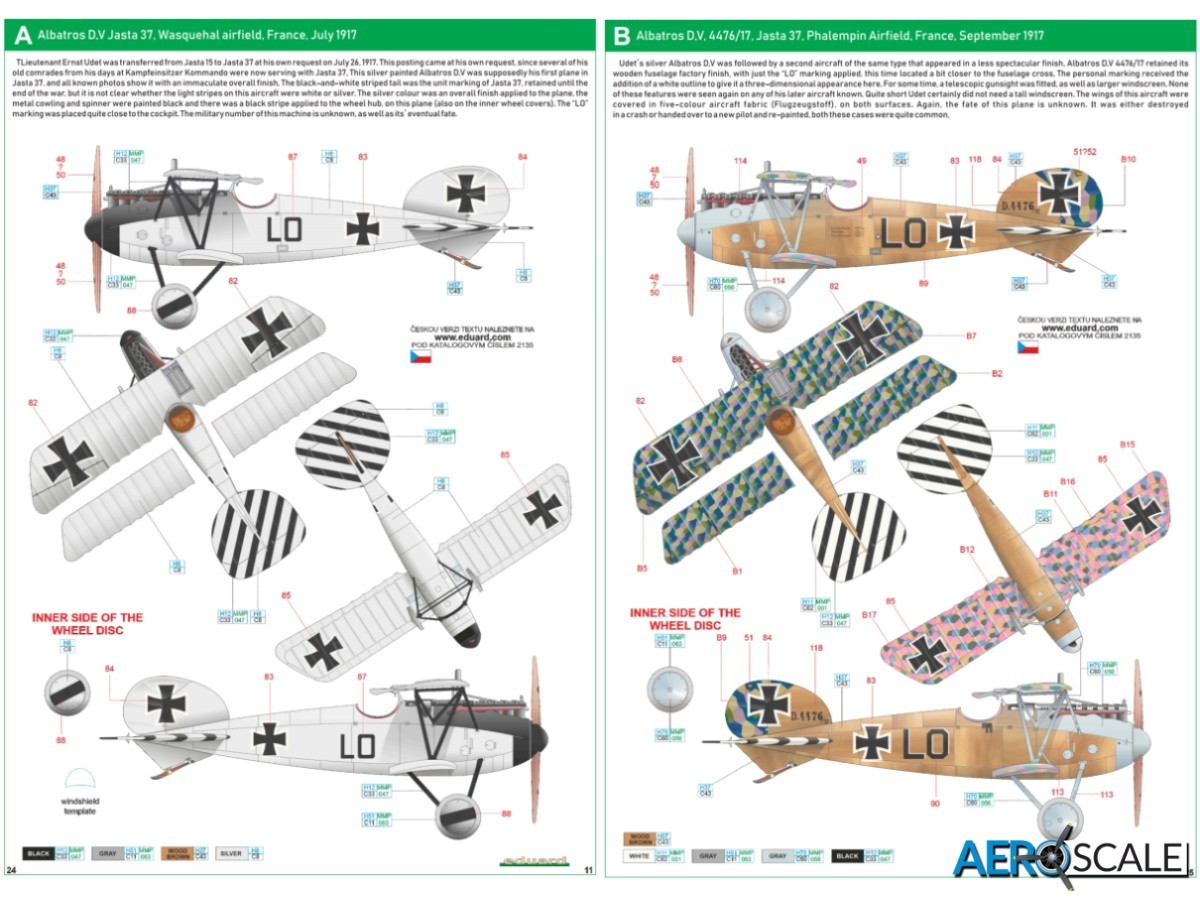
When the Albatross D.V/D.Va was introduced it was seen by many front line pilots as a step backward. Although it became the most numerous fighters produced by the Germans, its introduction was at the time when the Allies had much higher performing aircraft. After the WWI the Albatross D.V/D.Va was incorporated into many of the budding Air Forces emerging in Europe and served with them well into the 1920’s.
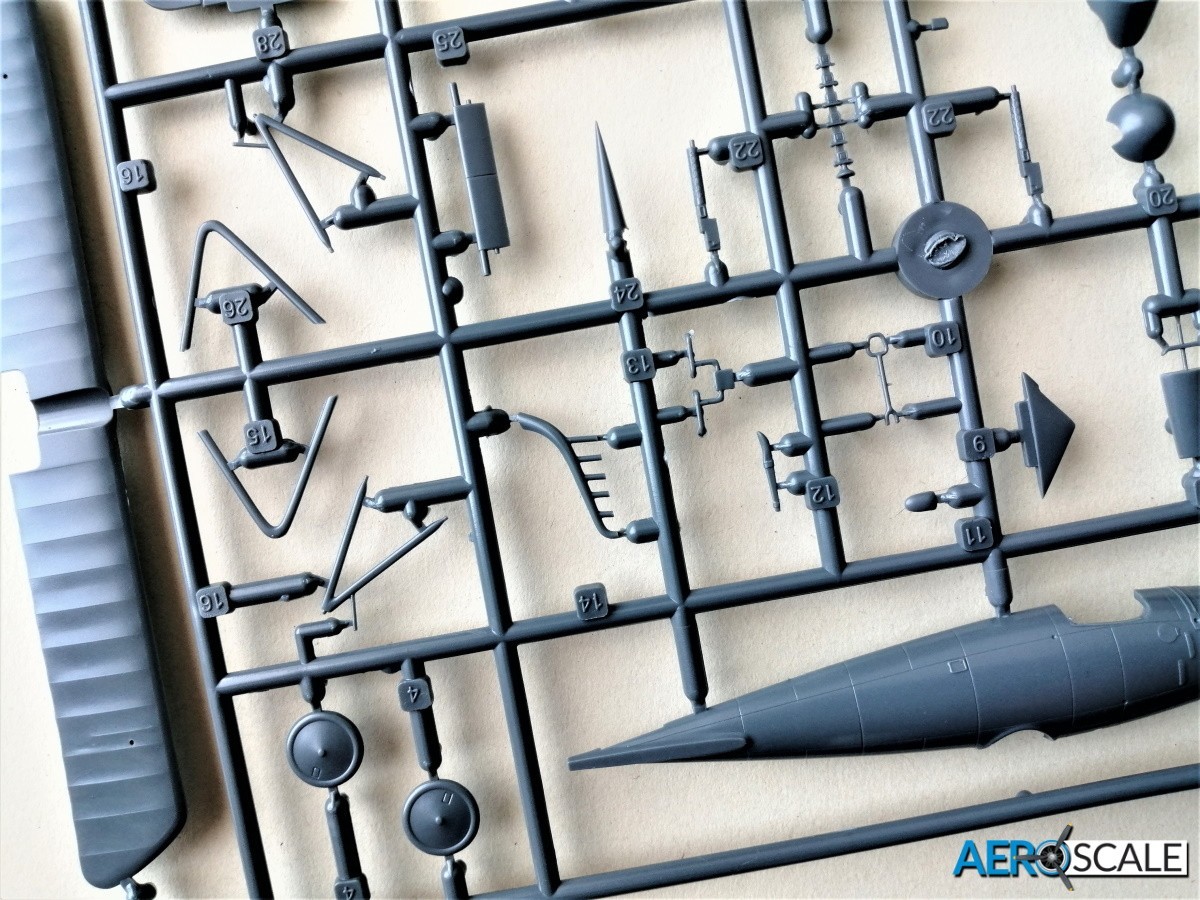
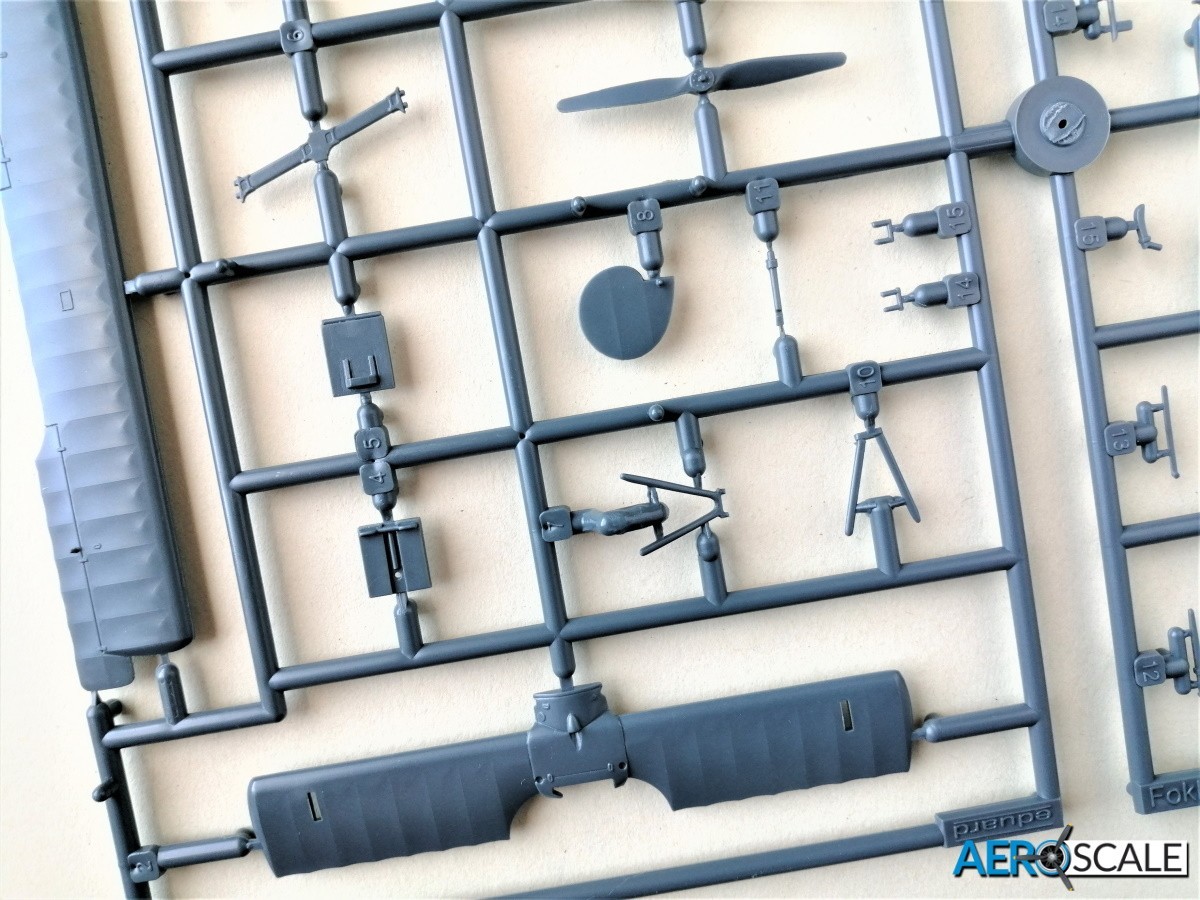
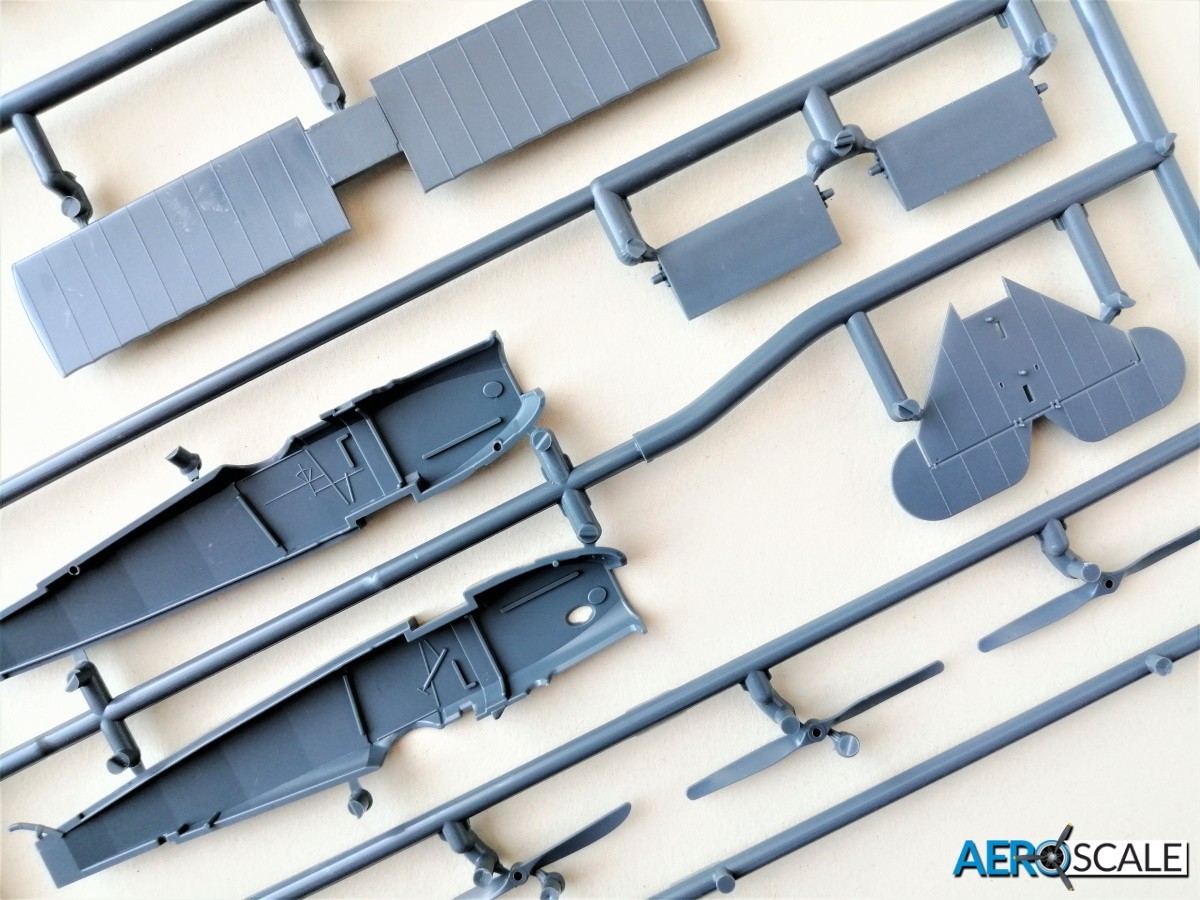
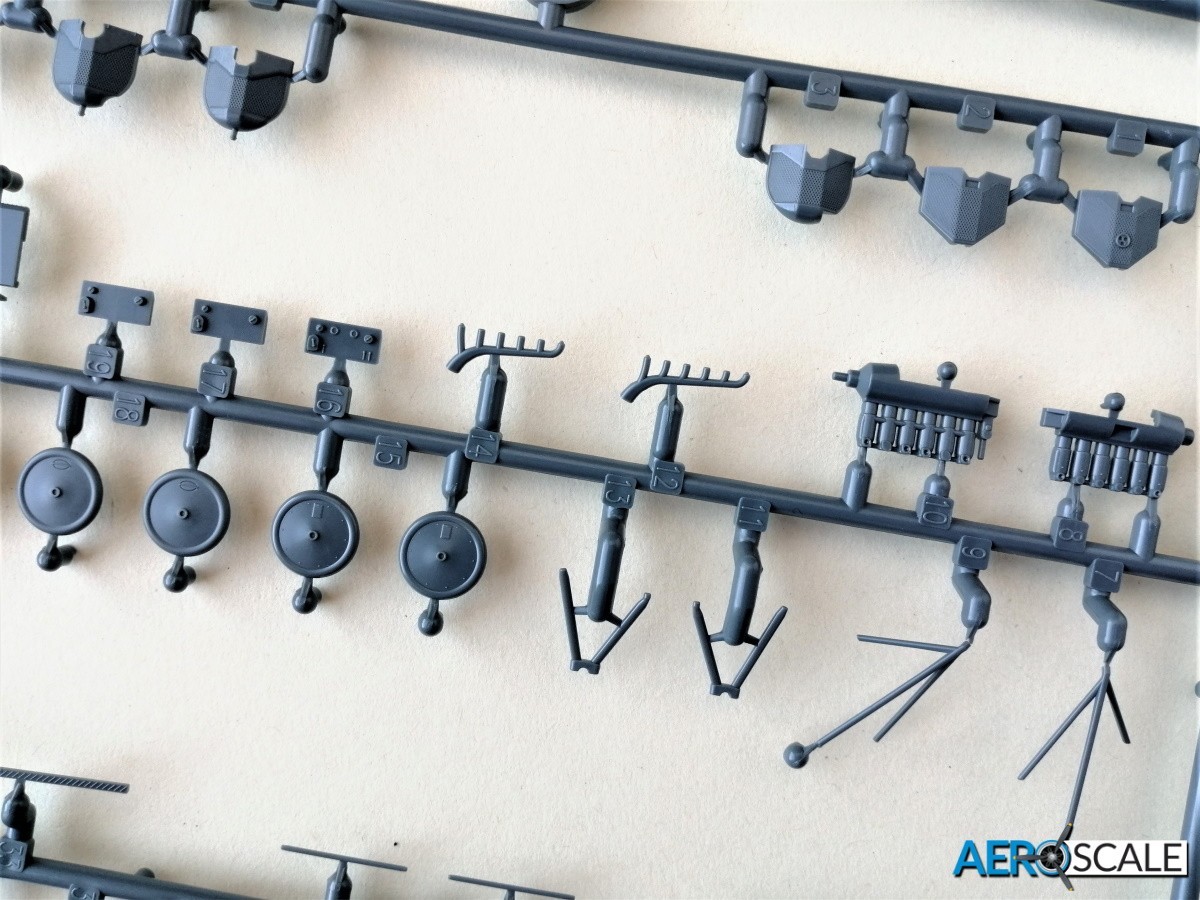
Just the one plastic sprue covers all you need to build the airframe. The shapely plywood fuselage is captured very well. The wings are both one-piece items, with the control surfaces integral to the upper wing. There is no sign of ejector marks on the surface. The upper wing has the shutters for the radiator made from PE parts. There is even a PE handle that operated its opening and closing. Photo etched parts takes care of most of the internal and some external detail. The only instruments included in the cockpit are the compass and fuel gauge, the latter situated by the air pump [not included]. The various handles [PE] for engine management are down to the right by the forward firewall and the PE fuel tank is to the left. There is a PE magneto and mixture lever on the left cockpit wall. The control stick, seat and the seat mount are plastic. There are pre-coloured seat harnesses and straps included. The cockpit floor is PE and by folding it also forms rear cockpit bulkhead. The interior needs to be painted as there is no decal to represent the plywood finish. The detail Eduard has included is not fully representative of the Albatross D.V cockpit, so you may want to address the shortcomings with some scratch building. The plastic two-part engine isn’t the most detailed, but the addition of the PE parts perks this area up. The machine guns have perforated PE sleeves, that need a gently rolling into shape. The plastic sleeved barrel needs to be removed. There are further PE parts to add including a sighted or none sighted barrel end and muzzle.
The instructions have a pretty good rigging guide. The three marking options offer some interesting paint challenges. The silver overall option ‘A’ and the black fuselage of option ‘C’ are probably the most straight forward, but still requires some careful masking on the tail to reproduce the black stripes. Option ‘B’ requires you to reproduce the look of varnished plywood.

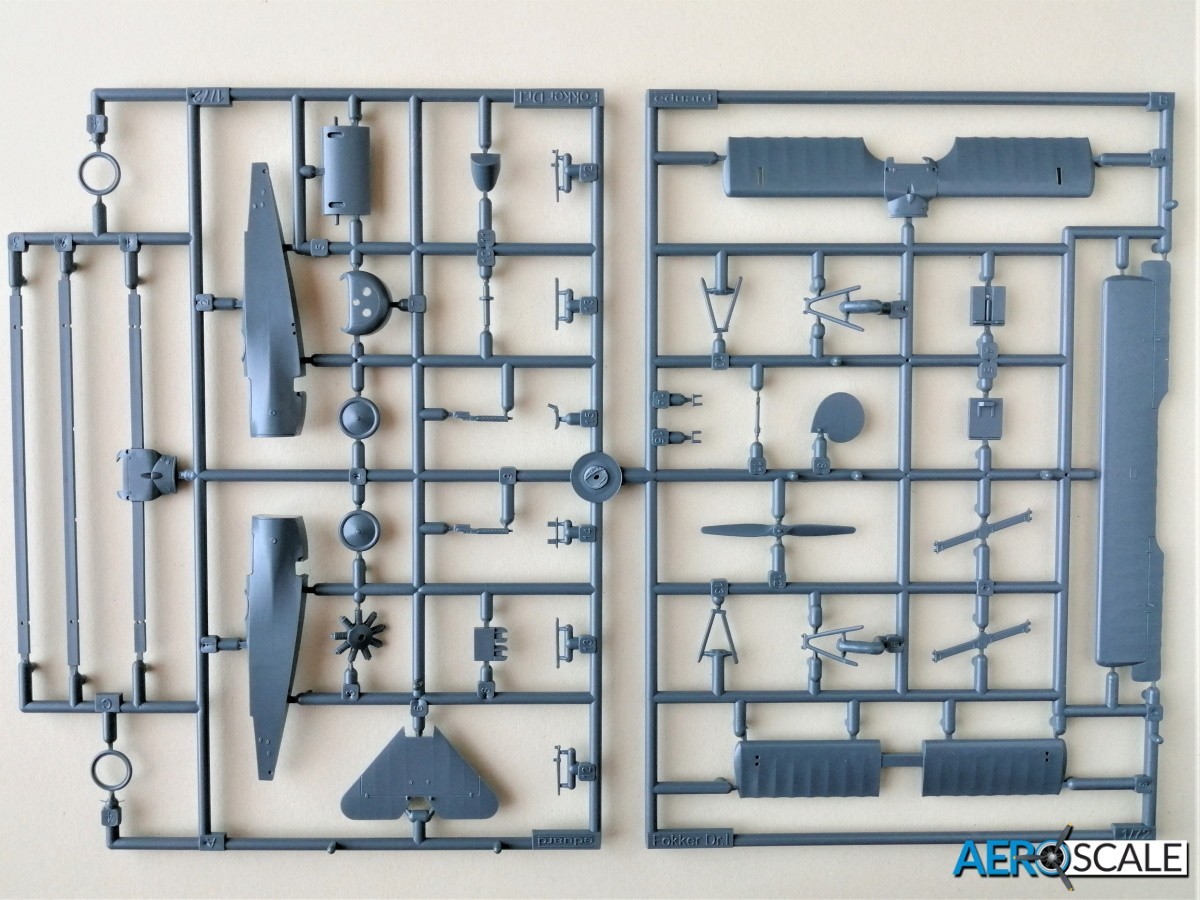
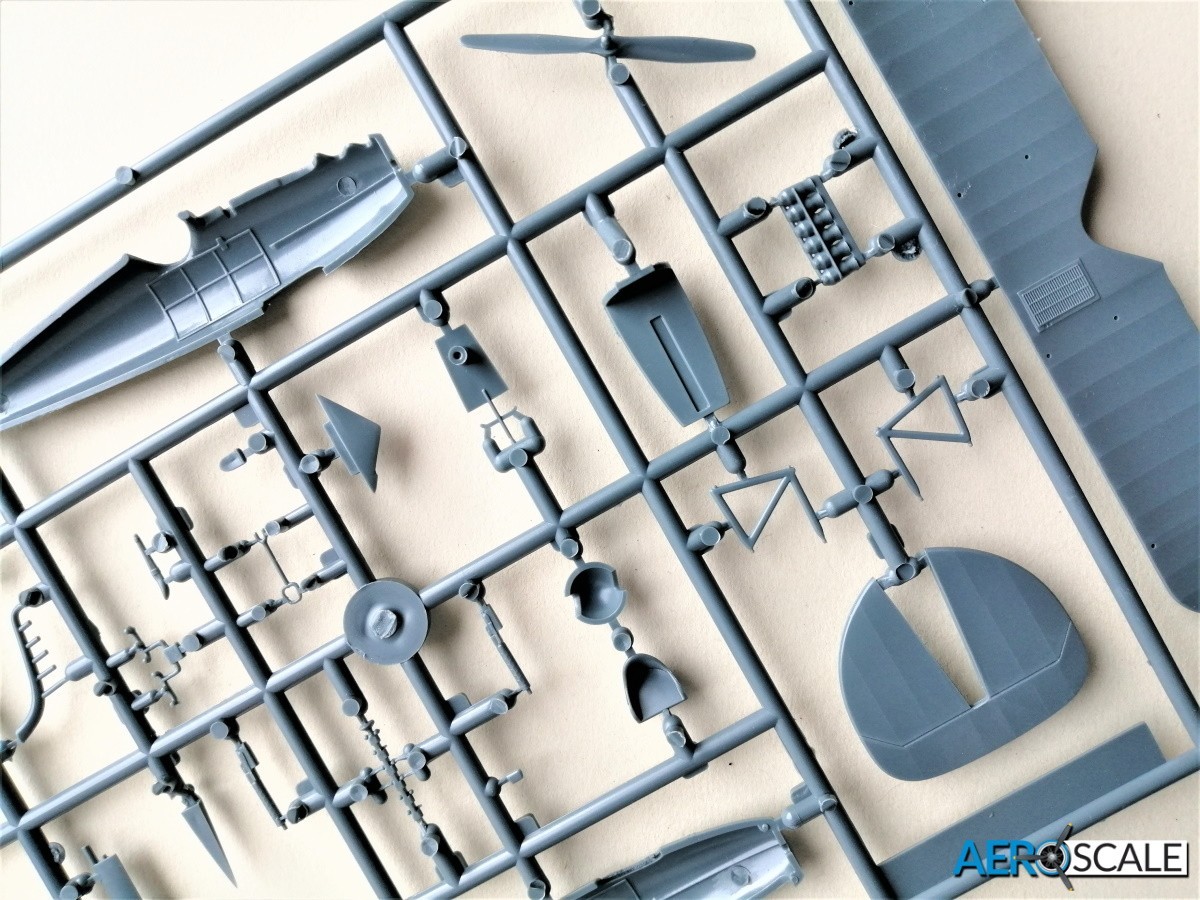
Fokker Dr.I
One of the more distinctive aircraft flying over the battle fields of northern Europe during WWI. It may have not been the fastest aircraft of its time but it certainly was highly maneuverable.
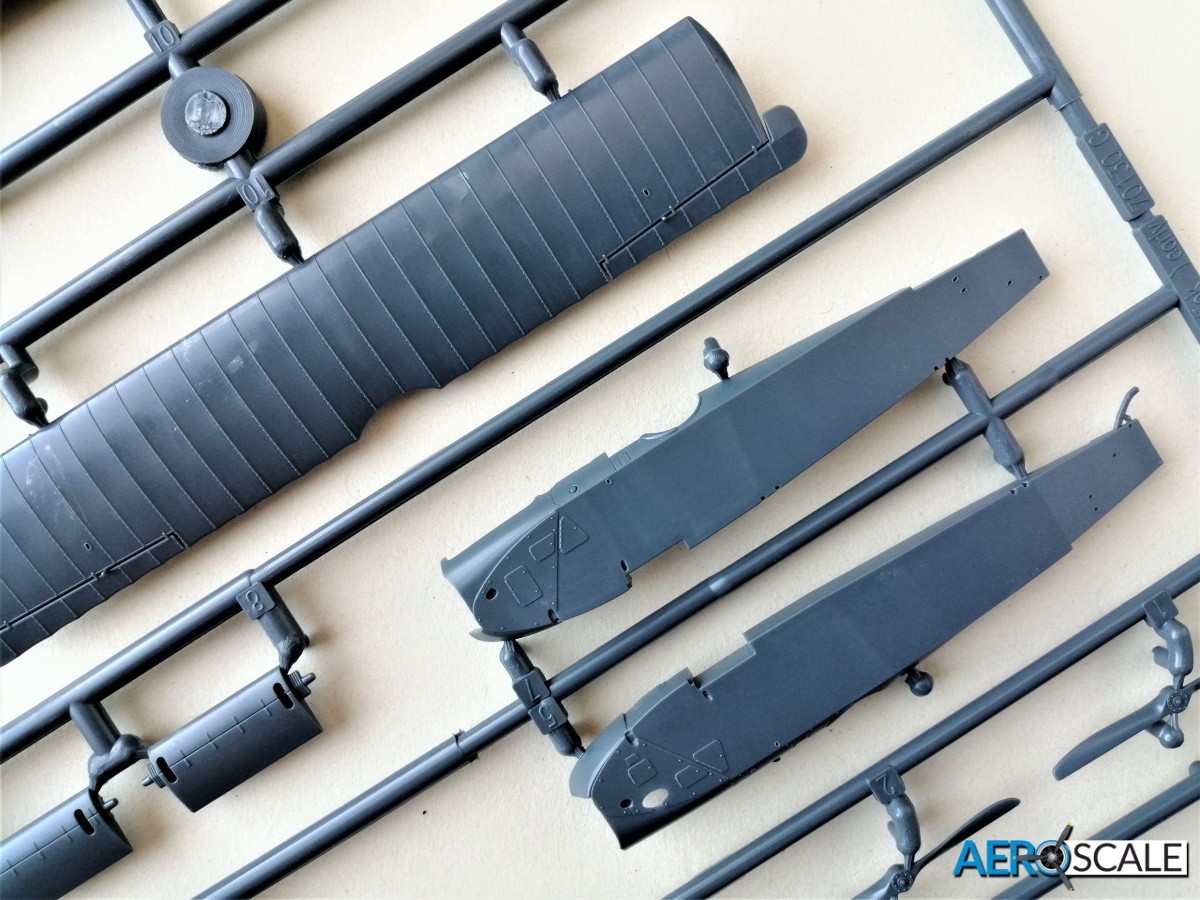
The internal frame work in the cockpit is represented in PE. Some of the internal plastic detail needs to be removed. The frame itself is very delicate, but it just needs folding to form the frame. There is an air pump and compass to add to the right and a mixture control to the left all PE items. The runner board is plastic and the control stick a rudder pedals are all made up from a one-piece PE part. The rear wall is plastic and the seat is PE supplemented with pre-coloured PE harness and straps. Even though there are only a few instruments in the cockpit. There are no decals for the cockpit walls so these need to be painted. The PE perforated machine guns jackets need to be gently rolled into shape. The plastic sleeved barrel needs to be removed.There are further PE parts to add including a sighted or none sighted barrel end and muzzle. A decal is placed between the two guns representing the fuel gauge. This is by far the fiddliest bit of the model, particularly in this scale. The rest of the airframe is a lot more straight forward to construct.The two lower wings can be attached to the fuselage and the interplane struts can be pushed through the middle wing. Then the upper wing is attached after fixing the cabane struts in place. Even though each wing is one piece there is no sign of ejector marks. The vertical tail is one piece as is the horizontal tail. There are plastic horns on all the control surfaces and these can be removed and replaced with PE parts. The rotary engine is designed to rotate with the prop. There are a couple of PE parts to further detail the engine. The one-piece prop has a PE boss plate. Undercarriage looks straight forward, there are paint masks for the hubs of the one-piece wheels. Finally, there are the wing tip and tail skids to add as well as the horizontal tail bracing. The instructions include a brace guide for the undercarriage and on the cabane struts as well as for the various exposed control cables.
Udet considered the Dr.I a temporary mount until the acquisition of the D.VII. So there are just the two marking options. Both feature the dark olive-streaked effect over light blue. Option ‘D’ ‘die optische täuschung’ features black and white stripes on both sides of the upper wing, tail and on the upper and sides of the fuselage. There are no decals for these so some careful masking is required.
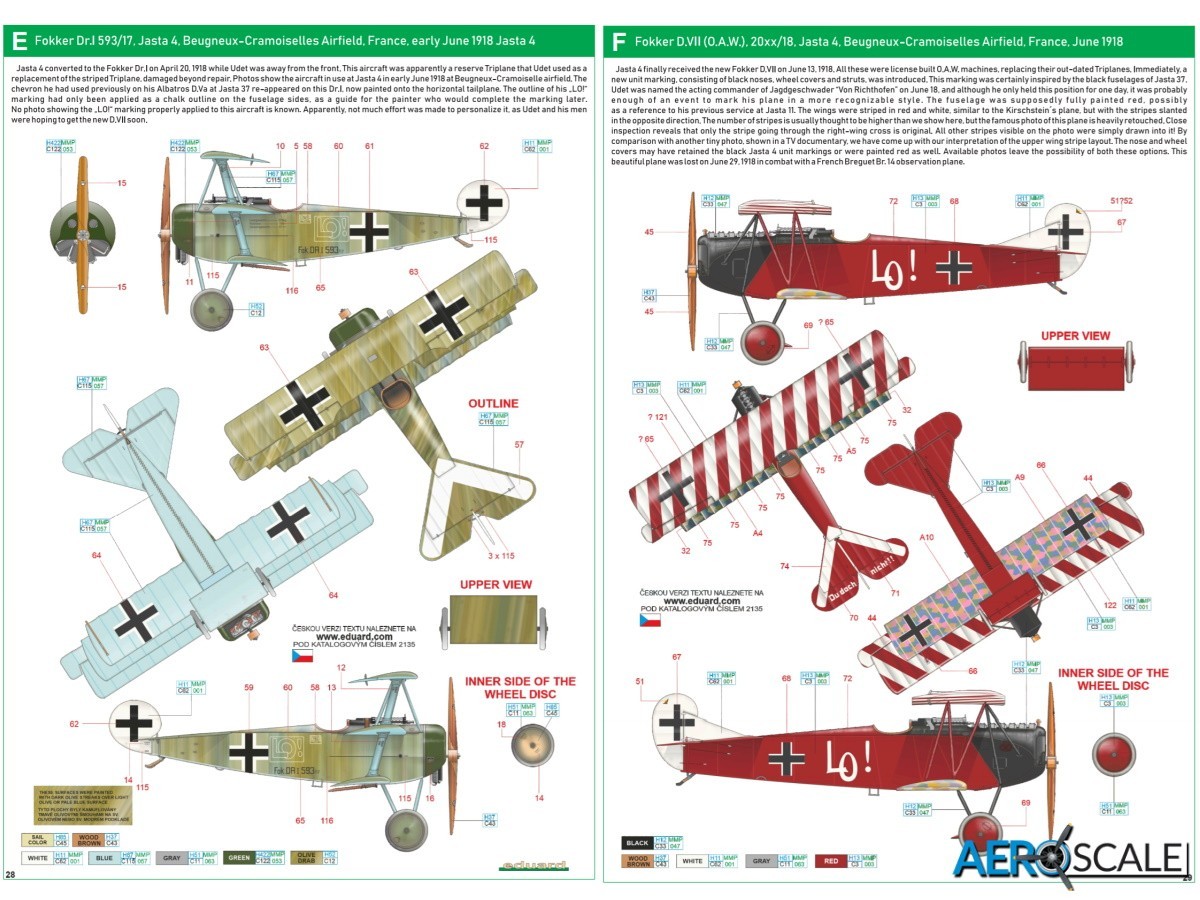
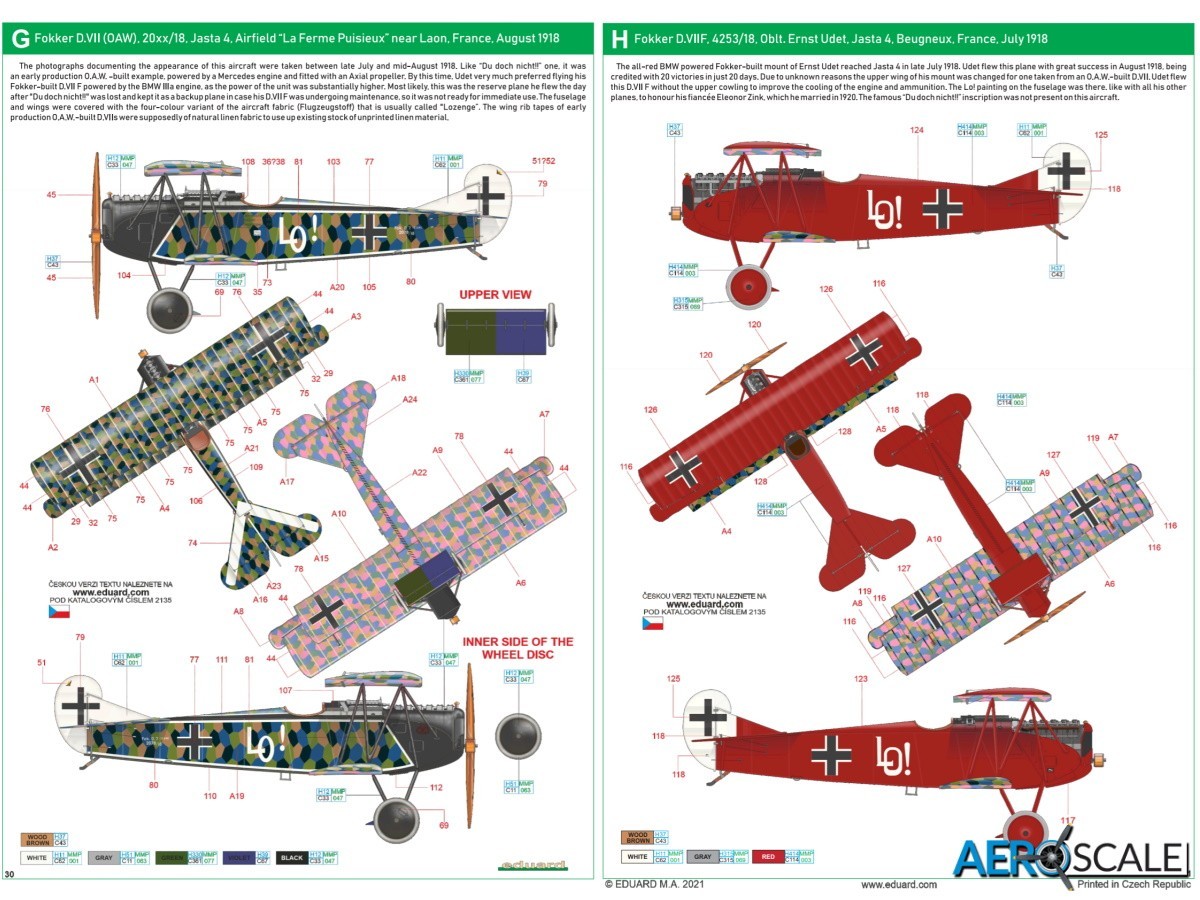
Fokker D.VII
Inspectorate of the Germany Flying Forces (Idflieg) decided to invite a number of aircraft manufactures for a competition to decide the next choice of fighter aircraft.Fokker entered a few aircraft, but it was the two cantilevered prototypes V.11 and V.18 that garnered widespread approval from the pilots. Unsurprisingly the Fokker was deemed superior to the aircraft entered by Albatross and Fokker received an initial order for 300 D.VIIs, followed by four more contracts amounting to 1.000 aircraft. Production capacity was not deemed sufficient at Fokker to fulfil the demand, so ironically Albatross and its subsidiary O.A.W.were ordered to take up the slack.
The strength,handling, speed and durability of the new Fokker immediately impressed front line pilots. In late June 1918, the first batch of BMW IIIa powered Fokkerv VIIF reached the front. The engine was a significant improvement in performance over the Mercedes D.III. The D.VIIs were beginning to rule the air on the western front and the Armistice came just in time for front line Allied pilots.
Many D.VII's survived the war, and served with many air forces well into the 1930’s. It became a star in many action movies inspiring many future pilots.
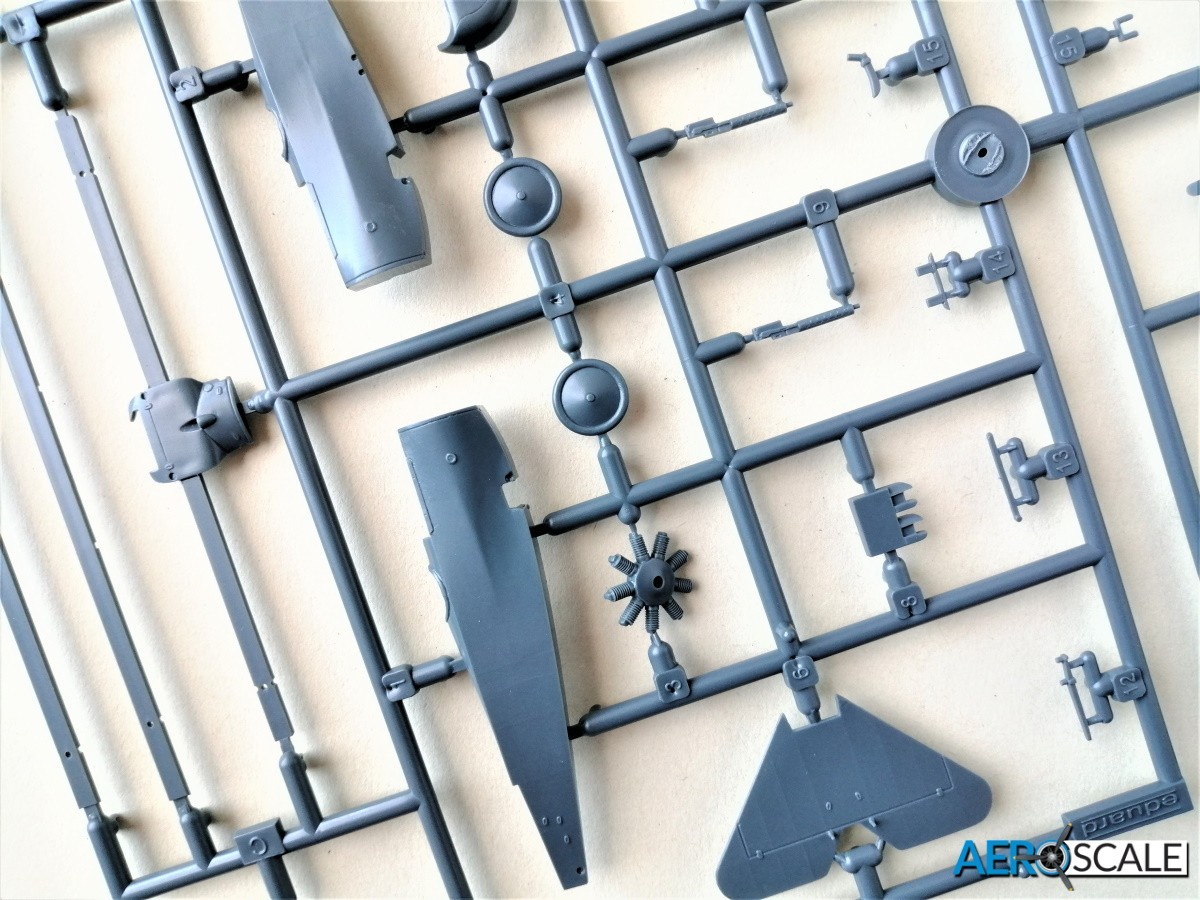
The cockpit is built up from a mix of plastic and photo etched parts or decals. The cockpit walls have two small decals with the polygon pattern. There are around eleven plastic parts and nine pre coloured photo etched [PCPE] parts that make up the cockpit area. The primer pump requires you to find a 0.5mm dia length of plastic rod. The handle is supplied as a photo etched part. There is a primer moulded onto the right-hand wall of the cockpit which needs removing as this will be covered by the decal. The seat has some cushioning detail including leather tension buttons and there are PCPE set harness included. The instructions provide plenty of colour references for the inside of the cockpit and you will have to recreate the look of plywood on the floor.
The pair of MG 08/15 or ‘nullachtfünfzehn’ included can be fitted with a photo etched [PE] perforated cooling sleeve. This will require you to lightly roll the PE sheet into a tube to fit around the gun barrel. If you can’t bare the thought of doing that then there is a plastic sleeved version included. The cartridge ejection chutes are separate parts.
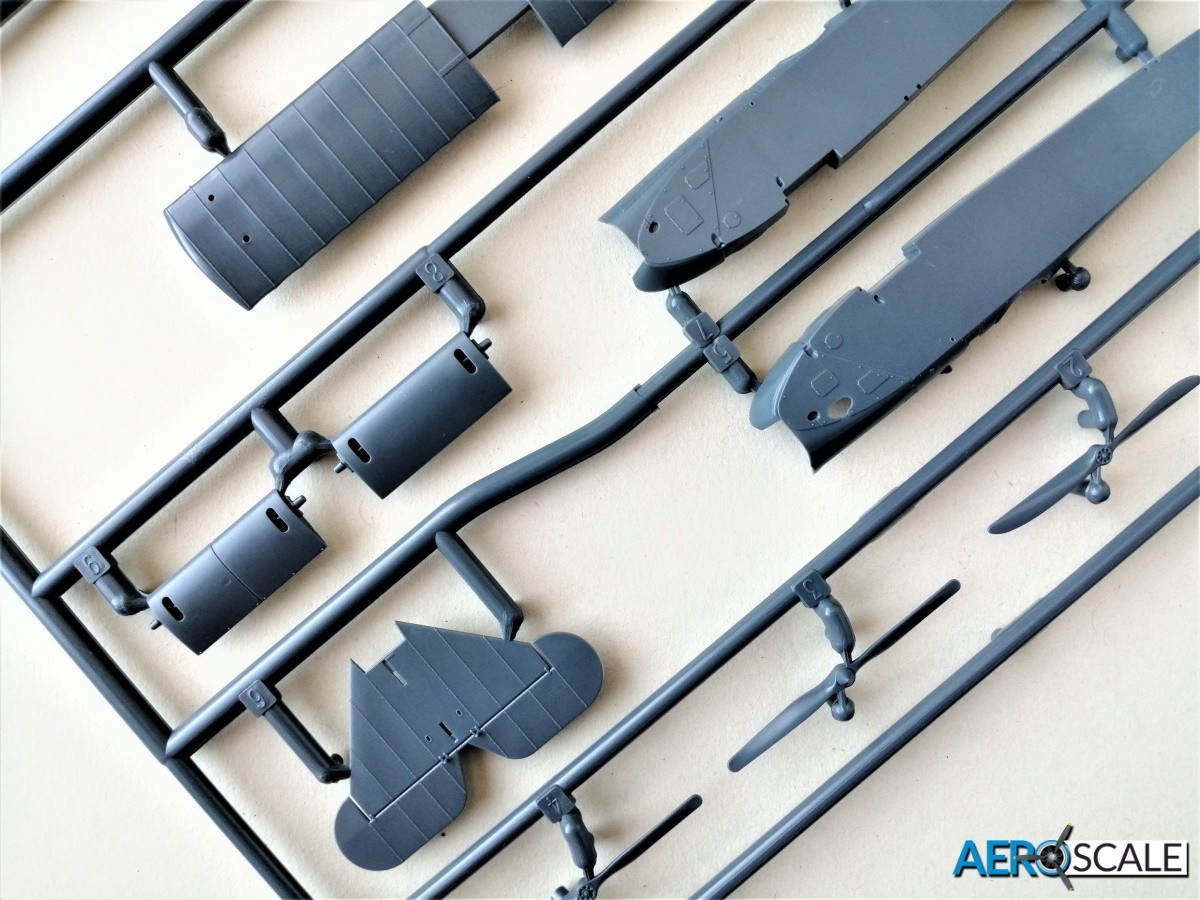
Eduard provide two different fuselages to cover two of factories that produced the aircraft: Fokker and OAW. The Fokker built option[H] has cut down nose around the BMW engine.
The plastic versions of the two power units: the MercedesD.III and the BMW IIIa look pretty good, although Eduard do resin replacements.It does take a few moments to work out the differences in the build of the engine. The cylinder block is the same, but the exhaust manifold and exhaust pipes are different. While we are in this area you become aware of the differences in look of the Fokker over time. There are two nose variations and this is accomplished by removing and adding parts as well as the filling in of one of the ports. The plastic radiators are exquisitely detailed, but there are even better-looking PE replacements. There are a couple of PE panels for the area around the engine. The detail is superb and they need to be formed into shape. Surgery is required to remove the plastic parts that the PE items replace, but this will be well worth the effort for the extra detail. With this release there is a choice of three propellers depending on which marking option you go for. There is a PE hub plate for the spinner.
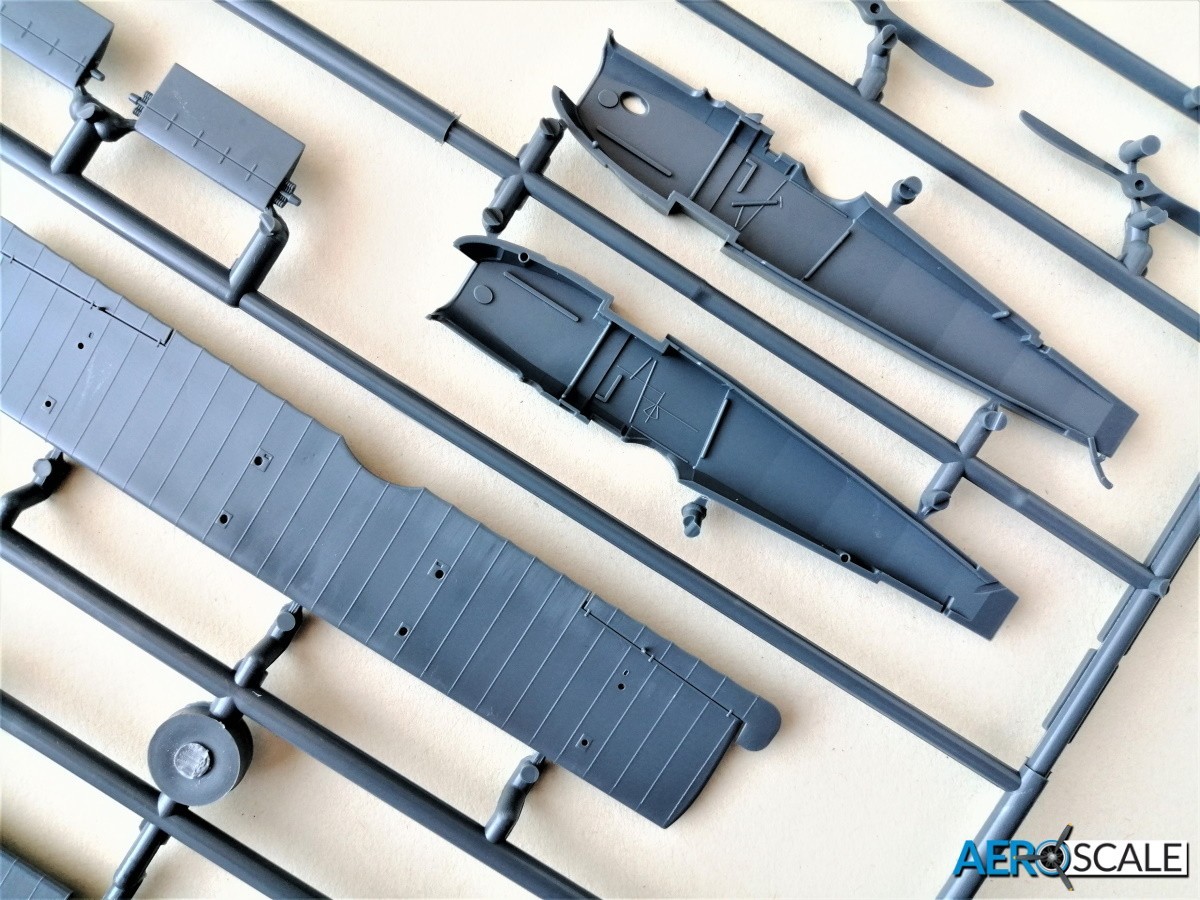
There is a slight faceted look replicating the stretched canvas over the fuselage frame. Eduard has correctly represented the doped canvas as being tight as a drum. The tail skid is moulded with the right-hand fuselage. There is a length of plastic included with stitching moulded on it which neatly fits over the lower fuselage join.The tail and rudder are a separate one-piece items featuring raised tape lines.The rudder has PE actuator including the cable. It’s good to see the amount of work that has gone into the smaller details. One example is the holes where the control cables emerge from the fuselage. They are not just holes; the holes have neat looking surrounds presumably representing the reinforcement so the cables would not rub the fabric. There are a few control cables to add
Both the upper and lower wings are each one piece. There is absolutely no hint of ejector marks. The tape lines are raised and these will aid the placing of the fifty or so decal tapes later in the build. There is the merest hint of scalloping on the upper wing surfaces, but it looks very acceptable. The ailerons on the upper wing have PE actuators including the cable.
There are locating holes for the one piece ‘N’ style inter plane struts in the lower wing. There are holes in the upper wing for the inter plane struts as well as the cabane struts that also attach to the fuselage. The forward group of three cabane struts are moulded as one piece. As the wing was a cantilever there is no rigging, just the control lines to add from the fuselage to the upper wing. There is a separate anemometer style airspeed indicator to attach to the port inter plane strut.
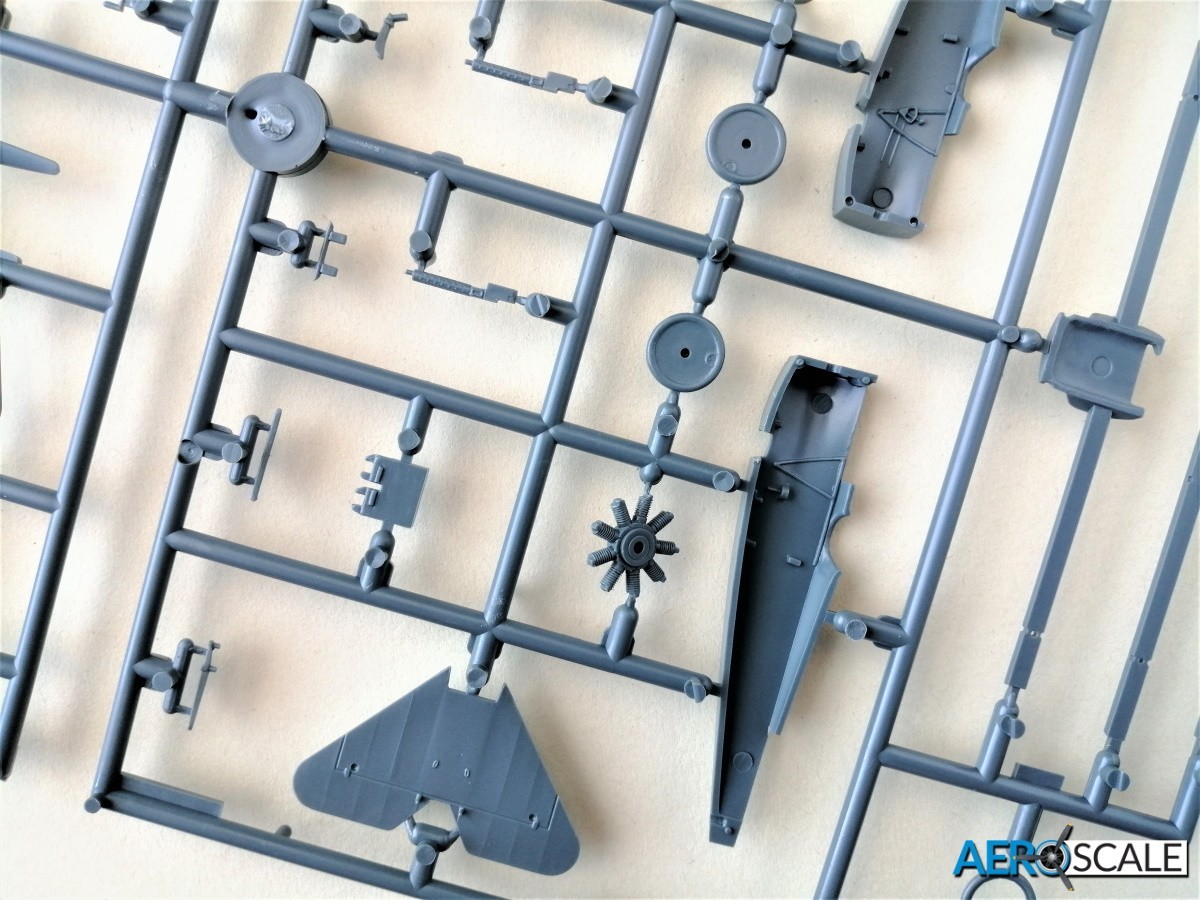
The horizontal tail and elevator are one piece and features raised tape lines. You might want to cut off the elevator and reset it dropped. The elevator has PE actuators including the cable. There are a few control cables to add as well as two bracing wires from the top of the fin to the end of the horizontal stabiliser.
The section of aerofoil between the wheels is one piece as are the wheels themselves. Here there a couple rigging lines to apply, a couple of illustrations in the instructions indicate where to locate them.
There are three marking options and Eduard provide the most help reproducing the finish with decals. The white stripes of both sides of the upper wing of option ‘F’. There are decals for white cheat lines bordering the fuselage polygon pattern of option ‘G’.
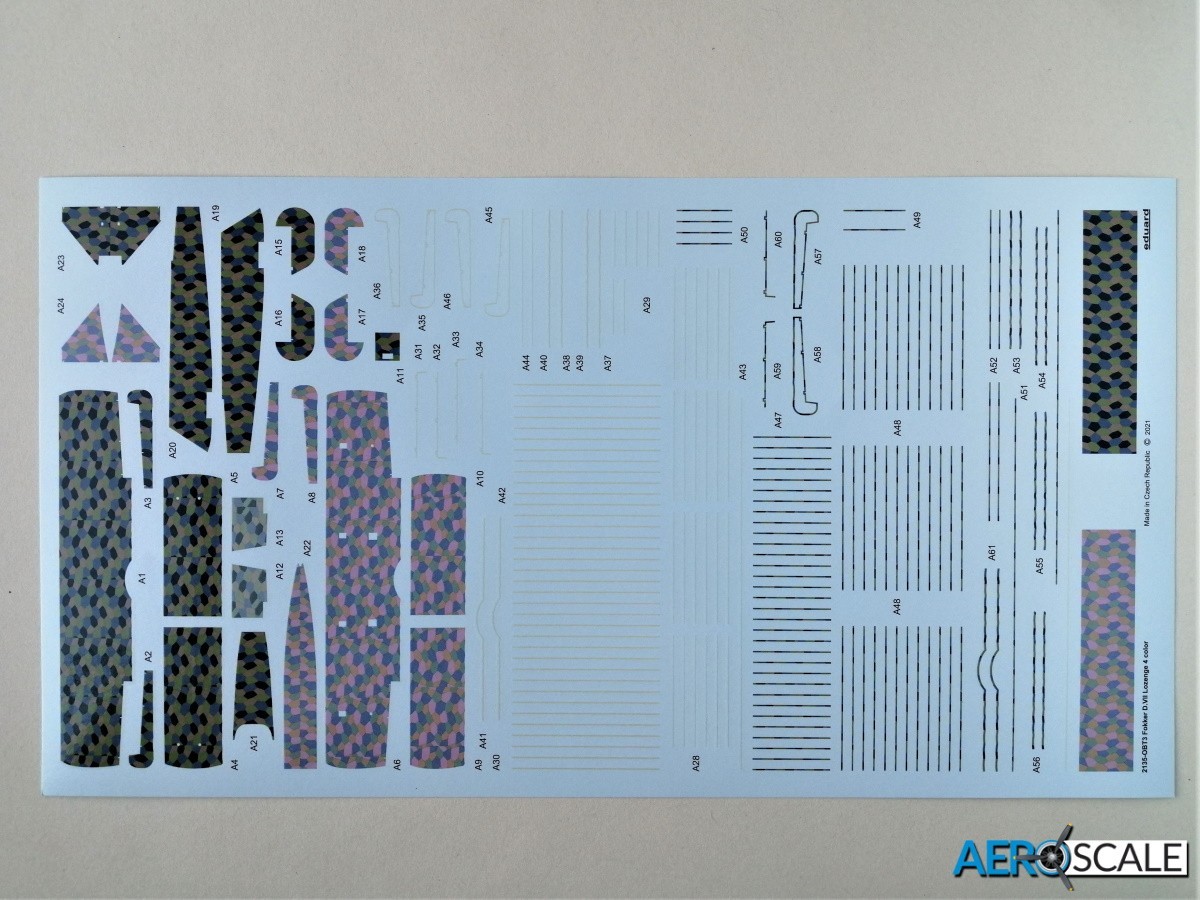
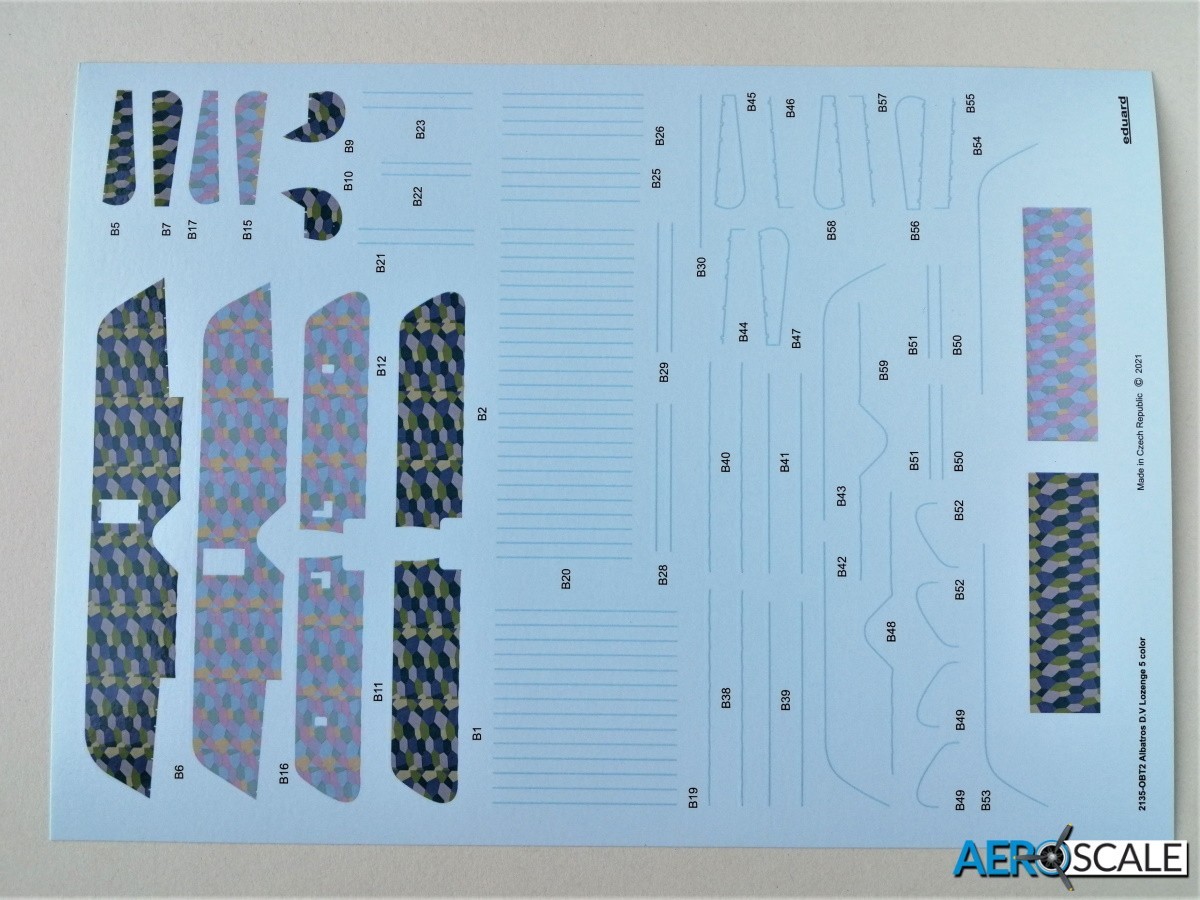
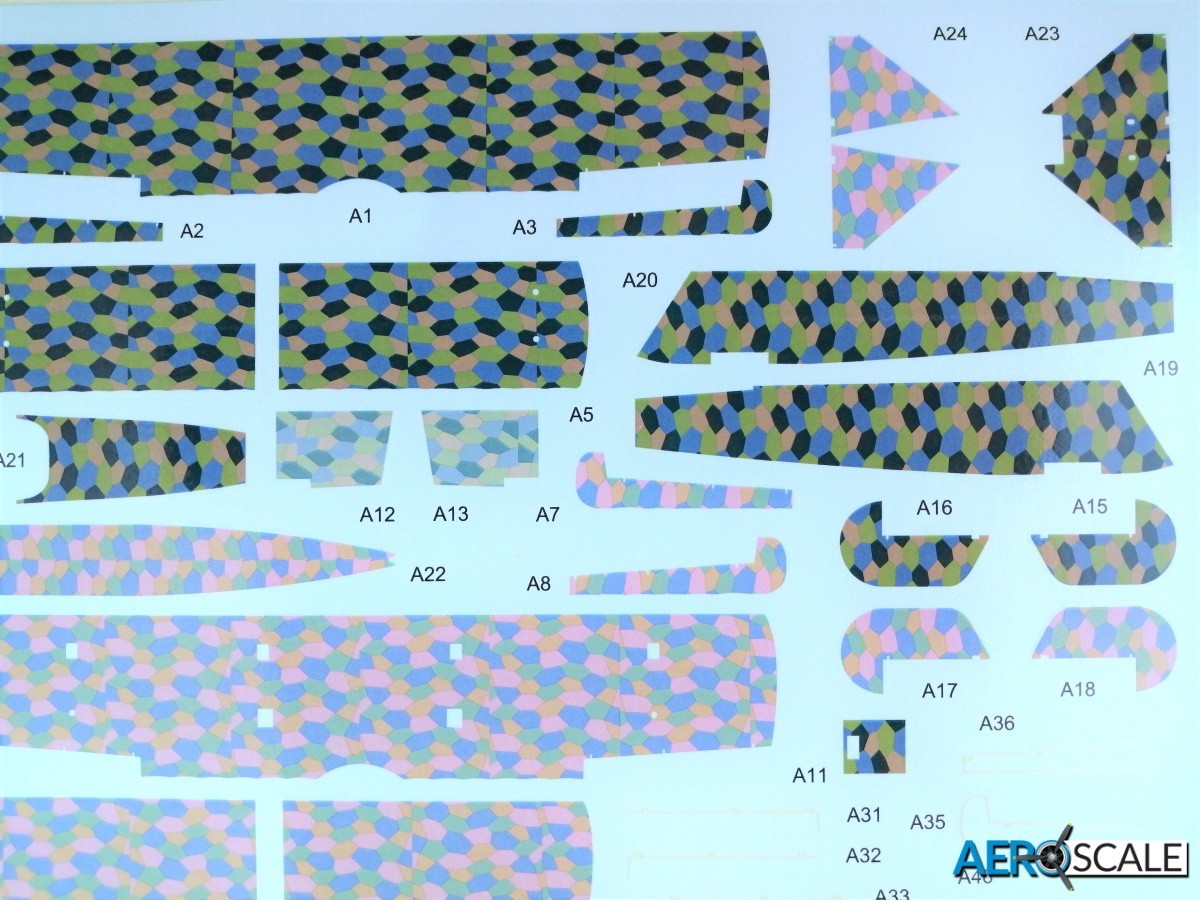
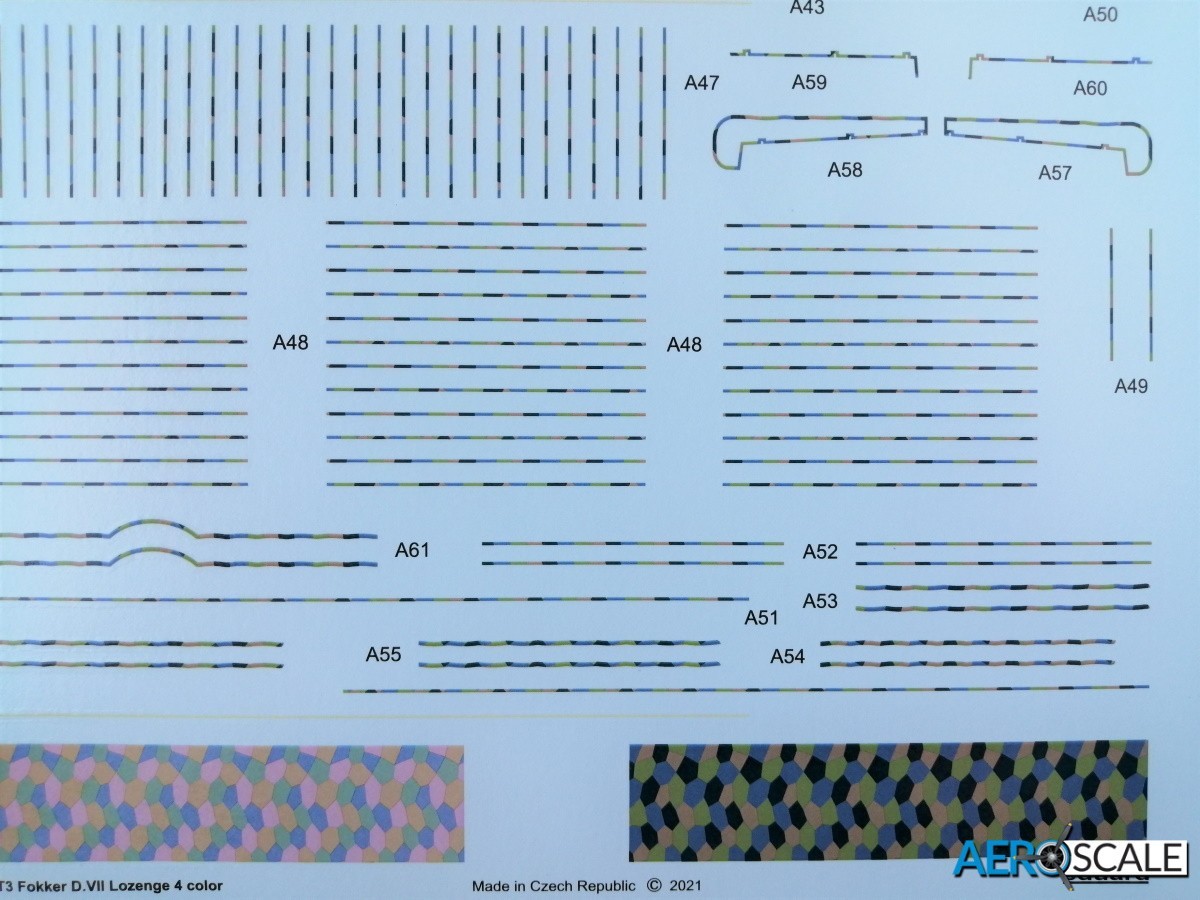
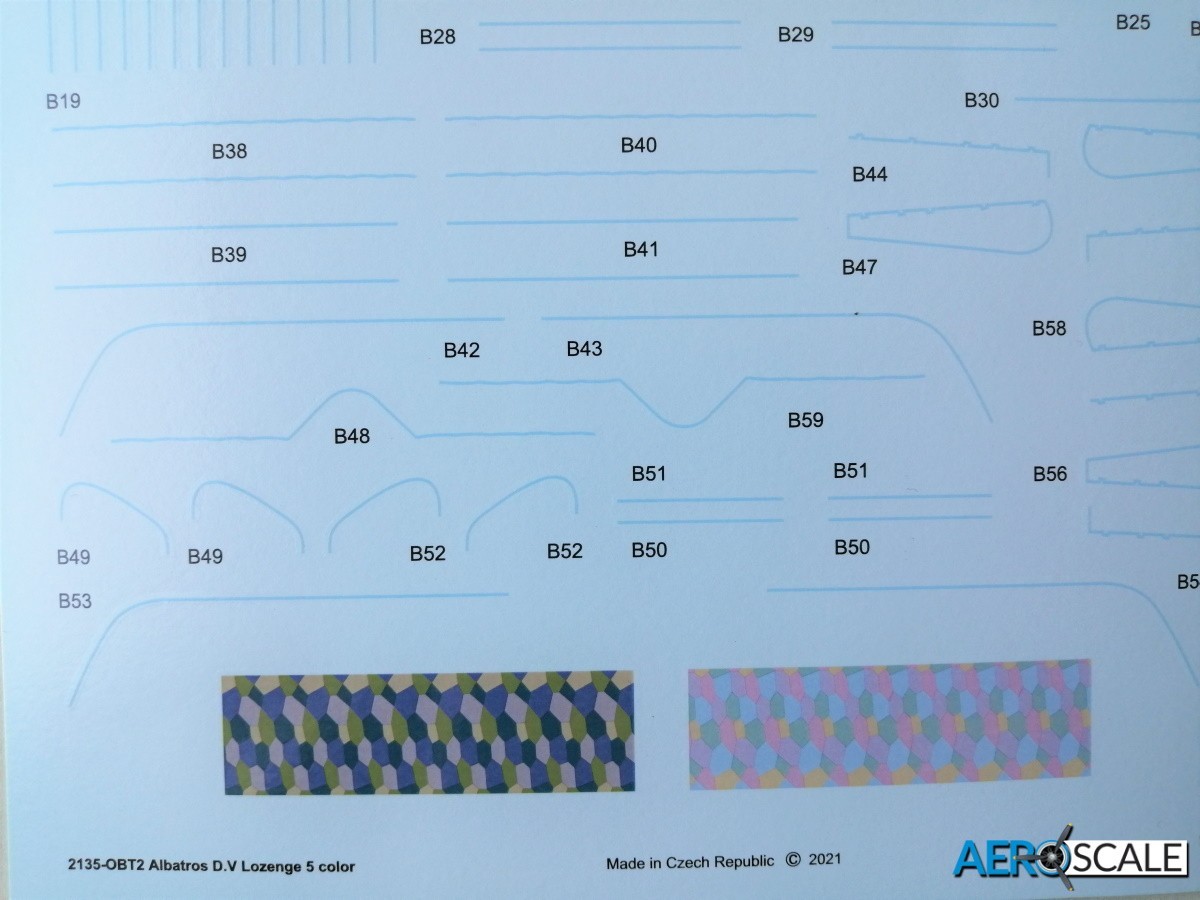
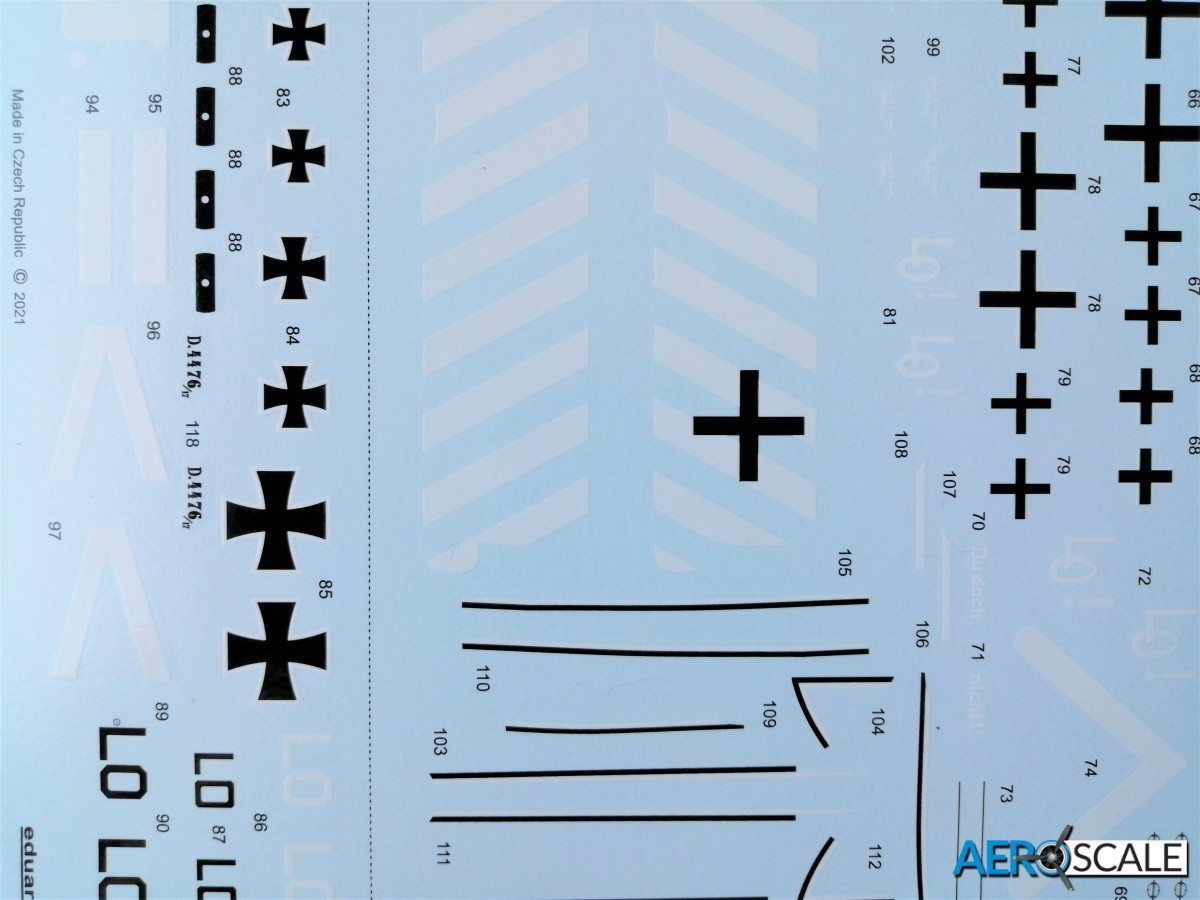
There are three large decal sheets and they are printed by Eduard. Eduard’s WWI releases stand out from many other companies releases in including decals for the polygon patterns. Also included are the rib tapes for the Albatros and Fokker D.VII. I really can’t say how accurate the colours are, but we know Eduard will have tried their hardest to get this right. The number of rib tapes is a little intimidating and will take time, care and setting solution to fit them. There is barely any excess carrier film even on the complex shaped Jasta markings.
The paint masks are for the wheels of all three aircraft.
The A4 booklet has thirty-two pages eight including a useful illustrated four-page biography of Ernst Udet. The eight-page painting guide provides additional detail relating to Udet and the aircraft. There is a page specifically for the polygon pattern decals and the rib tapes. Gunze and Mission Models paint numbers are used for colour reference.
If you want colour in your model flight line then look no further than this release. The three aircraft types featured almost span Eduards production of plastic kits. Although the Albatross D.V/D.Va and FokkerDr.I are still very good models. The more recent Fokker DVII is an excellent example of modern methods of producing high quality and detailed kits. There are some challenging paint schemes even for an experienced modeller. The inclusion of the ‘Pour le Mérite’ is a nice touch.
Our thanks to Eduard for this review sample.
2135 - Du Doch Nicht!! – 1:72
Please remember, when contacting retailers or manufacturers, to mention that you saw their products highlighted here – on AEROSCALE.


