Background
The Curtiss Model 74 [H-75} started off as a private venture. It marked a change in design of Pursuit/Fighter aircraft design around an all-metal monoplane with retractable undercarriage and enclosed canopy. It was designed to reverse the situation at a time when American bomber aircraft were faster than the pursuit aircraft. The prototype first flew on 6 May 1935 and took part in a faceoff with the Seversky P-35. Although both aircraft underperformed the Seversky won. Despite the loss, the Curtiss was awarded a contract to build three prototypes as a backup. The USAAC was concerned about Seversky ability to produce the P-35 effectively. Curtiss reworked the H-75 and in another competition proved its worth with its improved performance. It was purchased by the USAAC, but it suffered a lot of structural and mechanical problems when it reached the Squadrons. As a result it was not popular with the pilots. On the other hand, it proved much more success as an export to European nations, including France, Norway, and the Netherlands. It saw extensive action during the ‘Battle of France’. Captured aircraft were supplied to axis and co-belligerent forces, most notably the Vichy French and Finish Air Force. Finland used it extensively in the battles with the Soviet Union. It was well liked by the Finnish pilots and was nicknamed ‘Susu’. Hawks produced after the invasion of Europe were supplied to the RAF, SAAF and the ML-KNIL [Dutch East Indies Air Force]. The Hawk in the British Commonwealth Air Force was known as the Mohawk. The H-75 was also manufactured under license in China, for the Republic of China Air Force, in British India, for the RAF and Royal Indian Air Force (RIAF).


The H-75’ [P-36] was a commercial success for Curtiss with around 1000 aircraft being manufactured. It provided highly valuable design and production experience for the equally successful Curtiss P-40. Amongst the export version was a simplified design with spatted fixed undercarriage. Arma Hobby’s new tool kit represents the first production model of the H-75 [P-36].
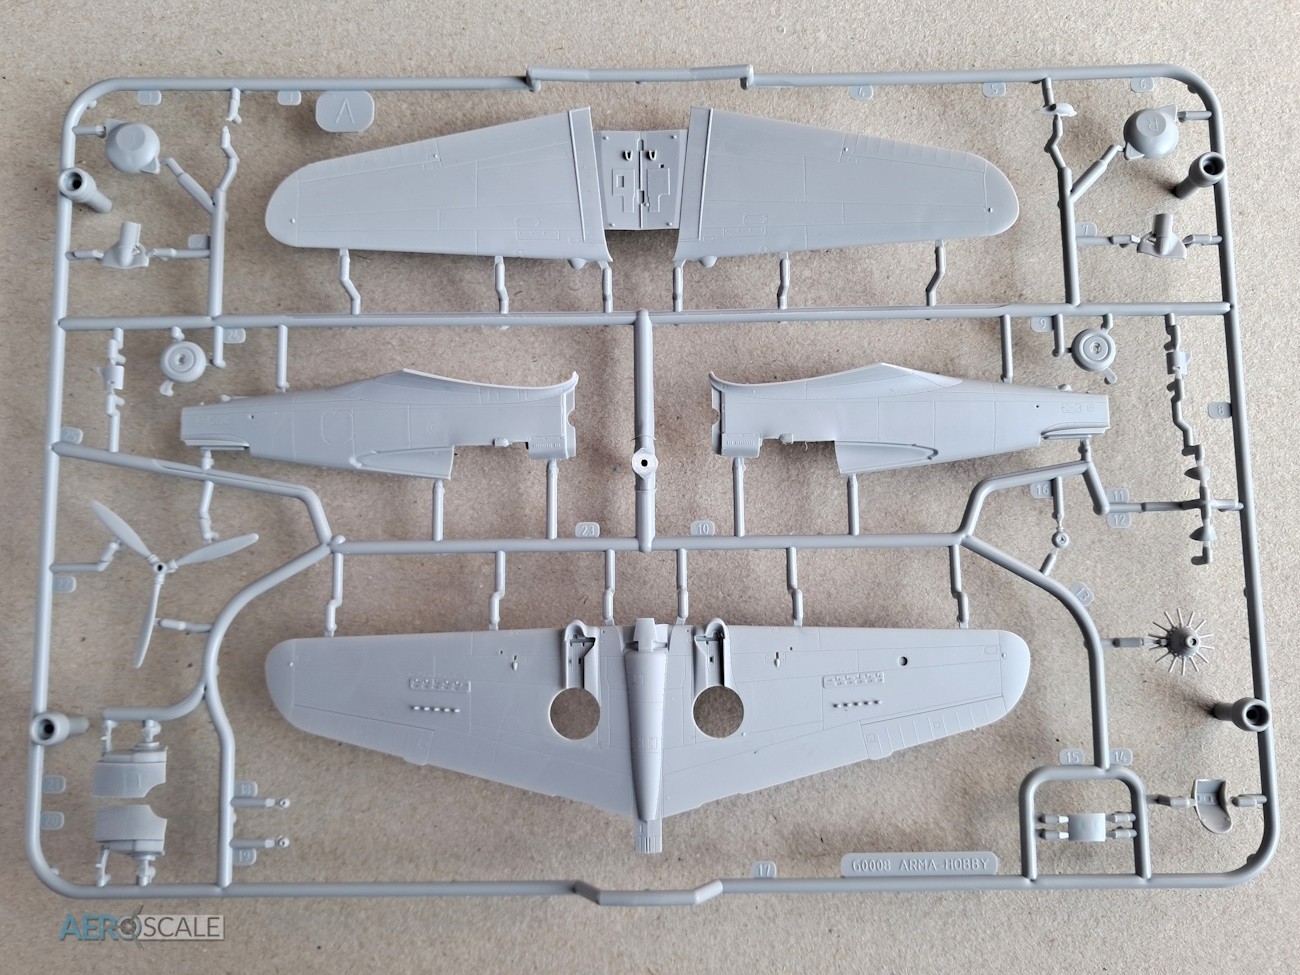
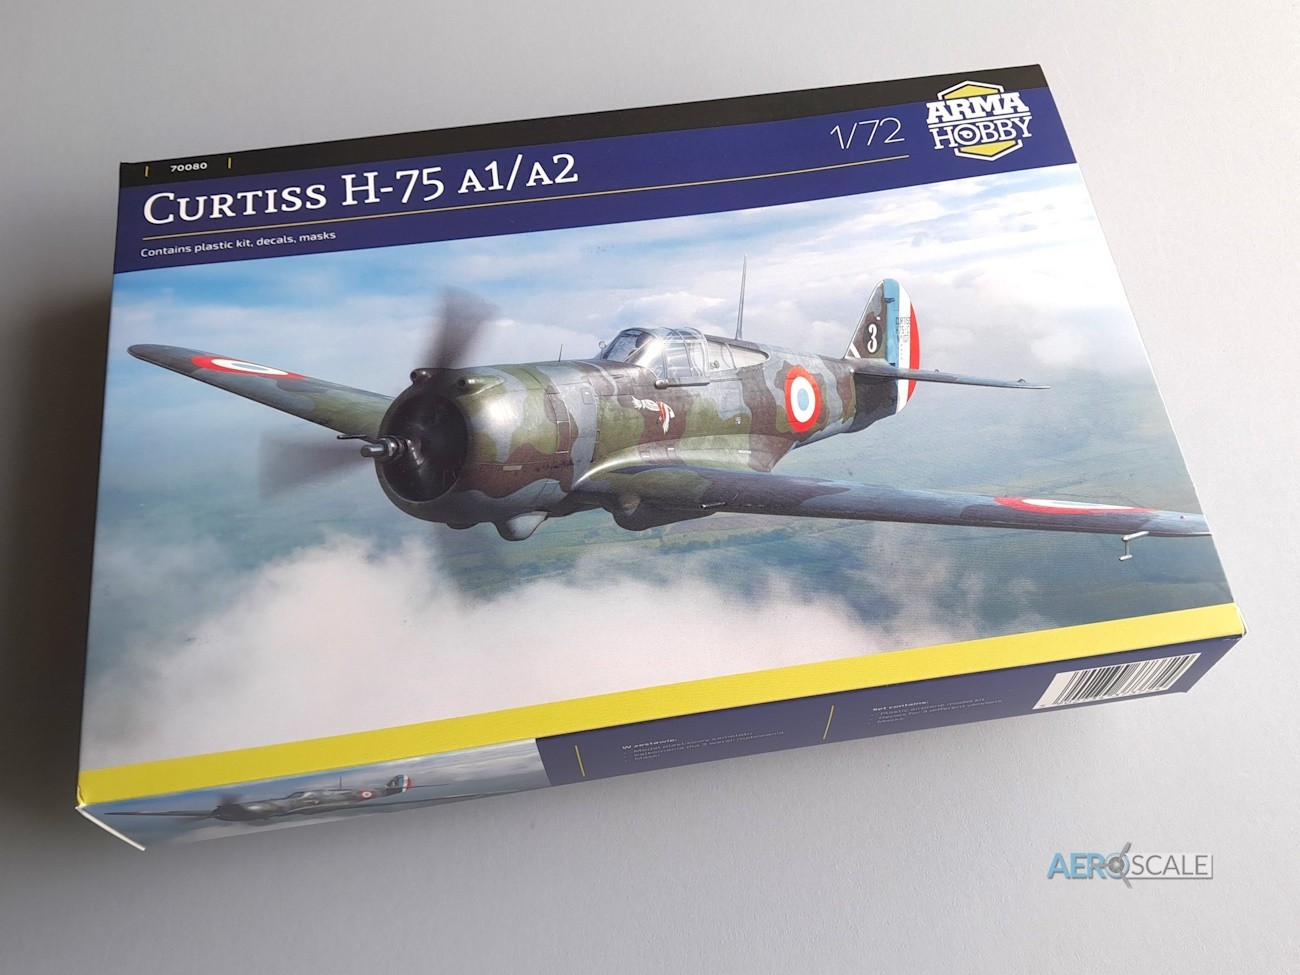
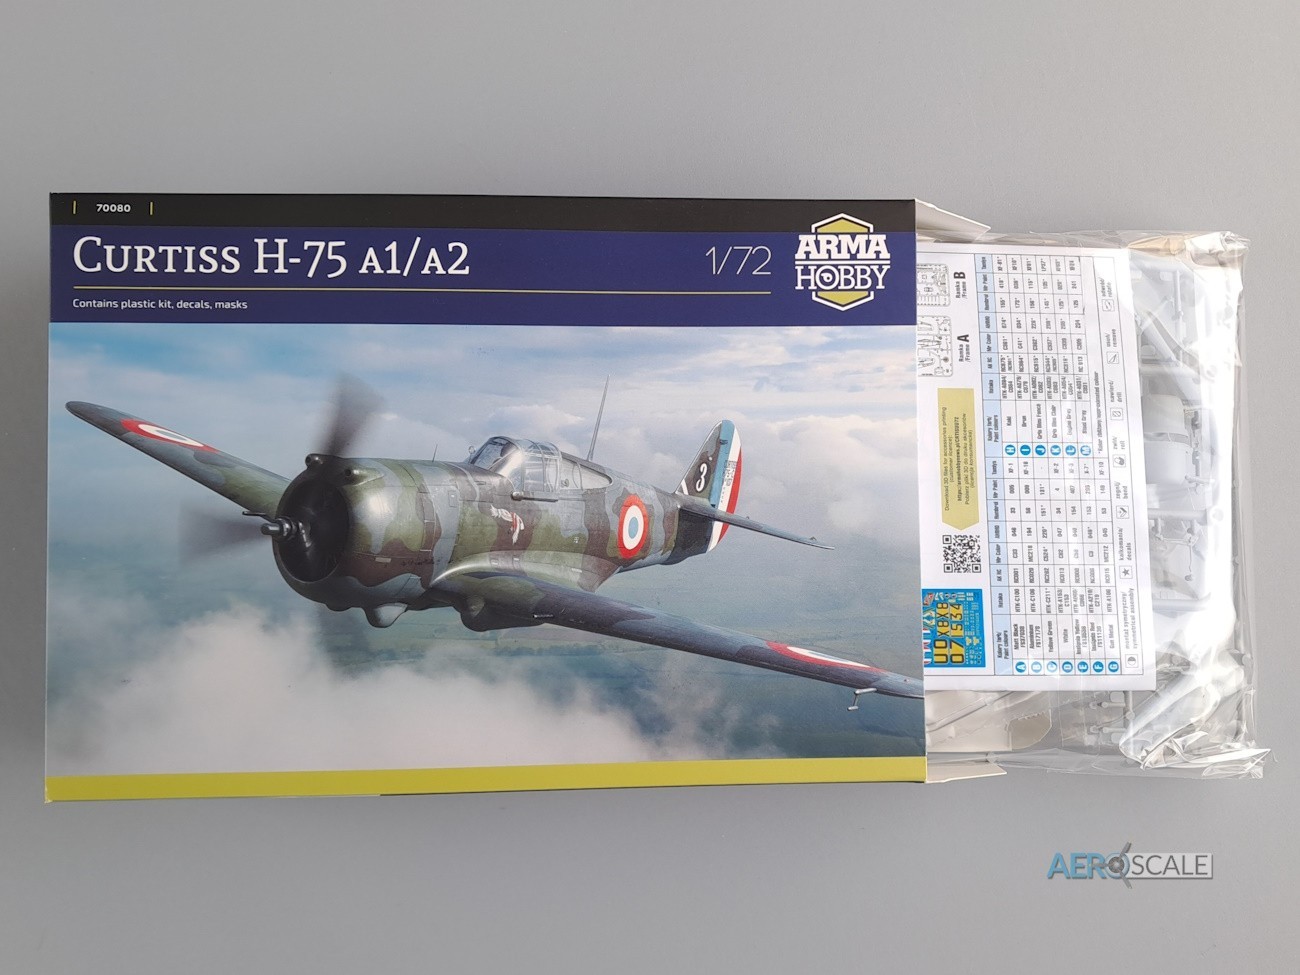
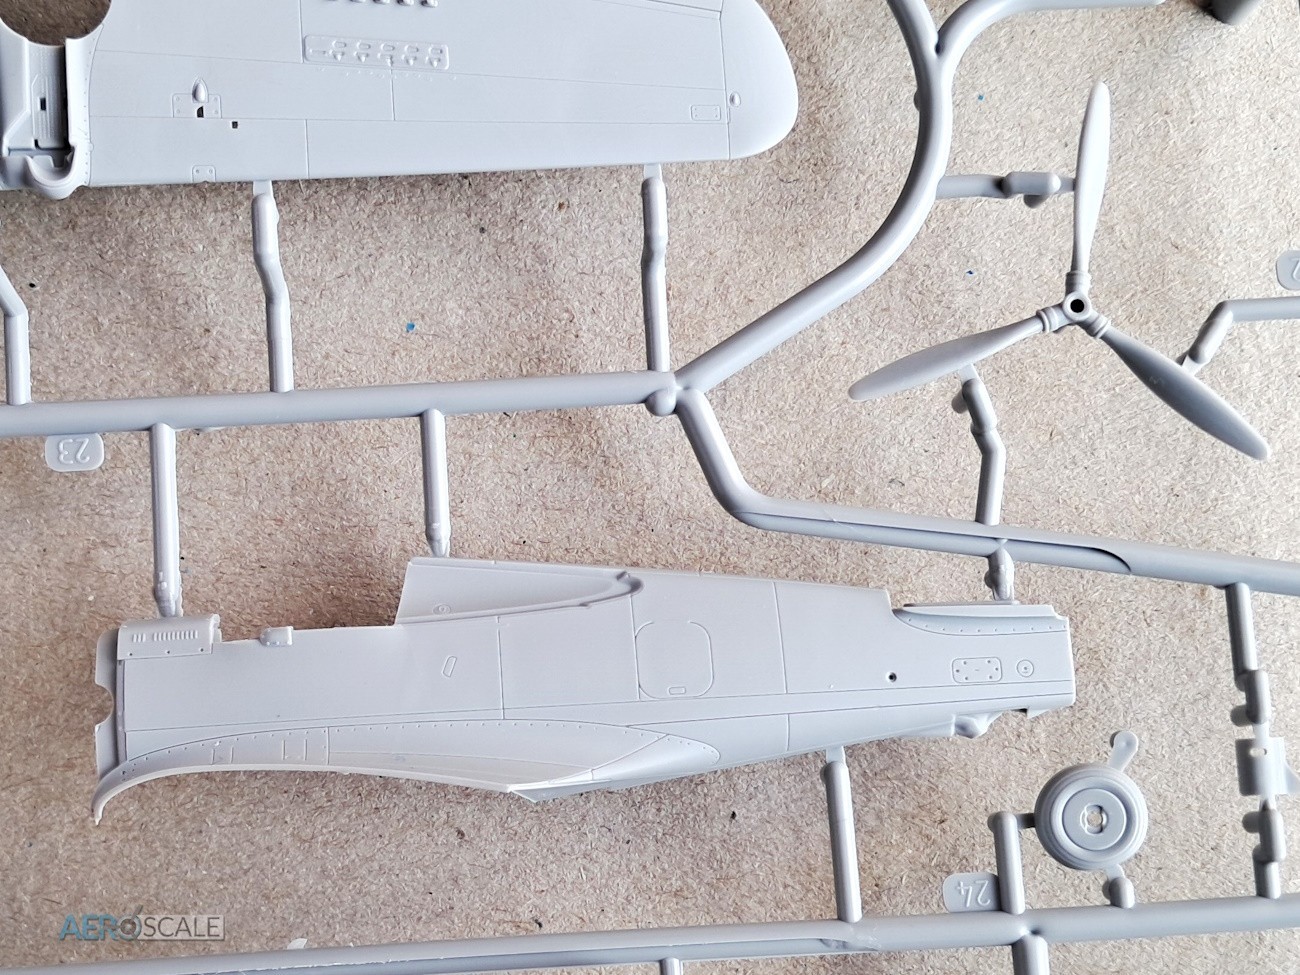
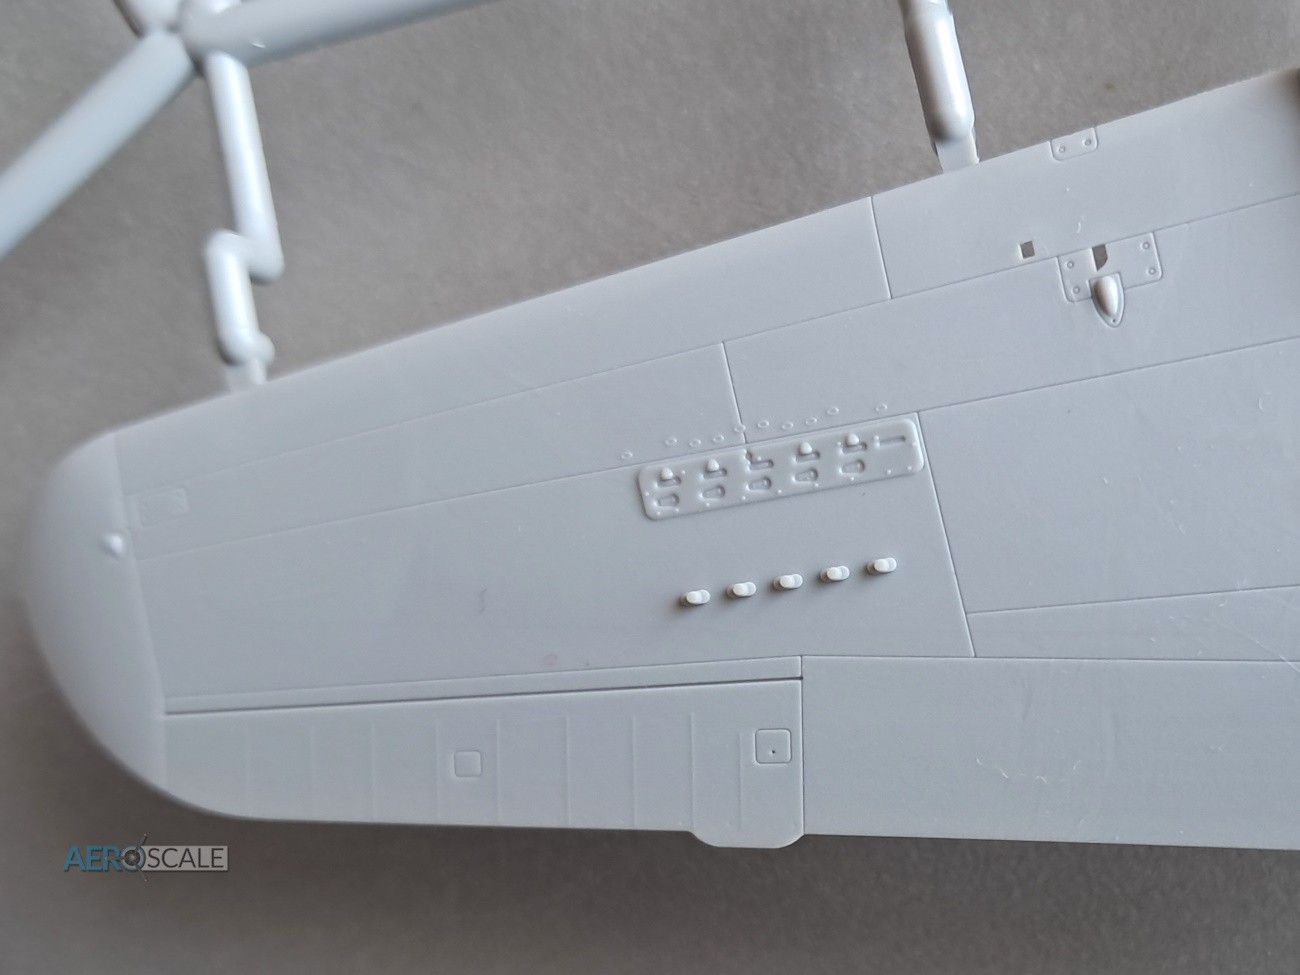
Arma Hobby has created a new tool for this 1:72 scale kit. The parts are in a side opening box, with the three marking options printed on the back. All the contents are packed inside a large bag. The clear sprue is contained inside its own bag. Decals from Techmod and the Kabuki paint masks are safely tucked away in the instructions. First impression of the detail on the plastic parts is very good. Arma Hobby maintains their high standards with the quality of the recessed detail. Its fine and consistent and will take a wash nicely if that is your thing. The fuselage, nose components and wings have pin and hole locating points. A little care will be needed to remove some of the parts from the sprues as the attachment points are quite thick.
Not included with the kit.
Contents
- 2 x grey plastic injected sprues
- 1 x clear plastic injected sprue
- 1 x Decals by Techmod
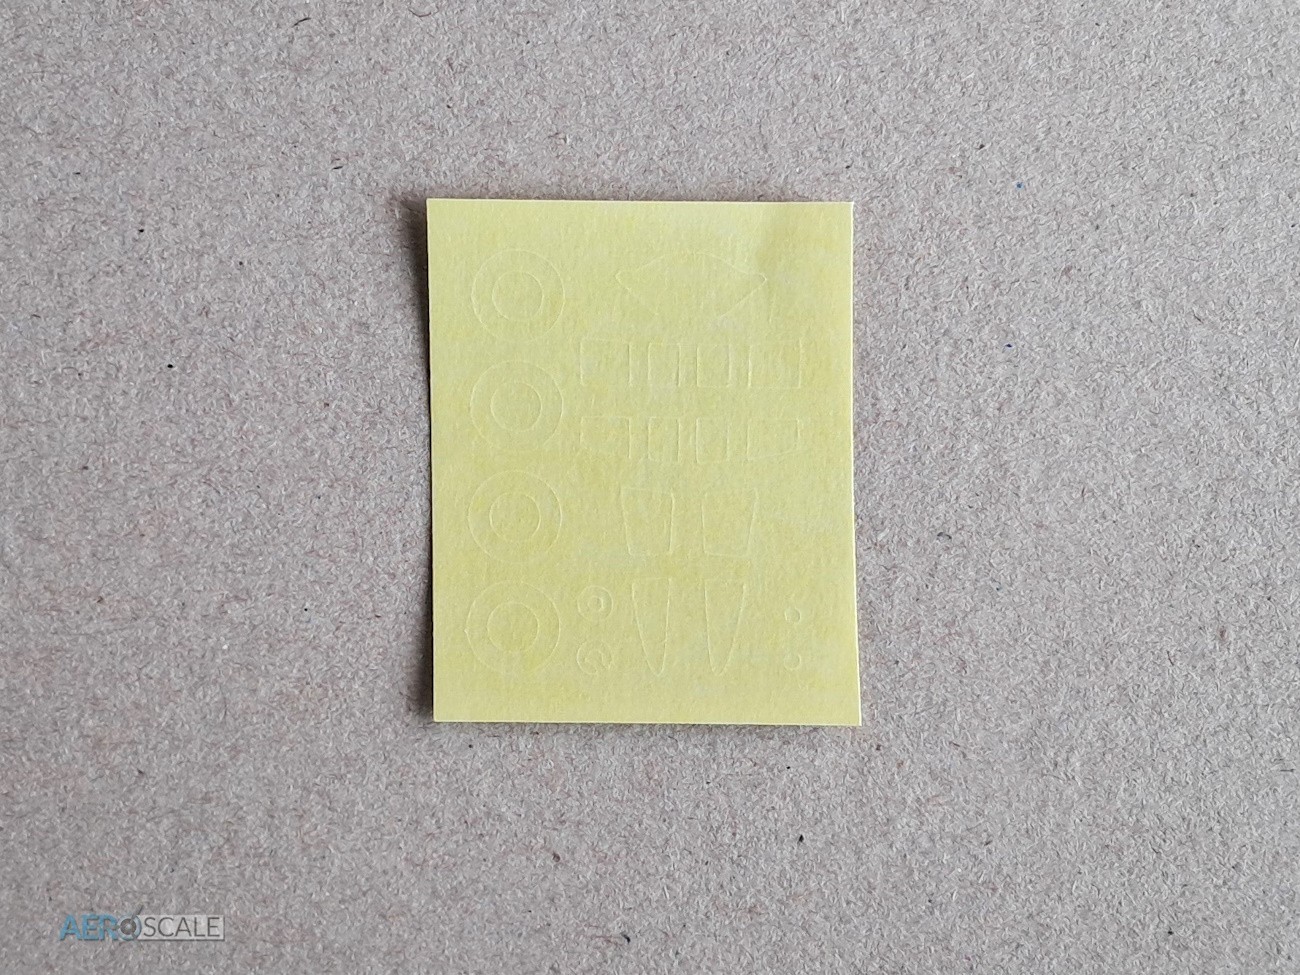
- 1 x Set of paint masks [canopy & wheels]
- instruction manual
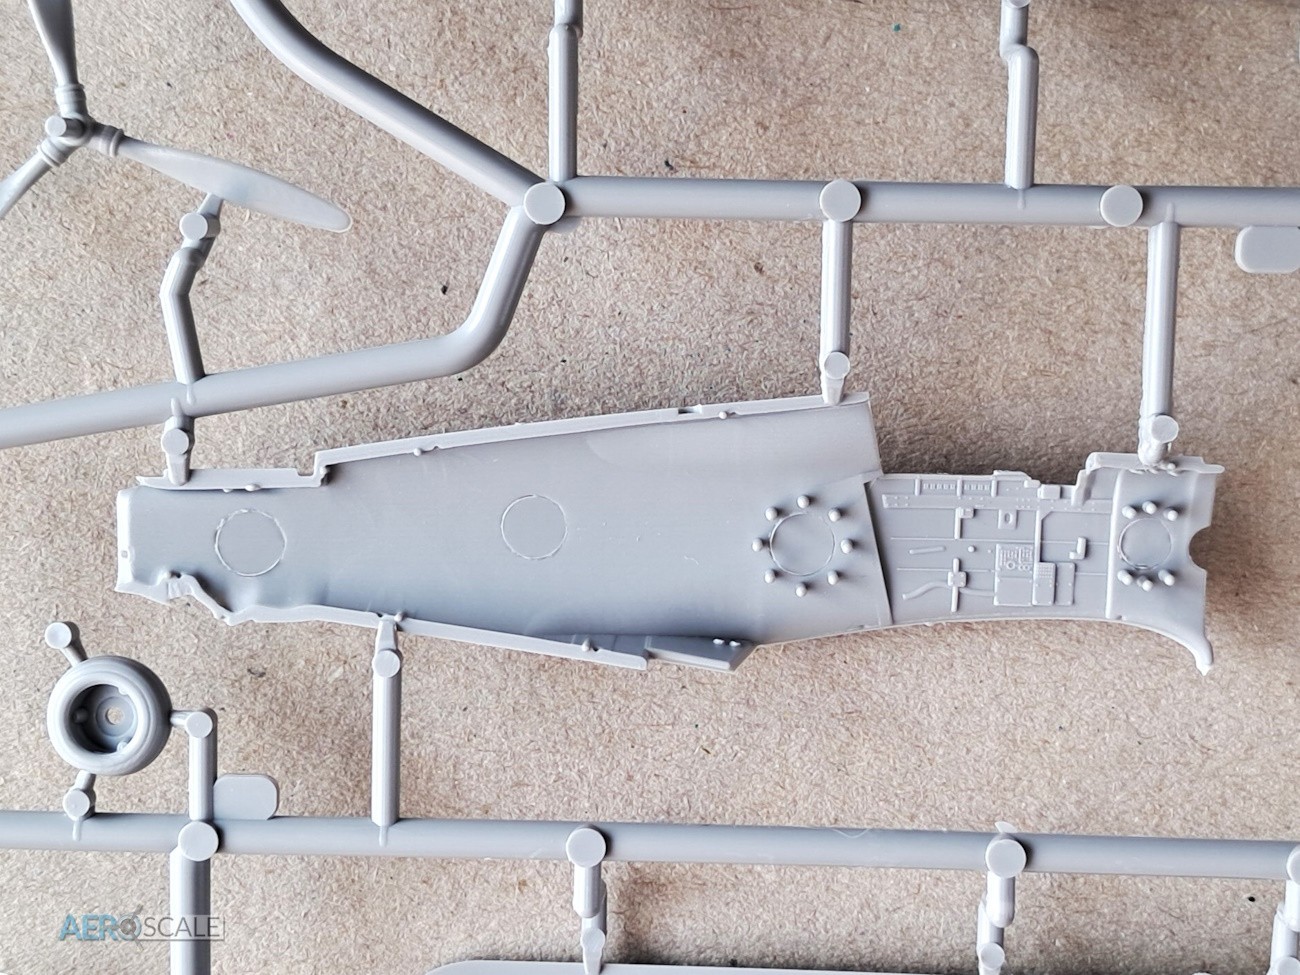
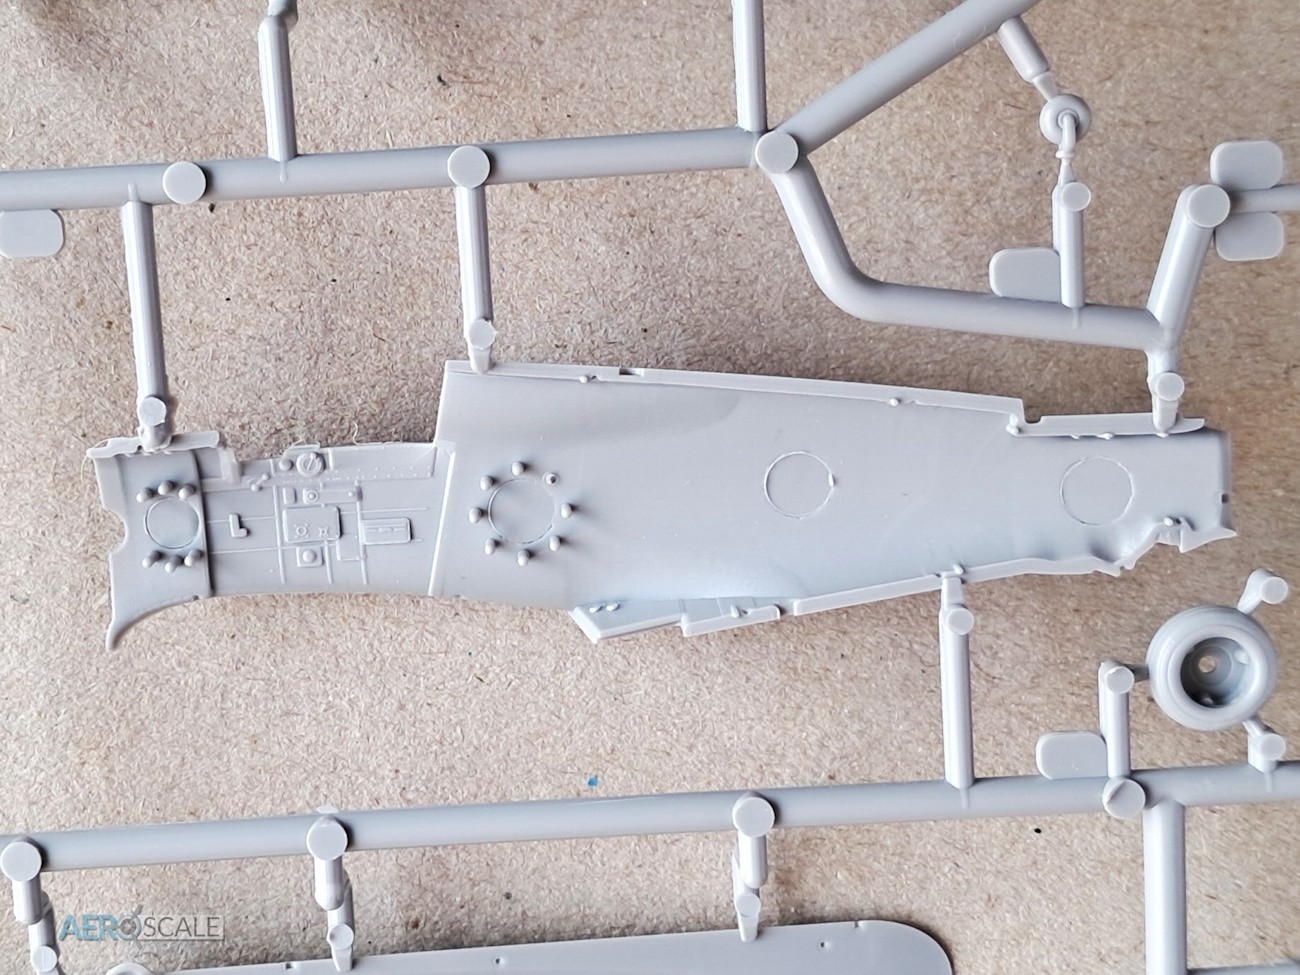
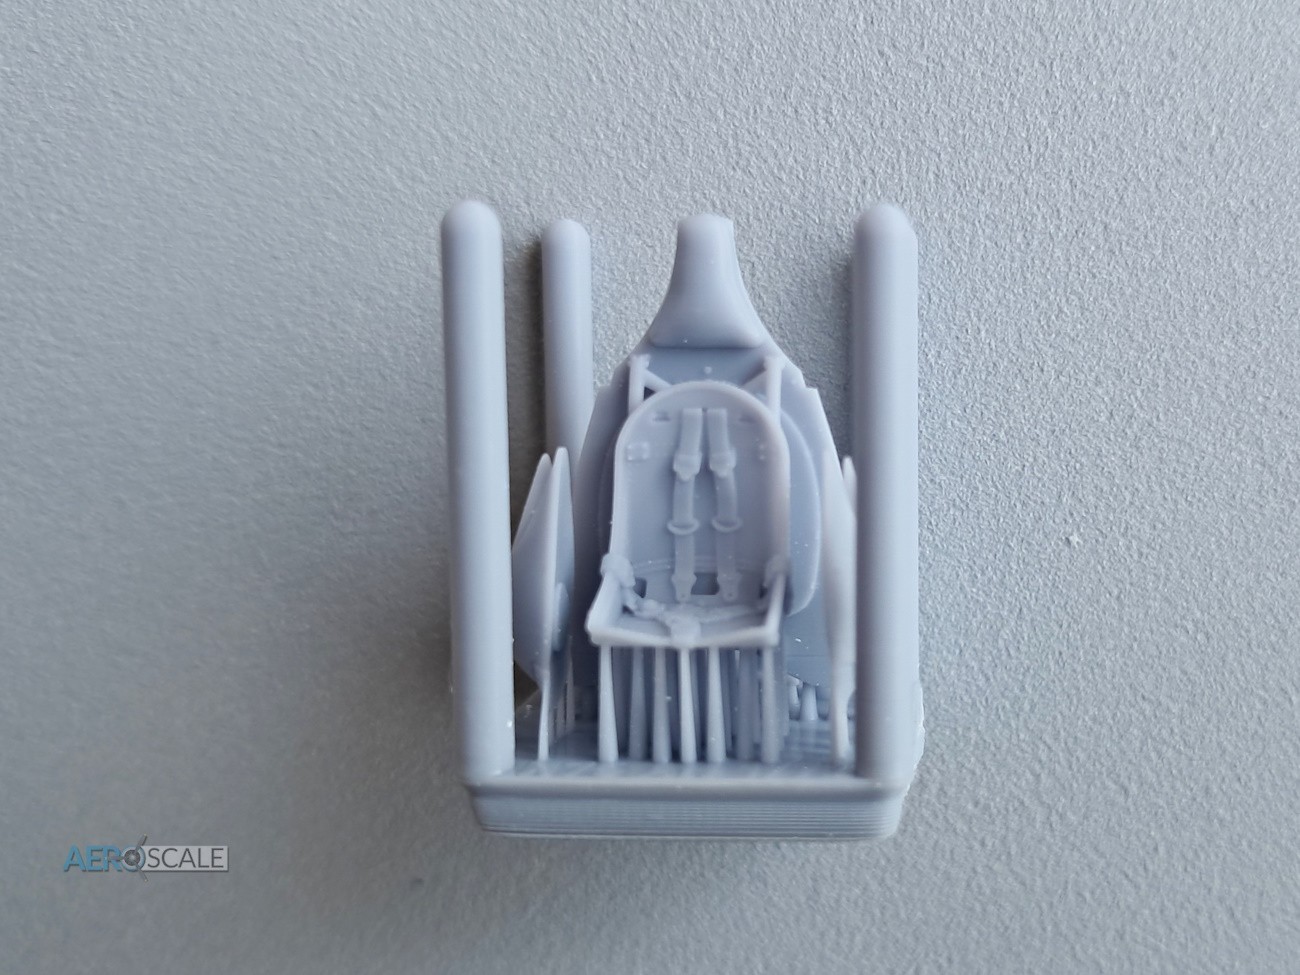
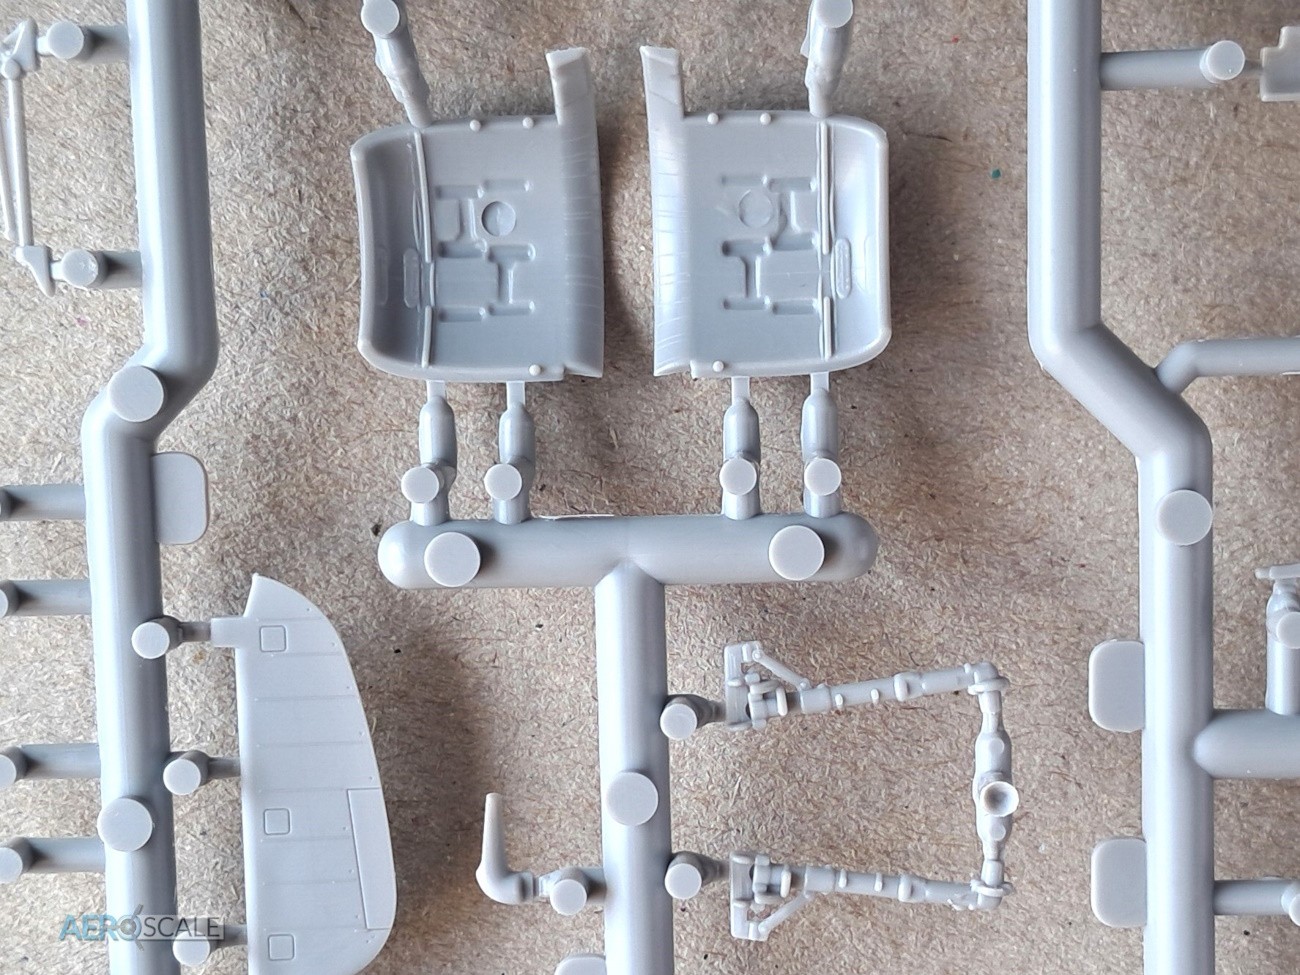
The cockpit will be well furnished with nine detailed plastic parts. Additionally, the walls and floor feature some well-defined raised surface detail. There are two types of instrument panels [IP], both have the rudder pedals attached. Detail is lightly done and there are decals to represent the instruments. Decals are also supplied for the electrical board on the portside cockpit wall. There is also an IP included in the 3D print file. The seat and bulkhead are nicely detailed. Seat belts are supplied as decals. If you are lucky enough to have access a 3D printer, then use the free file with the instructions for the superb printed seat with belts. The proportions of the control stick look good, with some subtle detail.
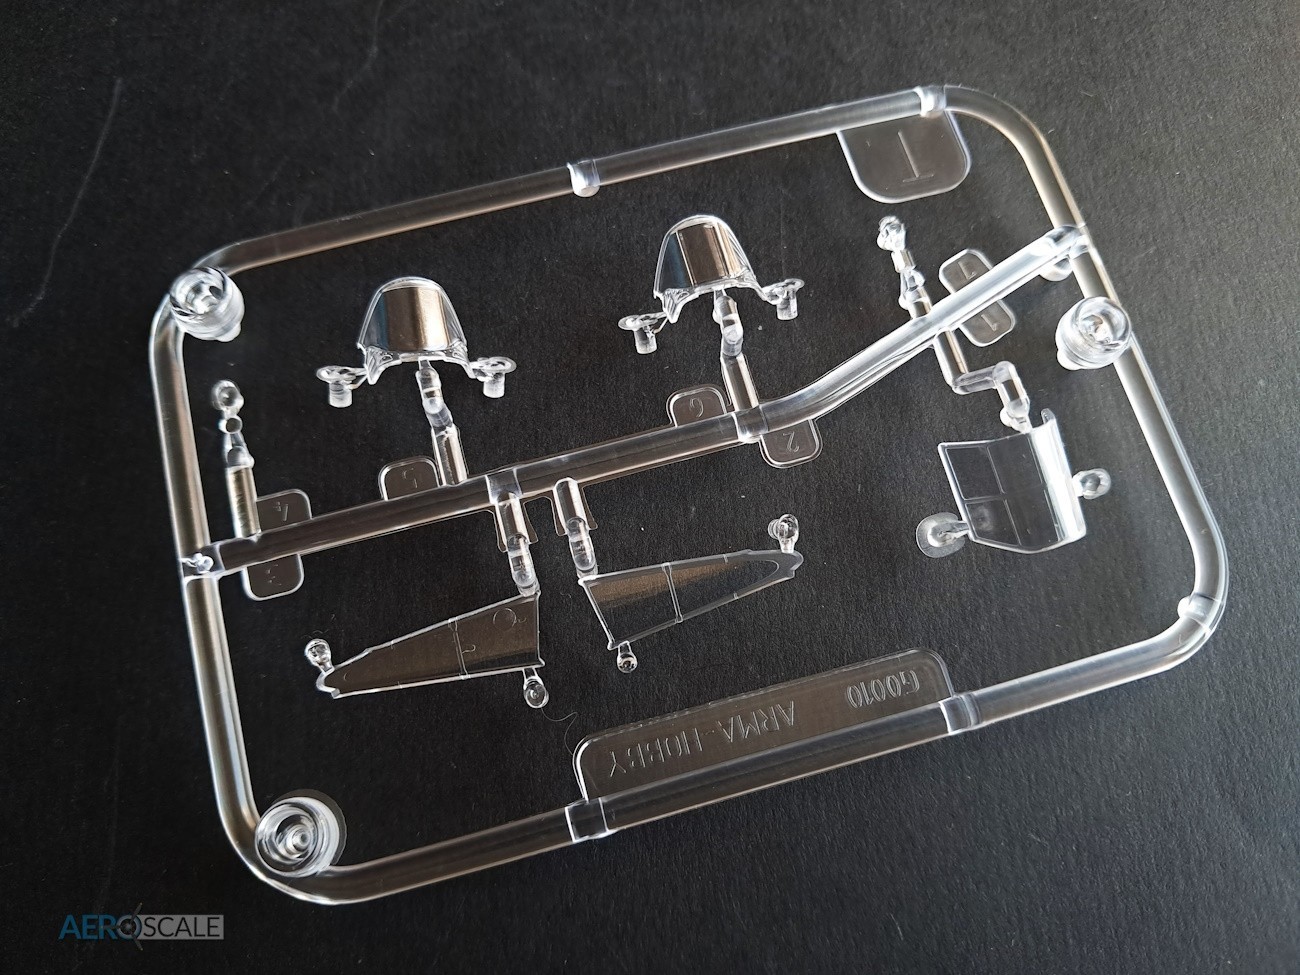
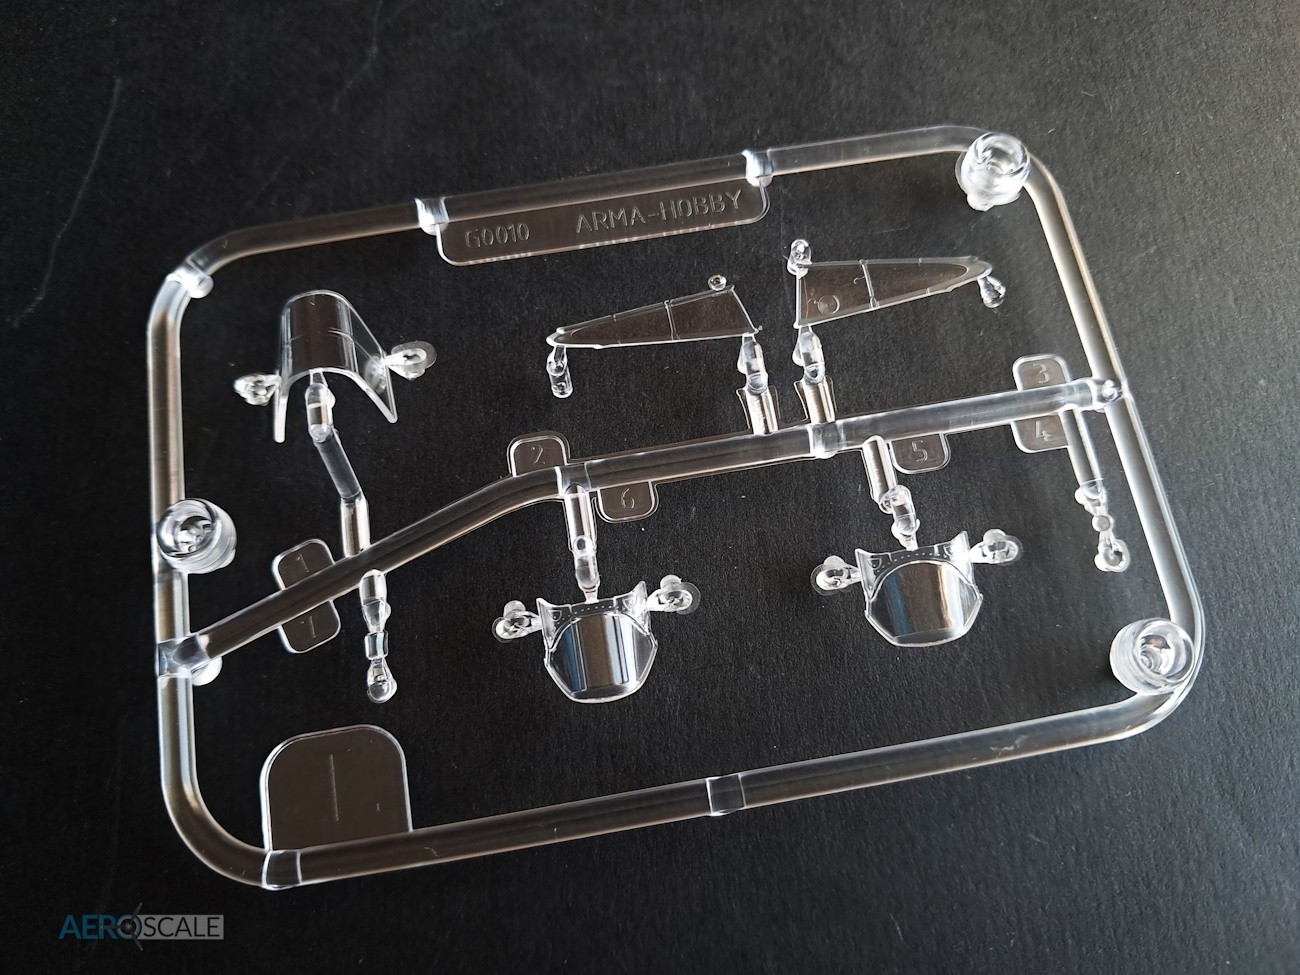
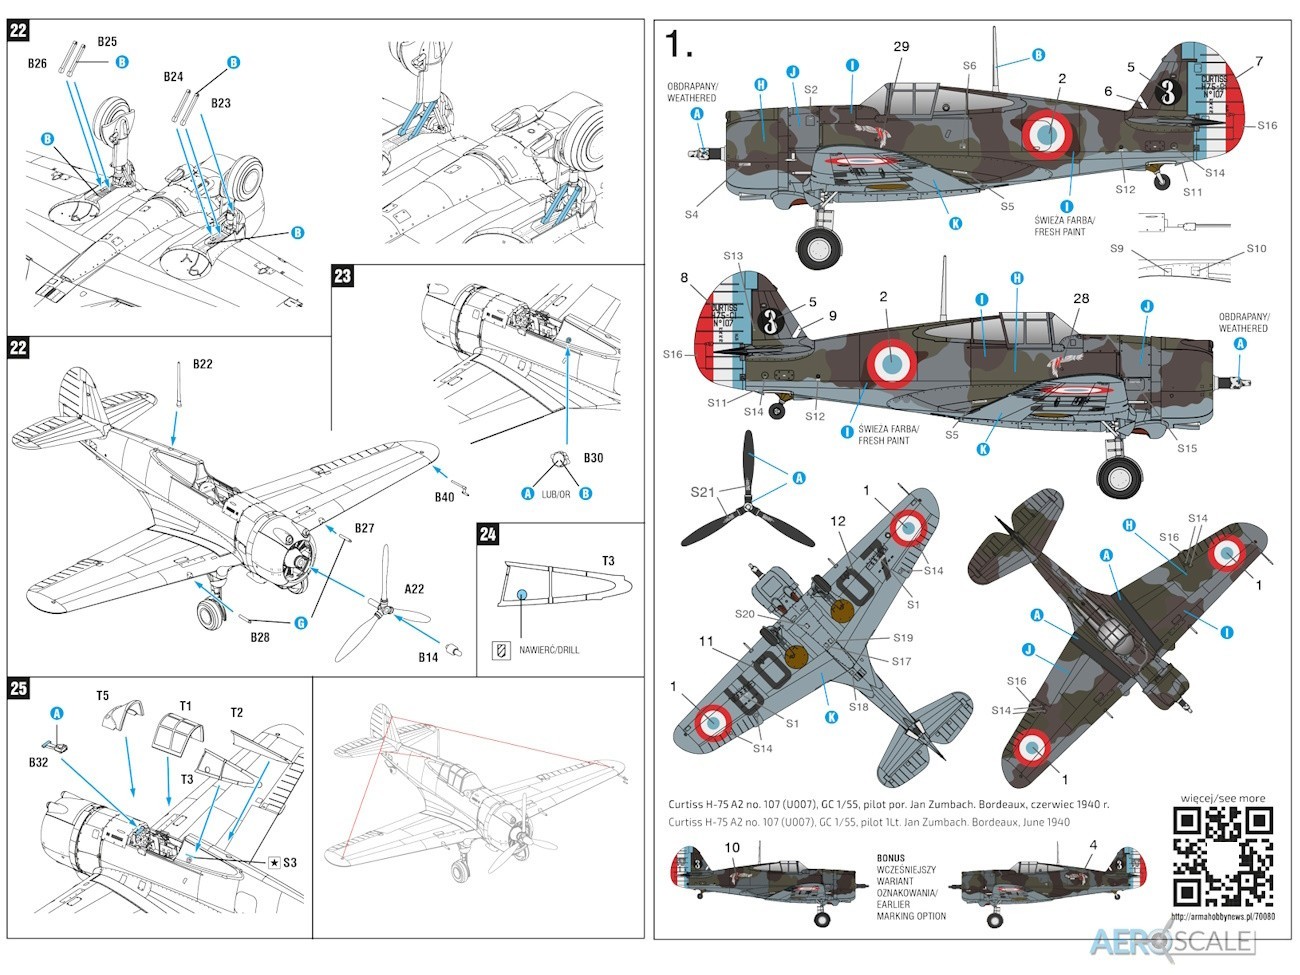
The clear parts are mostly for the glazing around the cockpit and they are crystal clear. There are two types of windscreens, both have a little extra plastic which fits into a recess just in front of the cockpit. The separate canopy can be moulded open or closed. The glazing for the scalloped rear fairing is separate parts. Paint masks are included for all the glazing.
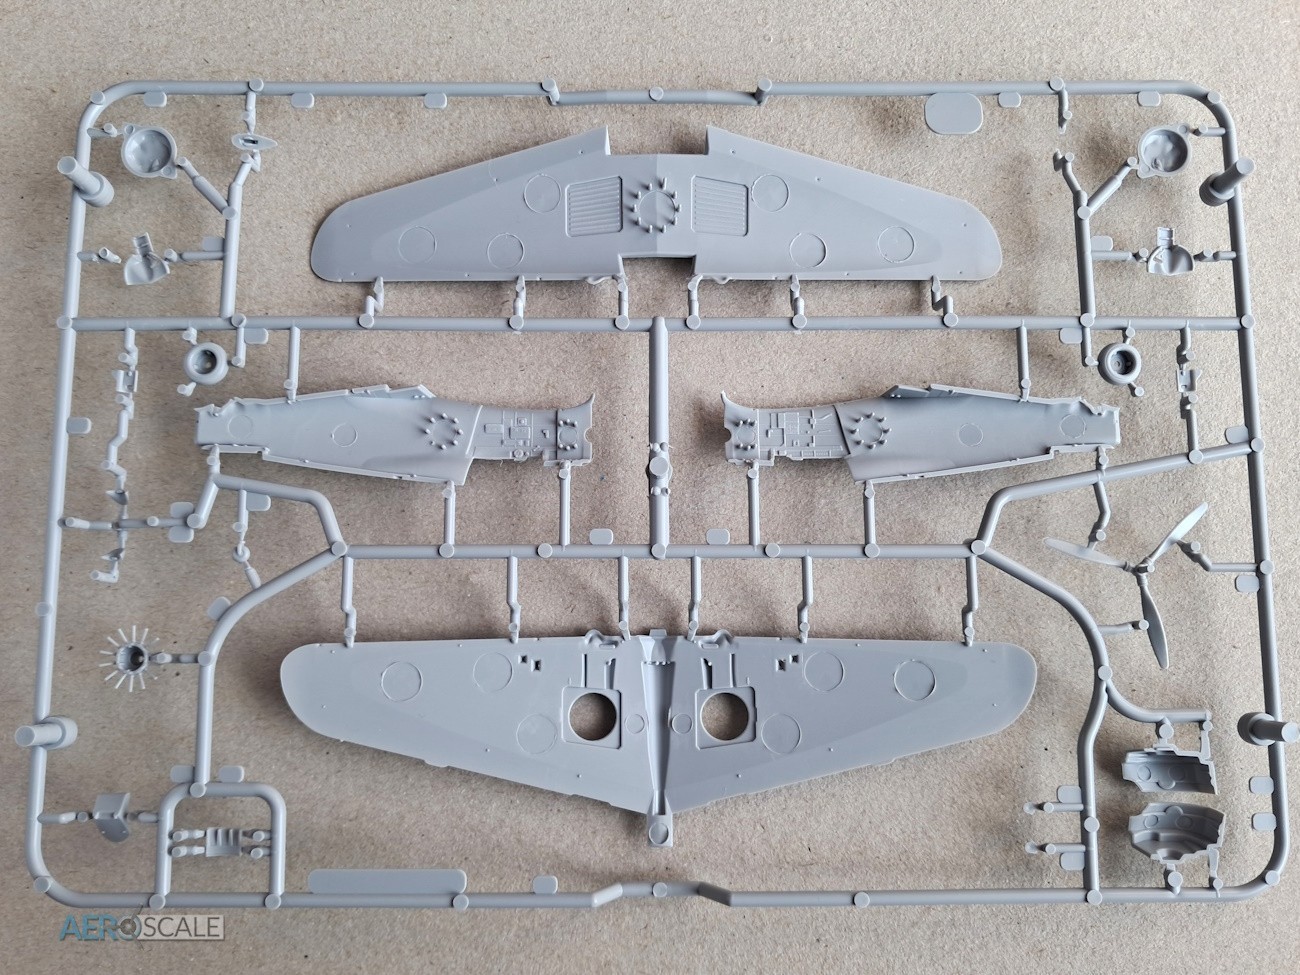
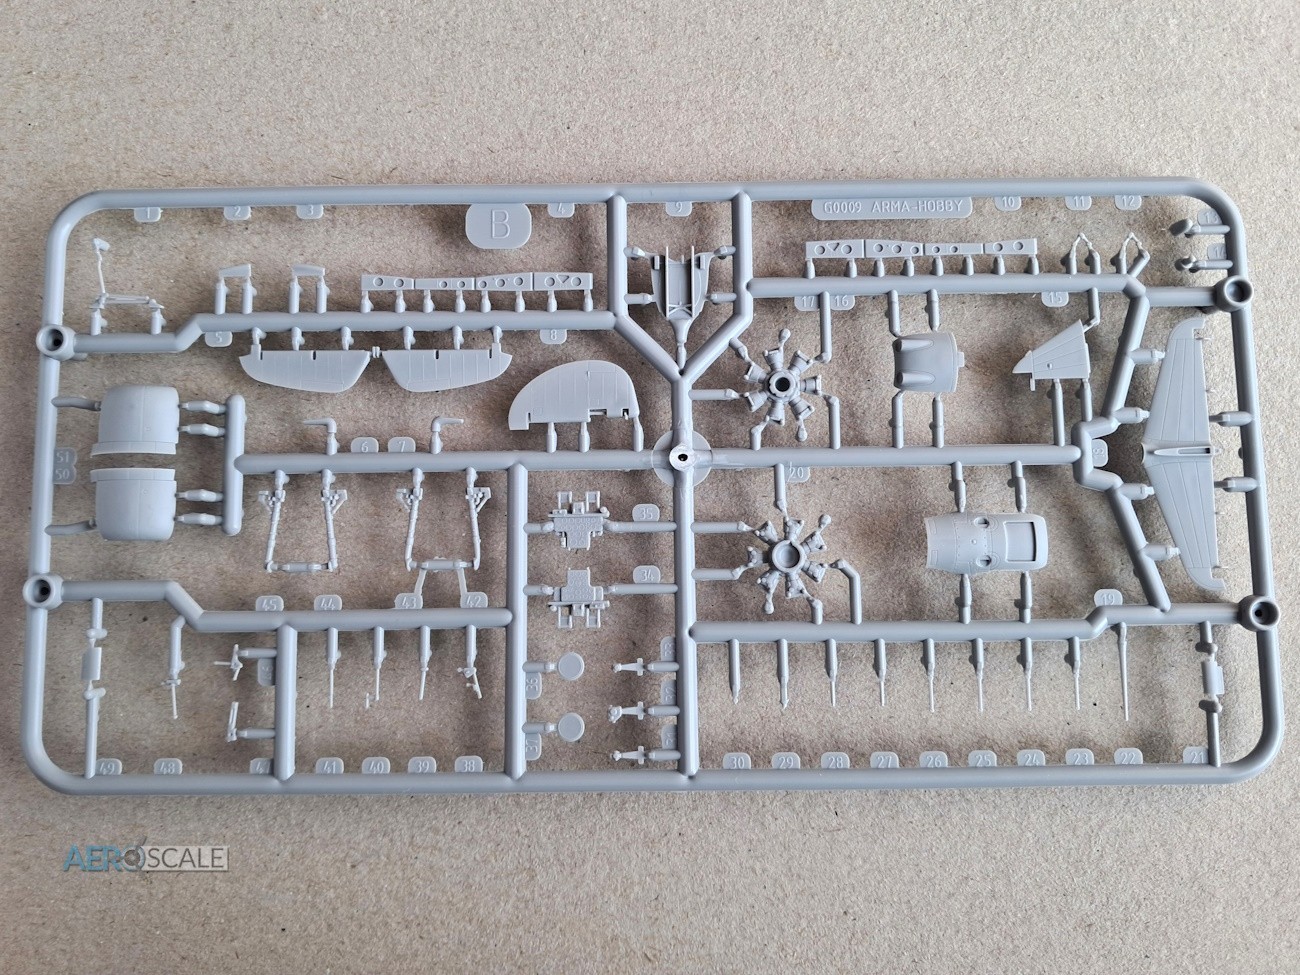
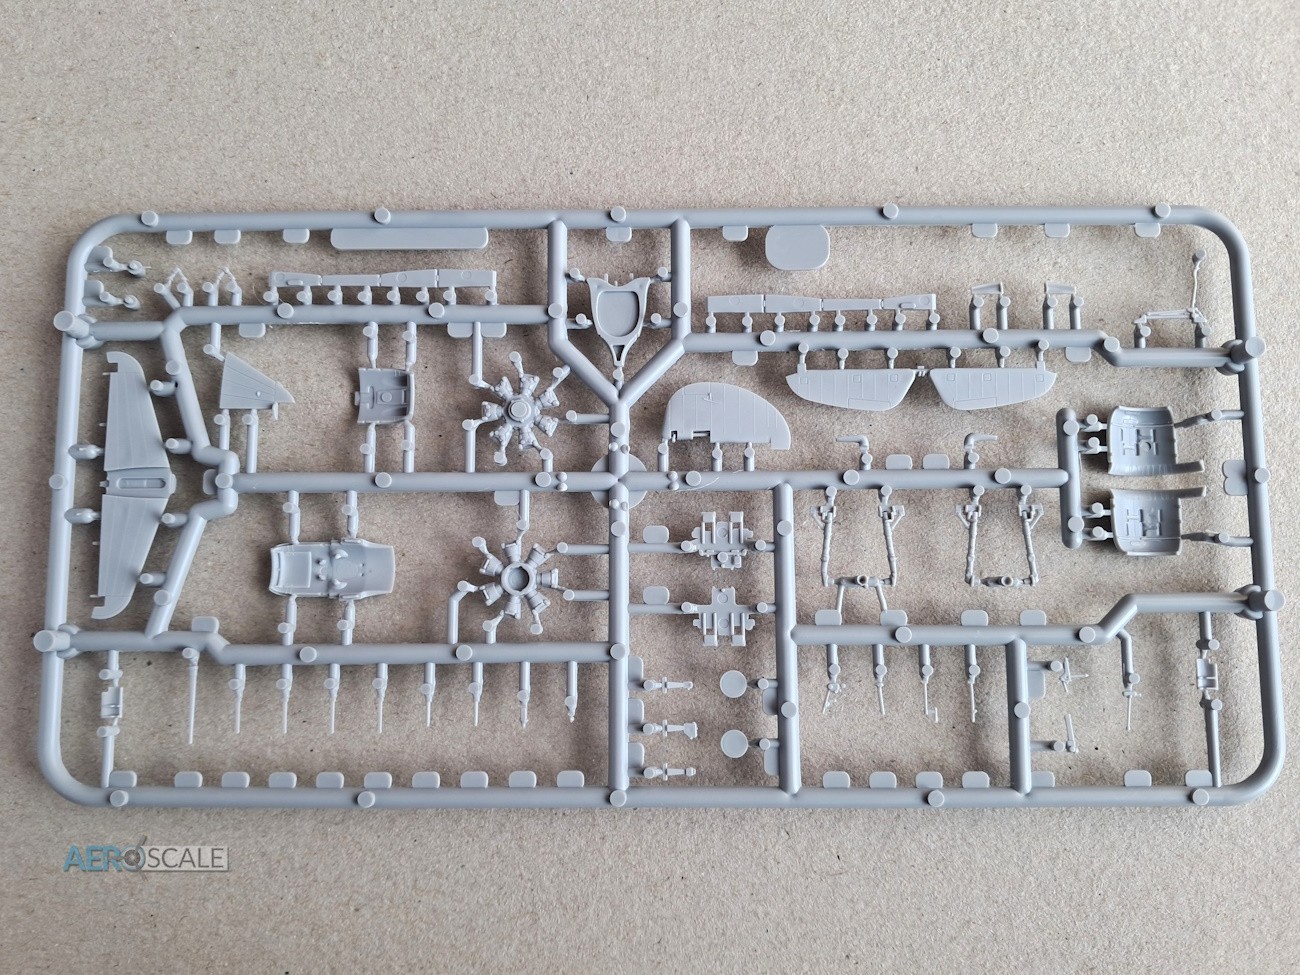
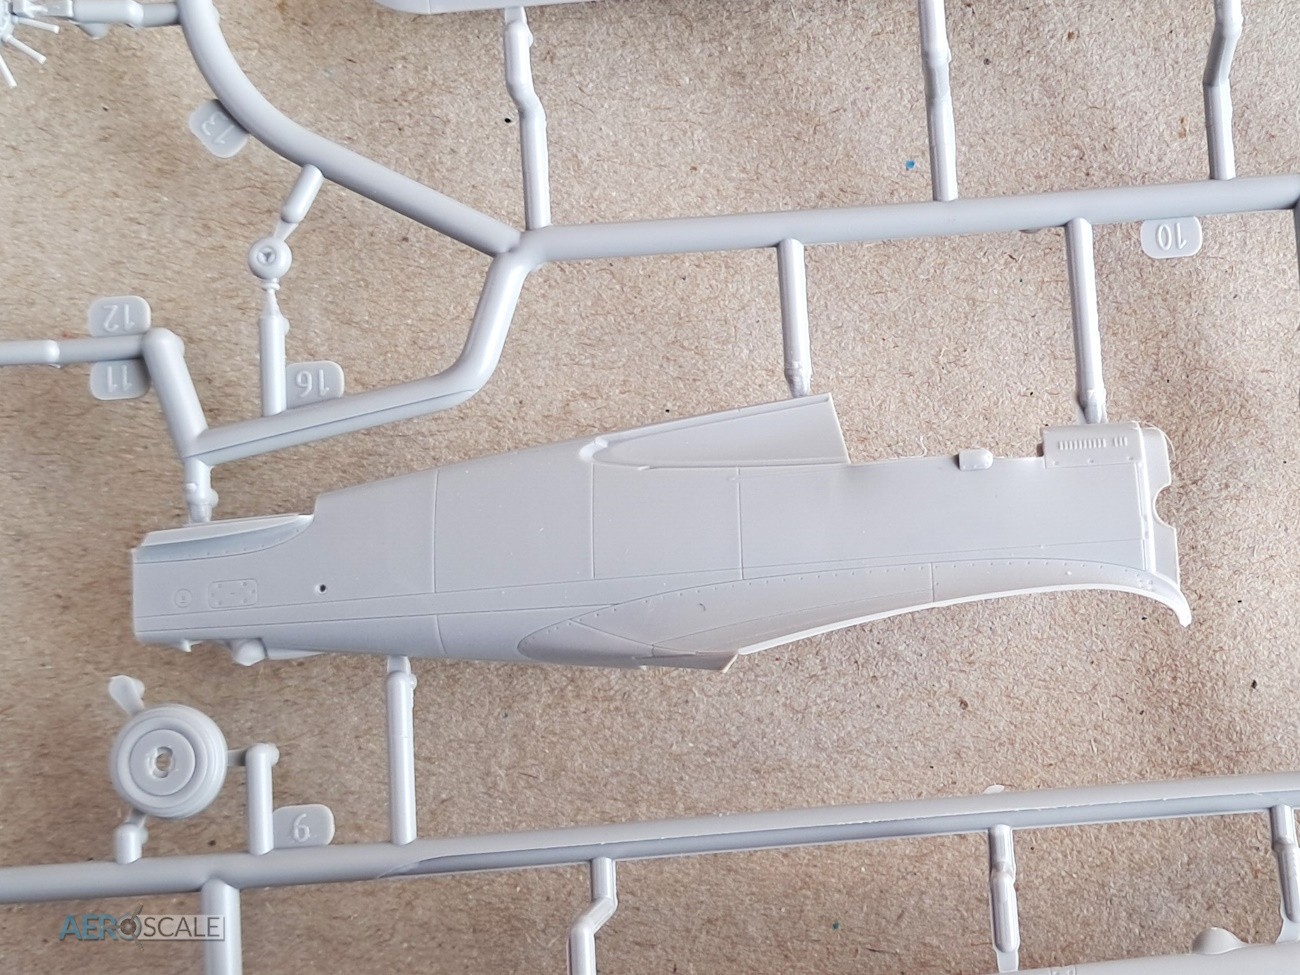
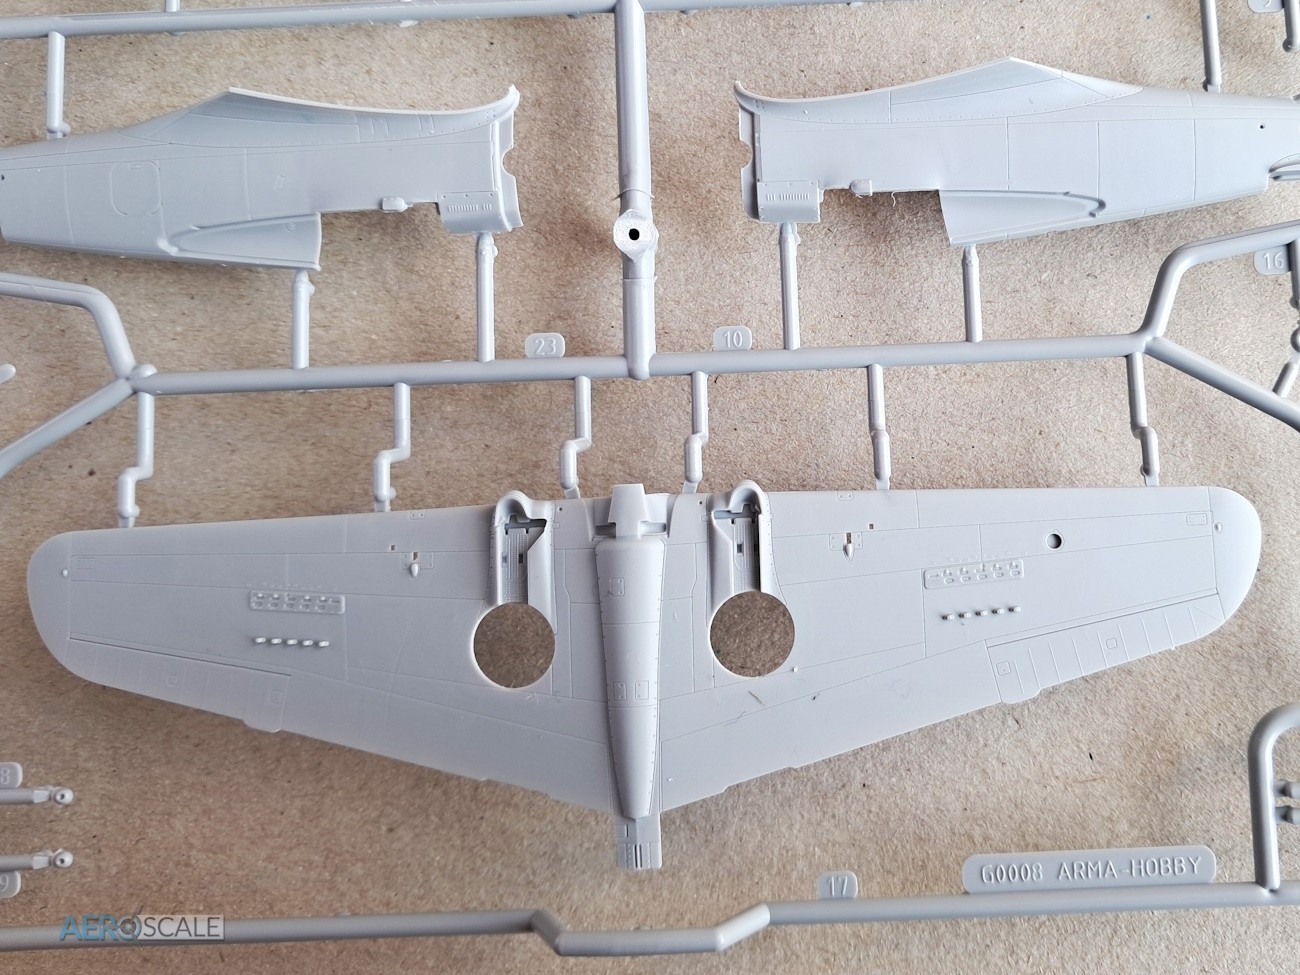
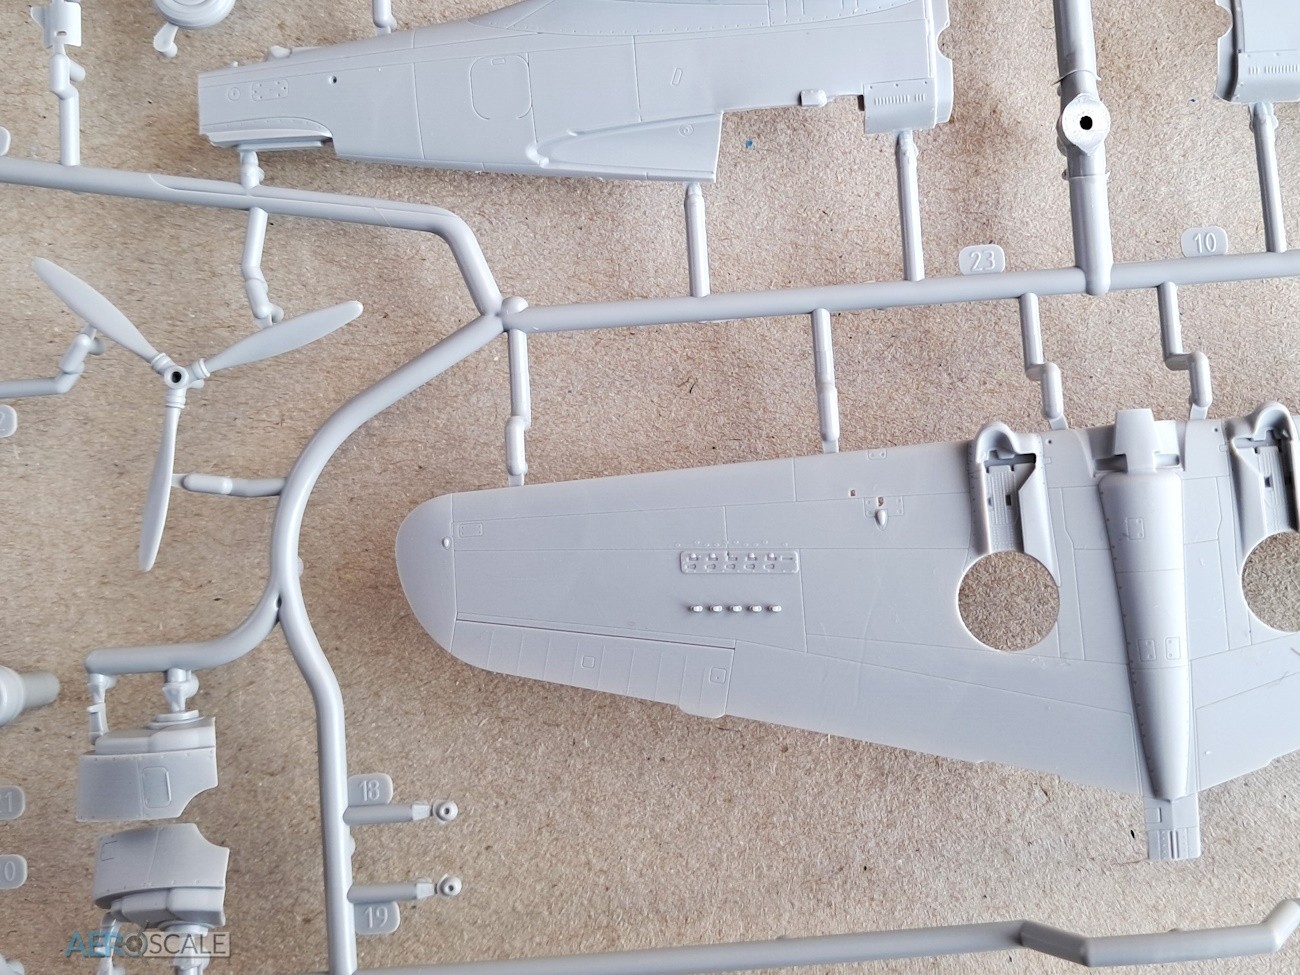
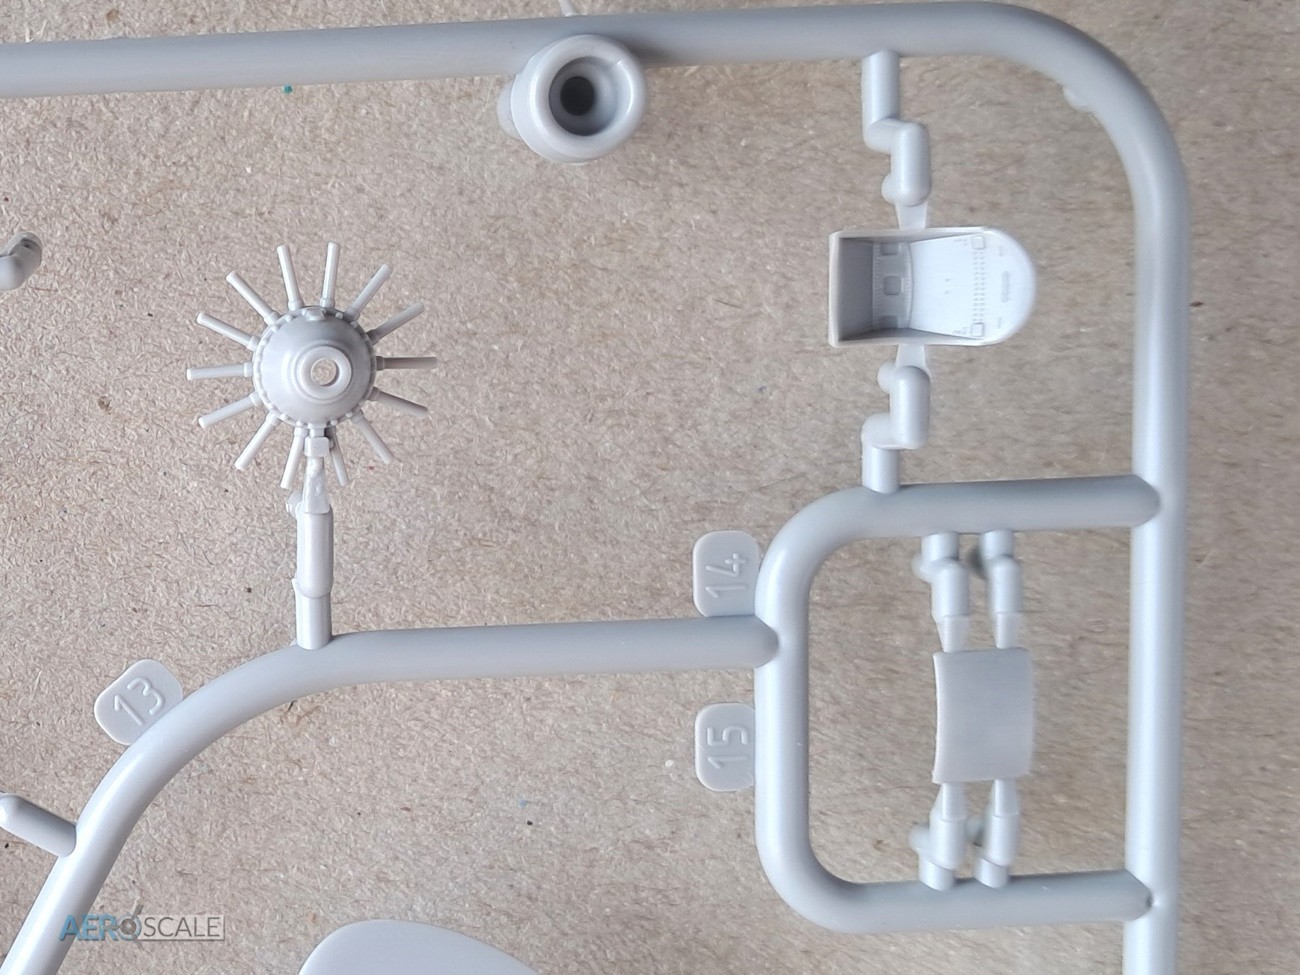
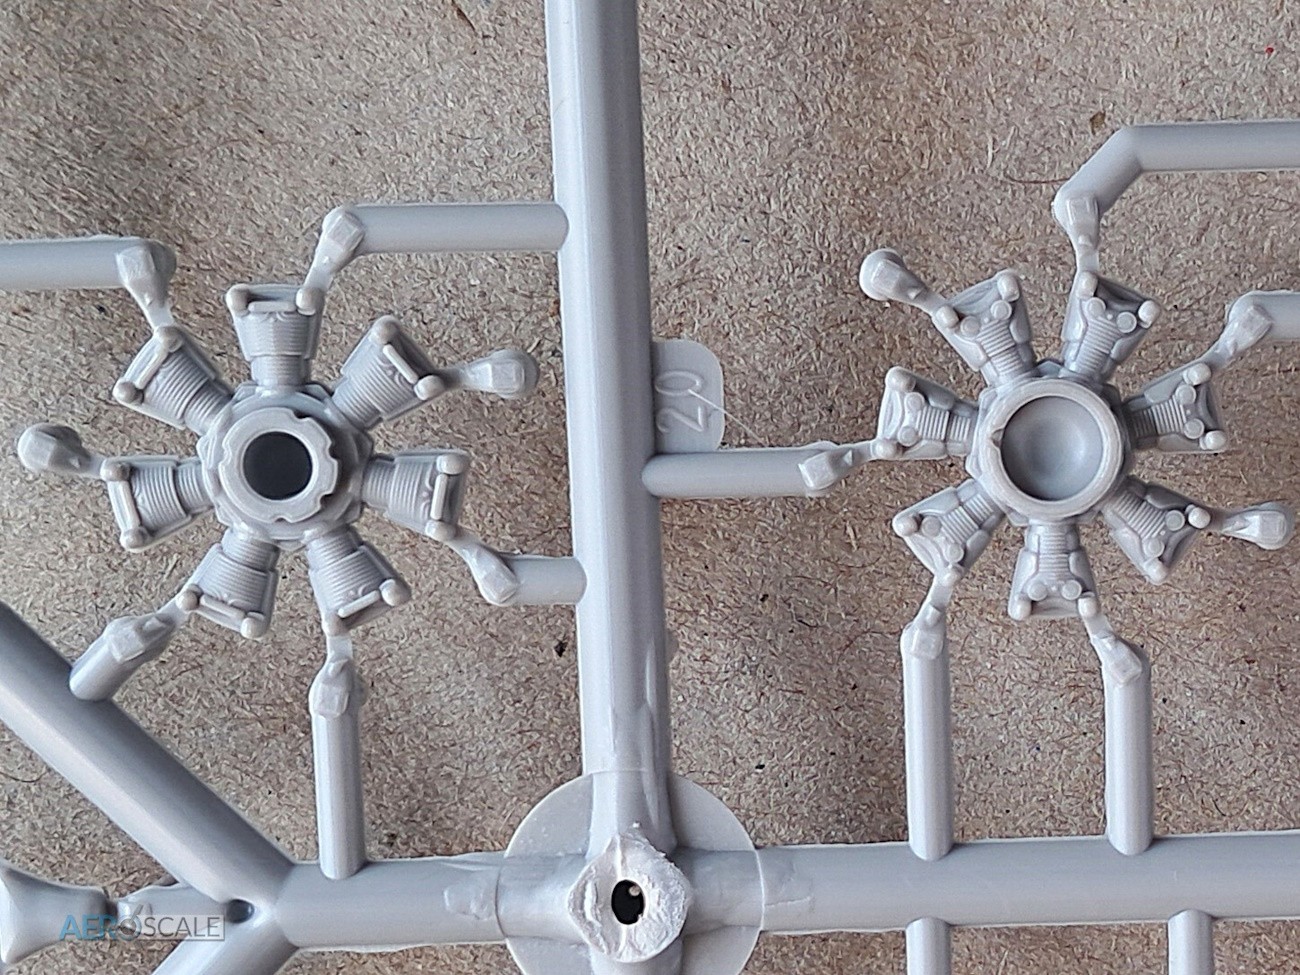
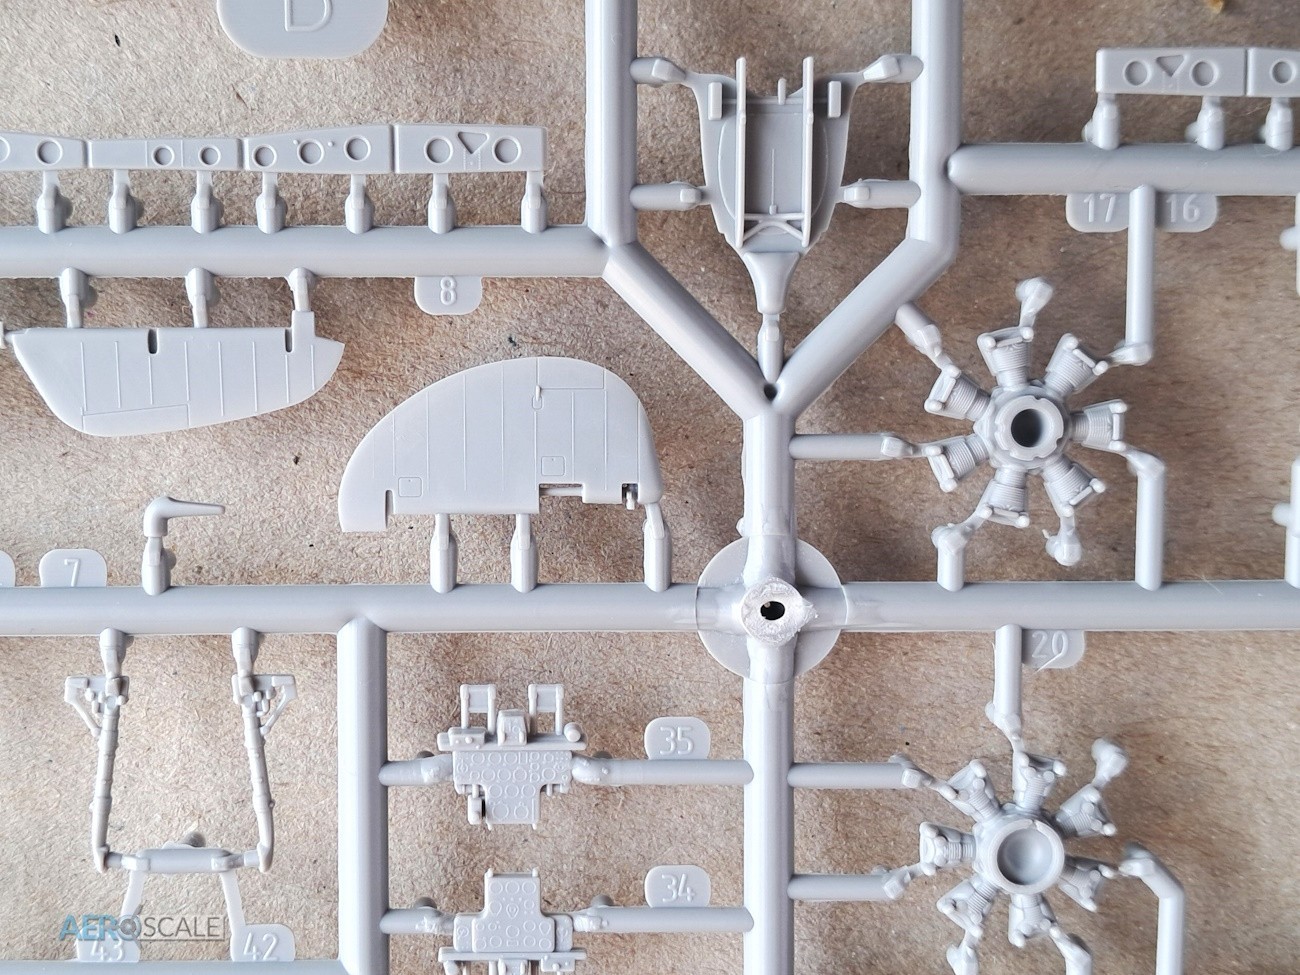
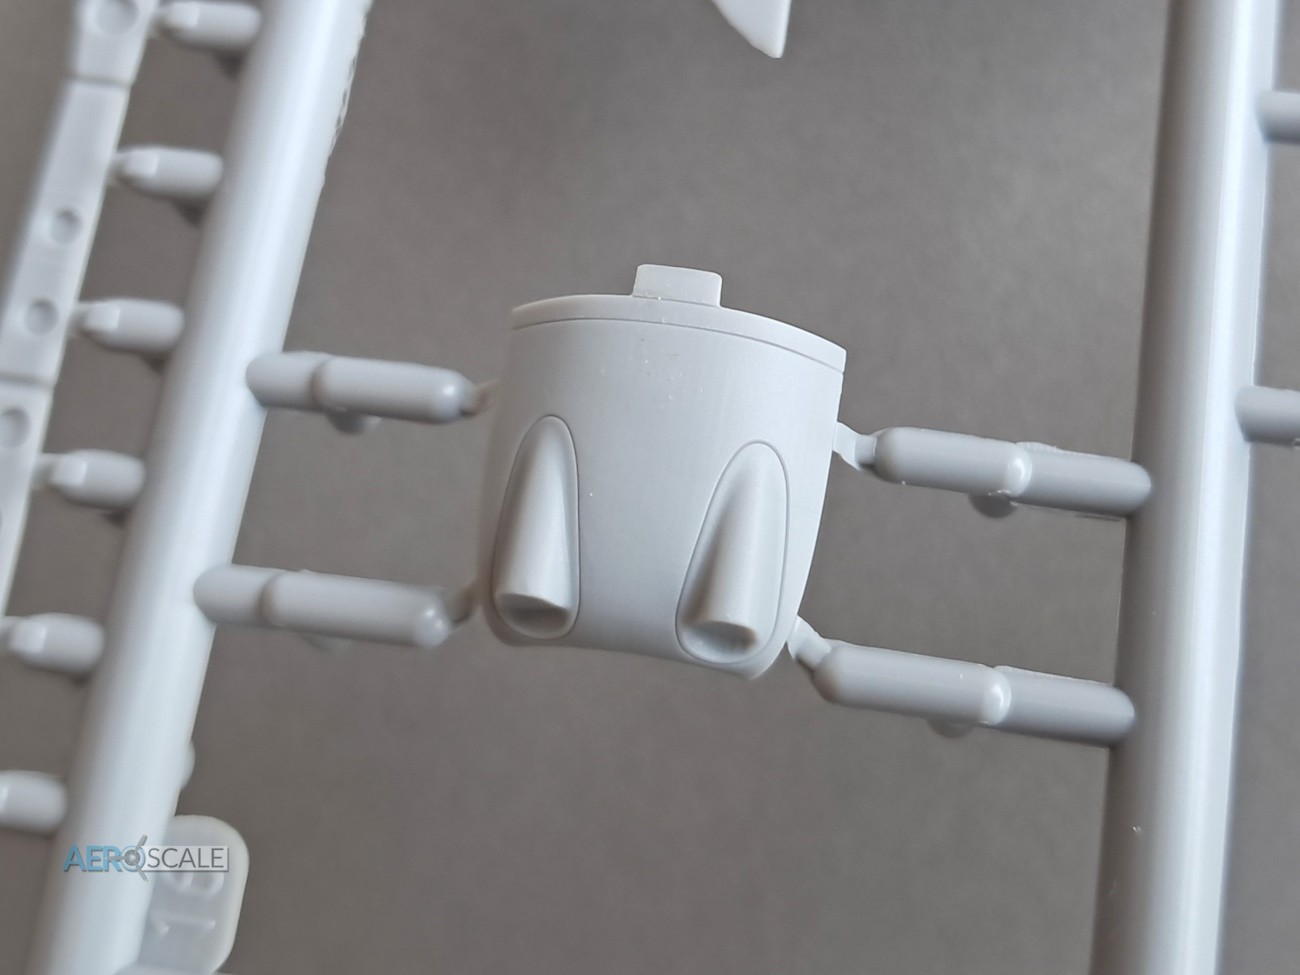
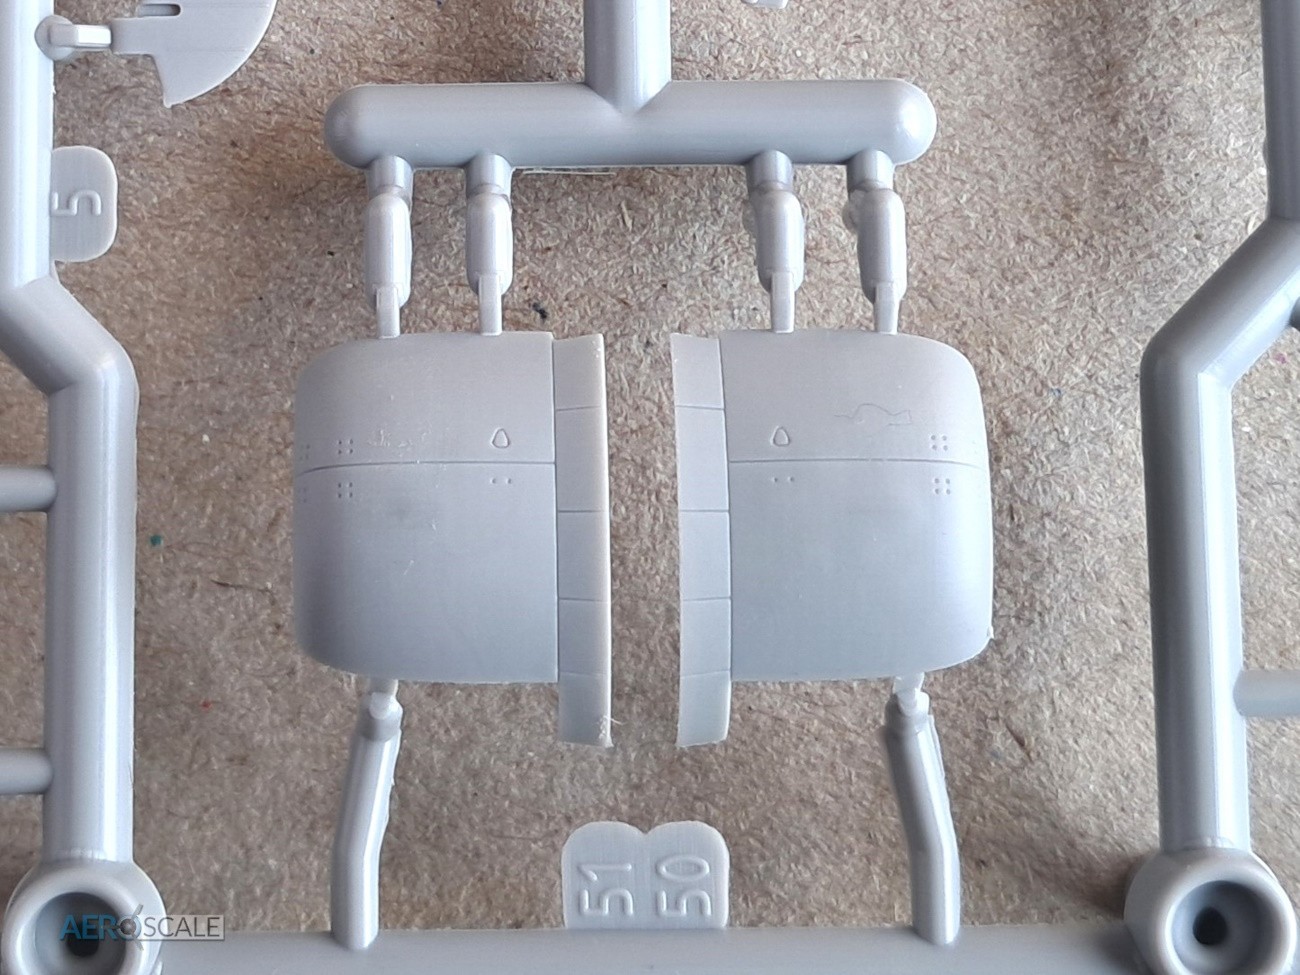
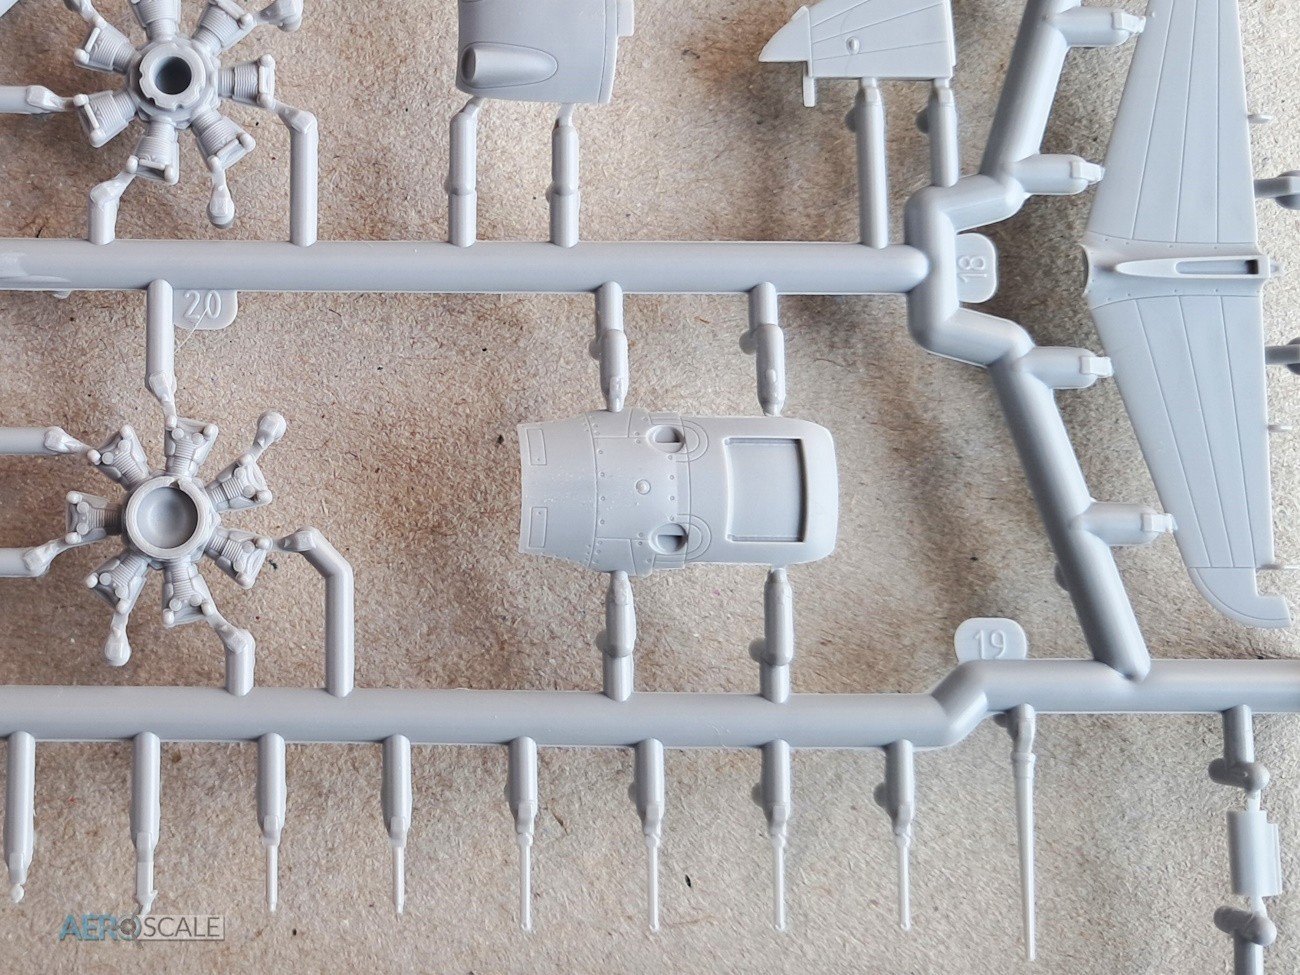
The fuselage is truncated, as the forward fuselage are made up from six parts. The nose section around the fuel and oil tanks, just in front of the windscreen, is made up from two parts. The nose cowling comes in four-parts with a nicely detailed three-part P&W Twin Wasp. The cooling gills are moulded in the closed position. The gun access cover is separate as are the gun nozzles. The engine exhaust shrouds and the air inlet under the cowl are separately moulded and fit into marked recesses. The three-blade propeller is one piece with separate prop bosses. The fuselage features separate vertical tail with separate one-piece rudder. Check out the instructions as the louvered detail just forward of the windscreen needs to be removed for marking options 1 and 2.

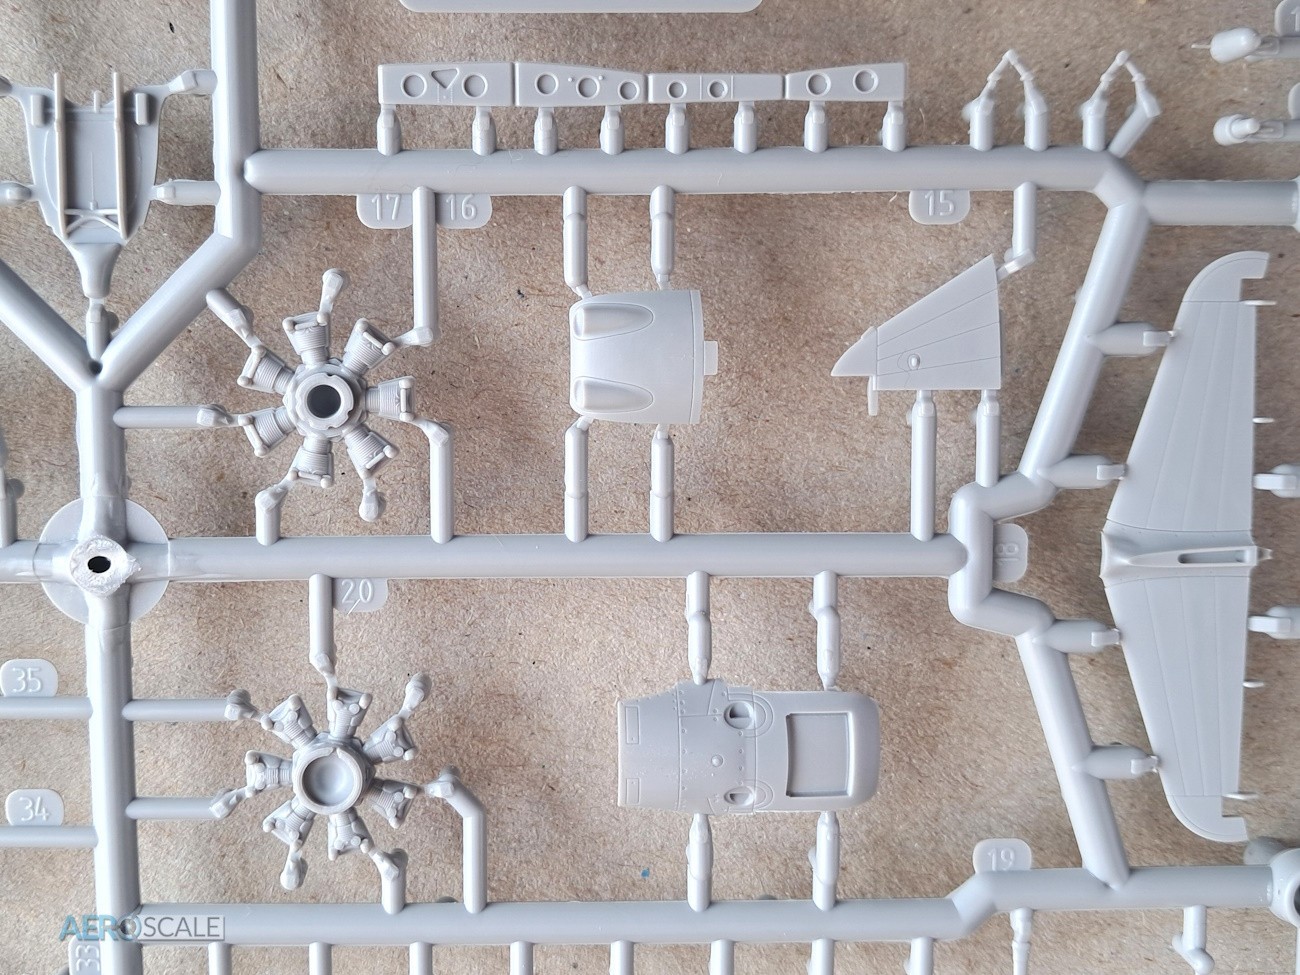
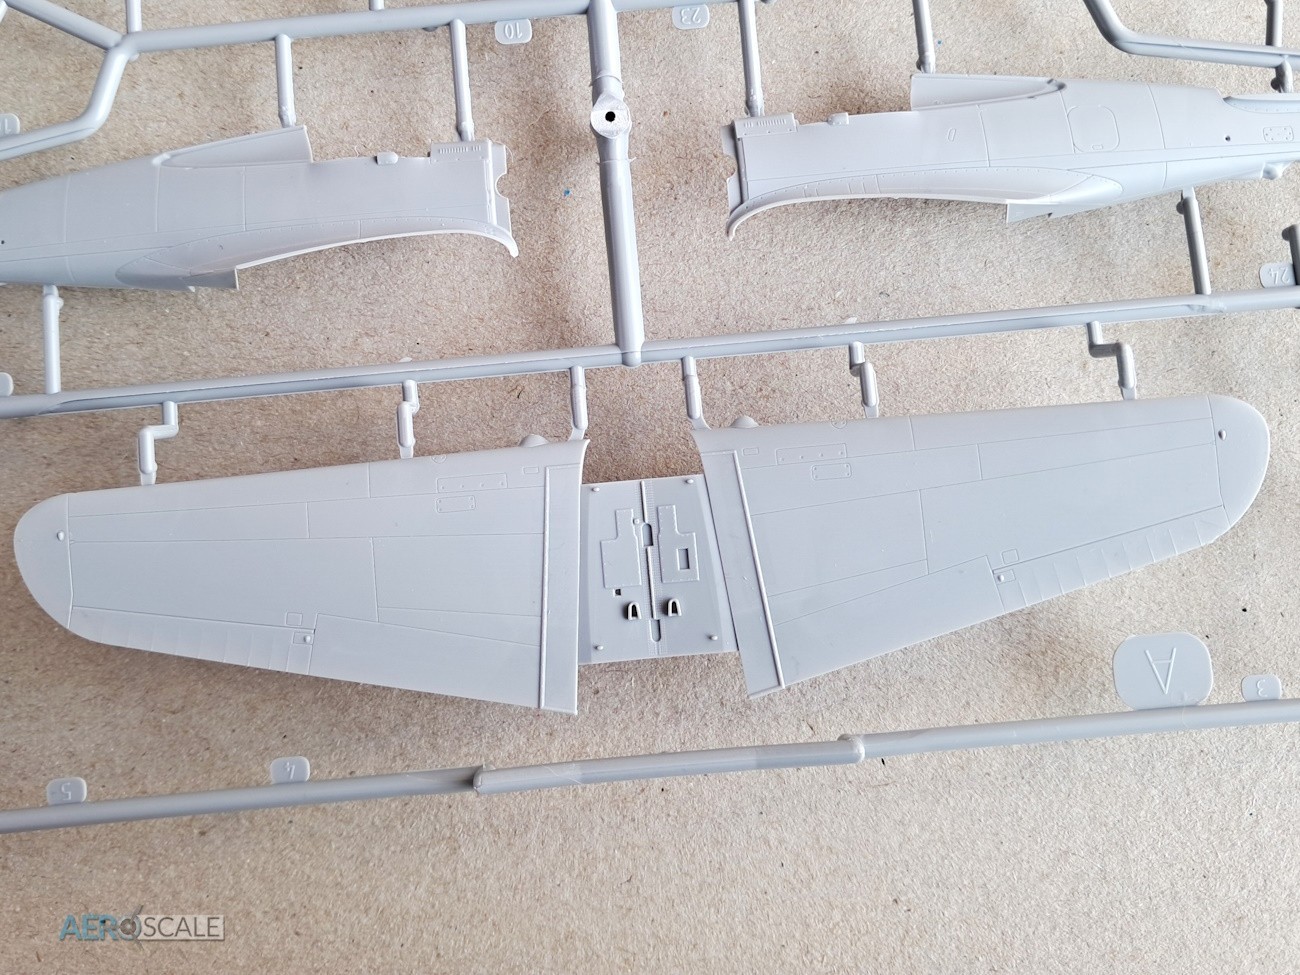
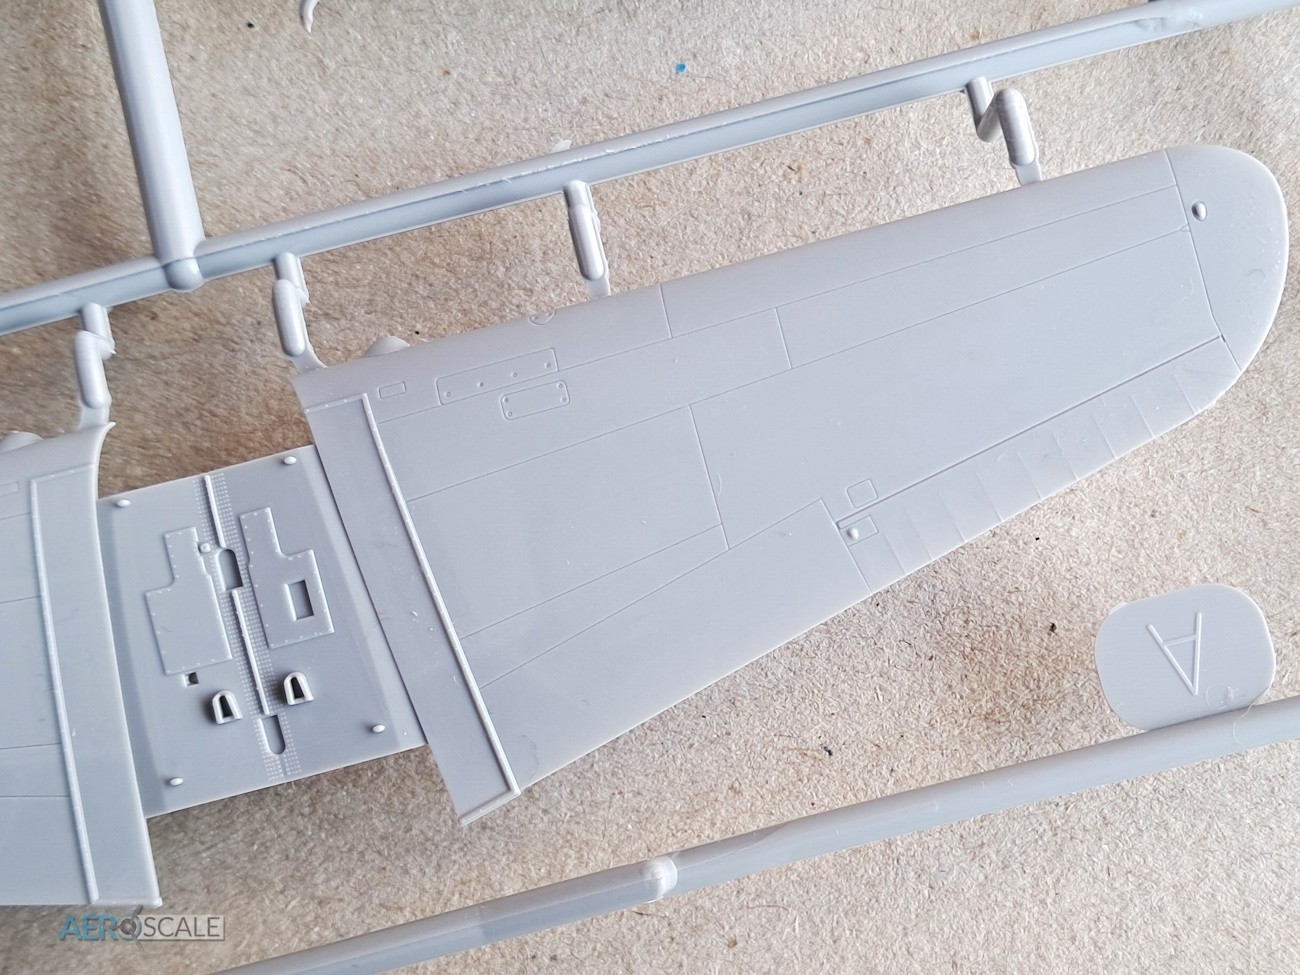
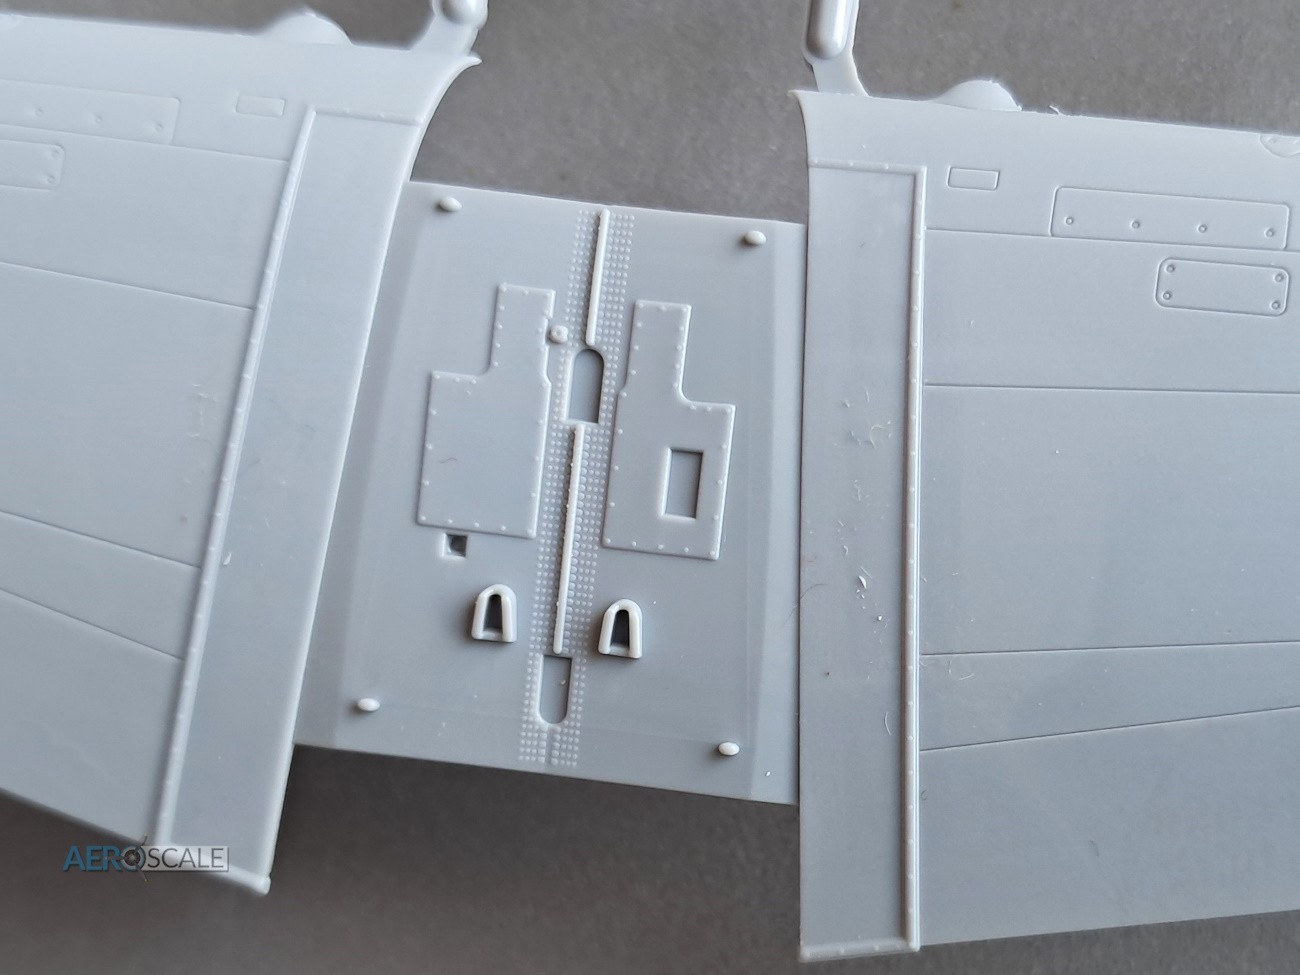
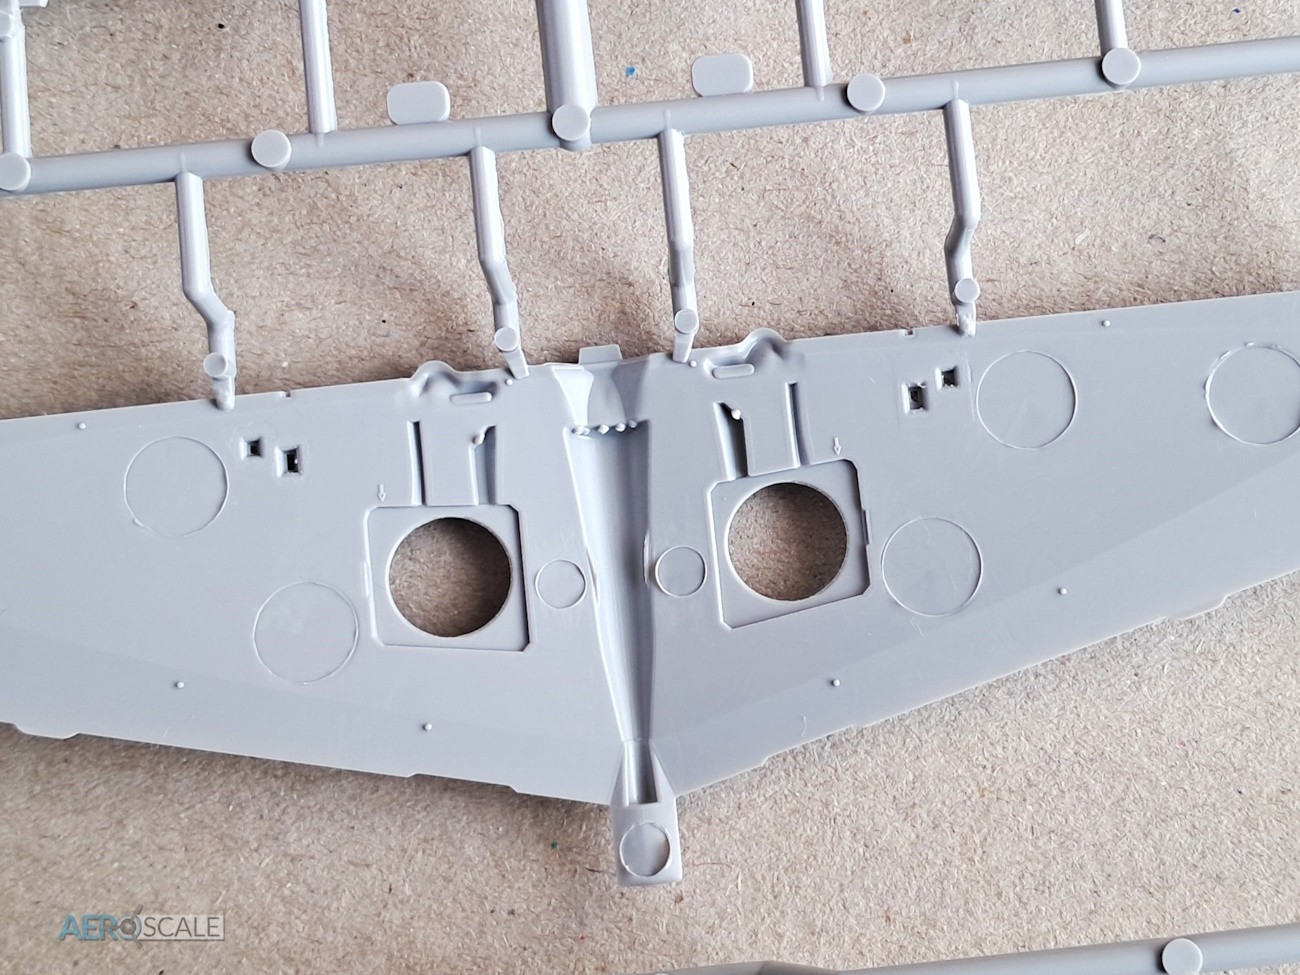
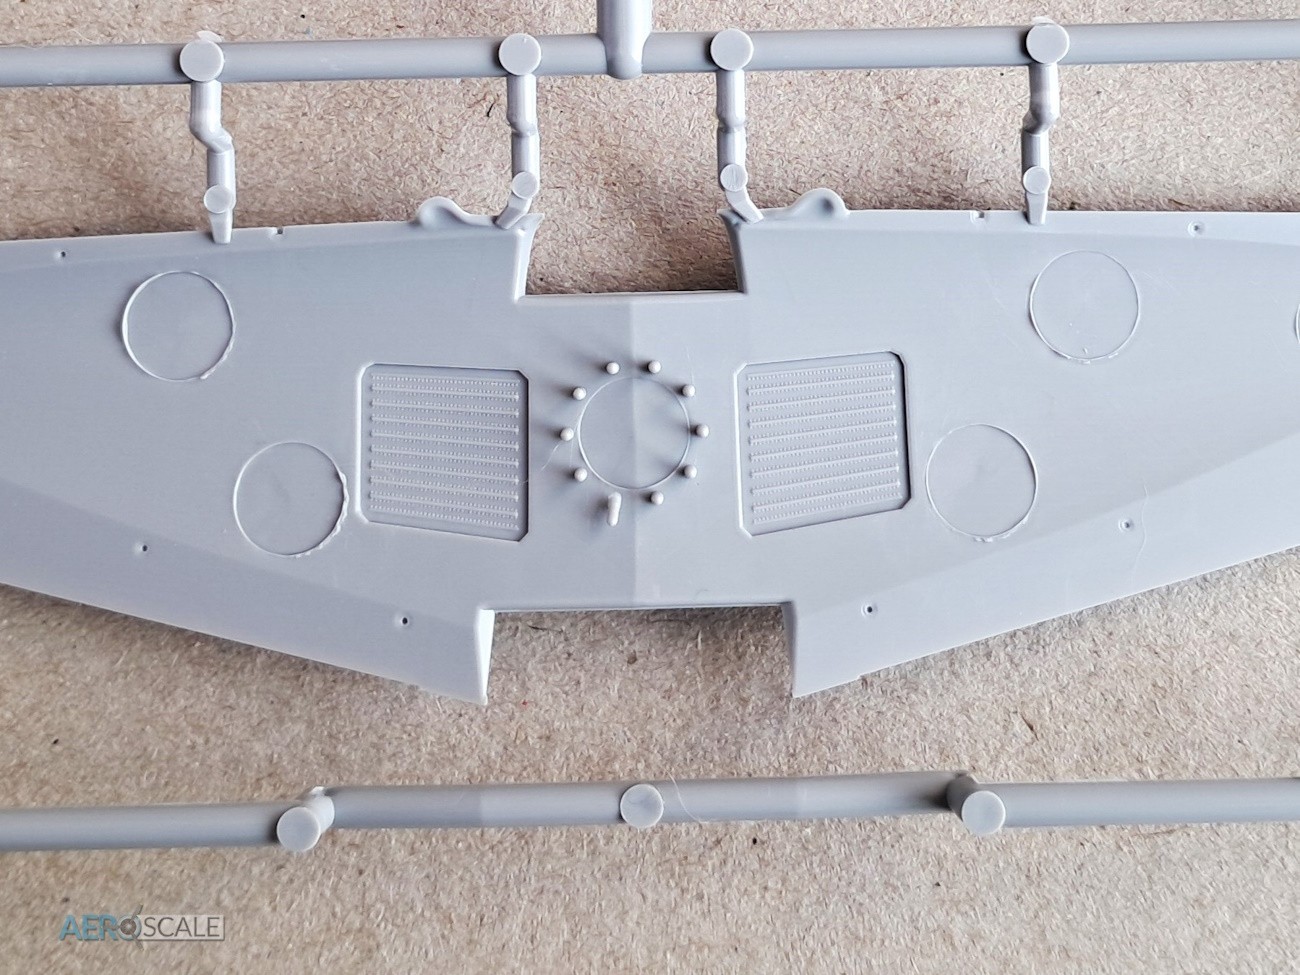
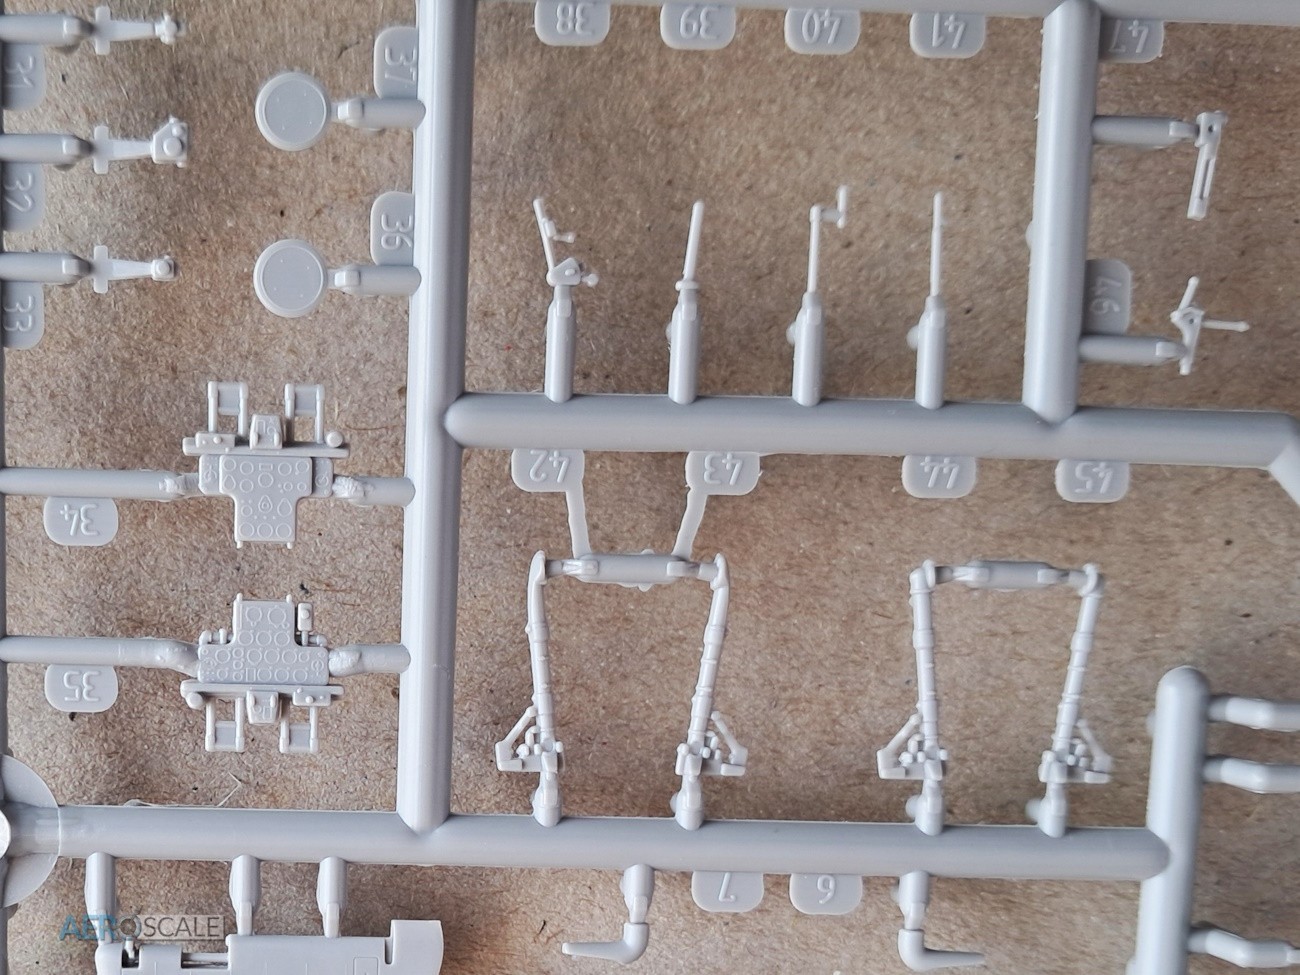
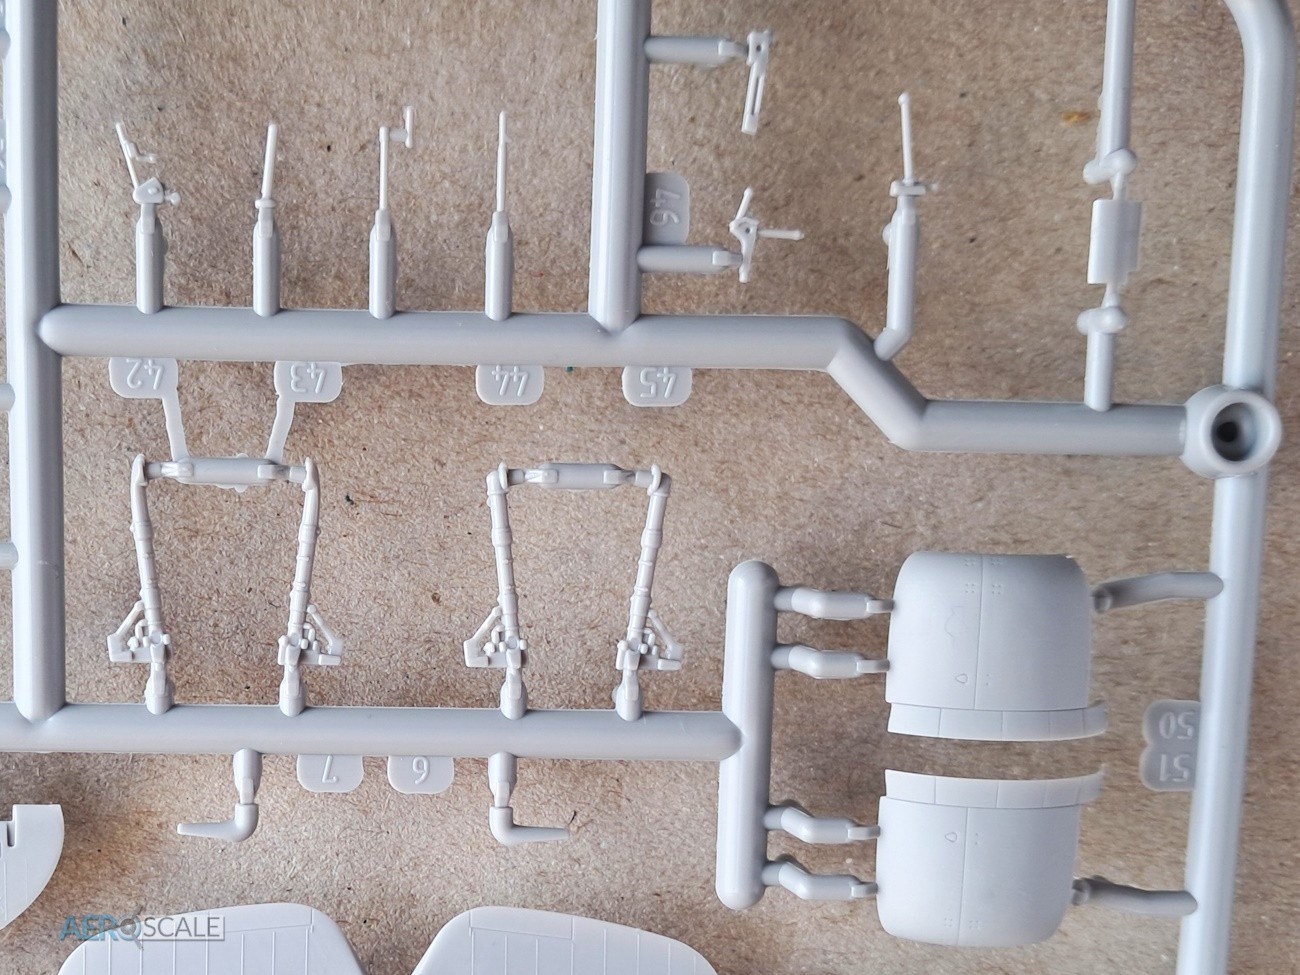
The two-part full span wing is a noticeable design feature from Arma Hobby. The bridge across the upper wing provides the floor for the cockpit. The ailerons and flaps are moulded in a neutral position. The upper wing features raised detail on the roof of the undercarriage bay. Arma Hobby has employed using foldable plastic to create the walls of the undercarriage bay. The walls fit into a well-defined recess. The raised moulded detail under the wing is removed for options 2 and 3. The fabric covered control surfaces with the rib tape and stretched fabric being nicely represented. This goes for the other control surfaces on the rudder and elevators. The horizontal tailplane has separate one piece elevator.

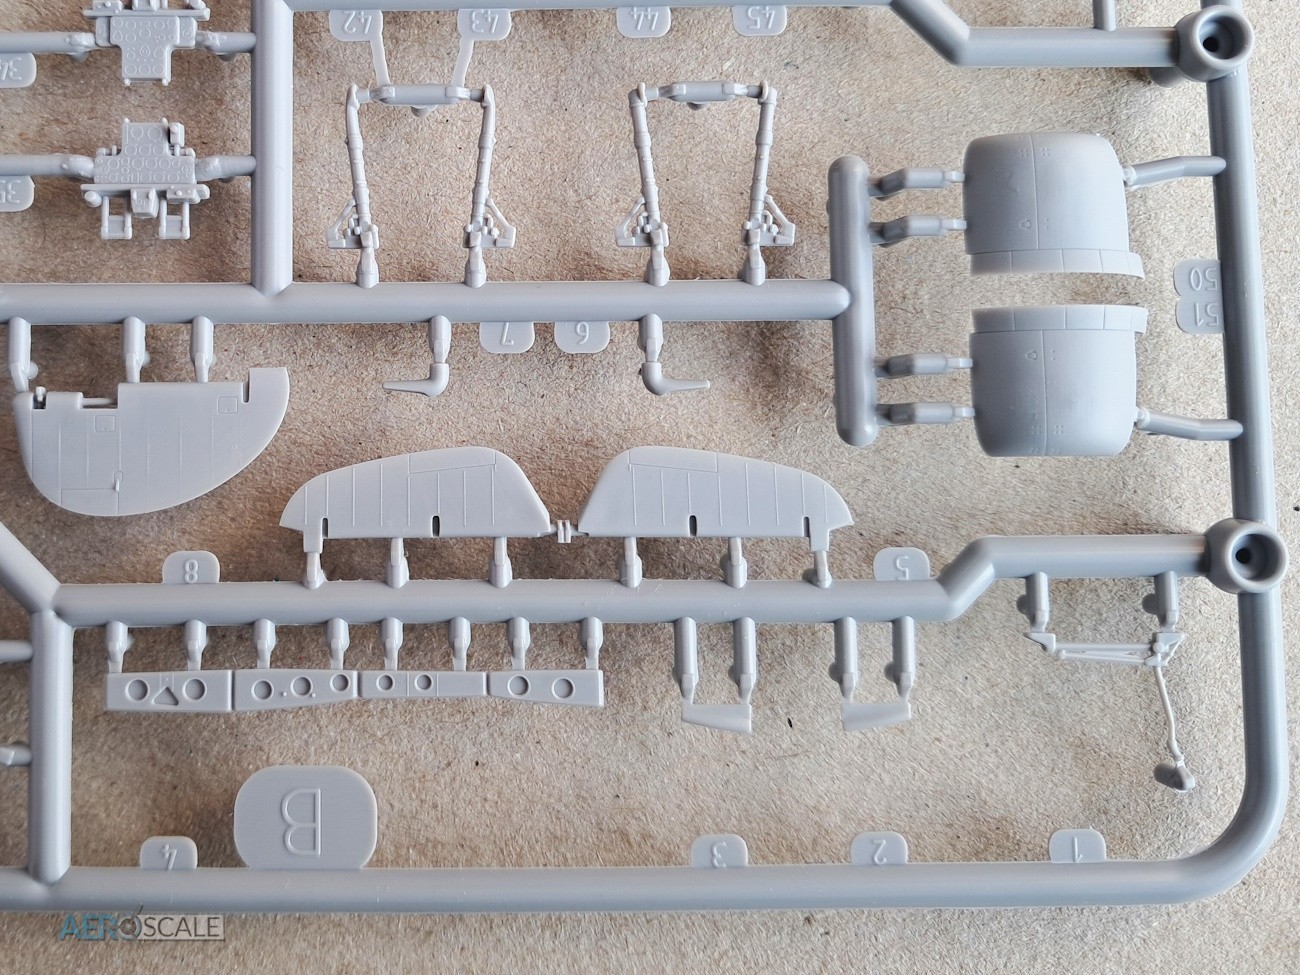
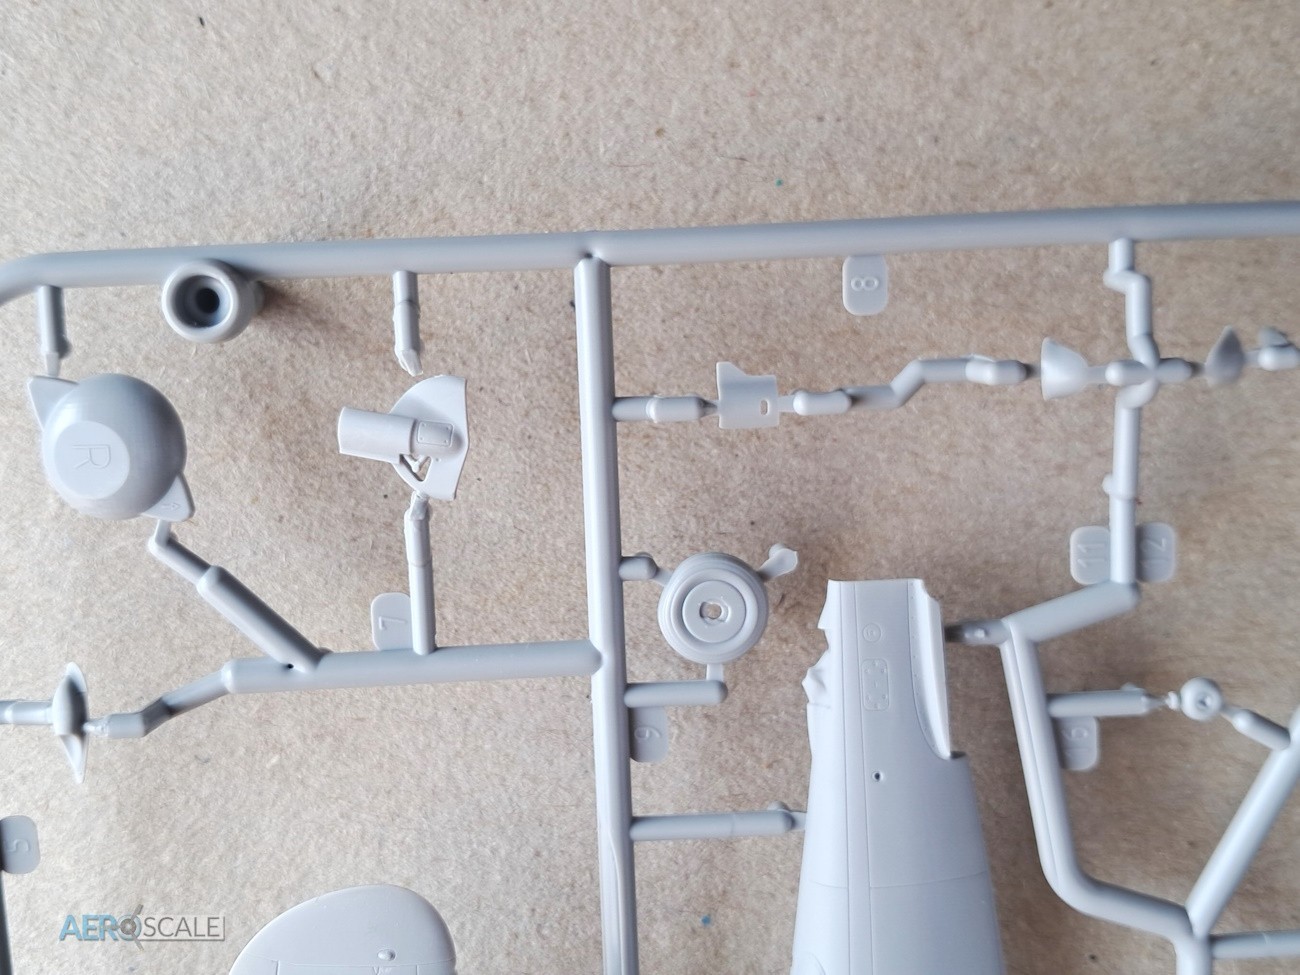
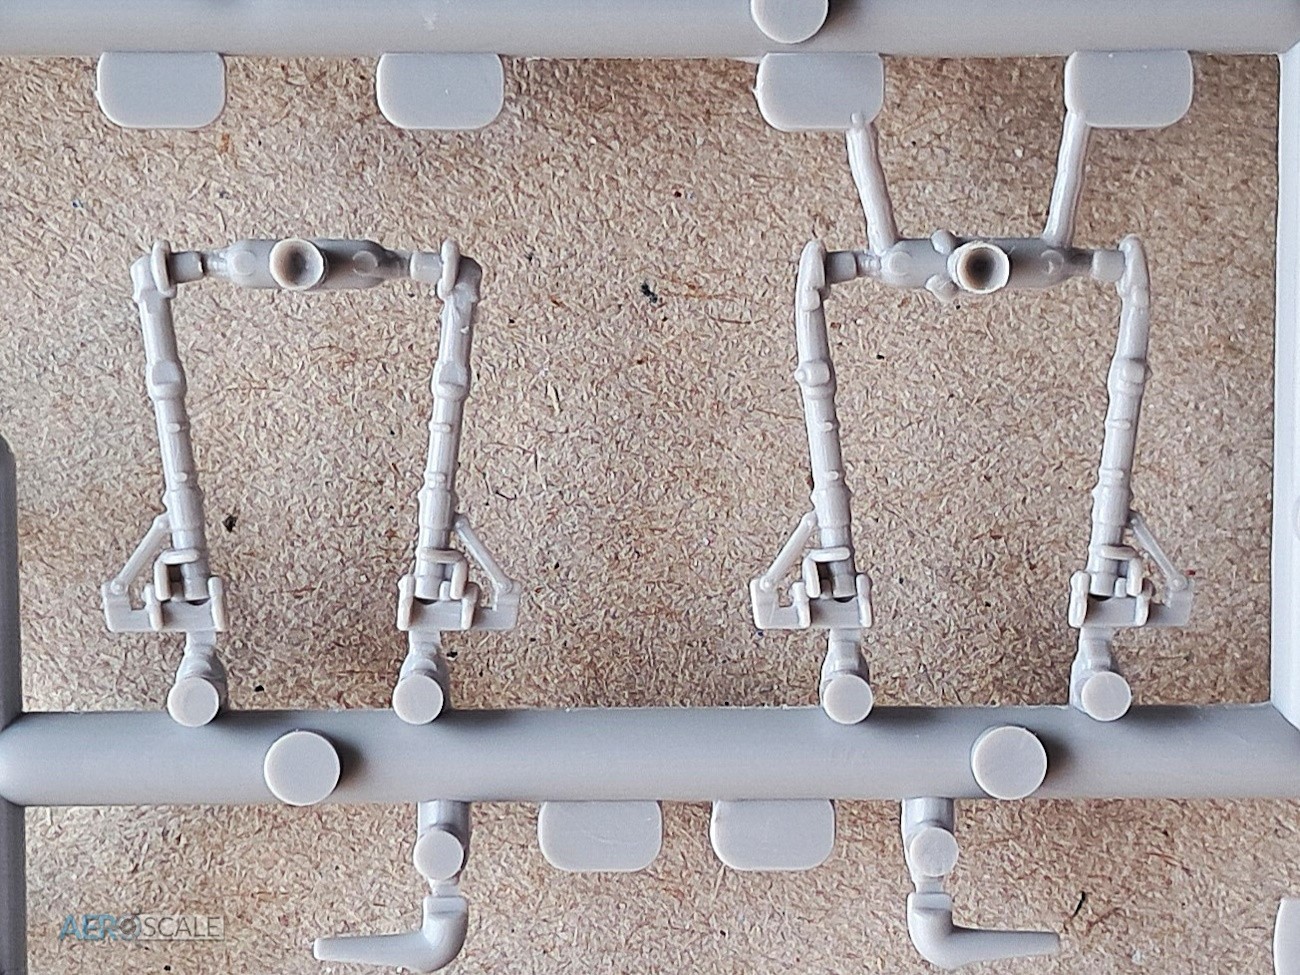
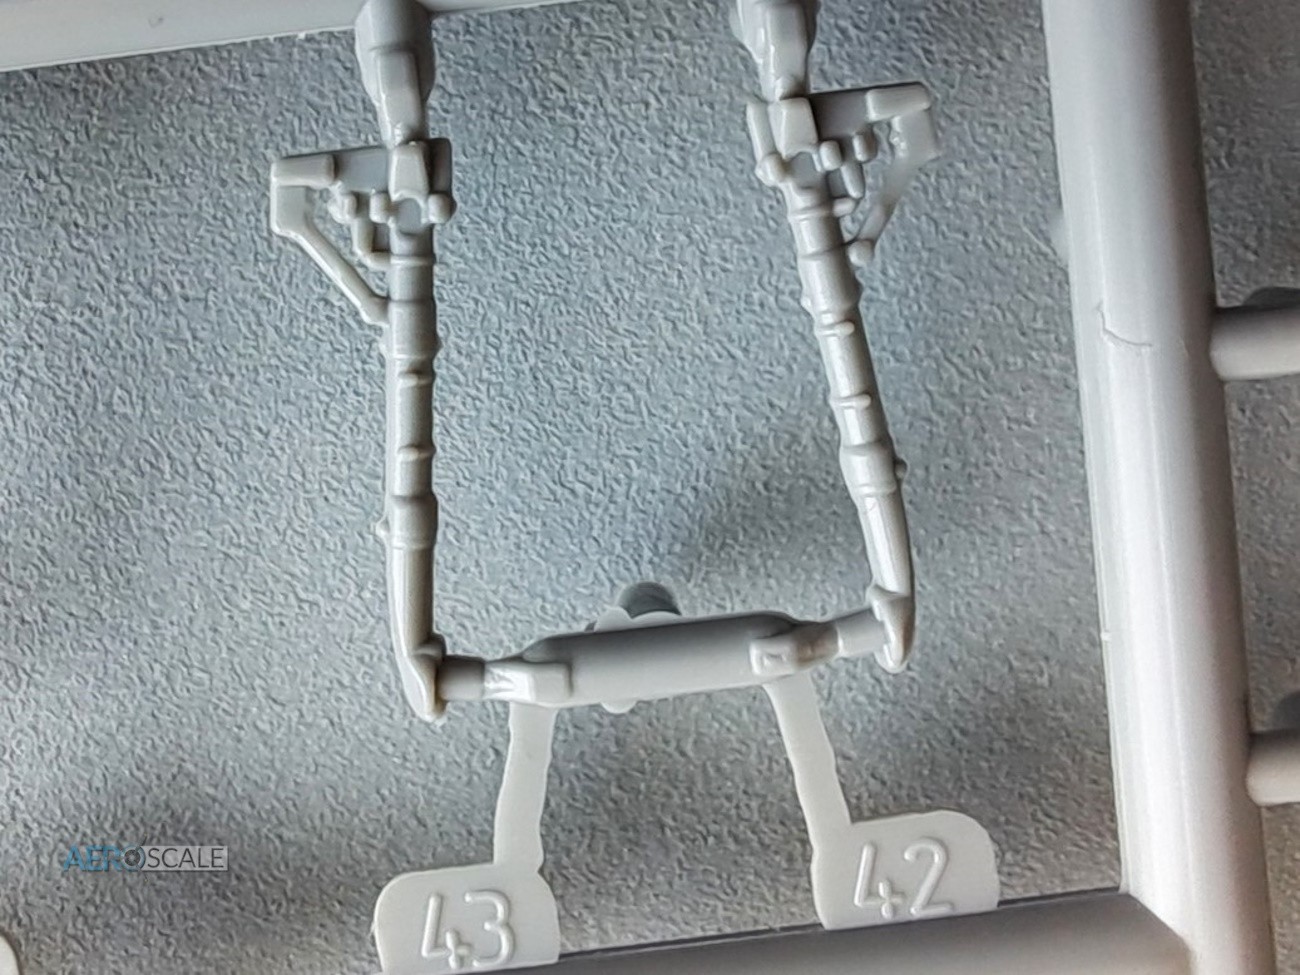
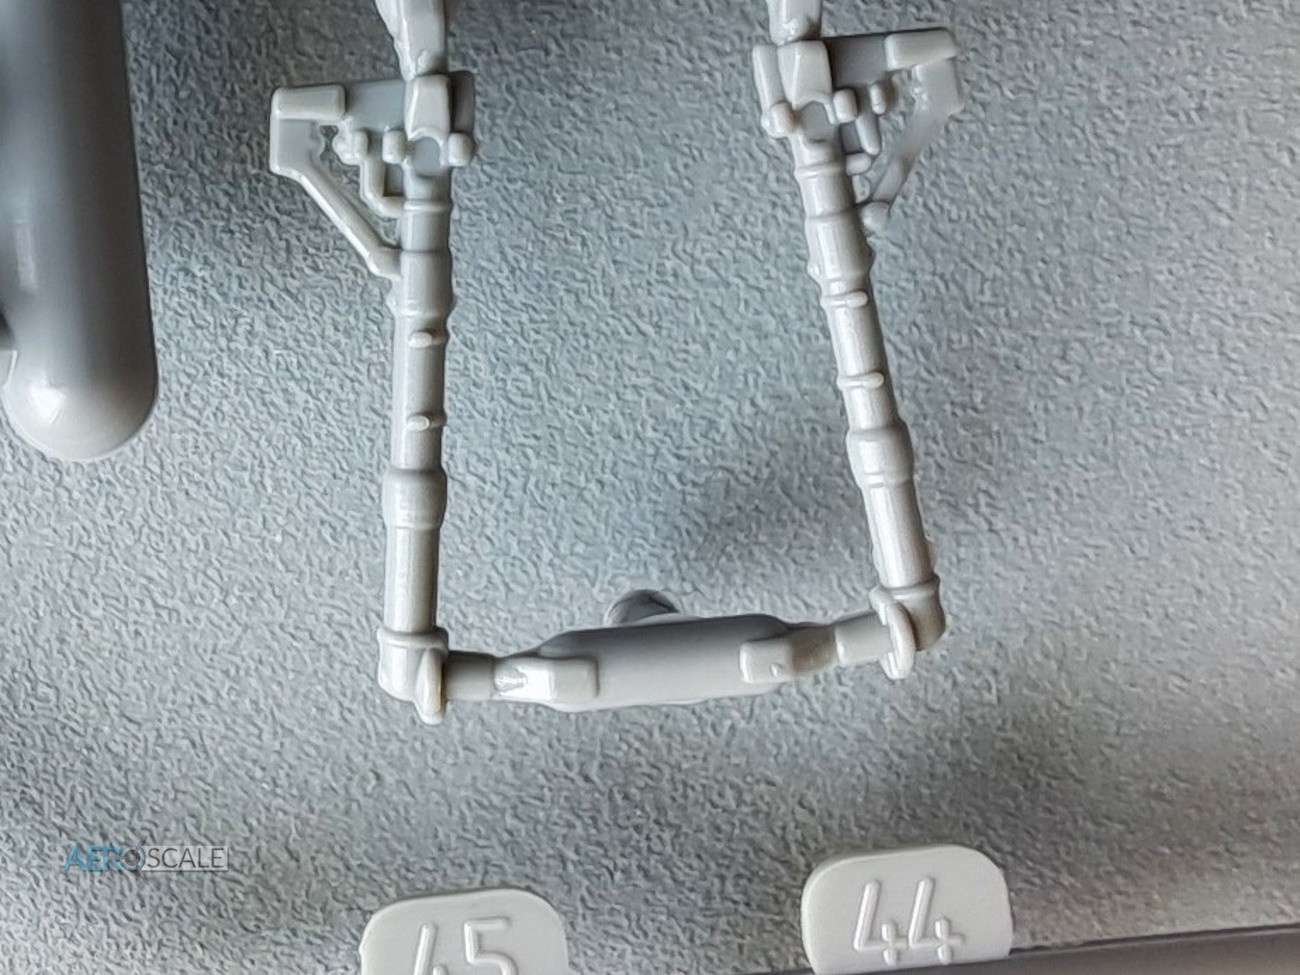
The parts for the main undercarriage look well moulded. The undercarriage was designed to fold with a 90°rotation. There are two sets of legs, one set longer than the other. Legs are one piece with a generous stub to glue to the inside of the wing. There are three doors for each of the legs. Arma Hobby has replicated the cut out on the main door nicely, showing of the torque link. The tyres have a weighted look to them and the hubs are separate. There are paint masks included for the wheels. The tail wheel and oleo are one piece, with separately moulded doors. Arma Hobby has included paint masks for this tiny part.
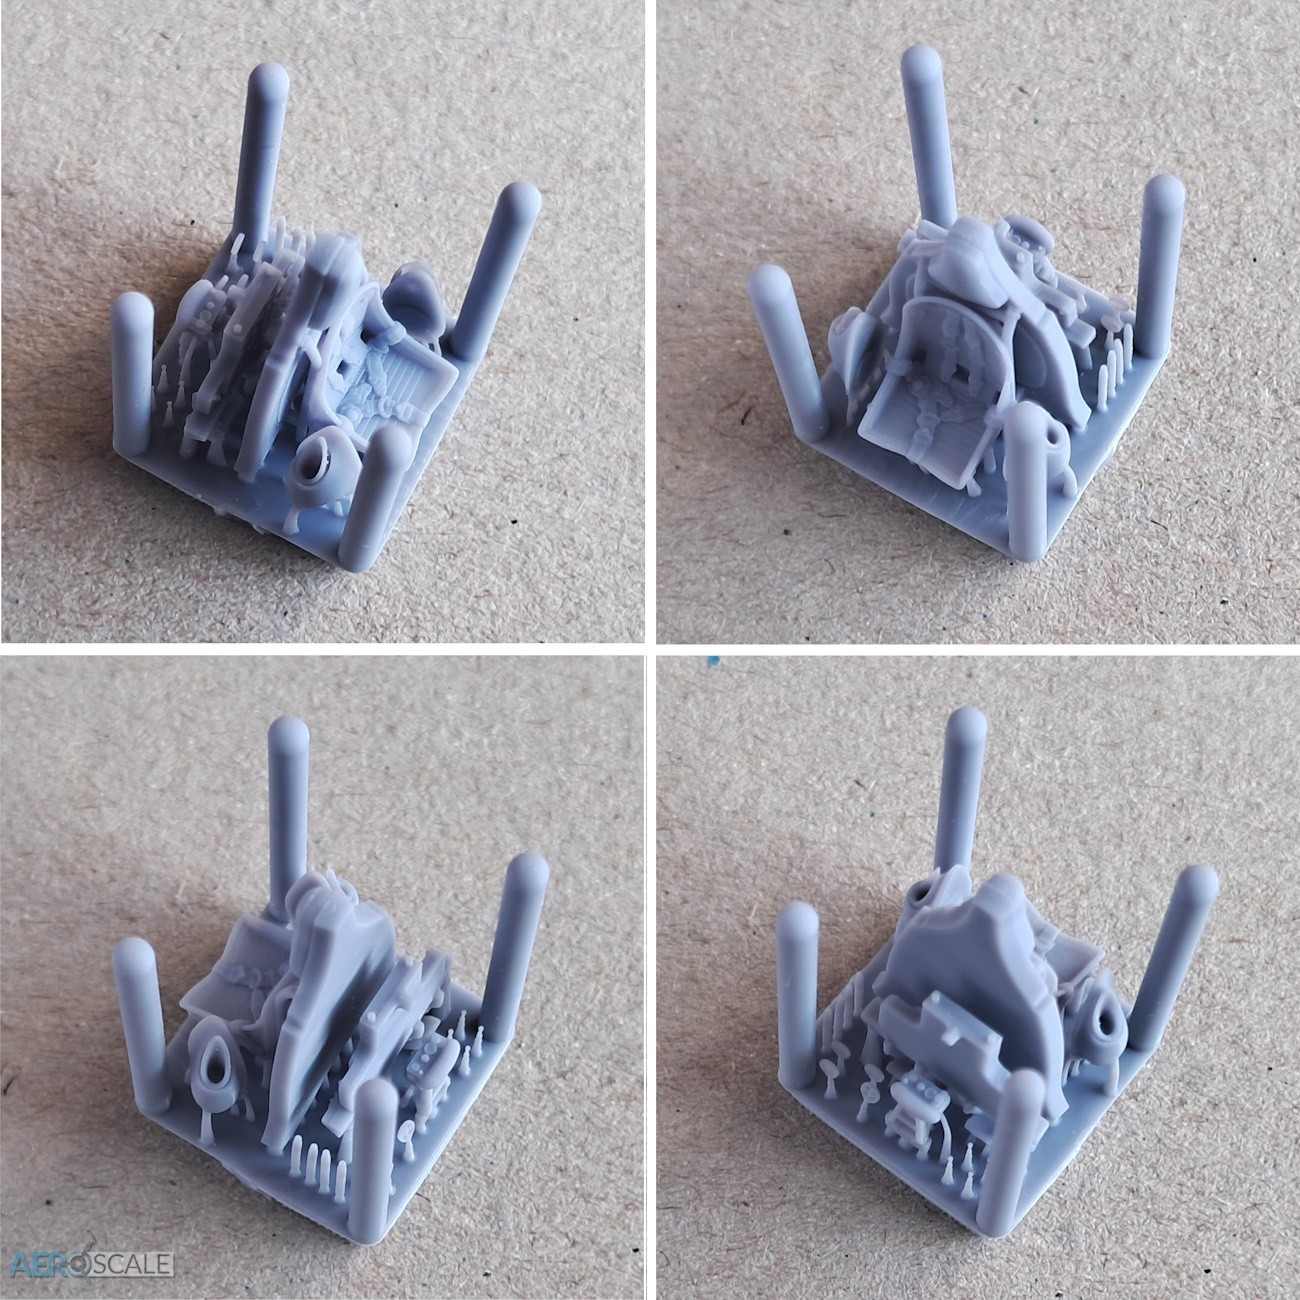
QR code for additional 3D printed detail set is included with the kit. If you have access to a 3D printer, then it is worth considering. As mentioned, the seat is well worth printing. The gun barrels and bead and cross gun sights are that more refined. Great care needs to be exercised to separate the parts from the block, as some of them are tiny. The 3D parts do have an amazing ability to go shooting off to the most unexpected places.
This separate set includes:
- Bulkhead with seat and seatbelts
- Instrument panel with rudder pedals
- Exhaust tubes with covers
- Gun barrels
- Reflector gunsight
- Ring and bead gunsight
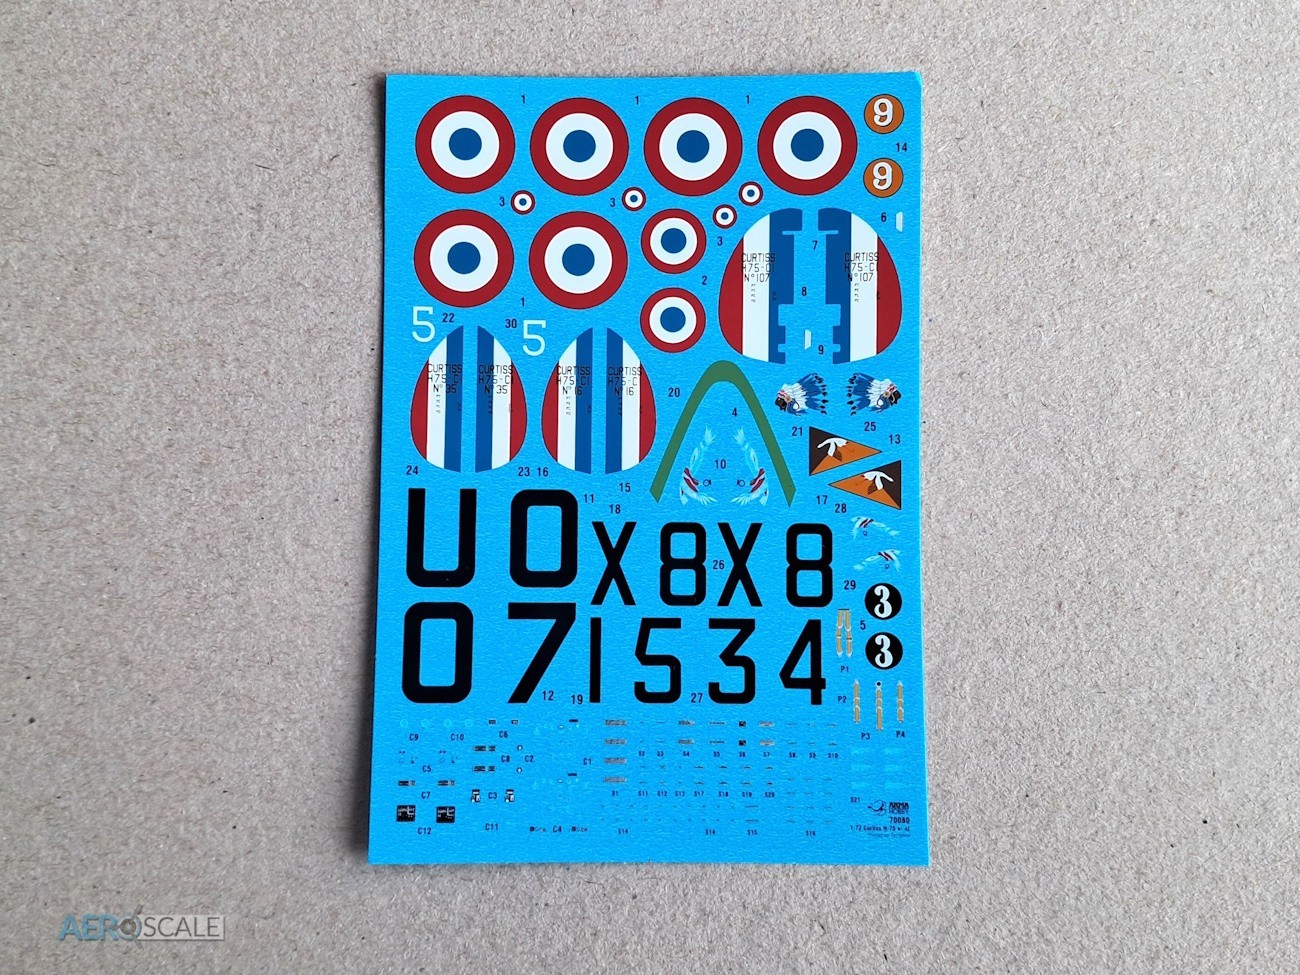
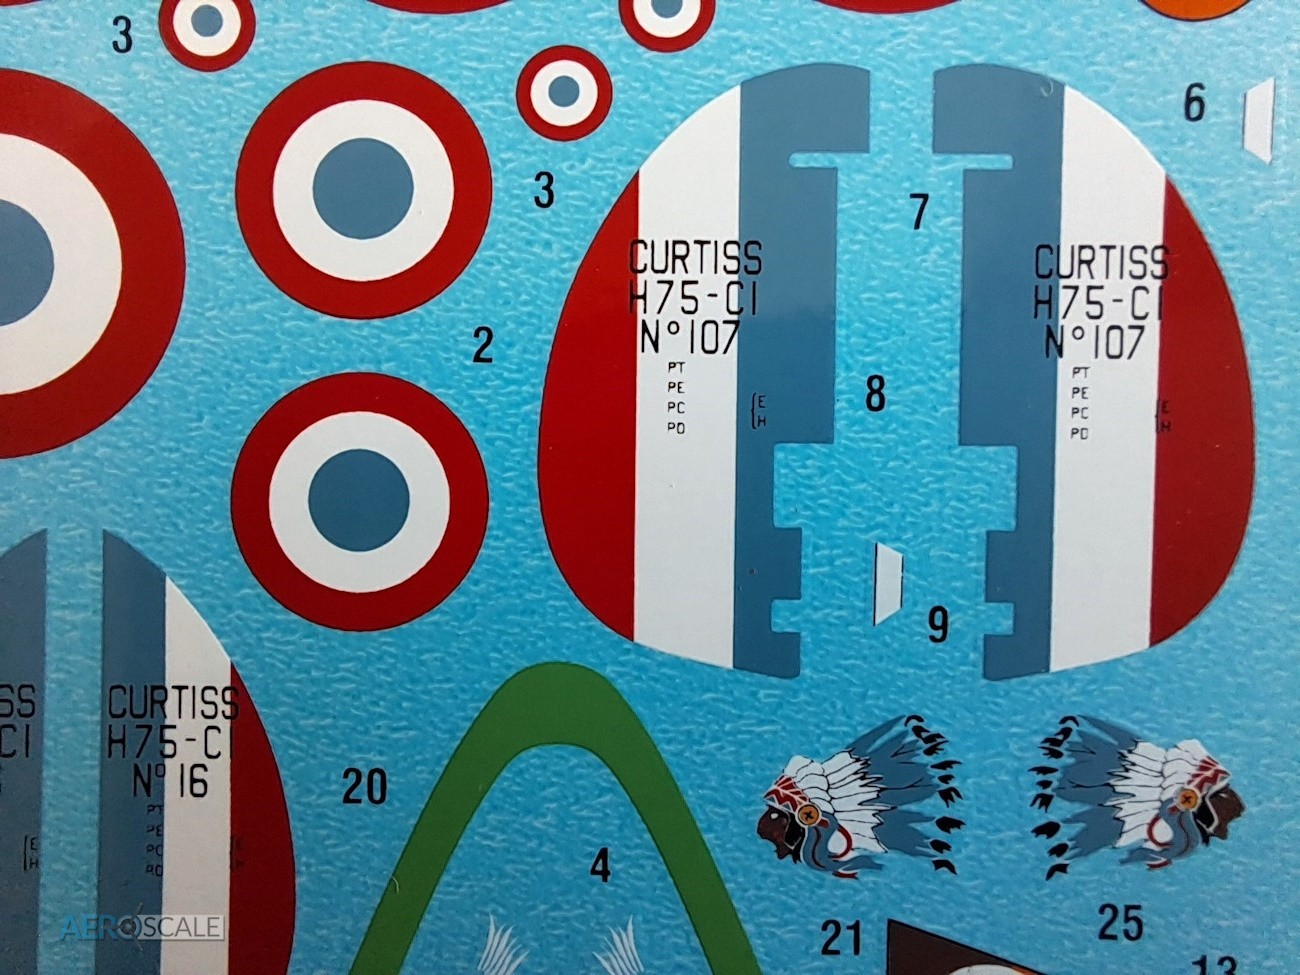
Decals are produced and printed by Techmod. They look superb with strong colour density and the registration of the colours looks spot on. There is minimal carrier film, so they should settle well using good decal solutions. A pity the aircraft details on the tail of each aircraft are not separate decals. Particularly for those that would have masking and painting the tricolour.
Marking options included with this new tool kit:
- Curtiss H-75 A2 no. 107 (U007), GC 1/55, pilot 1Lt. Jan Zumbach. Bordeaux, June 1940.
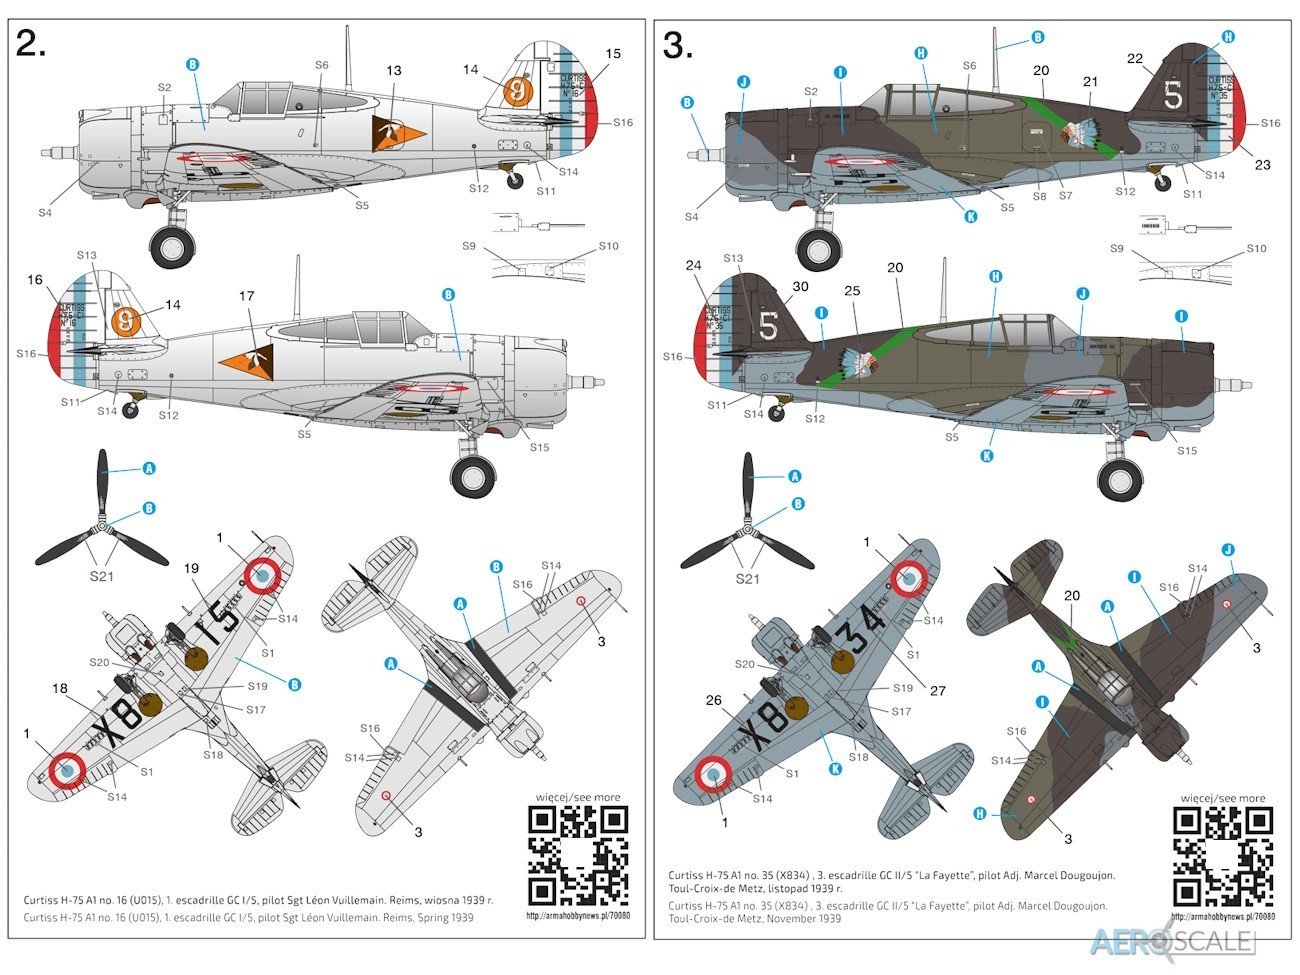
- Curtiss H-75 A1 no. 16 (U015), 1. escadrille GC I/5, pilot Sgt Léon Vuillemain. Reims, Spring 1939.
- Curtiss H-75 A1 no. 35 (X834) , 3. escadrille GC II/5 “La Fayette”, pilot Adj. Marcel Dougoujon. Toul-Croix-de Metz, November 1939.
Options 1 and 3 feature three colour disruptive camouflage on the upper surface. Option 1 has bonus marking for the Hawk of Jan Zumbach. You can have the aircraft with or without the fuselage roundel. The swan emblem of le GC 1/55 also was applied to two different area of the fuselage. Option 2 is either bare aluminium or doped aluminium. There are slight variations in the airframe for each of the marking options, so carefully examine the instructions for the variations.
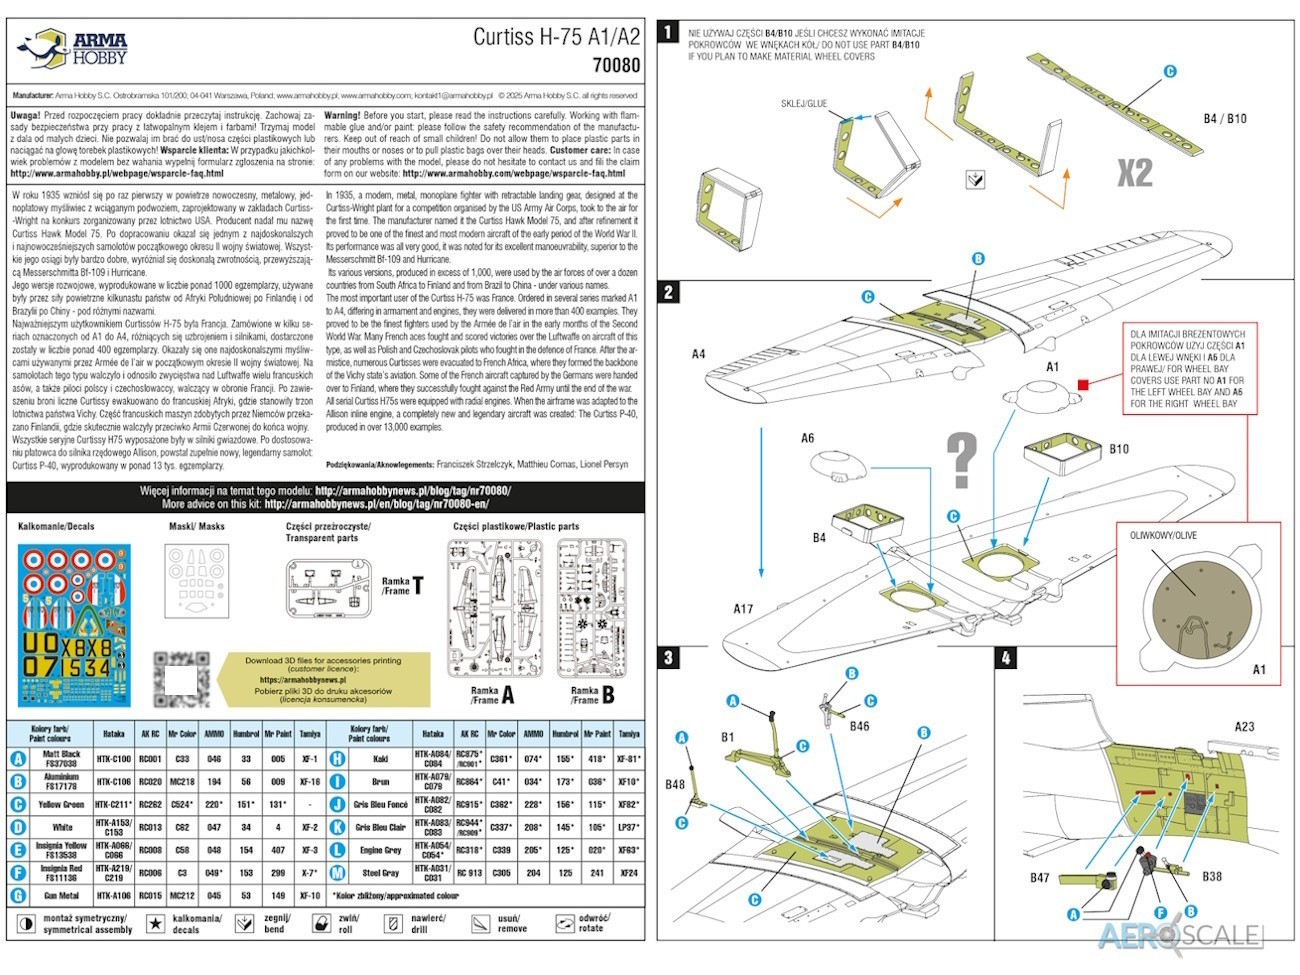

The eight-page A5 format instruction booklet is exemplary with clear construction instructions and diagrams that are colour coded. There is a useful rigging guide for the radio aerial. There are several paint manufactures referenced in the instructions including: Hataka, AK RC, Mr Color Ammo, Humbrol, Mr Paint and Tamiya.
Conclusions
This looks like another winner from Arma Hobby. Arma Hobby employs the best new tooling techniques to produce their plastic kits and this shows in the quality of the detail. The plastic parts are beautifully moulded and there appears to be nothing challenging about the build. If you have access to a 3D printer, then you will be able to utilise the excellent additional printed parts. The type will offer many marking possibilities as it operated in some interesting environments. So will have huge potential for further releases. Highly recommended
Many thanks to Arma Hobby for this sample. There is a useful build guide by Marcin Ciepierski over on the Arma Hobby Blog. The kit is available now from Arma Hobby.
70080 - Curtiss H-75 A1/A2. – 1:72
Please remember, when contacting retailers or manufacturers, to mention that you saw their products highlighted here – on AEROSCALE.


![Junkers F13 [Early Prod] With Winter Skis Coming Soon](/upload/media/posts/2025-07/22/48020-junkers-f13-with-winter-ski-early-prod_1753181324-s.jpg)