Background
The Airacobra was Bell’s answer to the US Army Air Corps [USAAC] Circular proposal X-609 for a fighter capable of intercepting high altitude hostile aircraft. Bell’s chief engineer set about designing the aircraft around the 37mm Oldsmobile T9 [later M4] canon. As the calibre of the canon was much greater than the standard 20mm canon, it was impossible to accommodate the engine in the forward fuselage. As a result, the engine was placed in the centre of the fuselage behind the pilot with the turbo charger placed in the belly. The air intake for the super charger was placed on the side of the fuselage similar to the intakes on the tail boom of the P-38. A ten-foot-long prop shaft connected the Allison V-1710 liquid-cooled V-12 engine to the propeller. The resulting XP-39 was submitted to the National Advisory Committee for Aeronautics [NACA] for tests. Unfortunately, it was found that there was high amount of drag resulting from the engine installation, oil cooler and intercooler scoops as well as the turbocharger. Changes were made from the recommendations of NACA including the deleting of the turbocharger. Its removal had a noticeable negative effect regarding high altitude performance. The glycol-cooled radiator was fitted in the wing centre section, immediately beneath the engine; it was flanked by the drum-shaped oil coolers. Air for the radiator and oil coolers was drawn in through intakes in wing leading edges and was directed via four ducts to the radiator faces. The air was then exhausted through three controllable hinged flaps in the fuselage centre section. Air for the carburettor was drawn in through a raised oval intake immediately aft of the rear canopy. Despite the change in aerodynamics the P-39 never attended speeds beyond 400mph. The lack of free space in the fuselage meant internal fuel storage was limited to the wing. As a result, range was disappointing and the P-39 generally flew on missions with external fuel tanks. Despite its limitations the P-39 saw service throughout WWII with the USAAF, Soviet AF, Free French, the RAF, and the Italian Co-Belligerent AF.
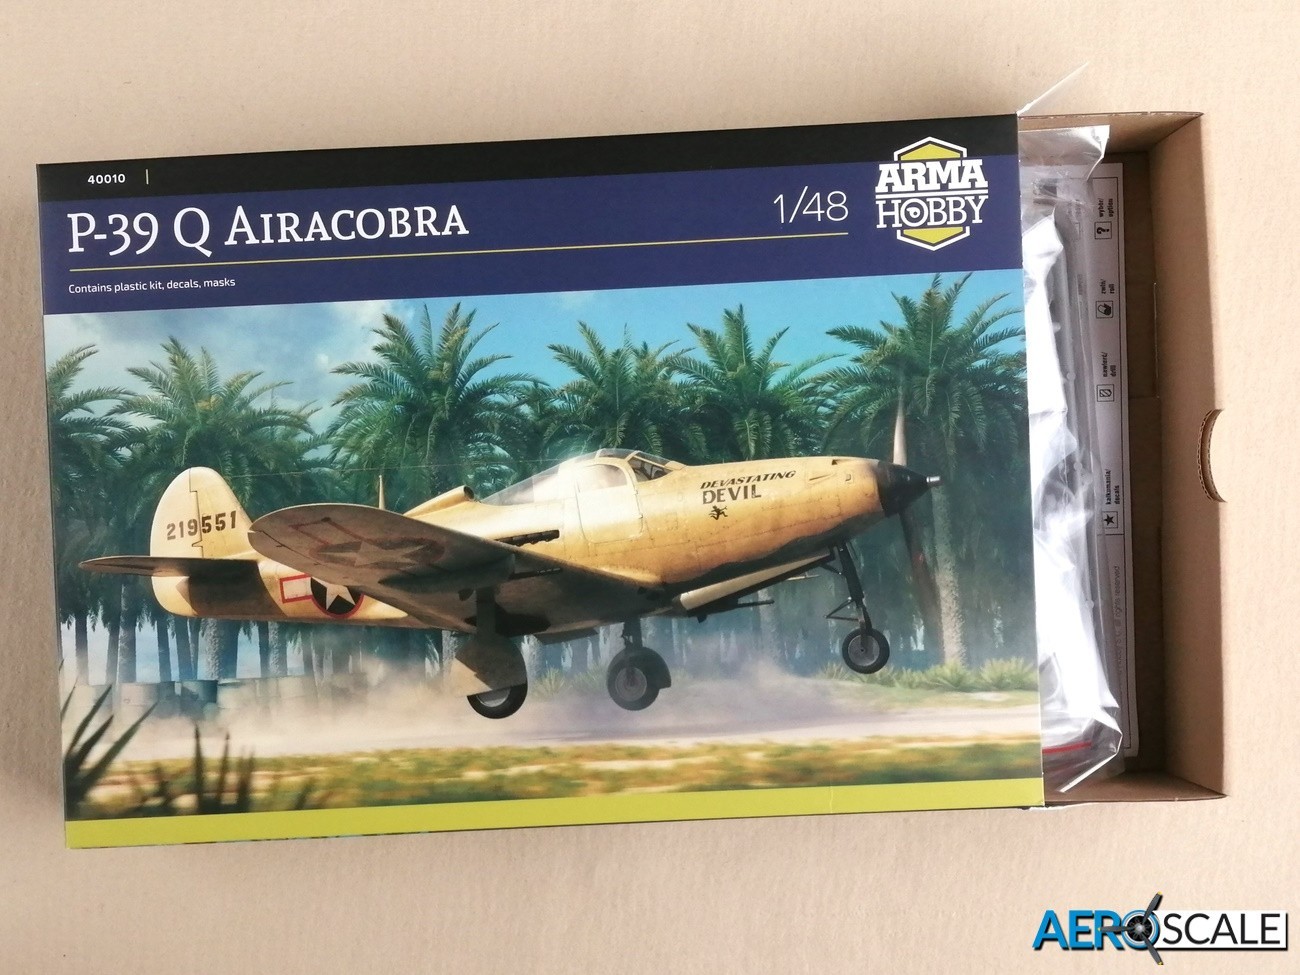
The P-39Q as is represented with this edition, is the final production version of the Airacobra. Production ceased in August 1944. There were quite a few subvariants during production including photo reconnaissance aircraft.
The Kit
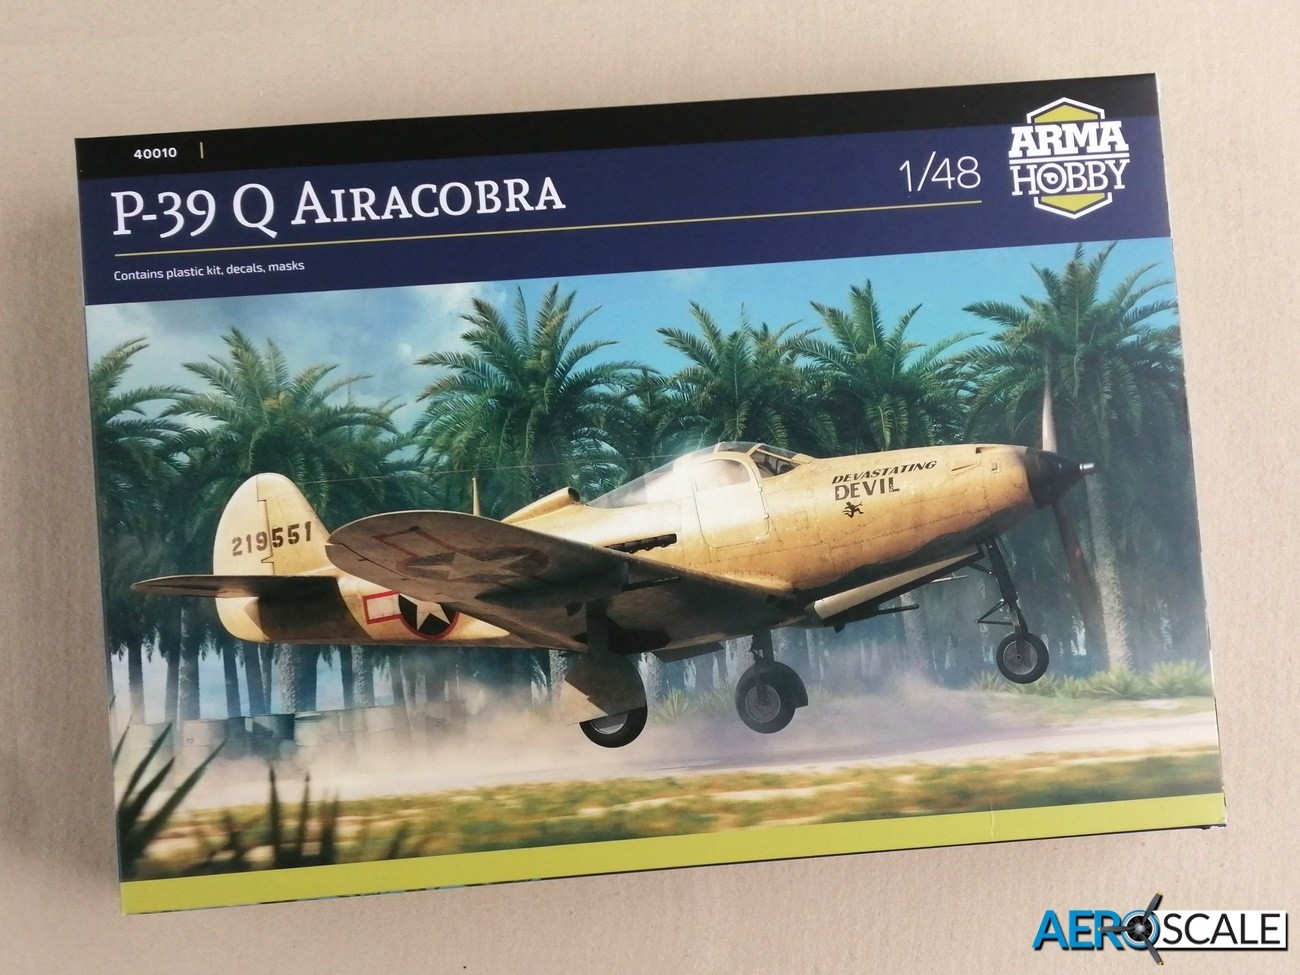
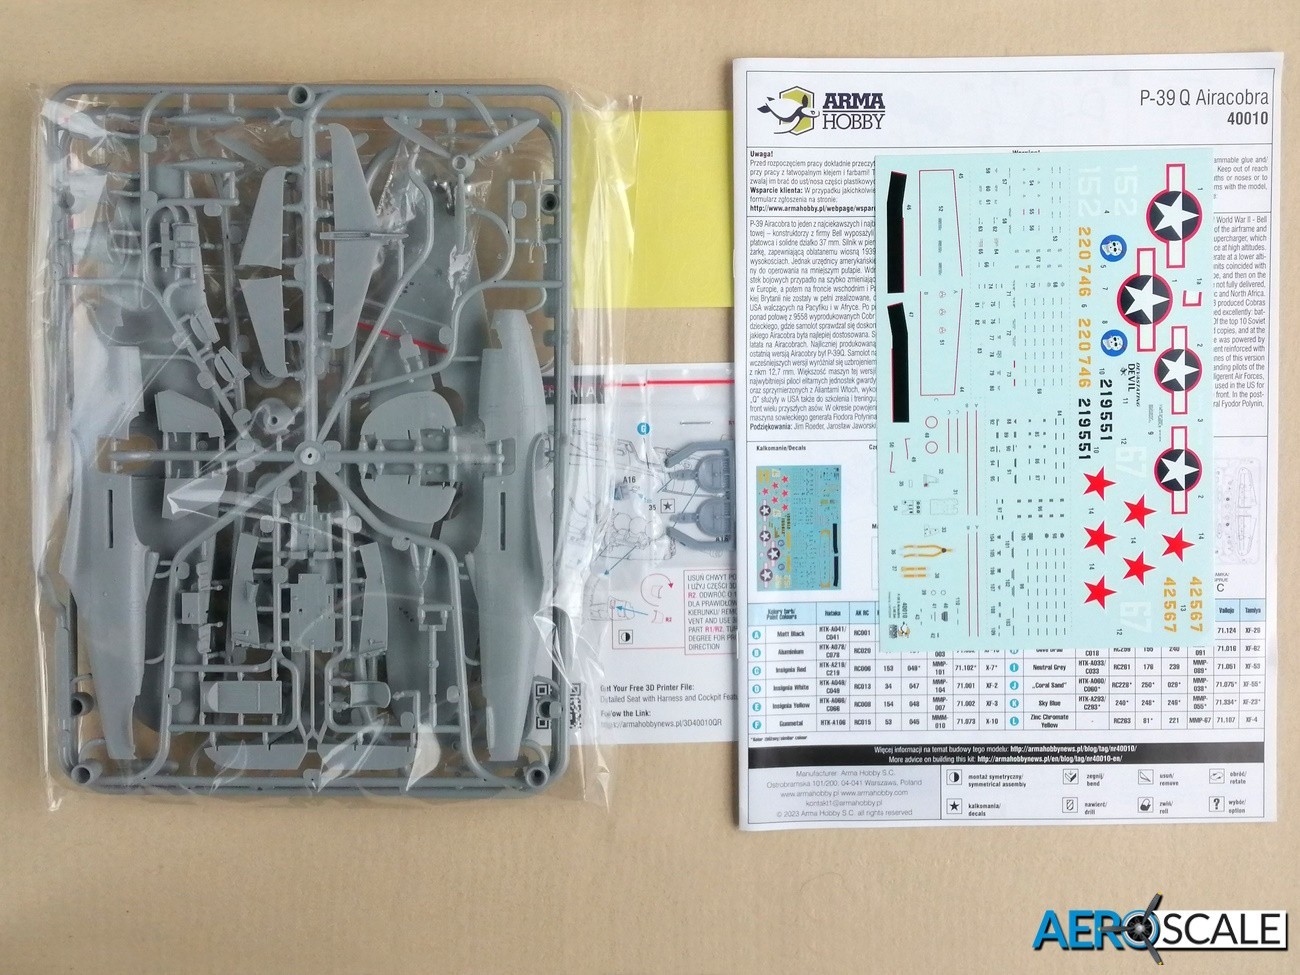
Although the kit comes in a side opening box, the kit contents are placed in a sturdy pull out tray. The tray provides a lot of structural strength, particularly important if you are adding this kit to a stash whether you are a builder or collector. The 3D parts are bagged separately.
The kit contains:
- 85 x plastic parts,
- 6 x clear parts
- 3D printed parts
- 3 x ball bearings [ballast]
- Kabuki paint masks
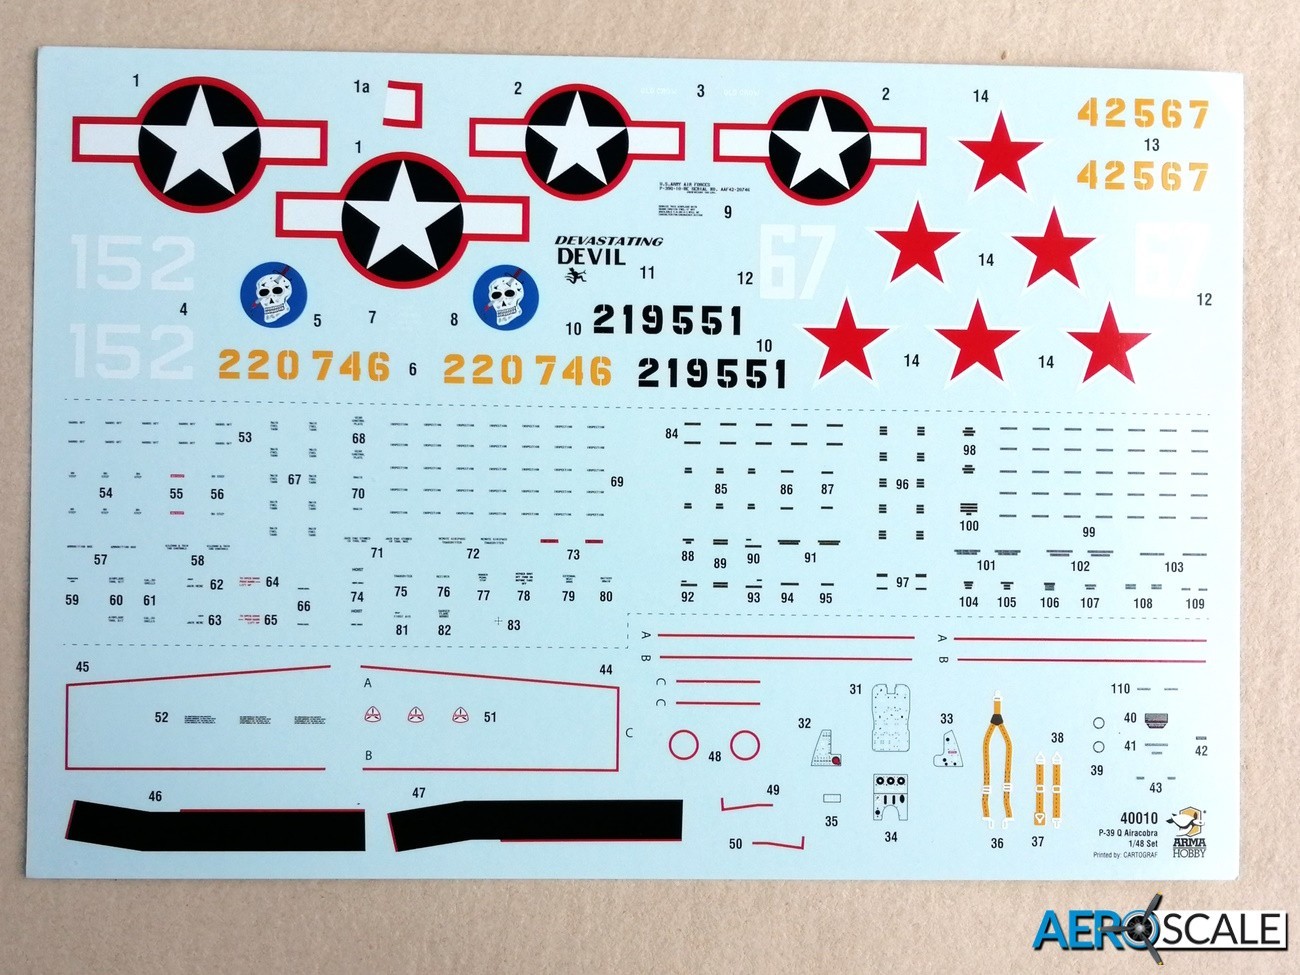
- Decal sheet [Cartograf]
- Instructions
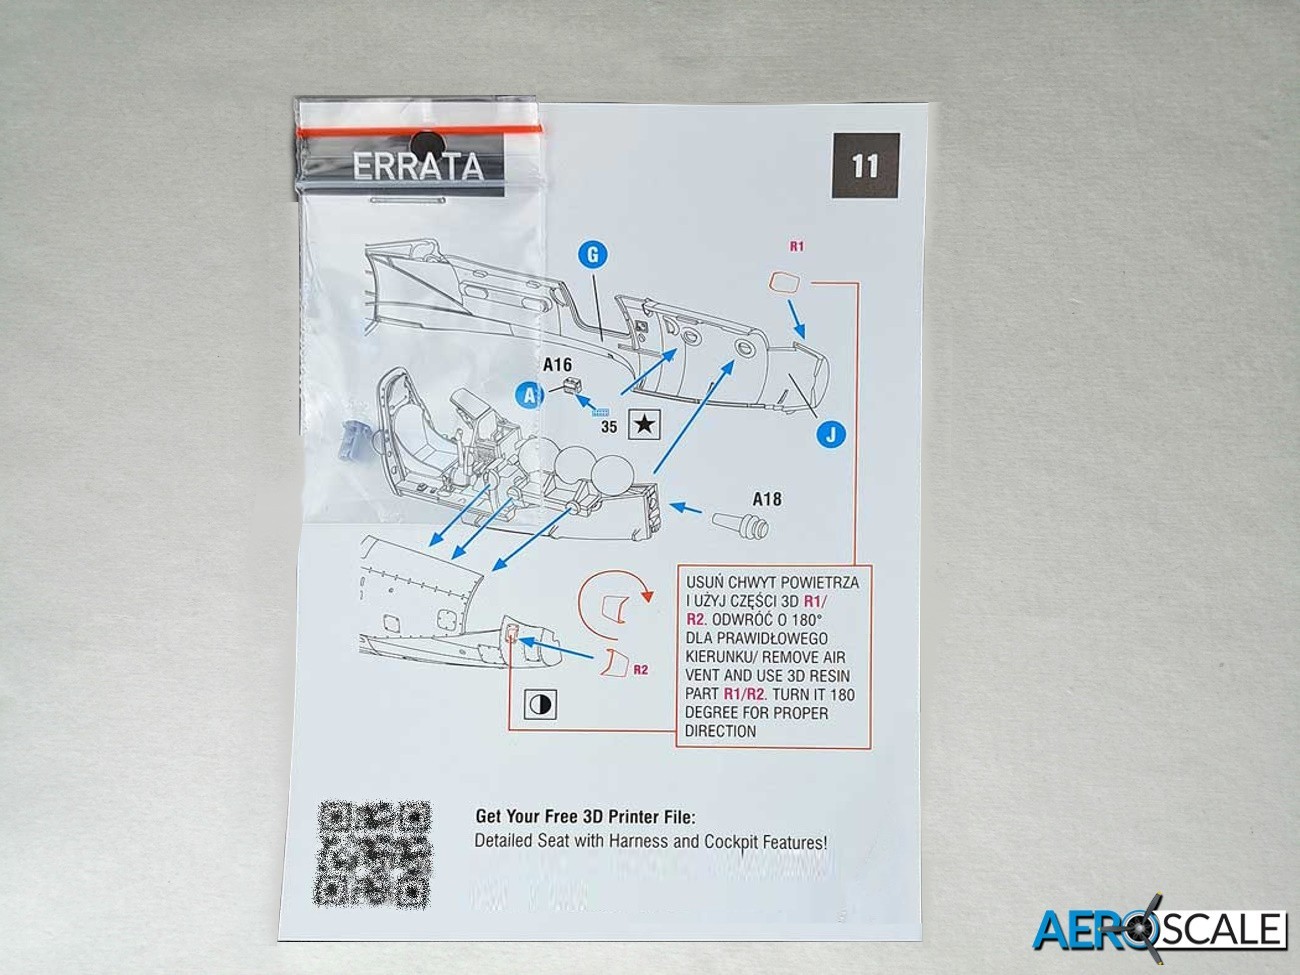
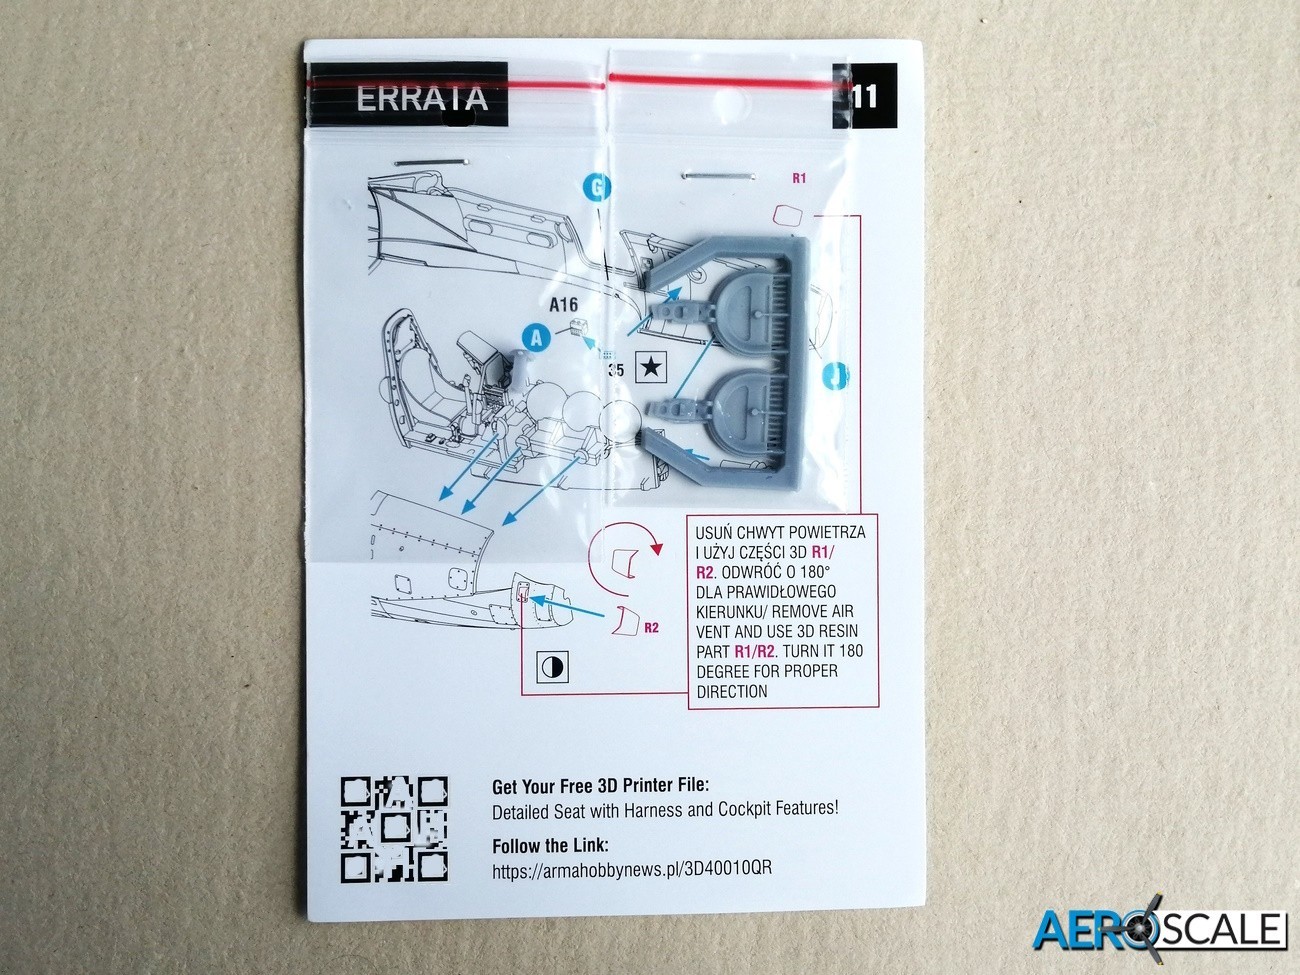
- Errata sheet
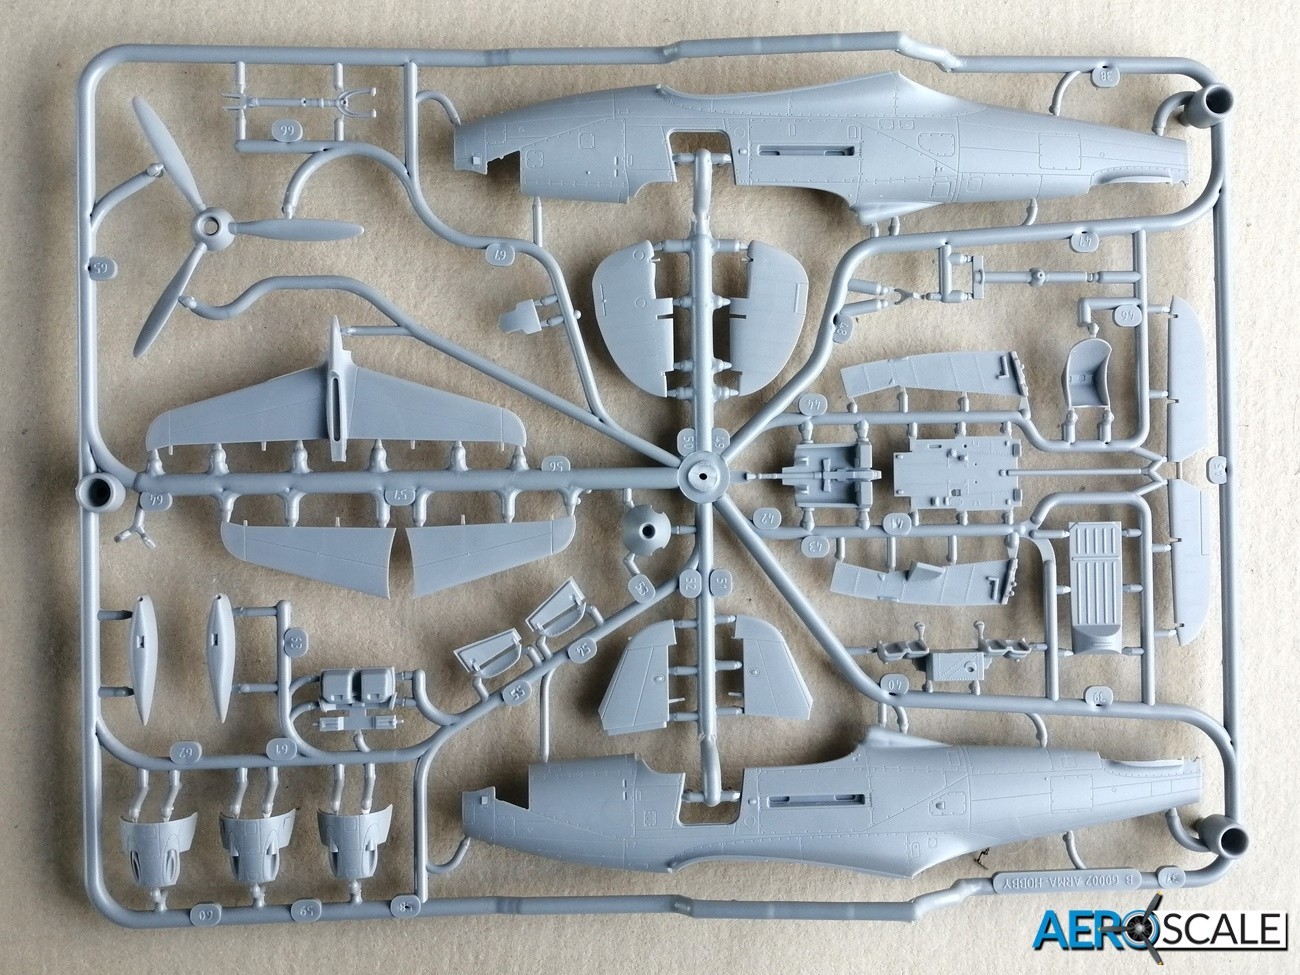
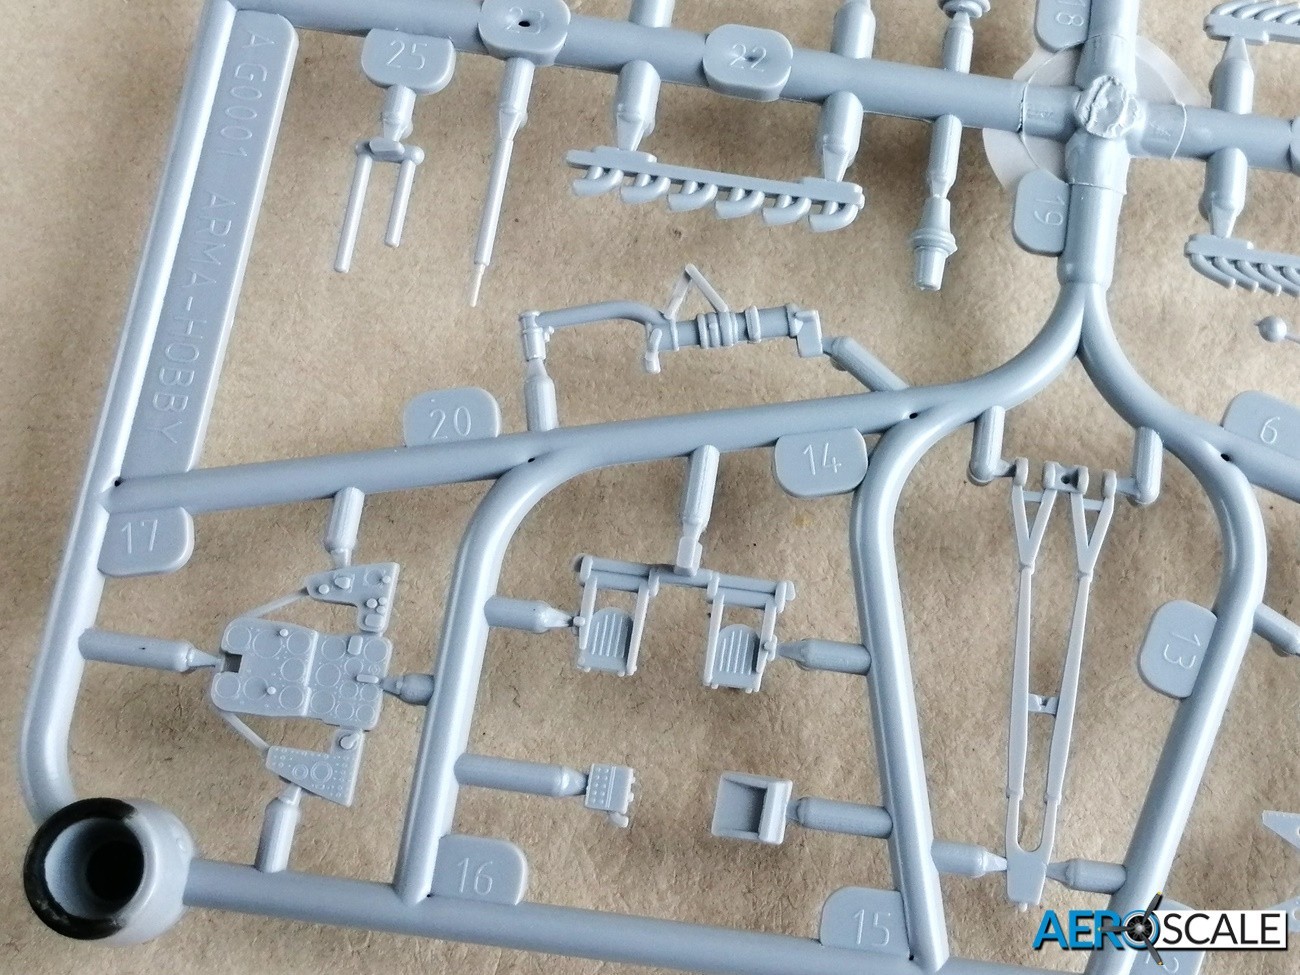
Looking at the parts generally, the quality of the raised and recessed detail is quite superb. The panel lines are fine and consistent, but enough to take a wash.

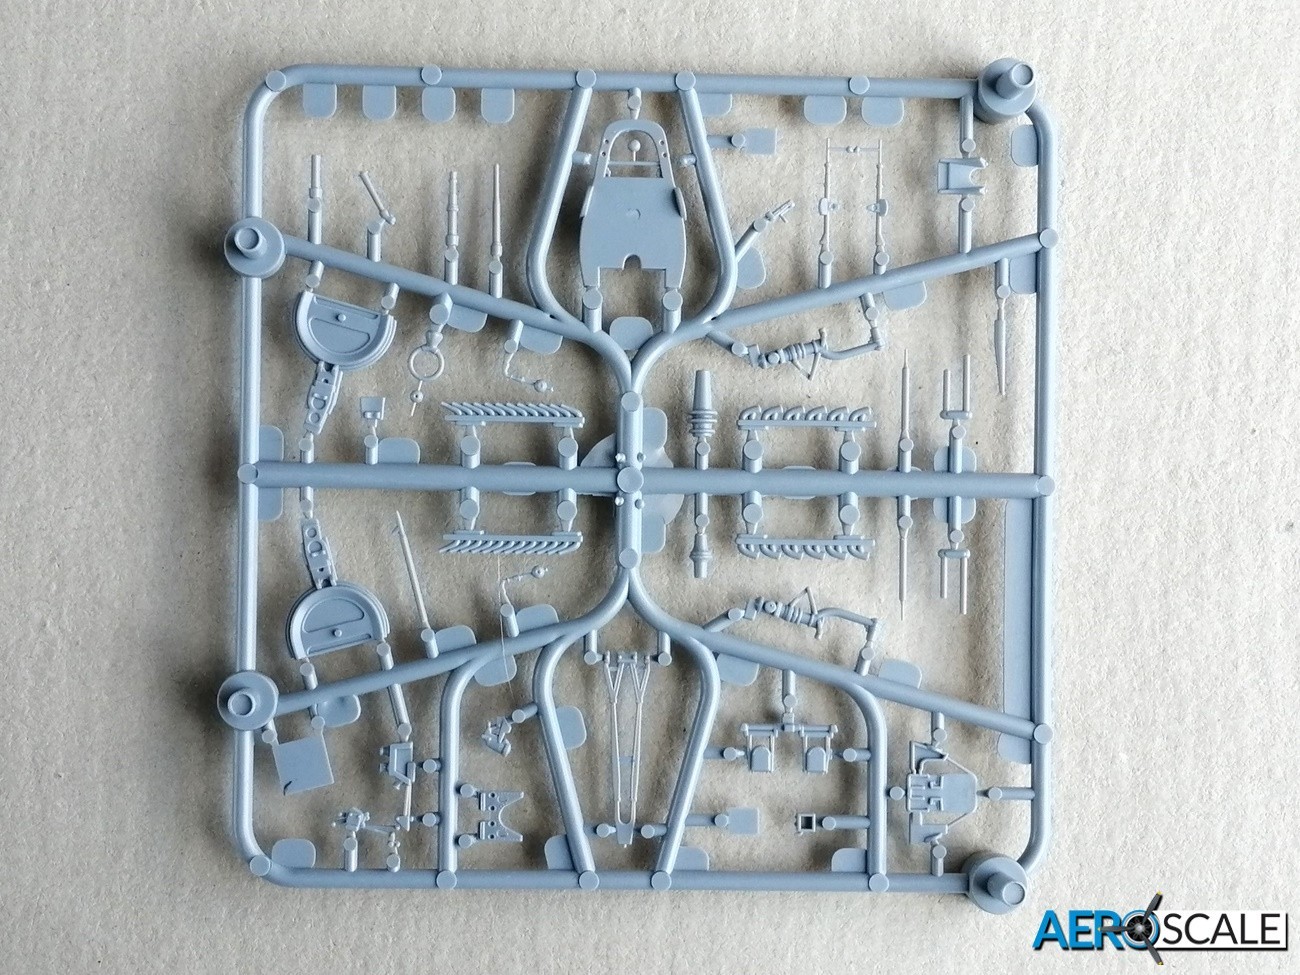
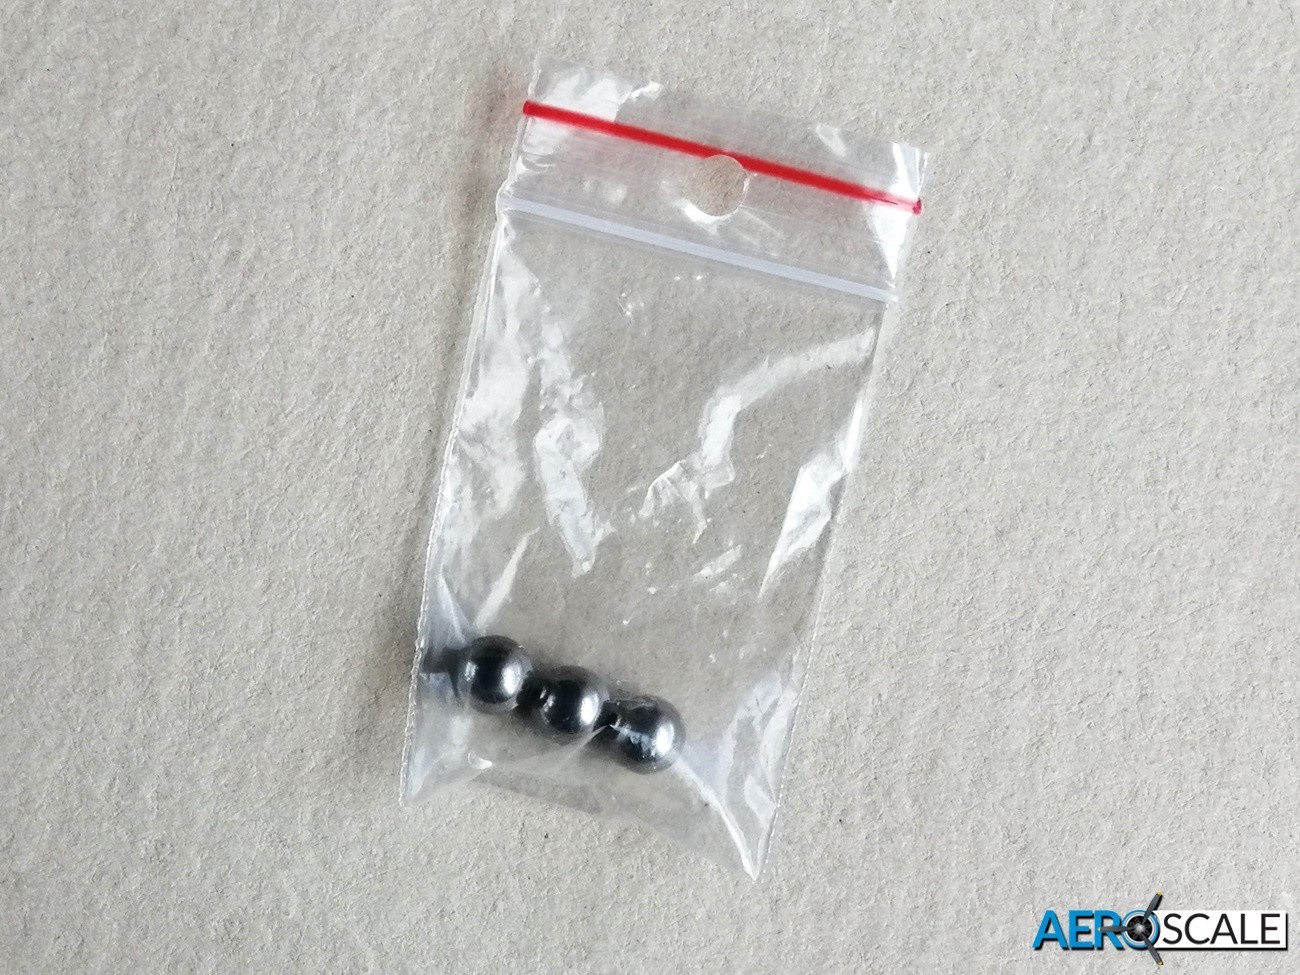
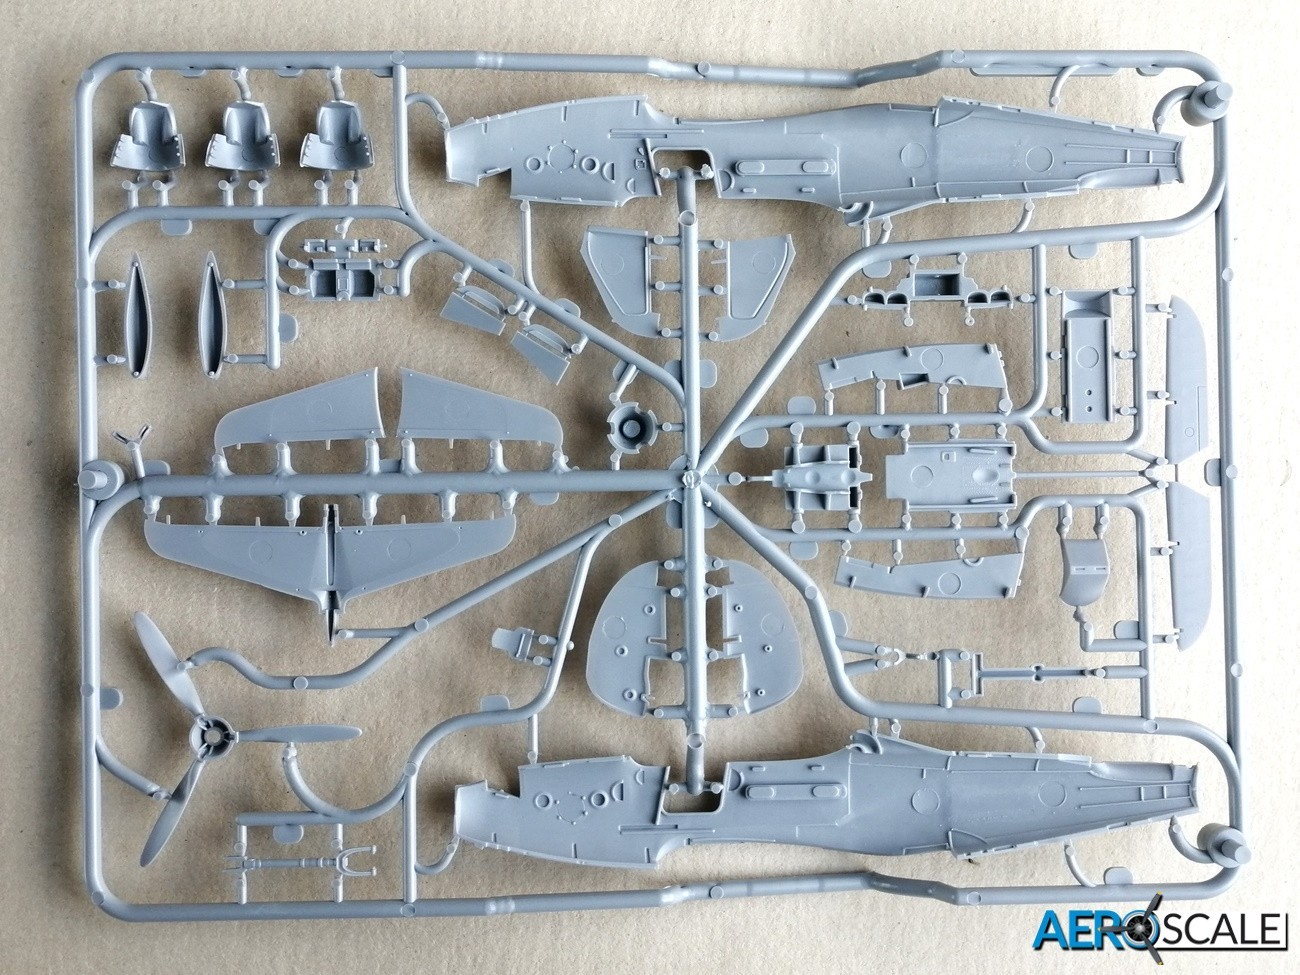
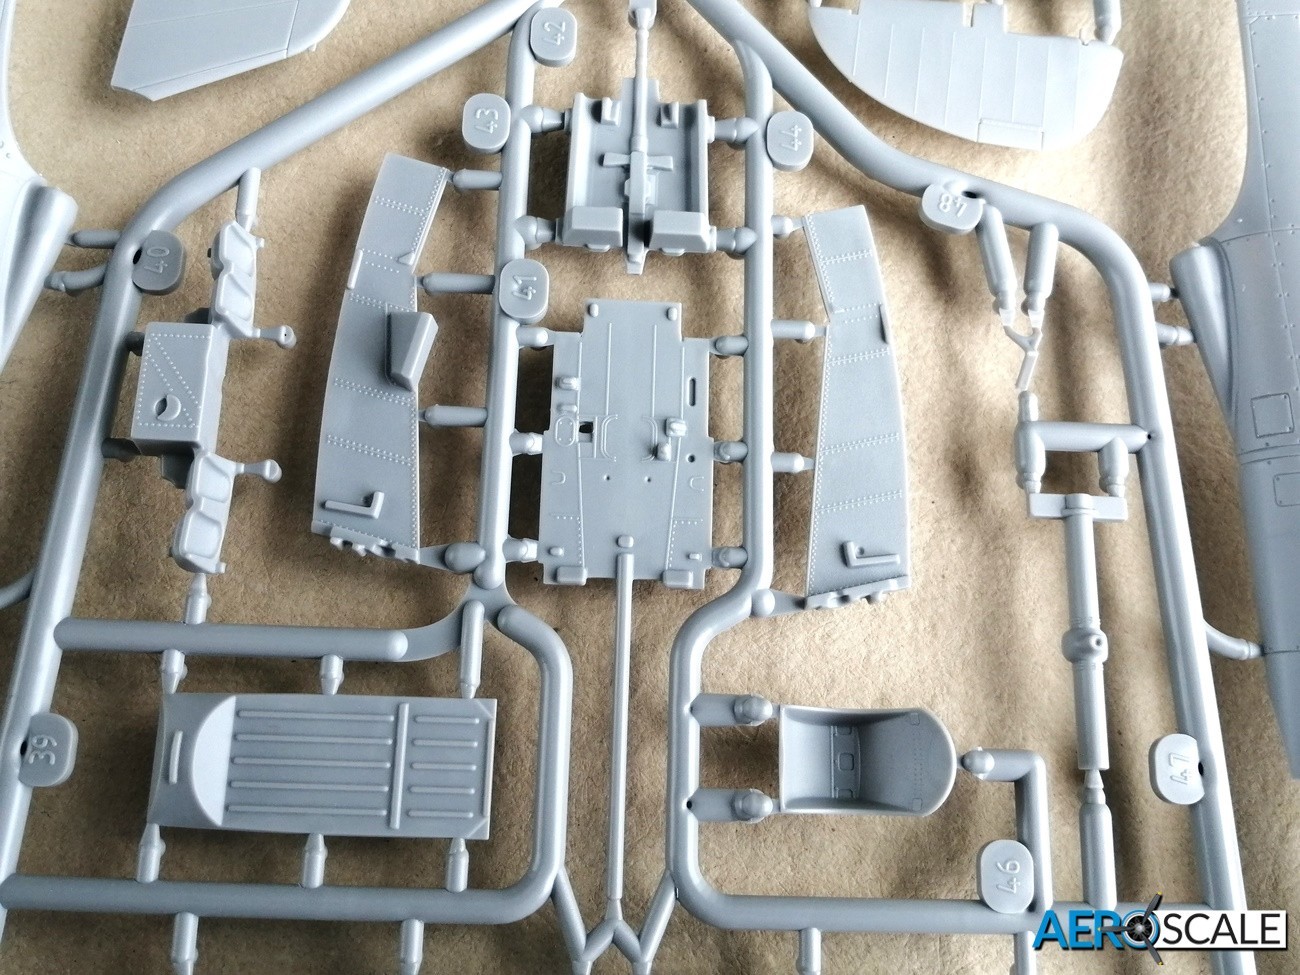
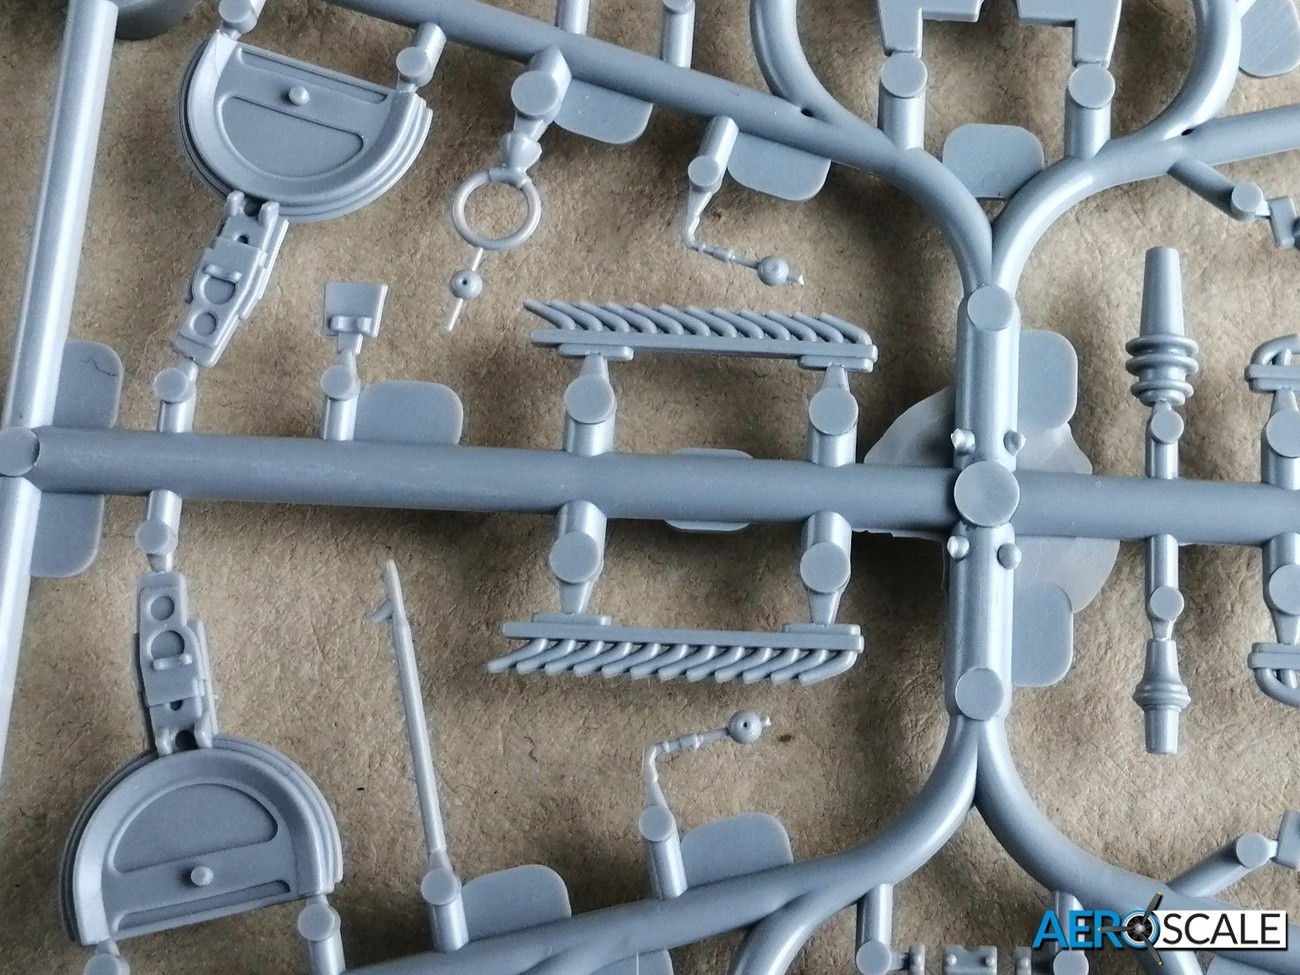
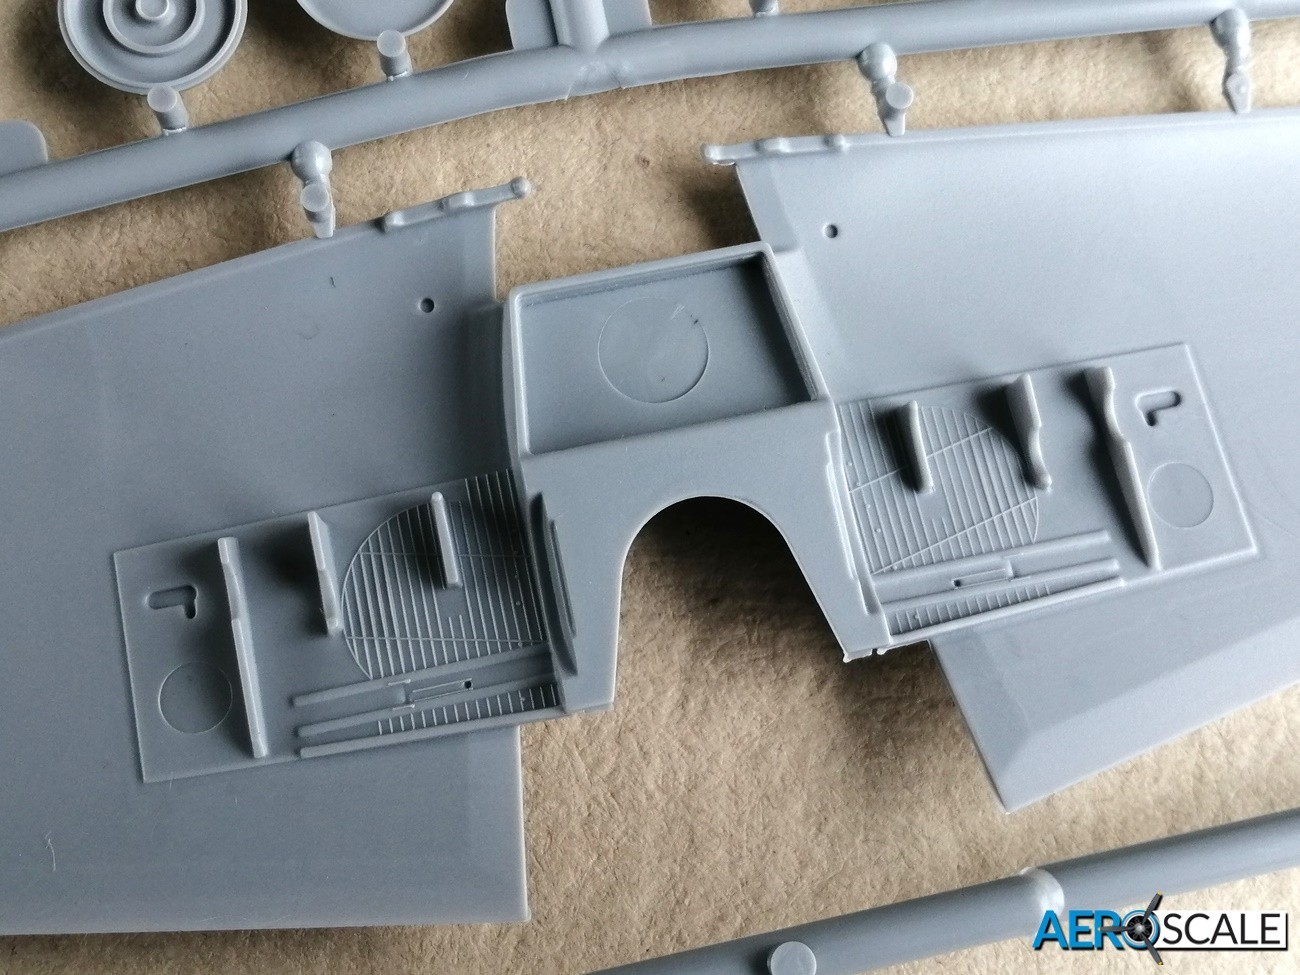
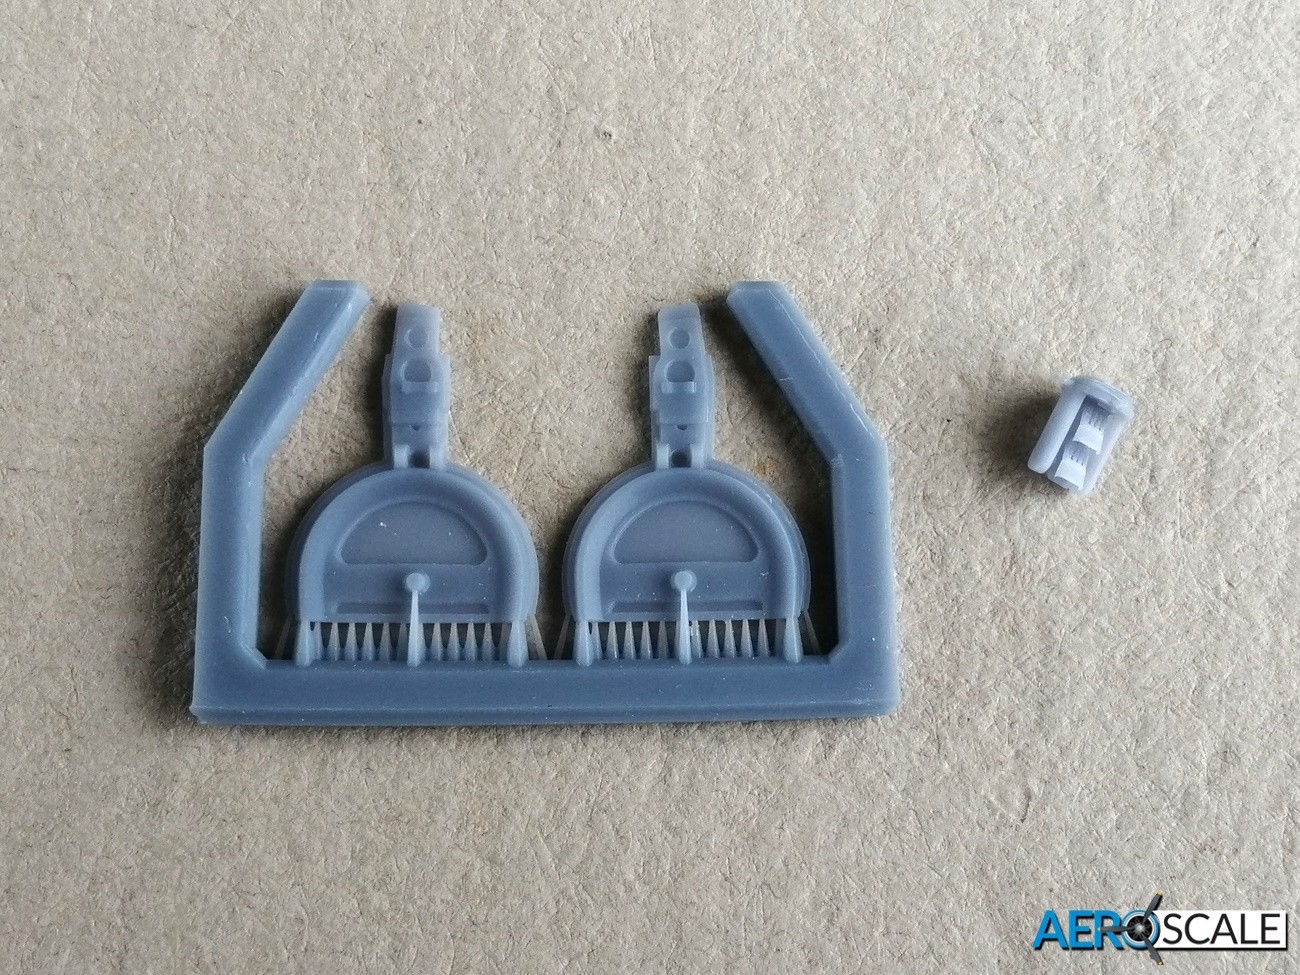
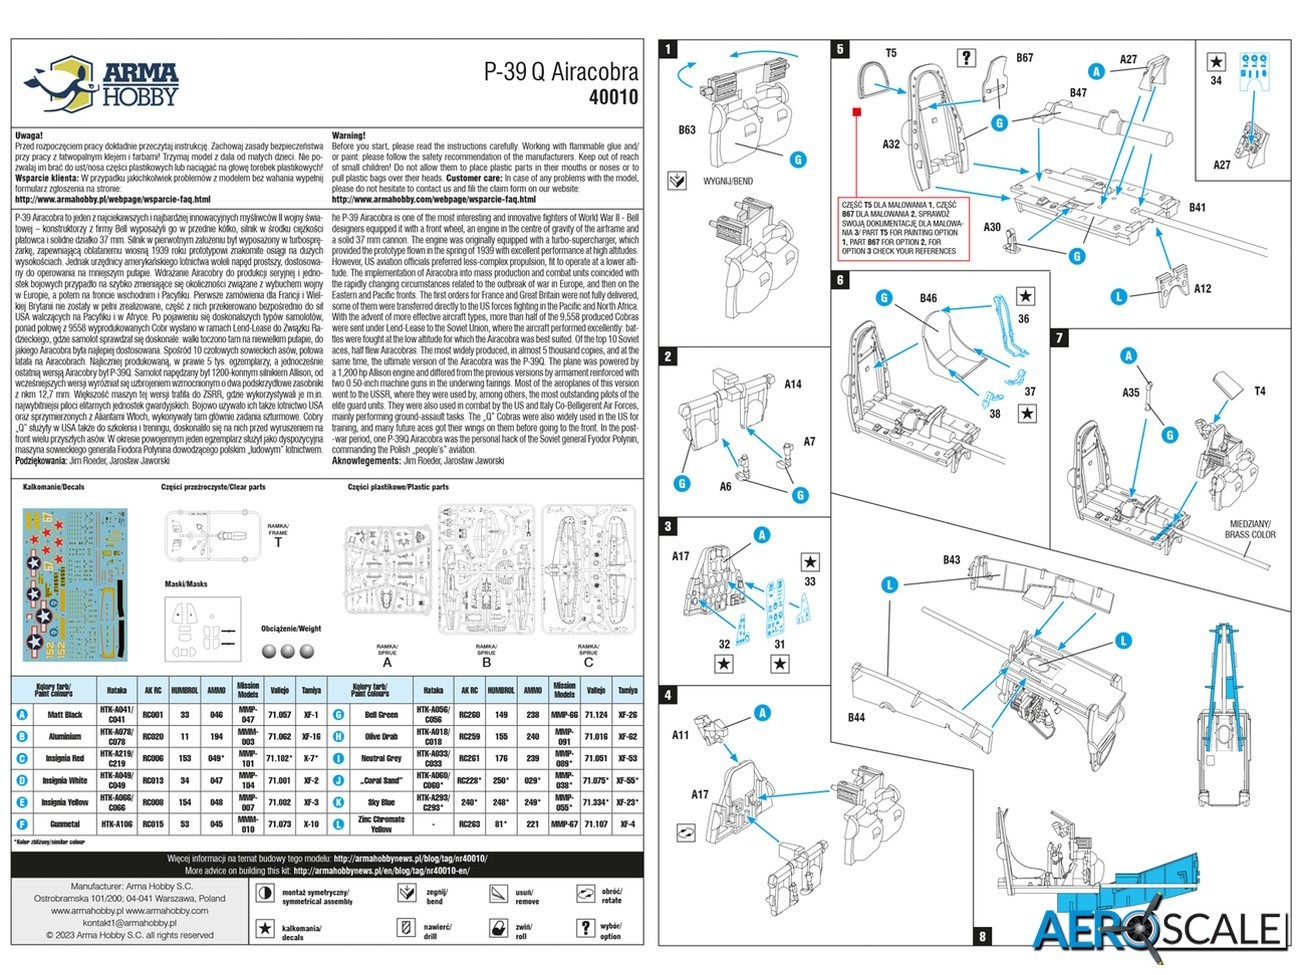
The cockpit is made up from around twenty-two nicely detailed parts including a clear part for the gun sight. Arma Hobby try to get as much detail on the plastic, rather rely on photo etched detail. The cockpit and front undercarriage bay form an integral unit before joining the fuselage halves. Unusually the step one of construction involves folding the plastic gun breeches 90° from the mounting and cartridge collector bags. The floor of the cockpit has the prop shaft moulded onto it, and there is an additional prop shaft casing to attach to the floor. The instrument panel is split into two parts, with light raised detail. This allows the decals instruments faces to settle much more easily. The seat looks a bit plain and the decal sheet includes seat belts. I would suggest if you have access to a 3D printer using the QR code to produce a printed seat that includes harnesses. Other detailed parts for the cockpit include seat frame, armour, headrest, left hand side console, rudder pedals, control stick, two-part gunsight, rear decking, and radio equipment. The two sides of the front undercarriage bay attach to the floor of the cockpit. There is a separate roof onto which go the three-ball bearing ballast.

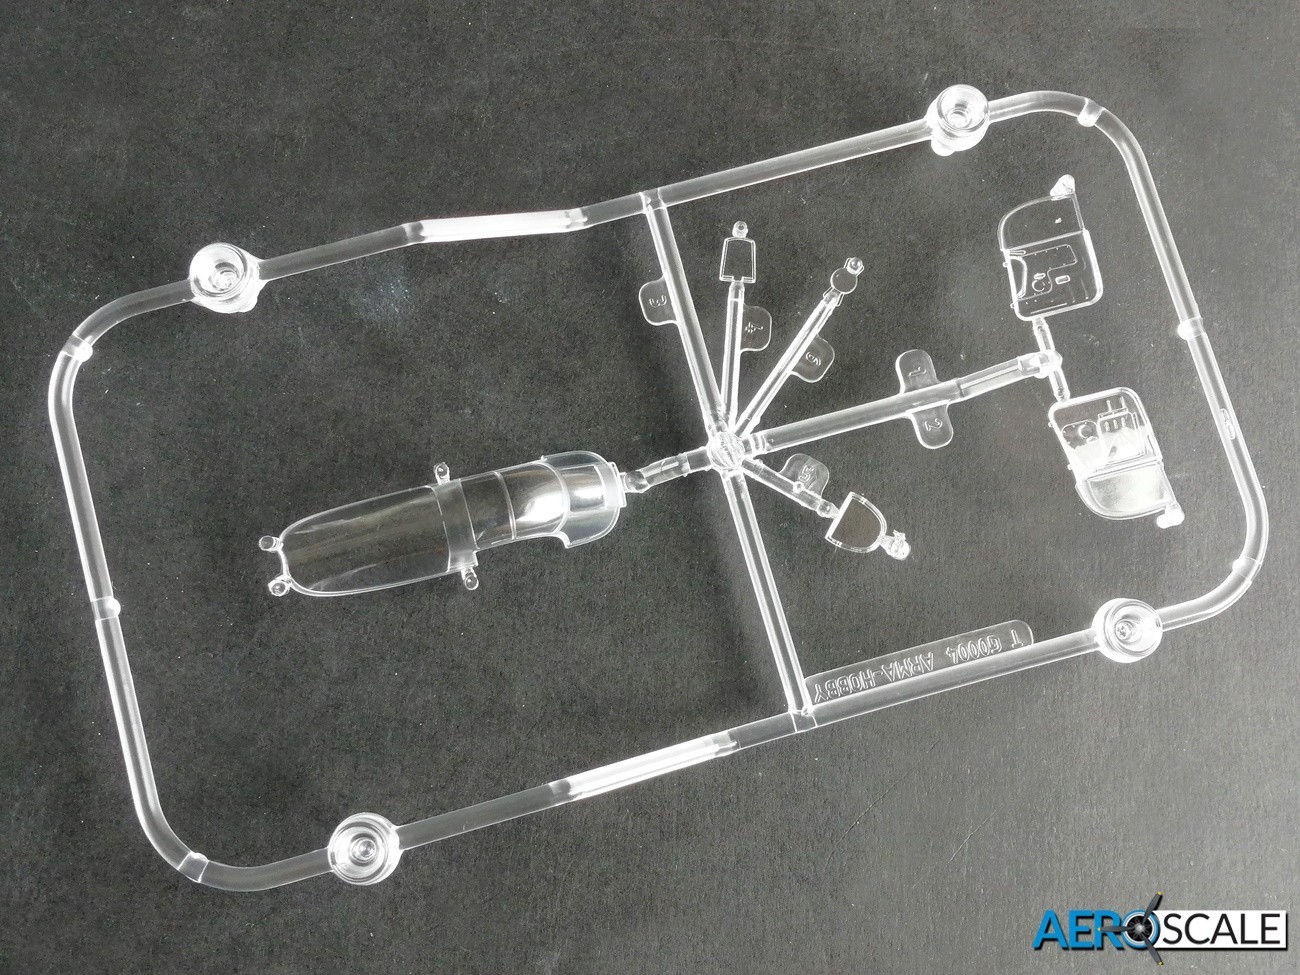
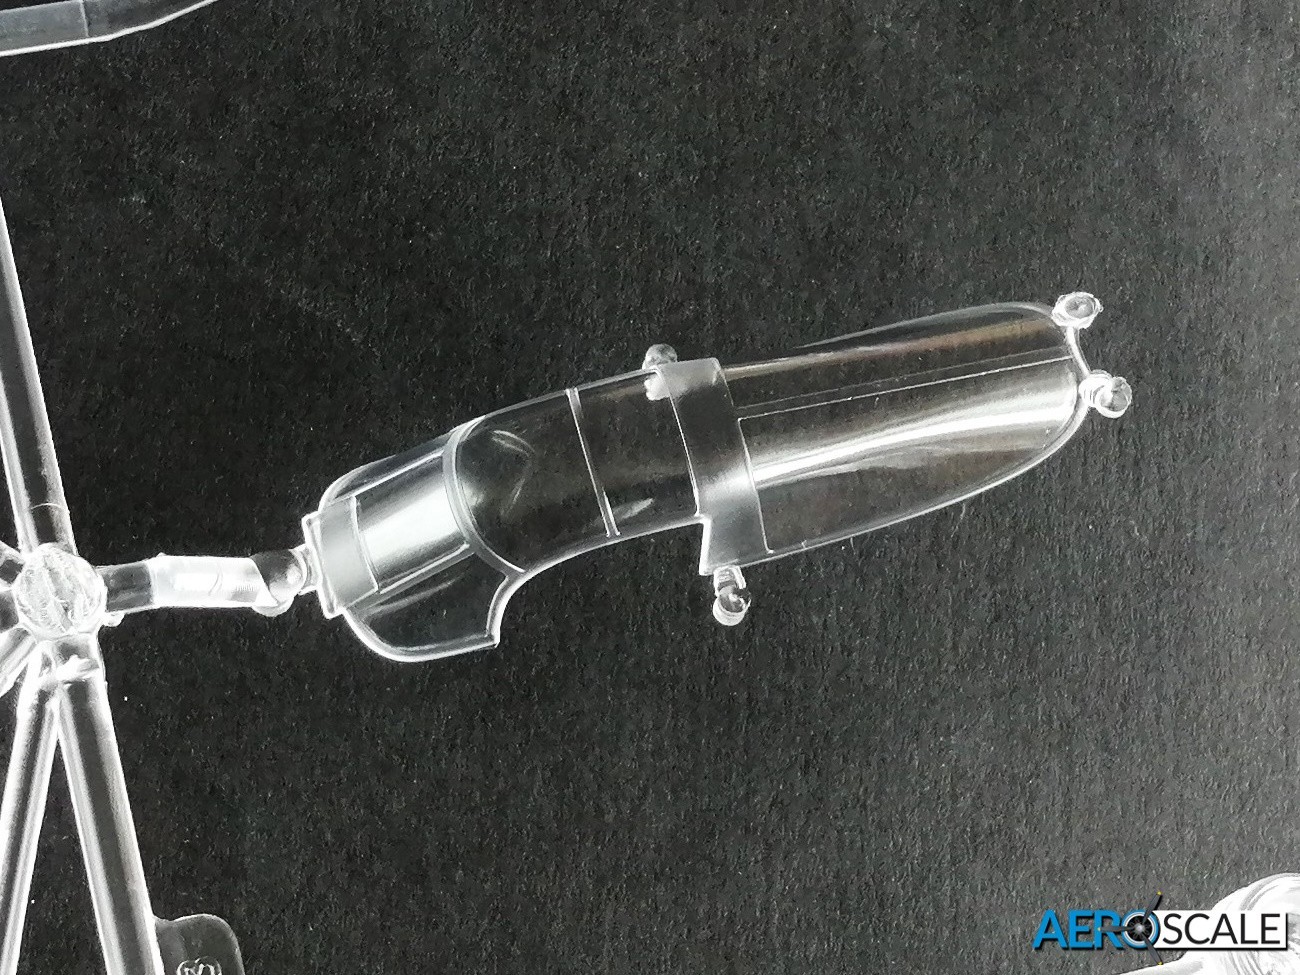
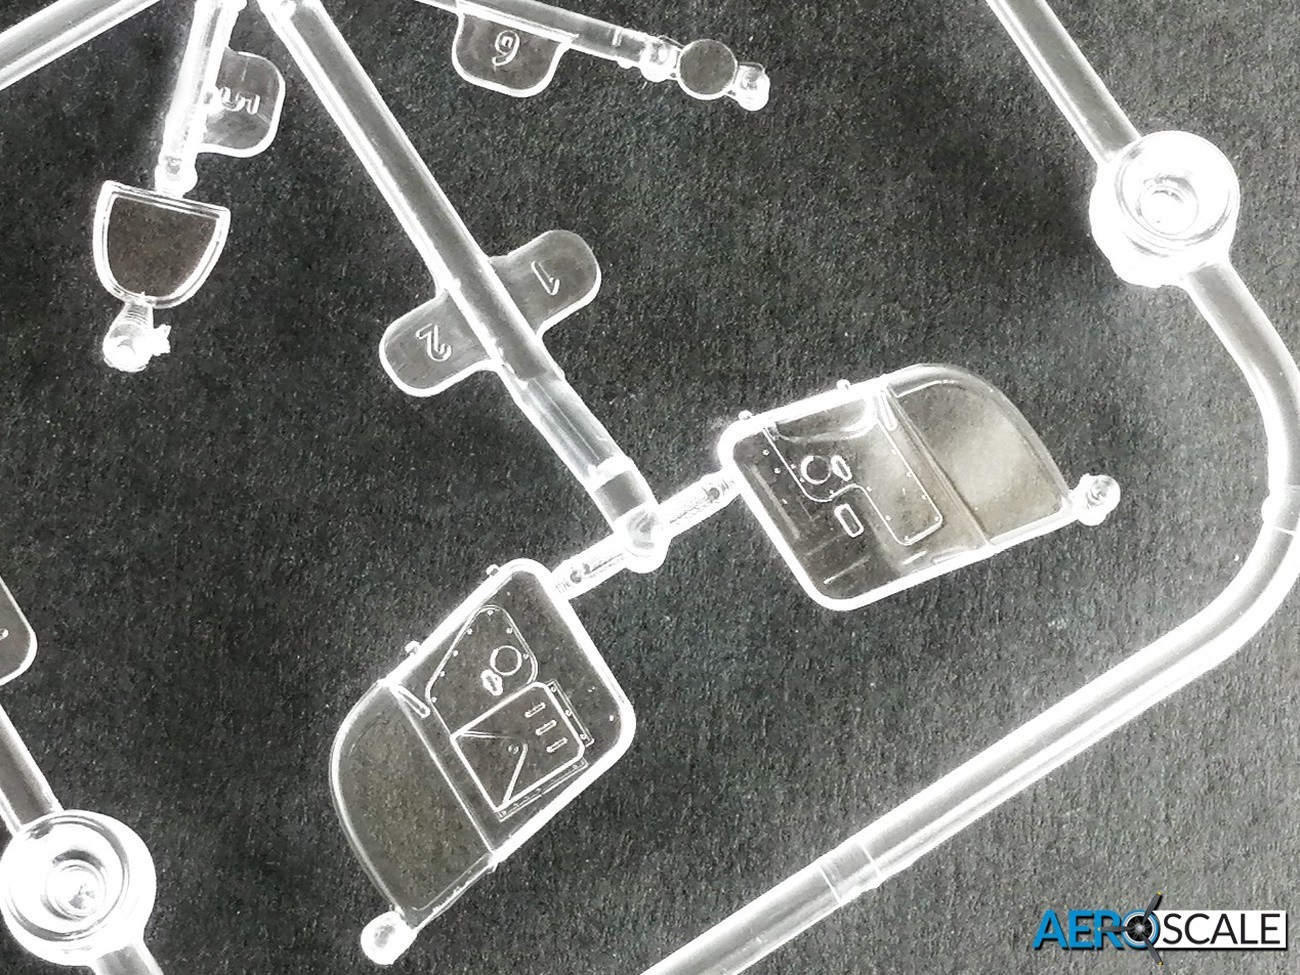
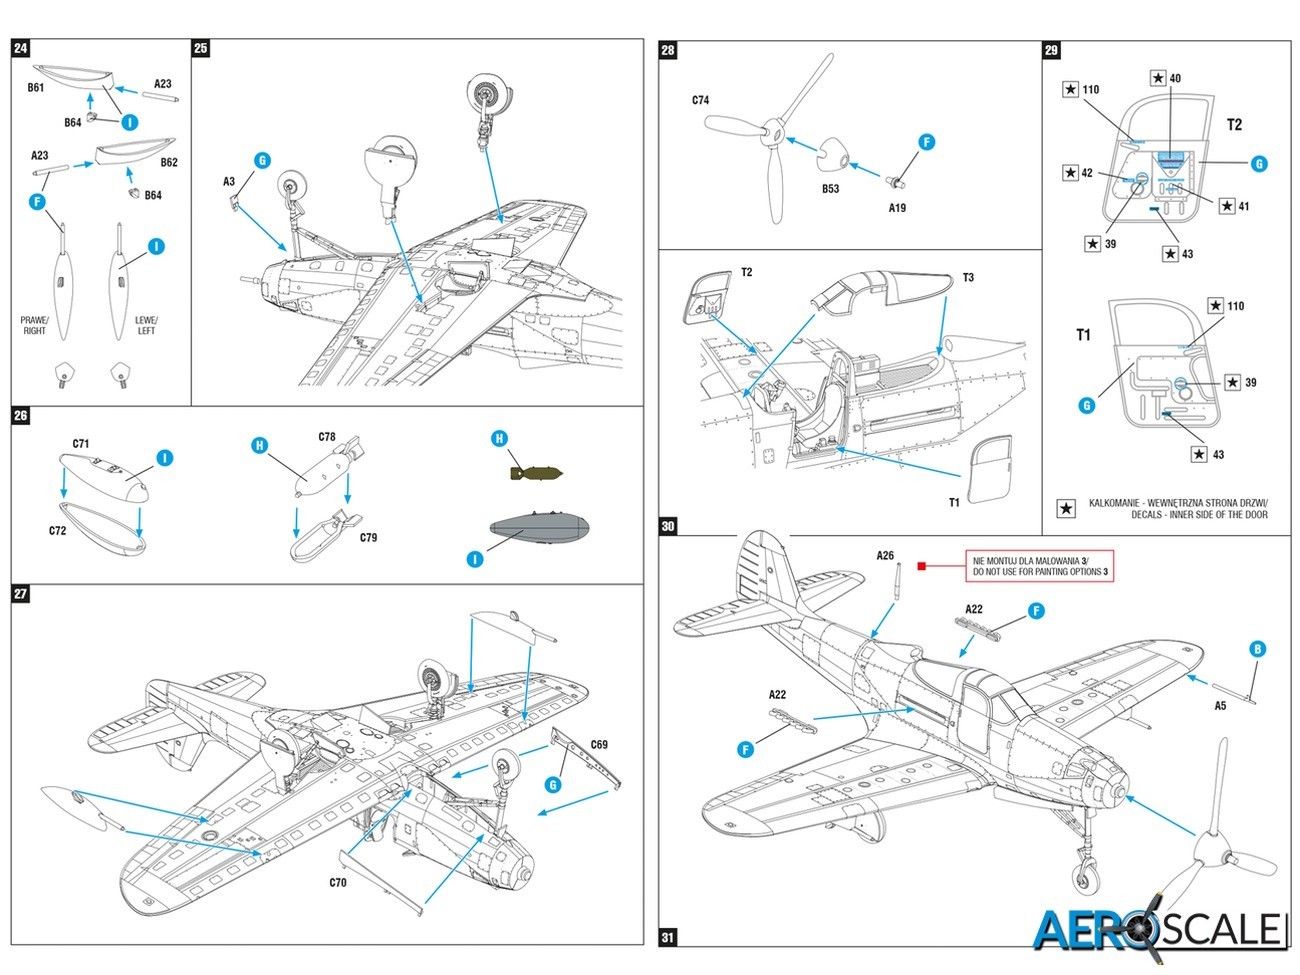
The canopy and windscreen are moulded together, the clear doors are separate and can be fitted open or closed. Detail moulded on the inside of the doors is very good. Decals are included for further detailing the inside of the doors. Paint masks are included. Apparently, the right door only had handles on both side and was the one used for entry and exit. The left-hand door could be opened only from the outside and was for emergency use, although both doors could be jettisoned.
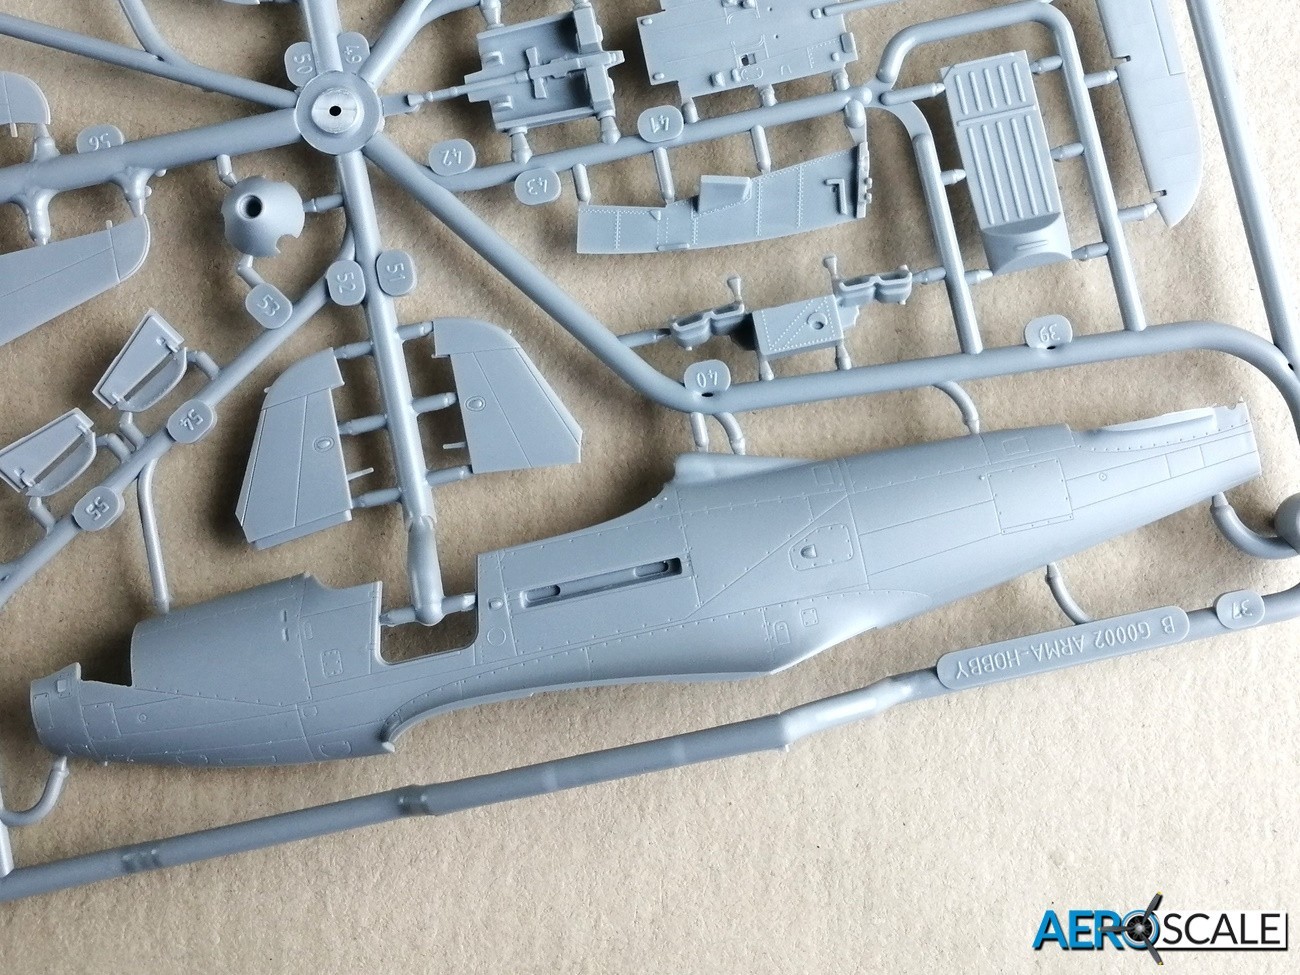
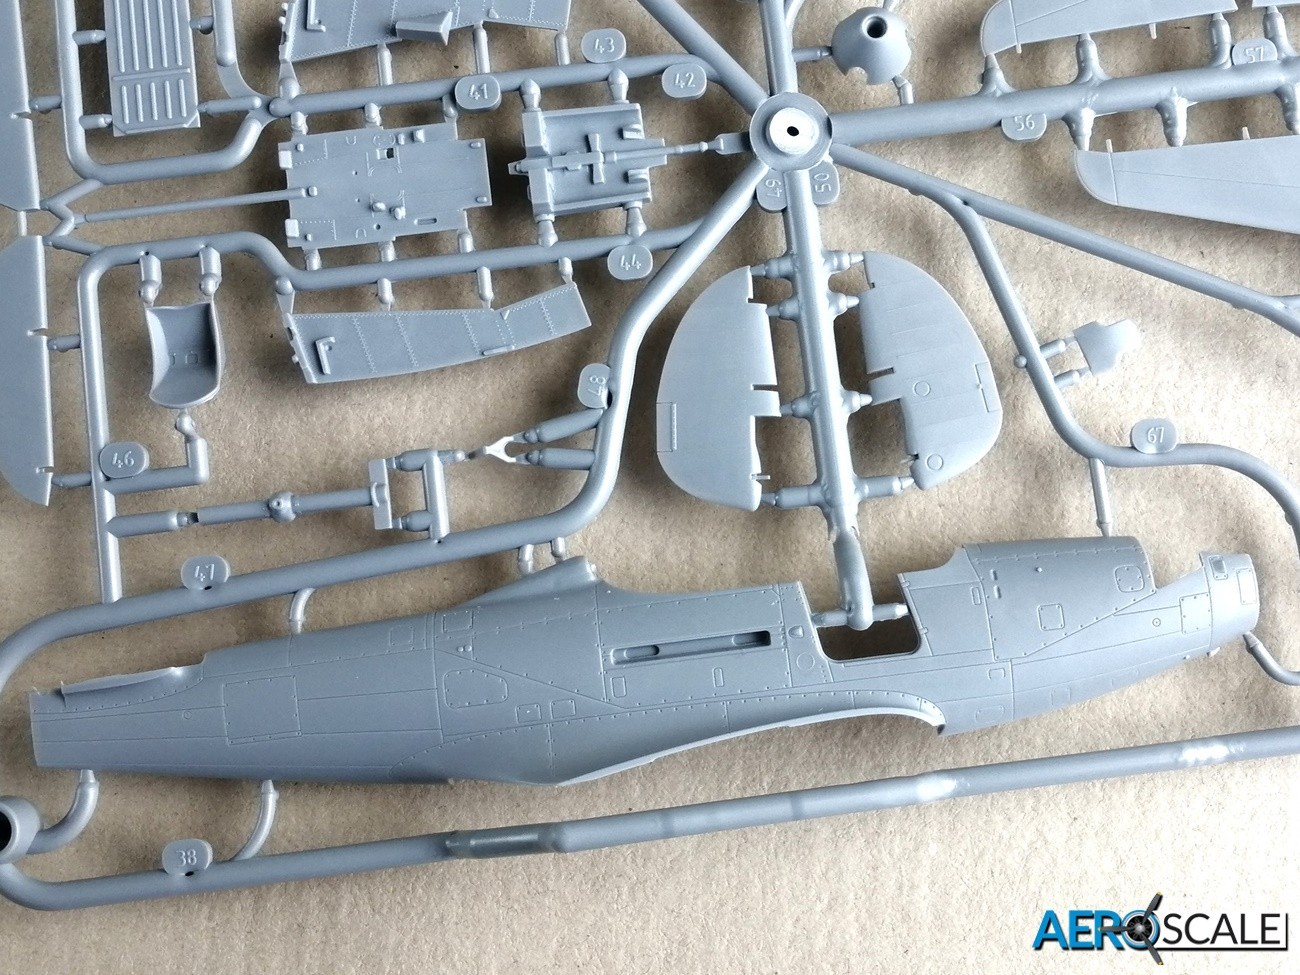
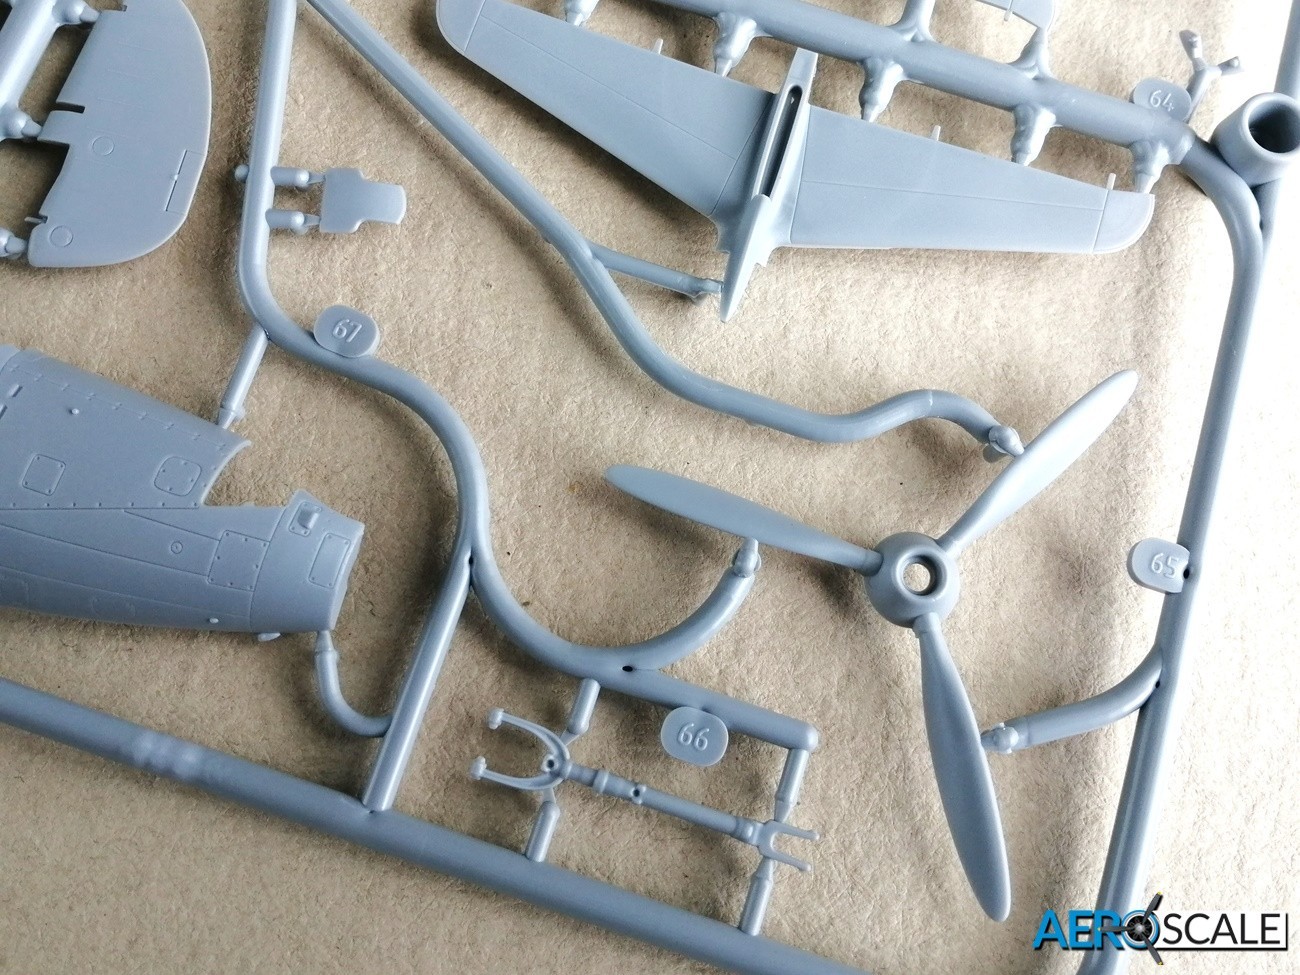
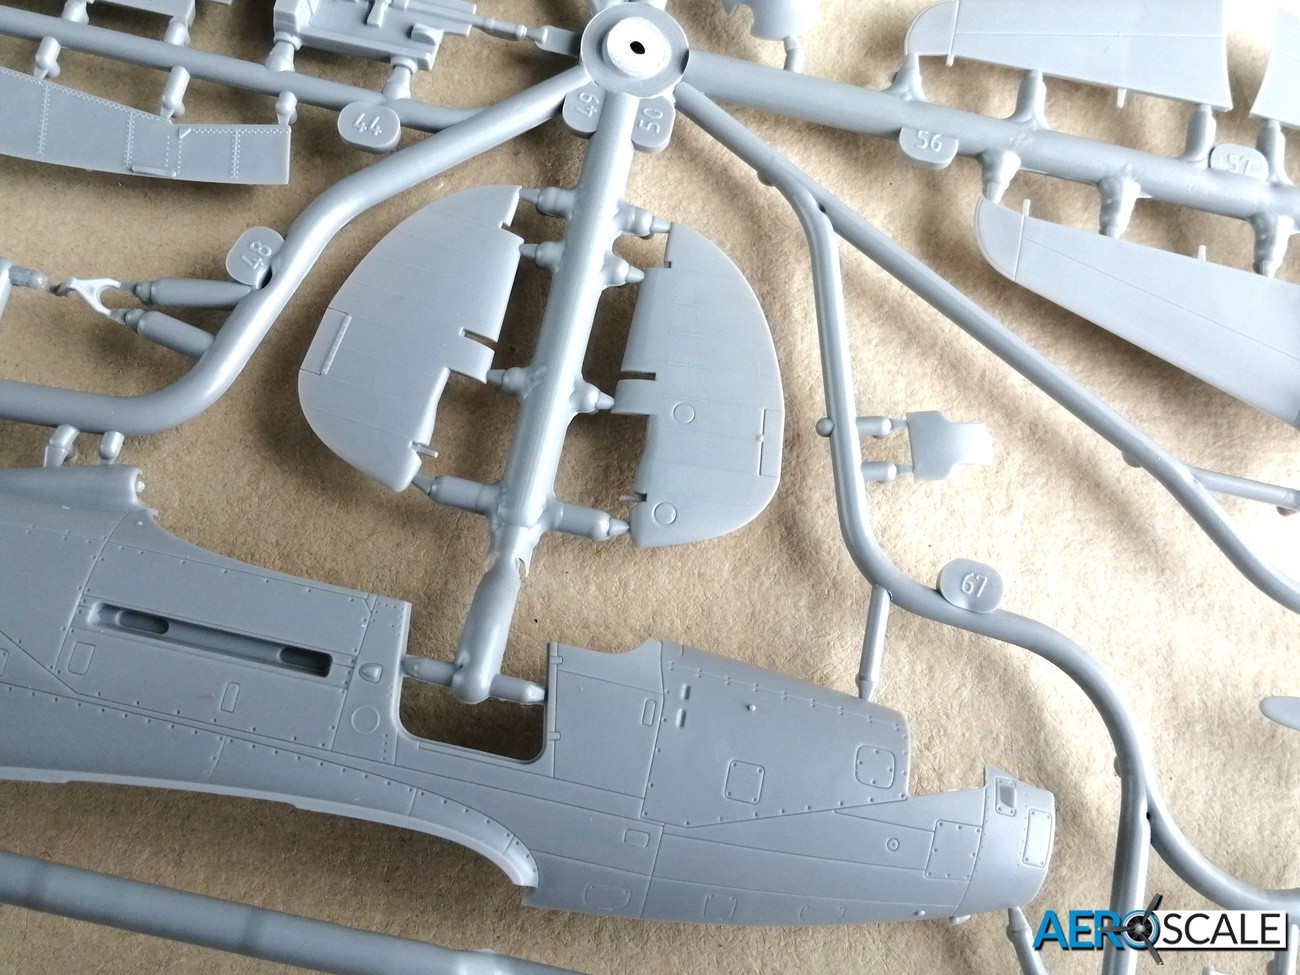
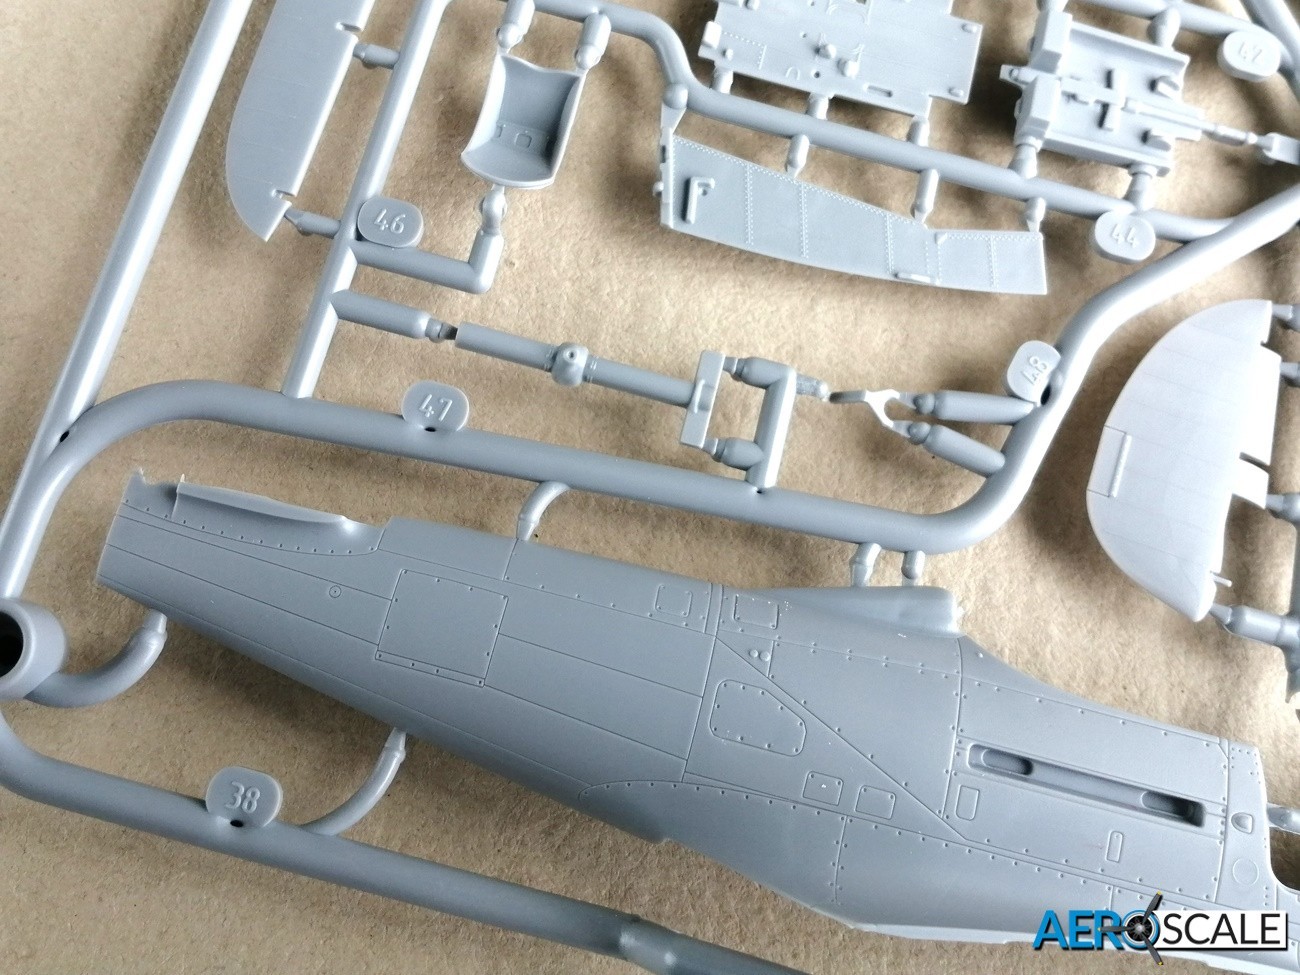
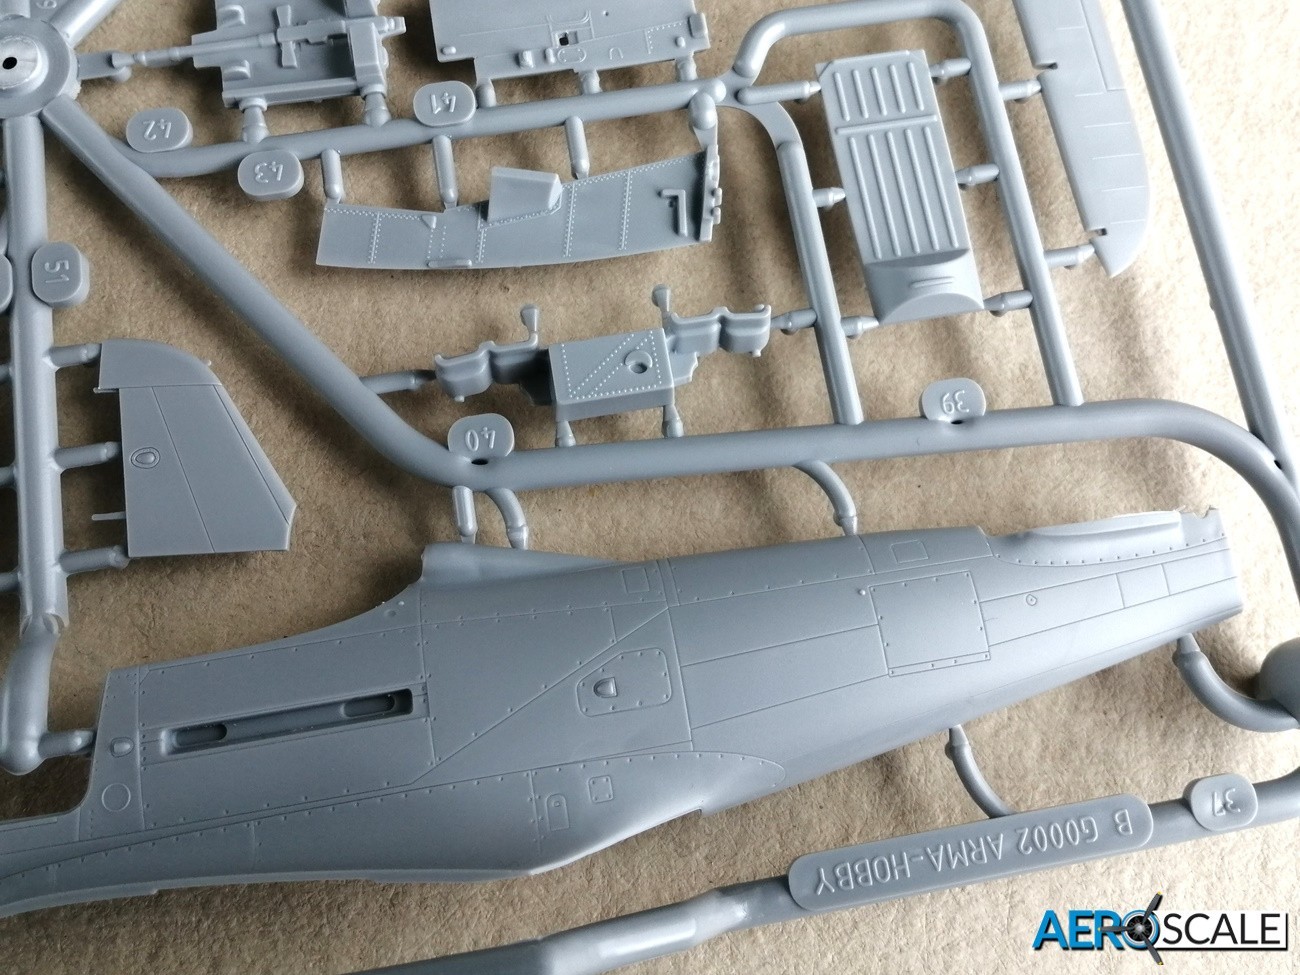
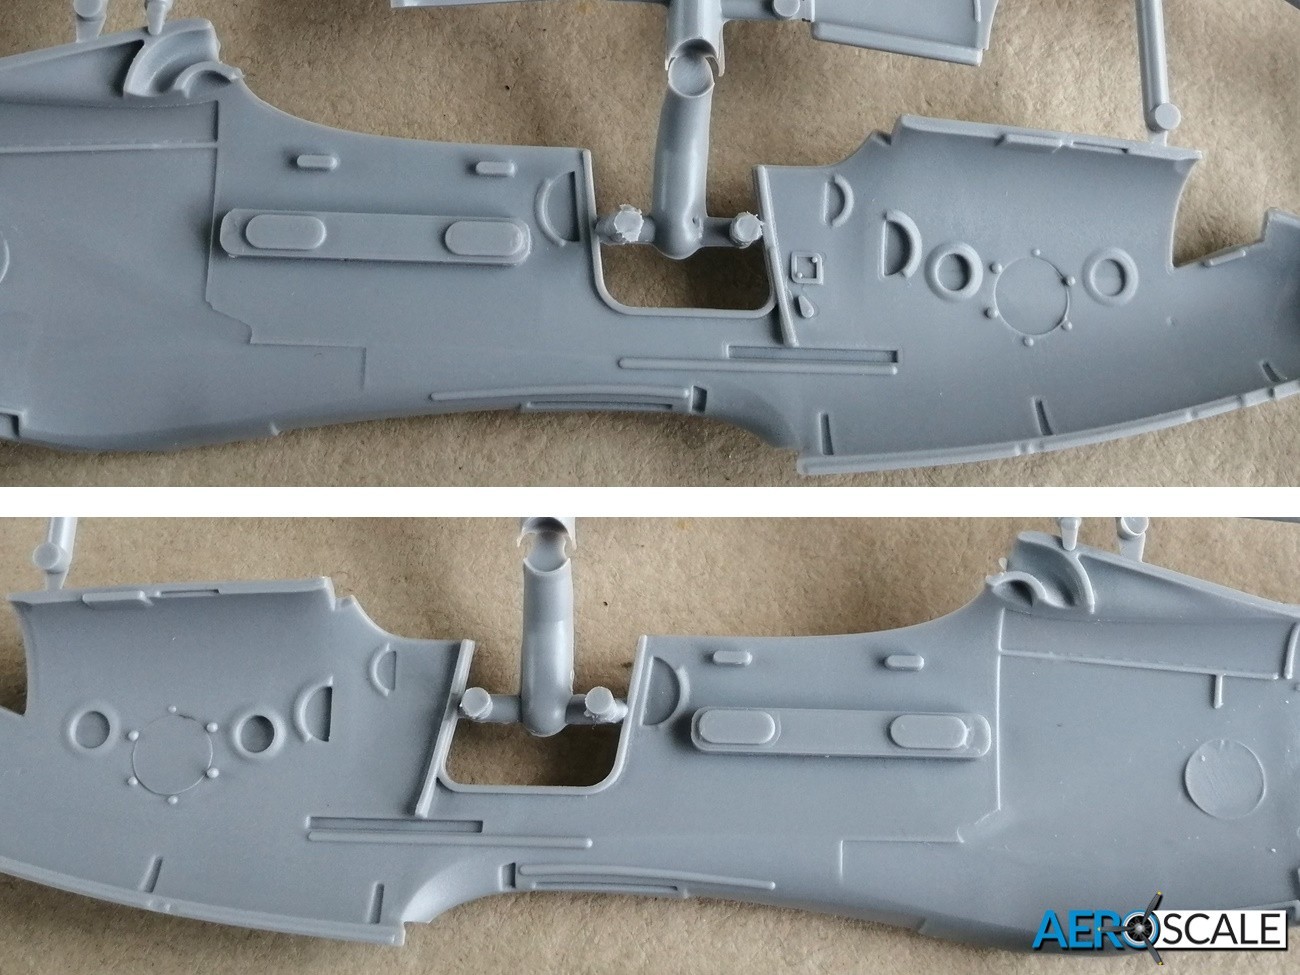
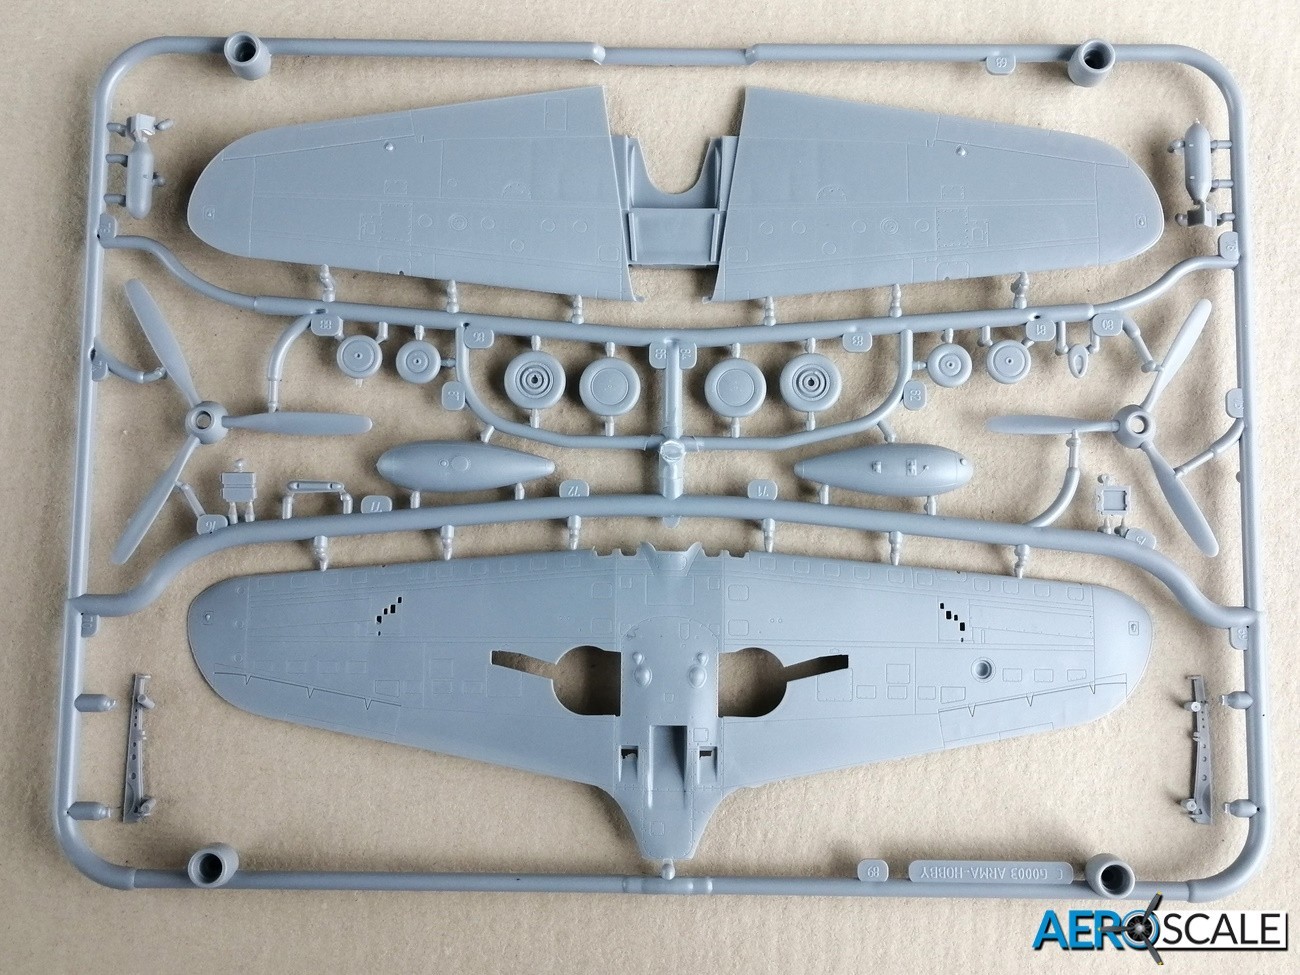
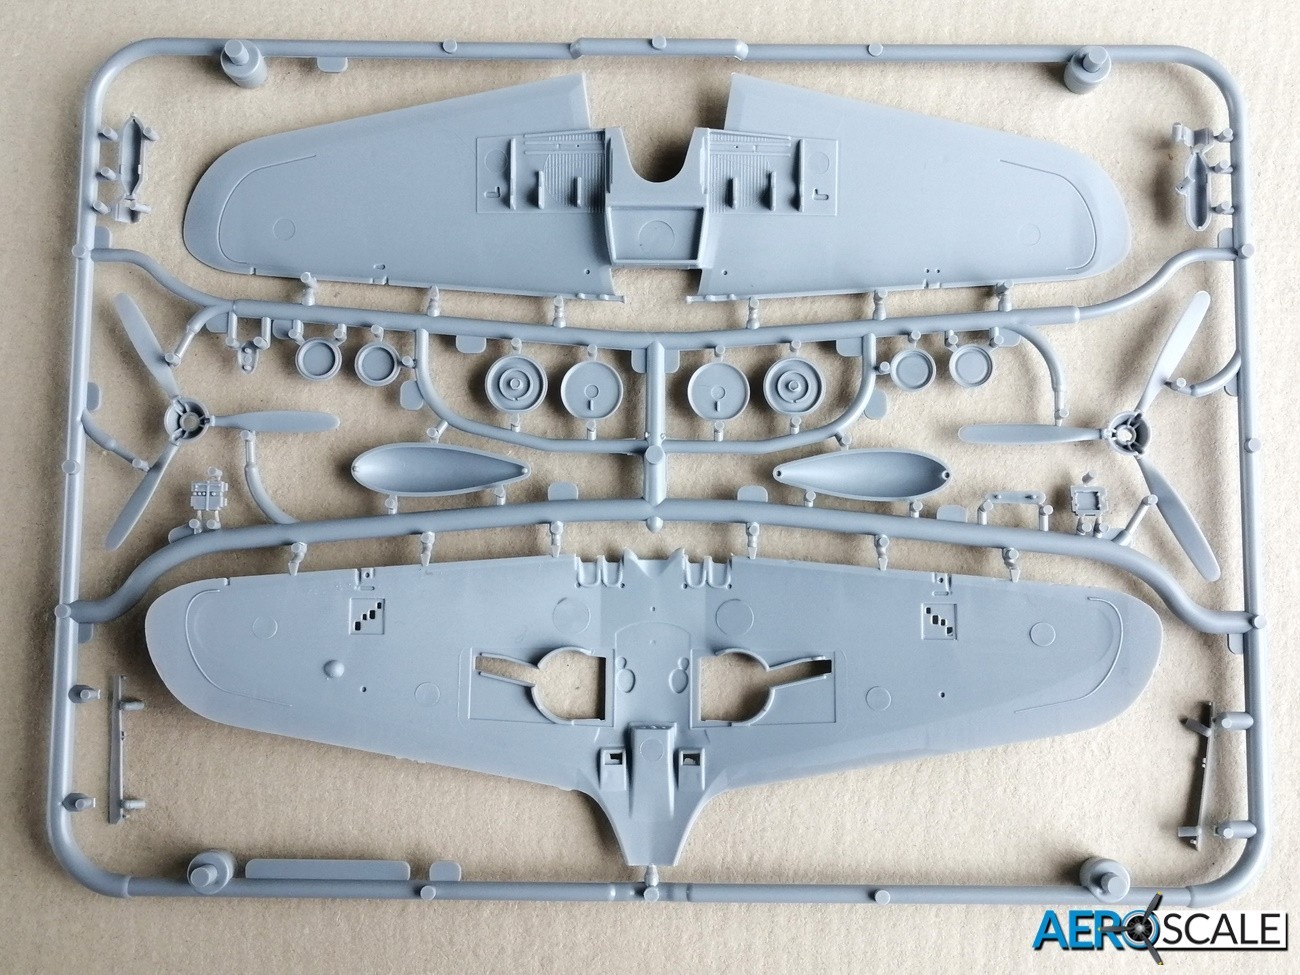
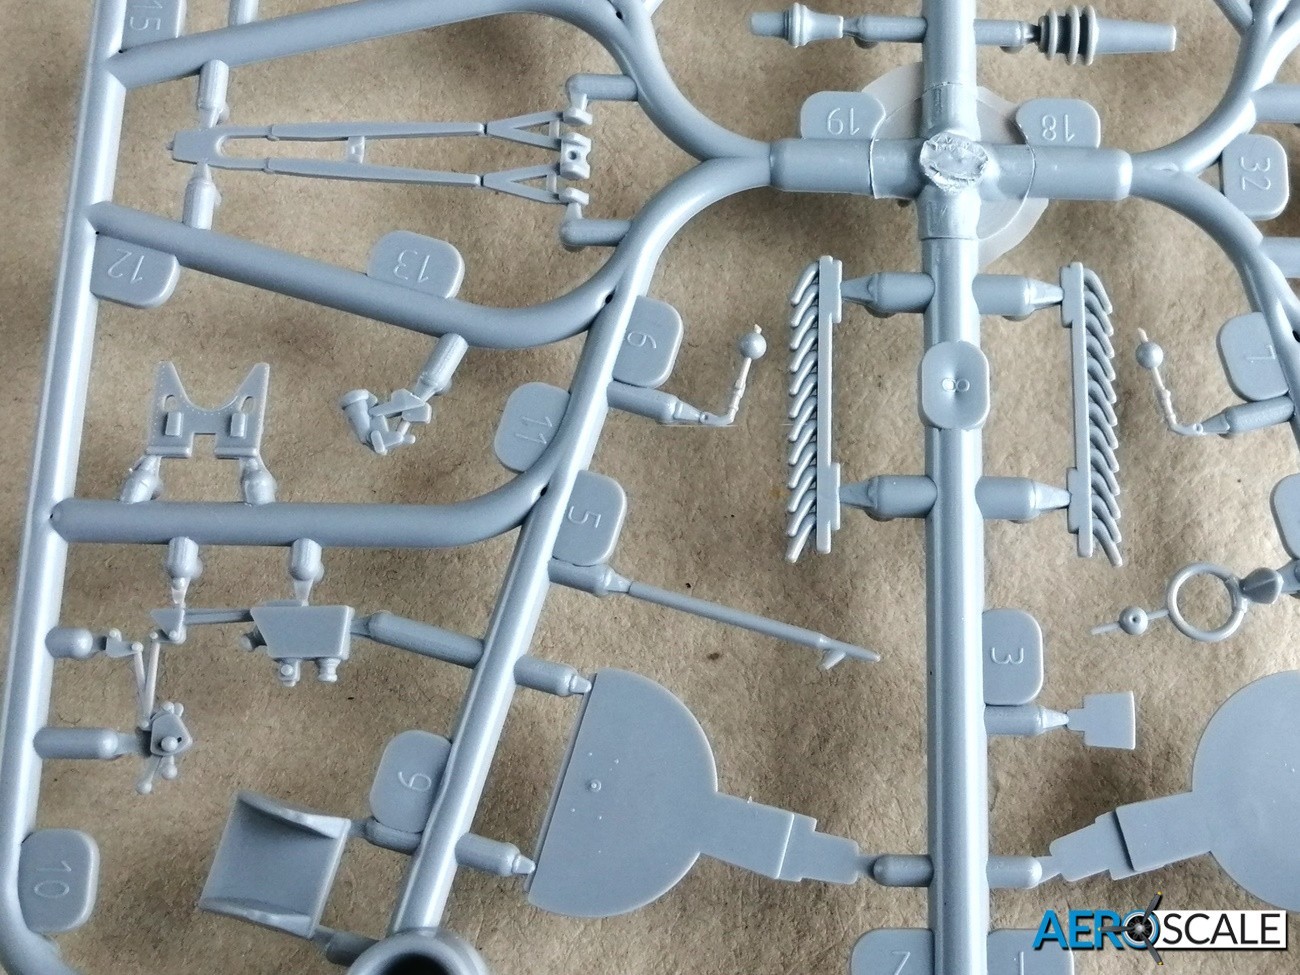
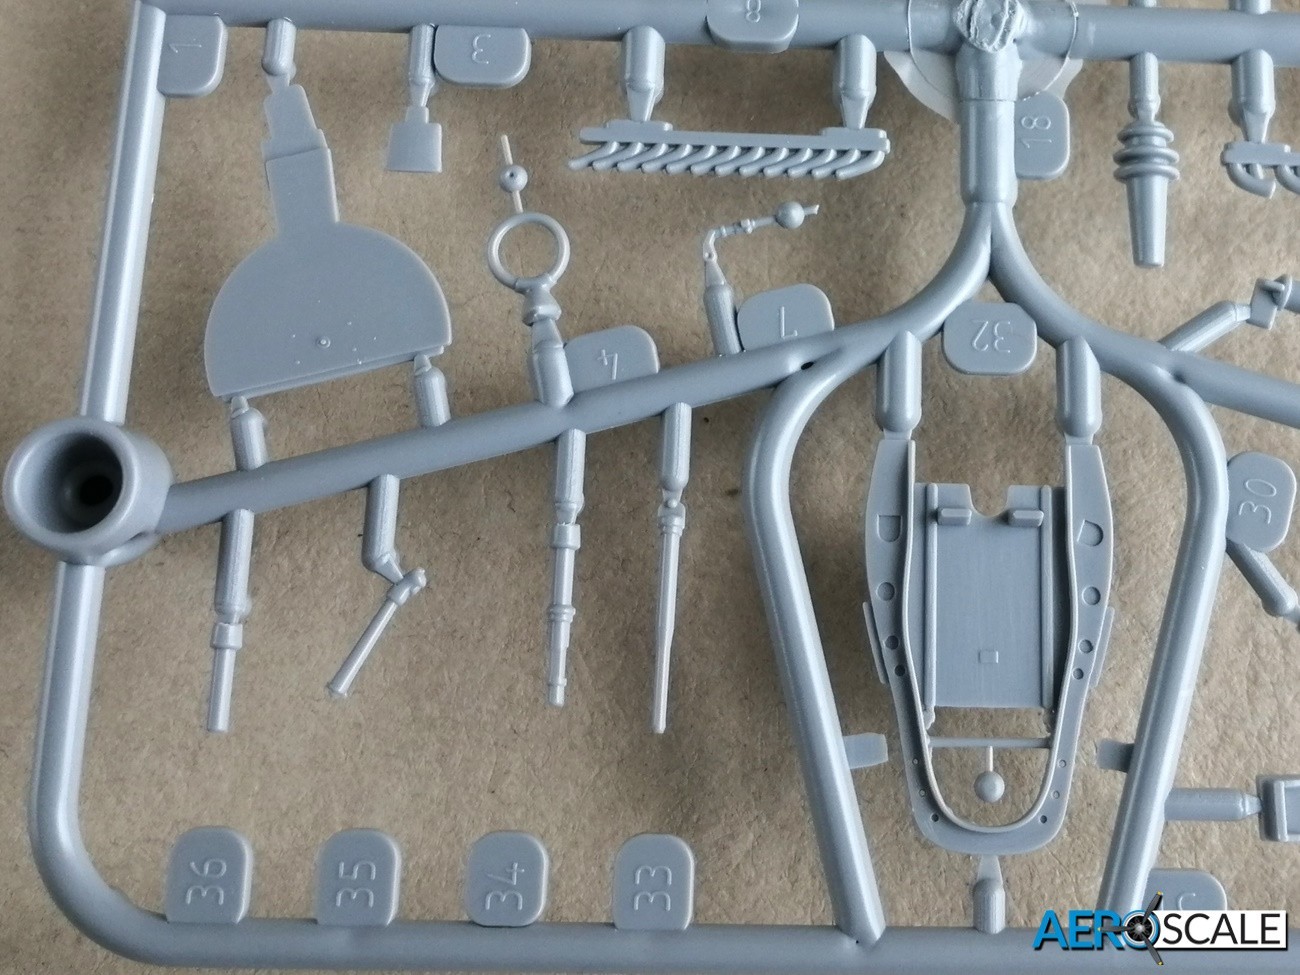
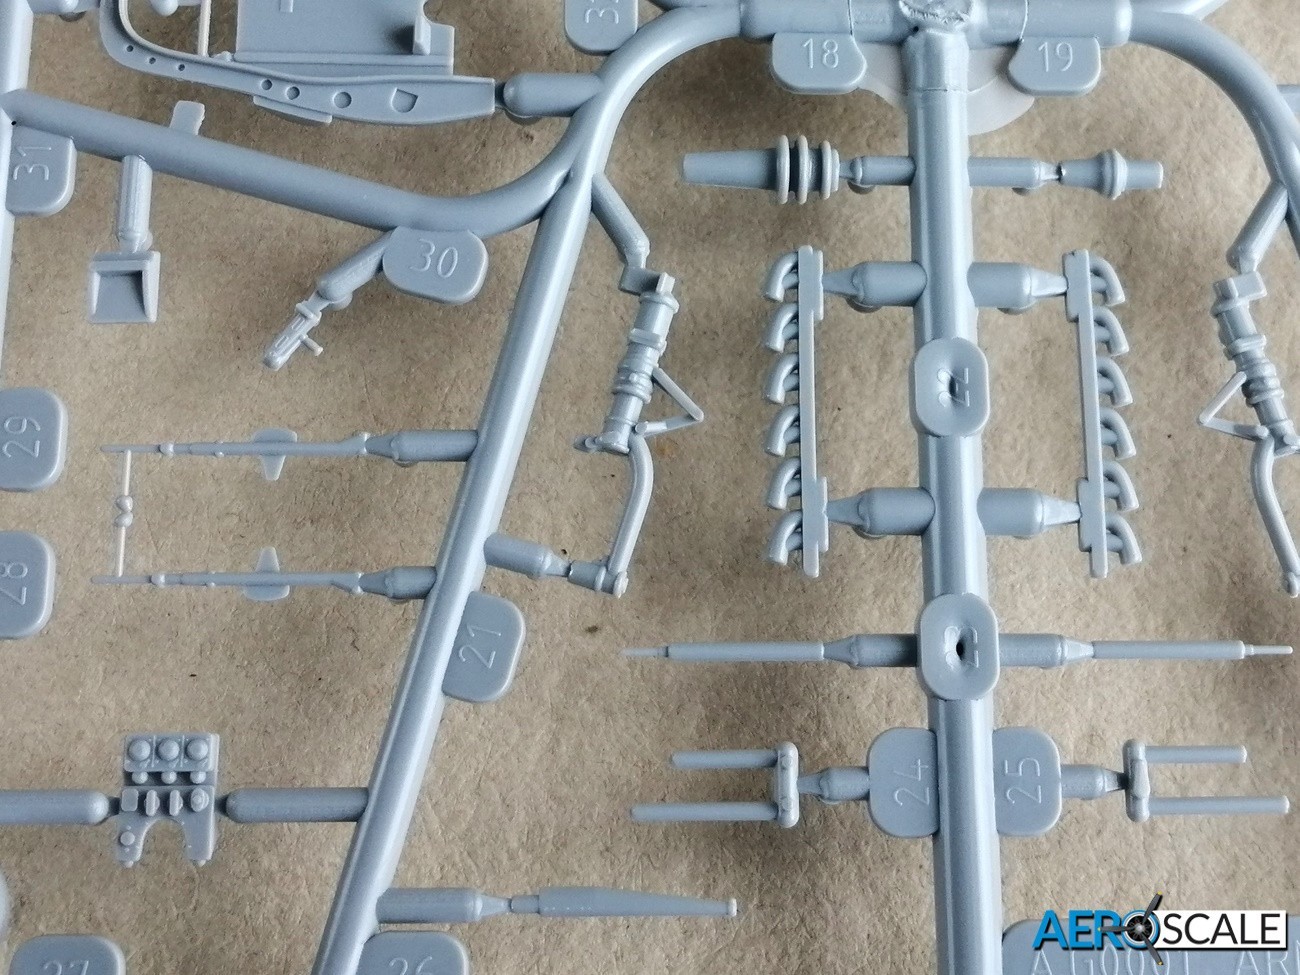
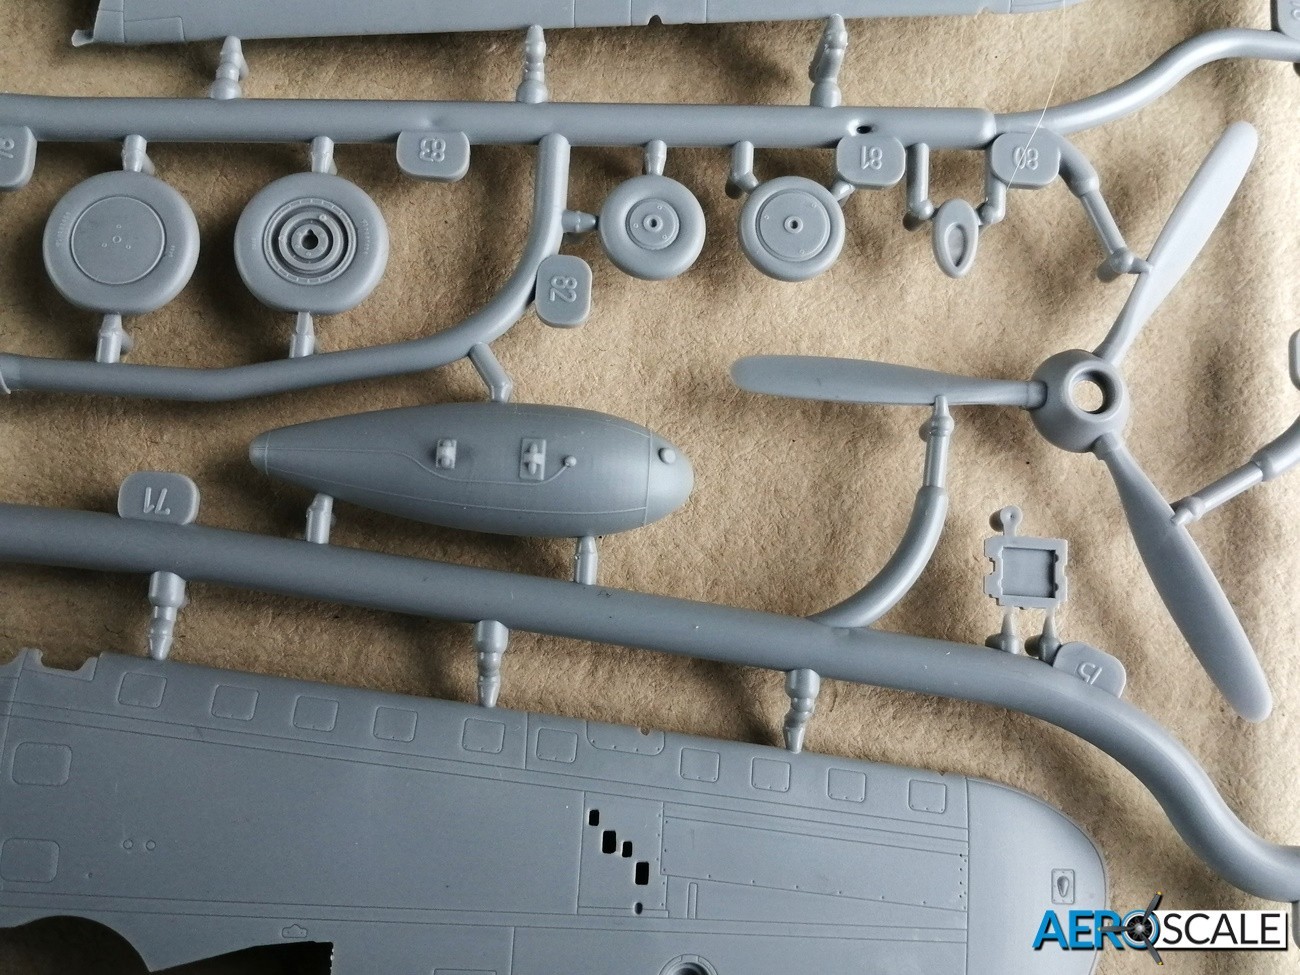
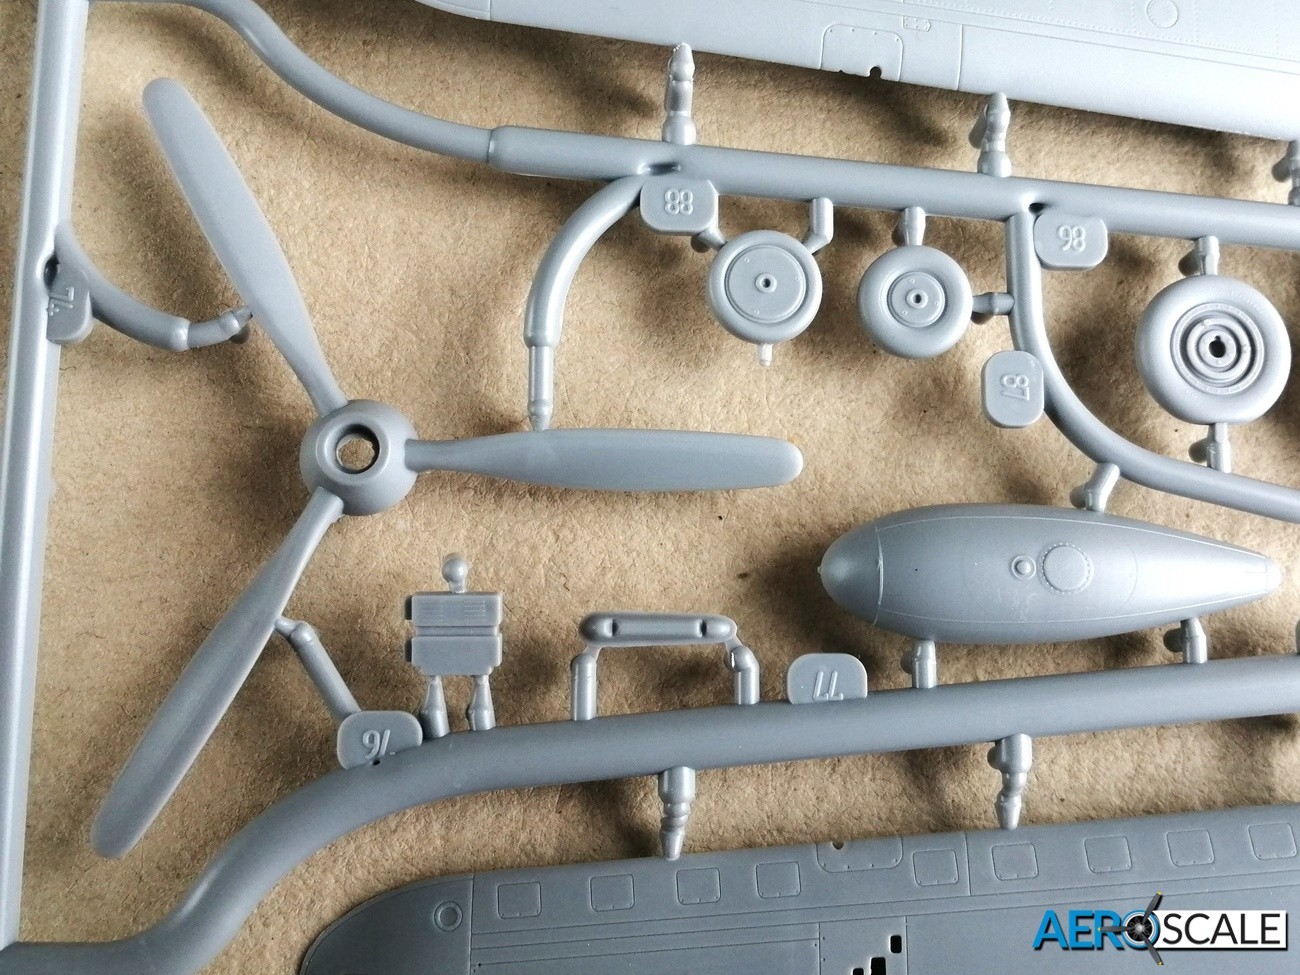
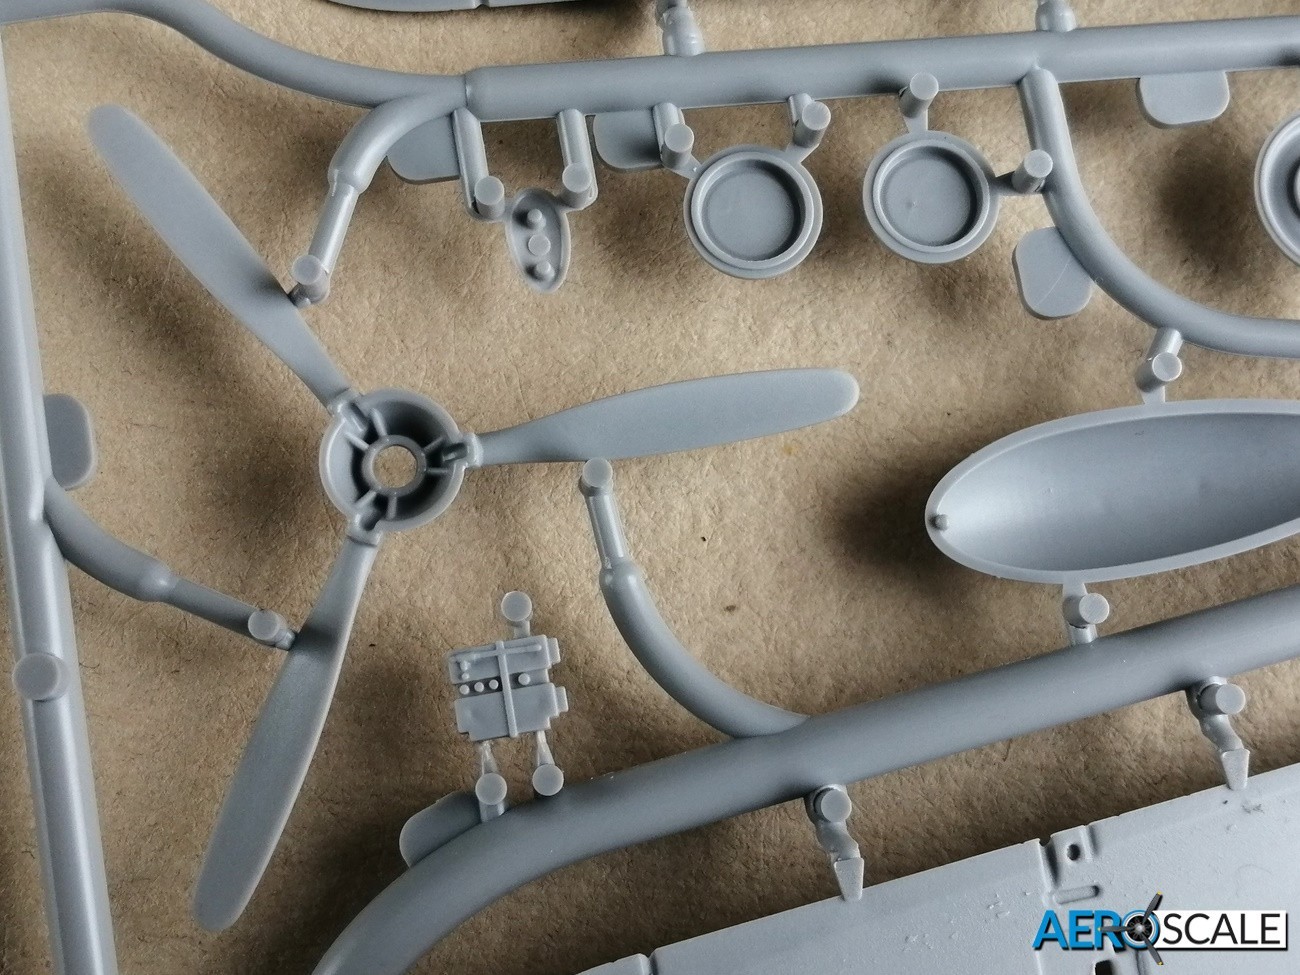
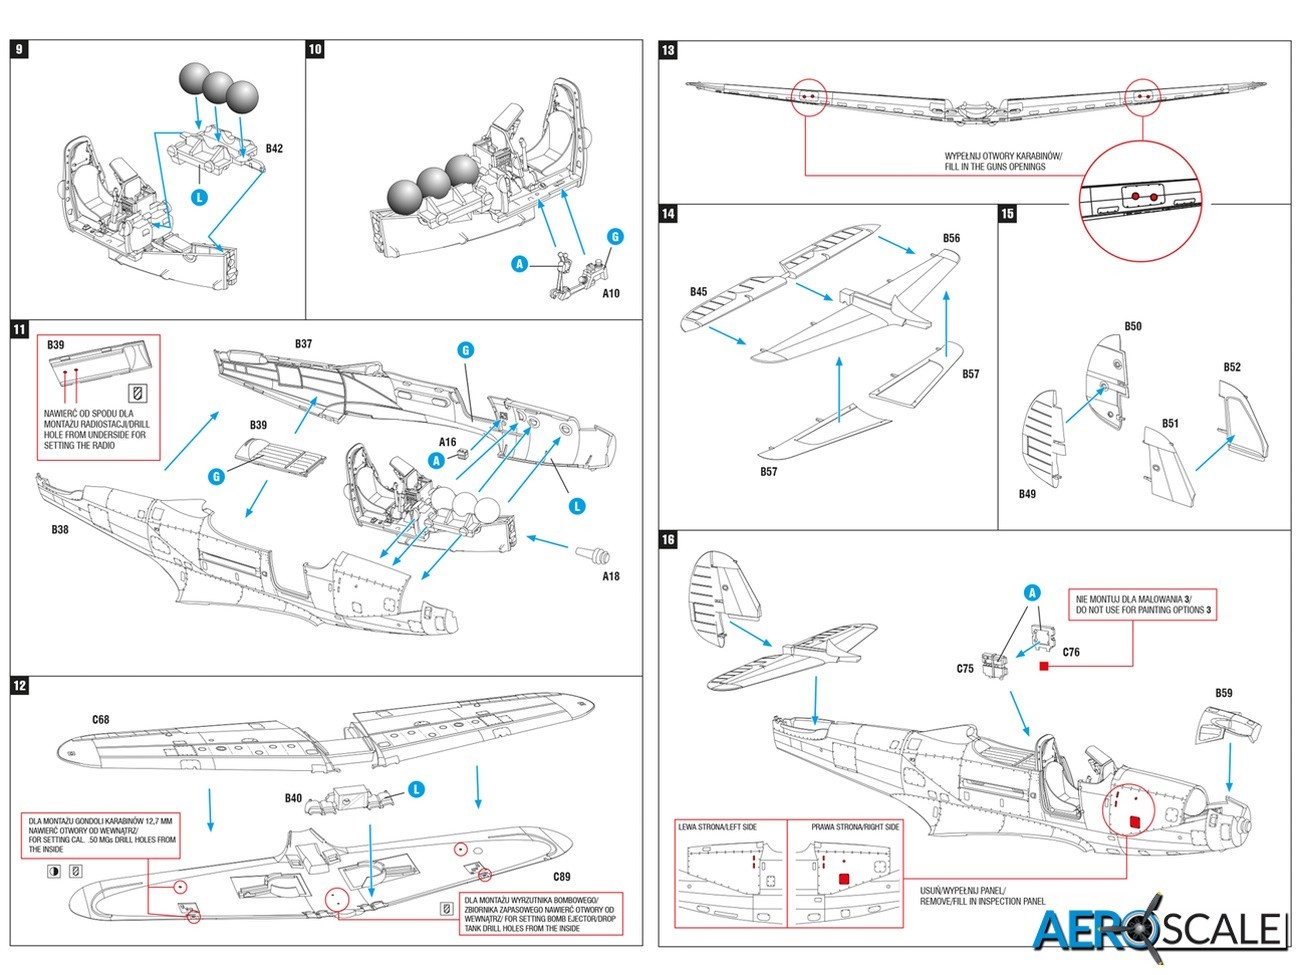
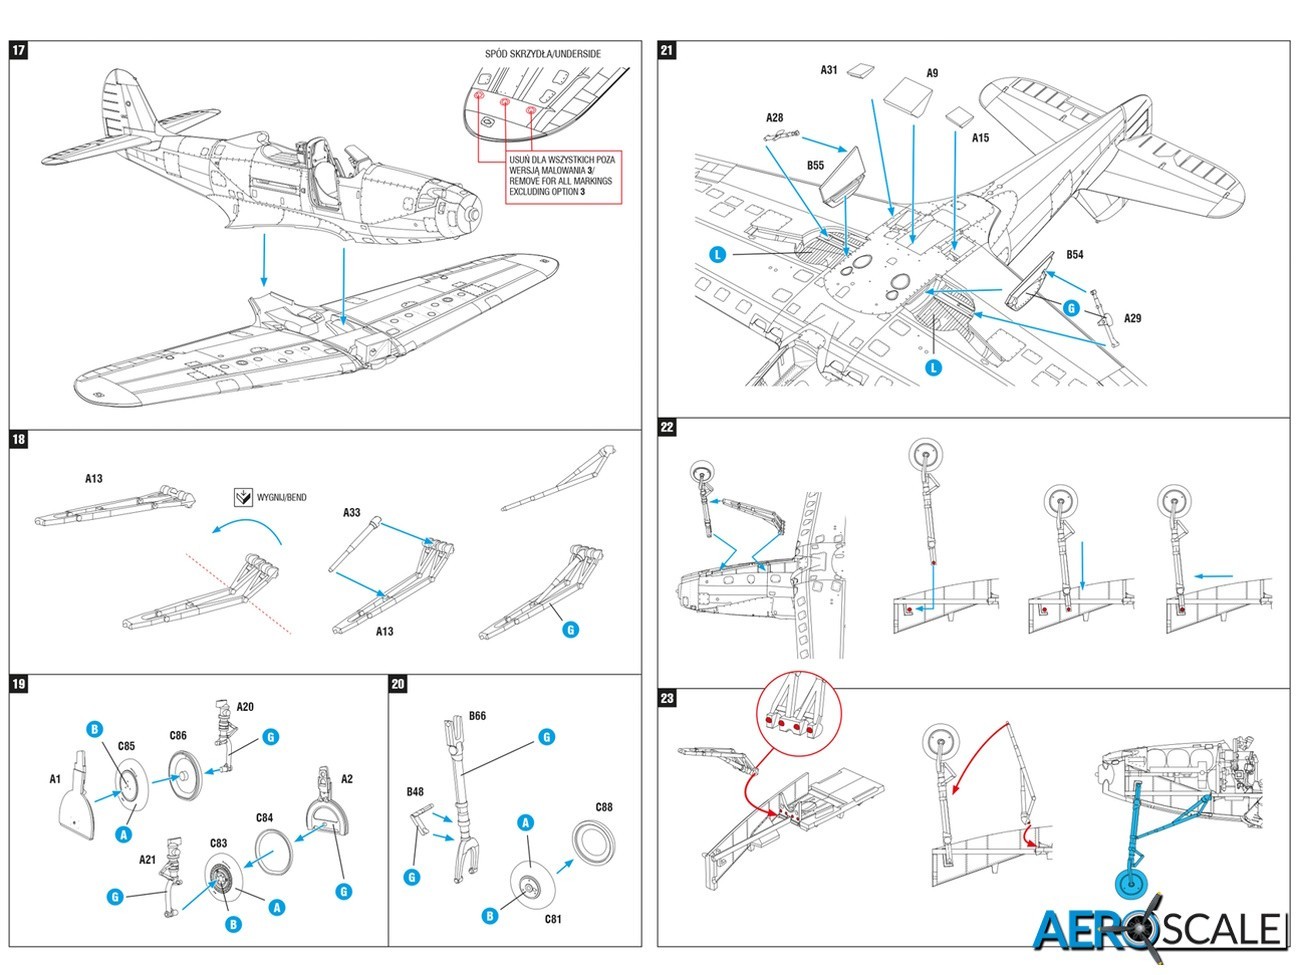
The fuselage has stunning recessed and raised detail. There are three sets of props, an indicator of many more editions to come. The prop used for this edition is made up from three parts including the canon barrel fitted in the centre of the spinner. There are 3D printed parts to replace the moulded vents on the nose of the aircraft. So, the raised vent needs to removed. Although the 3D printed vents are tiny, their fidelity is much better, so worth the effort. The fairing for the gun barrels is separate. One of the three fairings is used, but seeing three on the mould is further evidence of more versions. There are several access panels that need to be filled around the nose, the instructions provide full details. Two sets of exhaust for the Allison V-1710 engine are supplied, only one set is used. The three flaps under the engine for the glycol radiator and oil coolers are separate and look as if you can model them open or closed. Moving over to the tail the vertical fin is separate and made up from two parts. The rudder is separate and is made up from two-parts.
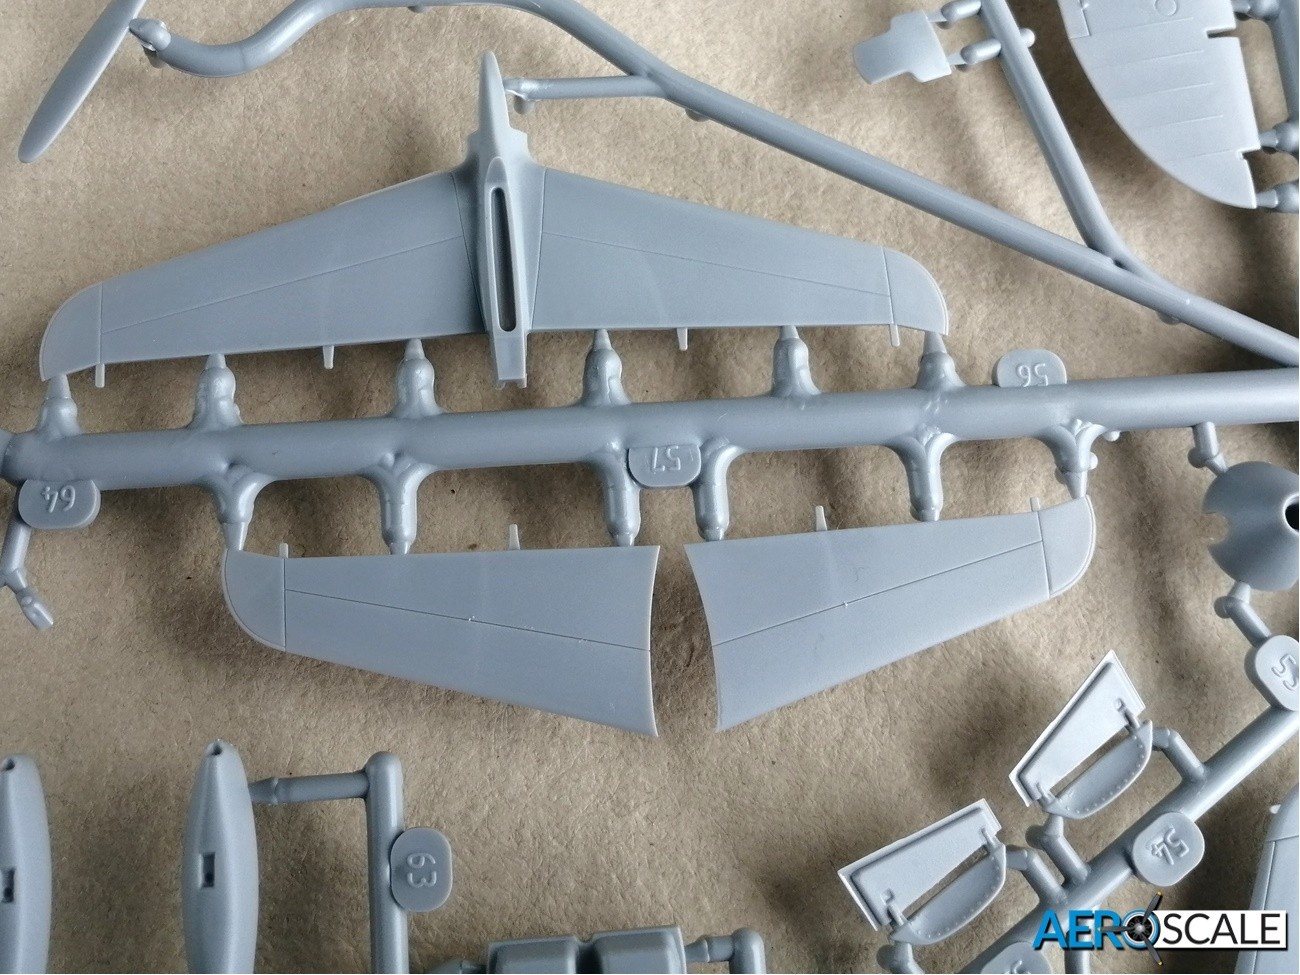
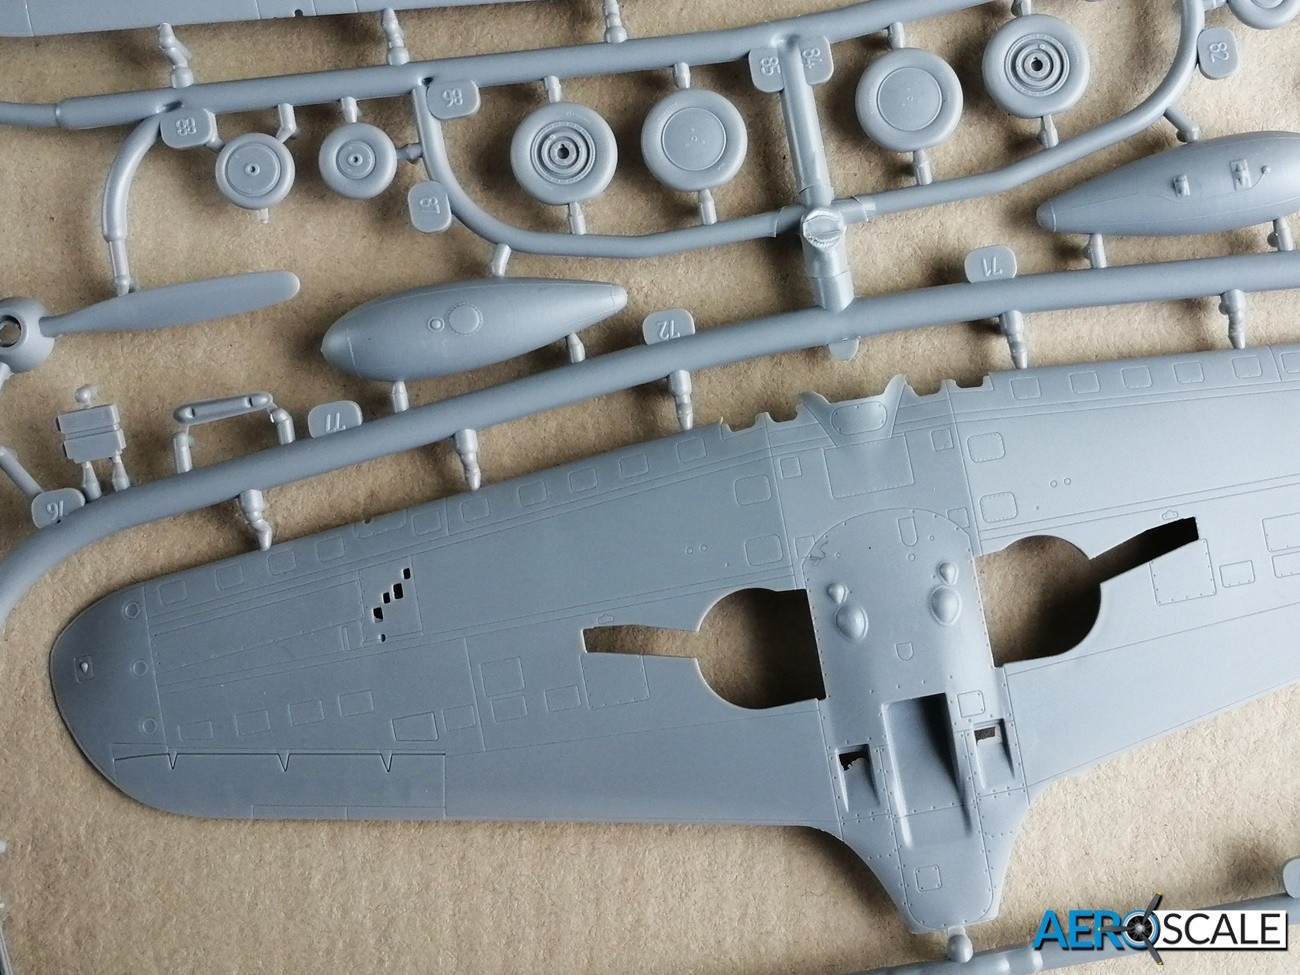
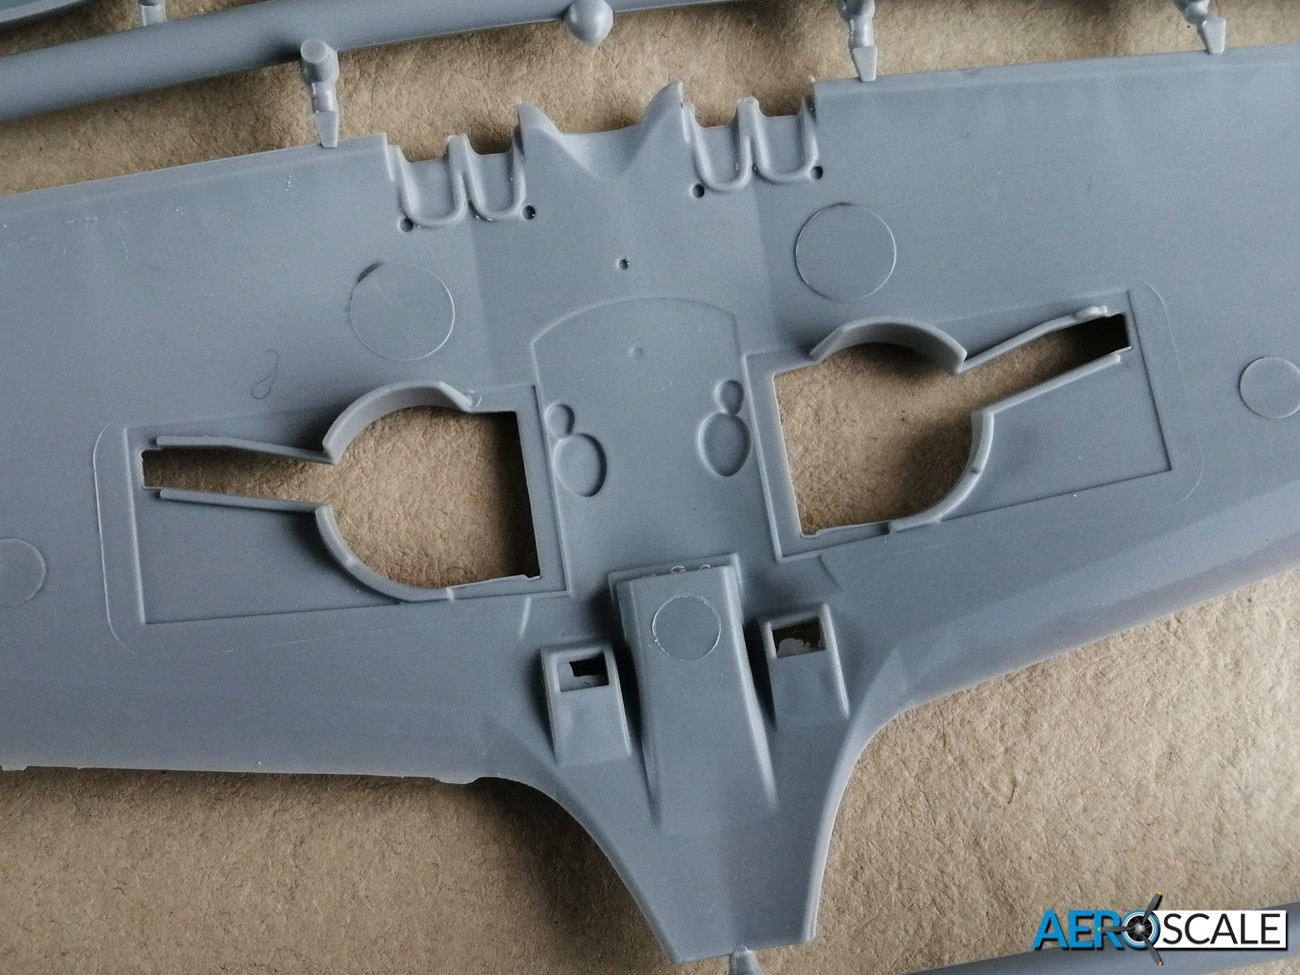
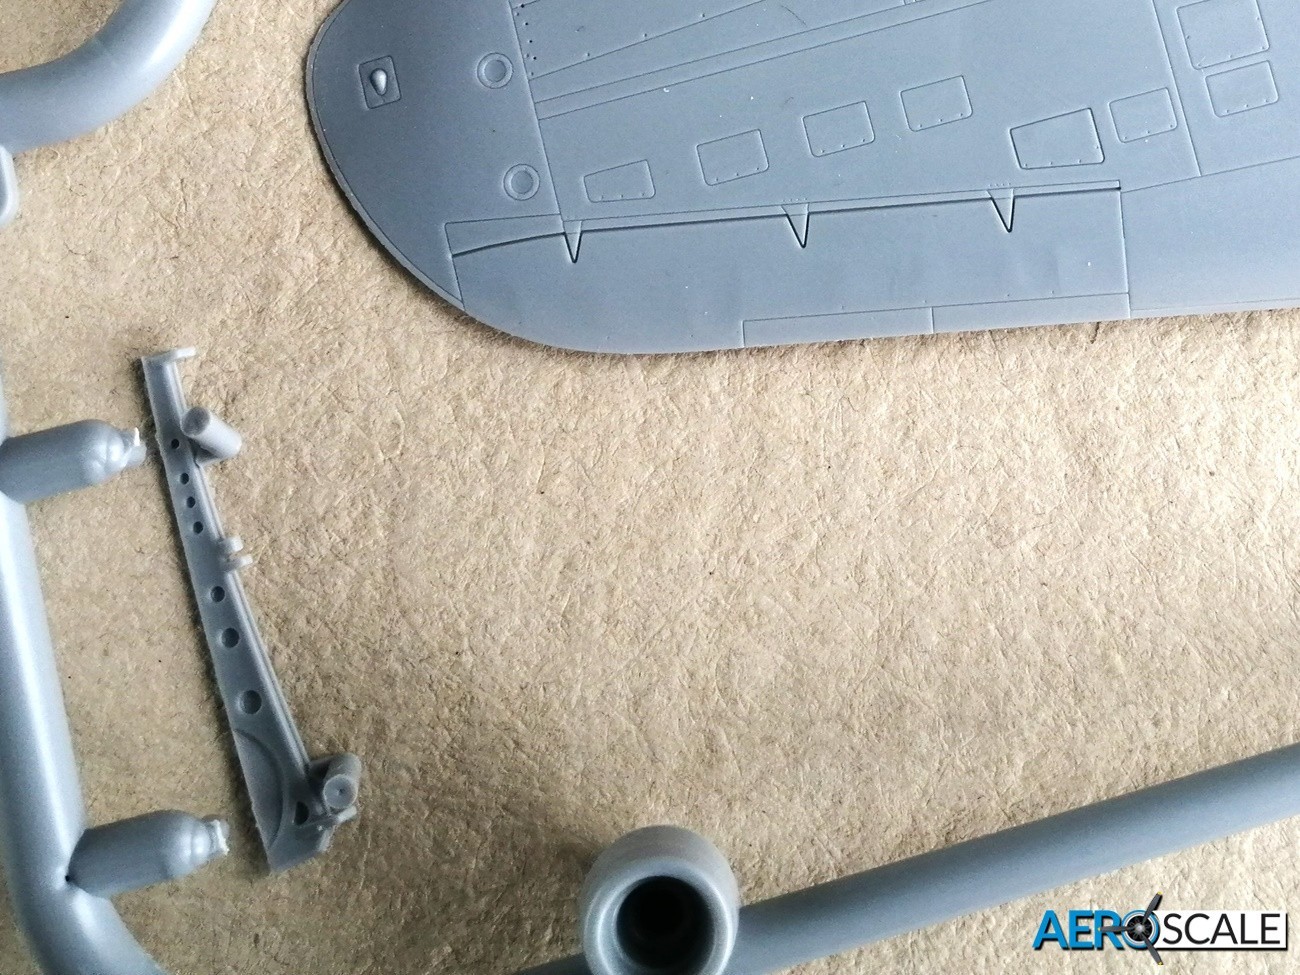
Both upper and lower wing halves are full span with elevators and flaps in a neutral position. Again, the moulded detail is superb. There seems to be sink marks in the upper wing skin corresponding with the undercarriage detail on the other side. Fortunately, there is little detail where the sink marks are, so rectifying them should be easy enough. There is some fine detail in the roof of the main undercarriage bay. Pay attention to the instruction as the moulded ID lights under the right wing need to be removed for option one and three. Also, the holes representing the guns in the leading edge of the wing need to be filled. There are a couple of gun pods to fit under the wing for options one and two. The horizontal tail unit is made up from three parts with the upper part being one piece. The elevators are one piece.
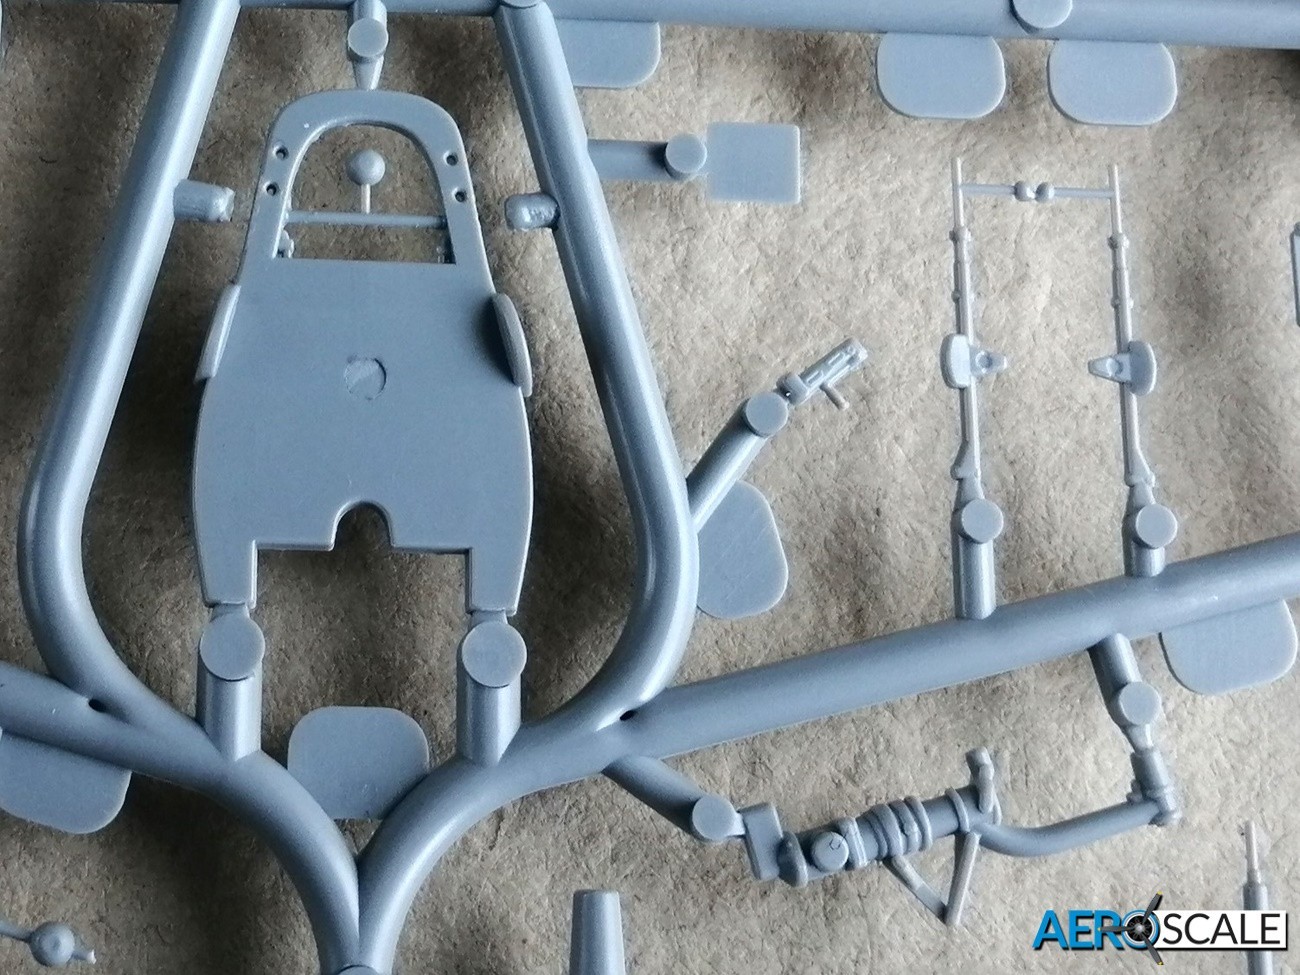
The tricycle undercarriage is one of the distinguishing features of the Airacobra. The complex looking front undercarriage leg looks very good. It’s made up from four parts. The attachment points into the fuselage look positive. The actuator arm needs to be gently bent to achieve the right shape. There is a notch in the actuator, where the bend is made. It’s very easy to do and the angle can be correctly set using the separate piston as a guide. The front undercarriage legs are designed to be installed after the building and painting. The one-piece main gear legs are a much simpler affair. The detail on the undercarriage doors is excellent. Arma Hobby has included a set of 3D main undercarriage doors. Wheels are all two-part with the main wheels having a weighted look. The manufactures name [Firestone] is visible on the main wheels.

There is a separate mount under the belly for the fitting of a bomb or fuel tank. Both are supplied in the kit.
Kabuki style paint masks are included for the canopy and windscreen. There are masks for both sides of the doors as well as the underwing landing light.
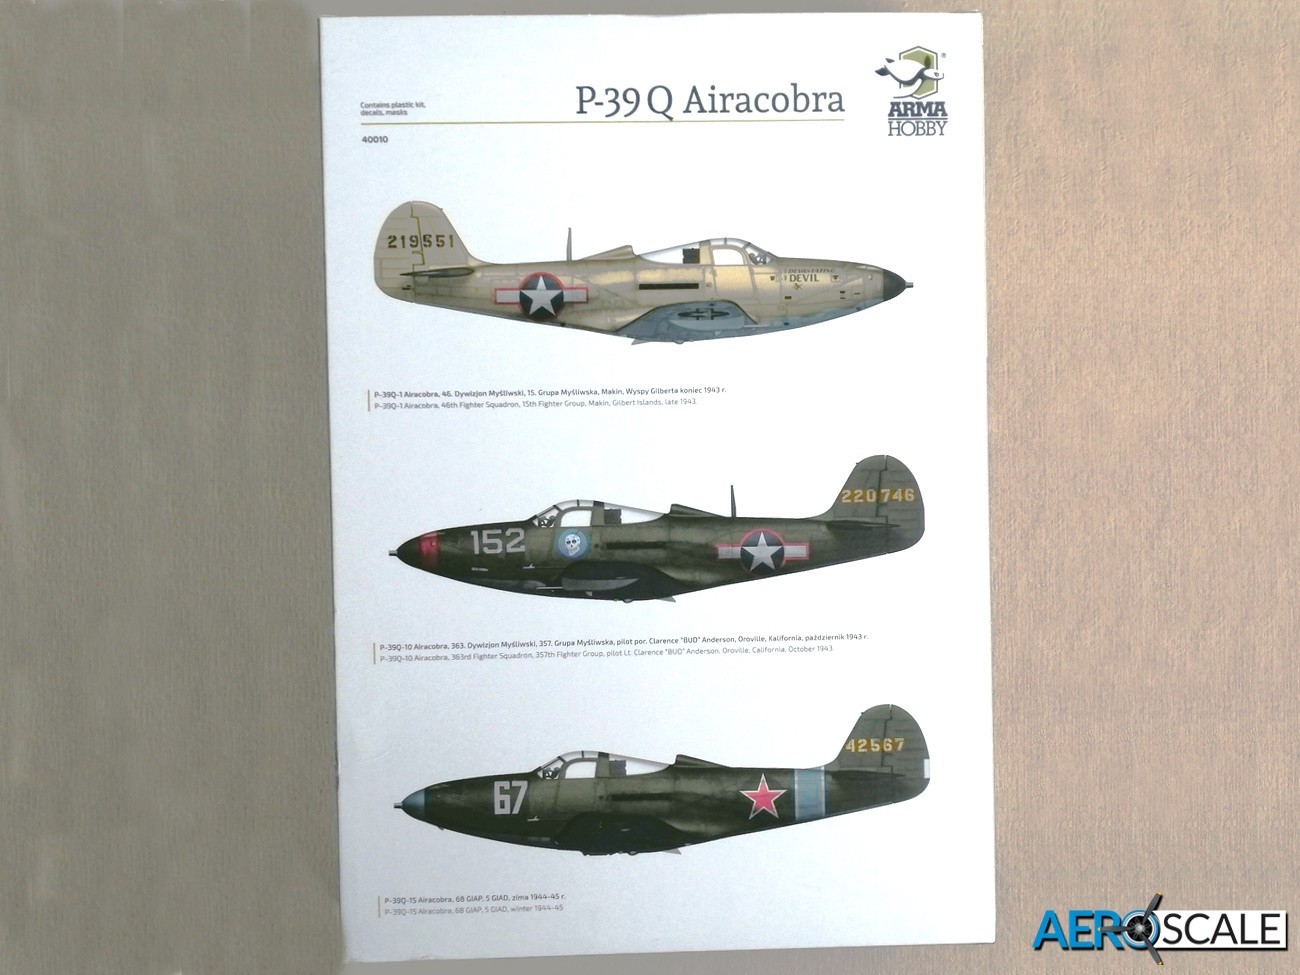
Marking options include:
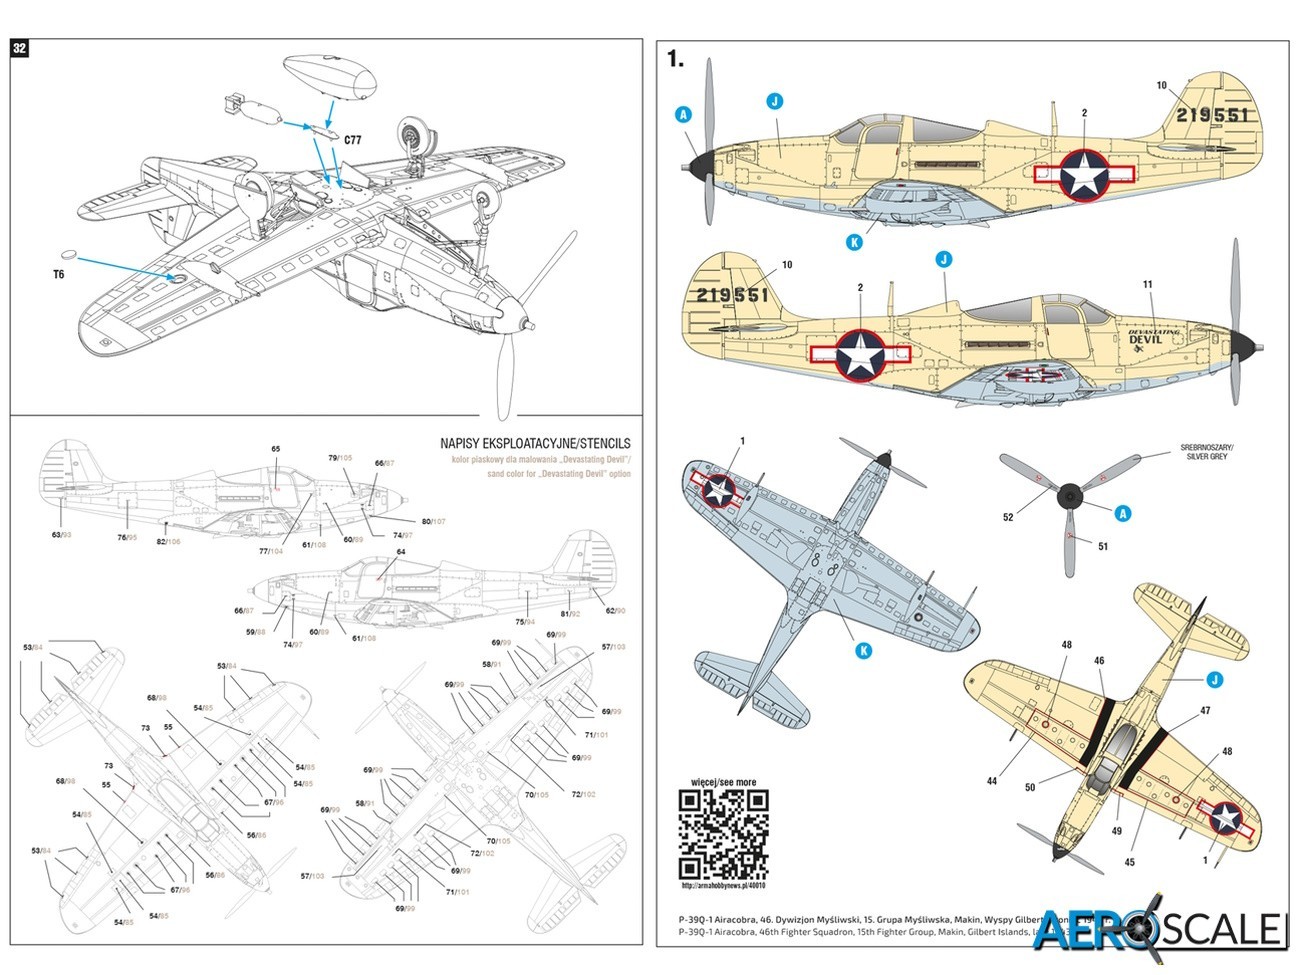
- P-39Q-1 Airacobra, 46th Fighter Squadron, 15th Fighter Group, Makin, Gilbert Islands, late 1943.
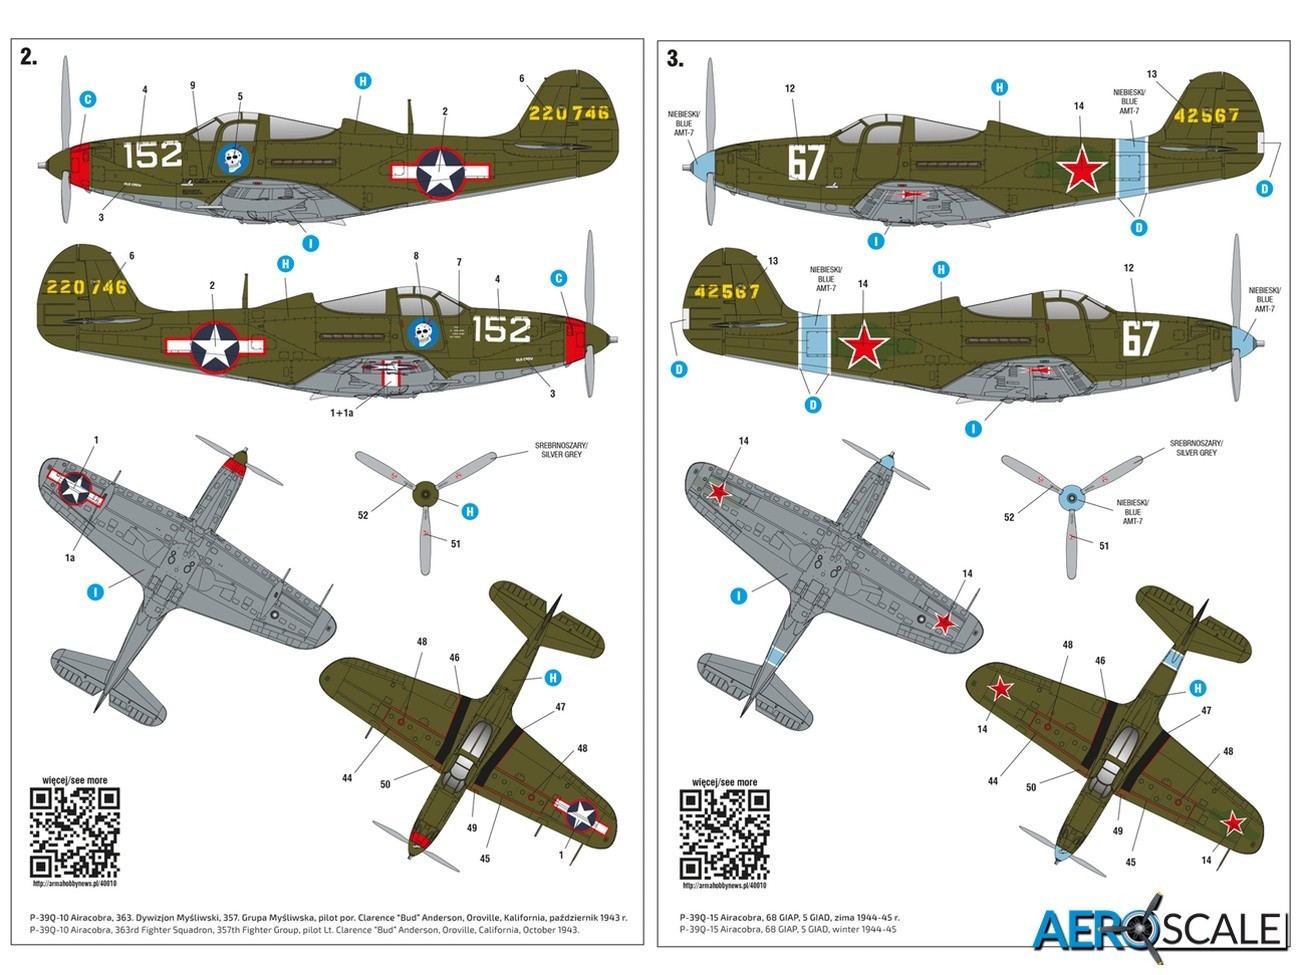
- P-39Q-10 Airacobra, 363rd Fighter Squadron, 357th Fighter Group, pilot Lt. Clarence “BUD” Anderson, Oroville, California, October 1943.
- P-39Q-15 Airacobra, 68th GIAP, 5th GIAD, winter 1944-45.
The first option has ‘Coral sand’ upper surfaces and sky-blue lower surfaces. The other two are olive drab upper and neutral grey lower surfaces. Its worth noting on option three that the painted out USAAF star and bar has been overpainted with the Soviet star.
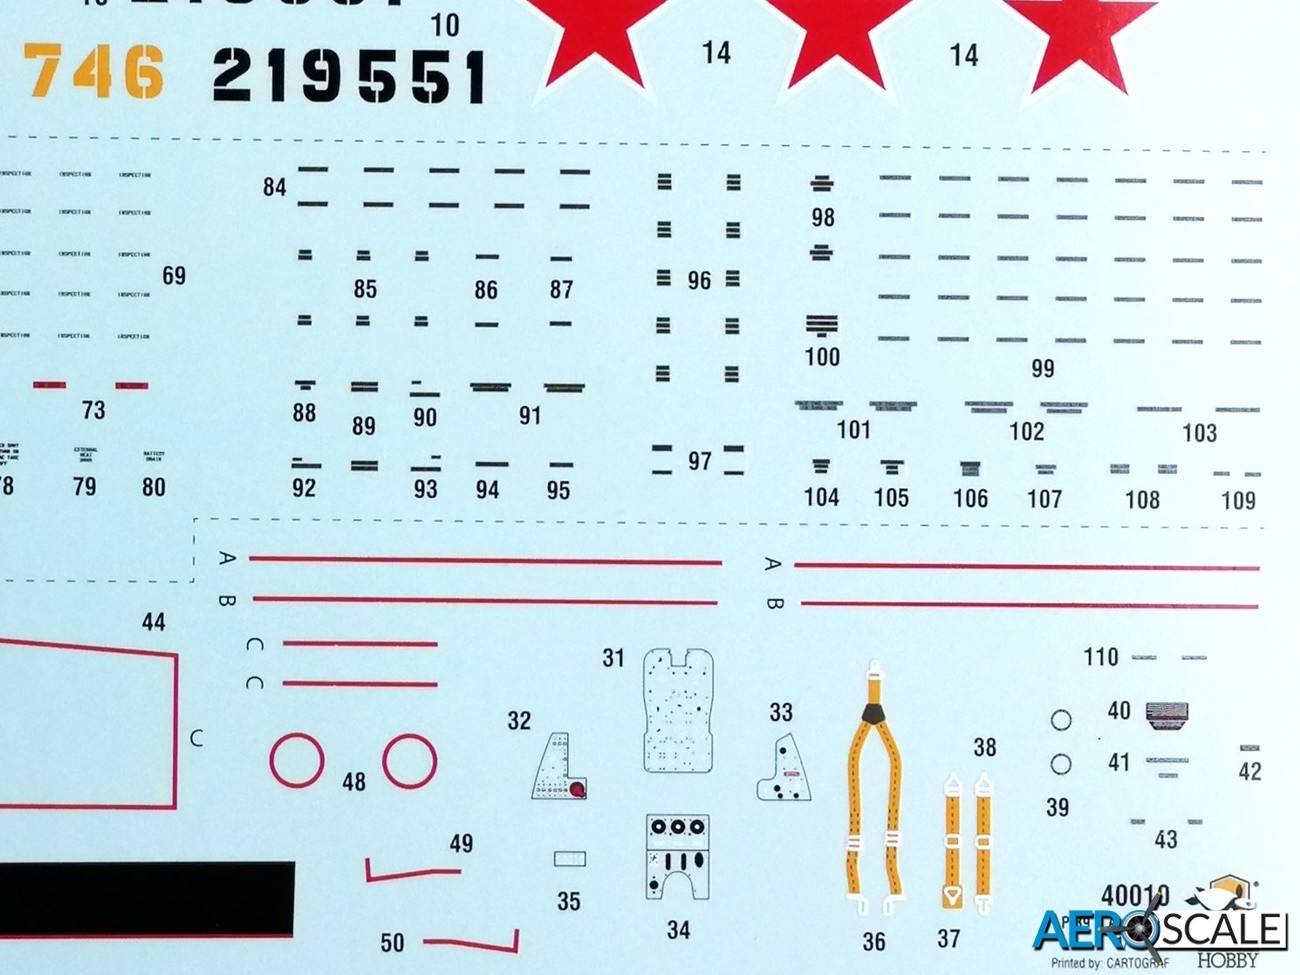
The quality of the decals is superb, not surprising as Cartograf has printed them. The colour, density and registry is excellent as is the definition. This can be clearly seen with the stencils as each one is legible. A nice touch is that the stencils on option ‘A’ have olive green backgrounds. The stencils would have been masked when the sand colour was applied.
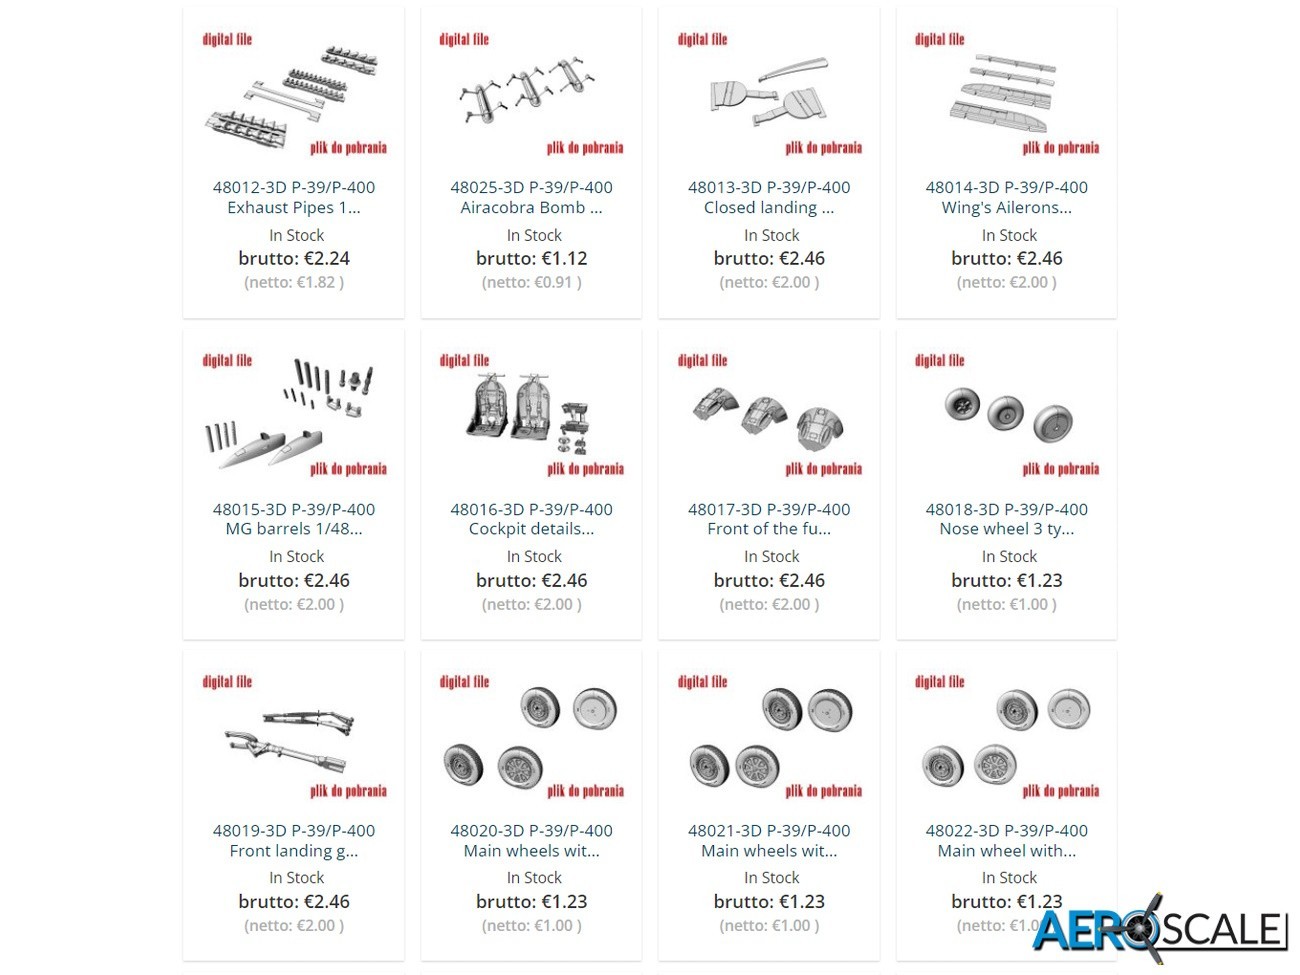
A bonus if you have or access to a 3D printer are the free files to create upgrades including seats with harness, gun butts as well as trim wheel and the lever for the oil cooler shutter. These are available under license for customers buying the kit. They are for private use and can be accessed via the QR code in the instructions. So, if you have access to a 3D printer, it is well worth creating seats to replace the kits seat
Instruction are A4 in format. The instructions are bilingual: Polish and English. If you want an authentic look to your finished model, make sure you follow the instruction. There are minor modifications needed for the marking options. There are several paint manufactures referenced in the instructions including: Hataka, AK RC, Lifecolor, Ammo, Humbrol, Vallejo and Tamiya. FS numbers are provided for all the colours.
Conclusion
This is a superb new tool release from Arma Hobby. Great testimony to Arma Hobby’s appetite for creating superb new tool kits using up to date design and manufacturing techniques. Highly recommended.
The kit is available from Arma Hobby or from your local stockist.
40010 – Bell P-39Q Airacobra – 1:48
Please remember, when contacting retailers or manufacturers, to mention that you saw their products highlighted here – on Aeroscale.