Background
The Wildcat stemmed from a line of Grumman aircraft that served with the US Navy. Initially the US Navy ordered a limited number of the XF4F-1 as a backup in case the preferred choice of the Brewster Buffalo did not live up to expectations. Disappointed Grumman went back to the drawing board and came up with the much-improved XF4F-3, with the new wings and tail and a supercharged version of the Pratt & Whitney R-1830 "Twin Wasp" radial engine. The improvement led to orders of the production model [F4F-3] from the US Navy, British Fleet Air Arm [FAA] and France. With the fall of Europe, the aircraft bound for France were delivered to Britain and were subsequently named the Martlet. Later the FAA adopted the US Navy and Marine name Wildcat. It proved to be successful in the air war over the north Atlantic, shooting down many Luftwaffe raiders. Out in the Pacific against the Japanese Zero the Wildcat was very successful, despite the Zeros superior performance. Taking advantage of its better performance at altitude enabled it to be used successfully in the tactic of diving – hitting - running. In defence the Beam Defence Position or the Thatch weave was devised by John S. Thatch, a tactic that provided a highly effective against Japanese fighters.

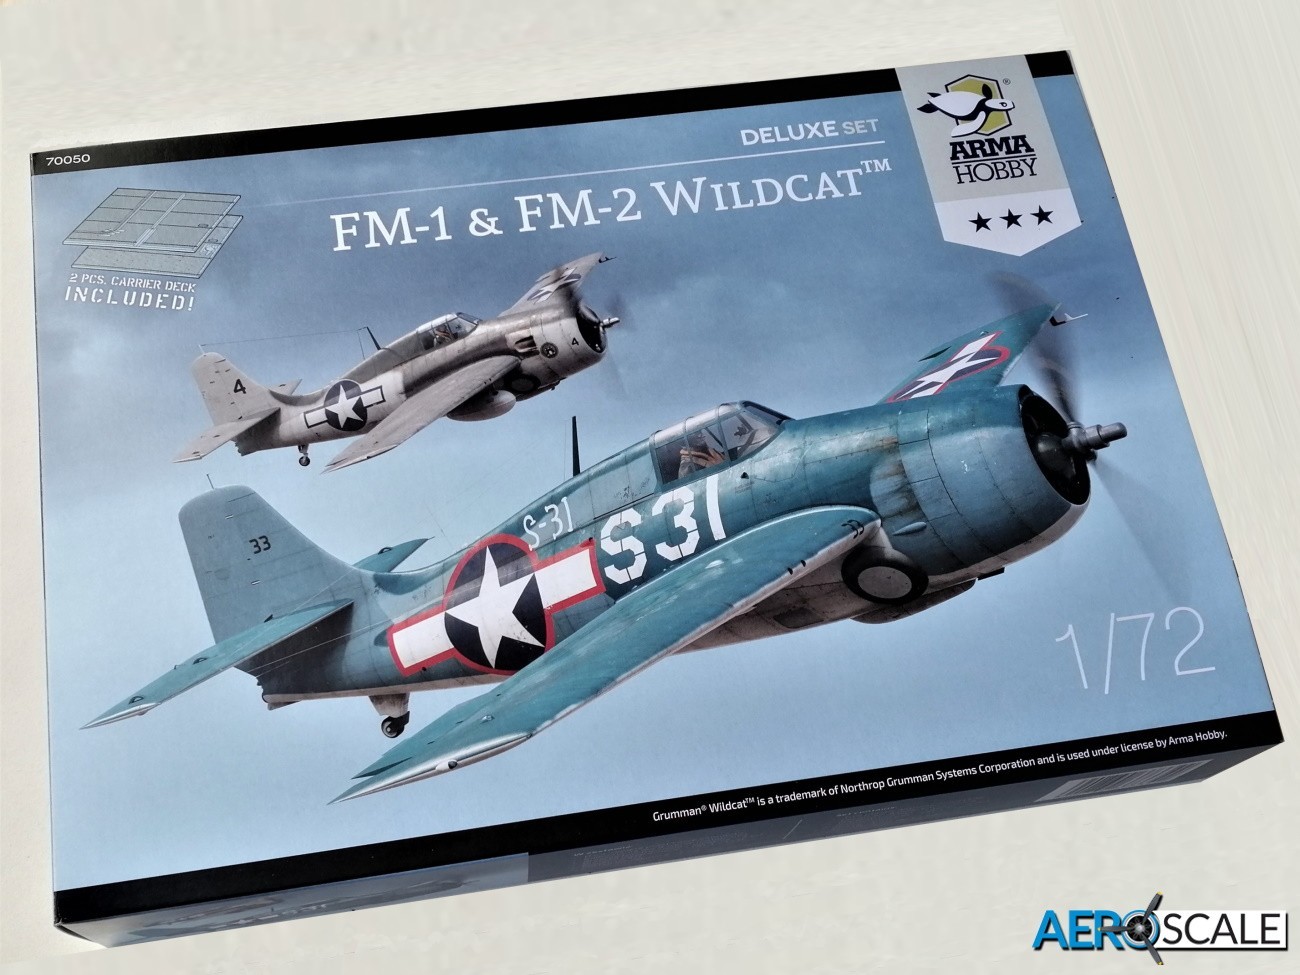
This new release from ARMA Hobby depict the General Motors Eastern Aircraft built F4F: the FM-1 and FM-2. In all they produced 5,280 FM variants while Grumman concentrated on construction of the F6F Hellcat. The reason for continuing production of the Wildcat was their ability to operate from the small escort carriers. The FM-1 varied from the F4F-4 in having just four wing mounted guns, but they had the ability to carry two 110kg [250lb] bombs or six rockets. The FM-2 was based on Grumman's XF4F-8 prototype and again optimized for small-carrier operations. It had more powerful engine Wright R-1820-56 engine, and a taller tail to cope with the torque. Like the FM-1, the FM-2 had four wing mounted machine guns.
One of the finest test pilots of the era Eric M. "Winkle" Brown had high praise for the Wildcat
“I would still assess the Wildcat as the outstanding naval fighter of the early years of World War II ... I can vouch as a matter of personal experience; this Grumman fighter was one of the finest shipboard aeroplanes ever created”.
THE KIT
ARMA Hobby has quite a few 1:72 scale individual releases of Grumman;s little fighter including F4F-4, FM-2 and the Mk. VI Wildcat. So, the release a pair of General Motors built Wildcats in the form of the FM-1/FM-2 and Wildcat Mk. V/VI seems like a great idea. This is the Expert Set contains a few additional goodies including two sections of a flight deck. Contents includes:
- 4 x grey plastic sprues
- 2 x clear plastic sprue
- 3 x photo etched frets
- 2 x sets of vinyl paint masks
- 1 x decal sheet
- 2 x sections of flight deck
The packaging is interesting as all the contents are contained in a strong card tray that slides out of the side opening box. It looks as if it will address the usual problems of side opening packaging collapsing over time.
First impression on opening the end opening box is extremely positive. The quality and consistency of the recessed and raised detail is quite superb. Even the piano hinges of the access panels are reproduced. With each subject there are around eighty parts on the four grey plastic sprues. There are locating pins on all the major airframe parts. The ejection marks on the inside of the fuselage and wings are unusual and interesting. As are the interlocking sprue spacers. I did check for any evidence of sinkage on the reverse sides to where the ejection marks are, but there is no sign at all.
The detail on the plastic for the cockpit parts is superb. Detailing on the plastic frame for the seat, cockpit floor and instrument panel [IP] is very good and some highlighting will pay dividends. The inside of the fuselage is also well detailed. There is also a photo etched IP [unpainted], with instrument faces supplied as decals. The raised surface detail on the plastic IP will need to be removed if utilising the PE. There is also a three-part photo etched seat harness [unpainted] and there is also a harness set on the decal sheet. Three PE parts further detail the cockpit and there are decals representing the instruments and placards on the side panels.
The clear parts are crystal clear, the canopy and windscreen are separate parts. The two small windows in the belly can be fitted towards the end of the build. There is a small sill in the recess to stop the clear panels being pushed right through. The canopy and wheel paint masks are not the usual Kabuki type, they have a more vinyl look to them.
The instructions for the Robart main undercarriage for the FM-1 compared to the FM-2 is different. It’s as if the Expert Edition instructions have been used for the FM-1 and the standard instructions are used for the FM-2. On both models the design of the ten plastic parts making up the undercarriage provides a fair bit of strength. ARMA Hobby has included on one of the sprues for the FM-1 a jig to help set up part of the undercarriage structure. Unfortunately, the jig is not included on the sprues of the FM-2. No matter as you can use the FM-1 jig. There is no mention of the PE parts representing the retraction gear in the instructions for the FM-2 even though they are included. Detail of the undercarriage parts is very good, particularly with the addition of the PE cogs and chains for the operation of the gear.
There are two choices of wheels: spoked or faired. Tyres have a slightly flattened look and you can even just make out the Goodyear tyre manufactures name on the sidewall. There are paint masks for the wheels. The instructions for the construction of the undercarriage of the FM-2 takes a different path to the FM-1. Whichever route you take with the instructions the undercarriage will look very impressive when completed. The ventral bridge between the two-wheel wells can be built using plastic or the more detailed PE parts. In contrast to the complexity of the main gear the two types of tailwheels are both one piece.
The difference between the FM-1 and FM-2 is more obvious in the fuselage. ARMA Hobby have thankfully produced two separate moulds. The Wright R-1820 Cyclone 9 of the FM-2 has the one bank of nine cylinders and lacks the two-stage supercharger of the Pratt & Whitney Twin Wasp R-1830-76 powering the FM-1. The FM-1 engine bay is just packed with detail including twelve parts making up the Twin Wasp and that’s not including the three-part engine mount. There is a PE enhancement in the way of an ignition harness. It’s the kind of attention to detail that would be found in 1:48 or 1:32. The Wright R-1820 Cyclone 9 of the FM-2 is a much less complex affair with just three plastic parts and no PE. There is an ignition harness on the PE fret suitable for a nine cylinder engine, but there is no mention in the instructions regarding its fitting. The lack of supercharger makes for much simpler construction. There is a difference in the cowling: the FM-1 has eight cooling flaps were as the FM-2 has just two. These are all moulded closed. The exhaust outlets are positioned differently too. The FM-1 is underneath the cowling and the FM-2 is underneath as well as on the side similar to the F6F Hellcat. Two more obvious differences are the lack of a ventral windows on the FM-2 and the FM-2 has a much taller vertical fin and rudder. The prop is one piece with two choices of boss depending on the marking option.
The wings have beautifully thin trailing edges. A thoughtful touch are the pins on the under surfaces of the wings where the external fuel tank shackles are located. ARMA Hobby has used the wing of the F4F-4 for the FM-1, so some of the panel lines and one of the machine gun cartridge chutes as well as the hole for the barrel of the outer machine gun needs filling. The bulges for the outer machine guns need removing and. There is a PE panel for the ammunition cartridge to attach under each wing. No such modifications are needed for the wings of the FM-2. The horizontal tail has positionable one-piece elevators.
There are a couple of fuel tanks that can be fitted, they have separate shackles. Also included are six rocket projectiles. Instructions suggest that they were fitted to option [5]. There is also a set of four PE bomb racks. No bombs are supplied though.
The three small PE frets contain seat harness, instrument panel, cockpit controls, undercarriage mechanism, dorsal panel between the wheel bay, engine ignition harness, ammunition hatch, wing bomb racks
The vinyl paint masks are for the canopy and windscreen as well as the dorsal windows of the FM-1. There are also masks for the main and tail wheels too.
A great bonus are the two squares of thin plywood [2mm thick] representing sections of the flight deck. They measure 145mm on each side and the recessed detail looks like it’s been applied using a laser. One of the sections has part of the lift engraved.
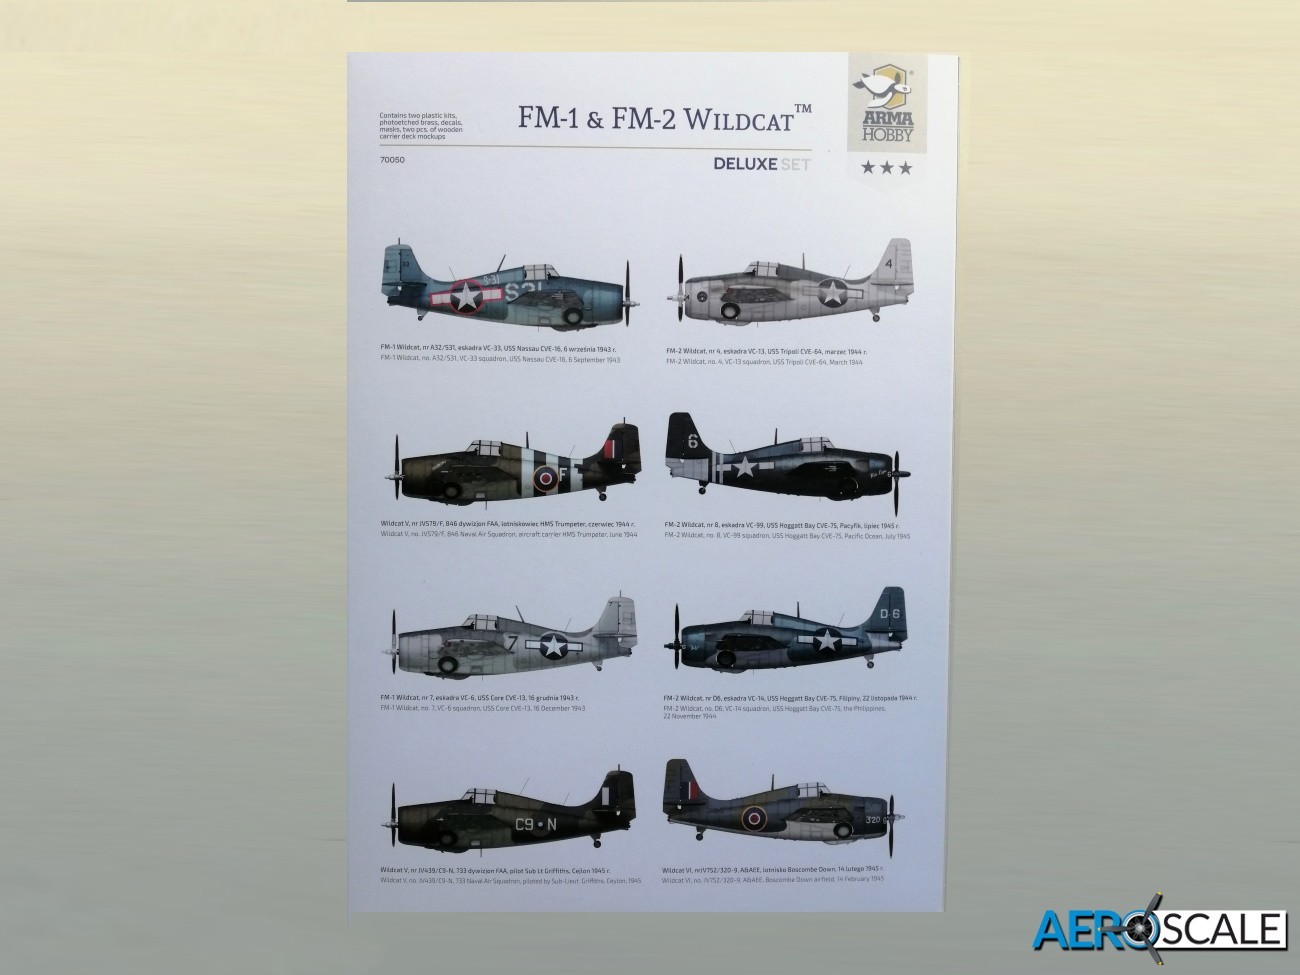
There are four marking options for each model of the Wildcat. including five US Navy and three British Fleet Air Arm Wildcats or Martlet.
FM-1/Wildcat V
[1] FM-1 - A32/531, VC-33, USS Nassau CVE-16, 6/7/1943. During training on the Californian coast, shortly before embarkation on USS Coral Sea CVE-57
[2] Wildcat V - JV579/F ‘That Old Thing’, 846 Naval Air Squadron, HMS Trumpeter/Eglington airfield. The Squadron provided air cover during Normandy landings of June 1944.
[3] FM-1 - No. 7, VC-6, USS Core CVE-13, 16/12/1943. During anti-submarine patrols, North Atlantic
[4] Wildcat V – JV439/C9-N, 733 Naval Air Squadron, piloted by Sub-Lt Griffiths, Trincomalee airfield, Ceylon, 1945.
FM-2/Wildcat VI
[5] FM-2 - ’Hot Lips’, No 8 VC-99, USS Hoggart Bay, CVE-75, Pacific theatre, July, 1945
[6] FM-2 - ‘Judy’, D6 VC-14, USS Hoggart Bay, CVE-75, Philippines, 22/11/1944.
[7] FM-2 – No 4 VC-13, USS Tripoli CVE-64, during anti-submarine patrols over the Atlantic in the vicinity of Cape Verde, March 1944.
[8] Wildcat VI – JV752/320-9, AAEE, Boscombe Down, test flown by S/Lt Janusz Zurakowski, 14/2/1945
The decal sheet is printed by Techmod and looks comprehensive. As previously mentioned, there are IP and side panel instruments, placards and seat harnesses for the cockpit. Colour looks good and very glossy. Excess carrier film is kept to a minimum.
Instructions
The twenty four-page A5 format instructions is mostly in colour. Construction instructions are colour coded and a useful aid are the CAD images of the finished items: engine and undercarriage bays and the undercarriage itself. There are a number of paint manufactures referenced in the instructions including: Hataka, AK RC, Lifecolor, Ammo, Humbrol, Vallejo and Tamiya.
ARMA Hobby has also posted a useful guide from the designer Marcin Ciepierski to building F4F-4 kit, parts of which is applicable to this release:
http://armahobbynews.pl/en/blog/2021/09/15/building-the-f4f-4-wildcat-notes-from-the-model-designer/
Conclusion
The amount of thought and care that ARMA Hobby’s has put into producing the series of 1:72 scale Wildcat is evident. It certainly raises the bar for other manufacturers to follow. Included is a really interesting choice of marking options too and the two sections of deck are a real bonus. The price is very reasonable for a combo kit brimming with this much quality. The price for the dual combo Deluxe release from ARMA online shop is €40.00 is very good. Whereas an Expert Set [70047] from the ARMA shop costs €23.53 [single kit] and that does not include paint masks and the carrier decks display stands. Very highly recommended.
If your curious about how the Robart undercarriage works, then there is a demonstration of a working model on Youtube: https://www.youtube.com/watch?v=lg1poaXOmnI
Another useful Youtube video: https://www.youtube.com/watch?v=bfkwjU8k6W4&t=1347s
Our thanks to ARMA Hobby for supplying this kit for review.
70050 FM-1 & FM-2 Wildcat® Deluxe Set – 1:72
Please remember, when contacting retailers or manufacturers, to mention that you saw their products highlighted here – on AEROSCALE

