

1⁄32Pfalz Pretences
12
Comments
history
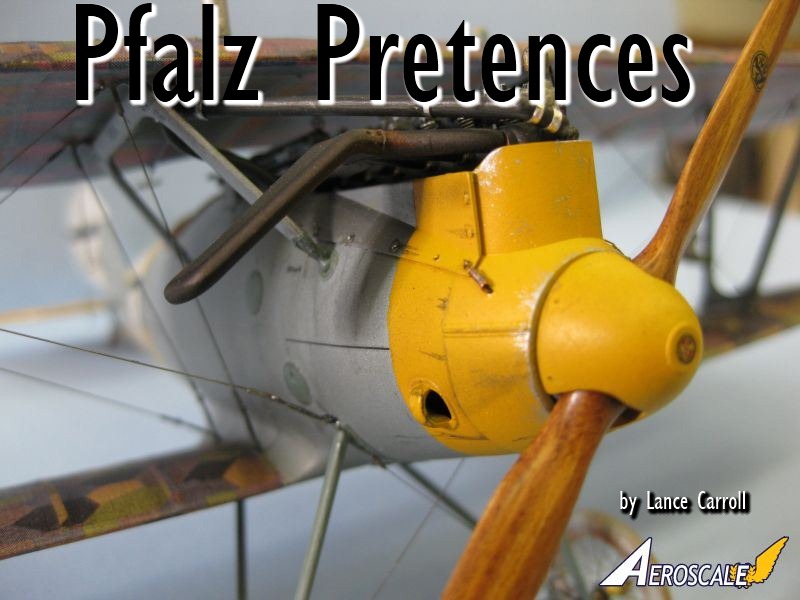
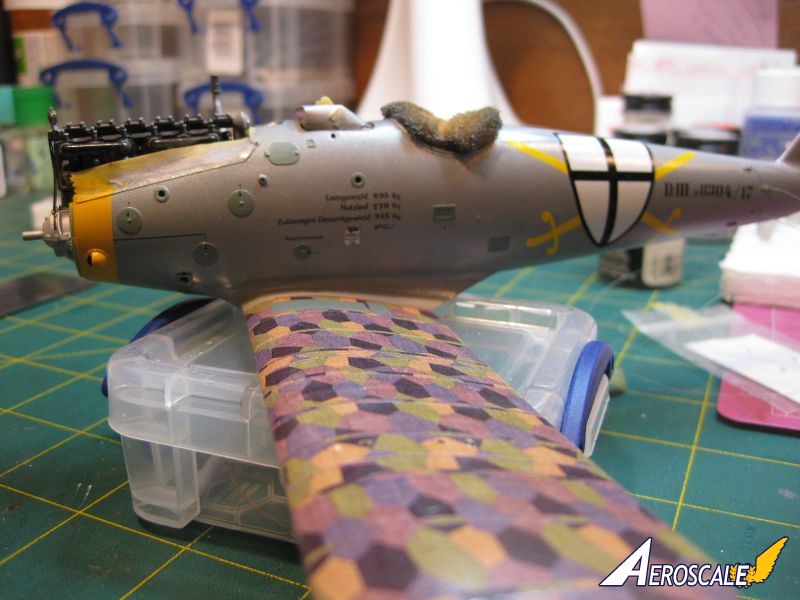
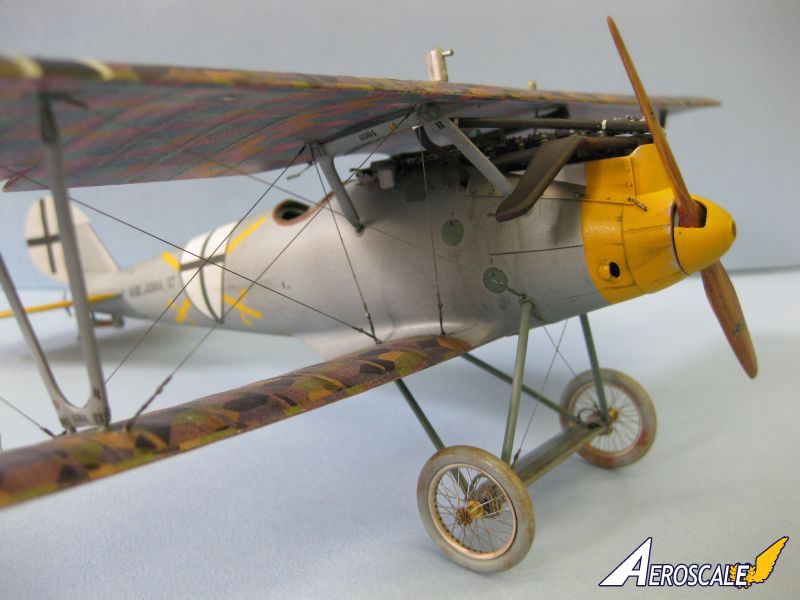
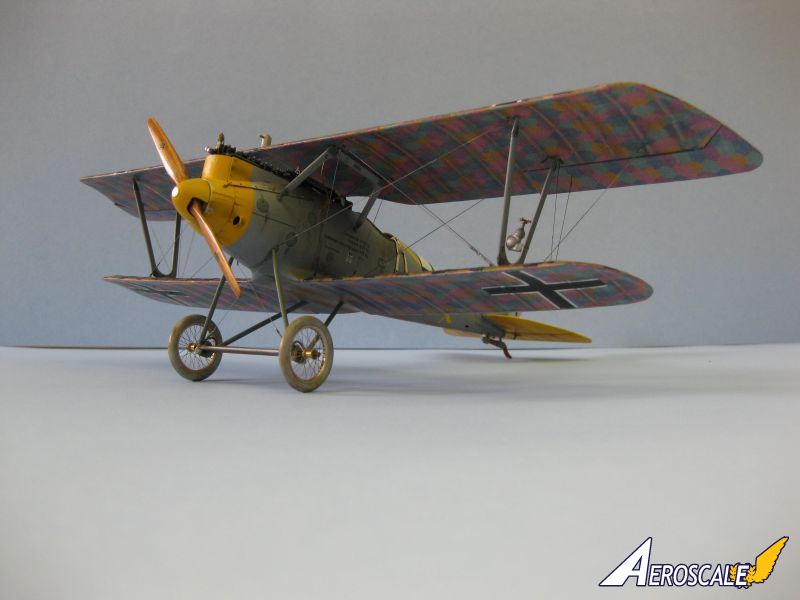
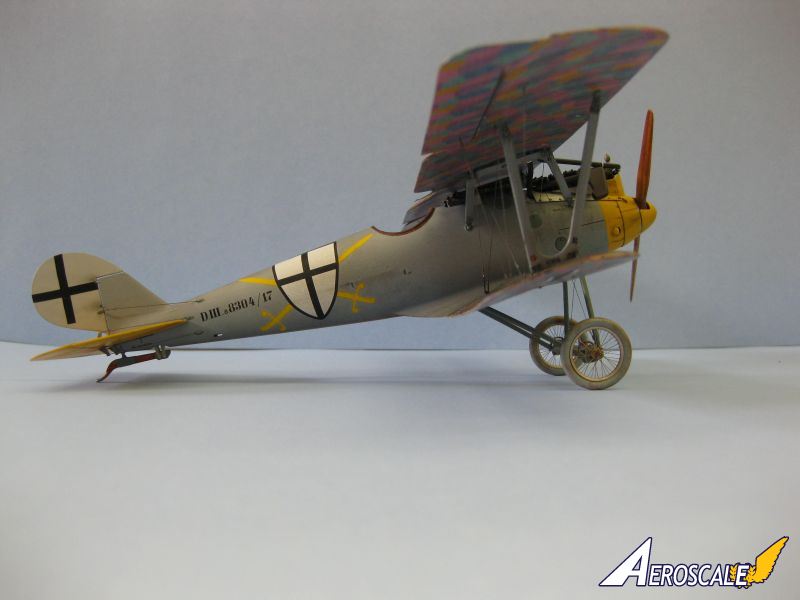
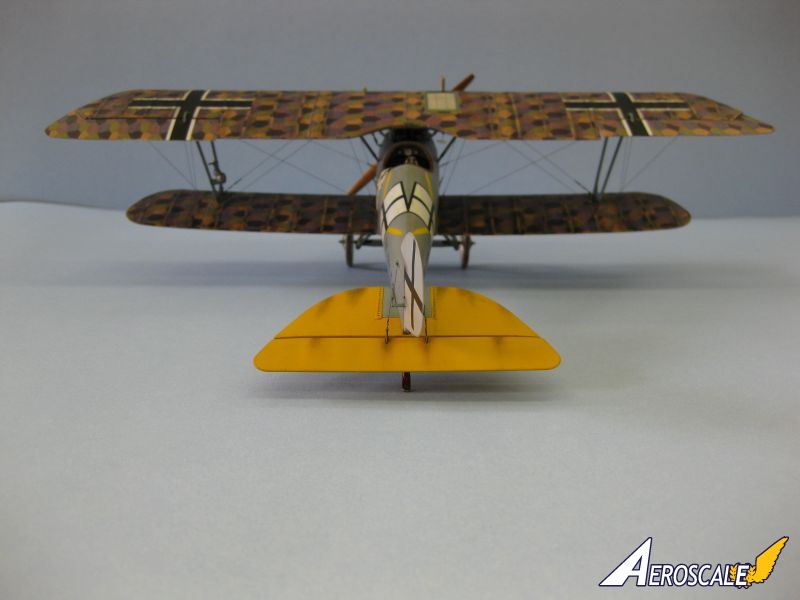
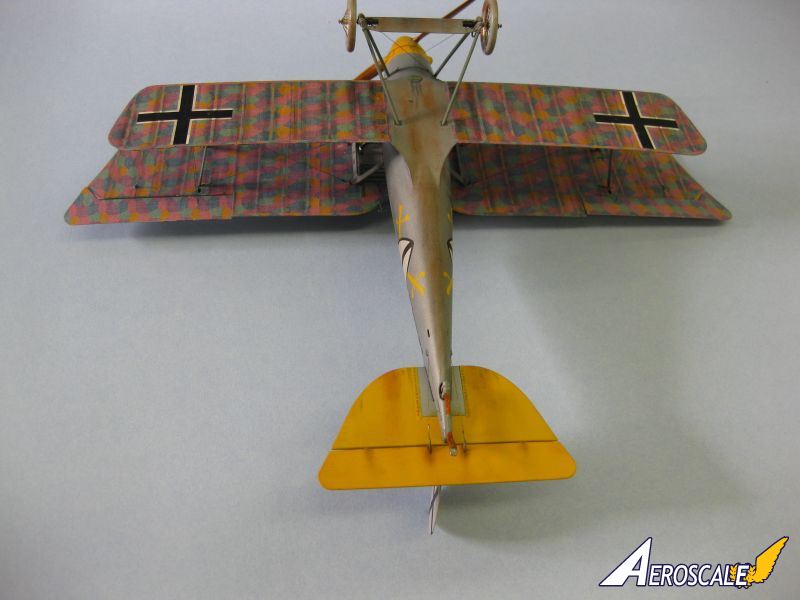
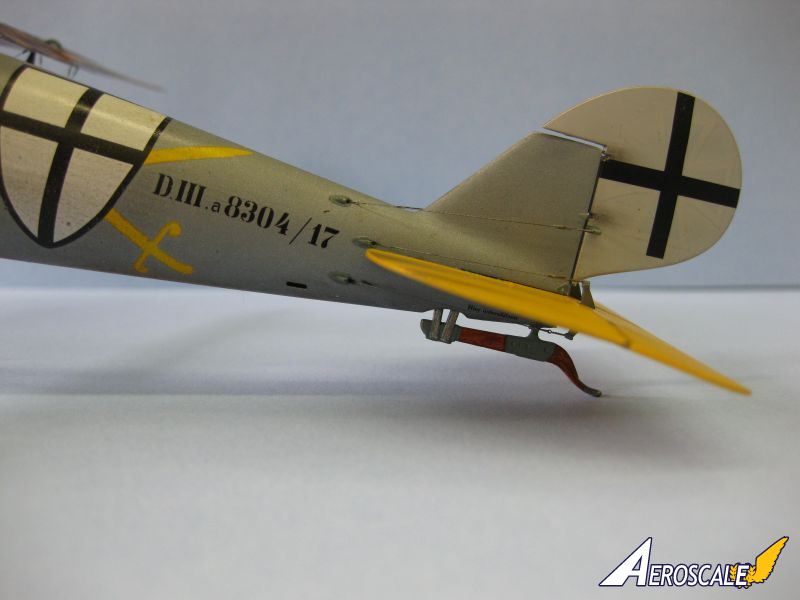
The Pfalz D.IIIa was the follow on to the earlier D.III version of which 260 were built. The D.IIIa version differed mainly in two areas; its Spandau LMG 08s were mounted on top of the fuselage decking as opposed to being enclosed, a feature that had proved very unpopular with the pilots, and balanced ailerons and a balanced rudder were incorporated in the improved D.IIIa design as well. Generally the D.IIIa proved no better then equal to the Albatros DV and Vas and the Fokker DR1s it was to replace. By April of 1918 the 433 D.IIIas serving at the front comprised 25% of the Fighter Force of 1751 fighter aircraft.This model represents Pfalz D.IIIa 8304/17 as flown with an unknown Marine Feld Jasta (MFJ) in 1918, and as photographed before being broken up post Armistice in early 1919.
kit and accessories
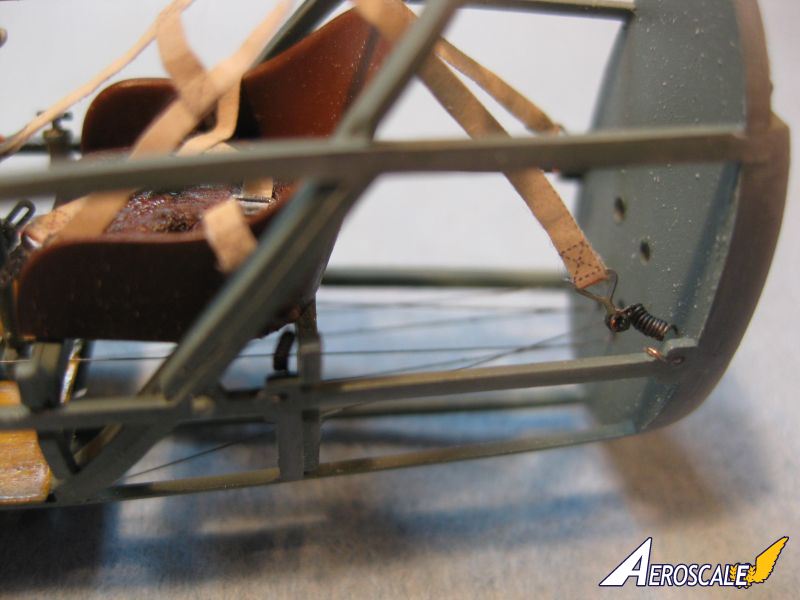
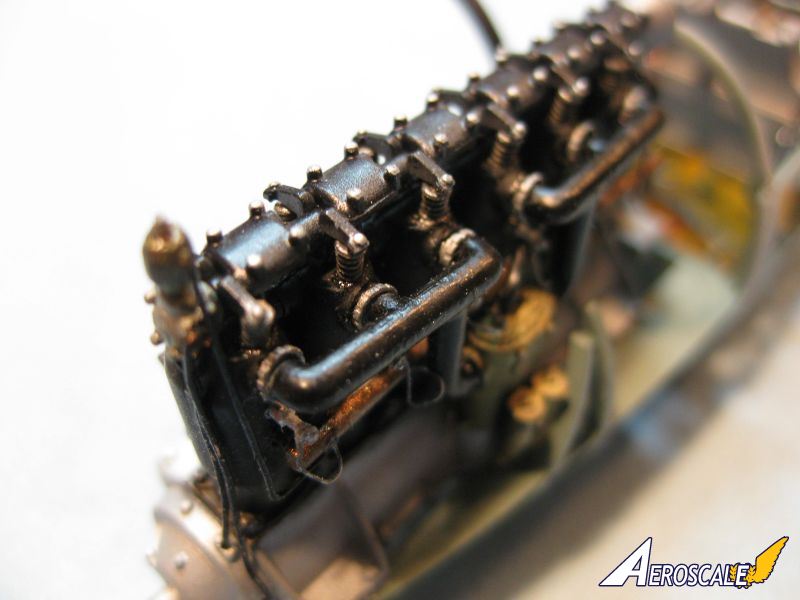
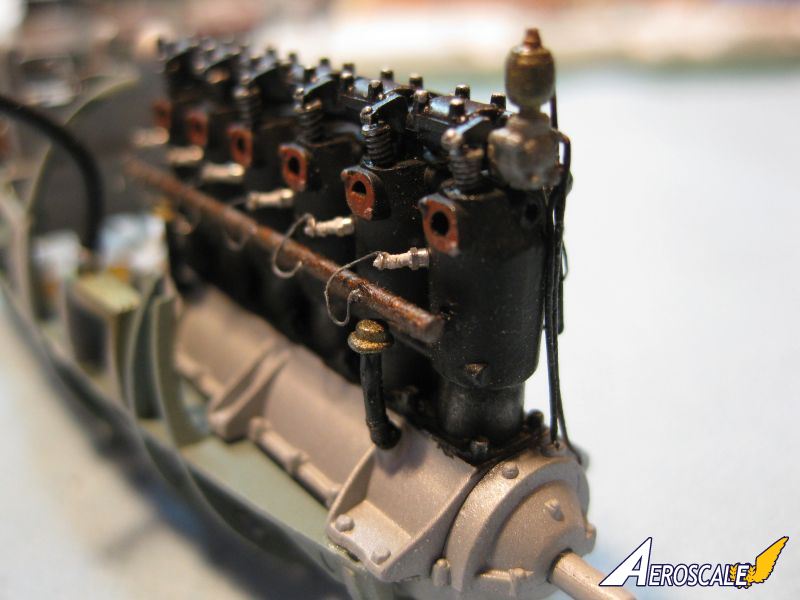
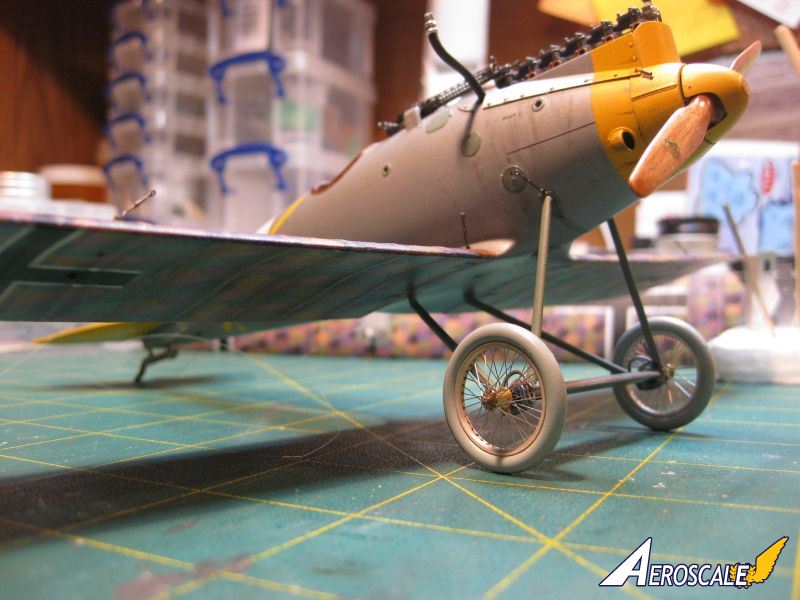
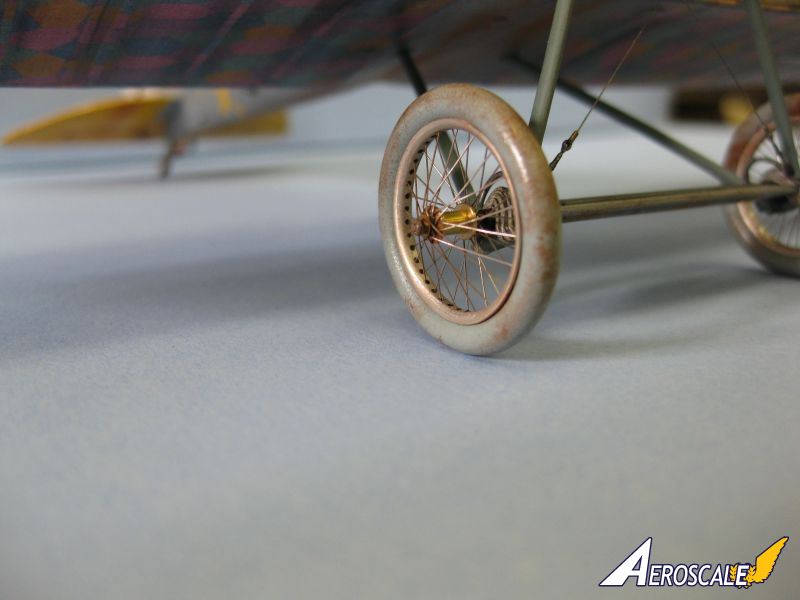
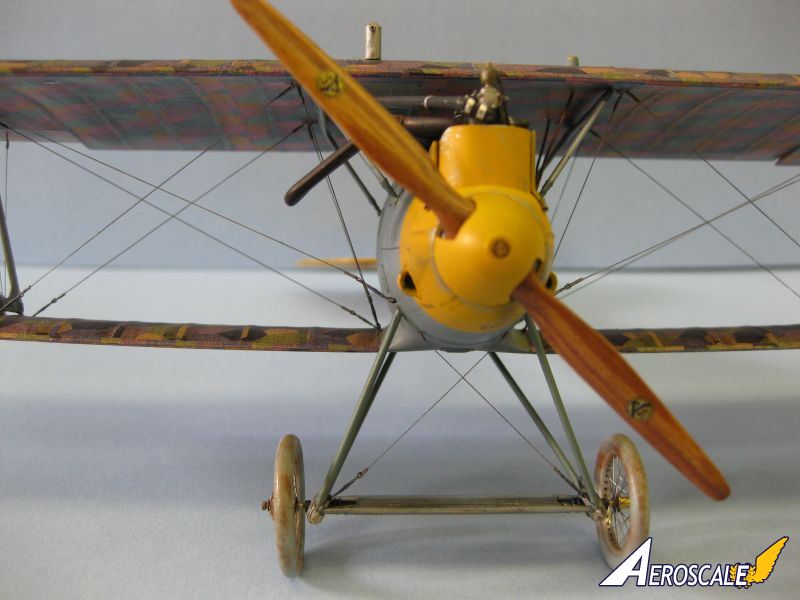
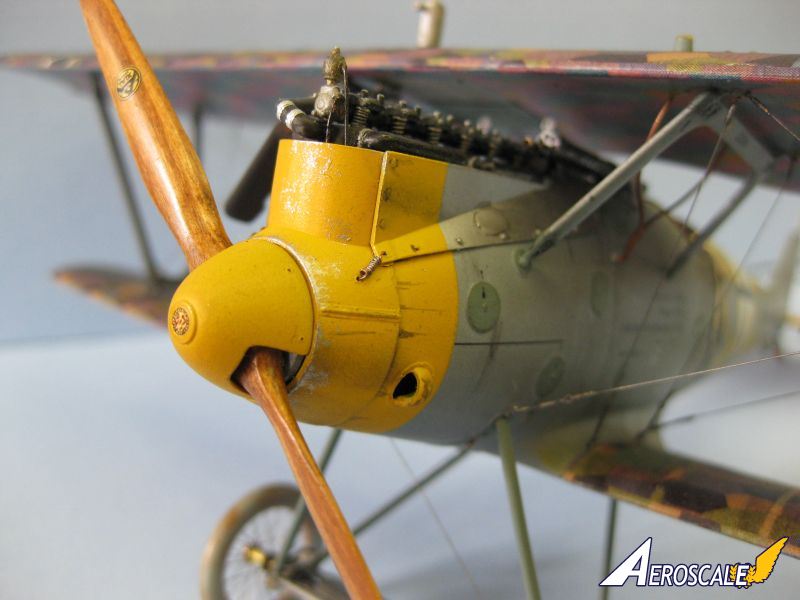
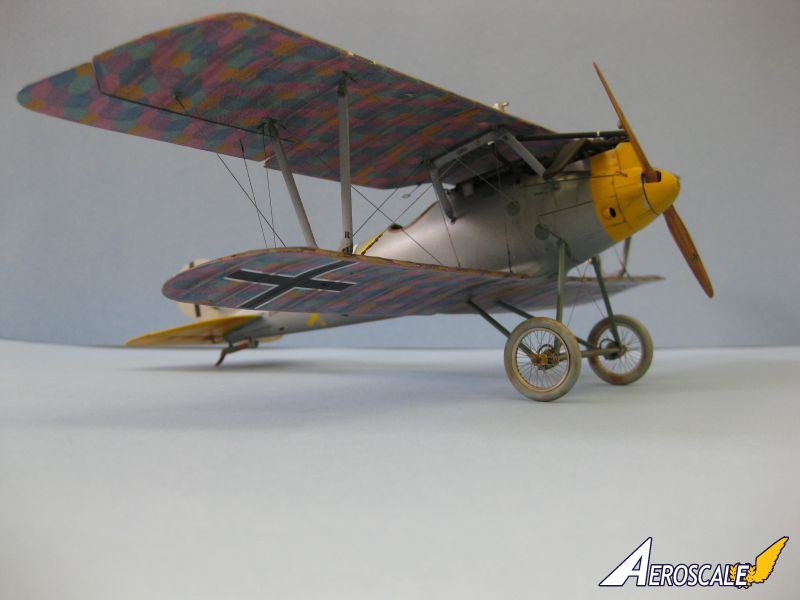
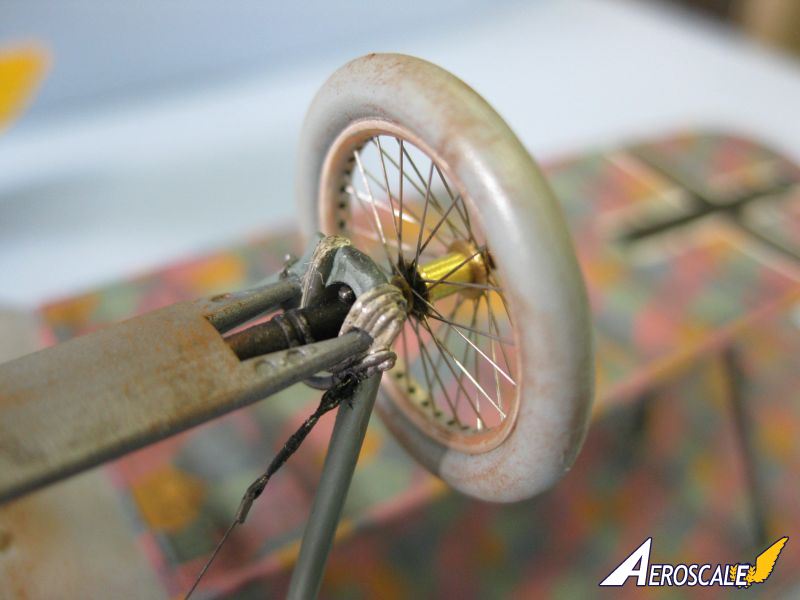
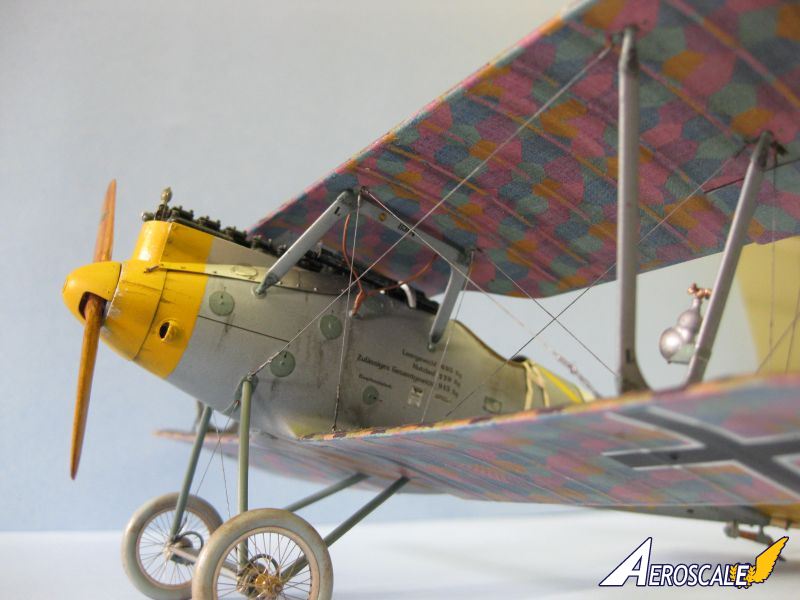
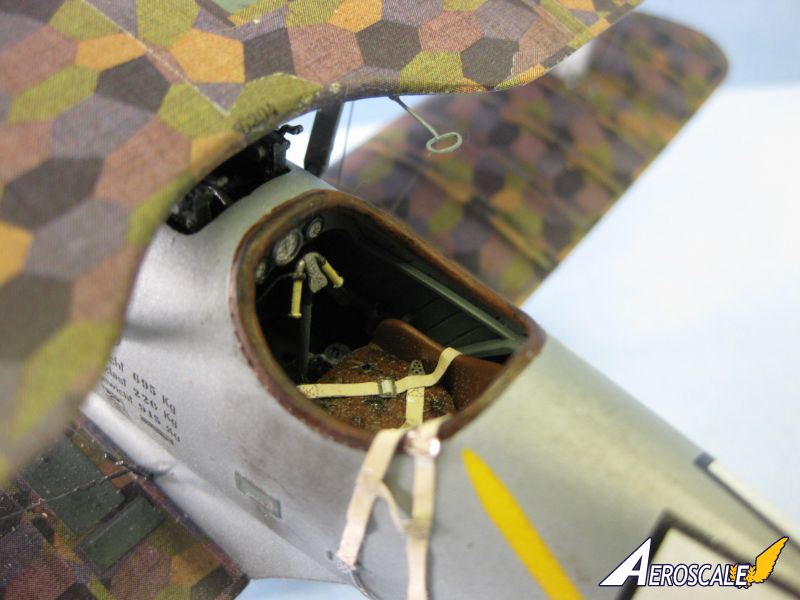
The Kit is up to the normal superb standards of Wingnut Wings that we have all come to enjoy. The standard Instruction Booklet is very well presented and contains some excellent reference photos. I found the engineering of the Kit exceptional, the fit near perfect, and the quality of the moldings second to none. All in all a beautiful package.Aftermarket additions to this Build included very basic items such as Instrument Bezels from Aeroclub and Czech Master Spandaus. The Kit was also augmented by a set of HGWs excellent fabric seat belts, several Taurus Mercedes engine upgrades such as castellated manifold nuts and replacement valve springs, and Gaspatch Models Turnbuckles to augment the standard Bobs Buckles. Last, I decided to add a set of 760X100 Spoked Wire Wheels from Steven Robsons Spoked Wheel Shop.
The decals for this Build were from Wingnut Wings After market Sheet 30019 Pfalz D.IIIa Flying Circus Part 1. These are also a high quality product and as good as any decal Ive ever used.
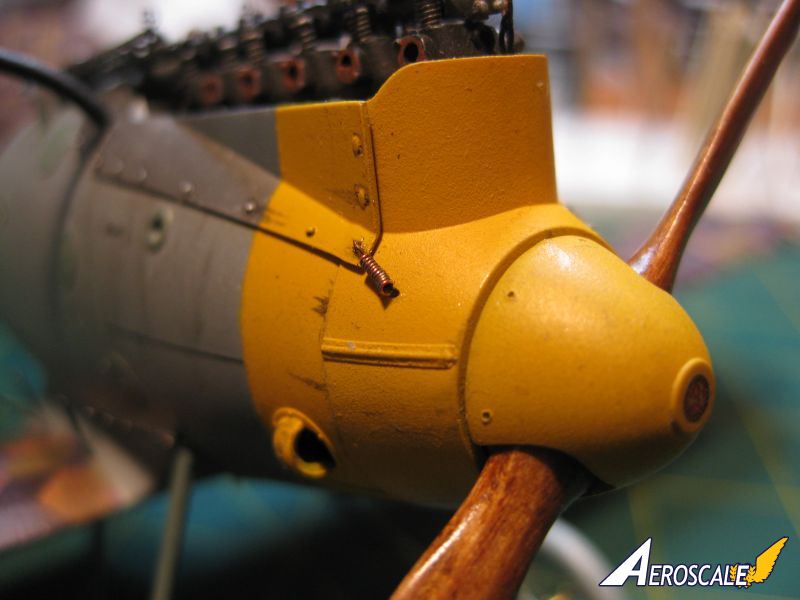
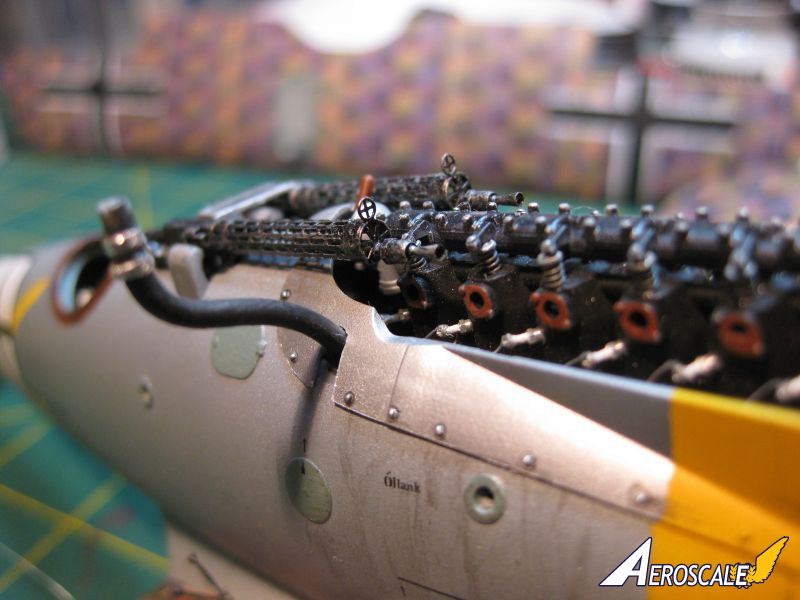
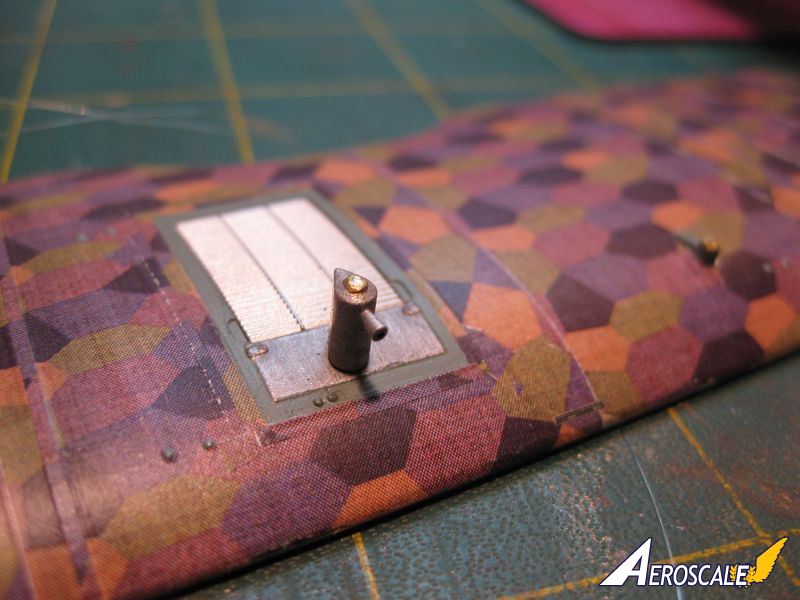
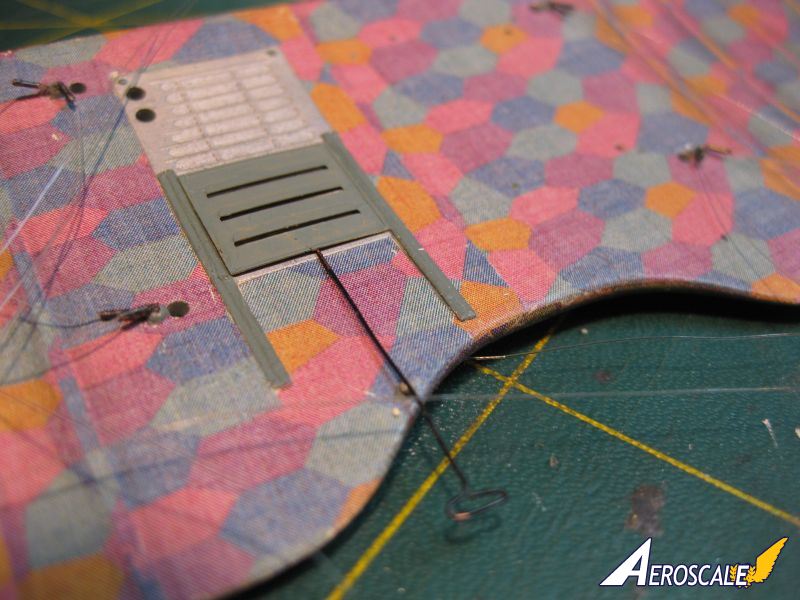
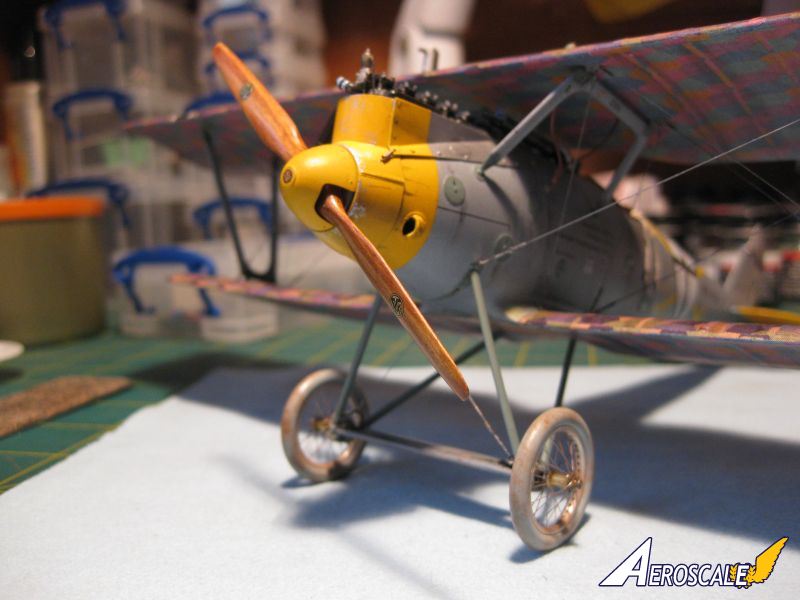
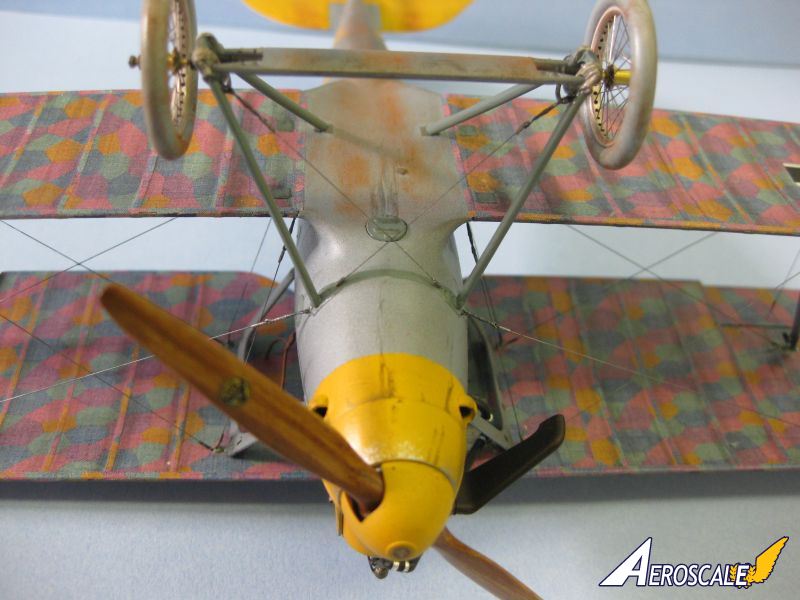
Scratch Built additions to the Kit started with a hand laminated and carved wooden Axial Propeller. Also added were several cockpit fuel and engine controls, radiator shutter adjustment handle, and spring release clips at the front of the upper engine cowling panels. The radiator supply and return lines were provided with pipe clamps made of Bare Metal Foil.
building and finishing
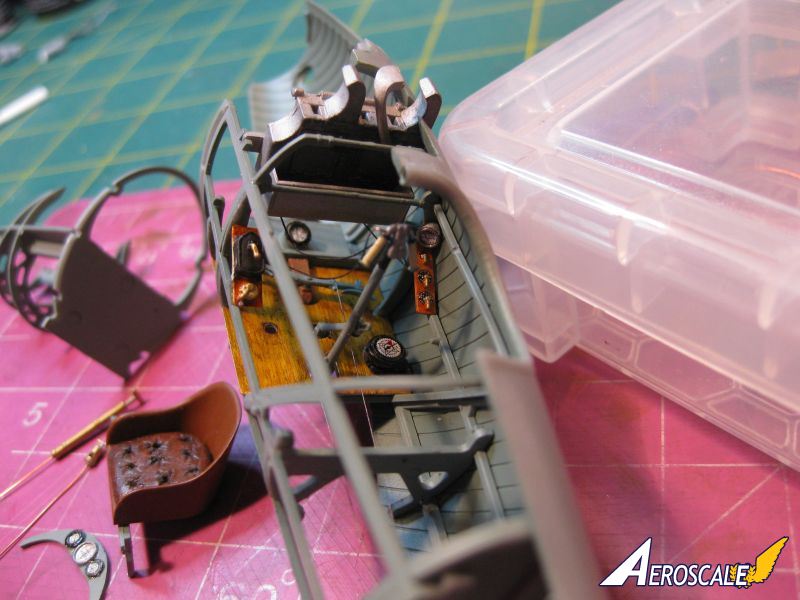
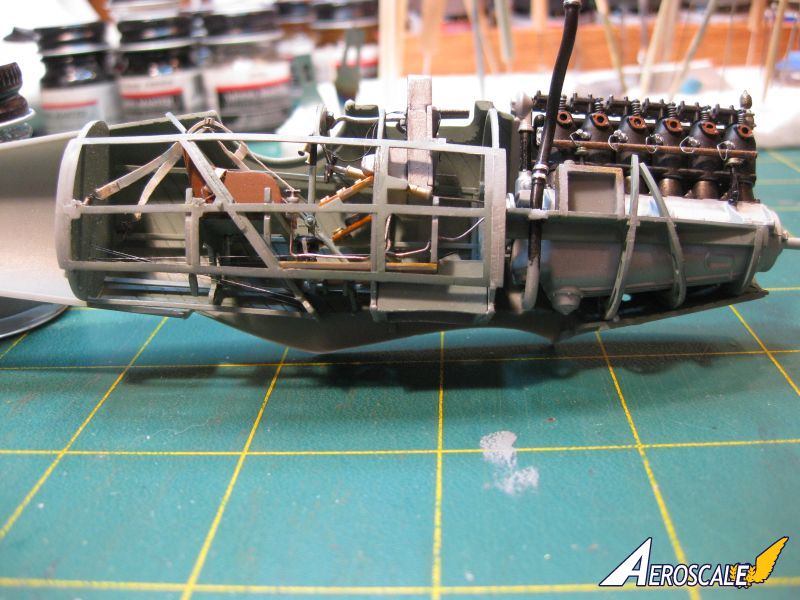
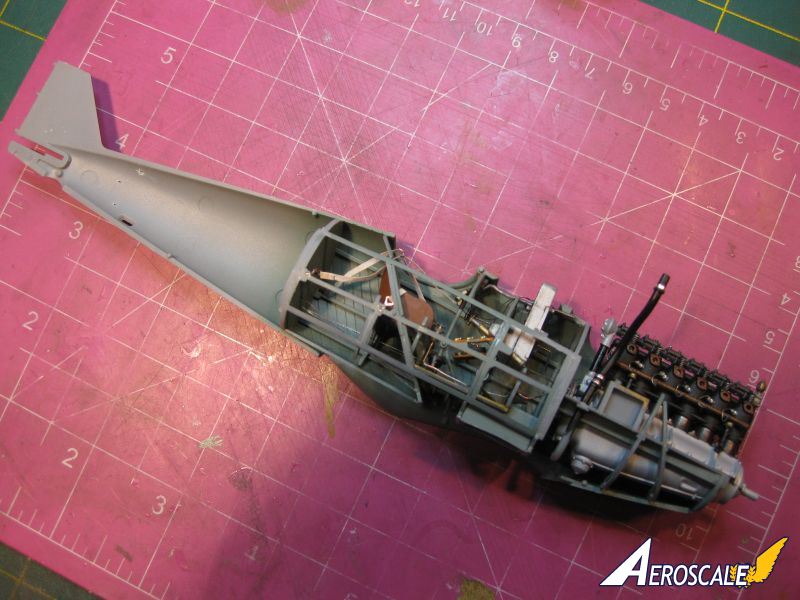
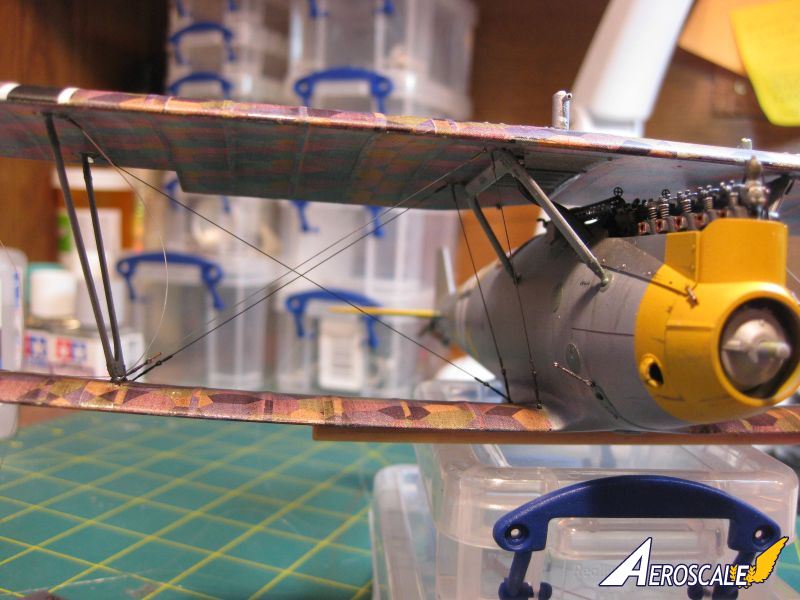
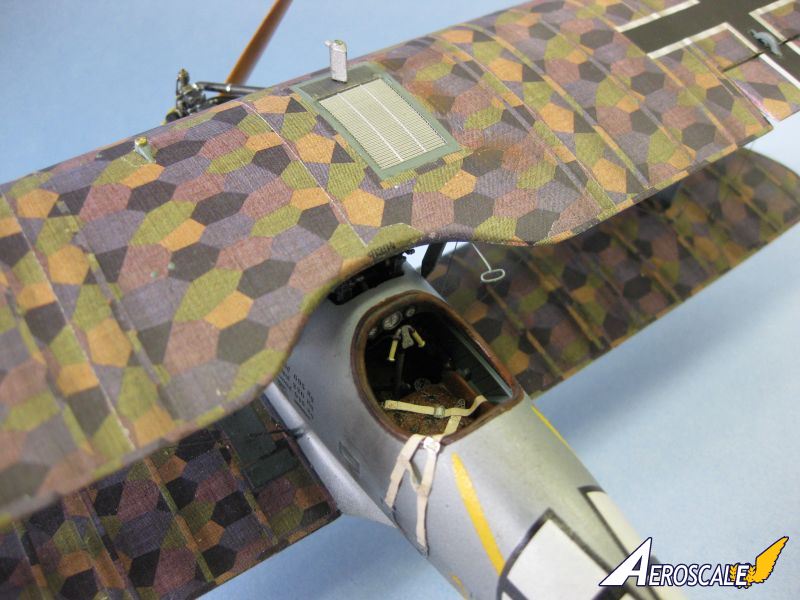
The Instructions were followed more or less in sequence for the build although, per my usual method, I used a modular approach where ever able. The cockpit was detailed and painted prior to full assembly and instrument bezels added, spring anchor points scratch built for the harness assembly, and all flight control cables installed. Once the cockpit was completed it was placed aside and the engine, guns, and landing gear assemblies were completed.Most detail work on the engine, in this case the Diamler Mercedes DIIIa 180 hp version, was limited to the upper one third, given that most of the engine would be invisible with the high side cowlings left installed. Painting was done with various shades of Alclad II. RB Motion Spark plugs were added and wired, the valve springs replaced with Taurus Resin ones, and lifters and manifold detailed. After installing the engine into the forward fuselage and cockpit frame and adding flight control wires (.012mm Mono) the fuselage was closed up and the lower wing added. Minimum sanding / filling was required as the fit was excellent.
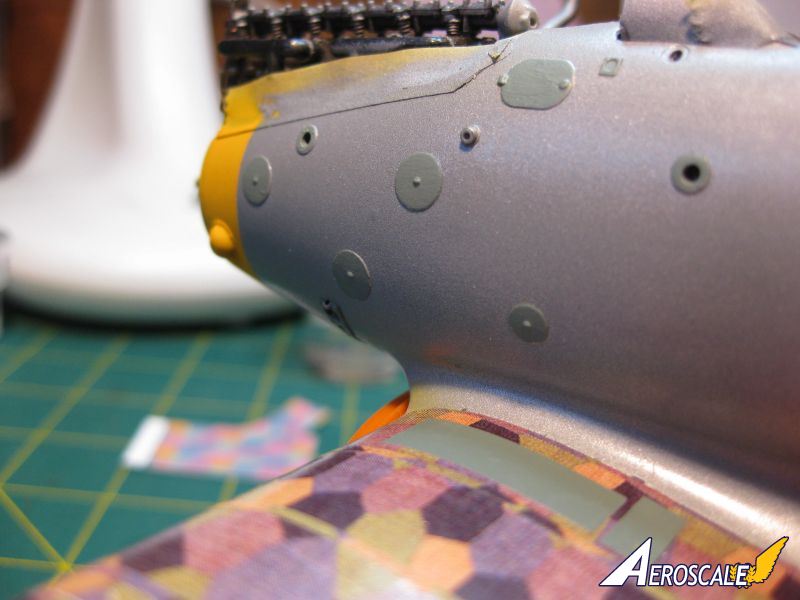
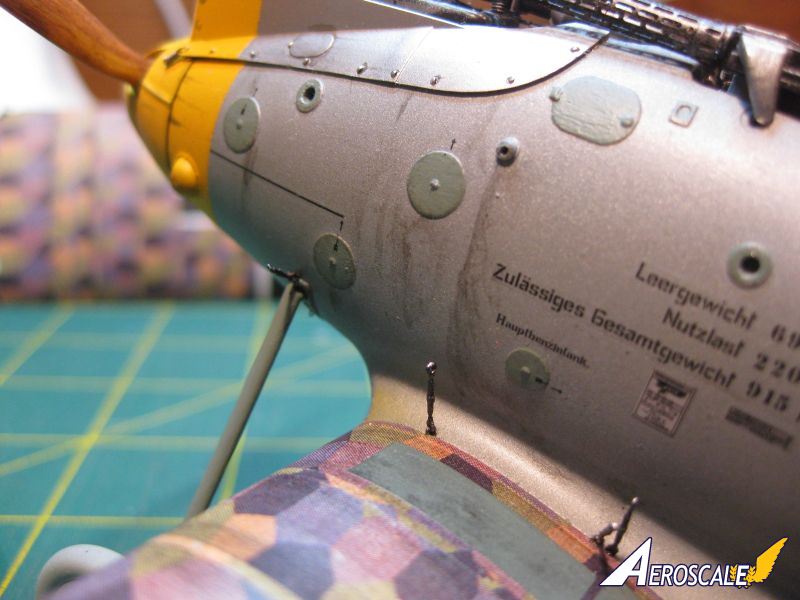
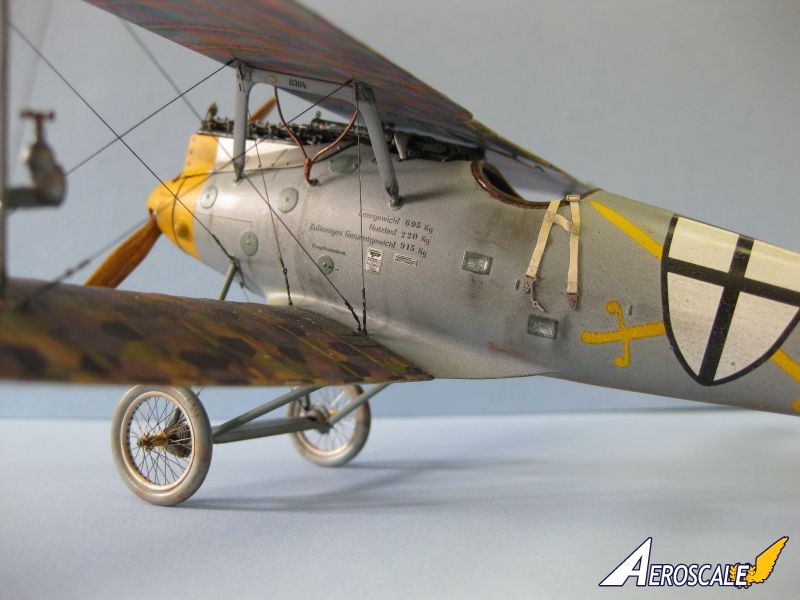
The fuselage was primed and then sprayed with a thin coat of Model Master Grey Primer followed later by two thin coats of the aluminium impregnated dope, Silbergrau which was applied to nearly all D.III and D.IIIas at the factory. I mixed Silbergrau from 2/3 Model Master Aluminium #1781, 1/3 Model Master Navy Blue Grey #2055, and added a few squirts of their Semi Gloss White to tone it down further. Next I applied a coat of Model Master enamel Gloss Light Ivory to the lower and upper wings to provide a glossy base for the lozenge decals.
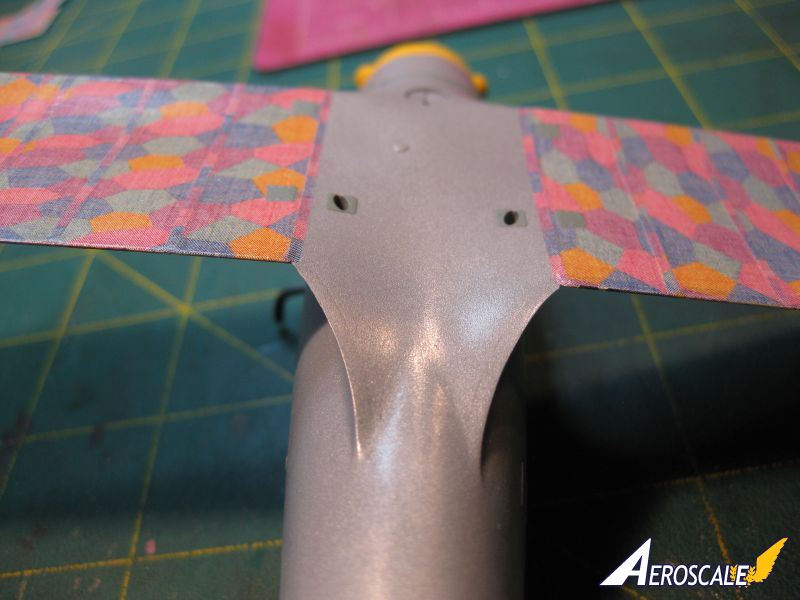
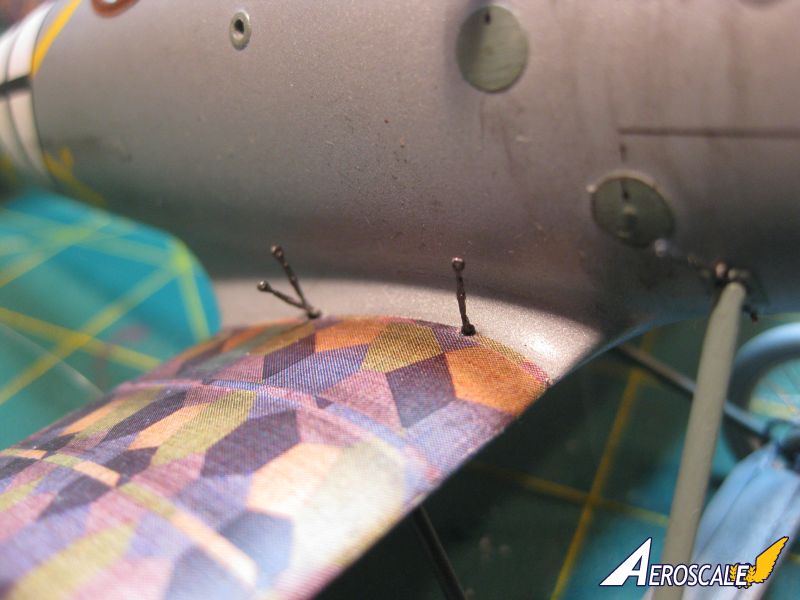
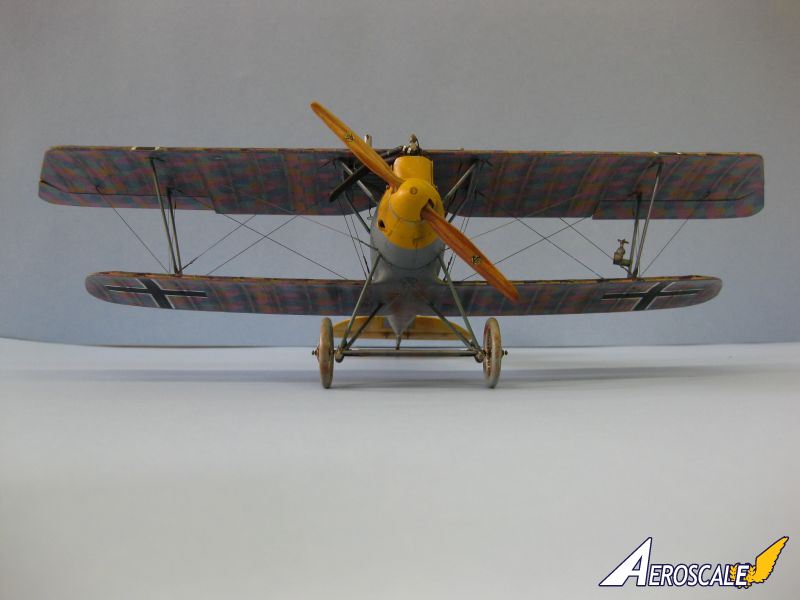
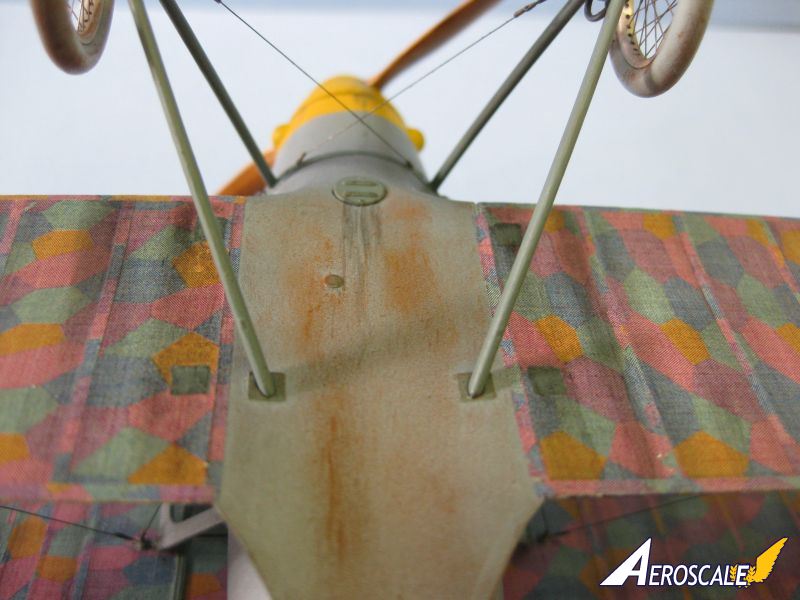
Both wings received their coverings of Wood and Wire 5 Colour Lozenge, I used the White Base faded version. No pre-shading was done, rather I elected to post shade with chalk pastels and pigments later in the Build. The Lozenge proved very disappointing; the decals went on well with a little help from Microset and, in the case of edges and curves, careful application of Microsol. Unfortunately the decals tended to chip a great deal; the colours chipping off the white base at an almost unworkable rate. Ultimately patching followed at every step from that point on and over coating with future and/or Klear Kote did not improve the situation. The wings/fuselage assembly was then given a good coat of Future, fuselage and wing decals plus wing tapes applied (edge tapes were saved for later) and then all turnbuckle locations were pre-drilled. The entire assembly was then sprayed with two coats of Alclad II Klear Kote Semi Matte and left to dry for two days. All rigging was then applied to the top wing and bottom where appropriate. Last, the post shading of the ribs and weathering of the entire assembly was completed using pastels and pigments of black, grey, and some dark browns with thinned down acrylics for fuel and oil staining.
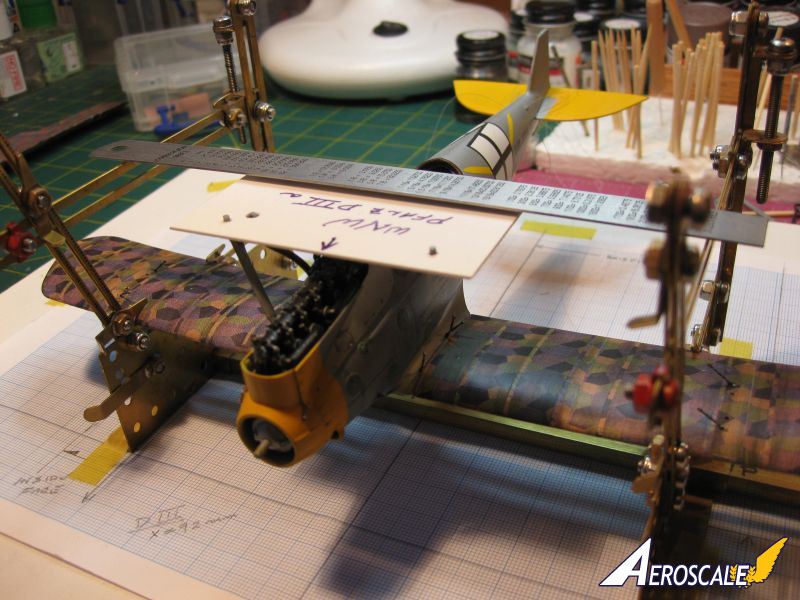
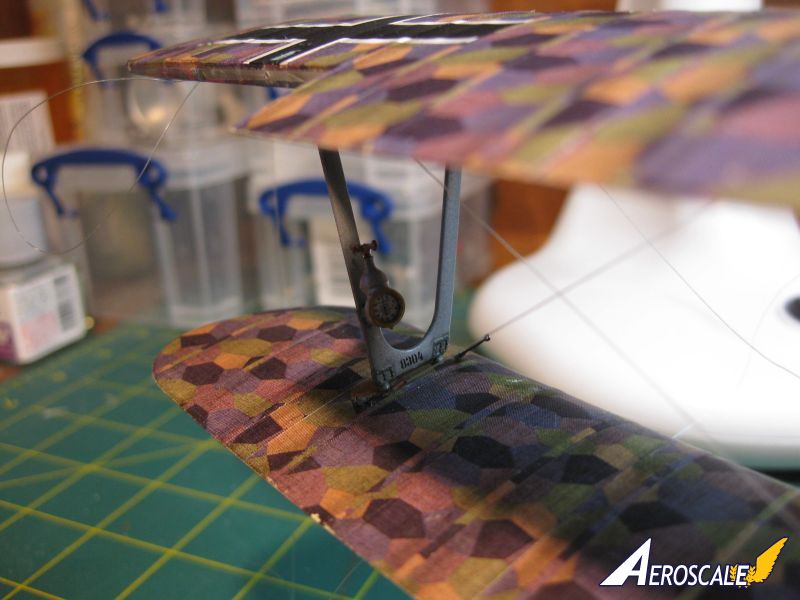
Once the guns, engine panels, and radiator fittings and lines were installed a sheet styrene template of the upper wing cabane mounting holes was prepared and used to install the cabanes at the proper spread and alignment. Once CAd in place the upper wing was installed using thin CA on the cabane joints first before slipping in and gluing the interplane struts.
With the upper wing now in place all rigging was completed using .012 and .015 mm Mono, the wing leading and trailing edge tapes applied to tops and bottoms, and the edges carefully sealed with another shot of the Klear Kote. The mono wires were painted with a thinned down coat of Mr. Metal Color Stainless.
The last parts installed were the pre-finished undercarriage assembly and prop/spinner. The fit and alignment on the former were superb.
conclusion
Another winner from that wonderful team at Wingnut Wings; this proved to be an exceptional Kit. I really enjoyed the Build with the exception of many hours of repairing the lozenge at seemingly every step, and Im very pleased with the effect of the unique colour scheme and markings. Hopefully theres a D.III Version in future to compliment this little jewel. Im very pleased with the final result and to add her to my Display Case.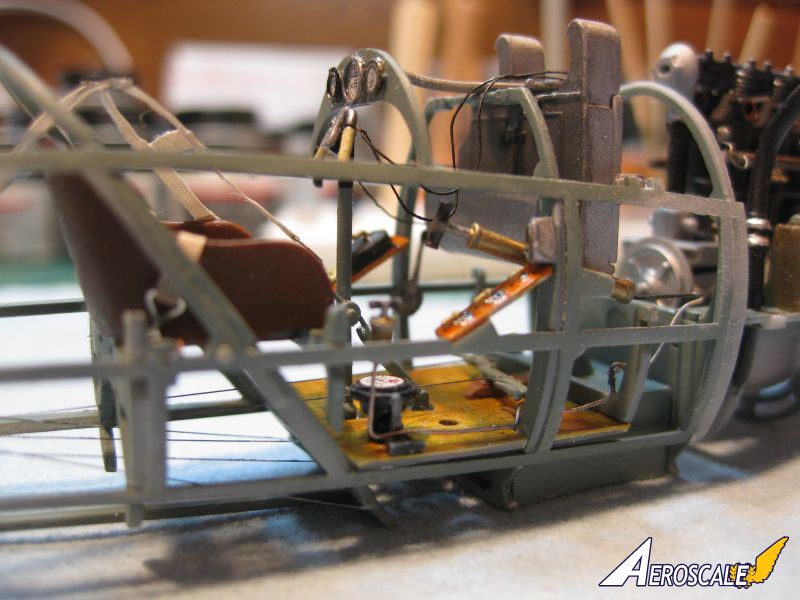


About the Author


FROM: ALBERTA, CANADA
Lifetime passion for all things WW1 Aviation. Served 37 years in RCAF/Canadian Forces, mostly as a Fighter Pilot. Second career in Oil and Gas Industry, Manager of Security, Enforcement, and Military Liaison Section for an Oil and Gas Corporation. Now retired and re-discovering the joys of scale mod...
Comments


Michael, Stephen, and Frederick,
Thanks so much for your kind comments; means a lot to the confidence and it is inspirational to get positive and encouraging feedback!
Cheers,
Lance
MAR 24, 2014 - 02:03 AM
Matt,
Thanks for the encouraging comments, methinks you might be somewhat blinded by the "family ties"!
As for being "twice the modeller" I don't agree; having seen several of your recent Builds up close and visiting your "Caves" on several happy occasions over the years I believe the only way I surpass your work is in preferring subjects with multiple flying surfaces and more "wood and wire" then yours!!
Cheers,
Uncle L.
MAR 24, 2014 - 02:11 AM

Lance,
a very nice build indeed one of your best congratulations!
Mikael
MAR 24, 2014 - 08:01 PM

Hi Lance
Simply wonderful! The turnbuckles and other details are eye-wateringly good!
All the best
Rowan
MAR 25, 2014 - 07:45 PM

Another masterclass build up. What a sensational work Lance. Congrats
MAR 26, 2014 - 03:28 AM
Mikael, Pedro, and Rowan,
Thanks for your much appreciated comments. As I said earlier, compliments from skilled modellers such as yourselves are encouraging to say the very least and inspire one to do even better on the next project!
Cheers,
Lance
MAR 31, 2014 - 02:58 AM

WOW Gary,
Nice to hear from you! I'll PM you in the next day or so. Long time since our days in the "Bowling Alley"!
Cheers,
Lance (Bishop) AKA Kugar 39
APR 07, 2014 - 09:38 AM
Copyright ©2021 by Lance Carroll. Images also by copyright holder unless otherwise noted. The views and opinions expressed herein are solely the views and opinions of the authors and/or contributors to this Web site and do not necessarily represent the views and/or opinions of AeroScale, KitMaker Network, or Silver Star Enterrpises. Images also by copyright holder unless otherwise noted. Opinions expressed are those of the author(s) and not necessarily those of AeroScale. All rights reserved. Originally published on: 2014-03-23 03:58:15. Unique Reads: 19794

WEB HOSTING BY


Copyright ©2021 AeroScale and Kitmaker Network, a subsidiary of Silver Star Enterprises
All Rights Reserved. Please read our Conditions of Use and Privacy Policy.
All Rights Reserved. Please read our Conditions of Use and Privacy Policy.