

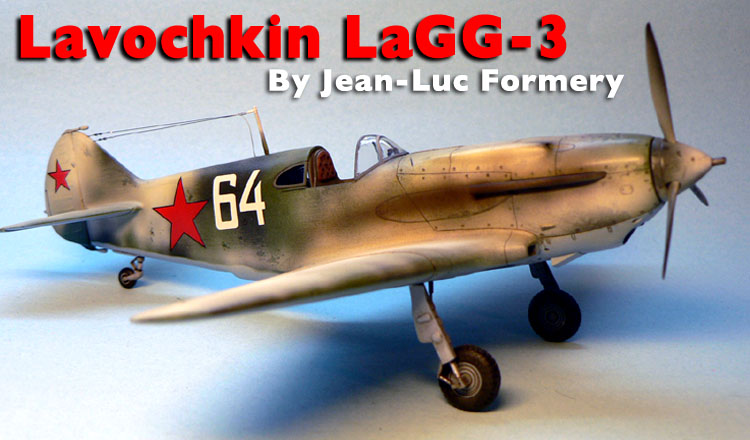
1⁄48Lavochkin LaGG-3
3
Comments
History
The LaGG-3 was designed by S. A. Lavochkin, V. P. Gorbunov & M. I. Gudkov and was a refined version of the LaGG-1 fitted with a more powerful Klimov M-105P, 1050hp engine. The LaGG-3 entered service in the early months of 1941 and was produced until mid-1942. Although it was an improved design, the LaGG-3 proved immensely unpopular. The novel, wood-laminate construction of the aircraft continued to be poor quality and pilots joked that rather than being an acronym of the designers names "LaGG" stood for "la kirovanny garantirovanny grob" ("guaranteed varnished coffin"). To improve the aircraft's overall performance, several modifications were made during production of the 6,258 units, resulting in no less than 66 variants!In combat, despite being generally rated as underpowered and not highly maneuverable, the LAGG-3 proved to be a durable fighter. The first fights of the LaGG-3 against the Bf 109E in June of 1941, demonstrated that it was a quite capable opponent, if somewhat over-weighted. It incorporated self-sealing fuel tanks and exhaust gas ducted into the fuel tanks as inert gas. During the early stages of German invasion Its resistance to combat damage was a large factor of its relative success.
Experiments with fitting a large radial engine to the LaGG-3 airframe eventually solved most of the problems and led to the superb Lavochkin La-5... but that's another story.
The Kit
When the kit was released last year, I wrote a review which can be found here. To sum up, in the box, South Front's LaGG-3 looks like a typical short run effort with parts that all need carefull cleaning. I said in the review that the kit was a Man's kit, designed in the good old ways with blood, sweat and tears... and the following build report will confirm that that is the sad truth!Construction
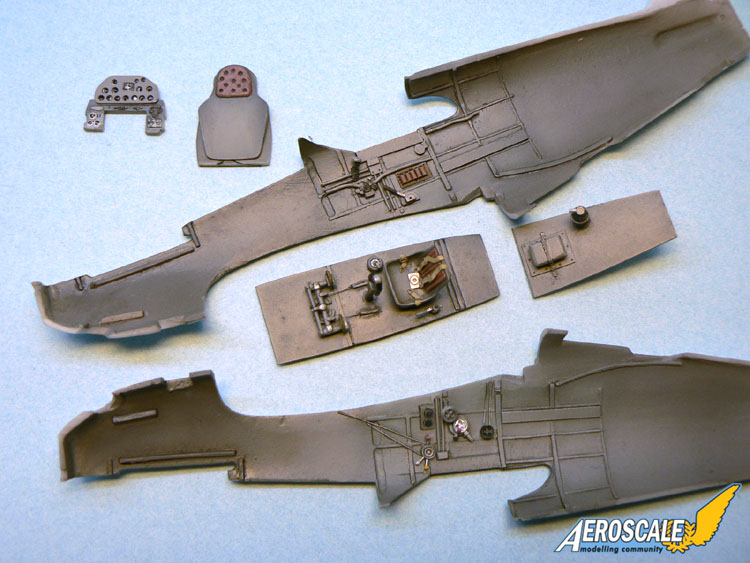
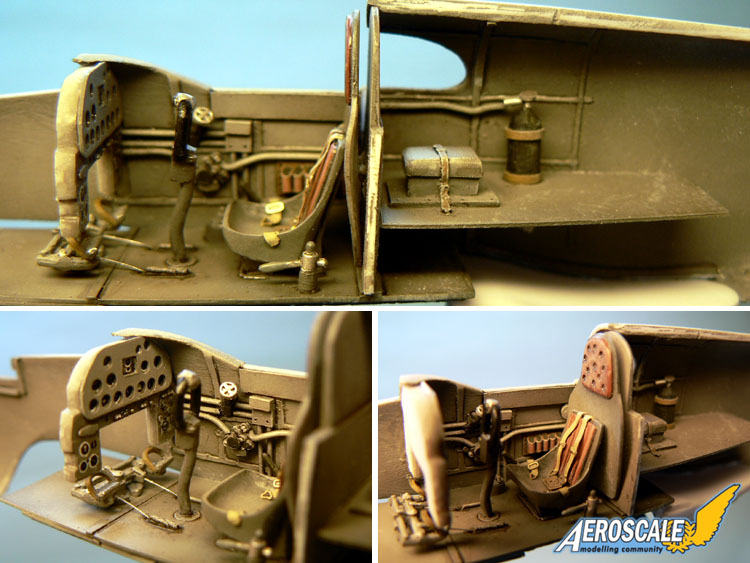
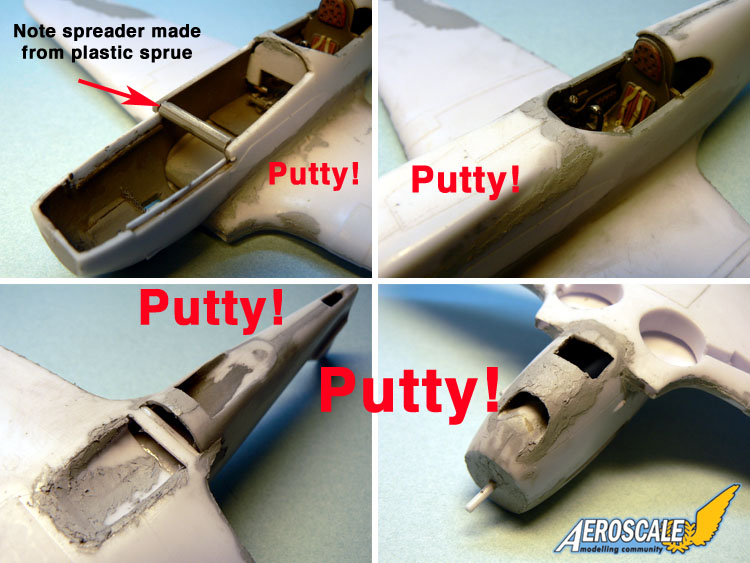
I started the model by assembling the cockpit. Usually I'm happy with what is provided in the box of a kit as manufacturers have made great progress in that field. But this time it was simply impossible to achieve an acceptable result only by using the kit's parts. South Front only provide basic detail so I used various scatchbuilt and spare box parts to make the cockpit look more busy and more convincing. It may not be 100% accurate (good reference photos of LaGG-3 cockpits are very rare!) but still better than the cockpit I would have obtained otherwise. Here's a list of what I added: complete rear compartment with box and oxygen bottle, side consoles, levers, wheels, rudder cables, seatbelts, etc... some parts were improved such as the head's cushion and the instrument panel which was made with a punch and die set.I'm not sure if the cockpit of the real plane was painted like I did. A silver or a wood finish might have been a better choice in this case. Anyway, I choosed the more "neutral" option, so every interior part was airbrushed in the same grey shade. Soviet WW2 fighters had a spartan interior so I didn't used any flashy color for the interior. I only applied a reddish brown on the leather parts, black on some instruments a well as the oxygen bottle and silver on the details. Once finished, I was very happy with the result, but it shouldn't be taken as a serious or accurate reference!
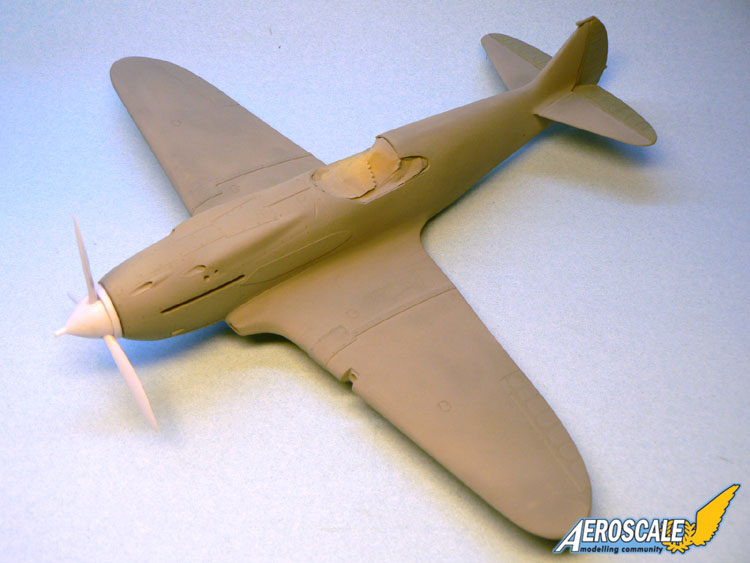
Now it was time to glue the fuselage halves together. It was a bit difficult but honestly I don't know if it's due to the bad engineering of the kit or the additional detail parts I have added. Probably a little bit of both...
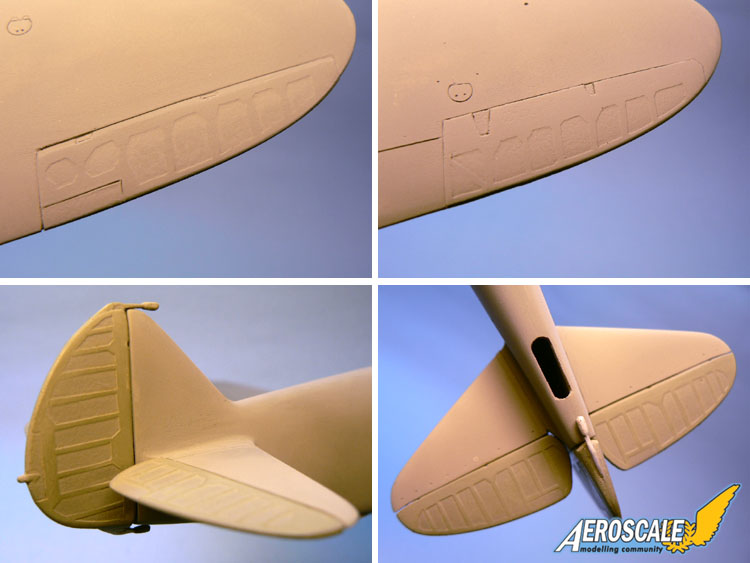
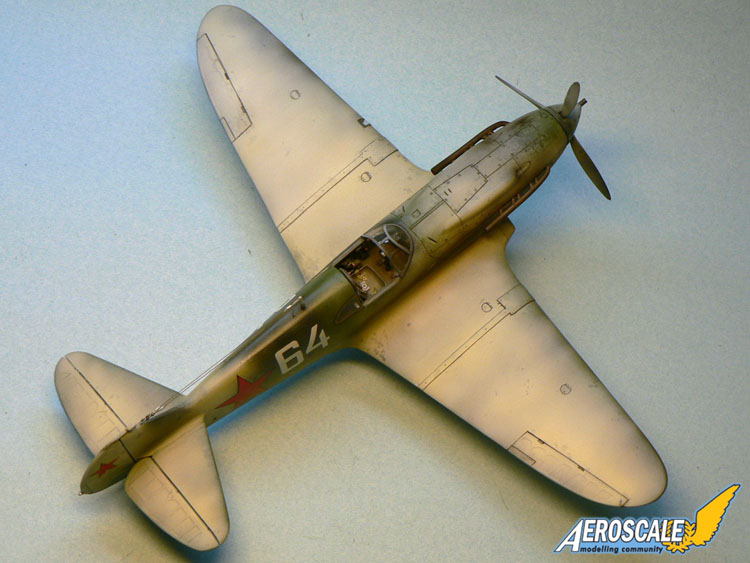
When assembling the wings, to achieve a satisfying result, I had to thin both the leading and trailing edges and also the two part ailerons. The latter are really difficult to get properly in place! I had to reduce them both in thickness and length but even with this additional work the fit was terrible. Finally I simply puttied the whole area so to be able to sand the surface smooth and rescribe new ailerons later. The wing roots have also received their share of putty but it looks worse on the pictures than it really is. However, be prepared to use a LOT of putty material on this kit!
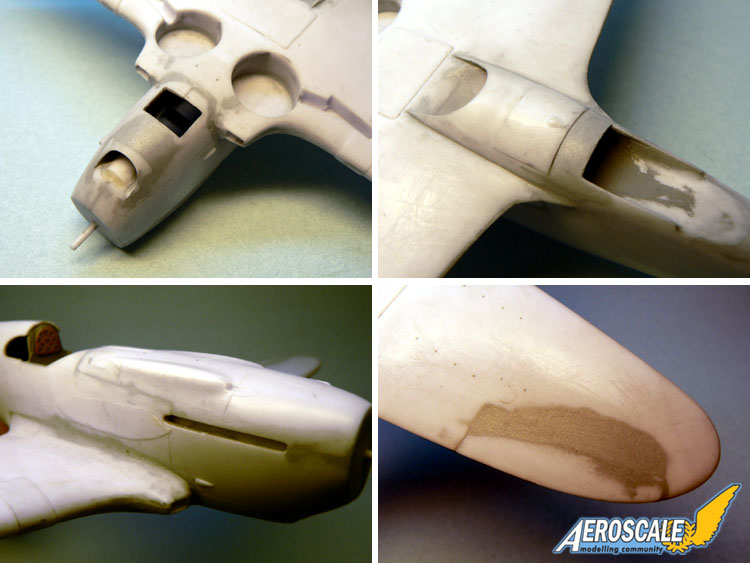
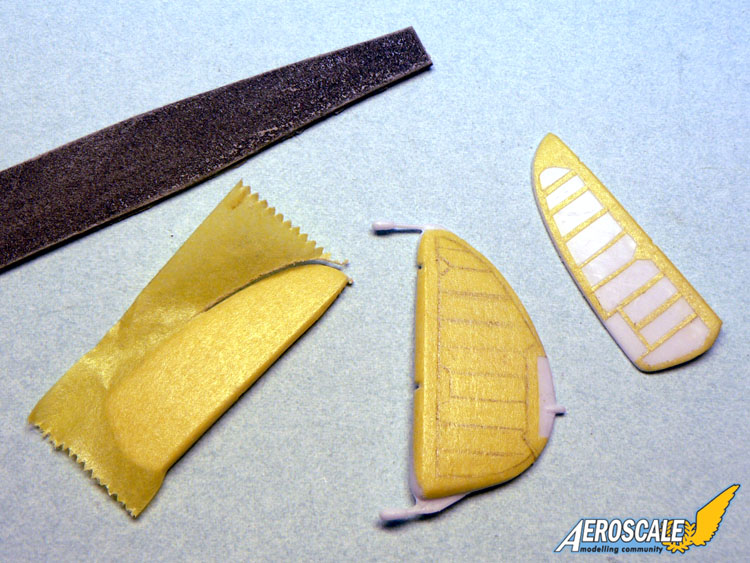
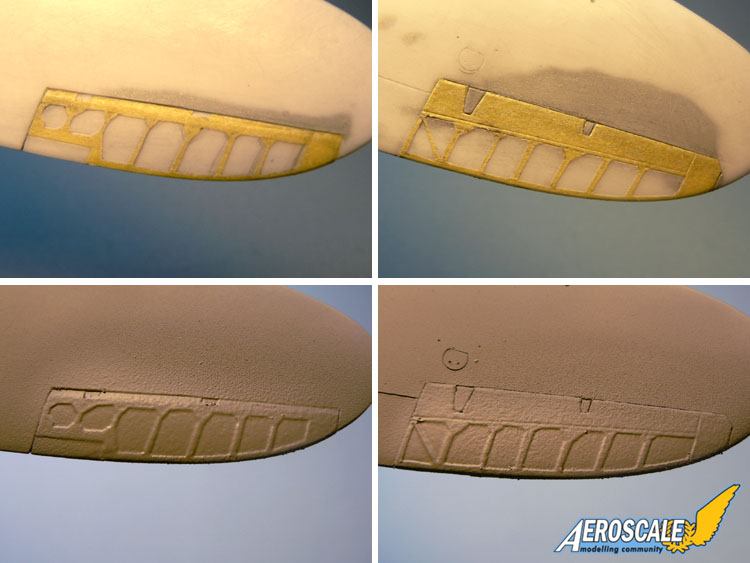
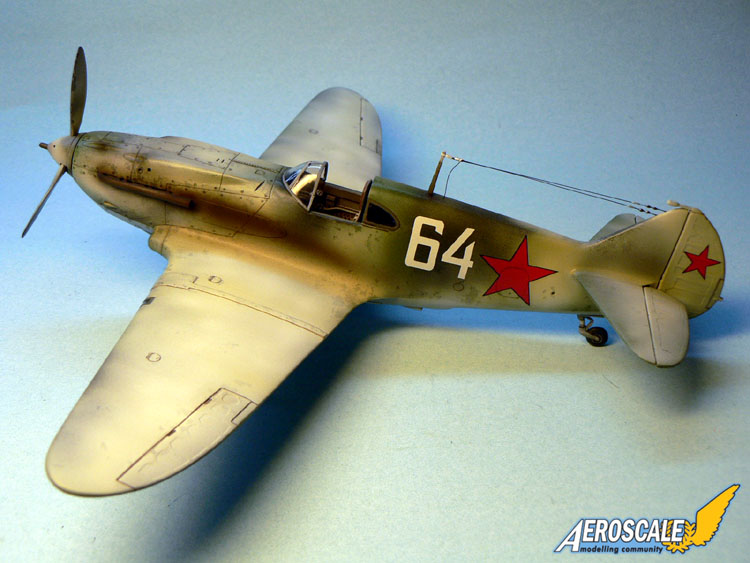
I found a nice picture of an early LaGG-3 in one of my reference books and noticed the nose of the kit was not very representative of the real thing, so I reshaped it by modifying the kit parts and using, you've guessed it, even more filler! At this stage of the build, most of my time was spent sanding the surface of the kit smooth and rescribing the surface detail. For my taste, wooden Soviet aircraft are too smooth so I reproduced the fabric effect of the ailerons, elevators and the rudder by using Tamiya masking tape and then applying a strong coat of undiluted acrylic paint. This method worked quite well and gives the model more character. After some more sanding, the LaGG was ready to get it's camouflage.
Painting
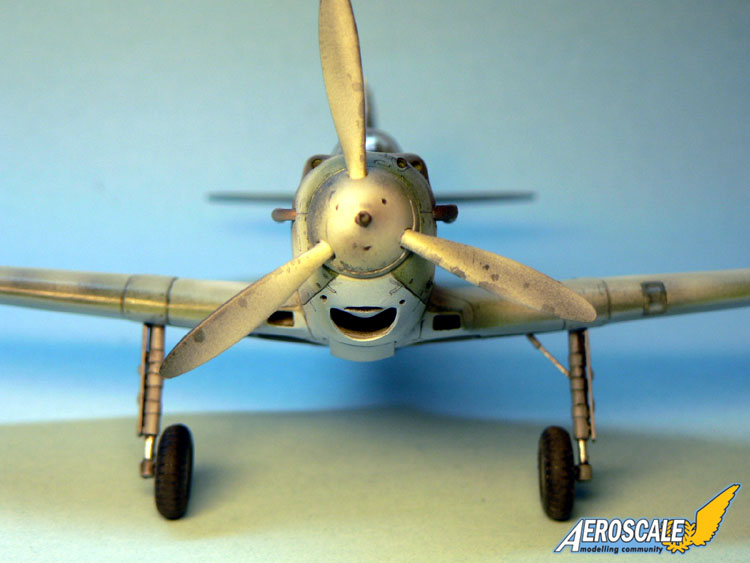
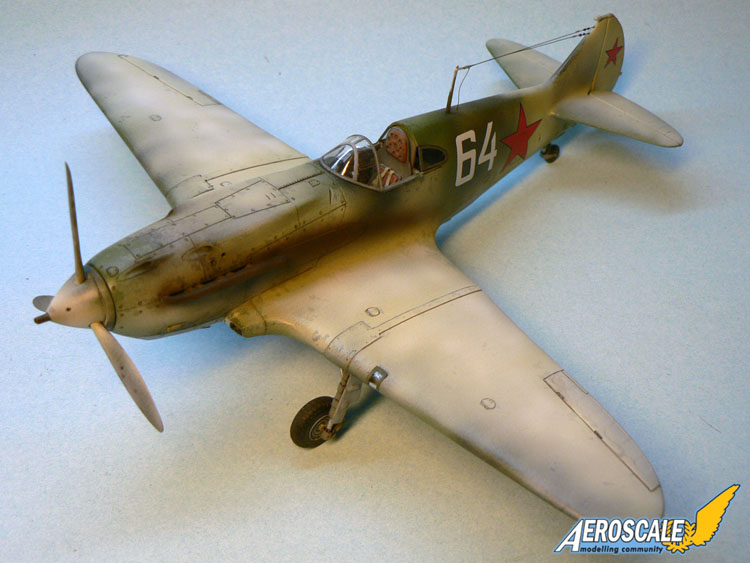
I chose to do a heavy worn out winter camouflaged aircraft so I first applied a classic black/green over blue paintscheme. The model was then coated with several layers of Future (Klir in France) before receiving the white wash. To achieve the chipped effect I applied some maskol with an old brush in between. After that, I applied the decals which went on very well. I made the few panel lines with a 00 brush and tinted Future. Some more weathering was done (exhaust and cordite stains) and the model was finished.If you wonder why I didn't added the sliding portion of the canopy, it's because the real plane wasn't fitted with it! The poor Soviet pilot probably prefered to be frozen to death rather than use the poorly manufactured hood which would have prevented him to see his advesaries in the air. The transparency of Russian WW2 aircraft glazings is legendary!
Conclusion
I can only recommend South Front's LaGG-3 kit to hard-core Soviet aircraft fanatics. While the basic shape of the real plane is there, a lot of additional work is needed to get a decent replica of this early variant. I hope that the next kit from the same manufacturer (a La-5 is announced) will be better designed and engineered. However, if you really want to have a WW2 VVS fighter in your collection, Eduard, ICM, Gavia and Accurate Miniatures have better ones in their catalogue... but no early LaGG-3 though!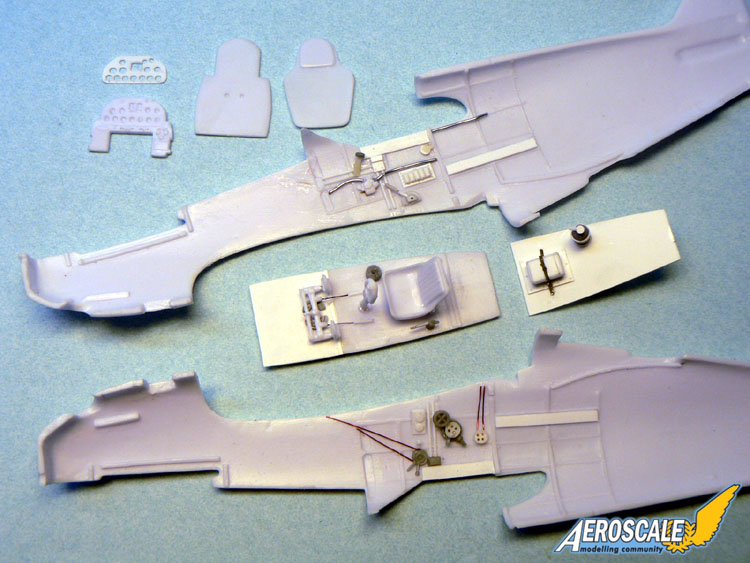


About the Author


FROM: MOSELLE, FRANCE
I'm mainly interested in WW2 aircraft and I build them in 1/48 scale.
Comments

Nice build Jean-Luc. A good builder can make a substandard kit look good.
Is the black outline on the red star correct? I'm not the expert on Soviet aircraft, but I thought they were outlined in white.
AUG 25, 2007 - 05:54 AM

Hi Carl!
Frankly I don't know. The only picture I know of that plane (it is printed in the kit's instructions) is very blurry and I suppose the black outline isn't 100% sure. However it make sense on the white wash background. Maybe a VVS expert can tell us more about this.
Thanks for the kind words!
Jean-Luc
AUG 25, 2007 - 09:22 PM

Hi Jean-Luc
Fantastic work! A real inspiration for anyone considering tackling the South Front model - although, with two of the blighters in my stash, it's a little bit disappointing that you had to put in quite so much work to make something presentable out of the kit.
As regards the black-outlined star - they were a common variation. Erik Pilawskii states in his book "Soviet Airforce Fighter Colours 1941-1945":
"Black Bordered Star - A national star with a thin black border very popular in the 1941-43 period, particularly with certain aircraft programmes (for example on Yak fighters). This type of star fell out of use during 1943, and was not usually seen thereafter."
All the best
Rowan
AUG 26, 2007 - 12:43 AM
Copyright ©2021 by Jean-Luc Formery. Images also by copyright holder unless otherwise noted. The views and opinions expressed herein are solely the views and opinions of the authors and/or contributors to this Web site and do not necessarily represent the views and/or opinions of AeroScale, KitMaker Network, or Silver Star Enterrpises. Images also by copyright holder unless otherwise noted. Opinions expressed are those of the author(s) and not necessarily those of AeroScale. All rights reserved. Originally published on: 2007-08-25 00:00:00. Unique Reads: 14935

WEB HOSTING BY


Copyright ©2021 AeroScale and Kitmaker Network, a subsidiary of Silver Star Enterprises
All Rights Reserved. Please read our Conditions of Use and Privacy Policy.
All Rights Reserved. Please read our Conditions of Use and Privacy Policy.