

Air Campaigns
Want to start or join a group build? This is where to start.
Want to start or join a group build? This is where to start.
Hosted by Frederick Boucher, Michael Satin
OFFICIAL: Those Radial Fighters Campaign

PeeJay74

#363

Joined: January 08, 2014
KitMaker: 425 posts
AeroScale: 401 posts

Posted: Monday, January 06, 2020 - 02:18 PM UTC
That is a gorgeous 190, nice paint work!
SGTJKJ

#041

Joined: July 20, 2006
KitMaker: 10,069 posts
AeroScale: 3,788 posts

Posted: Thursday, January 09, 2020 - 03:30 AM UTC
Wow, really nice Wurger, Eric. Super job on camo and markings.


Sleepwalker71

Joined: August 30, 2012
KitMaker: 265 posts
AeroScale: 72 posts

Posted: Thursday, January 09, 2020 - 03:54 AM UTC
Great 190. I wish to build one once.

Buckeye198
Joined: May 02, 2010
KitMaker: 596 posts
AeroScale: 197 posts

Posted: Thursday, January 09, 2020 - 02:48 PM UTC
Alright, I'm set up on Imgur and ready to post! I'm in with Academy's (Hobbycraft's?) I-16.

Cockpit is spartan, even by Soviet prewar standards. Three major modifications:
1. The kit's yoke was shaped like bike handlebars, so I cut off the horizontal sections and shaped them into the more appropriate rounded-rectangle shape.
2. The original floor was just a flat plane. I added lengths of stretched sprue to match the details seen in subject references.
3. I somehow overlooked the MASSIVE pin marks on the fuselage halves until after I had painted them. Rather than spend the time and effort flattening them, they actually lined up pretty well with some controls/radio/whatnot. So I painted them accordingly and added a few levers. The tiny cockpit opening allows just enough detail to poke through, I think it's enough to convince any curious penlight-wielding folks


I also added some support beams to the wheel wells, which were likewise completely barren.

The kit has a few major seams to address, but otherwise goes together pretty straightforward. I have done more sanding/filling on this model than I ever have done before, point of pride. However my impatience still got the better of me and I stopped far short of where the "serious" modelers would've called it!

Also, all the sanding took a toll on some of the raised details (the kit has both raised and recessed). I fashioned replacement ribbing on the tail underside again with stretched sprue. While not uniform with the rest of the ribs, they are uniform with each other and the L-R symmetry makes it okay as far as I'm concerned.

I forgot to take pictures of the engine and enclosed cockpit, but they're good, trust me I'm also pretty please with how I managed to mask off the cowl openings...more on that one to come!

Camo was masked with frisket film. I always struggle with straight edges, and this job is no exception. I never seem to burnish the edges well enough to prevent bleeding under the masks. I am happy with the overall pattern though.


I am NOT happy with the underside...many large sections got completely stripped. I primed, painted, and Future'd, giving at least 24hrs between each coat.

My salvage ideas are either (a) just spray the sections again and hope for the best, or (b) try to turn it into battle damage/field repairs. If the I-16 were a fully metal bird, then it would be a no-brainer to just paint all the patches aluminum. I could probably get away with the wing sections which were metal, but the body was wooden. Does anyone have ideas of what field repairs would look like on a wooden plane?
Cockpit is spartan, even by Soviet prewar standards. Three major modifications:
1. The kit's yoke was shaped like bike handlebars, so I cut off the horizontal sections and shaped them into the more appropriate rounded-rectangle shape.
2. The original floor was just a flat plane. I added lengths of stretched sprue to match the details seen in subject references.
3. I somehow overlooked the MASSIVE pin marks on the fuselage halves until after I had painted them. Rather than spend the time and effort flattening them, they actually lined up pretty well with some controls/radio/whatnot. So I painted them accordingly and added a few levers. The tiny cockpit opening allows just enough detail to poke through, I think it's enough to convince any curious penlight-wielding folks
I also added some support beams to the wheel wells, which were likewise completely barren.
The kit has a few major seams to address, but otherwise goes together pretty straightforward. I have done more sanding/filling on this model than I ever have done before, point of pride. However my impatience still got the better of me and I stopped far short of where the "serious" modelers would've called it!
Also, all the sanding took a toll on some of the raised details (the kit has both raised and recessed). I fashioned replacement ribbing on the tail underside again with stretched sprue. While not uniform with the rest of the ribs, they are uniform with each other and the L-R symmetry makes it okay as far as I'm concerned.
I forgot to take pictures of the engine and enclosed cockpit, but they're good, trust me
I'm also pretty please with how I managed to mask off the cowl openings...more on that one to come!Camo was masked with frisket film. I always struggle with straight edges, and this job is no exception. I never seem to burnish the edges well enough to prevent bleeding under the masks. I am happy with the overall pattern though.
I am NOT happy with the underside...many large sections got completely stripped. I primed, painted, and Future'd, giving at least 24hrs between each coat.
My salvage ideas are either (a) just spray the sections again and hope for the best, or (b) try to turn it into battle damage/field repairs. If the I-16 were a fully metal bird, then it would be a no-brainer to just paint all the patches aluminum. I could probably get away with the wing sections which were metal, but the body was wooden. Does anyone have ideas of what field repairs would look like on a wooden plane?
stoney

Joined: October 16, 2006
KitMaker: 480 posts
AeroScale: 67 posts

Posted: Friday, January 10, 2020 - 04:40 AM UTC
Hey Robby, good progress so far on a cool looking aircraft. Im curious about the underside peeling, I see you have Mr.surfacer for your primer, did the paint peel off the primer or did everything go all the way to the plastic? What did you use for paint on this?
I think sanding it back to ease the edges then primer/paint again to match it up would be the best option myself.
Cheers!
I think sanding it back to ease the edges then primer/paint again to match it up would be the best option myself.
Cheers!

JMartine
Joined: October 18, 2007
KitMaker: 1,698 posts
AeroScale: 96 posts

Posted: Friday, January 10, 2020 - 09:54 AM UTC
Grettings... have not build anything in some years, figure I can start again in 2020. Was wondering if I can add this entry to this campaign. I started it...years ago. Seems I snipped parts from the sprue, some minor assembly but no painting. Does it qualify?
Cheers,
J
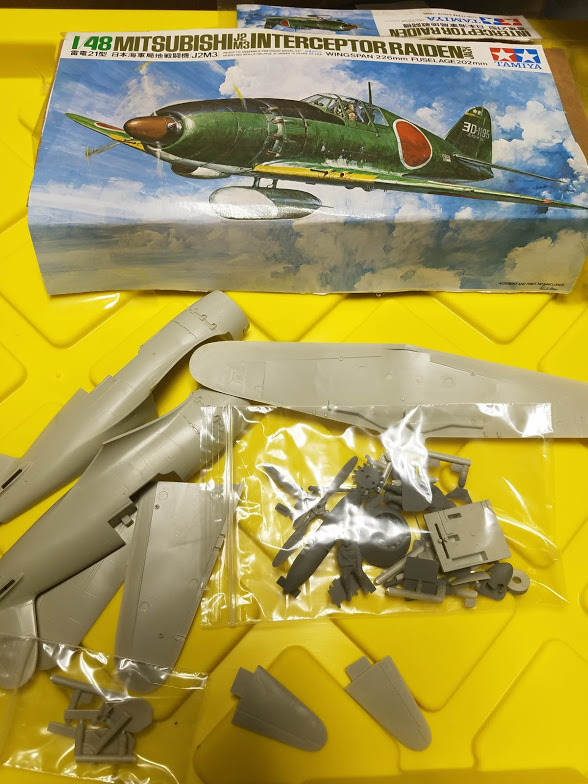
PS - This is the Tamiya #61018 Mitsubishi J2M3 Raiden (Jack) 1:48 kit
Cheers,
J
PS - This is the Tamiya #61018 Mitsubishi J2M3 Raiden (Jack) 1:48 kit

john41492
#442

Joined: July 20, 2015
KitMaker: 363 posts
AeroScale: 335 posts
Posted: Friday, January 10, 2020 - 02:13 PM UTC
Hey Robby,
My guess is that the Soviets repaired their wooden aircraft by cutting it up for firewood for use during the winter!
Having seen this before, my solution has been to take some 1200 grit, and wet sand the edges of where the paint peeled to taper the edge and then do a repaint in thin multiple passes. Shouldn't be noticeable once done. Good luck! So far it looks pretty darned nice!
JMart, from what I see, it certainly would qualify as it's not more than 25% done. Having built the kit, you should have a fun time with it too!
John
SGTJKJ
#041
Joined: July 20, 2006
KitMaker: 10,069 posts
AeroScale: 3,788 posts
Posted: Monday, January 13, 2020 - 10:27 PM UTC
Tough luck on the masking, Robby. I am sure it will look outstanding with a few touch ups.
I am getting done on the cockpit. More to follow soon


I am getting done on the cockpit. More to follow soon
Removed by original poster on 01/17/20 - 08:17:25 (GMT).
Removed by original poster on 01/17/20 - 08:28:53 (GMT).
SGTJKJ
#041
Joined: July 20, 2006
KitMaker: 10,069 posts
AeroScale: 3,788 posts
Posted: Friday, January 17, 2020 - 01:28 AM UTC
The fighter is taking shape now.
More to follow

More to follow

SpeedyJ

Joined: September 17, 2013
KitMaker: 1,617 posts
AeroScale: 212 posts
Posted: Friday, January 17, 2020 - 03:17 AM UTC
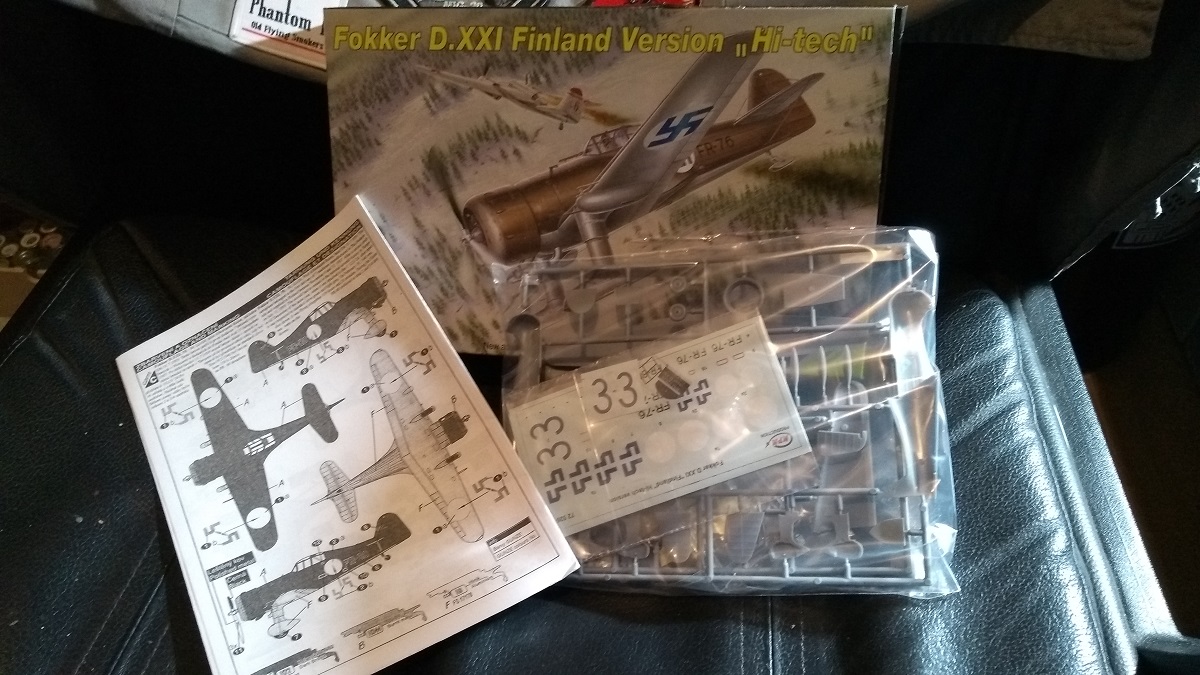
Very interesting builds I've seen.
Would like to enlist, but does this kit still qualify?
Box Art with the untouched sprue.


Sprue used to build the engine, tanks and wing parts

Build items so far. Inner details for wing and the engine.

Super Wing Series Noº5 - 1/32 Scale
Zoukei-Mura - J2M3 Raiden
Kind regards,
Robert Jan

Would like to enlist, but does this kit still qualify?
Box Art with the untouched sprue.
Sprue used to build the engine, tanks and wing parts
Build items so far. Inner details for wing and the engine.
Super Wing Series Noº5 - 1/32 Scale
Zoukei-Mura - J2M3 Raiden
Kind regards,
Robert Jan

b17-peter
#392

Joined: January 09, 2013
KitMaker: 696 posts
AeroScale: 608 posts

Posted: Friday, January 17, 2020 - 06:07 AM UTC
Hello mates and a happy new year, too!
I searched my stash and came up with two candidates for this campaign:

I hope I can join in soon
I searched my stash and came up with two candidates for this campaign:
I hope I can join in soon
SpeedyJ
Joined: September 17, 2013
KitMaker: 1,617 posts
AeroScale: 212 posts
Posted: Saturday, January 18, 2020 - 03:29 AM UTC
Hello Campaign Leader...
Can you give us a judgement on the 25% rule.
In other words.. Can we join the campaign?
Robert Jan
Can you give us a judgement on the 25% rule.
In other words.. Can we join the campaign?
Robert Jan
john41492
#442
Joined: July 20, 2015
KitMaker: 363 posts
AeroScale: 335 posts
Posted: Saturday, January 18, 2020 - 04:14 AM UTC
Hi Jan,
While I'm not the lead for this build, from what I see and know about the kit, you might be approaching the 10% mark! Very nice kit from what I know.
While I'm not the lead for this build, from what I see and know about the kit, you might be approaching the 10% mark! Very nice kit from what I know.
SpeedyJ
Joined: September 17, 2013
KitMaker: 1,617 posts
AeroScale: 212 posts
Posted: Saturday, January 18, 2020 - 11:54 AM UTC
Hello John. Thanks for the reply. It sure is a nice kit I need a break from Armor for a while and this one is just fine.
Hope campaign leader gives a clue.
Robert Jan
Hope campaign leader gives a clue.
Robert Jan

RhinoSpit

Joined: September 22, 2016
KitMaker: 224 posts
AeroScale: 191 posts
Posted: Sunday, January 19, 2020 - 09:45 AM UTC
This weekend i've worked on my Brewster Buffalo:


SpeedyJ
Joined: September 17, 2013
KitMaker: 1,617 posts
AeroScale: 212 posts
Posted: Monday, January 20, 2020 - 03:08 AM UTC
Mr. Campaign leader.
NOT INTERESTED ANYMORE,BYE BYE!
NOT INTERESTED ANYMORE,BYE BYE!

md72
#439
Joined: November 05, 2005
KitMaker: 4,950 posts
AeroScale: 3,192 posts

Posted: Monday, January 20, 2020 - 05:06 AM UTC
Franck, who's Buffalo is that? I'm pounding away on the old Airfix bagged kit. Not nearly as nice as yours.

Buckeye198
Joined: May 02, 2010
KitMaker: 596 posts
AeroScale: 197 posts
Posted: Monday, January 20, 2020 - 03:37 PM UTC
The theme for this build is "my way" it'll be really apparent when I'm all done and the markings are finalized, but for now just know that I'm NOT going for 100% historical accuracy nor 100% building perfection. And now, back to the update
So the underside patches were sanded lightly and resprayed with white primer and then the blue. Honestly did not turn out too good, but again, see the above paragraph! It's good enough for me right now, and I'm not planning on setting this on a mirror-base anyway. The patches that remain along the leading edges will be touched up with aluminum, reflecting the few parts of the plane that were metal. The landing gear assemblies were then put into position; without real guides molded onto the pieces, it's a real guessing game where the gear covers are supposed to go. I just aimed for symmetry, and I think I accomplished that.

I also touched up topside. After struggling with the masking, I just did what made me happy and sprayed over the black patches freehand/soft-edge. It really turned out well, though I'm a tad upset that I still won't have a hard-edge camo model on my shelf.

Almost ready for decals, weathering, and the final touches!
it'll be really apparent when I'm all done and the markings are finalized, but for now just know that I'm NOT going for 100% historical accuracy nor 100% building perfection. And now, back to the update So the underside patches were sanded lightly and resprayed with white primer and then the blue. Honestly did not turn out too good, but again, see the above paragraph! It's good enough for me right now, and I'm not planning on setting this on a mirror-base anyway. The patches that remain along the leading edges will be touched up with aluminum, reflecting the few parts of the plane that were metal. The landing gear assemblies were then put into position; without real guides molded onto the pieces, it's a real guessing game where the gear covers are supposed to go. I just aimed for symmetry, and I think I accomplished that.
I also touched up topside. After struggling with the masking, I just did what made me happy and sprayed over the black patches freehand/soft-edge. It really turned out well, though I'm a tad upset that I still won't have a hard-edge camo model on my shelf.
Almost ready for decals, weathering, and the final touches!
RhinoSpit
Joined: September 22, 2016
KitMaker: 224 posts
AeroScale: 191 posts
Posted: Monday, January 20, 2020 - 09:54 PM UTC
Quoted Text
Franck, who's Buffalo is that? I'm pounding away on the old Airfix bagged kit. Not nearly as nice as yours.
It's the brewster Buffalo from Tamiya in 1/48th.
I've opted for a plane from the Royal Netherlands East Indies Army Air Force.
The cockpit is painted in flat aluminium.
SGTJKJ
#041
Joined: July 20, 2006
KitMaker: 10,069 posts
AeroScale: 3,788 posts
Posted: Saturday, January 25, 2020 - 11:51 AM UTC
Nice save, Robby. Looking forward to see more.
My Hellcat is coming along. It is based and ready for camouflage. More to follow

My Hellcat is coming along. It is based and ready for camouflage. More to follow

Alex2011
Joined: May 13, 2018
KitMaker: 58 posts
AeroScale: 14 posts
Posted: Saturday, January 25, 2020 - 08:06 PM UTC
Hello everyone,
maybe it's a bit late, but I would like to participate in this campaign with this nice little kit

The model will be build OOB, but I hope that it will capture the look of the real Hayabusa when finished.
Happy modelling
- Alex
maybe it's a bit late, but I would like to participate in this campaign with this nice little kit
The model will be build OOB, but I hope that it will capture the look of the real Hayabusa when finished.
Happy modelling
- Alex
RhinoSpit
Joined: September 22, 2016
KitMaker: 224 posts
AeroScale: 191 posts
Posted: Sunday, January 26, 2020 - 08:02 AM UTC
I see the finish line 
First: masking, chipping with masking fluid on the wings edge and a coat of tamyia XF-62

Second: make the camo with Mig Ammo masking putty (awesome product)

And here is the result !

First: masking, chipping with masking fluid on the wings edge and a coat of tamyia XF-62
Second: make the camo with Mig Ammo masking putty (awesome product)
And here is the result !
Buckeye198
Joined: May 02, 2010
KitMaker: 596 posts
AeroScale: 197 posts
Posted: Sunday, January 26, 2020 - 12:43 PM UTC
Franck, that is outstanding! How tight can you get the borders when you use the Mig putty? The pictures you posted look like there's a nice hard edge with minimal to no overspray...exactly like what I was going for but couldn't achieve with frisket film haha! I also wonder how the Mig stuff compares to plain old poster tack.
 |

WEB HOSTING BY


Copyright ©2021 AeroScale and Kitmaker Network, a subsidiary of Silver Star Enterprises
All Rights Reserved. Please read our Conditions of Use and Privacy Policy.
All Rights Reserved. Please read our Conditions of Use and Privacy Policy.