Air Campaigns
Want to start or join a group build? This is where to start.
OFFICIAL: Foreign Fighters Campaign
MichaelSatin
Staff MemberCampaigns Administrator
AEROSCALE
_VISITCOMMUNITY
Colorado, United States
Joined: January 19, 2008
KitMaker: 3,909 posts
AeroScale: 2,904 posts
Posted: Sunday, June 02, 2019 - 03:24 AM UTC
Looks great Scott! Is that the Airfix 1/48 kit?

Michael
Magpie
_VISITCOMMUNITY
Queensland, Australia
Joined: July 10, 2011
KitMaker: 653 posts
AeroScale: 165 posts
Posted: Sunday, June 02, 2019 - 10:26 AM UTC
Cheers lads, yes It's the Airfix 1/48, very nice kit.
john41492
#442
_VISITCOMMUNITY
Malacca, Malaysia
Joined: July 20, 2015
KitMaker: 363 posts
AeroScale: 335 posts
Posted: Saturday, June 08, 2019 - 04:57 AM UTC
Hi All!

Time for an update. The Medallion Models resin set is really a nice drop fit, for this kit. Not a surprise, as it was made for this kit!

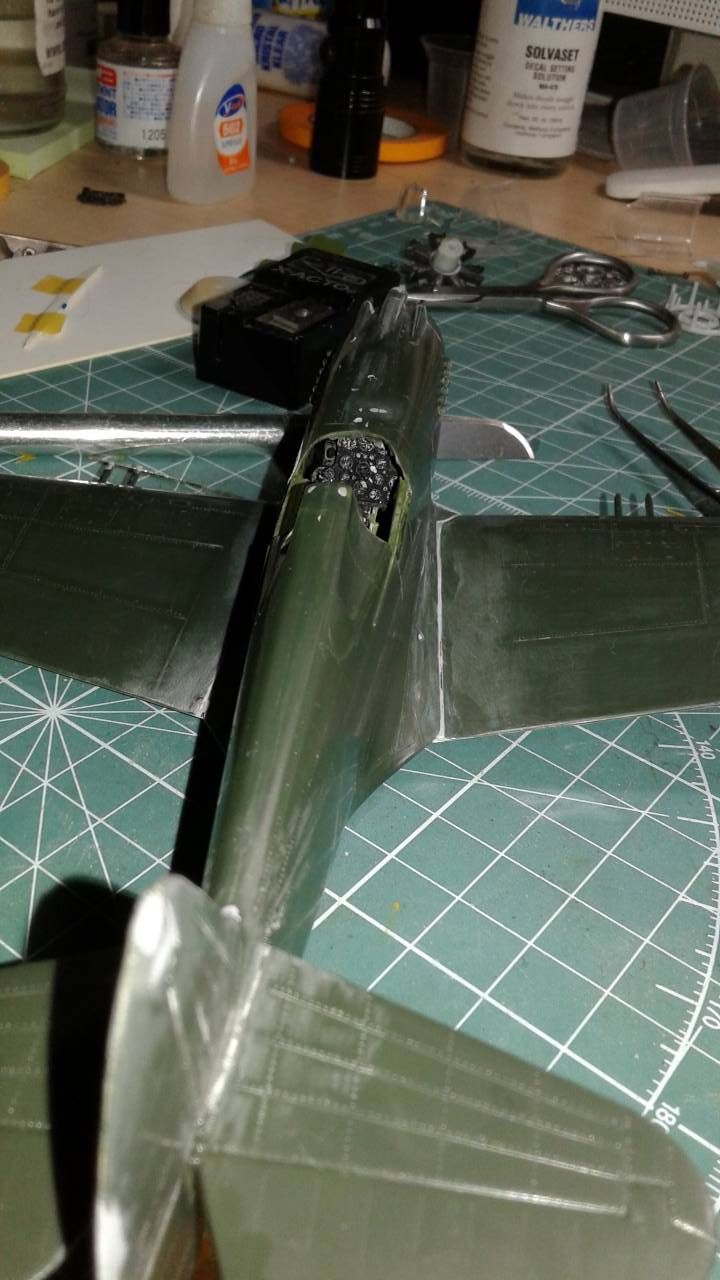
Following the instructions, I diverted to the front-end, and installed the intakes first! This alone adds so much to the model.

I then proceeded to the cockpit, and added it, again drop fit!

Next, I did the instrument panel, raised, but using a cream colored prisma pencil, it looks great!

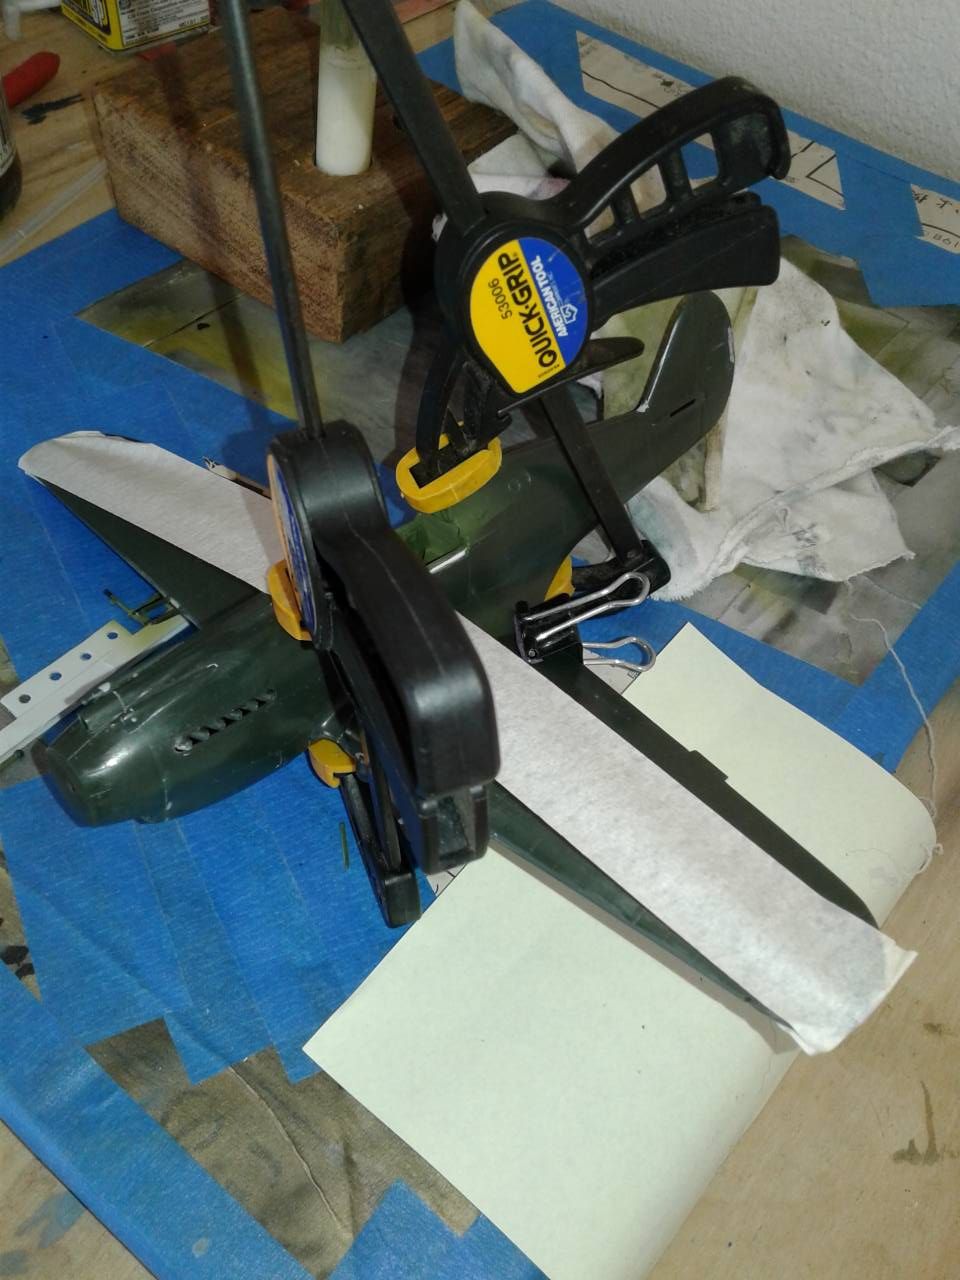
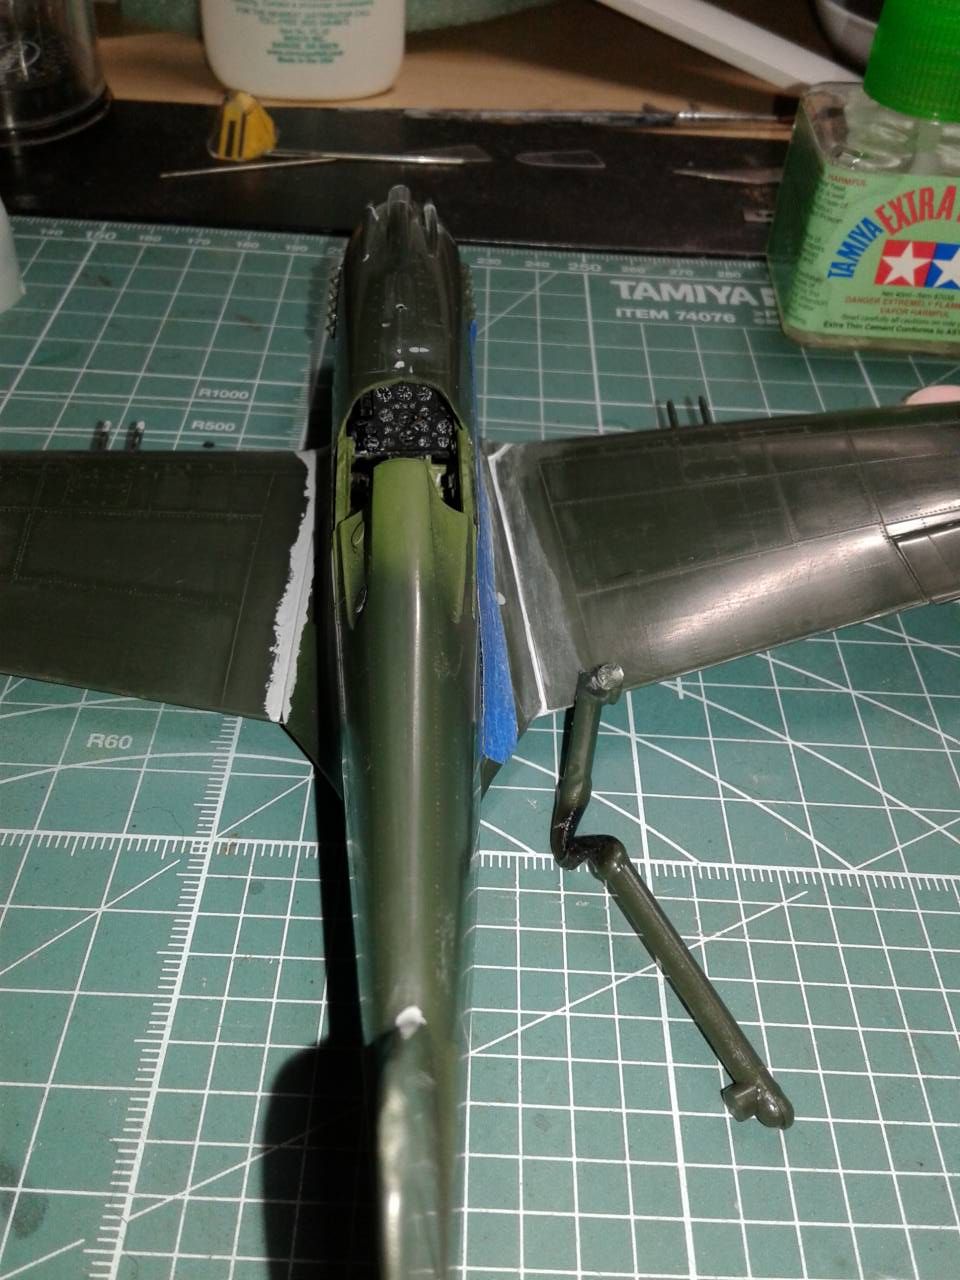
I then added the wings!


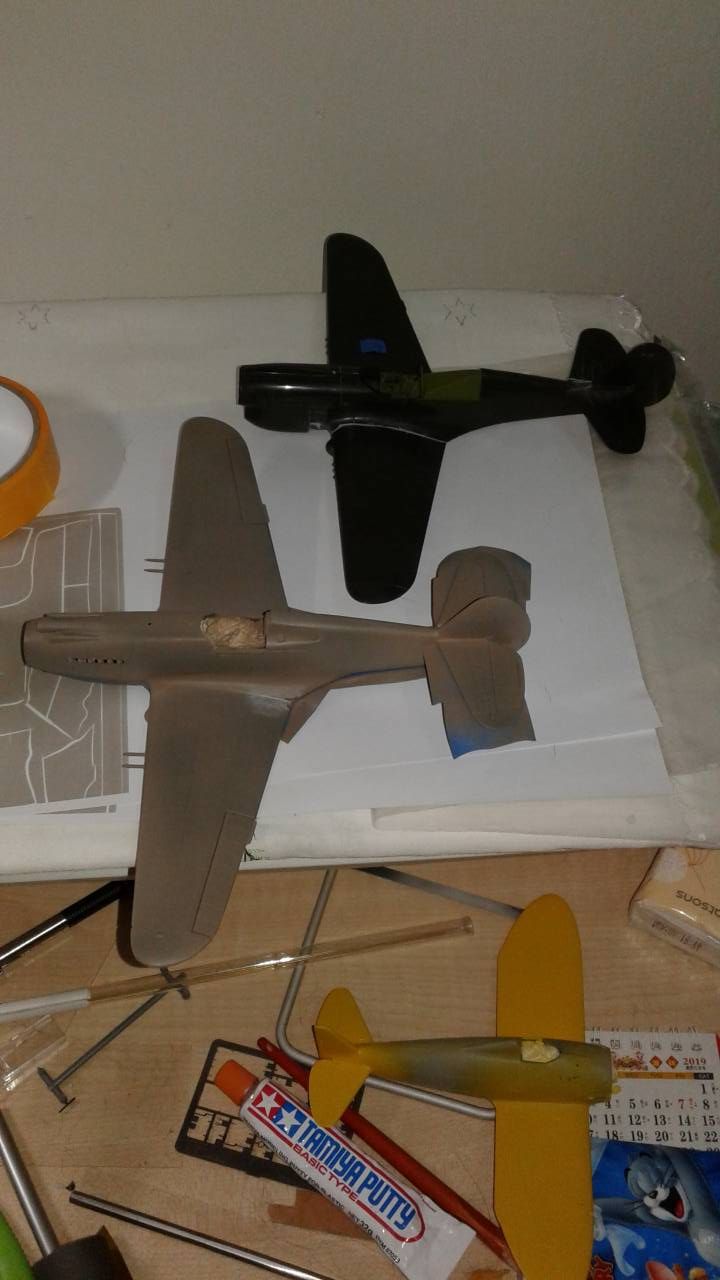
So, has this happened to anyone out there? I have found as I've gotten a bit older, that my skin, especially my hands have gotten dry. Try all sorts of moisturizer, to no avail, needless to say, upon removing the tape from the wings, the bird decided to try out it's wings!!

Things didn't go too well. Two places to land, grass or tile. Of course, tile. All in all, the damage wasn't too bad. A chip out of the rudder, and the instrument panel became dislodged.

The latter was the biggest hurdle to overcome. I fished the IP out, and started to figure out how to get it back to where it wanted to be.


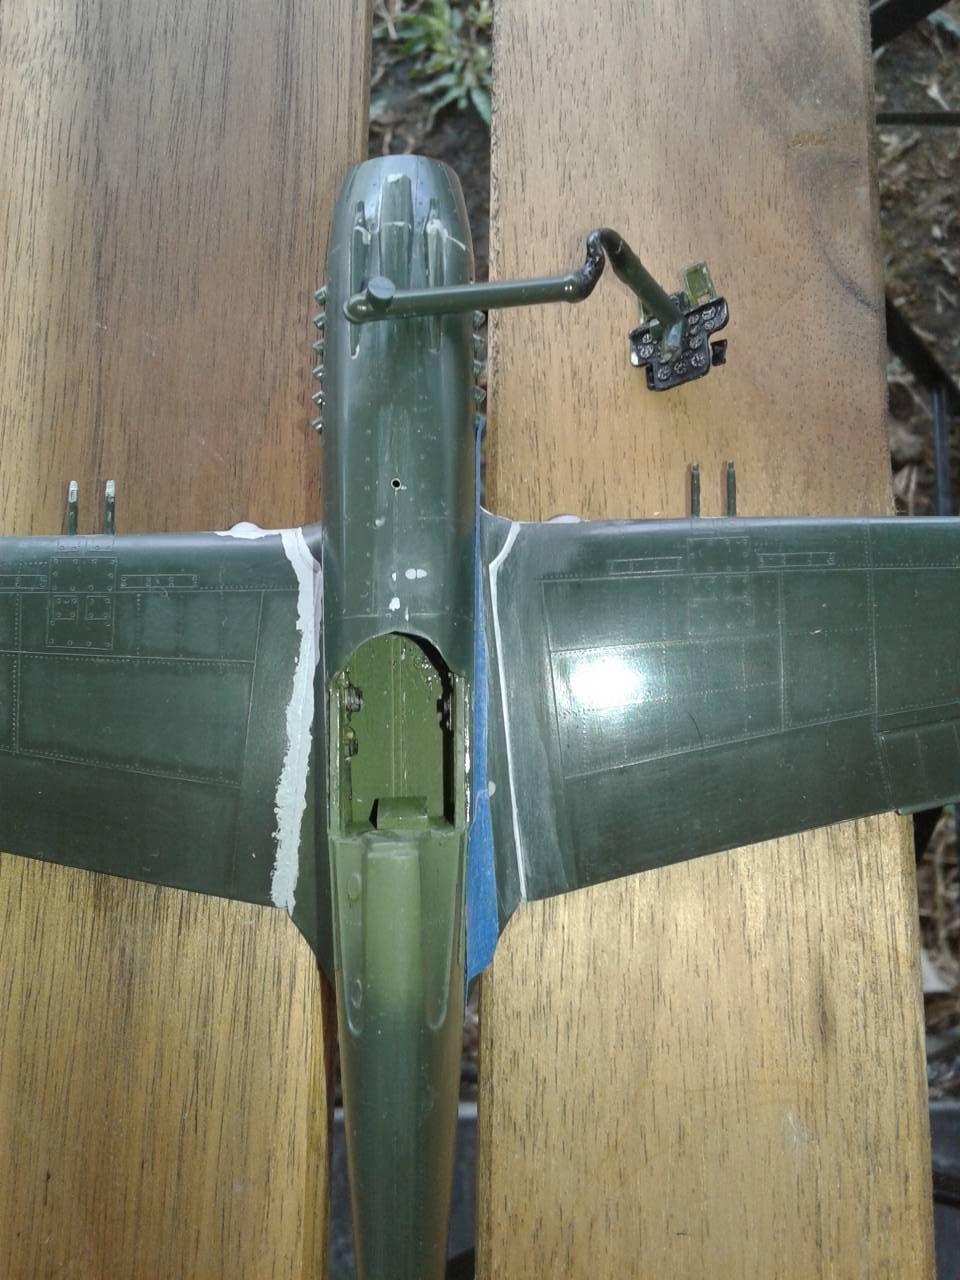
Taking some sprue and cutting it, and using white glue to attach it to the IP, I had a start. Following some heat to melt, and then fashion a handle that would allow for the IP to get to where it needed to be, I was able to get it there! Note, this took about 6 times to get it right. in the end, it was close enough.


It's close enough for this go around. This build is a pre-cursor to a really cool AVG build. Then again, life might intervene. So, at least this one will get done!
john41492
#442
_VISITCOMMUNITY
Malacca, Malaysia
Joined: July 20, 2015
KitMaker: 363 posts
AeroScale: 335 posts
Posted: Sunday, June 16, 2019 - 02:10 AM UTC
Hi All,

Well some progress has been made. Albeit, in a strange way. After fixing the IP and getting the seams on the wing roots taken care of, while drying on the bench outside, a storm struck.

Needless to say, the IP became dislodged again...so, this time I was going to secure it with epoxy. That didn't go so well, so I resorted to superglue again, and all seemed to be well.

During the storm, in it's second flight, the seam for the starboard wing root also was cracked and needed to be repaired. This go around I used superglue as well. With a bit of a twist that I picked up from Fine Scale.

I hit the seam to be filled with CA accelerator (Tamiya), and then applied a small bead of inexpensive superglue. Then sanded. This process seemed to go much faster, and yielded great results.


So, I lost a weeks worth of time, and I'm back on track. It should be noted that this build is a trial for the Medallion resin set, so any positives are good. So far, the resin set holds up to it's advertised claims. My next one will be the real one for my friend who lives in Guilin. Despite the set-backs, this has proved to be as fun as when I first built it back in 1970!

Up next, mask the canopy, I did foot the bill for a Squadron one, and redid the canopy sills, and made new back canopy glass for the aft end. All in all, this is a nice fun build. Granted, one does have to put a little TLC into it!

Keep having fun!

John
eMan
#298
_VISITCOMMUNITY
Hong Kong S.A.R. / 繁體
Joined: August 08, 2002
KitMaker: 1,182 posts
AeroScale: 351 posts
Posted: Wednesday, June 19, 2019 - 01:33 PM UTC
Defuant Mk1 progress update.


b17-peter
#392
_VISITCOMMUNITY
Hessen, Germany
Joined: January 09, 2013
KitMaker: 696 posts
AeroScale: 608 posts
Posted: Wednesday, June 19, 2019 - 08:27 PM UTC
@John and @Lap Man - Very well done so far, I will follow your
builds
eMan
#298
_VISITCOMMUNITY
Hong Kong S.A.R. / 繁體
Joined: August 08, 2002
KitMaker: 1,182 posts
AeroScale: 351 posts
Posted: Sunday, June 23, 2019 - 12:17 PM UTC
More update pics.


RhinoSpit
_VISITCOMMUNITY
Bas-Rhin, France
Joined: September 22, 2016
KitMaker: 224 posts
AeroScale: 191 posts
Posted: Sunday, June 23, 2019 - 10:12 PM UTC
Big update on my yak-3

(and sorry for the photos quality)


I really enjoy to build this kit.

May i ask a question: is it possible to have one more week ?


eMan
#298
_VISITCOMMUNITY
Hong Kong S.A.R. / 繁體
Joined: August 08, 2002
KitMaker: 1,182 posts
AeroScale: 351 posts
Posted: Monday, June 24, 2019 - 01:22 PM UTC
Defiant Mk.1A Night Fighter finished, N1671 belonged to 307th Polish Squadron based at Colerne, October 1941.


john41492
#442
_VISITCOMMUNITY
Malacca, Malaysia
Joined: July 20, 2015
KitMaker: 363 posts
AeroScale: 335 posts
Posted: Monday, June 24, 2019 - 03:51 PM UTC
Hi all,

Lap Man! Nice finish as always. I'm surely doing something wrong, as you seem to take difficult kits and get them done in such a short period of time! Very nice, as always.


Sad to say, that I'm out of this one. It appears that the kit was cursed. After 2 instrument panel re-attachments, and an unscheduled flight resulting in seam repairs, it appears someone took it on another unauthorized flight!

That said, it's the first time since 1974, that a model of mine has had an unplanned landing. Witnesses say that terminal velocity was reached. I have removed all the resin, and now per the family should consult a monk over the pieces prior to burning. Curses are really new to me.

Happy modeling!

John
MichaelSatin
Staff MemberCampaigns Administrator
AEROSCALE
_VISITCOMMUNITY
Colorado, United States
Joined: January 19, 2008
KitMaker: 3,909 posts
AeroScale: 2,904 posts
Posted: Monday, June 24, 2019 - 11:48 PM UTC

Quoted Text

Big update on my yak-3

I really enjoy to build this kit.

May i ask a question: is it possible to have one more week ?


I'm fine with an extension if people want one. Anyone else think that would help?

Michael
md72
#439
_VISITCOMMUNITY
Washington, United States
Joined: November 05, 2005
KitMaker: 4,950 posts
AeroScale: 3,192 posts
Posted: Tuesday, June 25, 2019 - 03:12 PM UTC
Yes, I could use an extension.
MichaelSatin
Staff MemberCampaigns Administrator
AEROSCALE
_VISITCOMMUNITY
Colorado, United States
Joined: January 19, 2008
KitMaker: 3,909 posts
AeroScale: 2,904 posts
Posted: Wednesday, June 26, 2019 - 03:04 AM UTC
Generally, when I extend a campaign, I give it an extra month. Will that do the trick?

Michael
RhinoSpit
_VISITCOMMUNITY
Bas-Rhin, France
Joined: September 22, 2016
KitMaker: 224 posts
AeroScale: 191 posts
Posted: Wednesday, June 26, 2019 - 07:50 PM UTC

Quoted Text

Generally, when I extend a campaign, I give it an extra month. Will that do the trick?

Michael


thank you Michael !
RhinoSpit
_VISITCOMMUNITY
Bas-Rhin, France
Joined: September 22, 2016
KitMaker: 224 posts
AeroScale: 191 posts
Posted: Monday, July 08, 2019 - 08:30 AM UTC
My yak 3 wear is beautiful soviet late colours


Some of the cockpit photoetched parts have come off and are wandering around in the plane. After so much effort and attention, it's very frustating.
Buckeye198
_VISITCOMMUNITY
Ohio, United States
Joined: May 02, 2010
KitMaker: 596 posts
AeroScale: 197 posts
Posted: Monday, July 08, 2019 - 11:39 PM UTC
Franck, that truly is a beautiful job on the camo! I really do like the late-war Soviet scheme. I built a Yak-7 not too long ago, but my lines aren't nearly as clean as yours (kinda like my Spitfire camo vs Peter's ). Excellent work, can't wait to see the rest!
I assume you'd recommend Eduard's kit? My Yak was from ICM...very few pieces, but an exercise in patience nonetheless!
Owengate
_VISITCOMMUNITY
United States
Joined: June 03, 2019
KitMaker: 73 posts
AeroScale: 2 posts
Posted: Tuesday, July 09, 2019 - 06:51 AM UTC
I agree. That's a job well-done.
RhinoSpit
_VISITCOMMUNITY
Bas-Rhin, France
Joined: September 22, 2016
KitMaker: 224 posts
AeroScale: 191 posts
Posted: Thursday, July 11, 2019 - 08:16 PM UTC
thank you !

yes Robby, it's the week-end edition from eduard. i've added some photoetch pieces (rudder, instrument panel) from the associated fret. but, as i say in my previous post, despite the care and attention some parts of the cockpit have come off.

for the camo, i've used the following vallejo references:
- 71.304 AMT-11 Blue Grey
- 71.308 AMT-12 Dark Grey
- 71.318 AMT-7 Greyish Blue

and for the camo, I was inspired by the following video:

http://www.youtube.com/watch?v=womD4C0-9bc&list=PLyh4vCmxnGfdSGztvWcOpMtCTiEZLp3dp&index=3
Buckeye198
_VISITCOMMUNITY
Ohio, United States
Joined: May 02, 2010
KitMaker: 596 posts
AeroScale: 197 posts
Posted: Thursday, July 11, 2019 - 11:51 PM UTC

Quoted Text


Thank you!! I've been using poster tack (Blu-Tack, Silly Putty, etc) for my masks and while it's good for soft lines, it's just too imprecise and irregular to get the hard lines like you're displaying. I think this masking trick--and the tricks in his other videos--will be very useful
RhinoSpit
_VISITCOMMUNITY
Bas-Rhin, France
Joined: September 22, 2016
KitMaker: 224 posts
AeroScale: 191 posts
Posted: Monday, July 22, 2019 - 06:46 AM UTC
I put the decals in.


MichaelSatin
Staff MemberCampaigns Administrator
AEROSCALE
_VISITCOMMUNITY
Colorado, United States
Joined: January 19, 2008
KitMaker: 3,909 posts
AeroScale: 2,904 posts
Posted: Thursday, July 25, 2019 - 12:56 AM UTC
Only a week left everyone. Put those pedals to the metal!

Michael
RhinoSpit
_VISITCOMMUNITY
Bas-Rhin, France
Joined: September 22, 2016
KitMaker: 224 posts
AeroScale: 191 posts
Posted: Monday, July 29, 2019 - 08:10 AM UTC
And ...


... Finished ...


Buckeye198
_VISITCOMMUNITY
Ohio, United States
Joined: May 02, 2010
KitMaker: 596 posts
AeroScale: 197 posts
Posted: Monday, July 29, 2019 - 11:45 AM UTC
Outstanding, just as I suspected it would be
The patch is a nice touch, I'm sure you could work that into a display base
RhinoSpit
_VISITCOMMUNITY
Bas-Rhin, France
Joined: September 22, 2016
KitMaker: 224 posts
AeroScale: 191 posts
Posted: Monday, July 29, 2019 - 11:20 PM UTC
Thank you !

I'm very happy about the result. And i must admit, this kit was an enjoyable build.
MichaelSatin
Staff MemberCampaigns Administrator
AEROSCALE
_VISITCOMMUNITY
Colorado, United States
Joined: January 19, 2008
KitMaker: 3,909 posts
AeroScale: 2,904 posts
Posted: Saturday, August 03, 2019 - 12:59 AM UTC
Well, the time has come to say good-bye to this one. Congrats to all those who finished and thank you to all who participated! Very nice work to all!

Ribbons have been awarded, so if you didn't get one and think you should have, let me know.

See you all around the site!

Michael