Air Campaigns
Want to start or join a group build? This is where to start.
OFFICIAL: MTO Campaign
Szmann
_VISITCOMMUNITY
Netherlands Antilles
Joined: September 02, 2014
KitMaker: 1,977 posts
AeroScale: 295 posts
Posted: Friday, October 19, 2018 - 03:27 PM UTC

Quoted Text


Quoted Text

Peter, I use BB's and white glue on my tricycle a/c. Not sure this helps at this stage.


Hi Bob,
just sneaked in a little less weight than I thought necessary and it seems to be ok now.

But I wonder about "BBs"?


Peter, BBs = pellets for "BB gun" = compressed air gun. I use the same - they are made of soft led - heavy and easy to shape if needed.

Gabriel
md72
#439
_VISITCOMMUNITY
Washington, United States
Joined: November 05, 2005
KitMaker: 4,950 posts
AeroScale: 3,192 posts
Posted: Friday, October 19, 2018 - 03:35 PM UTC
I've got a little tube like this Daisy BBs Been using it for a few years, mostly for adding to paint bottle for stirring.
b17-peter
#392
_VISITCOMMUNITY
Hessen, Germany
Joined: January 09, 2013
KitMaker: 696 posts
AeroScale: 608 posts
Posted: Friday, October 19, 2018 - 10:14 PM UTC
Gabriel and Mark - thanks for explaining to me
BTW, I'm using smaller lead pellets now and then.
For paint stirring I use little stainless steel balls.
Normally I go for ballast at the fishing shop, because you get more sizes of weights
Szmann
_VISITCOMMUNITY
Netherlands Antilles
Joined: September 02, 2014
KitMaker: 1,977 posts
AeroScale: 295 posts
Posted: Saturday, October 20, 2018 - 02:37 AM UTC
No problem, Peter!

For weight I also buy fishing led sinkers that can be shaped with the pliers when the space inside model allows one chunky piece.
For stirring I use stainless steel balls from bearings but my stock is running low since I've changed my job I use now more often glass balls from the brand liquor bottles

Cheers!
Gabriel
md72
#439
_VISITCOMMUNITY
Washington, United States
Joined: November 05, 2005
KitMaker: 4,950 posts
AeroScale: 3,192 posts
Posted: Saturday, October 20, 2018 - 03:26 AM UTC
I've got some fishing weights left from years ago, they just always seem too big for my 1/72 projects. I did get a bout 1/2 lb of bird shot from a reloader friend of mine that I've been using lately, tiny size allows me to get more in the small noses of fighters.

I also picked up a trick for finished planes that start to be tail sitters. Drill a small hole 0.032 or 0.016" into the nose gear well and push in some 0.032 or 0.015 solder. Fill the hole with a piece of styrene or just paint over it. It's usually enough to get that last little bit of weight into the nose and drop it down on the nose gear. Probably wouldnt have worked on that B-25 up there.
john41492
#442
_VISITCOMMUNITY
Malacca, Malaysia
Joined: July 20, 2015
KitMaker: 363 posts
AeroScale: 335 posts
Posted: Saturday, October 20, 2018 - 05:05 AM UTC
Hi Everyone!

Still lots of way cool builds going here! Peter, your B-25 is coming along nicely, and yes they do tend to be tail sitters! I'm confident that you'll resolve the issue. I'm a fishing weight person, and still stir my paints with a toothpick! I was a bit surprised on visiting the gallery that only three of us have uploaded our finished works, don't forget to upload them!

If you've not guessed by now, I was really jazzed to do this group build, and I'm very happy with my choice. If you get the opportunity to build the old Monogram/Revell B-25J don't be afraid of it. It's a great kit, with just a little work it turns out very nicely. Aside from the expensive decals, I also added a set of True Details seats, as they are quite visible from the cockpit and the kits are less than banner. I also purchased Eduard's Mask set for the kit, a purchase that was well worth the money. This is by far the most expensive kit for me to date. 54 USD, I'm a bit on the frugal side, so this was way over budget. Ironically, the wife got me the Tamiya F-14 for my birthday, so I've yet to pay more than this for a kit, hahaha!

Many a book have been written about the 340th Bomb Group. For me, none are better than Joseph Heller's tribute to them, where he served as a navigator, in his book "Catch-22". Since reading it numerous times, I've also got the real story behind the 340th. Not to give an in depth review here, my build focused on the planes following the German air raid of May 13-14 1944.

Prior to the air raid, all the planes were natural metal, and after the raid they were hastily painted green topside. With whatever green paint was available, be it olive drab, RAF dark green or Italian Green. Flying from Corsica, these paint jobs weathered quickly, and lend many possibilities for the average modeler!

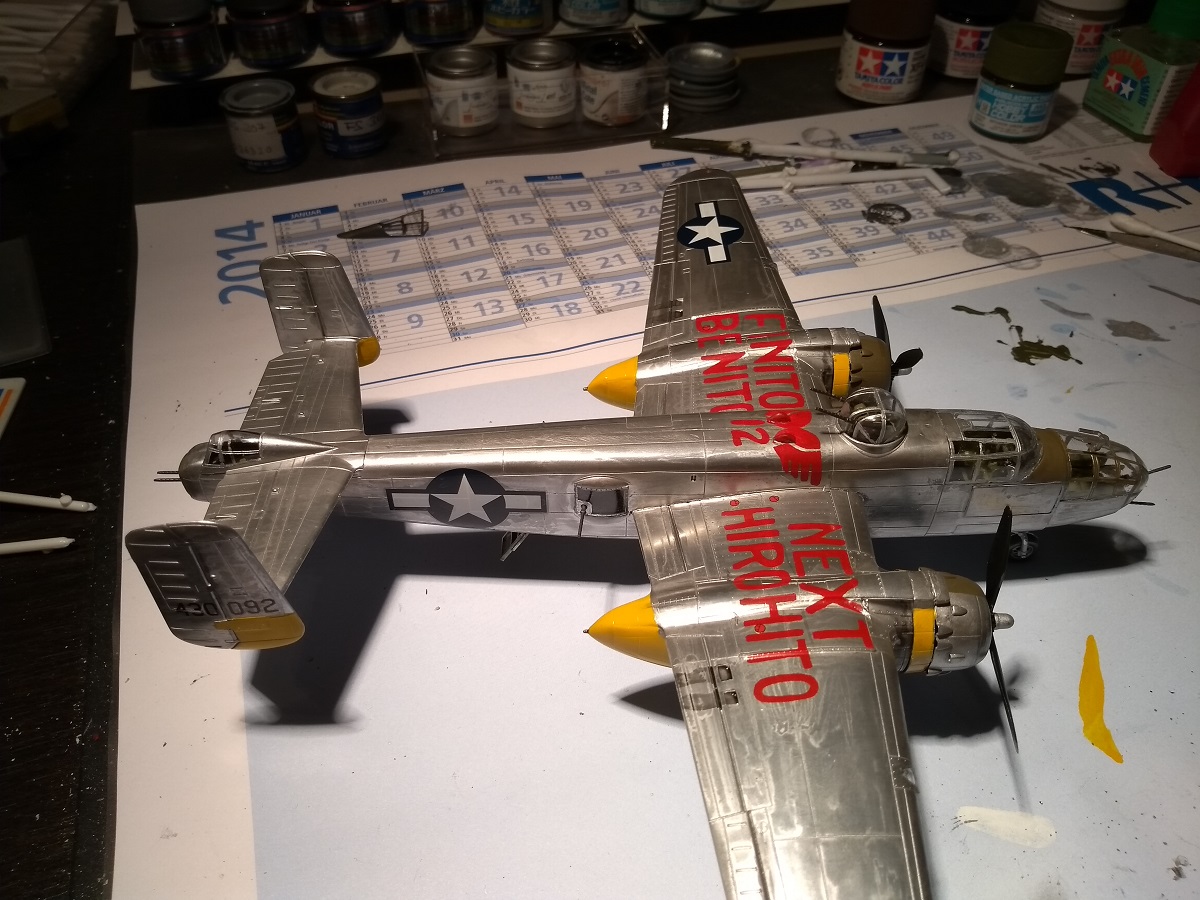
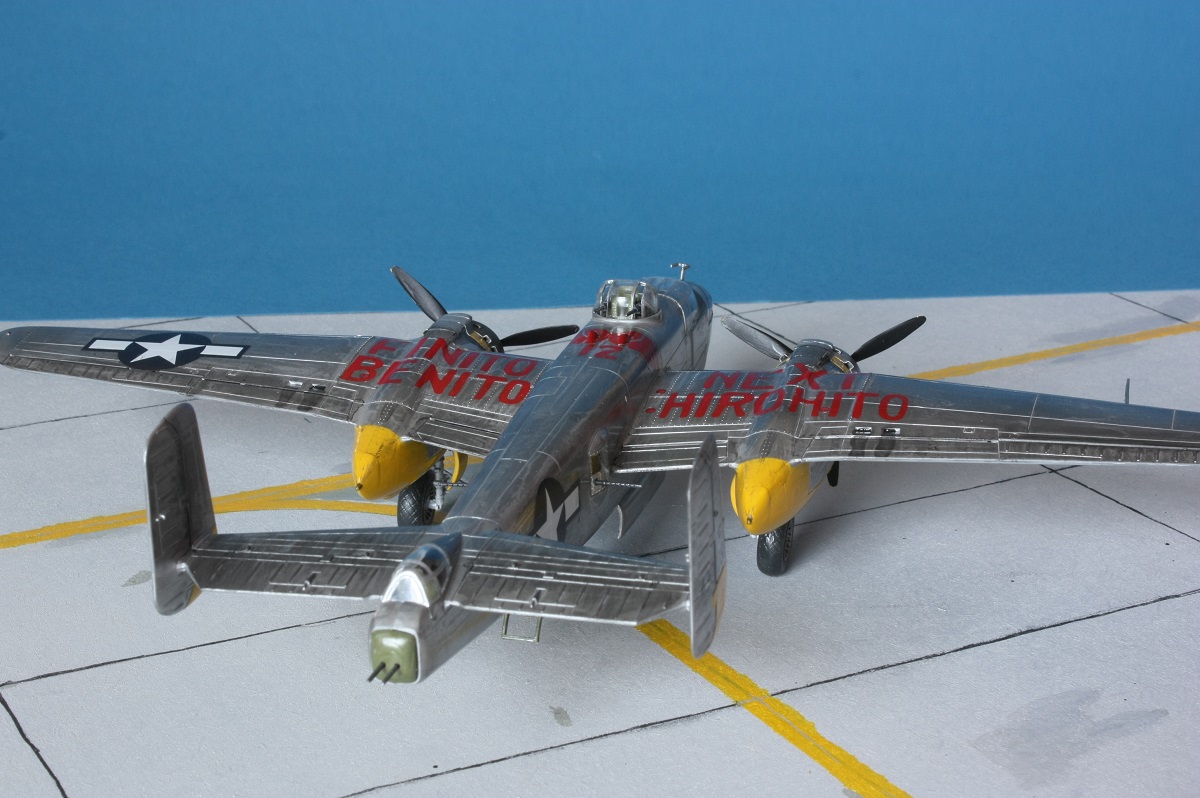
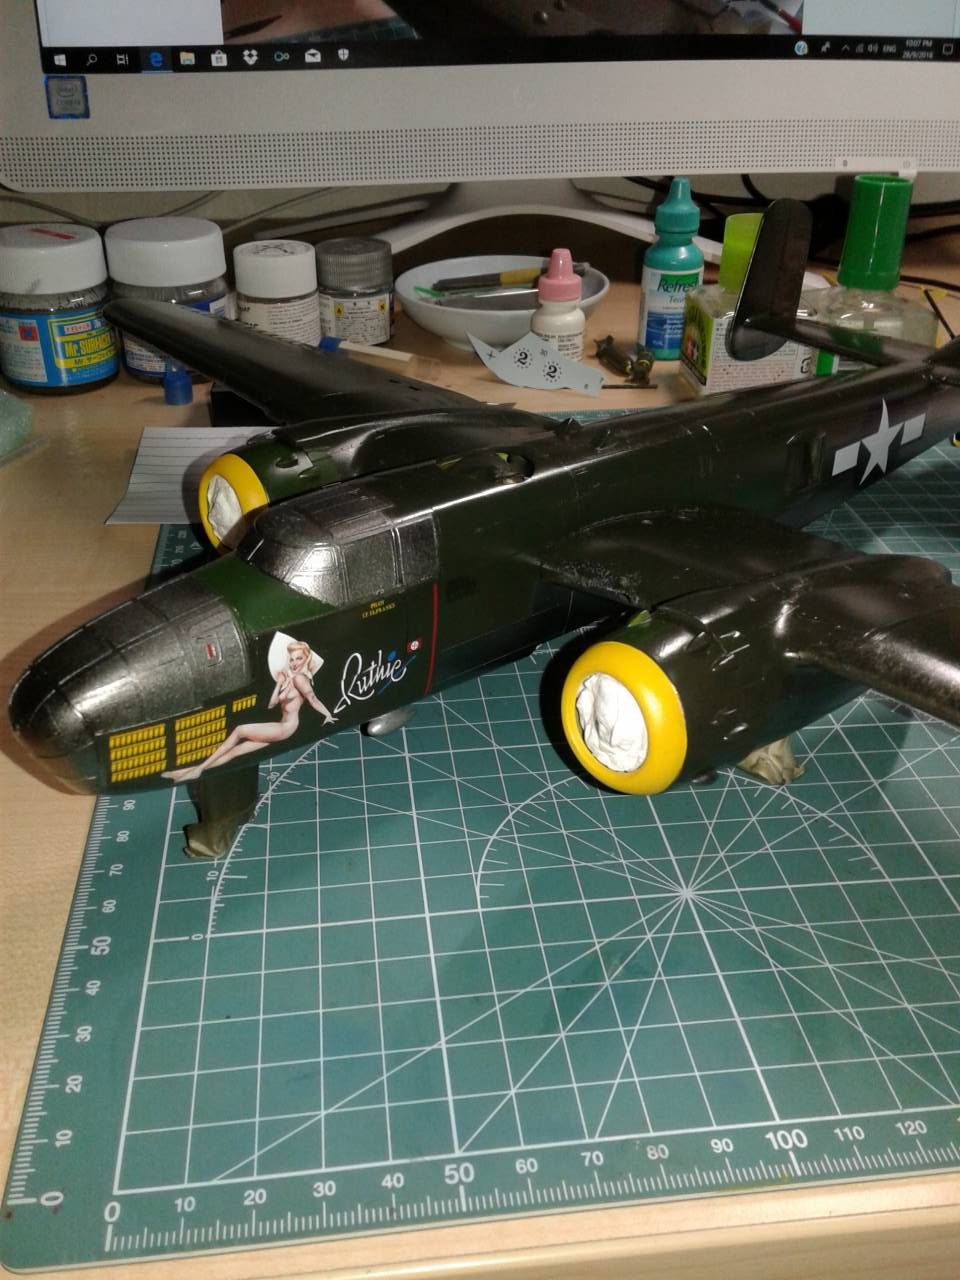
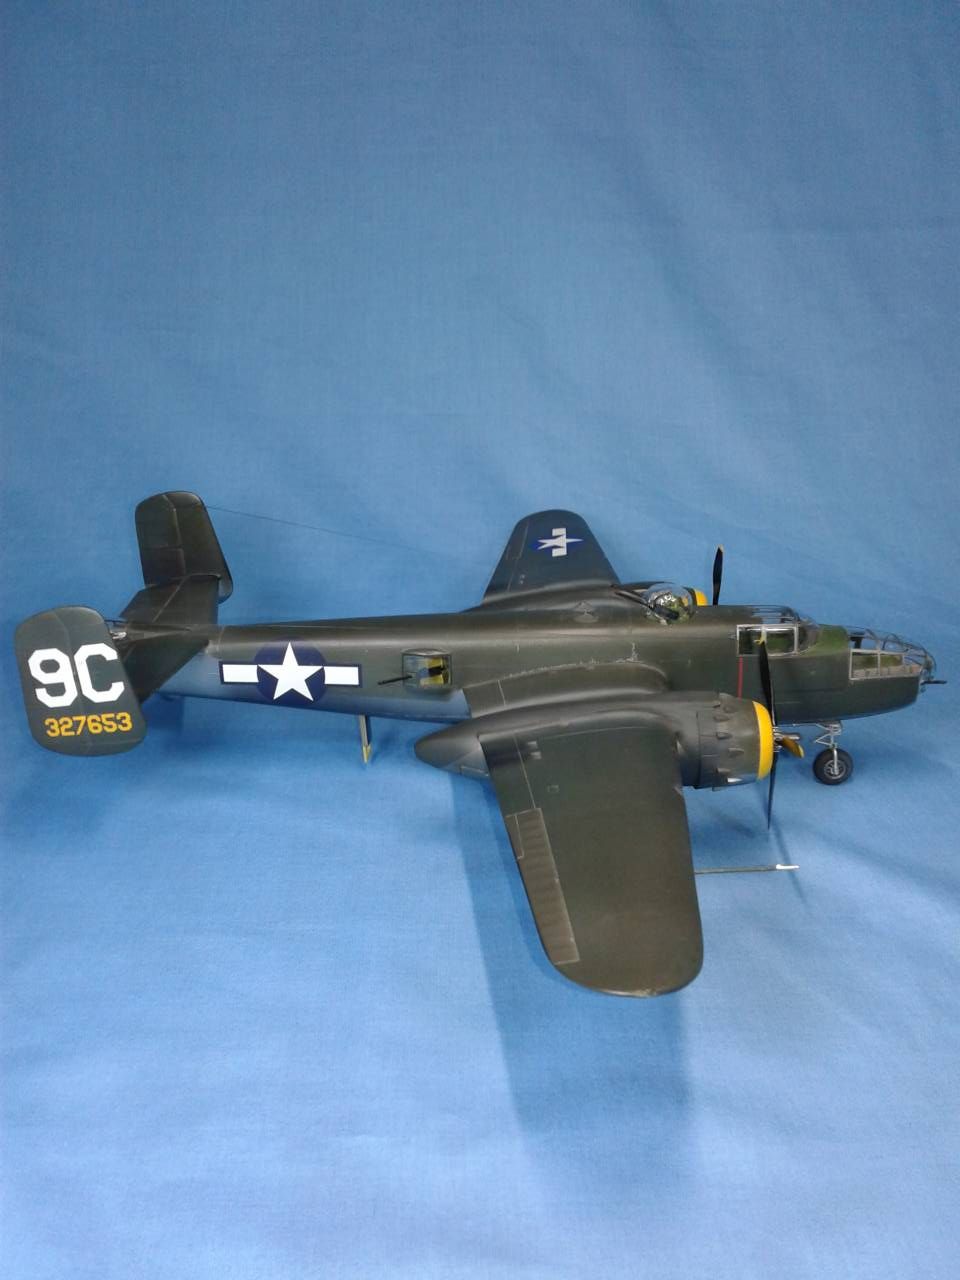
I chose to model "Ruthie" from the 340th BG, 489th Bomb Squadron at Alesani, Corsica. With 108 missions completed, she was a true survivor, and I opted to do her as she looked during the Fall of 1944. So, a sharp paint job that had a good bit of wear and tear on.

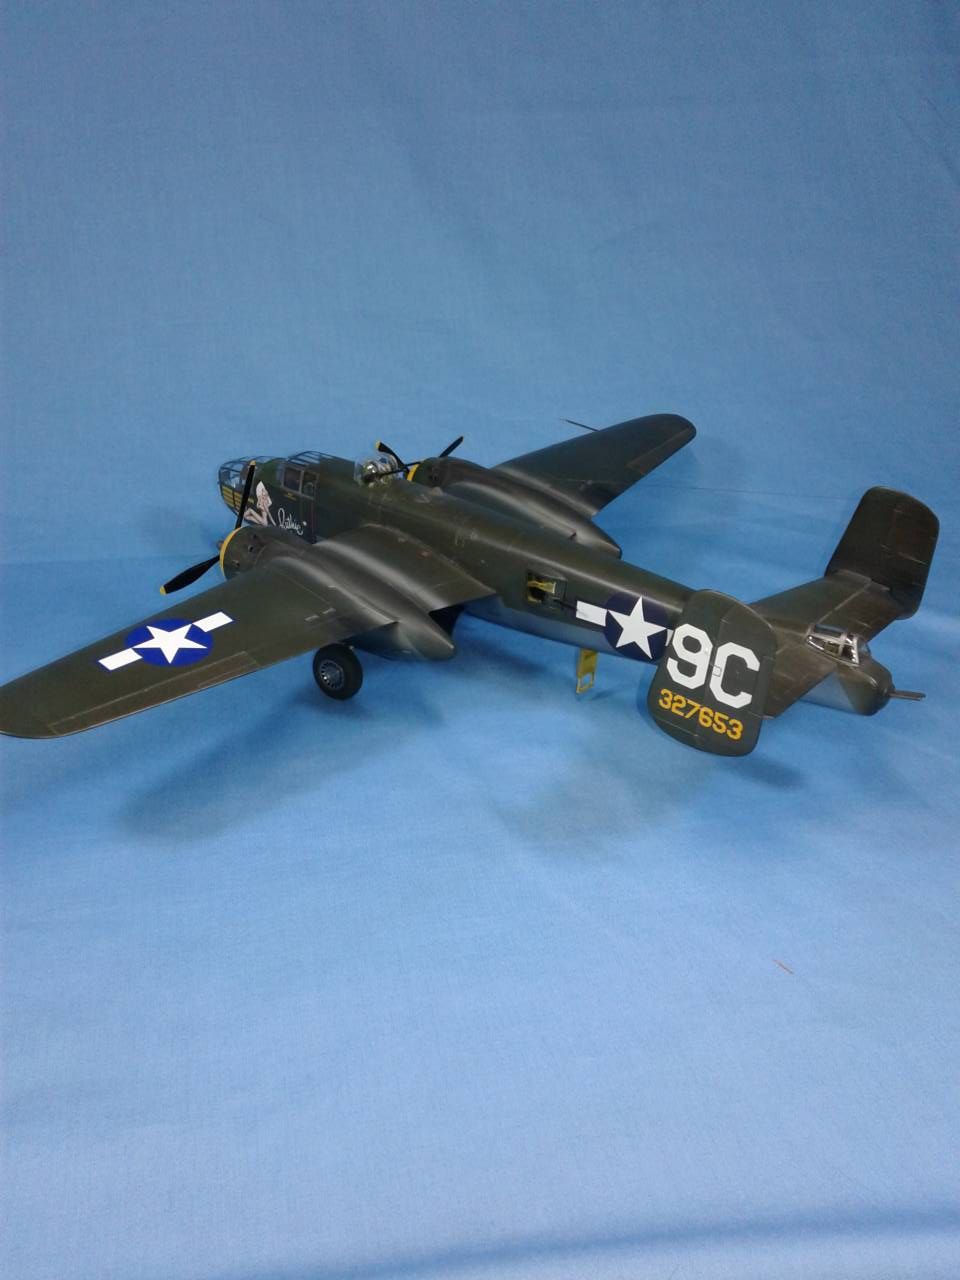
While at first glance "Ruthie" may appear to be nude, she's not. I think she's a rendition of a Vargas painting, which at the time were pretty risqué artworks, but from what I'm told, they were pretty good moral boosters to the troops. Prior to purchasing the Bombshell decals, I spoke with the wife, and got full approval! Yes, she picked "Ruthie".

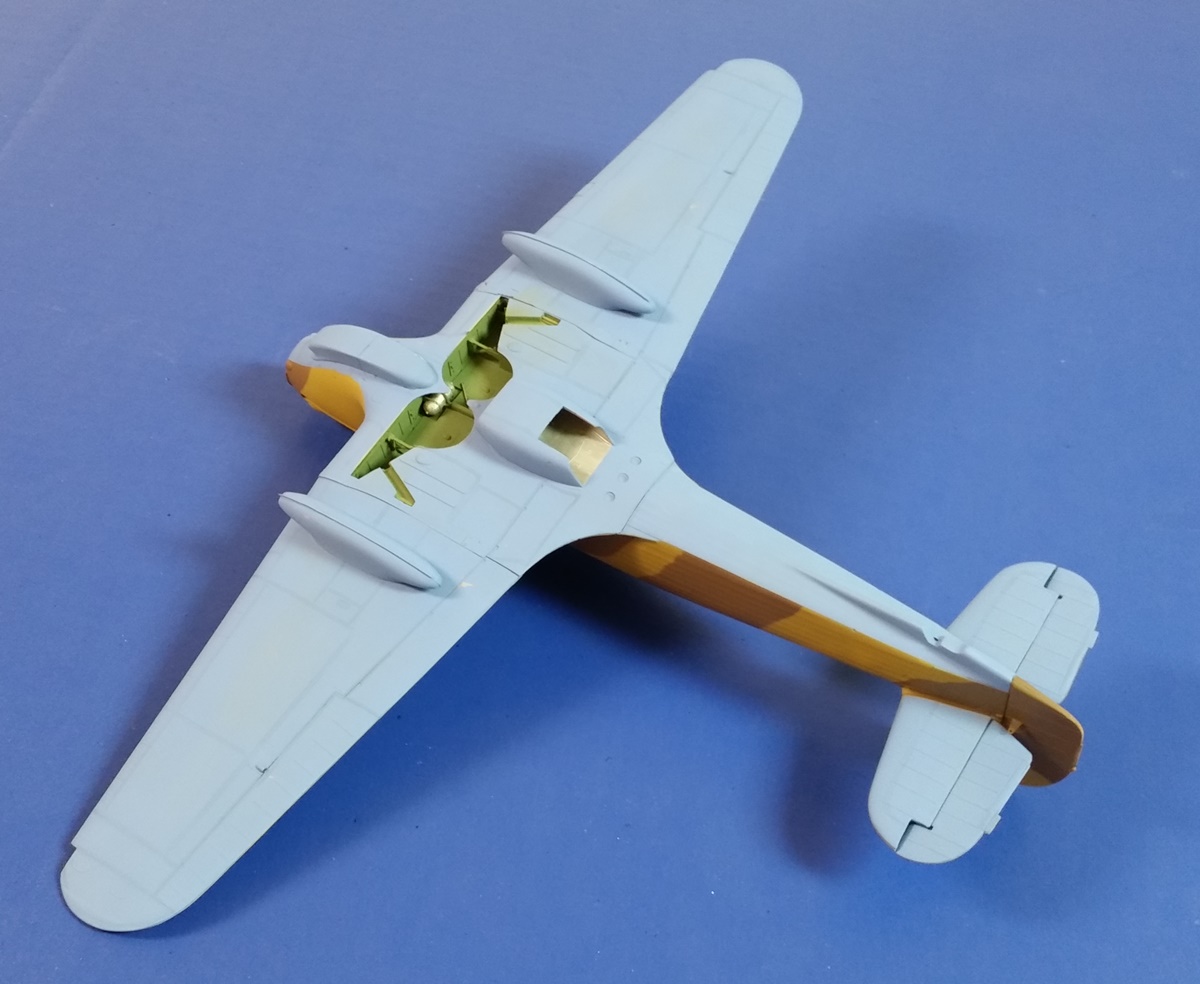
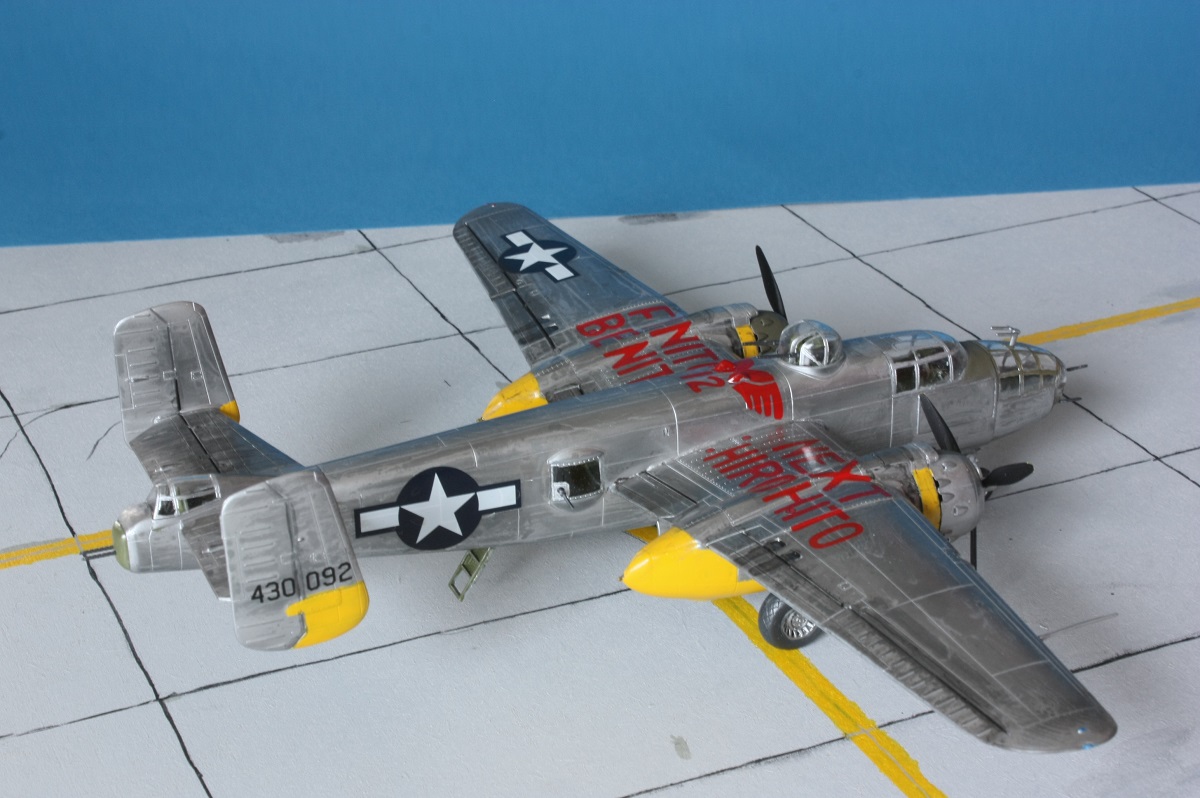
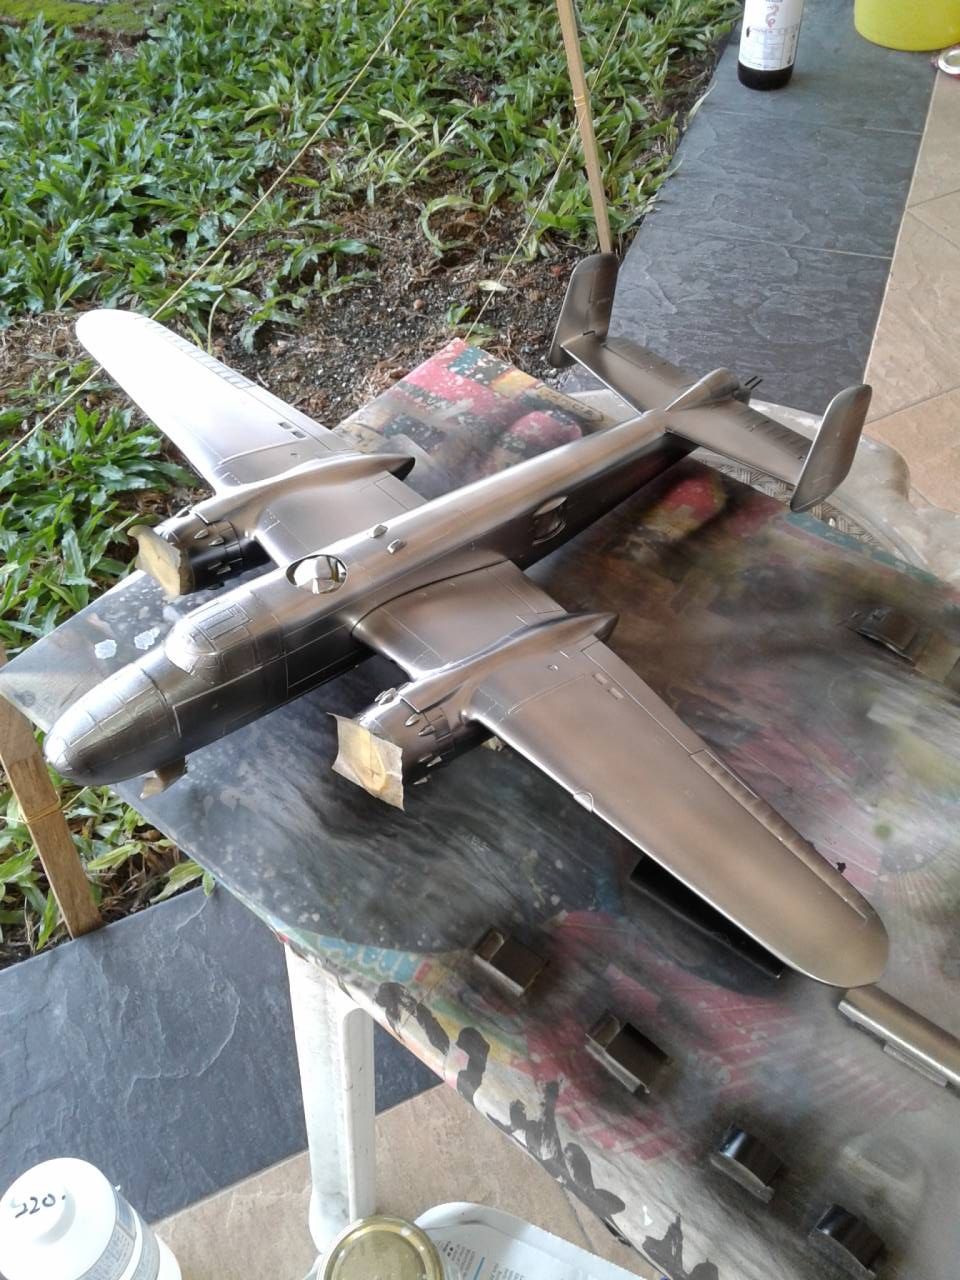
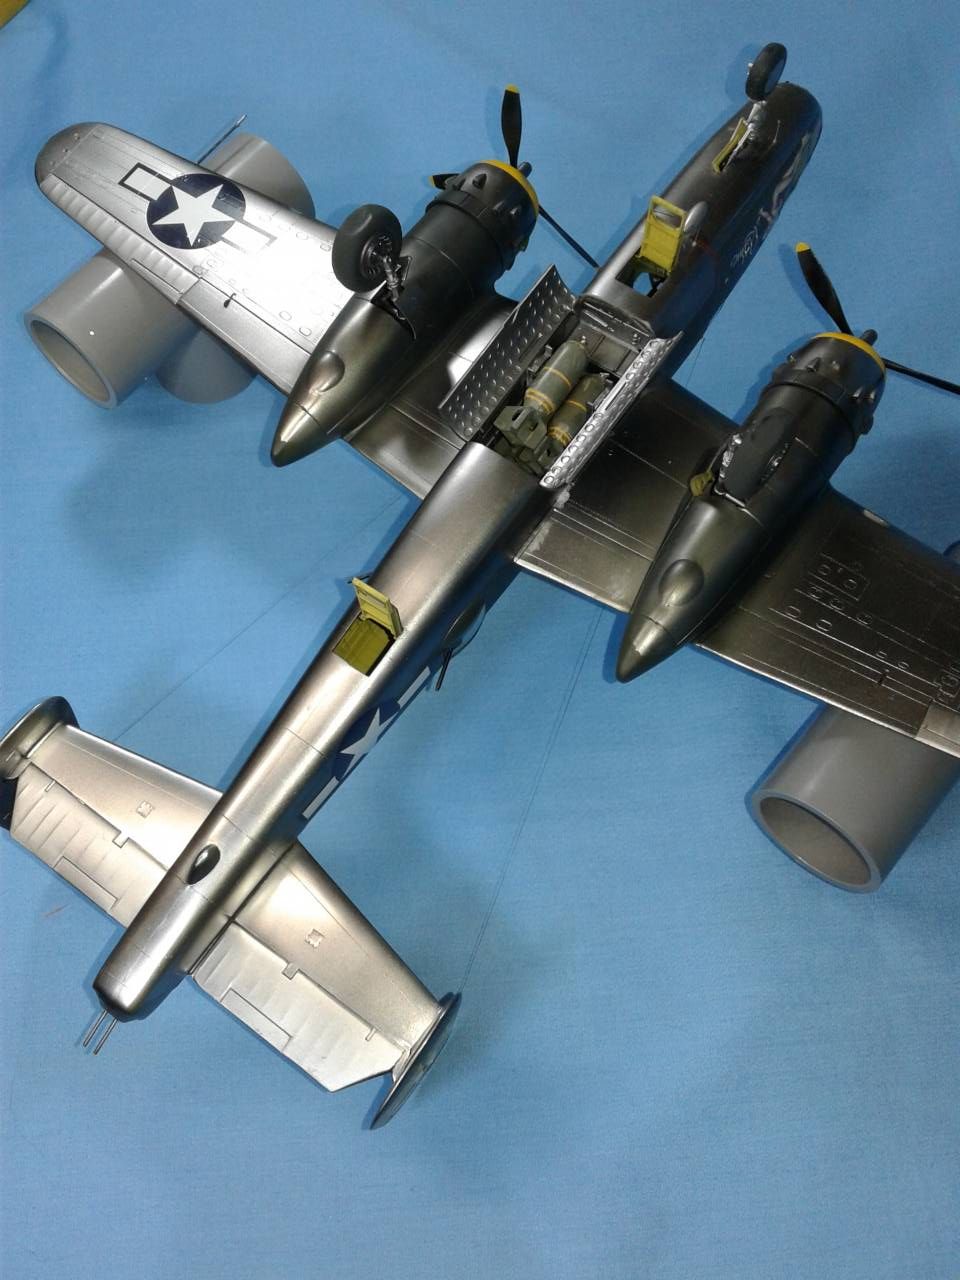
First order of business was to do a natural metal finish. Throughout the build, I made it a point to check all seams, and to polish any sanded areas, then I used Tamiya gloss black to double check my work and lay the foundation for the Alclad II Airframe Aluminum. All other paints on this project were Tamiya.

First up, Alclad II:


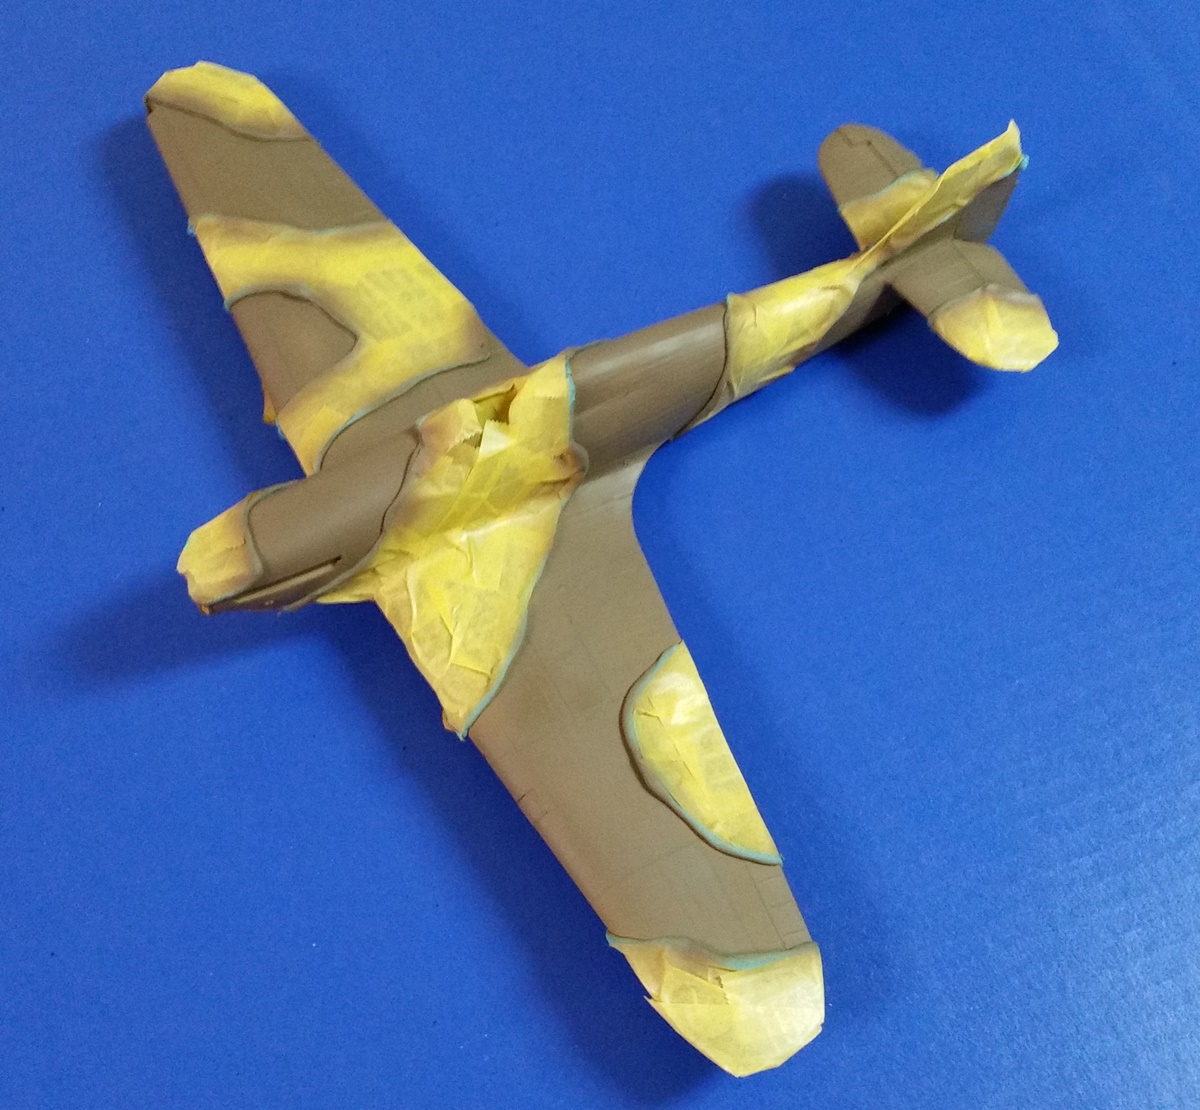
Next I masked the bird in preparation for the green topsides. My first attempt was XF-81 Dark Green 2 (RAF).


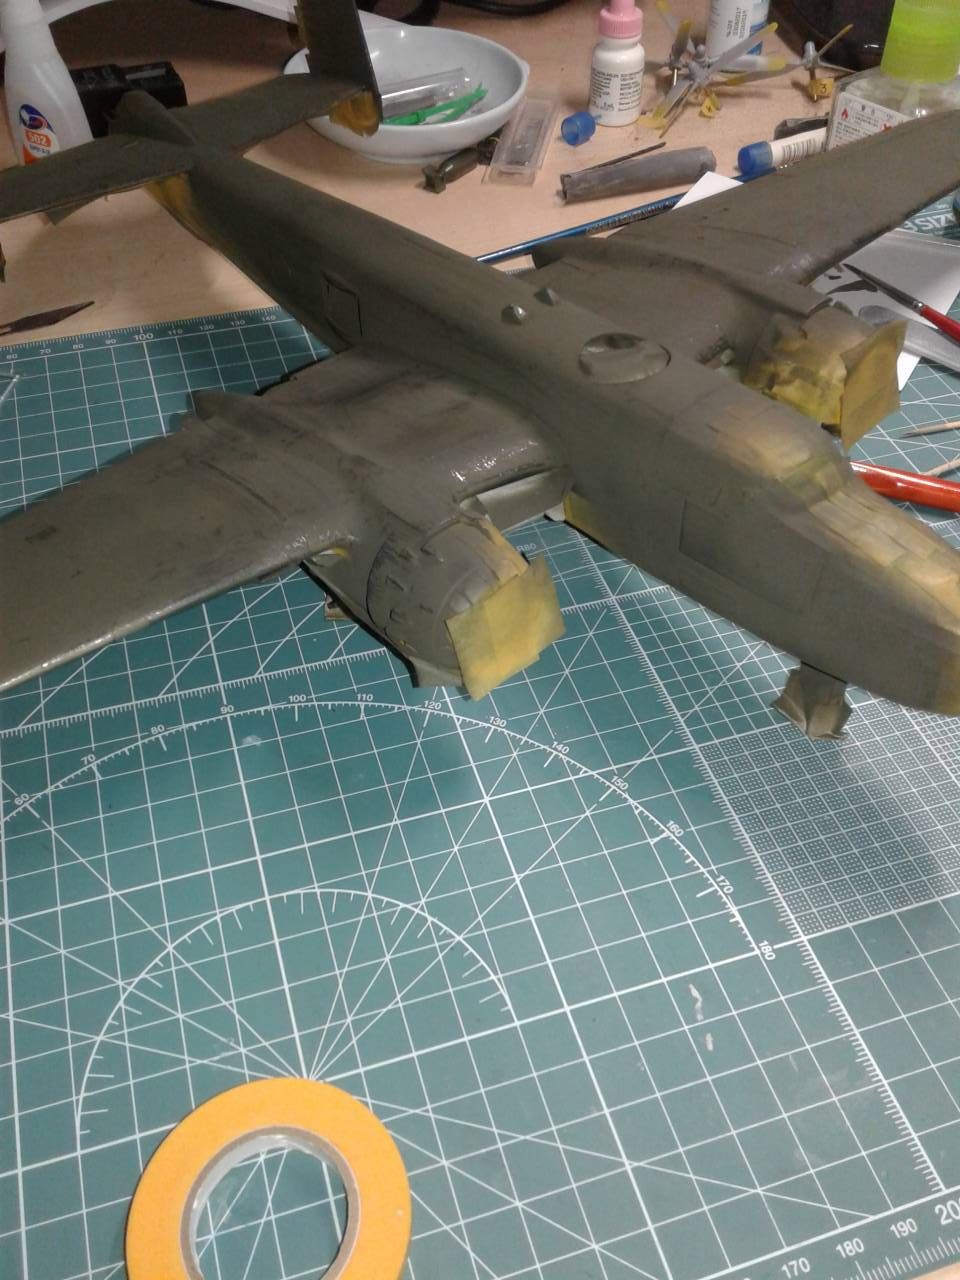
I then proceeded to chip off the green around the engine fronts, and various panel lines that would be in the prop wash, blowing any dirt and sand up from the airstrip. This was fun, but not the best chipping job I've experienced. I'm thinking that environmental issues are striking me again with the high humidity here. In the past, tape and toothpick yield a great chip job (think IJN late war paint jobs).

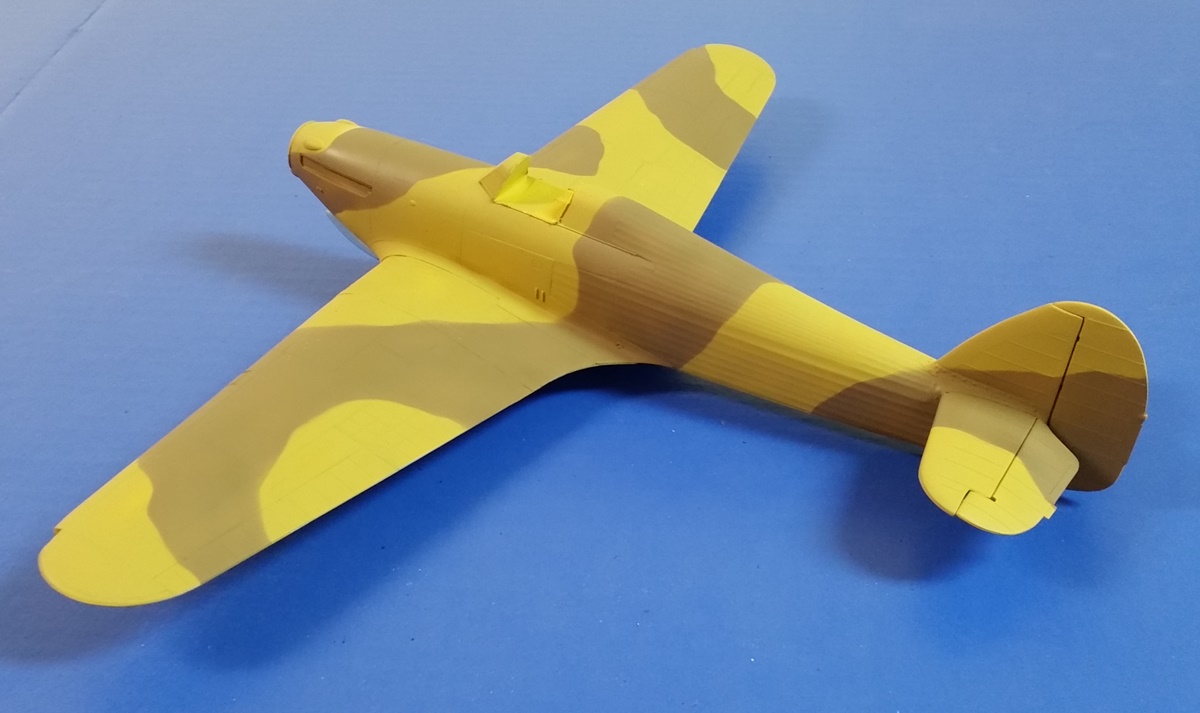
To my eyes, this green was not the RAF Dark Green I'd known. Having done some P-47's of the 56th, that used a very nice RAF dark green, and having a hangar queen still sporting some of the Model Master color, off to the mixing room I went! My version was 3 parts XF-81, and 1 part XF-70 Dark Green 2 (IJN). I diluted this 1:4 with Mr Thinner 400. I then airbrushed over the orginal paint job.

Satisfied with the color, I sprayed a mix of Future, cut 25% with IPA and a drop of dish soap, and glossed the bird.

Then came decaling. These decals are some of the best I've ever used. Worth 21 USD? No, but you get enough decals to do 2 birds, so really it's 10.50! Ha! Frugal to the end. Anyone wanting the leftovers, let me know, I can cut you a great deal on "Briefing Time".

Green and decaled!


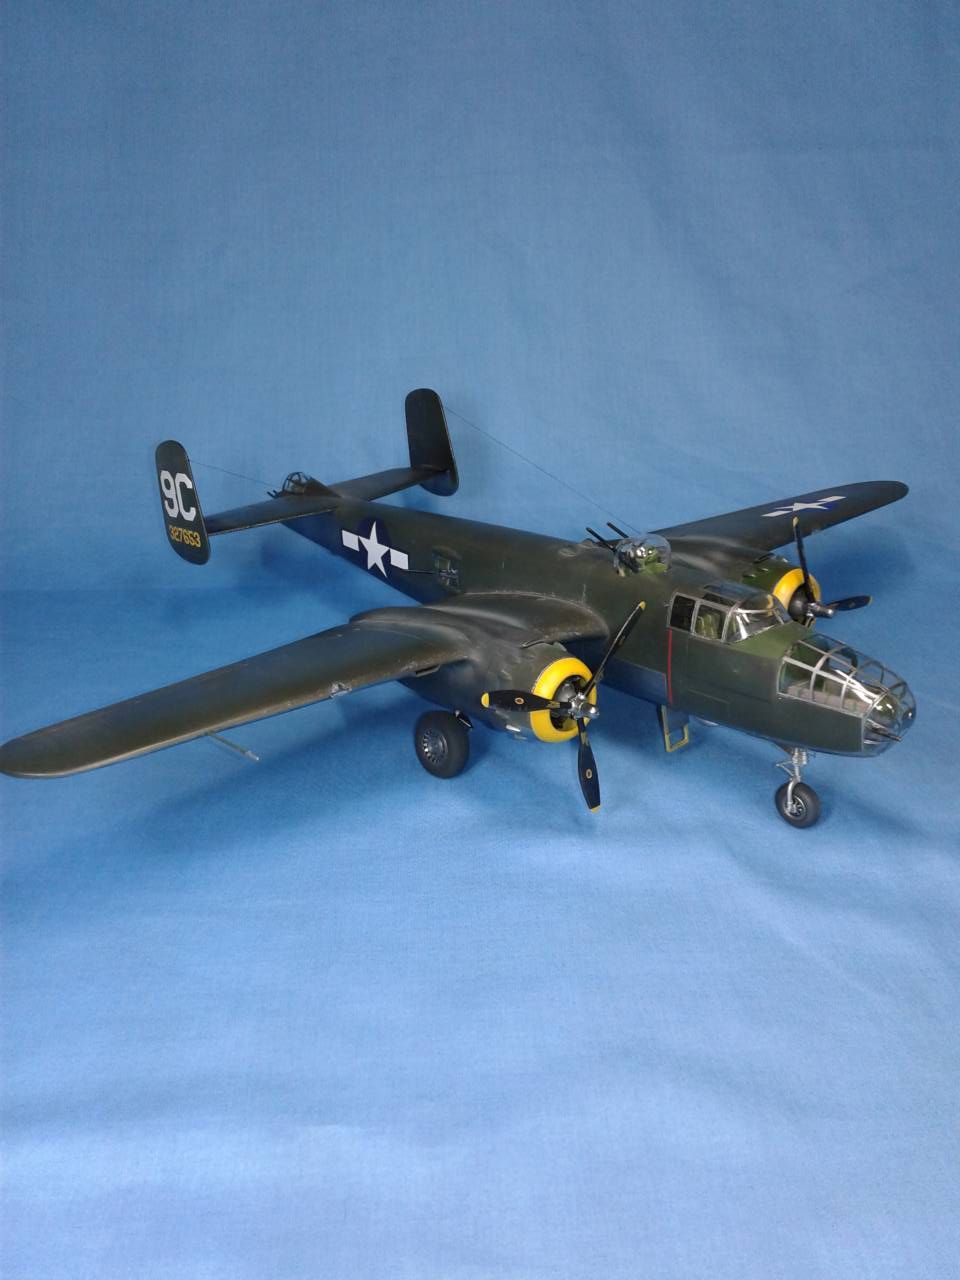
Finally, I added the little stuff, gear covers, dorsal turret, waist guns/glass, and the radio wires. Note: MTO allied aircraft have this feature, unlike their ETO counterparts. Based on the radio used. I used EZ-Line for this, securing the lines with some leftover "E" guitar string, drilled and plunked in with superglue. Most post paint weathering was done with Mr. Color 182 Flat Clear.

Finished! I think it depicts a well worn plane close to the color pictures I was able to find on the web.


To all of you participating in this historic event, I thank you! This has been a most pleasurable build for me, and I highly recommend this kit to anyone willing to do some basic filling. I also recommend getting Eduard's mask set. This is the first time using them and my only regret is not opening the package sooner! I masked the wheels, only to discover that they were included in the mask set. All in all, I'm pleased with the outcome of "Ruthie", and hope you enjoy her as much as I.

These historic group builds are in my opinion the best! Thank you Michael for the opportunity! To all my fellows out there, keep it up, great builds so far, and upload those finished pictures!


Have fun, I am!

John
MichaelSatin
Staff MemberCampaigns Administrator
AEROSCALE
_VISITCOMMUNITY
Colorado, United States
Joined: January 19, 2008
KitMaker: 3,909 posts
AeroScale: 2,904 posts
Posted: Saturday, October 20, 2018 - 05:33 AM UTC
Beautiful job, John!

We're in the middle of a bathroom remodel here in real life, but I'm hoping to get the dark earth on the 1/32 Fly Hurricane this weekend.

As John pointed out, don't forget to post your finished pics in campaign gallery!

Michael
Szmann
_VISITCOMMUNITY
Netherlands Antilles
Joined: September 02, 2014
KitMaker: 1,977 posts
AeroScale: 295 posts
Posted: Saturday, October 20, 2018 - 05:48 AM UTC
Great finish there, John! Congratulations for finishing the campaign in style!

Cheers!
Gabriel
john41492
#442
_VISITCOMMUNITY
Malacca, Malaysia
Joined: July 20, 2015
KitMaker: 363 posts
AeroScale: 335 posts
Posted: Saturday, October 20, 2018 - 06:05 AM UTC
Thanks Gabriel and Michael!

Michael, having just finished the bathroom, you have my sympathy! If it comes out half as nice as your models, then you win!!

Gabriel, the work you've done on the Stuka taught me a lot! Future is wonderful stuff no matter what it's called!

Oliver, I just got my second commission job, a matchbox VW mini-van. It may cover the cost of paint! Ha! Your work on the Styer taught me a few tricks! Thanks!

Here you take what you can get!
brekinapez
_VISITCOMMUNITY
Georgia, United States
Joined: July 26, 2013
KitMaker: 2,272 posts
AeroScale: 158 posts
Posted: Saturday, October 20, 2018 - 08:44 AM UTC

Quoted Text

I've got a little tube like this Daisy BBs Been using it for a few years, mostly for adding to paint bottle for stirring.


Are these corrosion-free? I have been wanting to get some but have only been finding the copper-colored BB's which prompted worries they would corrode and discolor my paint.
Bigrip74
_VISITCOMMUNITY
Texas, United States
Joined: February 22, 2008
KitMaker: 5,026 posts
AeroScale: 2,811 posts
Posted: Saturday, October 20, 2018 - 10:25 AM UTC
John, she is a KEEPER. NICE job on your B-25.

Bob
md72
#439
_VISITCOMMUNITY
Washington, United States
Joined: November 05, 2005
KitMaker: 4,950 posts
AeroScale: 3,192 posts
Posted: Saturday, October 20, 2018 - 10:29 AM UTC
Fair point. I've been doing it for a while and haven't seen any discoloration. The web page suggests that they're Zinc plated steel. The balls in this tube are silver, not like the brass colored ones I remember from my youth. Don't know if there's anything corrosive enough in our paints to eat up the Zinc. And Zinc oxide is white, so it might only serve to lighten up our paints rather than discolor it with red iron oxide from the underlying steel.
Hangelafette
_VISITCOMMUNITY
Pennsylvania, United States
Joined: April 22, 2012
KitMaker: 344 posts
AeroScale: 8 posts
Posted: Sunday, October 21, 2018 - 02:43 AM UTC
Hi all,

I am joining with a Tamiya's Dewoitine D.520.


Originally, I was hoping to build a french machine that tangled with the Americans over Morocco during Operation Torch, but I think that might exceed my paltry skills. So I will probably go with one of the Algerian or Syrian schemes.

Nate
MichaelSatin
Staff MemberCampaigns Administrator
AEROSCALE
_VISITCOMMUNITY
Colorado, United States
Joined: January 19, 2008
KitMaker: 3,909 posts
AeroScale: 2,904 posts
Posted: Sunday, October 21, 2018 - 03:20 AM UTC
Nate, Welcome, you're building a very nice kit there. Not sure why one that operated during Torch would be harder than one of the others, but they all qualify. Have at it, but don't forget the campaign only runs till the 1st of December.

Michael
b17-peter
#392
_VISITCOMMUNITY
Hessen, Germany
Joined: January 09, 2013
KitMaker: 696 posts
AeroScale: 608 posts
Posted: Sunday, October 21, 2018 - 08:34 AM UTC
...As a matter of taste, I don't like models with completely matte appearance - it "kills" the looks. Fom my collection, here you can see two dead flat models of which I was disappointed...
I let you "judge"
Cheers!
Gabriel [/quote]

Gabriel, I'm mostly with you here, I keep to paint most of my models with semi-gloss colours or at least give them a satin finish. It depends, of course
Gave my F-4C Phantom for the Vietnam campaign a rather matt finish and was quite content with the appearance of that model.
Well, beauty lies in the eye of the beholder...
b17-peter
#392
_VISITCOMMUNITY
Hessen, Germany
Joined: January 09, 2013
KitMaker: 696 posts
AeroScale: 608 posts
Posted: Sunday, October 21, 2018 - 08:44 AM UTC
John - What a beautiful Mitchell! Lovely nose-art
Well done, congrats
Lakota
#123
_VISITCOMMUNITY
New Mexico, United States
Joined: November 17, 2008
KitMaker: 1,202 posts
AeroScale: 292 posts
Posted: Sunday, October 21, 2018 - 09:31 AM UTC
John-That's a really beautiful B-25, love the nose art.
Take care,
Don "Lakota"
MichaelSatin
Staff MemberCampaigns Administrator
AEROSCALE
_VISITCOMMUNITY
Colorado, United States
Joined: January 19, 2008
KitMaker: 3,909 posts
AeroScale: 2,904 posts
Posted: Sunday, October 21, 2018 - 11:05 AM UTC
Finally getting somewhere on the Fly Hurricane IID.

Middlestone masked off and Dark Earth applied:


Masking removed:


Now we're talking. I may get this one done after all!

Michael
b17-peter
#392
_VISITCOMMUNITY
Hessen, Germany
Joined: January 09, 2013
KitMaker: 696 posts
AeroScale: 608 posts
Posted: Sunday, October 21, 2018 - 08:06 PM UTC
@Michael - Hurricane looks good so far, keep going!
b17-peter
#392
_VISITCOMMUNITY
Hessen, Germany
Joined: January 09, 2013
KitMaker: 696 posts
AeroScale: 608 posts
Posted: Tuesday, October 23, 2018 - 05:13 PM UTC
Hi mates,
I can declare my B-25J ready for ops
Pictures for the gallery will be taken soon.


b17-peter
#392
_VISITCOMMUNITY
Hessen, Germany
Joined: January 09, 2013
KitMaker: 696 posts
AeroScale: 608 posts
Posted: Wednesday, October 24, 2018 - 06:29 AM UTC
Found another drawing today with slightly different color markings on the engine nacelles. So it's back to the paintshop for final retouching

https://i0.wp.com/www.azmodel.cz/wp-content/uploads/2018/03/AZ7586-camo.jpg?zoom=1.25&fit=1152%2C648
see AZmodel(CZ)
brekinapez
_VISITCOMMUNITY
Georgia, United States
Joined: July 26, 2013
KitMaker: 2,272 posts
AeroScale: 158 posts
Posted: Thursday, October 25, 2018 - 03:09 PM UTC
Since we are getting close I suppose I should at least post my starting pic:

b17-peter
#392
_VISITCOMMUNITY
Hessen, Germany
Joined: January 09, 2013
KitMaker: 696 posts
AeroScale: 608 posts
Posted: Sunday, October 28, 2018 - 12:22 AM UTC

Well, the job is done! My Mitchell is ready for the Pacific

Hirohito, watch out!
A few other pictures are already in the gallery, thanks again, Michael, for another fine campaign!
Mates, I hope many will finish!
john41492
#442
_VISITCOMMUNITY
Malacca, Malaysia
Joined: July 20, 2015
KitMaker: 363 posts
AeroScale: 335 posts
Posted: Sunday, October 28, 2018 - 02:09 AM UTC
Nice finish Peter!

Looks like there's only about one way to mold a B-25. Your parts looked just like mine, though a bit smaller, and much better!

Congrats!
MichaelSatin
Staff MemberCampaigns Administrator
AEROSCALE
_VISITCOMMUNITY
Colorado, United States
Joined: January 19, 2008
KitMaker: 3,909 posts
AeroScale: 2,904 posts
Posted: Sunday, October 28, 2018 - 12:37 PM UTC
Very nice, Peter!

Got the decals on the Fly Hurricane IID:


And just like that, up on it's gear!


I'm gonna get this one done!

Michael