Air Campaigns
Want to start or join a group build? This is where to start.
OFFICIAL: Aluminium Cans or Quicksilver
john41492
#442
_VISITCOMMUNITY
Malacca, Malaysia
Joined: July 20, 2015
KitMaker: 363 posts
AeroScale: 335 posts
Posted: Monday, June 25, 2018 - 01:16 AM UTC
HI all,

Just a quick update! I got the cockpit done, and was able to close the fuselage, though clean-up will take a bit. I believe that when I deviated from the instructions I may have oopsed! I put the rear decking on to each side of the fuselage before mating the two halves. Needless to say there is a sizable gap.

On the brighter side, the cockpit looks ok, so I'll be doing this one with the canopy open.


I'll fill you all in on the next post.


Enjoy,

John
b17-peter
#392
_VISITCOMMUNITY
Hessen, Germany
Joined: January 09, 2013
KitMaker: 696 posts
AeroScale: 608 posts
Posted: Monday, June 25, 2018 - 06:50 AM UTC
@John - good progress, good luck!

My Tony went together without fitting problems and better still - without need for any putty
Now in the paintshop

Cheers Peter
Szmann
_VISITCOMMUNITY
Netherlands Antilles
Joined: September 02, 2014
KitMaker: 1,977 posts
AeroScale: 295 posts
Posted: Monday, June 25, 2018 - 07:27 AM UTC
Peter, I'm glad to see your build progressing so smoothly.


Quoted Text


My Tony went together without fitting problems and better still - without need for any putty


Your joy is my joy, because I just picked up my Tony from the shipping company. It's nowhere in the close future plans, but is reassuring to know I have a shake-n-bake kit for whenever needed.

I'm waiting to see your final result.

Cheers!
Gabriel
RhinoSpit
_VISITCOMMUNITY
Bas-Rhin, France
Joined: September 22, 2016
KitMaker: 224 posts
AeroScale: 191 posts
Posted: Monday, June 25, 2018 - 08:41 AM UTC
I submit for this campaign a french "bidon" (french word for can) who flew under israeli colors during the suez campaign and the 6 day war: The Marcel Dassault 450 Ouragan.

MD450-1

it'll depict the ouragan 26 wearing an all metallic color with a magnificent sharkmouth.

After 30 minutes of hardwork (no i'm kidding), the cockpit tube is glued and painted in XF69 NATO Black and aluminium.

MD450-2
stoney
_VISITCOMMUNITY
British Columbia, Canada
Joined: October 16, 2006
KitMaker: 480 posts
AeroScale: 67 posts
Posted: Friday, June 29, 2018 - 02:35 AM UTC


Hey guys, Ive cleared the bench and am in at the tail end with this P-47N, going to use a mix of the kit markings and masks for the stars and bars. Some great looking builds here so far!
b17-peter
#392
_VISITCOMMUNITY
Hessen, Germany
Joined: January 09, 2013
KitMaker: 696 posts
AeroScale: 608 posts
Posted: Friday, June 29, 2018 - 02:57 AM UTC
@ Eric - Welcome and good luck!

My Tony is going on smoothly, but I forgot to take a picture of the nicely detailed cockpit before I closed it with the(perfect fitting!) canopy


I'm away from home this weekend, so starting with decals next week
Have fun!
stoney
_VISITCOMMUNITY
British Columbia, Canada
Joined: October 16, 2006
KitMaker: 480 posts
AeroScale: 67 posts
Posted: Friday, June 29, 2018 - 01:53 PM UTC


the academy cockpit is pretty weak compared to the Tamiya one, but thats no surprise. I decided to do a quick hit to improve it instead of adding an entire resin replacement since it costs the same as the entire kit. Used fly tying lead wire wrapped around some copper tube to create a better O2 hose and added the always fantastic Ultracast seat. A black base, some Dark green, some detail painting, dry brushing on the instrument panel and a hit of Krystal Klear for glass, some spare cockpit placard decals and its looking passable.

b17-peter
#392
_VISITCOMMUNITY
Hessen, Germany
Joined: January 09, 2013
KitMaker: 696 posts
AeroScale: 608 posts
Posted: Sunday, July 01, 2018 - 10:48 PM UTC
@Eric - Cockpit looks cool, especially the selfmade hose!
b17-peter
#392
_VISITCOMMUNITY
Hessen, Germany
Joined: January 09, 2013
KitMaker: 696 posts
AeroScale: 608 posts
Posted: Wednesday, July 04, 2018 - 06:42 PM UTC
Hi there,

last night I finished my Ki-61 Id Hien, a very pleasant kit to build! Pictures for the gallery will follow.


Happy modeling and good luck to all who are still glueing and painting
Peter
stoney
_VISITCOMMUNITY
British Columbia, Canada
Joined: October 16, 2006
KitMaker: 480 posts
AeroScale: 67 posts
Posted: Friday, July 06, 2018 - 06:10 AM UTC
Thanks Peter, the academy cockpit is pretty sparse, barren compared to the Tamiya kit, a little elbow grease and once its closed up it does the trick. I should have added some wires to the back side of the instrument panel though as its visible once closed up (barely)
Your little Tony looks great, 1/72 is a little small for my sanity and sausage fingers !

[IMG]http://i346.photobucket.com/albums/p424/Gwaii2018/IMG_6168_zpsaxgudziu.jpg" BORDER="0">[/img]

Grinding along, Its fill, sand, spray, fill, sand, polish, spray, sand. Fit on the wings was good, the nose however was pretty lacking and took a few sessions to really make it disappear under the Alclad, but thats what we're all here for right? riiiiight?

[IMG]http://i346.photobucket.com/albums/p424/Gwaii2018/IMG_6176_zpsbqotubn5.jpg" BORDER="0">[/img]

[img[/img]
Removed by original poster on 07/06/18 - 18:50:54 (GMT).
stoney
_VISITCOMMUNITY
British Columbia, Canada
Joined: October 16, 2006
KitMaker: 480 posts
AeroScale: 67 posts
Posted: Saturday, July 07, 2018 - 07:02 AM UTC
[img[/img]

And it comes to a grinding halt, Academy decals strike again. Polished the alclad, set them with micro-set, gave a little micro-sol and again after drying a hit of Solvaset to try to help the ridiculously thick decals snug down at least a bit. Im going to finish up with just the stars and bars and general stencils lifted from a Tamiya kit and wait on the excellent Kagero book/decals I've got coming to personalize it. For the sake of the group build ill finish it as a generic P-47N. So if you're thinking of trying one of the Academy jugs, don't. The nearly equally priced Tamiya kit is so much better in every regard theres just no reason to mess with these things.
b17-peter
#392
_VISITCOMMUNITY
Hessen, Germany
Joined: January 09, 2013
KitMaker: 696 posts
AeroScale: 608 posts
Posted: Sunday, July 08, 2018 - 02:28 AM UTC
@Eric - That looks not amusing, mate! I wish you a good finish with your other decals. Except that, it's a beautiful build
b17-peter
#392
_VISITCOMMUNITY
Hessen, Germany
Joined: January 09, 2013
KitMaker: 696 posts
AeroScale: 608 posts
Posted: Sunday, July 08, 2018 - 02:32 AM UTC
Got the pictures into the gallery today. Here's another one

Again, it is a recommendable kit, well, it's a Tamiya.
Anything went smooth and without any fitting issues.
I'm looking forward to build their Mustang and Corsair, both still on my shelf...and the F-16!

Thanks for the fine campaign and good luck to all!
Peter
john41492
#442
_VISITCOMMUNITY
Malacca, Malaysia
Joined: July 20, 2015
KitMaker: 363 posts
AeroScale: 335 posts
Posted: Monday, July 09, 2018 - 03:04 AM UTC
Hi all,

Peter good to see you got the Tony done! 1/72nd isn't a scale that I do well in, good job.

Eric, I feel your pain. Academy is not known for their decals, much less their fit. You've done an admirable job, and if your not looking to compete you can always lay some future down under the decals, press it out, hit with Micro Sol, cover with future again. I've had good results with this method. I'm getting ready to do my F-16, and have replacement decals for all but the big blue bird on the underside. Not looking forward to that at all!

As a note from a big fan of P-47's the Monogram (Promodeler) or Academy kits for the N variant are the only option. Both are difficult builds to say the least. You're correct that the Tamiya kit is the best one! For any other variant, they do a fair job on the M, with correct engine and magneto's. It's a shame they didn't add another sprue to cover the N variant.

It's way past time for me to give an update, and to say the least, the outcome is questionable. I'm having a go with this! Admittedly, I diverged from the instructions, and glued the rear decking on first instead of gluing the fuselage together. I'm not alone in this diversion so I didn't feel too bad. I also glued the flaps in the closed position. From past experience this is a good call.

Still something didn't feel right. Seams were all over, that which in the past that was right wasn't. I was confused and in a quandary. Rosie told that I was overthinking things. I ignored this advise. I did, however, think back to when things were right. Slowly, it came. I'd purchased the Tamiya glue 5 years ago, and as modeling goes, not been so good at closing the lid. That was my guess. So my mind gears continued to grind.

This morning before leaving for work, Rosie said "Your expectations are too high, lower them a bit." Best modeling advice I've gotten to date. I chose not to dwell on the glue issue and tossed the 5 year old bottle. Went back to my seam roots of using superglue and after two, 10 minute sessions, the offending seam was closed.


john41492
#442
_VISITCOMMUNITY
Malacca, Malaysia
Joined: July 20, 2015
KitMaker: 363 posts
AeroScale: 335 posts
Posted: Monday, July 09, 2018 - 04:17 AM UTC


Ugh, sorry.

John
RhinoSpit
_VISITCOMMUNITY
Bas-Rhin, France
Joined: September 22, 2016
KitMaker: 224 posts
AeroScale: 191 posts
Posted: Wednesday, July 11, 2018 - 05:08 AM UTC
Big update on my Ouragan.

As you see on the picture, the build was very simple and straightforward.

I've sprayed 2 layers of alclad II gloss black primer sunday and tonight, and here is the result:

MD450-4


MD450-3

next step: aluminium !
stoney
_VISITCOMMUNITY
British Columbia, Canada
Joined: October 16, 2006
KitMaker: 480 posts
AeroScale: 67 posts
Posted: Tuesday, July 17, 2018 - 10:17 AM UTC
Franck what a cool looking aircraft, i bet it'll look amazing in its NMF skin. I think I recall seeing one in 3 tone cammo with a mean set of jaws painted on it years ago.
John, thanks for the support, your P-47D is coming along nicely, sorry to hear you were sabotaged by poorly performing materials (a pain I know as well!) Hopefully the rest is smooth sailing for you. As for the N model it was a toss up between Academy and pro modeller, neither really winning me over, I went with this kit due to the markings, and we know how well that went. Turns out Aeromaster make a set with this aircraft so eventually it'll have its nose art done properly.
Quick update as I grind towards a finish, I tried Makar Masks for the first time and was reasonably impressed, fiddly but I love how the stars and bars look sprayed on instead of chasing a decal.

 photo IMG_6224_zpsti1m6o3n.png " BORDER="0">

 photo IMG_6225_zpsogadniub.png" BORDER="0">
john41492
#442
_VISITCOMMUNITY
Malacca, Malaysia
Joined: July 20, 2015
KitMaker: 363 posts
AeroScale: 335 posts
Posted: Thursday, July 19, 2018 - 02:35 AM UTC
Hi all,

Franck, I really like how your build is going! There's much to be said about a jet black plane (pun intended!). Looking very good.

Eric, I really like what you've done. I have the Pro-Modeler, from what I read the lesser of two so-so attempts. Having recently done the Montex insignia, I'd say yours turned out much better. Sharp and clean. I'll be trying again, like you say, the painted version is better than chasing one around!

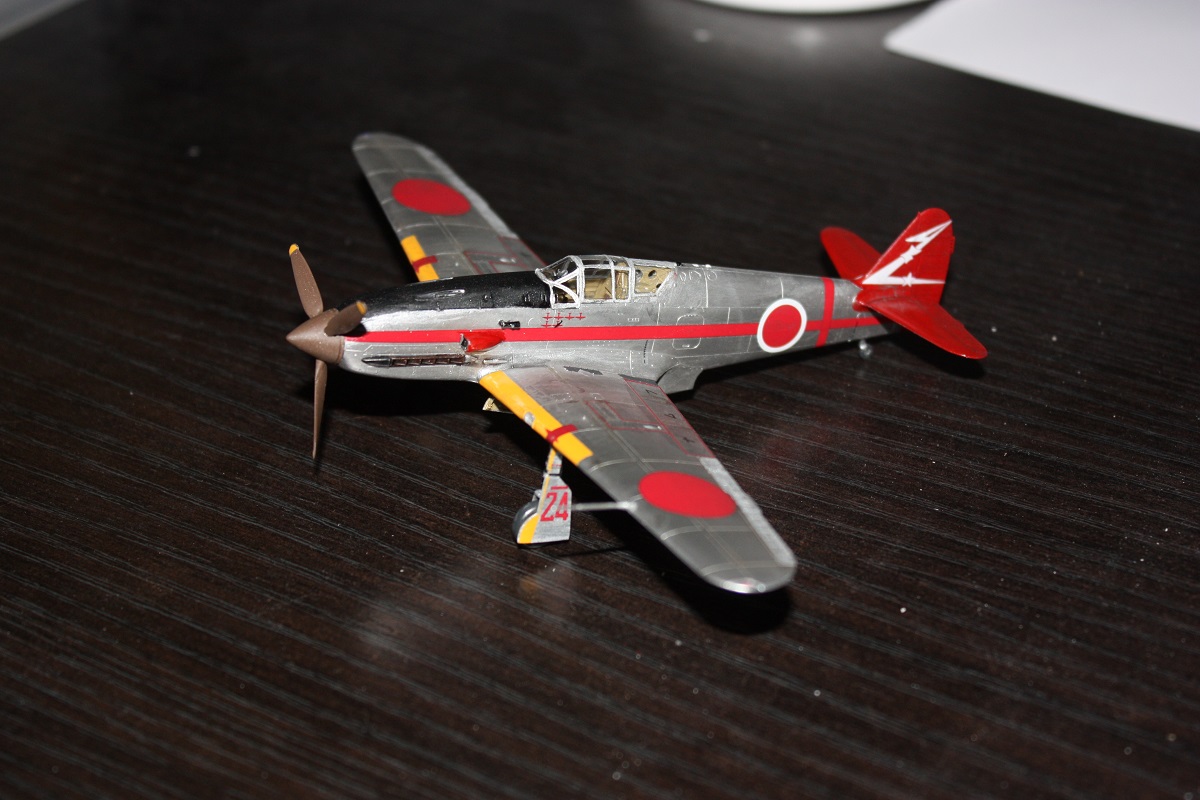
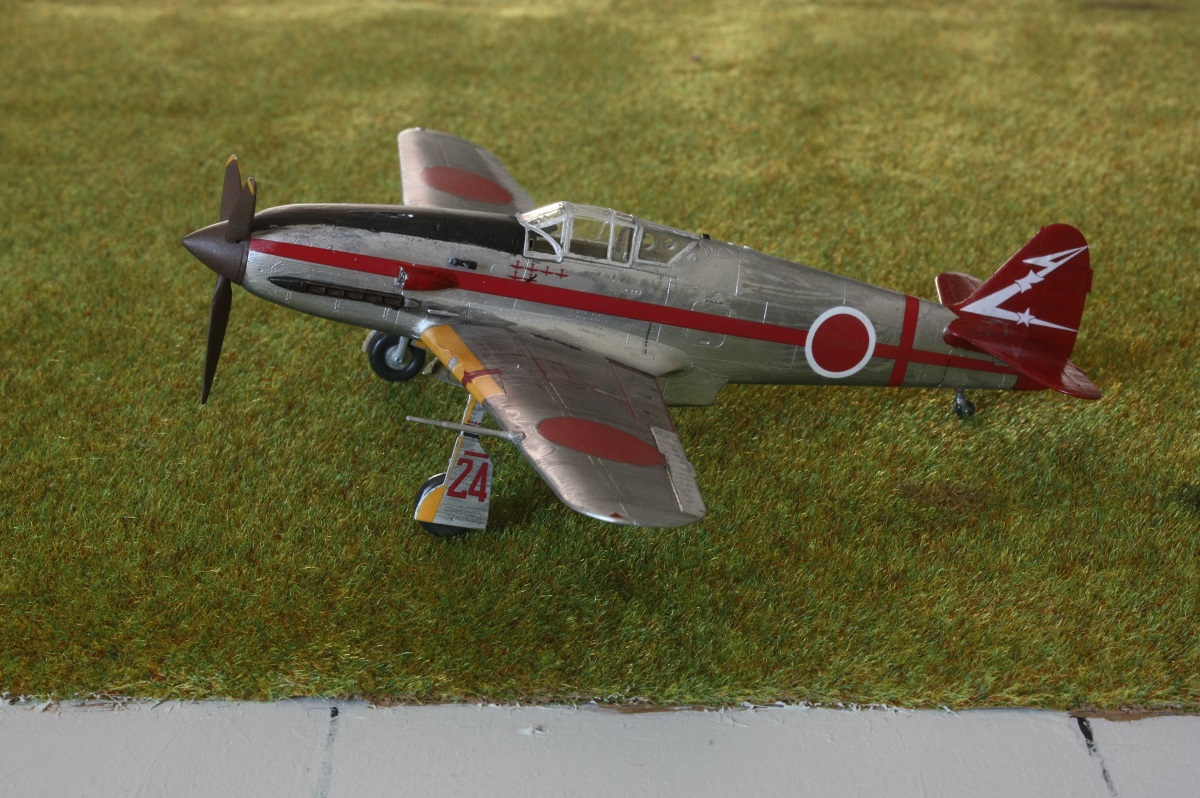
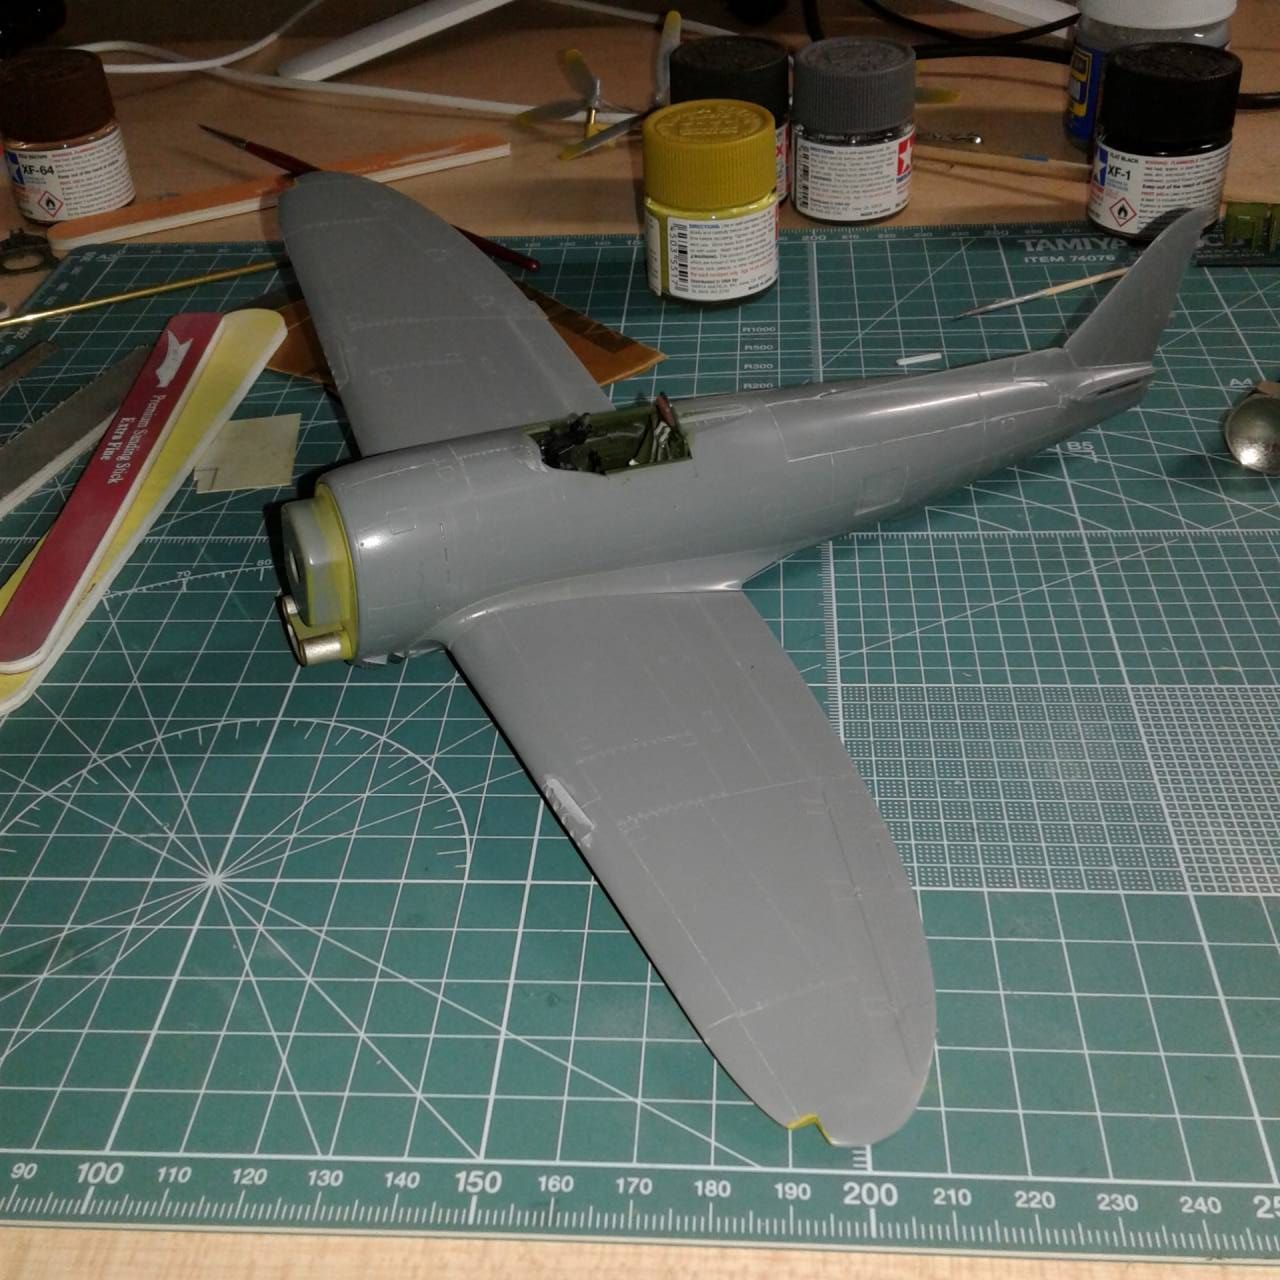
Time for an update. I've been in and out of a funk for a bit, and this build was to be an easy breezy waltz in the park. Reality always rears it's head, and I had some hic-ups. I'm glad that the glue issue is resolved, and after much self-inflicted work, things took shape. Today, I finally got to lay down the black base coat (Tamiya gloss).


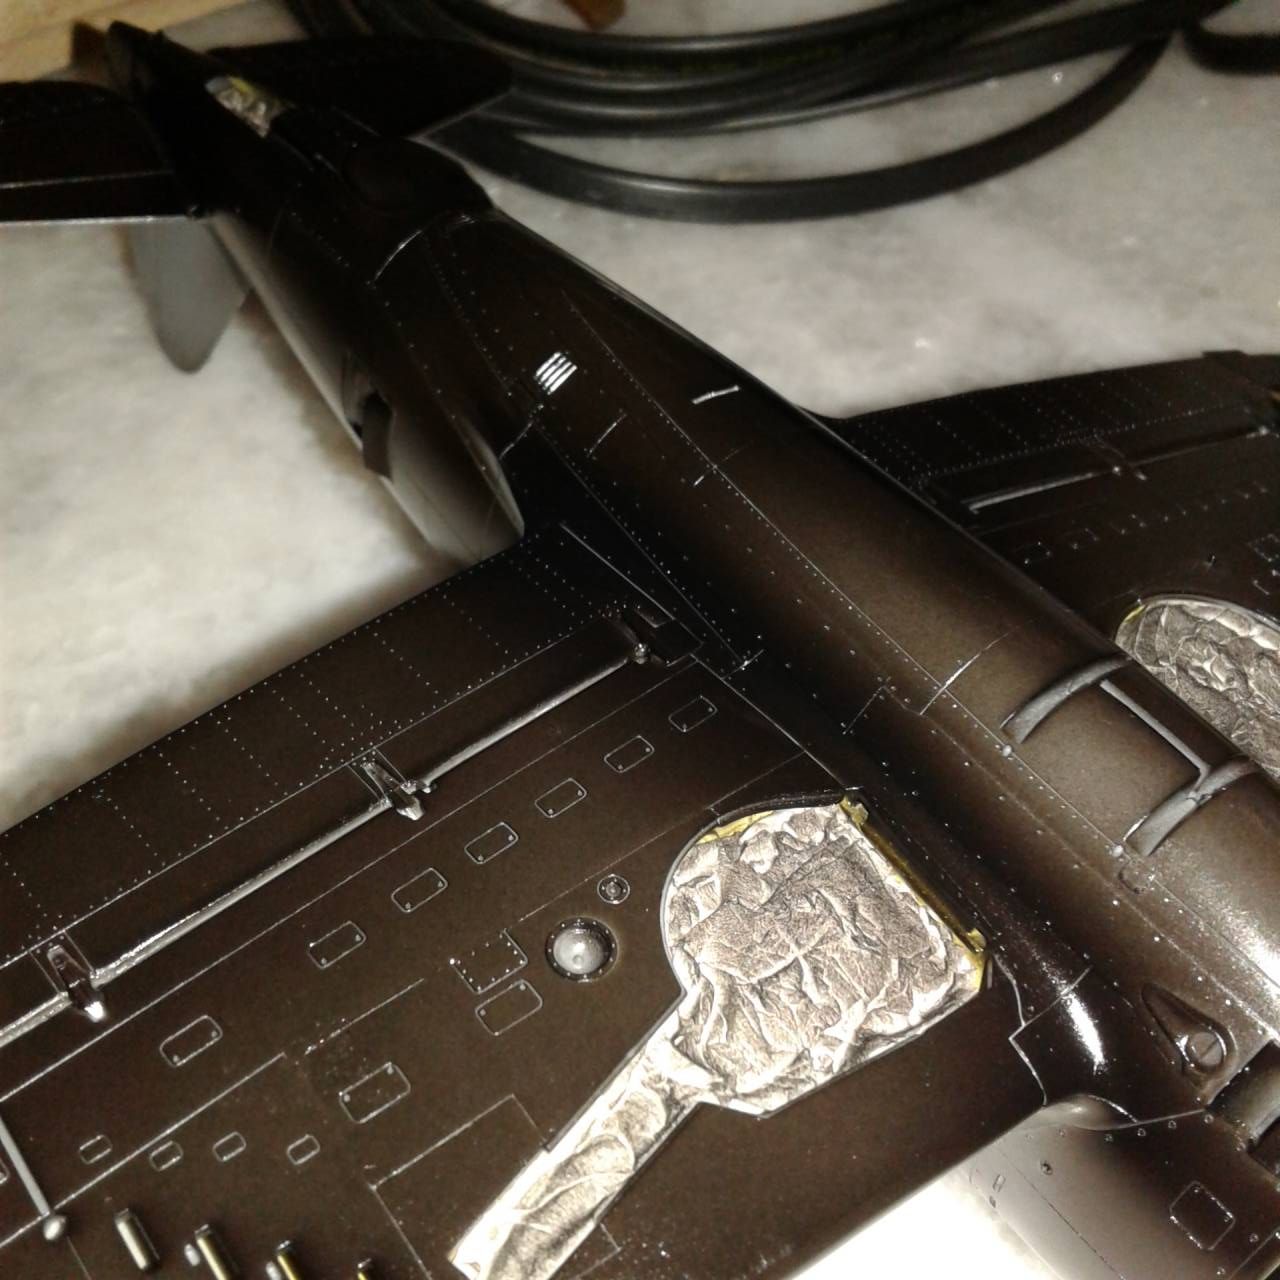
I was exceptionally surprised, given my half baked effort. This kit is as good as written about. I did work a bit longer due to NMF, with sanding and polishing, but still! I was "Wowed".
RhinoSpit
_VISITCOMMUNITY
Bas-Rhin, France
Joined: September 22, 2016
KitMaker: 224 posts
AeroScale: 191 posts
Posted: Thursday, July 19, 2018 - 08:00 AM UTC
Some update! i've opted for a full aluminium finish with a magnificent sharkmouth. After a layer of alclad II, a lot of drying time and an hour of decalling, my israeli shark see the finish line:


Tonight, the plan was to sprayed the matt varnish, but due to the very warm weather i will spray it sunday or monday, it depends of my motivation. Sometimes, software engineer can be stressful, especially during the holiday.
MichaelSatin
Staff MemberCampaigns Administrator
AEROSCALE
_VISITCOMMUNITY
Colorado, United States
Joined: January 19, 2008
KitMaker: 3,909 posts
AeroScale: 2,904 posts
Posted: Sunday, July 22, 2018 - 12:48 AM UTC
This campaign is nearly over and still doesn't have a ribbon. Anyone have any ideas?

Michael
Torpon
_VISITCOMMUNITY
Spain / España
Joined: February 28, 2012
KitMaker: 103 posts
AeroScale: 102 posts
Posted: Sunday, July 22, 2018 - 02:11 AM UTC
Michael,

What about silver with some panel lines and rivets in black?

I will be happy to help but I don't even know the format.

Carlos
Szmann
_VISITCOMMUNITY
Netherlands Antilles
Joined: September 02, 2014
KitMaker: 1,977 posts
AeroScale: 295 posts
Posted: Sunday, July 22, 2018 - 02:26 AM UTC

Quoted Text

Michael,

What about silver with some panel lines and rivets in black?

I will be happy to help but I don't even know the format.

Carlos


Michael, what is the size in pixels the badge must have?
md72
#439
_VISITCOMMUNITY
Washington, United States
Joined: November 05, 2005
KitMaker: 4,950 posts
AeroScale: 3,192 posts
Posted: Sunday, July 22, 2018 - 03:19 AM UTC

Quoted Text

This campaign is nearly over


Ouch, I'm not nearly over this campaign.


Guess it's time to start begging for more time.
MichaelSatin
Staff MemberCampaigns Administrator
AEROSCALE
_VISITCOMMUNITY
Colorado, United States
Joined: January 19, 2008
KitMaker: 3,909 posts
AeroScale: 2,904 posts
Posted: Sunday, July 22, 2018 - 05:33 AM UTC

Quoted Text


Quoted Text

Michael,

What about silver with some panel lines and rivets in black?

I will be happy to help but I don't even know the format.

Carlos


Michael, what is the size in pixels the badge must have?


The ribbon has to be 20 x 50 pixels and in .gif format. When I make one I generally do it as 200 x 500 first, then resize. Easier to work with.

Michael