

Rowan,
My workbench and modeling room is pretty neat, but I loose things all the time and sometimes I actually find them after the build is done and in the books. But sometimes I never do.
To my way of thinking it's your mental organization that's the most important thing, and mine is pretty poor these days.
Joel
World War II
Discuss WWII and the era directly before and after the war from 1935-1949.
Discuss WWII and the era directly before and after the war from 1935-1949.
Hosted by Rowan Baylis
FRROM 1:32 I.A.R.-80A
Joel_W

Joined: December 04, 2010
KitMaker: 11,666 posts
AeroScale: 7,410 posts
Posted: Wednesday, August 08, 2018 - 08:07 AM UTC


Merlin

#017


Joined: June 11, 2003
KitMaker: 17,582 posts
AeroScale: 12,795 posts

Posted: Thursday, August 09, 2018 - 09:14 AM UTC
Hi Joel
I'm tempting Fate more than usual this year by having multiple ongoing builds running simultaneously on separate workbenches to try to meet the deadline for my book. That inevitably means moving things around a lot - and the one thing I've never been good at is "putting things back where they belong" when I've finished with them.
Most years I have a major tidy-up in my workroom, but I don't know if it would do more harm than good just now. I think I need to reach a stage where I can afford to take a proper breather - and the tidy-up will form a natural break between projects.
The only problem then will be (and I know this only too well after previous "spring cleans") - instead of not being able to find one or two things that have been mislaid or covered up, I won't be able to find anything, because I won't remember where I tidied it away!
Back to the build: fingers crossed, the lead wire will arrive from Poland tomorrow or Saturday. I've got the day off work on Sunday, so I think I'm good to get the cockpit finished then...
I've had a couple of mishaps with the infamous "carpet monster" - slightly odd, seeing as there's lino on the floor in my workshop!
 - but the details of that can wait until my next post with, hopefully!, shots of a pretty much finished cockpit.
All the best
Rowan
I'm tempting Fate more than usual this year by having multiple ongoing builds running simultaneously on separate workbenches to try to meet the deadline for my book. That inevitably means moving things around a lot - and the one thing I've never been good at is "putting things back where they belong" when I've finished with them.
Most years I have a major tidy-up in my workroom, but I don't know if it would do more harm than good just now. I think I need to reach a stage where I can afford to take a proper breather - and the tidy-up will form a natural break between projects.
The only problem then will be (and I know this only too well after previous "spring cleans") - instead of not being able to find one or two things that have been mislaid or covered up, I won't be able to find anything, because I won't remember where I tidied it away!
Back to the build: fingers crossed, the lead wire will arrive from Poland tomorrow or Saturday. I've got the day off work on Sunday, so I think I'm good to get the cockpit finished then...
I've had a couple of mishaps with the infamous "carpet monster" - slightly odd, seeing as there's lino on the floor in my workshop!
- but the details of that can wait until my next post with, hopefully!, shots of a pretty much finished cockpit.All the best
Rowan

Joel_W
Joined: December 04, 2010
KitMaker: 11,666 posts
AeroScale: 7,410 posts
Posted: Friday, August 10, 2018 - 07:20 AM UTC
Quoted Text
Hi Joel
I'm tempting Fate more than usual this year by having multiple ongoing builds running simultaneously on separate workbenches to try to meet the deadline for my book. That inevitably means moving things around a lot - and the one thing I've never been good at is "putting things back where they belong" when I've finished with them.
Most years I have a major tidy-up in my workroom, but I don't know if it would do more harm than good just now. I think I need to reach a stage where I can afford to take a proper breather - and the tidy-up will form a natural break between projects.
The only problem then will be (and I know this only too well after previous "spring cleans") - instead of not being able to find one or two things that have been mislaid or covered up, I won't be able to find anything, because I won't remember where I tidied it away!
Back to the build: fingers crossed, the lead wire will arrive from Poland tomorrow or Saturday. I've got the day off work on Sunday, so I think I'm good to get the cockpit finished then...
I've had a couple of mishaps with the infamous "carpet monster" - slightly odd, seeing as there's lino on the floor in my workshop!
All the best
Rowan
Rowan,
Multiple builds should prove to be a certain test for your organizational skills
 As for the carpet monster, he or she as I've never been able to figure out which it is, doesn't care about what's on the floor, the end game is always the same.
 Joel
Merlin
#017
Joined: June 11, 2003
KitMaker: 17,582 posts
AeroScale: 12,795 posts
Posted: Tuesday, August 14, 2018 - 05:42 AM UTC
Hi again
Well, my lead wire arrived from Poland today - so my one week's delay has turned into nearly two, because I won't have a chance to get to the workbench until Friday. That should teach me to keep my workshop tidier in future - but it probably won't, if I'm honest...
All the best
Rowan
Well, my lead wire arrived from Poland today - so my one week's delay has turned into nearly two, because I won't have a chance to get to the workbench until Friday. That should teach me to keep my workshop tidier in future - but it probably won't, if I'm honest...
All the best
Rowan
Joel_W
Joined: December 04, 2010
KitMaker: 11,666 posts
AeroScale: 7,410 posts
Posted: Wednesday, August 15, 2018 - 12:35 AM UTC
Quoted Text
Hi again
Well, my lead wire arrived from Poland today - so my one week's delay has turned into nearly two, because I won't have a chance to get to the workbench until Friday. That should teach me to keep my workshop tidier in future - but it probably won't, if I'm honest...
All the best
Rowan
Rowan,
Look at it this way. At least you have the wire when you will need it for your next build session. I'd say it's a win situation.
Joel
Merlin
#017
Joined: June 11, 2003
KitMaker: 17,582 posts
AeroScale: 12,795 posts
Posted: Wednesday, August 15, 2018 - 08:12 AM UTC
Cheers Joel
I'm really looking forward to getting underway again.
I've just had a look at the list of reviews we have on Kitmaker and there's no sign of Plus Model's Lead Wire. I've got to say, since discovered it years ago, I find it indispensable - there's nothing else quite like that I've ever come across. It comes in a variety of sizes from 0.2mm up to 1.0mm and its flexibility is amazing and it just does jobs that nothing else in my arsenal of materials can tackle - hence my dismay at having mislaid my stash of the small diameter stuff to tackle some cabling in the cockpit of the IAR!
All the best
Rowan
Merlin
#017
Joined: June 11, 2003
KitMaker: 17,582 posts
AeroScale: 12,795 posts
Posted: Sunday, August 19, 2018 - 03:22 AM UTC
Hi again
Well, I've added a few cables for the instruments and leading from the control column. The colour of the ones behind the instrument panel is just a guess because I couldn't find a photo of the real thing - as is whether they threaded down through the holes behind them - but they add a touch of interest in an empty area.:
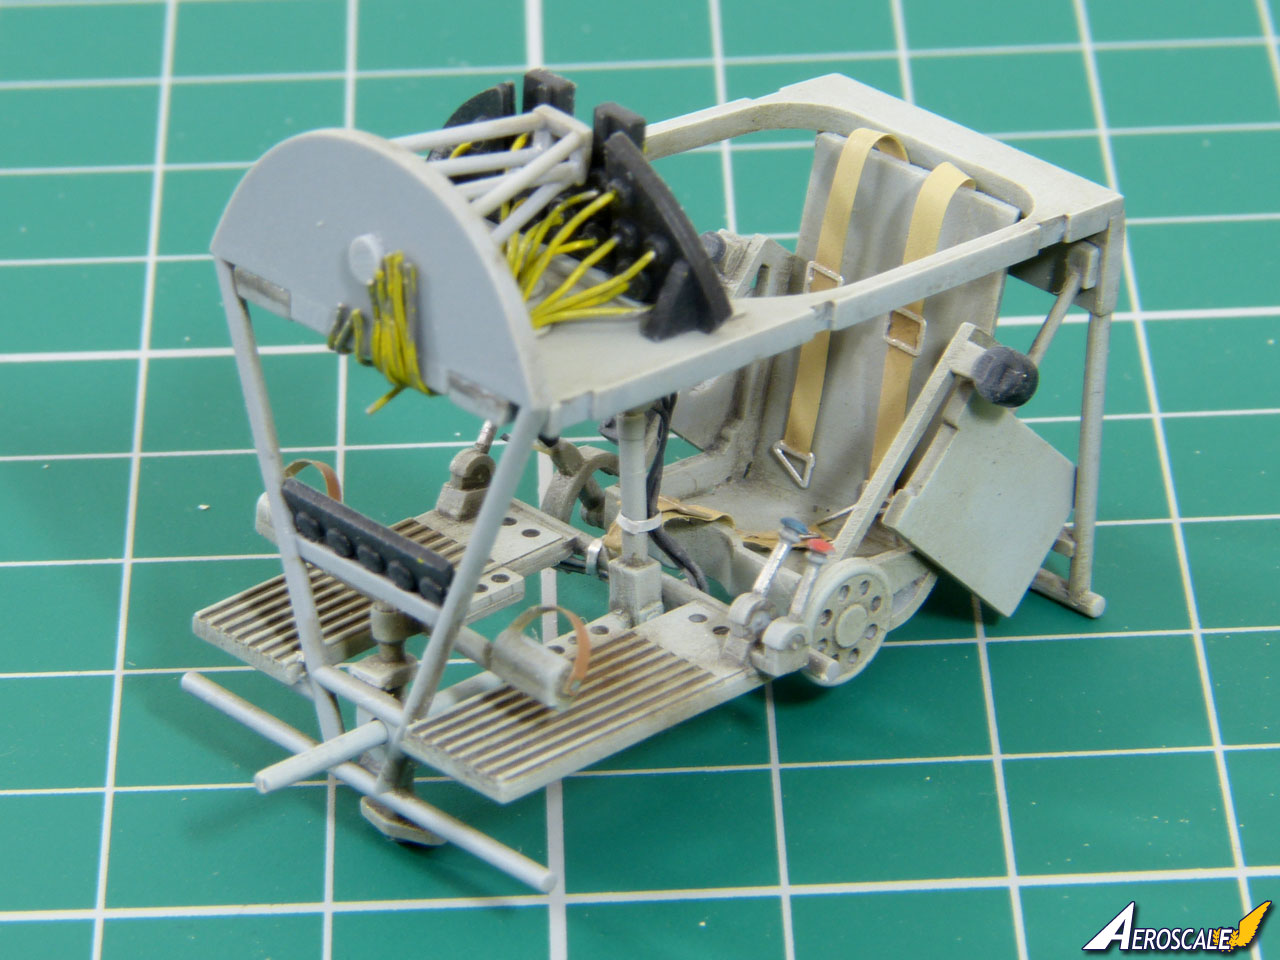
The main thing is... the cockpit fits very neatly into the fuselage:
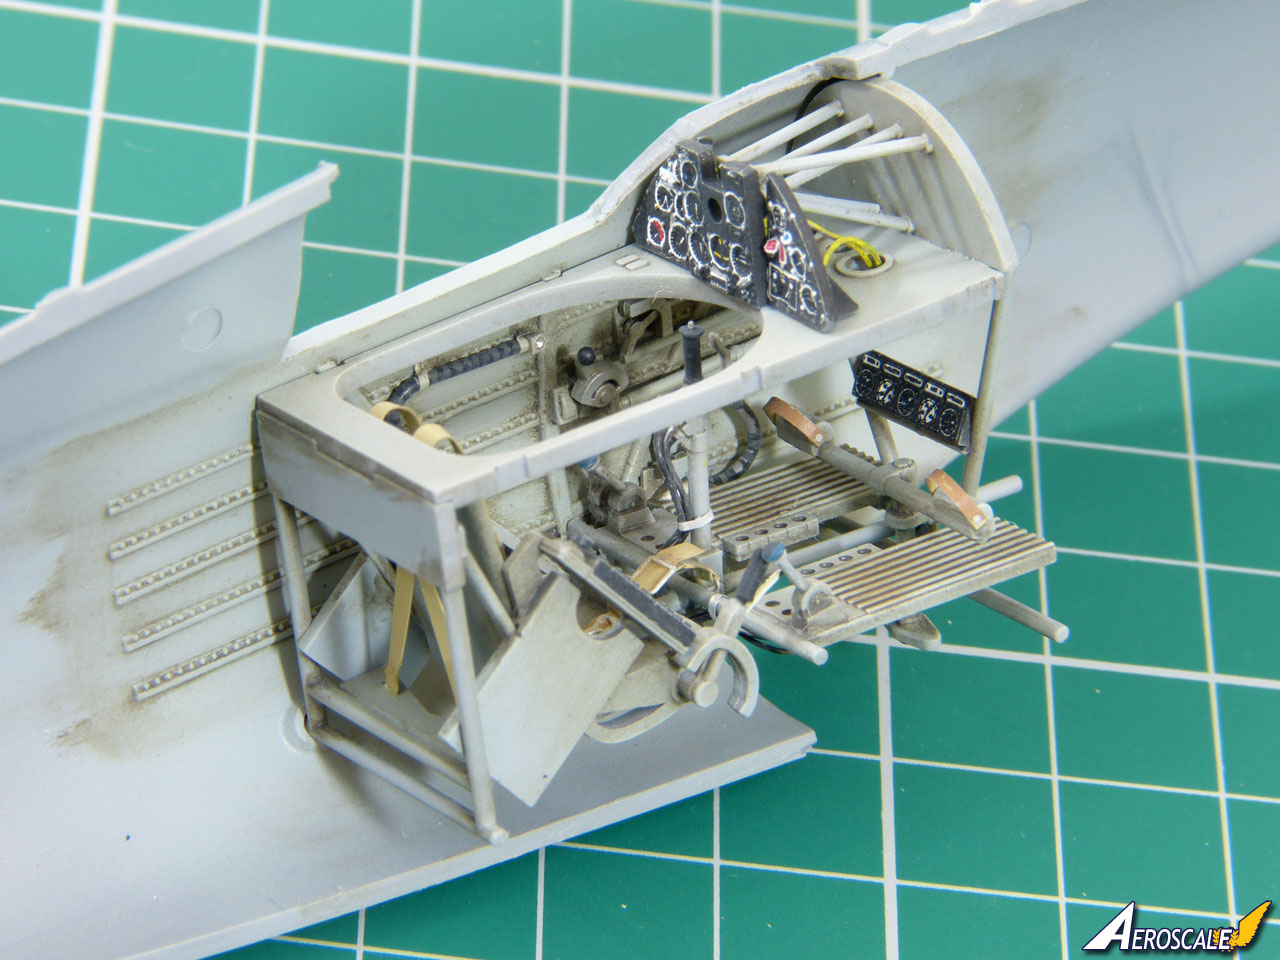
I might tinker with a few more bits and bobs, buy I'm calling this stage of the cockpit basically "done" (there's still the headrest and canopy rails to add), because I want to close up the fuselage halves and move on.
All the best
Rowan
Well, I've added a few cables for the instruments and leading from the control column. The colour of the ones behind the instrument panel is just a guess because I couldn't find a photo of the real thing - as is whether they threaded down through the holes behind them - but they add a touch of interest in an empty area.:
The main thing is... the cockpit fits very neatly into the fuselage:
I might tinker with a few more bits and bobs, buy I'm calling this stage of the cockpit basically "done" (there's still the headrest and canopy rails to add), because I want to close up the fuselage halves and move on.
All the best
Rowan
Joel_W
Joined: December 04, 2010
KitMaker: 11,666 posts
AeroScale: 7,410 posts
Posted: Sunday, August 19, 2018 - 04:03 AM UTC
Quoted Text
Hi Joel
I'm looking to get a bit more done tomorrow too, because I should have the afternoon off work. I've got the basic engine colours on, and had another tinker with the cockpit - but it's hopefully not too much of a case of shirking (or else forgivable, at least), because I did work on reviews and played guitar in a recording session.
All the best
Rowan
Rowan,
You sure one very busy guy.
Looking forward to your next update.
Joel
Merlin
#017
Joined: June 11, 2003
KitMaker: 17,582 posts
AeroScale: 12,795 posts
Posted: Sunday, August 19, 2018 - 05:15 AM UTC
Cheers Joel
I try to keep out of mischief. I really do need to find more time for the guitar - I don't practise nearly often enough these days.
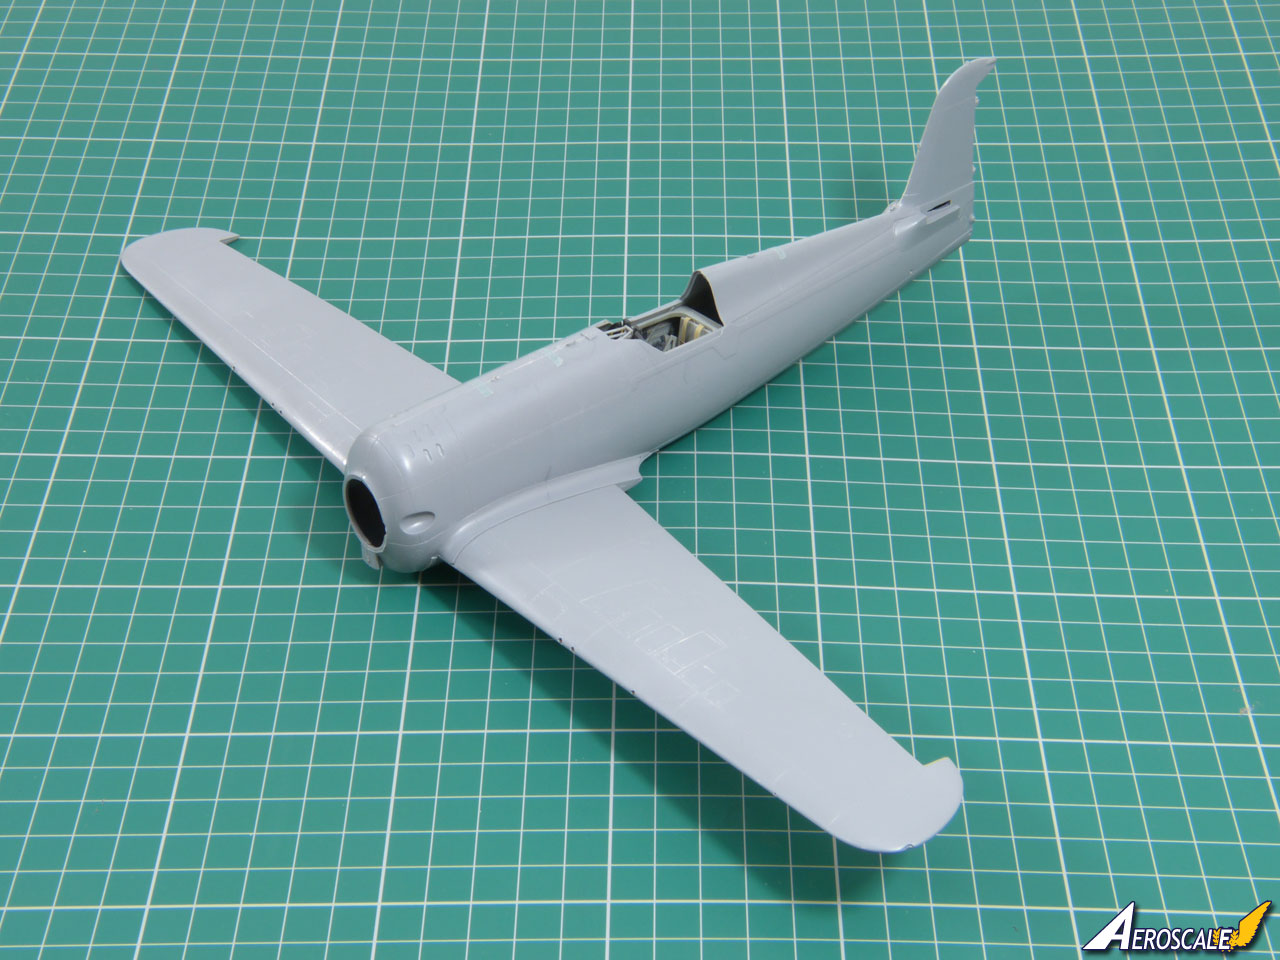
Anyway, I've reached the point with the IAR that I hoped to be at before I mislaid the lead wire. I've cemented the fuselage halves and dry-fitted the wings again to make sure the fix I did yonks back is still working. I'll make a couple of small tweaks, but the fit is pretty good already:
All the best
Rowan
I try to keep out of mischief. I really do need to find more time for the guitar - I don't practise nearly often enough these days.
Anyway, I've reached the point with the IAR that I hoped to be at before I mislaid the lead wire. I've cemented the fuselage halves and dry-fitted the wings again to make sure the fix I did yonks back is still working. I'll make a couple of small tweaks, but the fit is pretty good already:
All the best
Rowan
Joel_W
Joined: December 04, 2010
KitMaker: 11,666 posts
AeroScale: 7,410 posts
Posted: Sunday, August 19, 2018 - 05:46 AM UTC
Rowan,
Great progress for sure.
Joel
Great progress for sure.
Joel

MS406C

Joined: May 22, 2008
KitMaker: 100 posts
AeroScale: 85 posts
Posted: Monday, August 20, 2018 - 05:48 AM UTC
Hello Rowan. I have done that kit recently and Yes I had to reduce the cylinder heigths to be able to close the engine cover. Another point which I suggest you could do right now, is to slowly increase the diameter of the front cockpit hole, where the antenna passes through! You'll thank me latter buddy! Do not forget the bolts on the main undercarriage covers, punch and die and plasticard are winners! Here are some pics of mine, cheers and keep it up!
 DSC_0003 by jean Barby, sur Flickr
 DSC_0005 by jean Barby, sur Flickr
 DSC_0008 by jean Barby, sur Flickr
 DSC_0002 by jean Barby, sur Flickr
DSC_0003 by jean Barby, sur FlickrDSC_0005 by jean Barby, sur FlickrDSC_0008 by jean Barby, sur FlickrDSC_0002 by jean Barby, sur Flickr Merlin
#017
Joined: June 11, 2003
KitMaker: 17,582 posts
AeroScale: 12,795 posts
Posted: Monday, August 20, 2018 - 08:51 AM UTC
Hi Jean
Beautiful work as always! And thank you for the heads-up on the aerial mast and undercarriage covers. Looking at the latter in Radu's book, I can see immediately the bolts you mention - which I might well have missed otherwise.
I've got no fresh progress to show this evening. I tinkered with the wing roots fit and it's pretty much "there" now.
It's still a little way off, but I'll do like Doug in his detailed Blog of the I.A.R. 81C, and completely replace the strengthening strip along the bottom of the fuselage. It just makes so much more sense than trying to preserve what's moulded and hide the join between the wings and the fuselage.
All the best
Rowan
Beautiful work as always!
And thank you for the heads-up on the aerial mast and undercarriage covers. Looking at the latter in Radu's book, I can see immediately the bolts you mention - which I might well have missed otherwise. I've got no fresh progress to show this evening. I tinkered with the wing roots fit and it's pretty much "there" now.
It's still a little way off, but I'll do like Doug in his detailed Blog of the I.A.R. 81C, and completely replace the strengthening strip along the bottom of the fuselage. It just makes so much more sense than trying to preserve what's moulded and hide the join between the wings and the fuselage.
All the best
Rowan
Joel_W
Joined: December 04, 2010
KitMaker: 11,666 posts
AeroScale: 7,410 posts
Posted: Tuesday, August 21, 2018 - 08:22 AM UTC
Jean,
Now that's one really nice IAR-80A.
Joel
Now that's one really nice IAR-80A.
Joel

Szmann

Joined: September 02, 2014
KitMaker: 1,977 posts
AeroScale: 295 posts
Posted: Tuesday, August 21, 2018 - 11:09 AM UTC
Hi, Rowan!
I just caught up with the build. Very nice detail in the kit and the scratch-built ones make the model as realistic as it can get!
Just one question - although probably it's too late. The interior colour was suggested to be dark gray (RLM 66 inspired). Relatively recently surfaced an interview with a Romanian pilot (quoted by RB in his book in the last chapter) that points at the fact that the interior cockpit was painted with the same paint as the undersides (light blue).
Enjoying your build!
Gabriel
golfermd
Joined: March 01, 2013
KitMaker: 152 posts
AeroScale: 98 posts
Posted: Wednesday, August 22, 2018 - 09:16 AM UTC
Are those "get better organized" resolutions to be filed with the "get in shape" or "lose weight" resolutions?? 
Merlin
#017
Joined: June 11, 2003
KitMaker: 17,582 posts
AeroScale: 12,795 posts
Posted: Thursday, August 23, 2018 - 08:30 AM UTC
Quoted Text
Are those "get better organized" resolutions to be filed with the "get in shape" or "lose weight" resolutions??
Hi Dan
Absolutely!
I've managed to keep my new haul of lead wire firmly where I can keep an eye on it, but give it a couple of builds and it'll probably be lost in the disaster zone that I call a workshop! All the best
Rowan
Merlin
#017
Joined: June 11, 2003
KitMaker: 17,582 posts
AeroScale: 12,795 posts
Posted: Thursday, August 23, 2018 - 08:40 AM UTC
Quoted Text
Hi, Rowan!
I just caught up with the build. Very nice detail in the kit and the scratch-built ones make the model as realistic as it can get!
Just one question - although probably it's too late. The interior colour was suggested to be dark gray (RLM 66 inspired). Relatively recently surfaced an interview with a Romanian pilot (quoted by RB in his book in the last chapter) that points at the fact that the interior cockpit was painted with the same paint as the undersides (light blue).
Enjoying your build!
Gabriel
Hi Gabriel
Thank you for your kind comments - I really appreciate them.
As you suggest, I've gone by Radu Brinzan's indication for the basic cockpit colour, which is also what FROMM indicate in their instructions (Radu has been closely involved with the design and production of the kit).All the best
Rowan

thegirl

Joined: January 19, 2008
KitMaker: 6,743 posts
AeroScale: 6,151 posts
Posted: Tuesday, August 28, 2018 - 02:24 AM UTC
Such an interesting aircraft , your build so far is shaping up very nicely Rowan 
Terri
Terri
Merlin
#017
Joined: June 11, 2003
KitMaker: 17,582 posts
AeroScale: 12,795 posts
Posted: Tuesday, August 28, 2018 - 09:25 AM UTC
Hi Jessie
Many thanks for your kind words and encouragement.
I hope to make a bit more progress soon - but I'm staring at a pile of reviews to tackle, plus the clock's always ticking on the book I have to write - so it might be next week before I get a chance to move on.
All the best
Rowan
Many thanks for your kind words and encouragement.
I hope to make a bit more progress soon - but I'm staring at a pile of reviews to tackle, plus the clock's always ticking on the book I have to write - so it might be next week before I get a chance to move on.
All the best
Rowan
 |

WEB HOSTING BY


Copyright ©2021 AeroScale and Kitmaker Network, a subsidiary of Silver Star Enterprises
All Rights Reserved. Please read our Conditions of Use and Privacy Policy.
All Rights Reserved. Please read our Conditions of Use and Privacy Policy.