OFFICIAL: Rotor RPM is Life Campaign

#041
Kobenhavn, Denmark
Joined: July 20, 2006
KitMaker: 10,069 posts
AeroScale: 3,788 posts
Posted: Saturday, July 18, 2015 - 11:39 PM UTC
Great work, Paul! Looks much better now and nice to see you solved the problem. Sometimes one cannot help but wonder how kits end up like this from manufacturers... No test fit, old moulds, bad engineering, all three...??
Good to see you are back on track with some major cosmetic surgery to your kit.

Campaign'oholic - 252+ campaigns completed
Nordrhein-Westfalen, Germany
Joined: March 22, 2015
KitMaker: 671 posts
AeroScale: 614 posts
Posted: Saturday, July 18, 2015 - 11:56 PM UTC
Paul: This is real good plastic surgery! How did You glue the sprues to the clear part without major fogging?
Oliver

On the desk: Probably a Panzer III.
Joined: December 23, 2007
KitMaker: 1,596 posts
AeroScale: 1,275 posts
Posted: Sunday, July 19, 2015 - 12:02 AM UTC
Hi All!
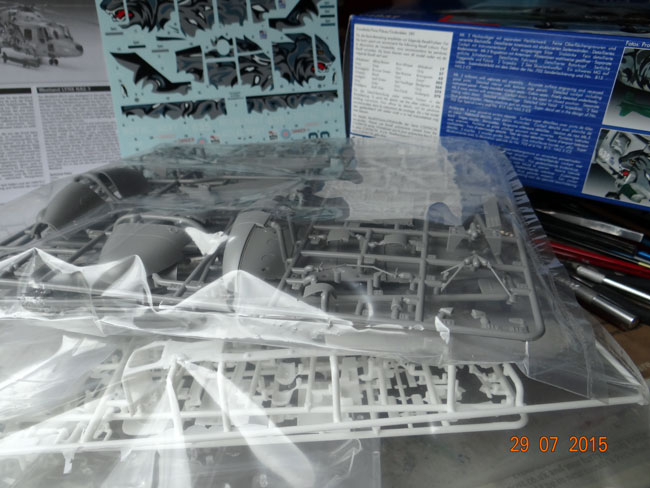
I've just joined the campaign. I'll be building this well known Hobby Boss incarnation of Mi-8 in the markings of Polish Police. This helo is being used by Aviation Unit of the Police HQ. I'm going to build it straight out of the box, however I already know it won't work so easily as I'm already thinking about few improvements. For sure I will need to add a rescue wintch on the port side which is typical equipement of Polish Hips - this part is outsourced from the Armory resin set.
And this is the kit I'll use here. I couldn't resist and cut few parts off the sprues for dryfitting.

Tel Aviv-Yafo, Israel
Joined: June 03, 2014
KitMaker: 277 posts
AeroScale: 36 posts
Posted: Monday, July 20, 2015 - 12:16 AM UTC
Hobby Boss 1/72 Kamov Ka-29 Helix-B
Whoa Michal, that what the Polish police use, remind me not to make them mad.
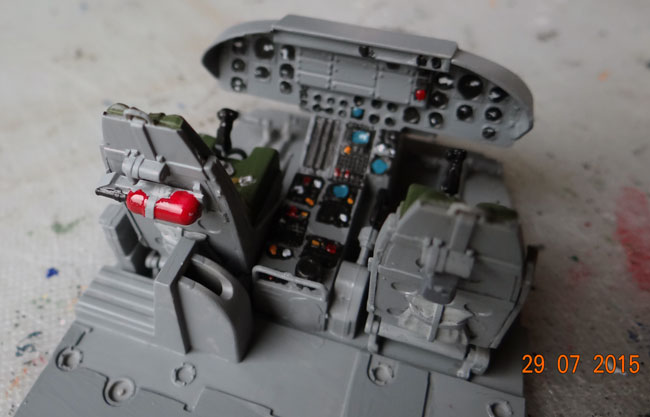
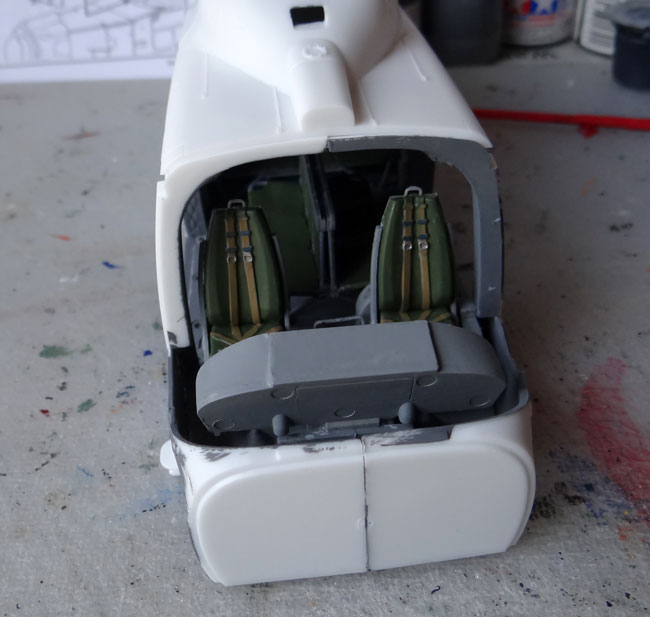
Ive been progressing on the cockpit and interior. The "P" PE cockpit is pretty neat but definitely lacking, I scratchbuilt seat belts, HUD and the whole set up for the copilot. The photos show everything painted and dry fitted into the fuselage.
I also cut up seats in the cabin as they are supposed to hang on the fuselage wall, I glued some up and some down.
Finally as I was dryfitting everything I noticed that the rear of the instrument panel is completely visible through the huge windscreen so I will have to scratch something back there, more wires and vacuum tubes I suppose.
Cabin Seats (dont look very comfortable)

Dry fitted cabin, starting to look alright

Thanks for looking,
Bryan
European Union
Joined: September 28, 2004
KitMaker: 2,186 posts
AeroScale: 1,587 posts
Posted: Monday, July 20, 2015 - 02:52 PM UTC
Quoted Text
Hobby Boss 1/72 Kamov Ka-29 Helix-B
Whoa Michal, that what the Polish police use, remind me not to make them mad.
Ive been progressing on the cockpit and interior. The "P" PE cockpit is pretty neat but definitely lacking, I scratchbuilt seat belts, HUD and the whole set up for the copilot. The photos show everything painted and dry fitted into the fuselage.
I also cut up seats in the cabin as they are supposed to hang on the fuselage wall, I glued some up and some down.
Finally as I was dryfitting everything I noticed that the rear of the instrument panel is completely visible through the huge windscreen so I will have to scratch something back there, more wires and vacuum tubes I suppose.
Cabin Seats (dont look very comfortable)
Dry fitted cabin, starting to look alright
Thanks for looking,
Bryan
Going in the right direction.
Amazing how different this interior looks compared to US choppers
The mission: Beat the stash.
Almost conquered: MIG-29, Blackhawk, Skyray, Skyraider, fouga
Main battle:Demon, Skyhawk, F-14, CH-53
Stash reserve:Blackhawk, CH-46, 47 en 53; SU-7, Eurofighter, mohawk, hellcat, F-16D, 6x Fouga Magister, Voodoo
European Union
Joined: September 28, 2004
KitMaker: 2,186 posts
AeroScale: 1,587 posts
Posted: Monday, July 20, 2015 - 06:33 PM UTC
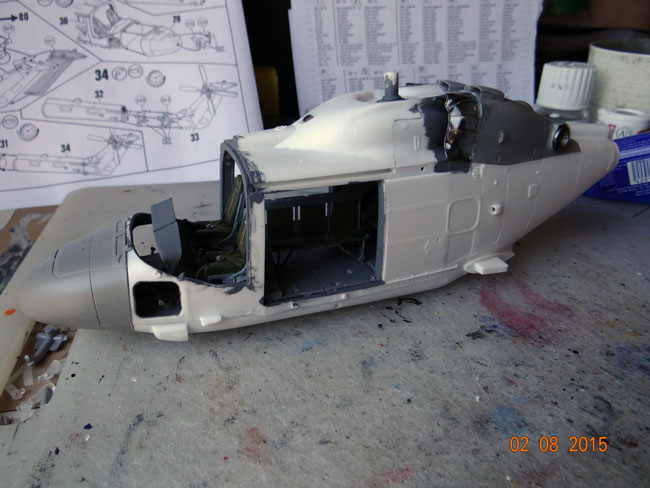
Adjustuibng the resin nose to the Revell plastic... quite a bit of work

The mission: Beat the stash.
Almost conquered: MIG-29, Blackhawk, Skyray, Skyraider, fouga
Main battle:Demon, Skyhawk, F-14, CH-53
Stash reserve:Blackhawk, CH-46, 47 en 53; SU-7, Eurofighter, mohawk, hellcat, F-16D, 6x Fouga Magister, Voodoo
Texas, United States
Joined: May 27, 2009
KitMaker: 1,293 posts
AeroScale: 1,072 posts
Posted: Monday, July 20, 2015 - 10:06 PM UTC
looking good keep it up bro
Nordrhein-Westfalen, Germany
Joined: March 22, 2015
KitMaker: 671 posts
AeroScale: 614 posts
Posted: Tuesday, July 21, 2015 - 12:56 AM UTC
Bryan and Drabslab: Very nice updates!
On my H-19 not much happened this weekend. Just sprayed a coat of clear flat. Then I glued most of the parts together and tested the dry fit of the hull.


Dry fit seems to be quite good, but the instructions says, there have to be 10 g weight into the nose. Quite much for 1/72 scale, so I will look for some lead.
Oliver
On the desk: Probably a Panzer III.
Nordrhein-Westfalen, Germany
Joined: March 22, 2015
KitMaker: 671 posts
AeroScale: 614 posts
Posted: Thursday, July 23, 2015 - 12:32 PM UTC
Hallo modelers,
just made the major assembly and found some flaws.
First, I cut out too much plastic in the shaft area

.

Although the general fitting of the kit´s parts is good, there is one major gap joining the tail to the body.

Finally, after glueing in the cockpit glass, there are still some minor gaps. Probably it appeared due to an improper fitting of the instrument panel, that came up too high. Hopefully, it will be cured by some white glue.

.
So lots of work to be done this weekend.
Oliver
On the desk: Probably a Panzer III.
England - South East, United Kingdom
Joined: January 11, 2003
KitMaker: 4,307 posts
AeroScale: 272 posts
Posted: Thursday, July 23, 2015 - 01:23 PM UTC
Just joined. I'll be building Revell's 1/32 Lynx HAS3
Bulldog#3
Grumpy Old Modeller No1
Growing old disgracefully!
Tel Aviv-Yafo, Israel
Joined: June 03, 2014
KitMaker: 277 posts
AeroScale: 36 posts
Posted: Thursday, July 23, 2015 - 05:11 PM UTC
Patience patience Oliver, Im sure with some love you will get that looking right and proper. I like some of the PE on that whirley bird, it provides some creative additions.
Keep up the good work,
Bryan
#041
Kobenhavn, Denmark
Joined: July 20, 2006
KitMaker: 10,069 posts
AeroScale: 3,788 posts
Posted: Saturday, July 25, 2015 - 03:07 AM UTC
Great looking work so far, Oliver. Clearly a few things to be corrected, but a bit of plastic card and putty will take care of it. It will be a great build when finished.
Dave, great choice of kit. I looking forward to see that getting build. I have been tempted many times, but never bought the kit ..... So far.
Campaign'oholic - 252+ campaigns completed
MichaelSatin
 Campaigns Administrator
Colorado, United States
Joined: January 19, 2008
KitMaker: 3,909 posts
AeroScale: 2,904 posts
Posted: Sunday, July 26, 2015 - 07:55 PM UTC
Very interesting stuff here! On the other hand, still no ribbon... (nudge, nudge)
Michael

On the bench:
Sorta depends on your definition of "on the bench"...
Nordrhein-Westfalen, Germany
Joined: March 22, 2015
KitMaker: 671 posts
AeroScale: 614 posts
Posted: Sunday, July 26, 2015 - 08:56 PM UTC
Quoted Text
Very interesting stuff here! On the other hand, still no ribbon... (nudge, nudge)
Michael
Okay, what about this one. Simple, but the important things are there!

Oliver
On the desk: Probably a Panzer III.
England - South East, United Kingdom
Joined: January 11, 2003
KitMaker: 4,307 posts
AeroScale: 272 posts
Posted: Tuesday, July 28, 2015 - 09:51 PM UTC
Bulldog#3
Grumpy Old Modeller No1
Growing old disgracefully!
Nordrhein-Westfalen, Germany
Joined: March 22, 2015
KitMaker: 671 posts
AeroScale: 614 posts
Posted: Thursday, July 30, 2015 - 02:45 AM UTC
Dave: Astonishing fast progress. Looks good!
This week, I filled and sanded the gaps of my chopper.

Because I did not wanted to mask the windows conventionally, I bought some masks of Eduard (feels like cheating, but looks good

).
Than I primed the whole thing and added small cutted masking tape for the white stripes.

Followed by the first color. Some bright red was applied. Here I wondered, how many times I had to airbrush, until the dark pre-shading lines dissappeared nearly.

On this picture, the pre-shading seems to be gone. But, looking at it without a lense, the pre-shading is nearly too strong

. I will wait for daylight to choose, if I will airbrush more red color onto it.
Oliver
On the desk: Probably a Panzer III.
European Union
Joined: September 28, 2004
KitMaker: 2,186 posts
AeroScale: 1,587 posts
Posted: Thursday, July 30, 2015 - 09:49 PM UTC
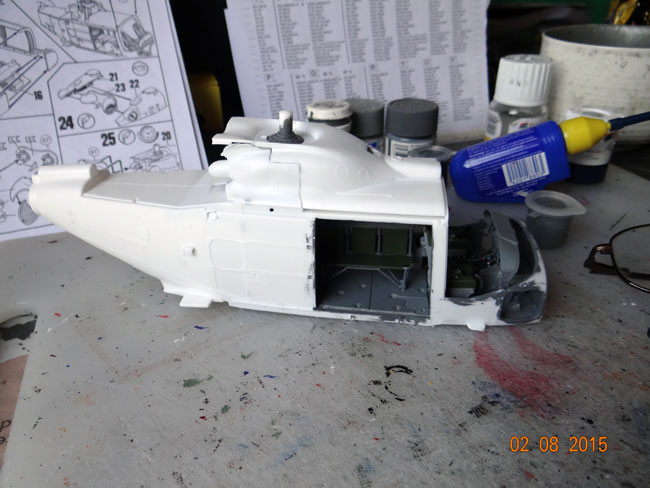
I just primed the MH-53 with white acryl-polyurethane primer from Vallejo.
Well, its a big surface with many difficult to reach details.
And now its white instead of that pesky dark green.
About that primer. It is the first time that I use it and mostly with the intention of having a pale surface to spray the typical MH-53 grey on. I thought that the original green would be a to dark a background.
And now it is unevenly white as intended.

For all the miraculous qualities that are given to the Vallejo primer like hiding small scratches , and filling up small seam gaps... I haven't noticed anything yet.

The mission: Beat the stash.
Almost conquered: MIG-29, Blackhawk, Skyray, Skyraider, fouga
Main battle:Demon, Skyhawk, F-14, CH-53
Stash reserve:Blackhawk, CH-46, 47 en 53; SU-7, Eurofighter, mohawk, hellcat, F-16D, 6x Fouga Magister, Voodoo
European Union
Joined: September 28, 2004
KitMaker: 2,186 posts
AeroScale: 1,587 posts
Posted: Thursday, July 30, 2015 - 10:04 PM UTC
@Dave: you are really fast, and the result looks good as well.
@Oliver: that is turing out very well
The mission: Beat the stash.
Almost conquered: MIG-29, Blackhawk, Skyray, Skyraider, fouga
Main battle:Demon, Skyhawk, F-14, CH-53
Stash reserve:Blackhawk, CH-46, 47 en 53; SU-7, Eurofighter, mohawk, hellcat, F-16D, 6x Fouga Magister, Voodoo
Scotland, United Kingdom
Joined: May 11, 2015
KitMaker: 768 posts
AeroScale: 656 posts
Posted: Friday, July 31, 2015 - 09:53 PM UTC

Slow progress this week. Had a false start with a clogged up airbrush that took a bit of cleaning. Once that was sorted out I got her masked and primed at least.
Pax & Pallets: Revell 1/48 Dakota
Terrible Teens : Revell 1/48 F15E Strike Eagle
Airfix IV : Airfix 1.72 Vulcan
England - South East, United Kingdom
Joined: January 11, 2003
KitMaker: 4,307 posts
AeroScale: 272 posts
Posted: Saturday, August 01, 2015 - 10:30 PM UTC
More progress on the Lynx. Slower than usual as I've been away for a couple of days. Back to work tomorrow so time will be more limited as well.
Not keen on the transparent intake covers Revell have provided instead of mesh, but a coat of Tamiya smoke has toned them down a bit, they'll be matt varnished along with the rest of the airframe later which'll tone them down even more.
Bulldog#3
Grumpy Old Modeller No1
Growing old disgracefully!
Nordrhein-Westfalen, Germany
Joined: March 22, 2015
KitMaker: 671 posts
AeroScale: 614 posts
Posted: Monday, August 03, 2015 - 08:02 PM UTC
Drabslab: Acryl-polyurethane? Sounds interesting. Looking forward to some pictures of the result.
Jonathan: The Sea King looks good. Great build up of the canopy!
Dave: Your still fast! Is this a different nose section of the lynx. I wonder about the different colour of the plastic
.
I just painted the blue colour this week and have to wipe out some mistakes due to not properly fitting masking tape of the white stripes.
So far:


Oliver
On the desk: Probably a Panzer III.
British Columbia, Canada
Joined: September 03, 2009
KitMaker: 6,965 posts
AeroScale: 6,247 posts
Posted: Monday, August 03, 2015 - 09:34 PM UTC
Now
that's a proper scheme for an S-55
When once you have tasted flight you will walk the Earth with your eyes turned skyward.
For there you have been, and there you will always long to return.
-Leonardo Da Vinci
England - South East, United Kingdom
Joined: January 11, 2003
KitMaker: 4,307 posts
AeroScale: 272 posts
Posted: Monday, August 03, 2015 - 10:10 PM UTC
Quoted Text
Dave: Your still fast! Is this a different nose section of the lynx. I wonder about the different colour of the plastic .
Oliver
I think it's where Revell make different versions - this is the kit nose. It's all in a mix of white and grey plastic, makes it a pain to paint.
Bulldog#3
Grumpy Old Modeller No1
Growing old disgracefully!
#041
Kobenhavn, Denmark
Joined: July 20, 2006
KitMaker: 10,069 posts
AeroScale: 3,788 posts
Posted: Wednesday, August 05, 2015 - 11:59 AM UTC
Nice progress, Guys.
Dave, you move with lightning speed!
Oliver, that is a really striking scheme. No hiding there
Campaign'oholic - 252+ campaigns completed
Scotland, United Kingdom
Joined: May 11, 2015
KitMaker: 768 posts
AeroScale: 656 posts
Posted: Thursday, August 06, 2015 - 08:14 PM UTC

YELLLLLLOW!
Going to have to tone this down a lot and heavily weather her!
Pax & Pallets: Revell 1/48 Dakota
Terrible Teens : Revell 1/48 F15E Strike Eagle
Airfix IV : Airfix 1.72 Vulcan