OFFICIAL: Fighter-Bomber Campaign
England - South East, United Kingdom
Joined: March 01, 2010
KitMaker: 7,078 posts
AeroScale: 118 posts
Posted: Saturday, August 29, 2015 - 10:58 PM UTC
Almost there.
Flaps painted and on.

Canopy and landing lights in place.

Aerials on, and she is finished.

will post some pics in the Gallery shortly.
Cheers.
Si
Scotland, United Kingdom
Joined: February 15, 2013
KitMaker: 1,273 posts
AeroScale: 200 posts
Posted: Saturday, August 29, 2015 - 11:13 PM UTC
New Jersey, United States
Joined: July 25, 2006
KitMaker: 1,139 posts
AeroScale: 53 posts
Posted: Sunday, August 30, 2015 - 04:52 PM UTC
Very nice Simon. The skill comes through no matter what you build. Will you join a group build in armor soon?

The underside of my fury with the necessary doors closed and primed with Mr. Surfacer 1000. There has been a bibit of sanding and touching up since.
Tom
"ALLONS" 11TH ACR BLACKHORSE
"Death Before Dismount"
19K40/ Dino Rider 19F10
England - South East, United Kingdom
Joined: March 01, 2010
KitMaker: 7,078 posts
AeroScale: 118 posts
Posted: Tuesday, September 01, 2015 - 12:13 AM UTC
Thanks Tom,
The fury is coming on very nicely.
Almost an out of the box job, but I enjoyed it.
Got a few AFV's in the stash, might find time and room on the workbench for something in the not too distant.
Cheers.
Si
New Jersey, United States
Joined: July 25, 2006
KitMaker: 1,139 posts
AeroScale: 53 posts
Posted: Tuesday, September 01, 2015 - 05:17 PM UTC
I'm experimenting with marker on the seams of another kit, the Tamiya F4D Skyray if it works out I'll try it on the Fury. I have 3 tanks on the bench as well. I went from not building to an assembly line.
Tom
"ALLONS" 11TH ACR BLACKHORSE
"Death Before Dismount"
19K40/ Dino Rider 19F10
Slovakia
Joined: October 15, 2010
KitMaker: 825 posts
AeroScale: 476 posts
Posted: Wednesday, September 02, 2015 - 01:34 AM UTC
New Jersey, United States
Joined: July 25, 2006
KitMaker: 1,139 posts
AeroScale: 53 posts
Posted: Wednesday, September 02, 2015 - 04:17 AM UTC
Welcome. Join the fun, and I know what you mean having a full bench.
Tom
"ALLONS" 11TH ACR BLACKHORSE
"Death Before Dismount"
19K40/ Dino Rider 19F10
Slovakia
Joined: October 15, 2010
KitMaker: 825 posts
AeroScale: 476 posts
Posted: Saturday, September 05, 2015 - 12:33 AM UTC
United Kingdom
Joined: September 17, 2012
KitMaker: 462 posts
AeroScale: 42 posts
Posted: Saturday, September 05, 2015 - 07:45 PM UTC
Hey,
A bit of progress to report.
The Revell Mig 21 primed and ready for paint..


And now with paint

Cheers
Matthew

#392
Hessen, Germany
Joined: January 09, 2013
KitMaker: 696 posts
AeroScale: 608 posts
Posted: Monday, September 07, 2015 - 05:56 PM UTC
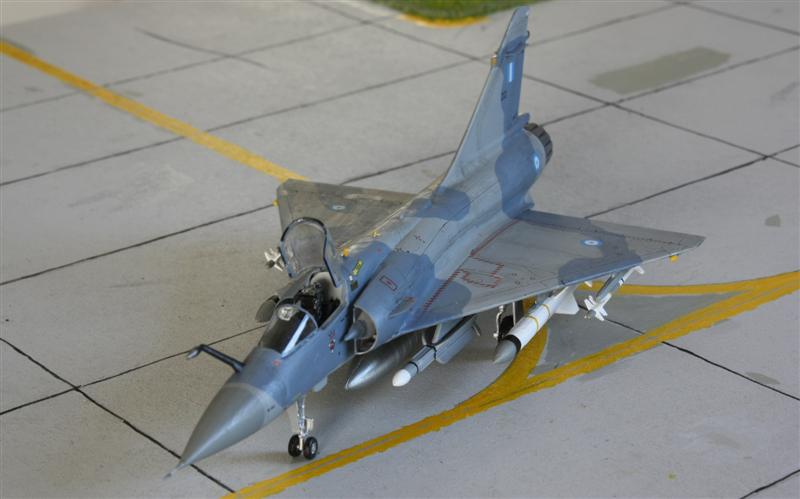
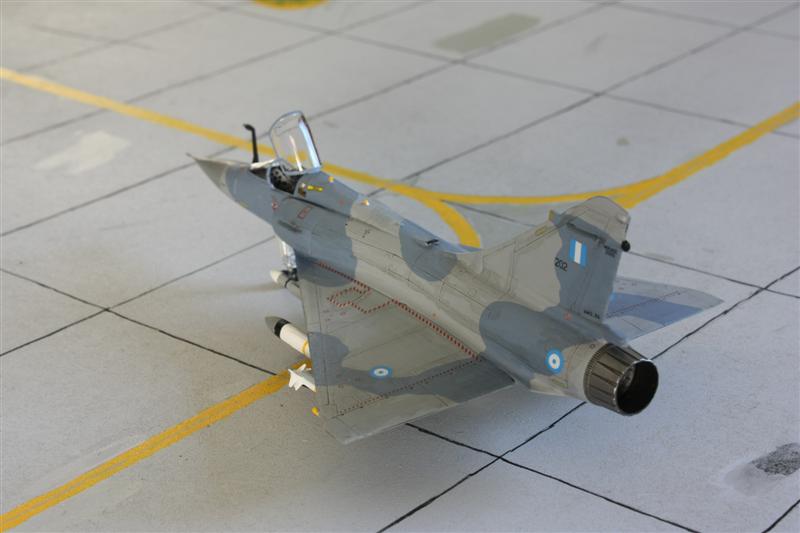
Hey guys,
I've finished my Hellenic Air Force Mirage and here are some first pictures. Will put some more in the gallery.
- Simon
Well done Seahawk

- Matthew
Your MiG starts to look really cool
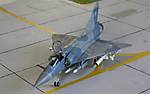

Sorry for the little pictures, don't know yet what is wrong. Having trouble since last week to upload photos...
On the bench:
EE(BAC) Lightning F.2A (Airfix 1:72)
#392
Hessen, Germany
Joined: January 09, 2013
KitMaker: 696 posts
AeroScale: 608 posts
Posted: Wednesday, September 09, 2015 - 01:49 PM UTC
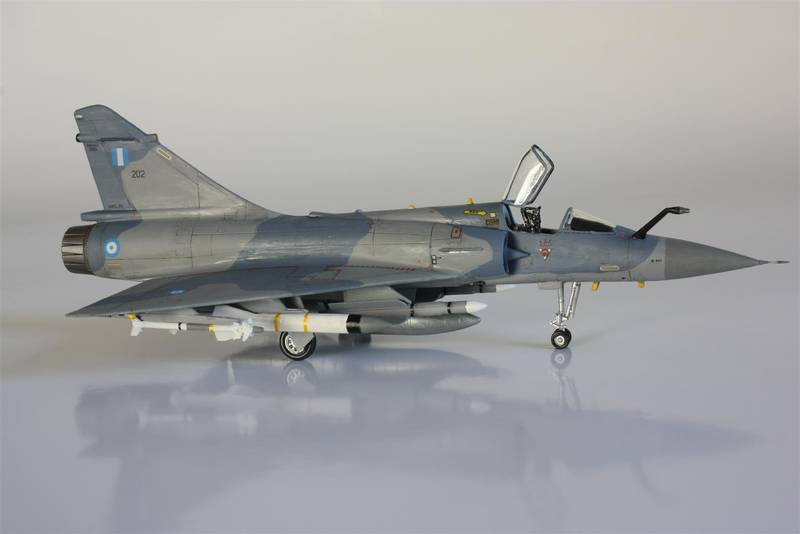
Well,
the problem seems to be over and here are bigger pictures of my Mirage.

On the bench:
EE(BAC) Lightning F.2A (Airfix 1:72)
#392
Hessen, Germany
Joined: January 09, 2013
KitMaker: 696 posts
AeroScale: 608 posts
Posted: Wednesday, September 09, 2015 - 01:54 PM UTC
On the bench:
EE(BAC) Lightning F.2A (Airfix 1:72)
#392
Hessen, Germany
Joined: January 09, 2013
KitMaker: 696 posts
AeroScale: 608 posts
Posted: Wednesday, September 09, 2015 - 02:31 PM UTC
Hi mates,
just wanted to put pictures into the gallery, but encountered another problem

/home/gallery3/public_html/uploads/53454: Error creating directory (check permissions).
Please notify the System Administrator.
Maybe someone knows it?
Cheers Peter
On the bench:
EE(BAC) Lightning F.2A (Airfix 1:72)
Slovakia
Joined: October 15, 2010
KitMaker: 825 posts
AeroScale: 476 posts
Posted: Thursday, September 10, 2015 - 01:10 PM UTC
Great Mirage Peter, maybe You could make some closeup pictures ?
MichaelSatin
 Campaigns Administrator
Colorado, United States
Joined: January 19, 2008
KitMaker: 3,909 posts
AeroScale: 2,904 posts
Posted: Thursday, September 10, 2015 - 07:05 PM UTC
Quoted Text
Hi mates,
just wanted to put pictures into the gallery, but encountered another problem
/home/gallery3/public_html/uploads/53454: Error creating directory (check permissions).
Please notify the System Administrator.
Maybe someone knows it?
Cheers Peter
It's not just the Fighter-Bombers gallery having the problem. The big shots have been notified. They usually get these issues fixed pretty quickly, so hopefully it'll be back up soon.
Michael

On the bench:
Sorta depends on your definition of "on the bench"...
Slovakia
Joined: October 15, 2010
KitMaker: 825 posts
AeroScale: 476 posts
Posted: Saturday, September 12, 2015 - 01:29 PM UTC
MichaelSatin
Campaigns Administrator Colorado, United States
Joined: January 19, 2008
KitMaker: 3,909 posts
AeroScale: 2,904 posts
Posted: Tuesday, September 15, 2015 - 04:47 AM UTC
OK, apparently the galleries are fixed. A big thanks to Jim at Admin! Post away everyone!
Michael
On the bench:
Sorta depends on your definition of "on the bench"...
New Jersey, United States
Joined: July 25, 2006
KitMaker: 1,139 posts
AeroScale: 53 posts
Posted: Tuesday, September 15, 2015 - 09:48 AM UTC
Nice patch on the F80. Looking good guys.
Tom
"ALLONS" 11TH ACR BLACKHORSE
"Death Before Dismount"
19K40/ Dino Rider 19F10
#392
Hessen, Germany
Joined: January 09, 2013
KitMaker: 696 posts
AeroScale: 608 posts
Posted: Thursday, September 17, 2015 - 01:28 AM UTC
Hi mates,
I call this one done! Pictures are in the gallery. Built OOB, borrowed the decals from the Italeri kit, put a resin seat in, handpainted the whole thing with the hairy stick and at last added a metal pitot tube from Master.
Thanks for the campaign, much fun as always.

On the bench:
EE(BAC) Lightning F.2A (Airfix 1:72)
Slovakia
Joined: October 15, 2010
KitMaker: 825 posts
AeroScale: 476 posts
Posted: Saturday, September 19, 2015 - 02:29 AM UTC
#392
Hessen, Germany
Joined: January 09, 2013
KitMaker: 696 posts
AeroScale: 608 posts
Posted: Saturday, September 19, 2015 - 05:09 PM UTC
@Naseby Thank you!
You're also doing a great job so far with your F/P-80

I like the guns, go on!
P.S. As for the close-ups of my Mirage, I just finished the "photo-shooting" then. Maybe I take some when I got another kit built...
On the bench:
EE(BAC) Lightning F.2A (Airfix 1:72)
United Kingdom
Joined: September 17, 2012
KitMaker: 462 posts
AeroScale: 42 posts
Posted: Sunday, September 20, 2015 - 05:23 PM UTC
Blue 66 - finished!


I learned a lot in this campaign:
1) aluminium silver is not at all forgiving - every spec of dust and minute scratch become a mountain and a deep valley.
2) the Revell Contacta glue, which is supposed to be fume-free, fogged up the inside of the canopy

. I discovered however that oven cleaner which contains micro granules will clean it up with patient polishing

.
3) In future Ill attach the delicate landing gear after all painting and weathering is finished. I must have snapped the gear on one side off at least three times towards the end of the build.
Still, enjoyed this campaign a lot!
Cheers
Matthew
Slovakia
Joined: October 15, 2010
KitMaker: 825 posts
AeroScale: 476 posts
Posted: Tuesday, September 22, 2015 - 11:51 PM UTC
Matthew, take a look at this side, they are producing odourless superglue, its not cheap, but worth it :
https://www.deluxematerials.co.uk/gb/MichaelSatin
Campaigns Administrator Colorado, United States
Joined: January 19, 2008
KitMaker: 3,909 posts
AeroScale: 2,904 posts
Posted: Wednesday, September 23, 2015 - 12:26 AM UTC
I often use this for clear parts as well as photoetch. Strong, odorless, and acrylic. Not as fast as superglue, but safer.
http://www.ipmsusa3.org/reviews/Products/gator-hobby_glue/gator-hobby_glue.htm Michael
On the bench:
Sorta depends on your definition of "on the bench"...
Slovakia
Joined: October 15, 2010
KitMaker: 825 posts
AeroScale: 476 posts
Posted: Saturday, September 26, 2015 - 03:16 PM UTC
The work on the Shooting Star is coming slowly forward. Here are two pictures of the wheel bays. Im very happy with the fit of this parts. For a moment there one can forget that this is a Hobby Boss kit, not Tamiya.