OFFICIAL: Vac and Resin Campaign
Tennessee, United States
Joined: April 04, 2002
KitMaker: 1,290 posts
AeroScale: 87 posts
Posted: Friday, March 06, 2015 - 08:34 PM UTC
Tennessee, United States
Joined: April 04, 2002
KitMaker: 1,290 posts
AeroScale: 87 posts
Posted: Friday, March 06, 2015 - 09:01 PM UTC
After the A-12 disaster, I started my A-8 kit.

I use a generally dustless method of cleaning up resin parts. A piece of wet/dry sandpaper in a plastic dish with water to remove resin plugs (common in armor kits I build). For smaller parts or minor cleanup I dip the part in the water, sand, re-dip to remove sludge until complete. I do have face masks to use as required.

I taped the fuselage halves together to test to the wing

After I installed the interior I had to clamp fuselage together as I glue. One fuselage half is warped but corrects itself as fuselage is glued together

I use cup with screw on caps to store small parts. I was able to store all of the vac parts for My Martin MS-1/XS-1 in one. I was going to complete this kit as part of this campaign, but I hid it from myself.


I acquired the cups from drug testing supplies, as any leftovers have to be trashed because of possible contamination.

#259
Massachusetts, United States
Joined: October 23, 2011
KitMaker: 2,265 posts
AeroScale: 1,715 posts
Posted: Friday, March 06, 2015 - 09:34 PM UTC
geez. Here I thought vacuforms were a lot of work...
Good luck, will be cheering for you. You are obviously up to the task.

Tennessee, United States
Joined: April 04, 2002
KitMaker: 1,290 posts
AeroScale: 87 posts
Posted: Friday, March 06, 2015 - 11:32 PM UTC
I am currently retired, but should be partially retired this summer if I get some contractor gigs, so I have the time to beat these resin kits into submission, if my patience holds up. Bur Sam Adams can help me be mellow

British Columbia, Canada
Joined: September 03, 2009
KitMaker: 6,965 posts
AeroScale: 6,247 posts
Posted: Friday, March 06, 2015 - 11:49 PM UTC
Jeff, you should be able to cure that warp with a dip in just-boiled water and some judicious bending.
When once you have tasted flight you will walk the Earth with your eyes turned skyward.
For there you have been, and there you will always long to return.
-Leonardo Da Vinci
Tennessee, United States
Joined: April 04, 2002
KitMaker: 1,290 posts
AeroScale: 87 posts
Posted: Saturday, March 07, 2015 - 05:03 AM UTC
Jessie,
I fixed the initial warp but the new one cracked the part. I will try to fix the two parts per the hot water dip.
Removed by original poster on 03/08/15 - 00:12:48 (GMT).
Removed by original poster on 03/08/15 - 00:46:22 (GMT).
#259
Massachusetts, United States
Joined: October 23, 2011
KitMaker: 2,265 posts
AeroScale: 1,715 posts
Posted: Sunday, March 08, 2015 - 12:59 AM UTC
Painted

before I work on the decals, I need to deal with the landing gear.
Tennessee, United States
Joined: April 04, 2002
KitMaker: 1,290 posts
AeroScale: 87 posts
Posted: Sunday, March 08, 2015 - 03:13 AM UTC
What are you using for the metallic paint?
#259
Massachusetts, United States
Joined: October 23, 2011
KitMaker: 2,265 posts
AeroScale: 1,715 posts
Posted: Sunday, March 08, 2015 - 03:58 AM UTC
Tamiya rattle can TS-17 "gloss aluminum"
Tennessee, United States
Joined: April 04, 2002
KitMaker: 1,290 posts
AeroScale: 87 posts
Posted: Sunday, March 08, 2015 - 07:27 AM UTC
Great paint. I use it for US Navy "yellow wing" aircraft.
Tennessee, United States
Joined: April 04, 2002
KitMaker: 1,290 posts
AeroScale: 87 posts
Posted: Sunday, March 08, 2015 - 07:37 AM UTC
I had a delay in building the Curtiss A-8 as my Milliput is dried up. I decided to prep my Execuform Northrop N1M.

the kit has two versions of the same airframe. It also has metal detail parts

The parts

I used Jessica's method of priming the parts to simplify cutting out the parts. I used some chart tape to mark the final cut lines as they were indistinct.


#523
Idaho, United States
Joined: February 28, 2014
KitMaker: 342 posts
AeroScale: 250 posts
Posted: Thursday, March 12, 2015 - 06:19 AM UTC
Here is the latest on my Build.
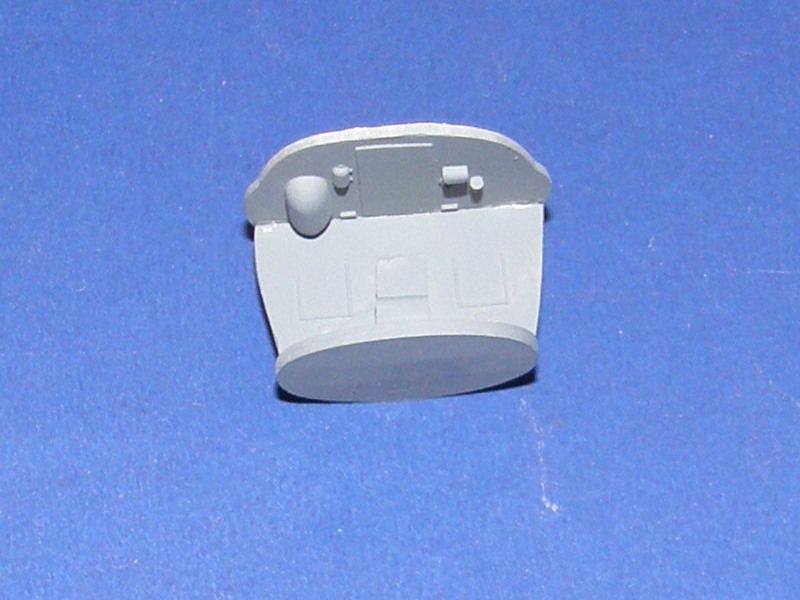
I scratched built and interior for the Ba.65.
I also decided to turn it into a Bis version.
here is the interior

Tennessee, United States
Joined: April 04, 2002
KitMaker: 1,290 posts
AeroScale: 87 posts
Posted: Thursday, March 12, 2015 - 08:23 PM UTC
Jeff,
What did you use as a reference for the interior? Looks good.
Jeff
#523
Idaho, United States
Joined: February 28, 2014
KitMaker: 342 posts
AeroScale: 250 posts
Posted: Friday, March 13, 2015 - 02:33 AM UTC
I use this site for information on Italian Aircraft.
"cpmr.it"
there they have manuals and such in the section - MANUALI E NOMENCLATORI.
I used it for the basic outline it's not exact at all but in a 1/72 to give it a bit more detail I think it will do.
Jeff D
Tennessee, United States
Joined: April 04, 2002
KitMaker: 1,290 posts
AeroScale: 87 posts
Posted: Friday, March 13, 2015 - 07:53 PM UTC
SB2U Vac kit - I will be interested to see how this evolves. I have the same kit in the stash.
Tennessee, United States
Joined: April 04, 2002
KitMaker: 1,290 posts
AeroScale: 87 posts
Posted: Friday, March 13, 2015 - 07:55 PM UTC
Thanks for info, I have a lot of Italian aircraft kits. Cockpit openings on most 1/72 kits are so small a lot of detail can be out of sight.
Tennessee, United States
Joined: April 04, 2002
KitMaker: 1,290 posts
AeroScale: 87 posts
Posted: Friday, March 13, 2015 - 08:02 PM UTC
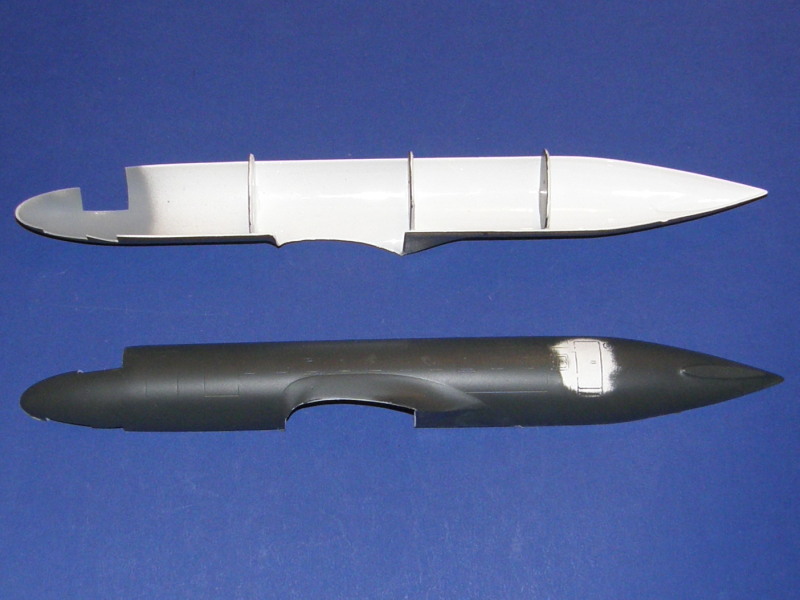
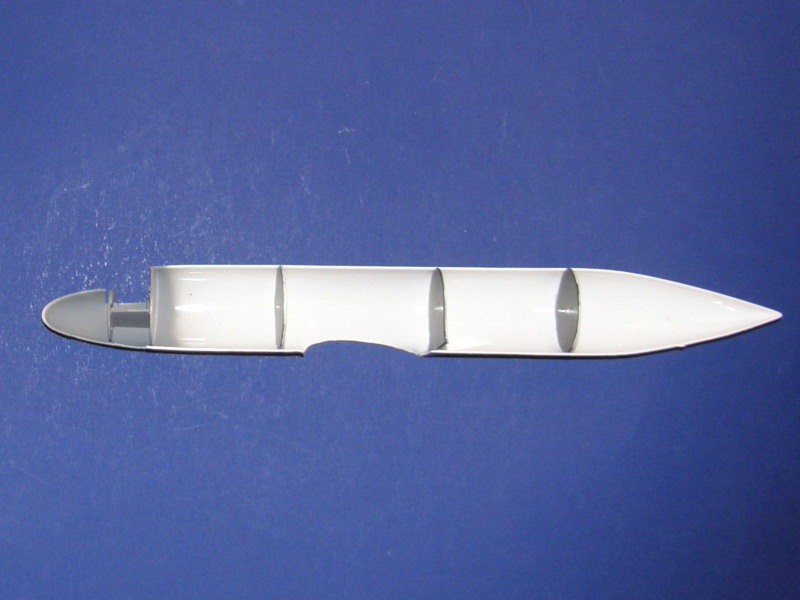
I have continued work on the N1M flying wing.
Initial fit testing of early N1M fuselage halves. Needs more triming of bottom half to match top.


Initial fit of fuselage for late N1M.

Ipt and bottom views of fuselage halves. Late and early are very similar.


British Columbia, Canada
Joined: September 03, 2009
KitMaker: 6,965 posts
AeroScale: 6,247 posts
Posted: Saturday, March 14, 2015 - 10:18 AM UTC
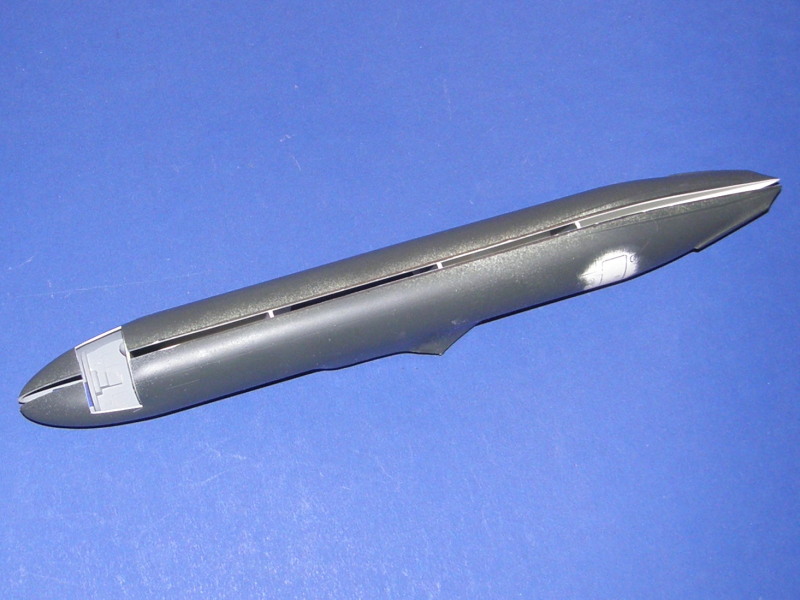
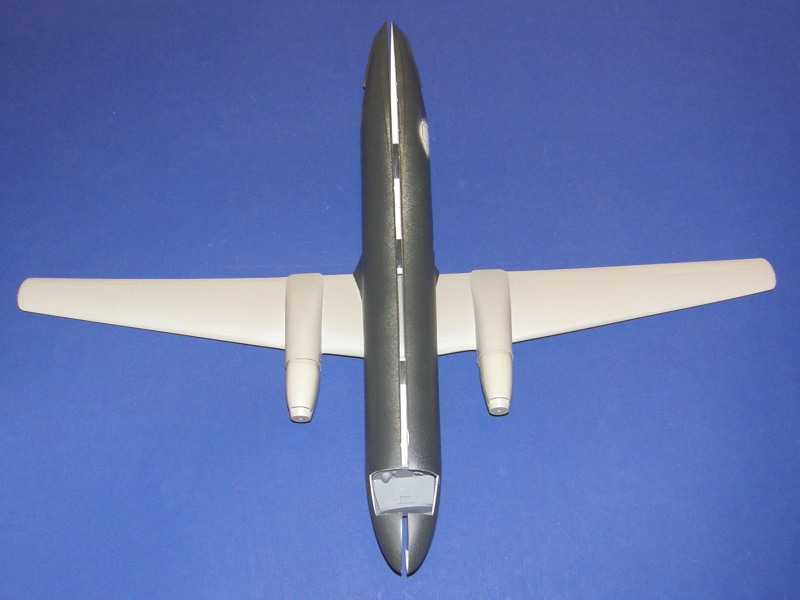
I return to the Cosmo. I've sanded out the fuselage, and opened up the cockpit roof for the clear part to be added later. The bulkheads are positioned inside the right fuselage half. and the civvy entry door at the rear sanded off.
The cockpit interior is very basic, but then not very much is going to be visible once it's all buttoned up.
Those bulkheads are going to need a little work before they're small enough for the fuselage to close properly
The fit of the engines to the wing is less than encouraging. I know that resin shrinks, but this is ridiculous. I will need to take out shares in Milliput for this.
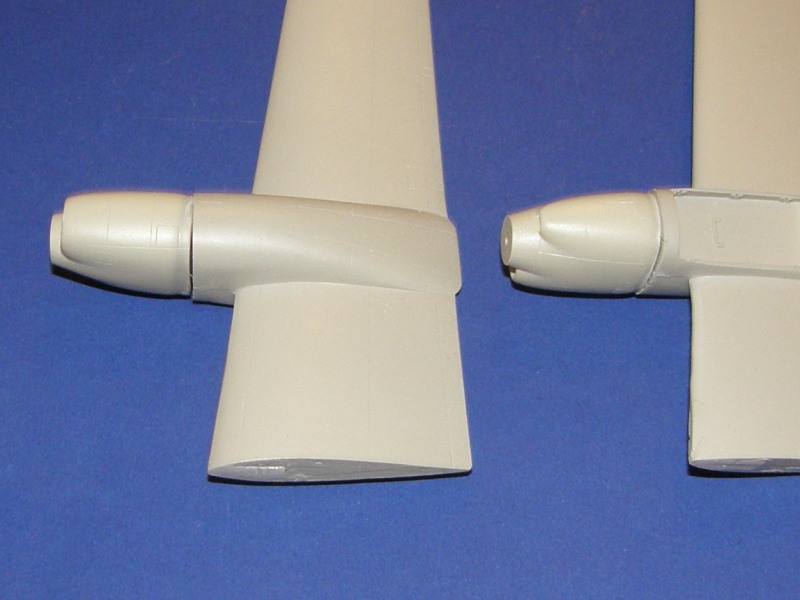
The wings butt-join together, then the fuselage sits on top of them. It will be a pretty solid construction when all is glued.
When once you have tasted flight you will walk the Earth with your eyes turned skyward.
For there you have been, and there you will always long to return.
-Leonardo Da Vinci
#523
Idaho, United States
Joined: February 28, 2014
KitMaker: 342 posts
AeroScale: 250 posts
Posted: Saturday, March 21, 2015 - 10:45 PM UTC
Wanted to provide a little update on my build.
I have reinforced the fuselage halves and guild it together and added all the wings.
Um, they did not want to comply that well So I drilled holes and added 2 1/8 rods for support of main wings.

#259
Massachusetts, United States
Joined: October 23, 2011
KitMaker: 2,265 posts
AeroScale: 1,715 posts
Posted: Sunday, March 22, 2015 - 03:50 PM UTC
Excellent, bunch of nice projects going on.
BoiseBlade, the scratch built interior looks great in the closed up fuselage.

I hope to get back to my model building later this week.
#257
Ontario, Canada
Joined: October 11, 2011
KitMaker: 812 posts
AeroScale: 458 posts
Posted: Monday, March 23, 2015 - 10:07 PM UTC
Jessie, After working on my 144 scale Cosmo i had to fill in the rear door as you did but the last four windows on same side as the doors. Does the 1/72 scale have the same problem.
Modelling is something we never perfect. We should never quit learning new tricks and be willing to share what we have learned on our own.
British Columbia, Canada
Joined: September 03, 2009
KitMaker: 6,965 posts
AeroScale: 6,247 posts
Posted: Tuesday, March 24, 2015 - 06:43 AM UTC
To be honest I haven't looked. Since I'm going to cheat and use the decal windows I'm just going with filling in the lot of them proactively.
When once you have tasted flight you will walk the Earth with your eyes turned skyward.
For there you have been, and there you will always long to return.
-Leonardo Da Vinci
#259
Massachusetts, United States
Joined: October 23, 2011
KitMaker: 2,265 posts
AeroScale: 1,715 posts
Posted: Saturday, April 04, 2015 - 10:27 PM UTC
Attaching the landing gear is a bit of a challenge, there is nothing inside the wings, and the provided parts are rather minimal.
I welded in some blocks of styrene and drilled holes in the right spots.

I founds some styrene tubing the right size to snug the struts into and then slid them into the holes, with the help of a leveling jig I dreamed up.

success.

Next step is to make gear doors out of the bits I hacked out of the vacuform parts.


 However, a new warp developed between the cockpits above the wing slot
  I sent an email to CMR to see if a replace is available, but I doubt it as it is no longer in catalog. Will try to fix later.