Air Campaigns
Want to start or join a group build? This is where to start.
OFFICIAL: Hot out of the Molds I
alpha_tango
_VISITCOMMUNITY
Germany
Joined: September 07, 2005
KitMaker: 5,609 posts
AeroScale: 5,231 posts
Posted: Saturday, March 21, 2015 - 07:42 PM UTC
Very Nice Thorsten!!

Just finished mine today:


btw I am working on Eduards Spit VIII. If that counts as "Hot out of the mold", I would be in...

all the best

Steffen
MichaelSatin
Staff MemberCampaigns Administrator
AEROSCALE
_VISITCOMMUNITY
Colorado, United States
Joined: January 19, 2008
KitMaker: 3,909 posts
AeroScale: 2,904 posts
Posted: Saturday, March 21, 2015 - 08:46 PM UTC
Nice work all!

The cockpit on the Airfix 1/24 Typhoon is done:

 photo 2015-03-21_16-40-37_394_zpsenmhezzx.jpg

Click here for the build log and more pics.

Michael
litespeed
Staff MemberNews Reporter
AEROSCALE
_VISITCOMMUNITY
England - North West, United Kingdom
Joined: October 15, 2009
KitMaker: 1,976 posts
AeroScale: 1,789 posts
Posted: Thursday, March 26, 2015 - 02:46 AM UTC
Hi all

I have applied most of the markings and stencils.


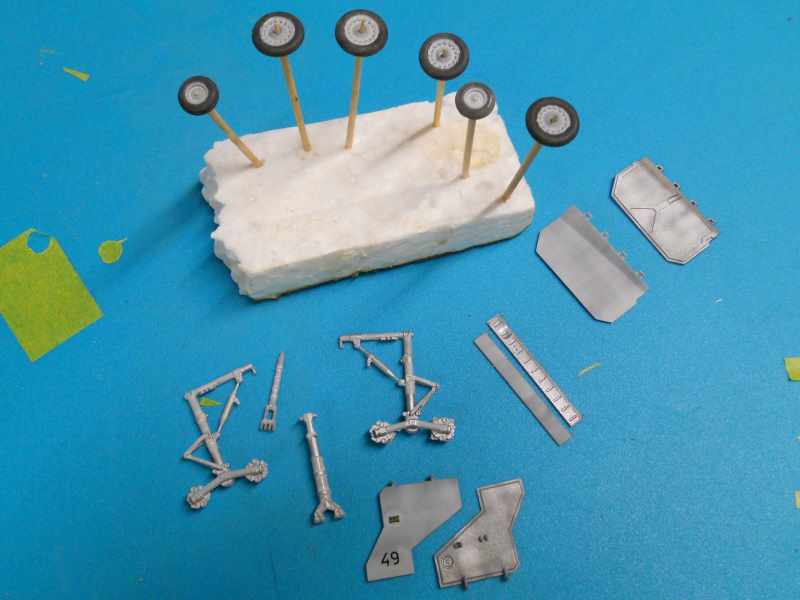
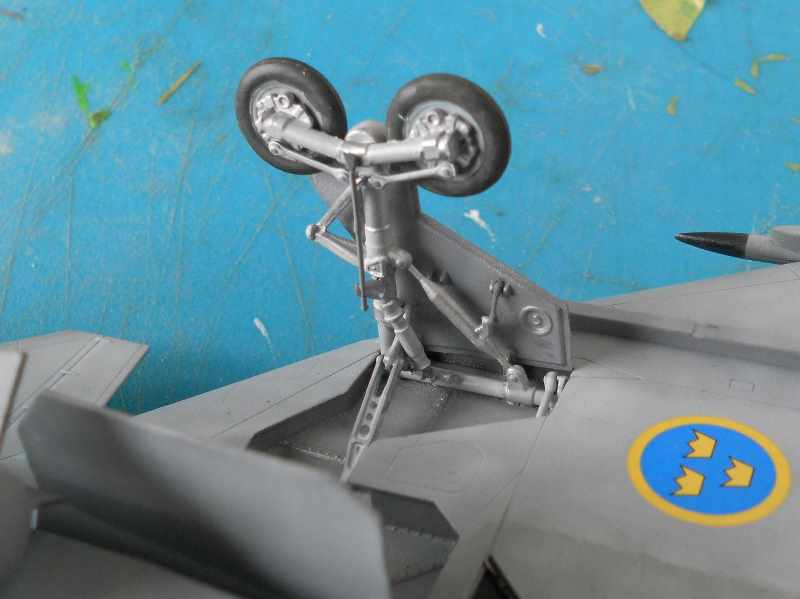
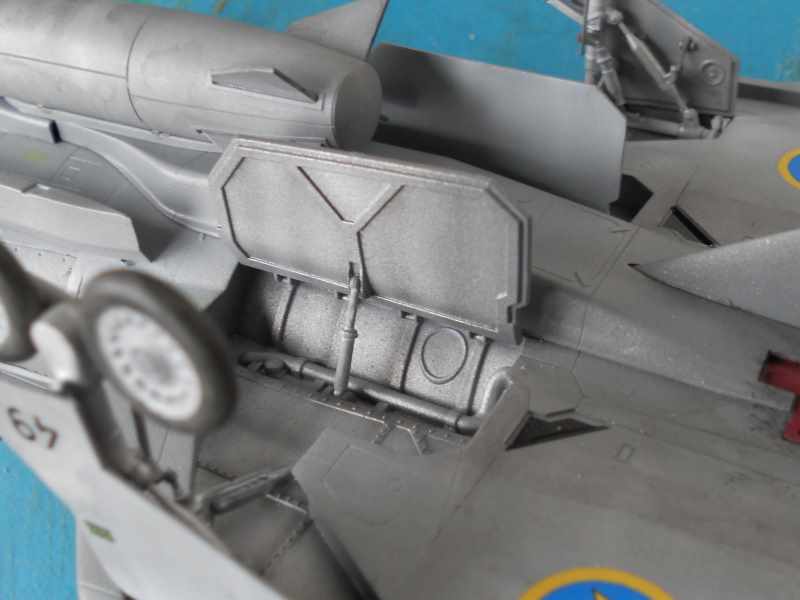
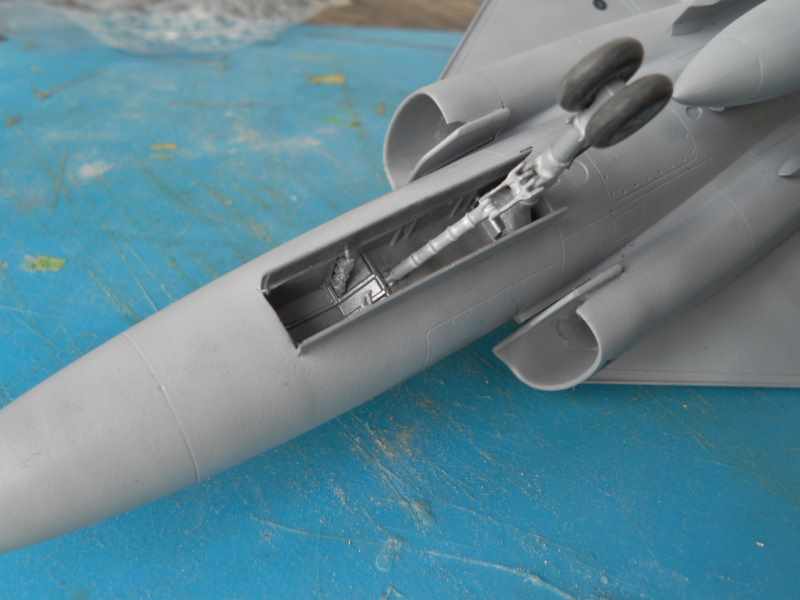
I have made some progress painting the parts for the undercarriage. The doors I painted alongside the airframe a while back. There are a lot of parts for the undercarriage as you can see from the images below.

To be continued…….


BlackWidow
_VISITCOMMUNITY
European Union
Joined: August 09, 2009
KitMaker: 1,732 posts
AeroScale: 1,336 posts
Posted: Friday, March 27, 2015 - 12:35 AM UTC

Quoted Text

Very Nice Thorsten!!

Just finished mine today ....


That's lovely, Steffen!
Tim, great progress on your Viggen. I wish the kit wouldn't be so expensive over here. But 88 Euros is far beyond my limit ....

Anyway, I came a bit further with my little Bedford and came to the point, where I had to decide wether to build the early or the late version. And after seeing Steffen's build I have changed my mind ....

.... and decided for the early version without canvas ....

.... I furthermore thought, why shouldn't I paint the truck in RAF-Blue??? And this is how it looks right now ....

.... I have used Medium Blue XF-18 from Tamiya for that. Now follows the detail painting. The whole build will take me a little longer than Steffen, because I have 2 more kits on the workbench, Trumpeter's new Whirlwind and a Leopard 1. Both want to be build also ....

Torsten
alpha_tango
_VISITCOMMUNITY
Germany
Joined: September 07, 2005
KitMaker: 5,609 posts
AeroScale: 5,231 posts
Posted: Friday, March 27, 2015 - 01:47 AM UTC
Hi Thorsten,

just a bit of caution!

I made a mistake and blanked out the right front light .. this is a feature of the late version!


so I produced a bit more work for myself .. I also started to install the Red Zebra Storage for RAF Bedford truck

cheers

Steffen
BlackWidow
_VISITCOMMUNITY
European Union
Joined: August 09, 2009
KitMaker: 1,732 posts
AeroScale: 1,336 posts
Posted: Friday, March 27, 2015 - 04:46 PM UTC
Thanks for the advice, Steffen, but it comes too late. I've build the kit as shown in the instruction and will leave it that way. There are surely not many people over here who know that ....
Meanwhile I've ordered another Bedford at my LHS and will build that one as the late version.

Torsten
litespeed
Staff MemberNews Reporter
AEROSCALE
_VISITCOMMUNITY
England - North West, United Kingdom
Joined: October 15, 2009
KitMaker: 1,976 posts
AeroScale: 1,789 posts
Posted: Saturday, March 28, 2015 - 09:05 PM UTC
[quote]
Quoted Text


Tim, great progress on your Viggen. I wish the kit wouldn't be so expensive over here. But 88 Euros is far beyond my limit ....


Hopefully Torsten when MPM/Special Hobby release their 1/48 Viggens the prices will come down.
tim
BlackWidow
_VISITCOMMUNITY
European Union
Joined: August 09, 2009
KitMaker: 1,732 posts
AeroScale: 1,336 posts
Posted: Sunday, March 29, 2015 - 11:53 PM UTC
Nearly done! The next photos will be of the finished model ....


I just noticed, that I still have to fix the "door" on one end ....

Torsten
Charlie-66
#186
_VISITCOMMUNITY
Texas, United States
Joined: May 24, 2006
KitMaker: 771 posts
AeroScale: 13 posts
Posted: Monday, March 30, 2015 - 07:24 AM UTC
It may be a little while before I start this, but I thought I better post my selection while it is still "hot out of the molds". Can't believe some guys are almost done already! I feel like a snail!

litespeed
Staff MemberNews Reporter
AEROSCALE
_VISITCOMMUNITY
England - North West, United Kingdom
Joined: October 15, 2009
KitMaker: 1,976 posts
AeroScale: 1,789 posts
Posted: Wednesday, April 01, 2015 - 02:42 AM UTC
Hi all

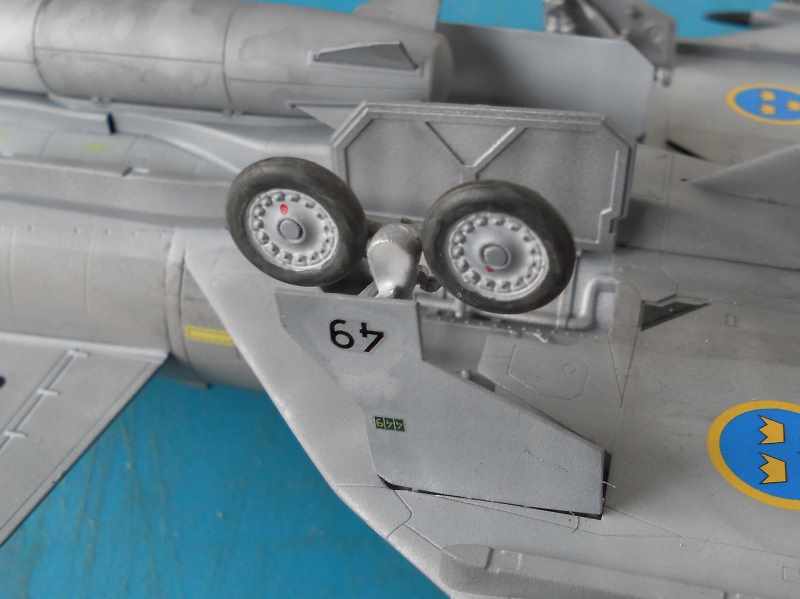
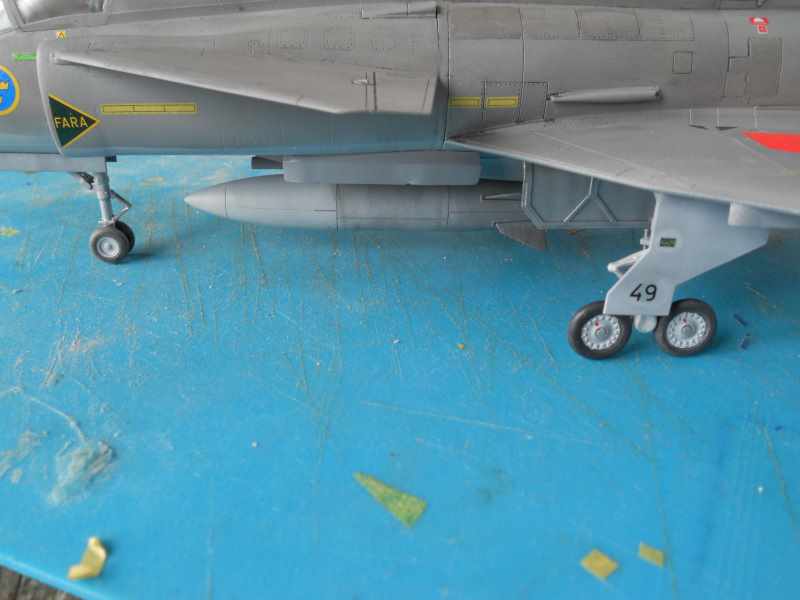
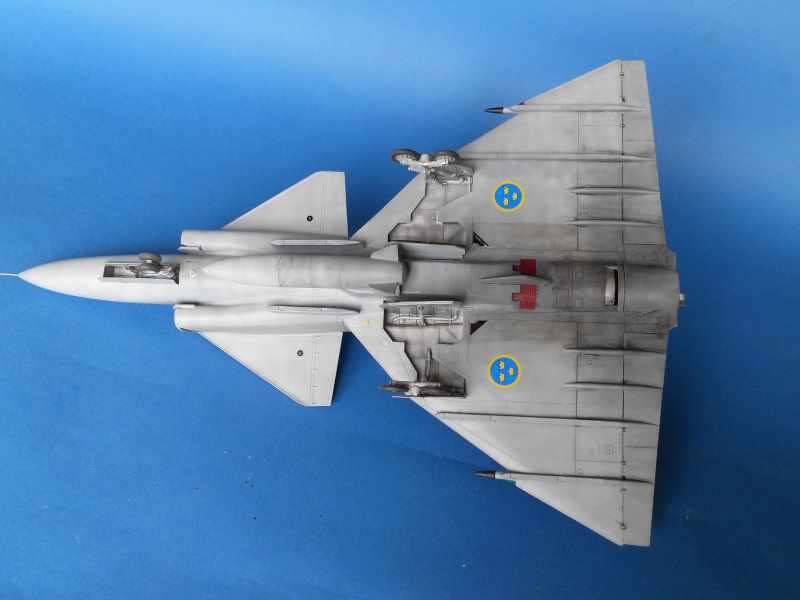
Well much to my relief the undercarriage went together very easily. I glued the legs first and left them overnight to allow the bond to harden. The rest of the parts were done in one session. There are lots of parts to fit, but you end up with a superb looking undercarriage. The Viggen can now stand on its own three legs. All I need to do now is touch up some areas with paint.


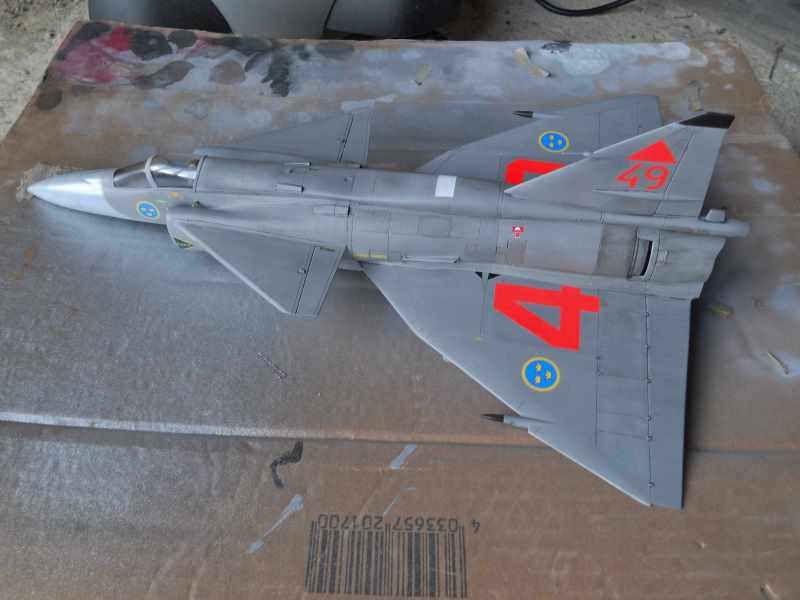
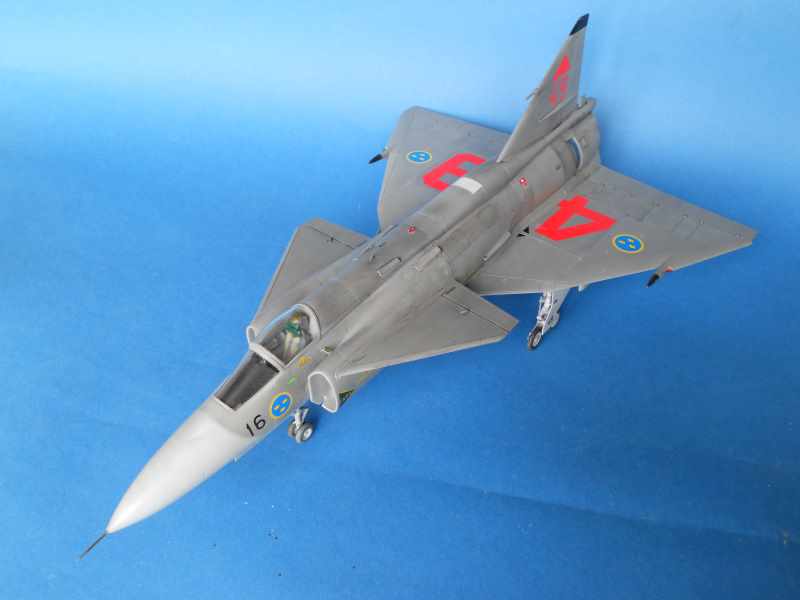
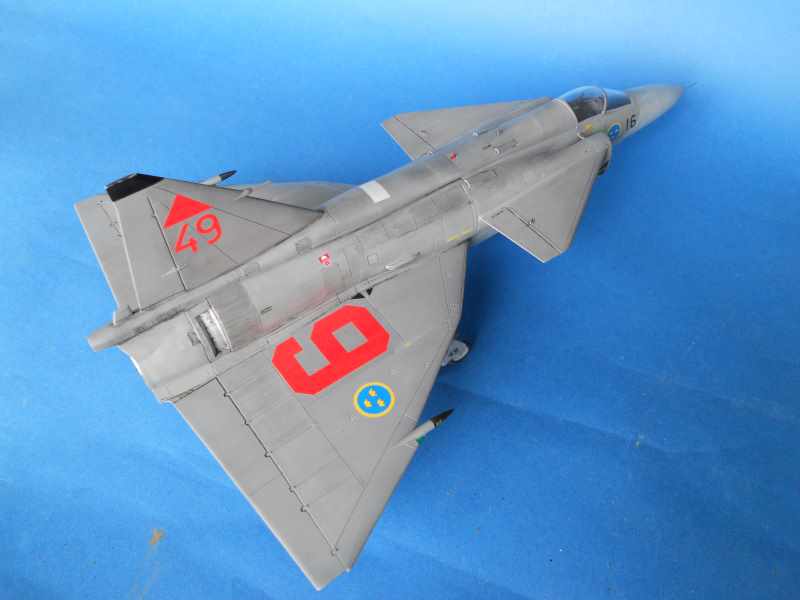
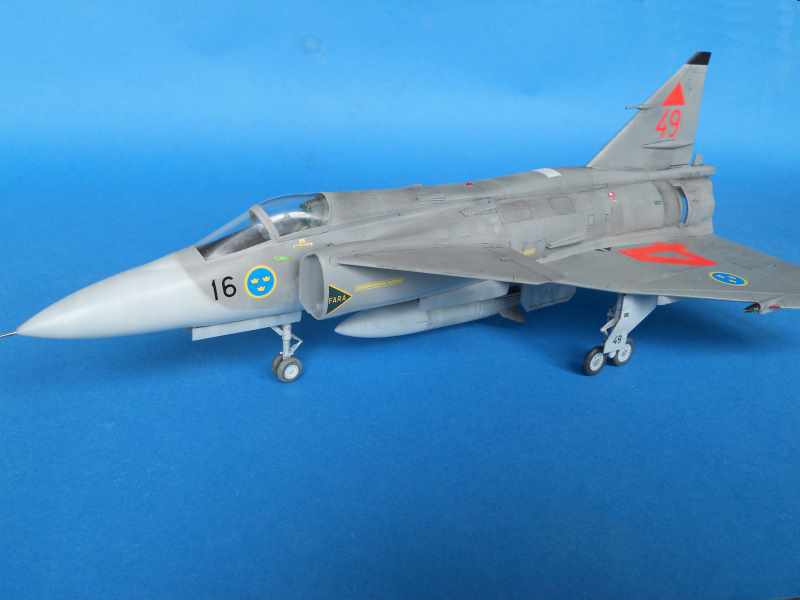
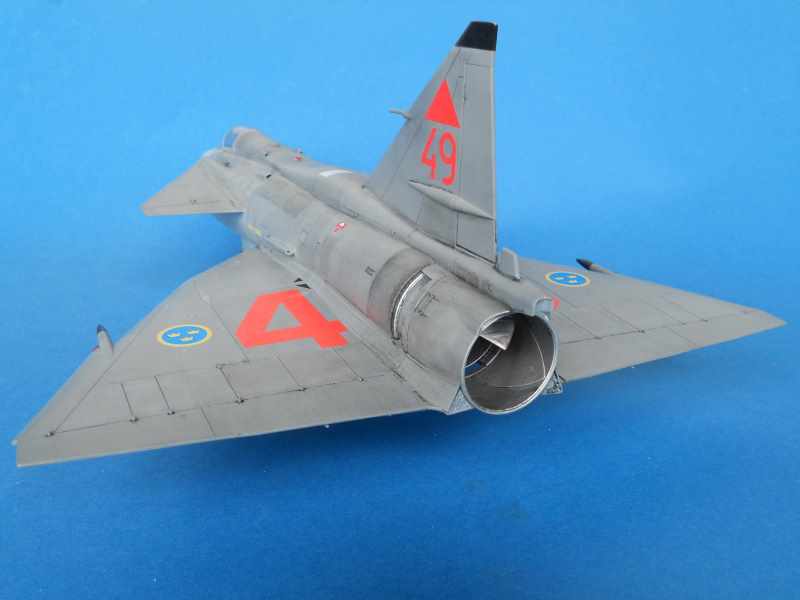
I think I have now finished the Tarangus Saab JA 37 Viggen. Finishing touches include a bit more weathering, adding the pitot probe on the nose and the various navigation lights and of course adding the undercarriage. The pitot probe is actually a sewing pin cut down to size. I was becoming really fed up breaking the plastic part it replaced. I did lose the upper red light cover to the carpet monster, but it was easy enough to manufacture another from clear plastic. The green and red of the lights were coloured using permanent marker pens. It was a real pleasure to build and paint the Viggen. I can’t remember the last time a model went together as well as this one has. If you ever have the chance to acquire one do not hesitate. The red colours of the numbers look a bit patchy; this is not evident on the model. I think it’s a problem reducing the size of the photo.

I have really enjoyed participating and looking at the other builds.

Thanks for looking in everyone.

Tim


MichaelSatin
Staff MemberCampaigns Administrator
AEROSCALE
_VISITCOMMUNITY
Colorado, United States
Joined: January 19, 2008
KitMaker: 3,909 posts
AeroScale: 2,904 posts
Posted: Wednesday, April 01, 2015 - 03:56 AM UTC
Kind of a brute of an airplane. Nice job Tim!

Michael
Removed by original poster on 04/02/15 - 20:50:48 (GMT).
dbmdyxl
_VISITCOMMUNITY
California, United States
Joined: May 20, 2011
KitMaker: 30 posts
AeroScale: 28 posts
Posted: Thursday, April 02, 2015 - 01:52 AM UTC
Tim, the smoked rear part (the last picture) looks fantastic. How did you paint it? Just with an airbrush?


Quoted Text

Hi all

I primed the whole thing and painted the anti-glare shield black before adding the windscreen and HUD. The seat as I mentioned earlier in this build is too large for the cockpit tub. So I had to reduce the width and the height a little. Thankfully without damaging the visible parts of the seat. I then masked the canopy and windscreen ready for painting.


I have painted all the under surfaces with various shades of light grey. Coats have been built up to try to achieve a more weathered and less than pristine finish. The weathering has been achieved by brushing heavily thinning Tamiya matt black paint and then blowing the wet paint with an airbrush. All internal surfaces have been sprayed aluminium and then weathered.


continuing with the upper surface this time. As with the under surface I used a few shades of grey progressing from dark to light. I did mask some of the panels protecting the grey primer for the first two applications of colour. I also used some of the under surface grey to lighten a few panels as well. Heavily thinned Tamiya paint was used throughout.

After everything was dry I applied a few coats of Klear and then I highlighted some of the panel lines with the Tamiya thinner I use to clean my brushes. If you look at any images of the Viggen in the two tone grey, you will quickly see how dirty these beasts can become.

Not too far from finishing.


To be continued……..

alpha_tango
_VISITCOMMUNITY
Germany
Joined: September 07, 2005
KitMaker: 5,609 posts
AeroScale: 5,231 posts
Posted: Thursday, April 02, 2015 - 11:02 PM UTC
Here is my entry to the campaign: Eduards Spitfire Mk.VIII (build log)


all the best

Steffen

BTW the Bedford has its load too


litespeed
Staff MemberNews Reporter
AEROSCALE
_VISITCOMMUNITY
England - North West, United Kingdom
Joined: October 15, 2009
KitMaker: 1,976 posts
AeroScale: 1,789 posts
Posted: Friday, April 03, 2015 - 12:59 AM UTC
Hi dbmdyxl, thanks for the positive comments.

The smoked rear part is simply a mix of Tamiya paint heavily thinned with Tamiya thinner. It is basically the thinner that I have I cleaned my brushes with. I think there is some black, dark slate grey, light grey and white. Basically the paints I used to cover the Viggen. First you must seal the paint on the model. I use Johnson’s Klear. I stood the model on its tail and I applied the wash with a broad flat brush. I was very liberal with the amount on the brush, so much so the wash ran a bit. I brushed in one direction from the main undercarriage bays down to the tail pipe [see below]. Then carefully use an airbrush or drinking straw to blow the paint from the main gear bay to the tail pipe. I did this about seven times so some patience is required. I was trying to replicate the leaking hydraulic fluid on the underside of the aircraft as well as the smoke accumulation from the reverse thrust. Don’t be tempted to use less thinner with the paint. Also allow each application of wash to dry thoroughly.

Hope this helps.

tim


TMoon
#152
_VISITCOMMUNITY
Texas, United States
Joined: December 07, 2002
KitMaker: 487 posts
AeroScale: 19 posts
Posted: Friday, April 03, 2015 - 07:27 PM UTC
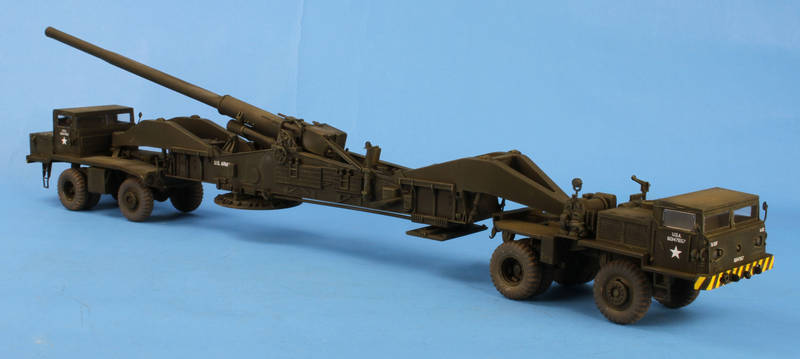
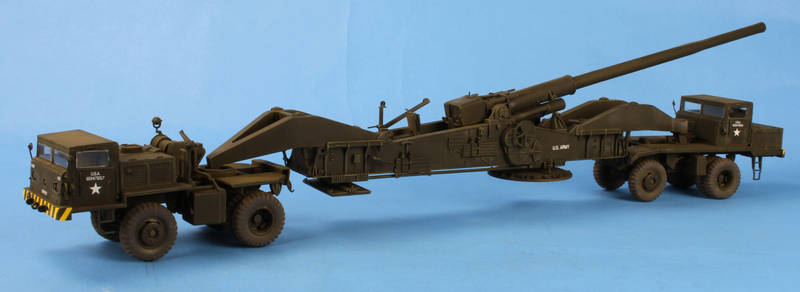
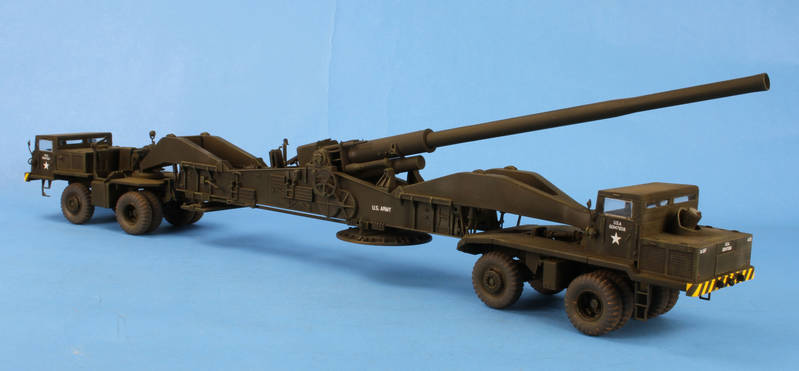
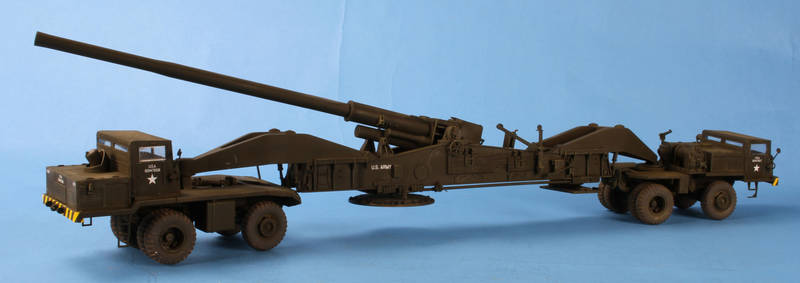
Here are the photos of the finished 1/72 M-60 Atomic Annie. The same photos are in the gallery.


Great campaign!
Tom
BlackWidow
_VISITCOMMUNITY
European Union
Joined: August 09, 2009
KitMaker: 1,732 posts
AeroScale: 1,336 posts
Posted: Sunday, April 05, 2015 - 07:11 PM UTC
Great Spit, Steffen! And where did you get that load for the Bedford? Need also some for my easter egg, which I found this morning on my work bench ...


When I have finished my Whirlwind, I'll take better photos for the gallery.

Torsten
alpha_tango
_VISITCOMMUNITY
Germany
Joined: September 07, 2005
KitMaker: 5,609 posts
AeroScale: 5,231 posts
Posted: Sunday, April 05, 2015 - 09:10 PM UTC
Hi Thorsten,

it looks nice (though I personally like a little more weathering, but i know you do not)... BTW I just learned the plate with the 3 is o.k. for early models too! The load comes from Red Zebra Models http://www.redzebramodels.co.uk/

RAF load


British Army storage


all the best

Steffen
litespeed
Staff MemberNews Reporter
AEROSCALE
_VISITCOMMUNITY
England - North West, United Kingdom
Joined: October 15, 2009
KitMaker: 1,976 posts
AeroScale: 1,789 posts
Posted: Monday, April 06, 2015 - 01:47 AM UTC


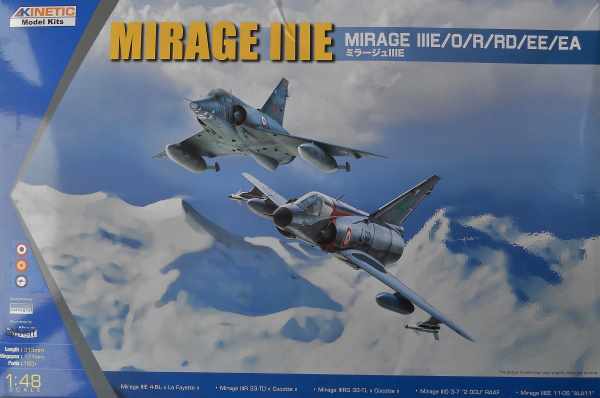
Hi all
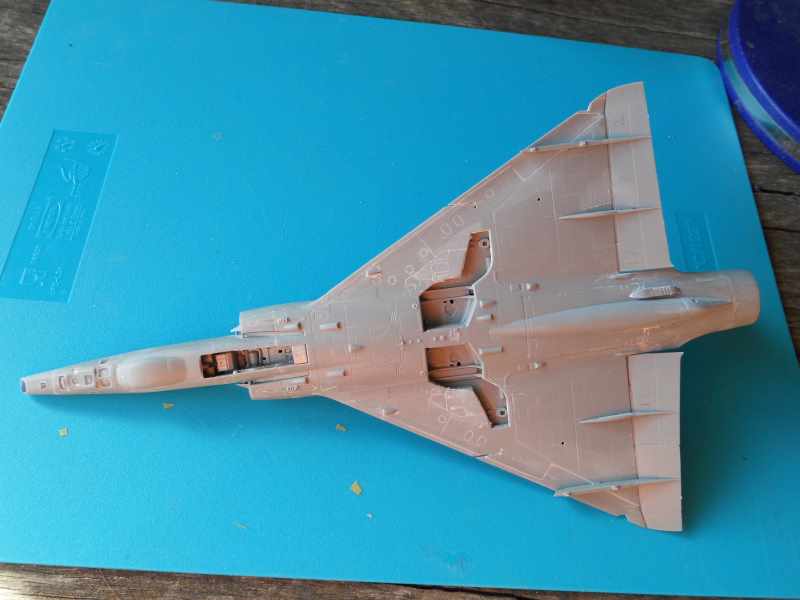
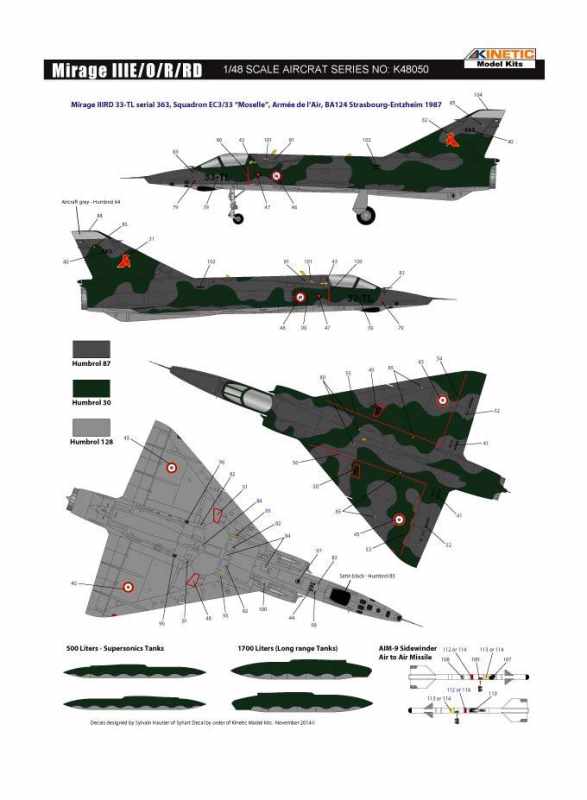
Having reviewed the Kinetic 1/48 scale kit of the Mirage IIIE recently, I decided it was going to go to the top of my must build list. I know I wont receive two medals for this, but it's still a worthy release for this campaign. You can find my review here. I have always been interested in photo reconnaissance aircraft, so I was pleased to see a “recce” Mirage III R/RD option included with this release. In actual fact markings are shown in the painting guide for Mirage IIIR, but there is no scheme for the IIIRD. Even odder is that there are marking included on the decal sheet for an IIIRD. The Kinetic facebook page has an explanation for the omission; they just forgot to add the scheme in the instructions. Anyway they have published the missing scheme on their facebook page and I have included it below.


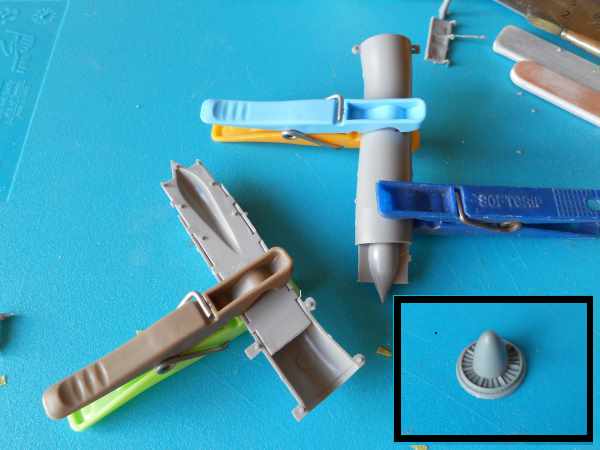
Right onto the build. The first thing I did was join the parts creating the air duct. There are two raised ejector marks on the inside of each duct, but I doubt you will see them once the parts are joined. I will leave them on just to see. I like where the joins are located and there should be little evidence of them once the parts are glued together. The ducts are a little tricky to install into the fuselage. I was glad I numbered the parts as I wondered at one point if I had the parts mixed up. Once in the correct position they seem to click into place. There is a compressor fan to add at the end of the duct, but I suspect you will not see it once everything is buttoned up.

To be continued…….


TangoOscarMike
_VISITCOMMUNITY
Australia
Joined: April 02, 2015
KitMaker: 35 posts
AeroScale: 16 posts
Posted: Friday, April 17, 2015 - 07:33 PM UTC
Greetings. I am building Trumpeter's 1/48 De Havilland Hornet.

My build log is here

http://aeroscale.kitmaker.net/forums/234171&page=1
litespeed
Staff MemberNews Reporter
AEROSCALE
_VISITCOMMUNITY
England - North West, United Kingdom
Joined: October 15, 2009
KitMaker: 1,976 posts
AeroScale: 1,789 posts
Posted: Sunday, April 19, 2015 - 02:24 AM UTC
Hi all

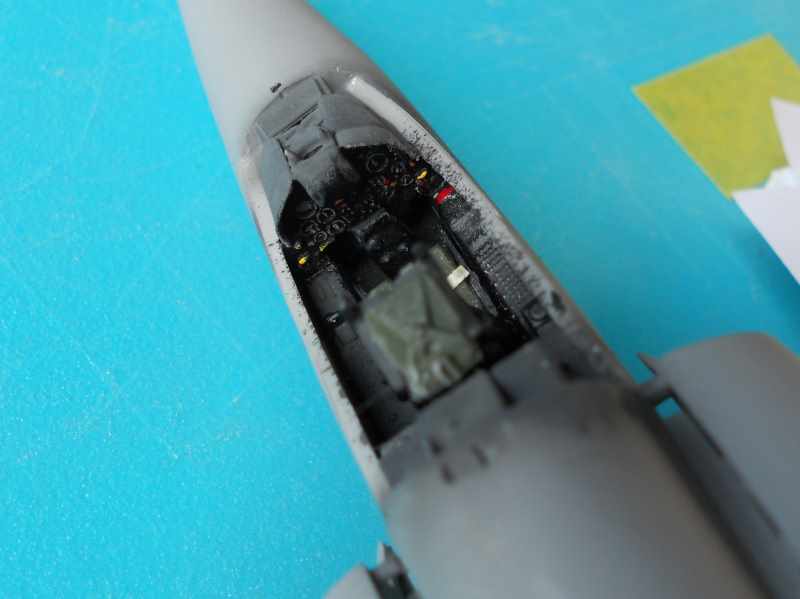
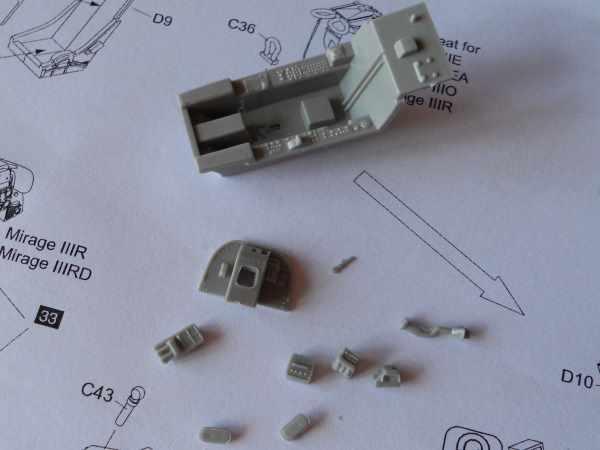
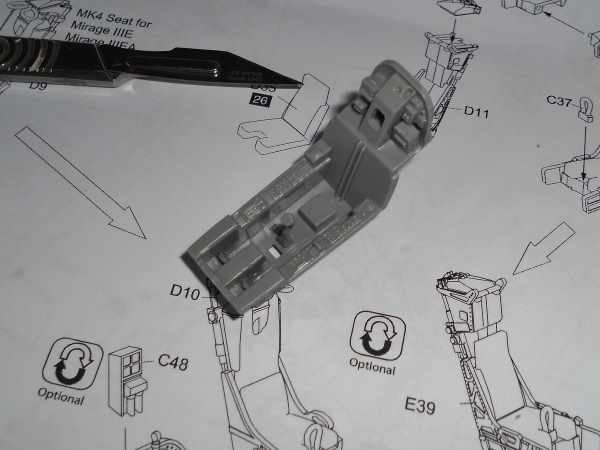
The cockpit is made up from quite a few parts and looks good once built up. The raised detail is fine, but does disappear in parts. As with most combat aircraft of this era, the inside of the cockpit is mostly black in colour. Some of the switches and instruments were highlighted with some colour. I used reference images from the internet as there are no details in the instructions. The hardest parts to install were the rudder pedals. Boy the air was blue after umpteen tries to get them looking right with some tweezers! I ended up using a cocktail stick with a tiny blob of blue tack on the end and the rudder pedals went into their positions first time. The seat will be built later.
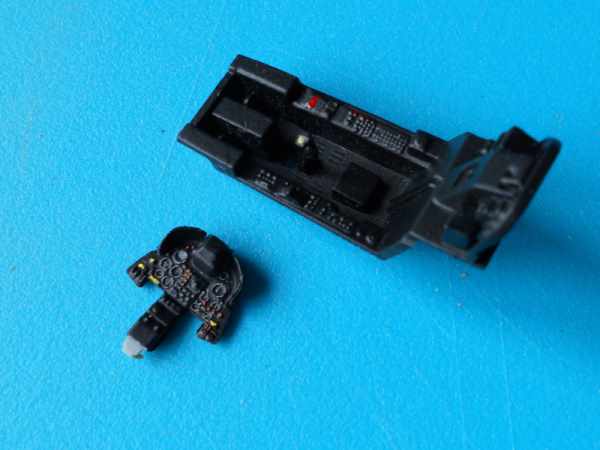


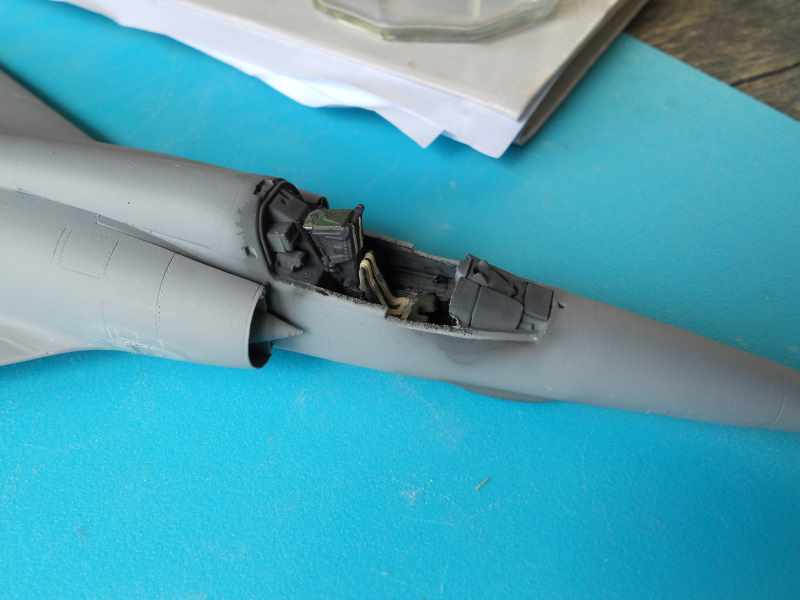
The cockpit was installed minus the seat. The fuselage halves were joined but some work was needed on the mating surfaces of the fuselage as the join was not very good. There were a few gaps that just would not close up. Also the design of the fuselage makes it difficult to clamp the halves together. I ended up using small spots of super glue along the spine and held the two halves together while the glue set. Then I reinforced the join with liquid glue.
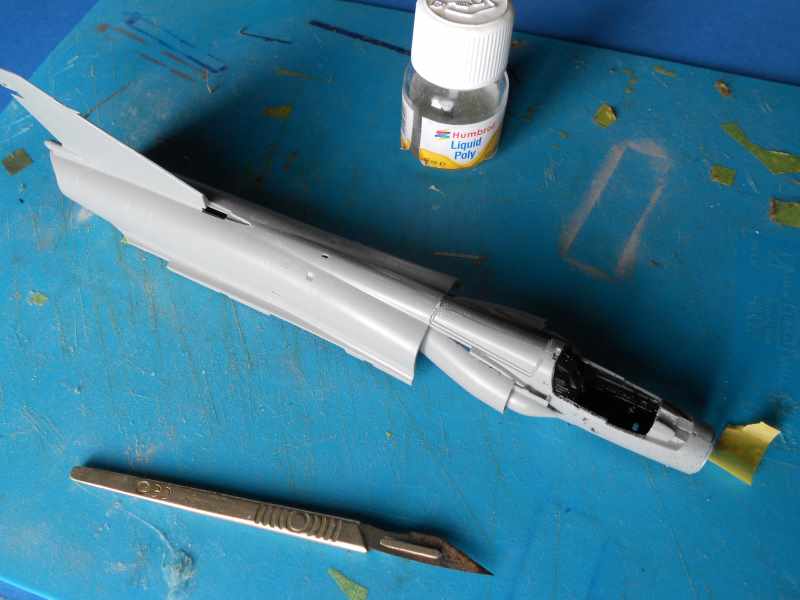
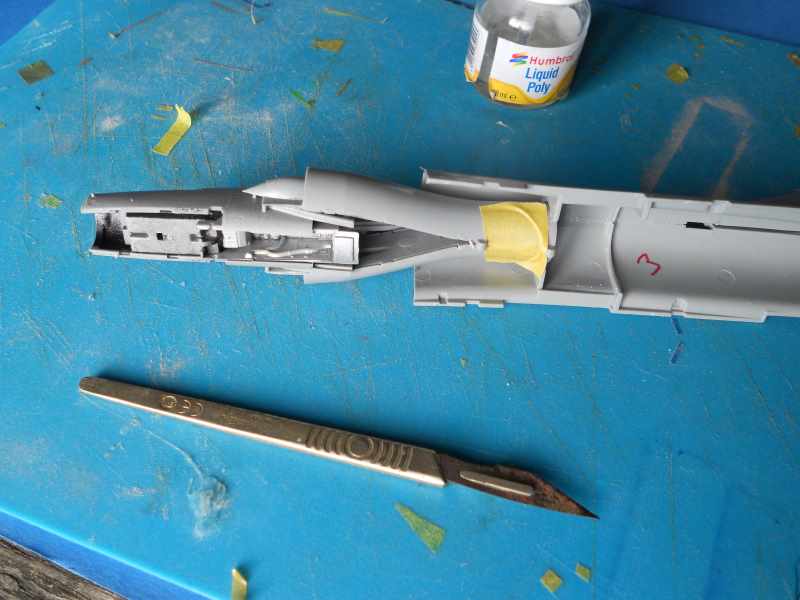


Part of the air intake and the spine behind the cockpit has been added. The joins are reasonable, but they certainly do not look like a panel lines. They will need some filling, a bit of sanding and blending. I also added the distinctive Doppler radar housing under the nose. Again the join is less than perfect. You can see the detail in front undercarriage bay is pretty good. I did pick out some of the detail with various shades of grey and aluminium, but it’s not obvious from this photo.
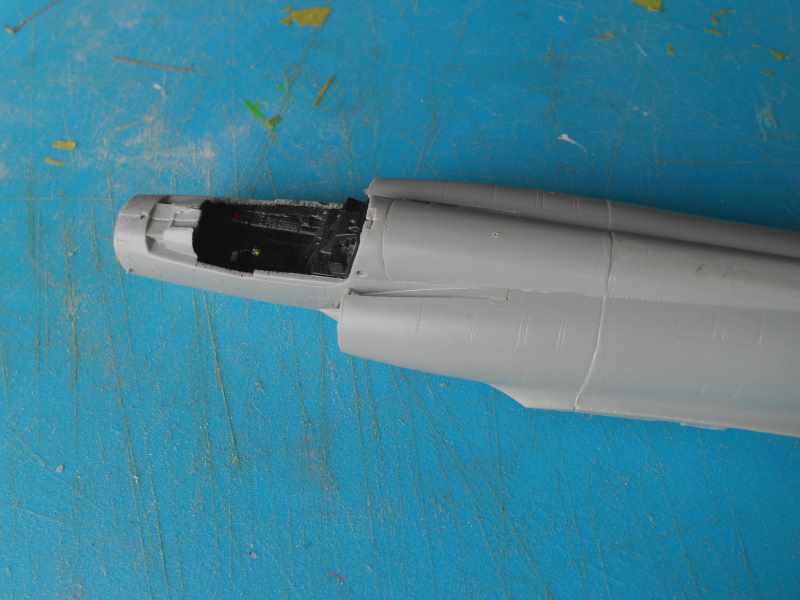
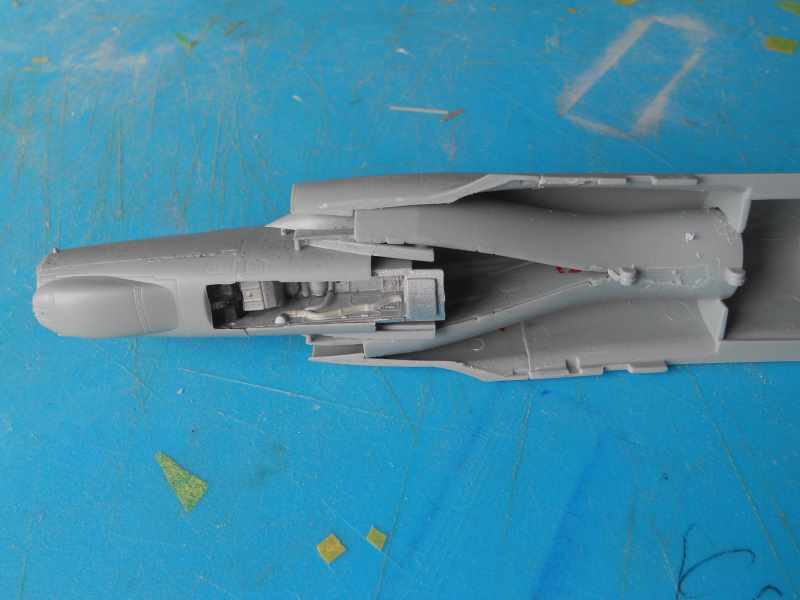


I have tried to be very careful with the joins, but the joins look more akin to welded tank plates! Hopefully I will be able to clean them up. I do laugh at some of the model companies claims that the joins fall on the panel lines on the actual aircraft. Yes they might, but the joins rarely look like the finely recessed panel lines on modern kits.

The wings were built, but I did have problems with the locating pins. They seemed to be very slightly misaligned. So I cut a couple of the locating pins off and the wings fitted together fine.
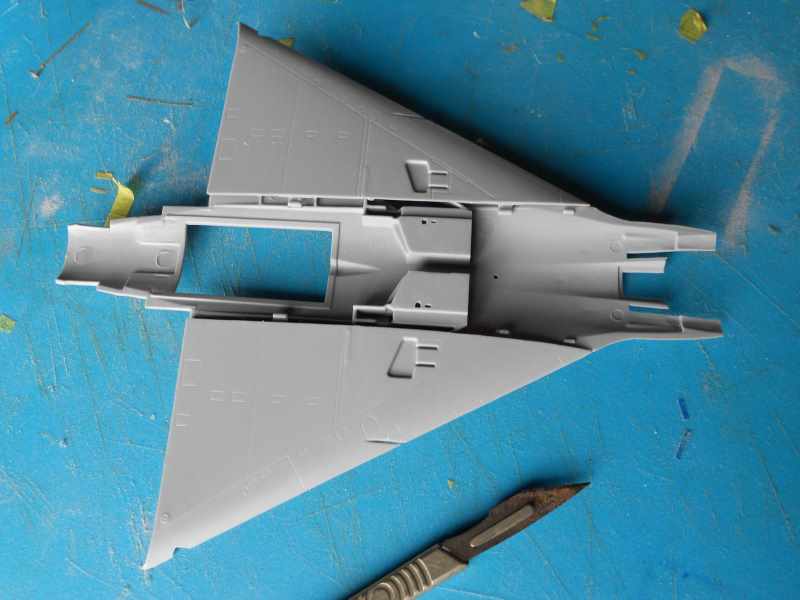
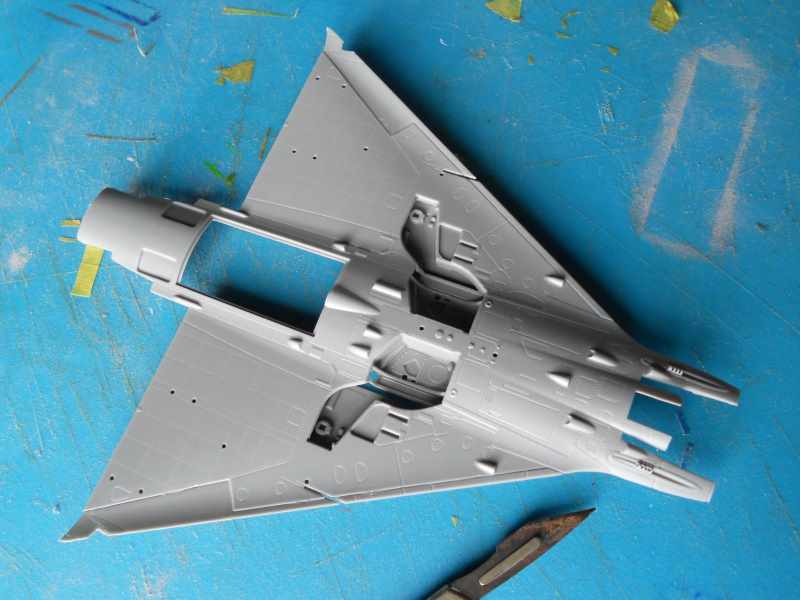


I attached the wings to the fuselage, but boy was it a struggle. The problem is trying to squeeze together the part of the intake on the wing to the intake on the fuselage. I tried clamping, taping and elastic bands, but no joy. In the end I resorted to applying spots of super glue and holding the parts in place till the glue set. I reinforced the join with some liquid glue.
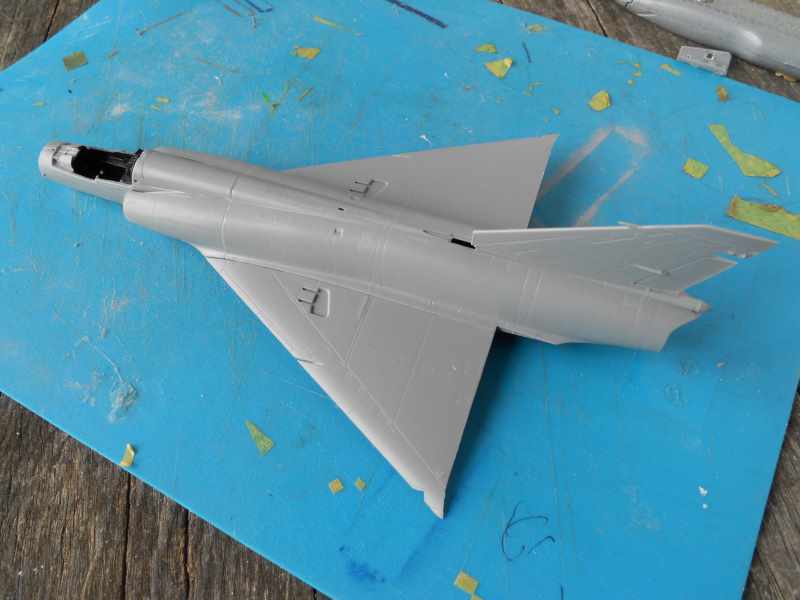
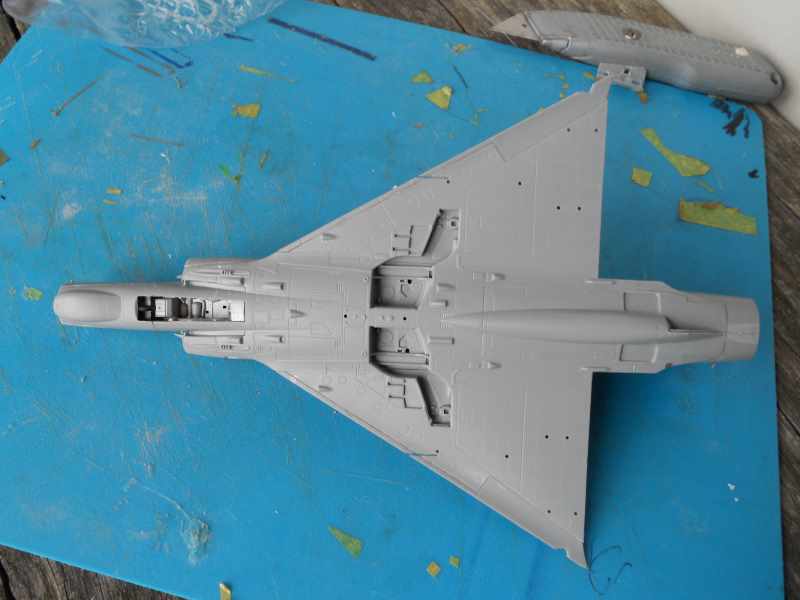


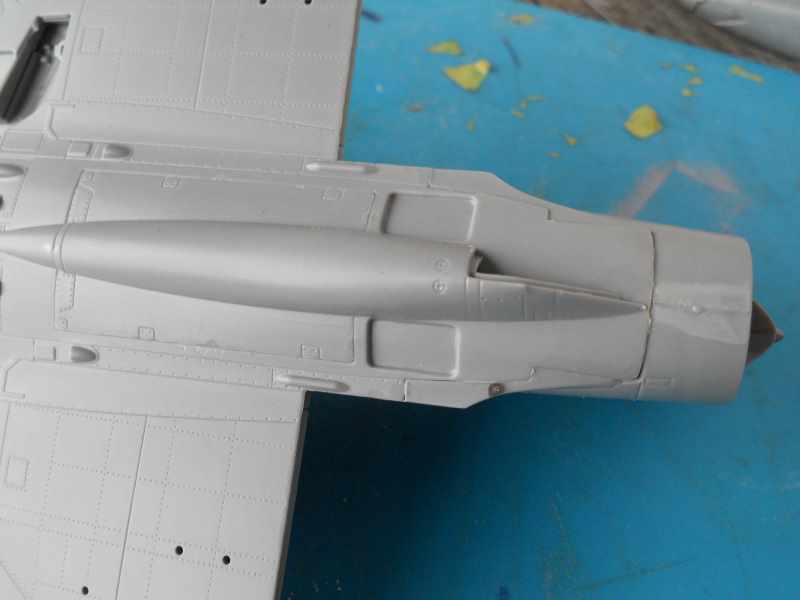
There is a sizable gap to fill along the fuselage/wing join. Hopefully this will be easily done with some stretched sprue. The rear end of the fuselage attached to the lower wing needed a small amount of plastic removing with a sanding stick. One part that does fit very well is the fuel tank underneath the rear fuselage.
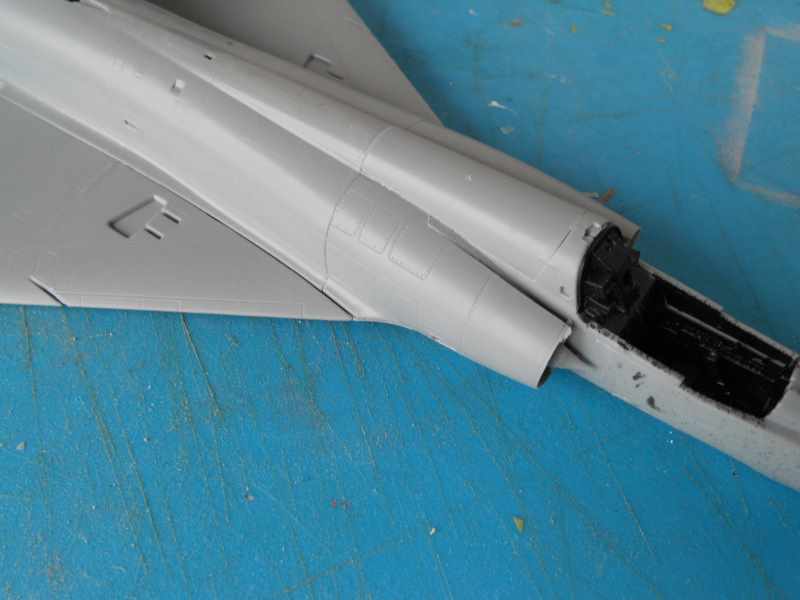
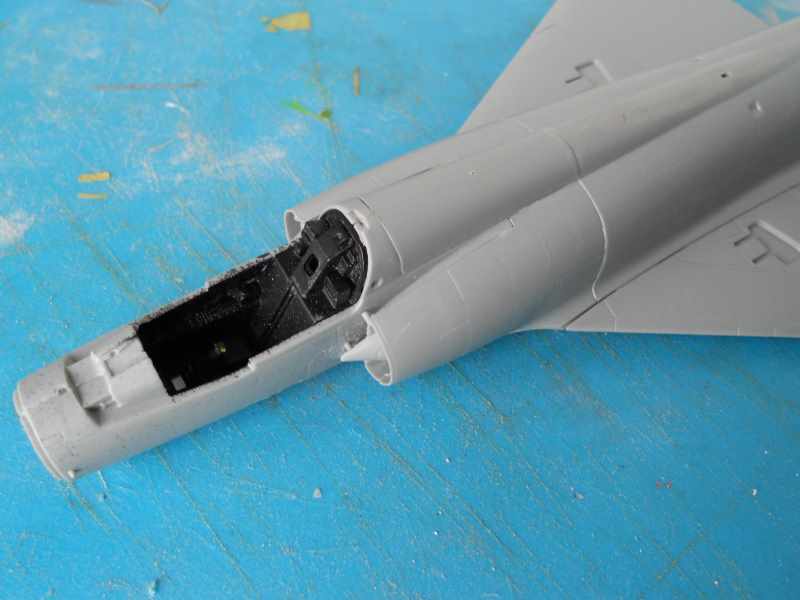


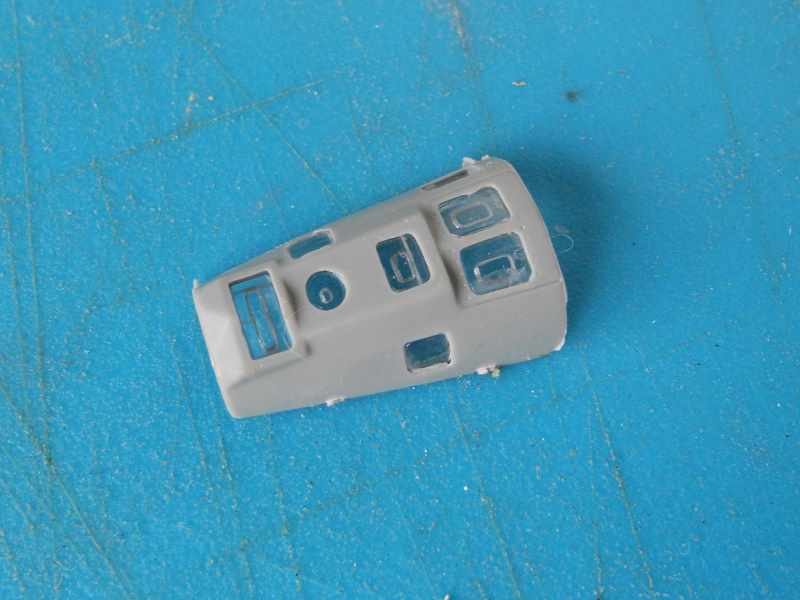
The fit of the single clear plastic which represents the windows for the cameras is not great. Some filler and cleaning up will be necessary. The instructions do not mention the transparent covers for the camera [A] in the tip of the nose and the camera [B] behind. I scratch built the camera cover [B] using a section of clear sprue which I filed four sides onto. I thought occurred to me that the parts might be included on the sprue. Sure enough there they are. So I will use my improvised cover for [B] and use the kit part for [A]. As you can see from the image I have filled the slight gaps around the clear camera cover. I will sand this down later and buff up the clear parts with micromesh polishing cloths.
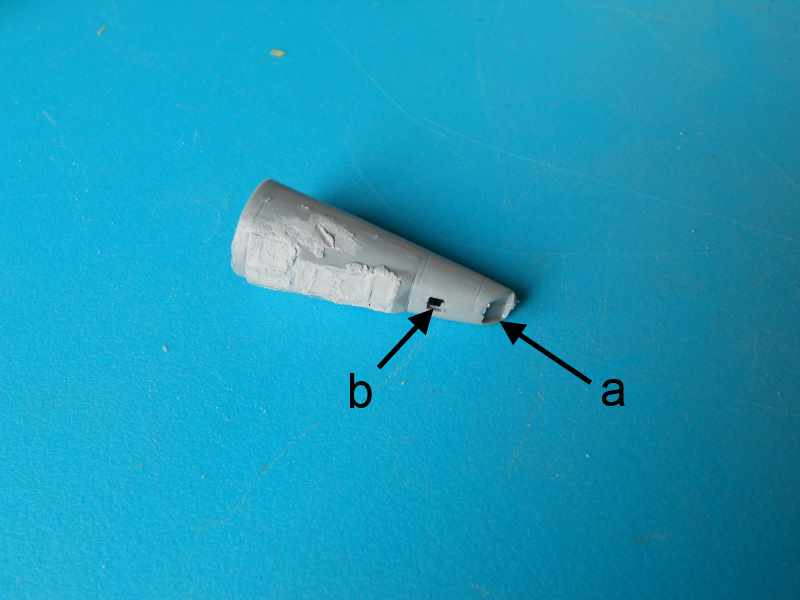


I have started filling in all of the obvious seams on this kit. I used stretched sprue on the wing root, Humbrol filler on most of the other joins and super glue and talc on the seam on the air intakes.
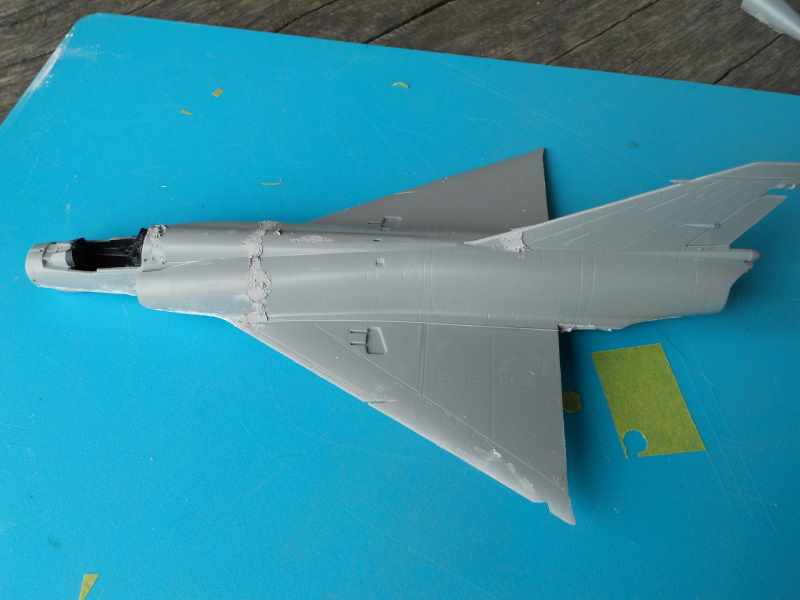
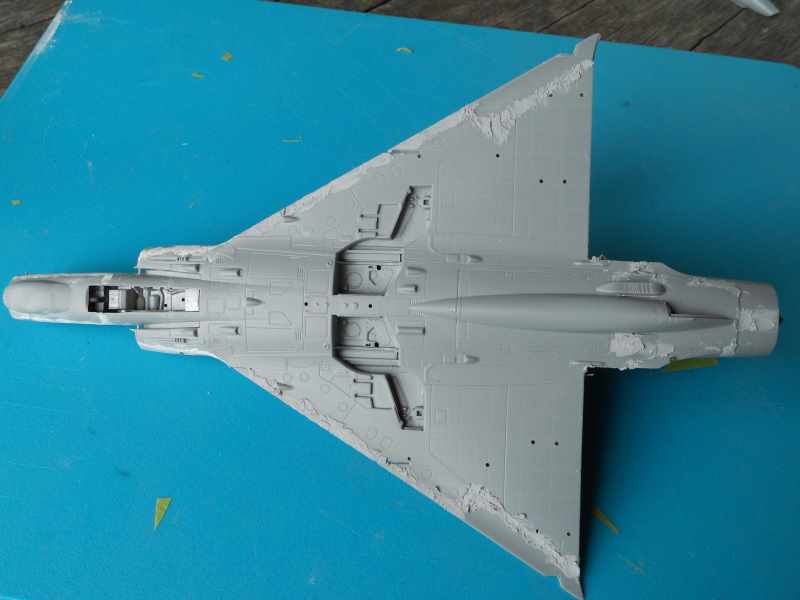
Despite the work I am really enjoying this build particularly now the gorgeous lines of the Mirage III are taking shape. I have been comparing the kit to some images and I have to say Kinetic have captured the shape nicely. The shape of the wing with the slight anhedral and the shape around the wing tips and leading edge look very good.

The fit of the nose to the fuselage is not great, so some work is needed to blend the nose into the fuselage. I have started cleaning up the various filled areas. One of the poorest areas for fit of parts is under the rear tail cone. The inserts either side of the fuel tank is poor by any standards. The application of the filler makes the joints look worse than they really are particularly on the under surfaces of the wing. I tend to use plenty of filler in the eternal hope that all the seams will be flawless on the first pass with the sanding sticks and sponges.
Isn’t this fun!!!!
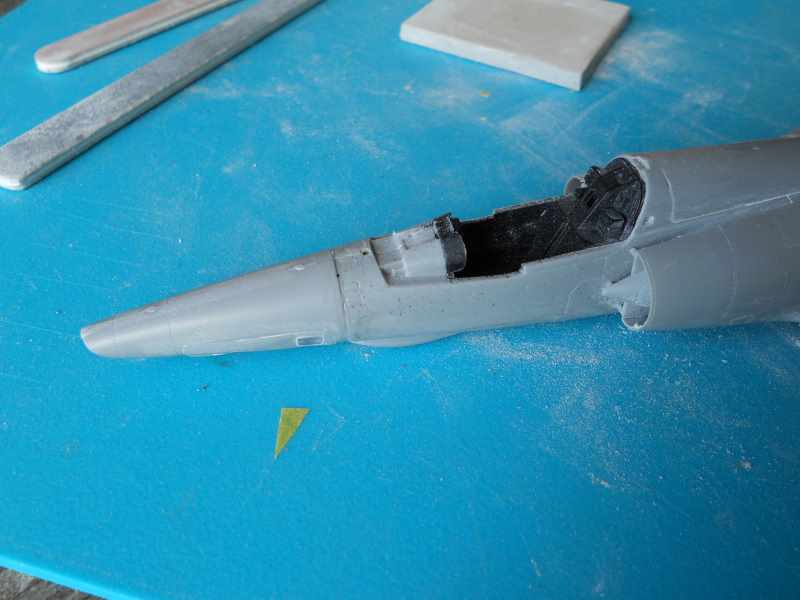
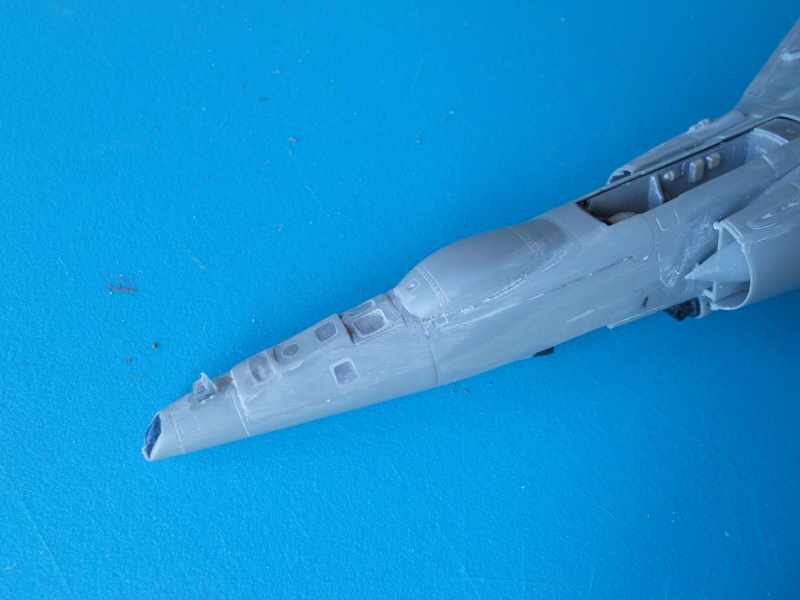
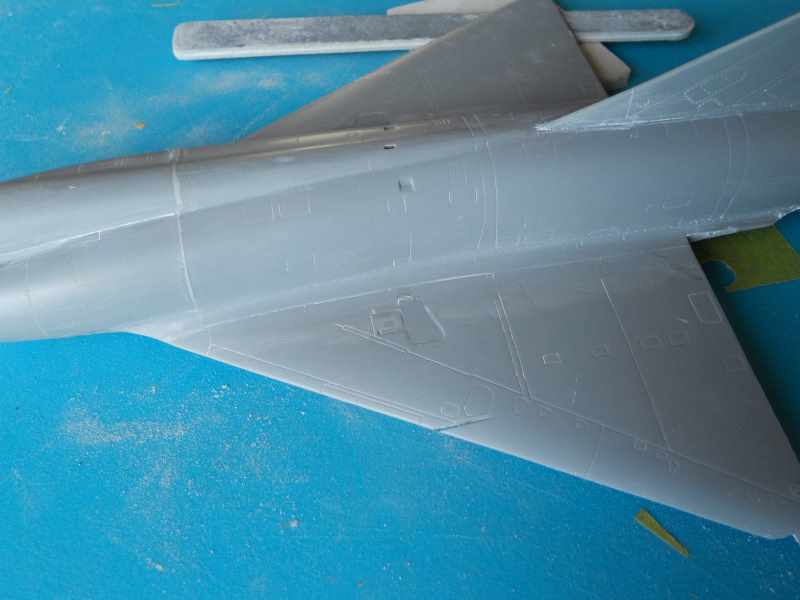


I have fitted the actuator housing and the control surfaces for the wing. No dramas here.
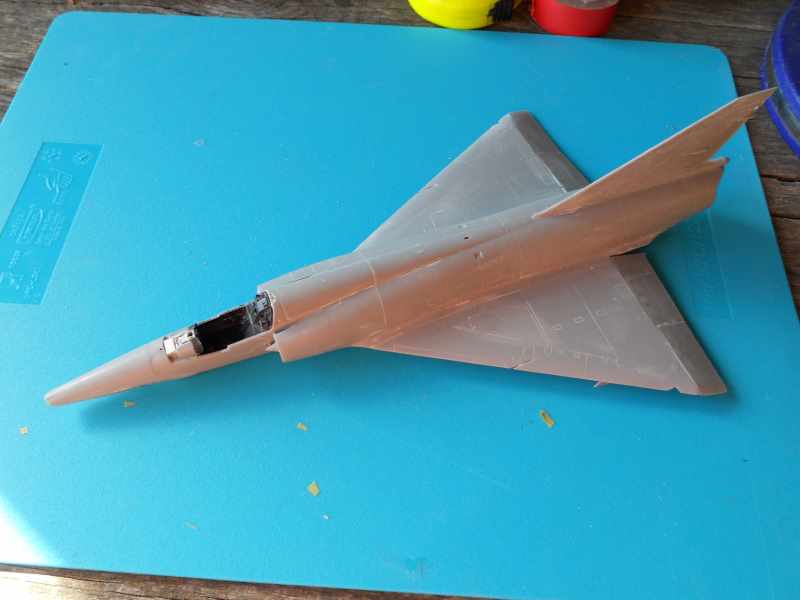


To be continued…….
Jessie_C
_VISITCOMMUNITY
British Columbia, Canada
Joined: September 03, 2009
KitMaker: 6,965 posts
AeroScale: 6,247 posts
Posted: Sunday, April 19, 2015 - 02:55 AM UTC
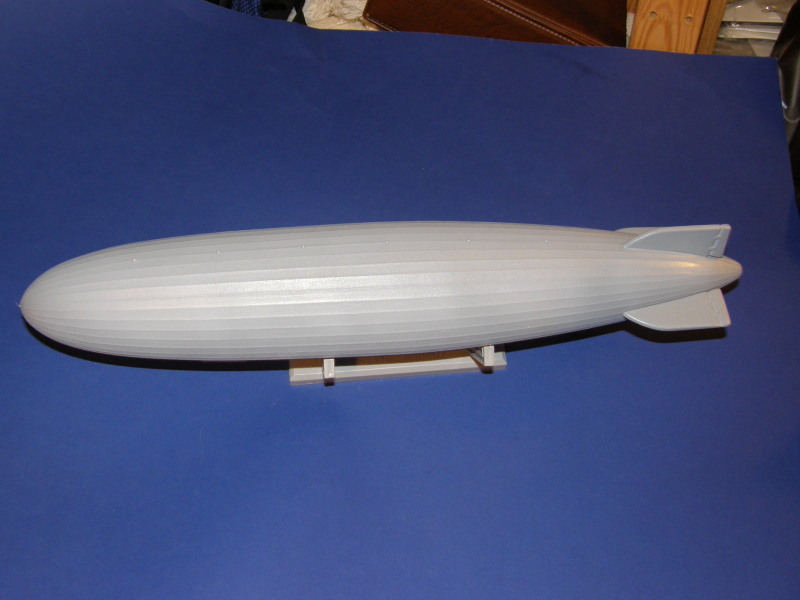
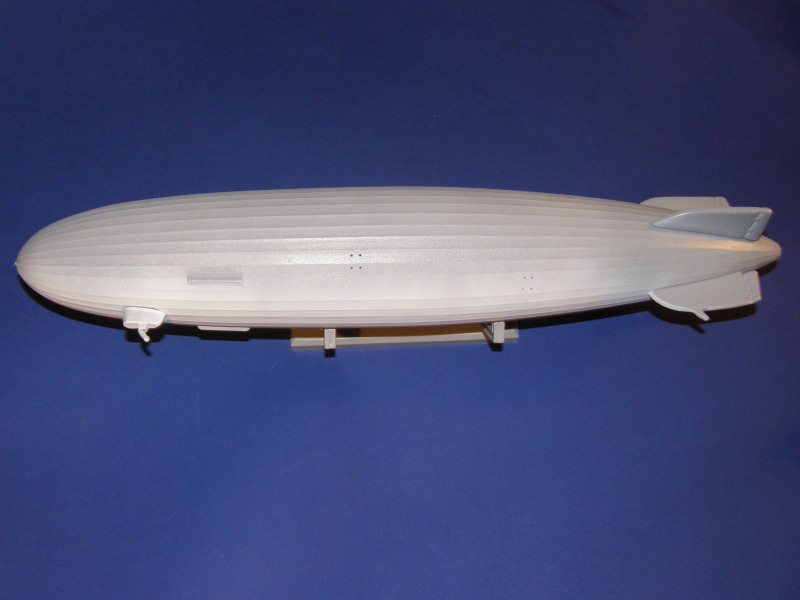
Building a Hindenburg happens quickly when there are only 6 major parts
I have the grey primer on, and the white is for the two strips of unpainted fabric which ran down the belly of the beast. They'll be masked off before the silver dope colour gets sprayed. Also to be seen are the holes I drilled for the engine mounts. The kit would have you glue the struts to 4 engraved circles per engine. My last Hindenburg didn't last a week before all 4 engines were knocked off.

litespeed
Staff MemberNews Reporter
AEROSCALE
_VISITCOMMUNITY
England - North West, United Kingdom
Joined: October 15, 2009
KitMaker: 1,976 posts
AeroScale: 1,789 posts
Posted: Tuesday, April 28, 2015 - 04:15 AM UTC
Hi all

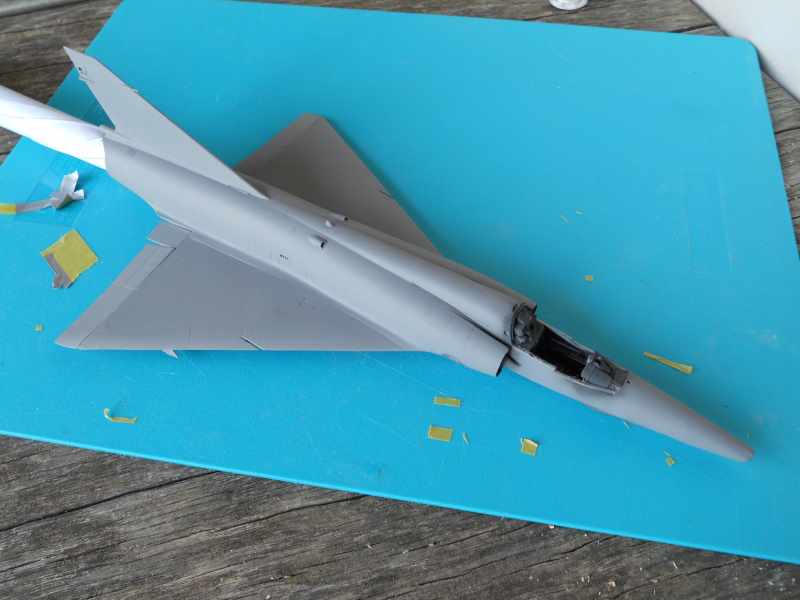
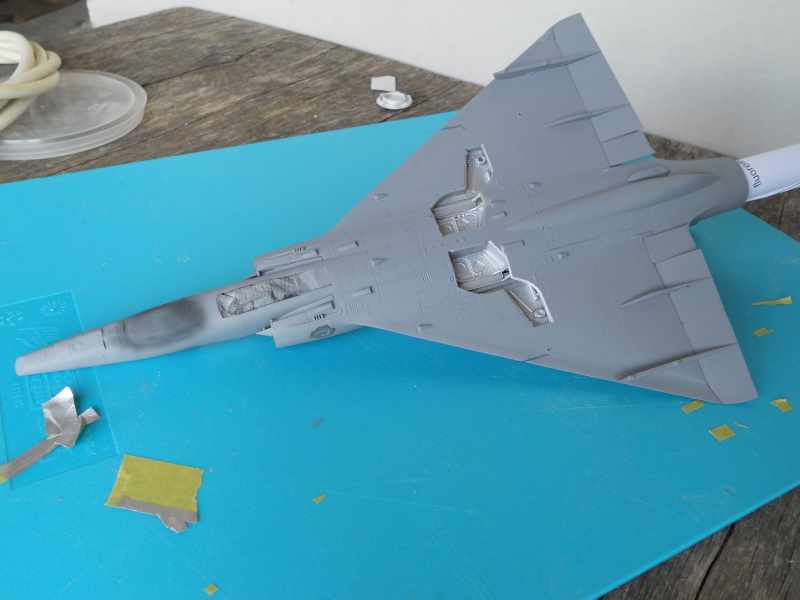
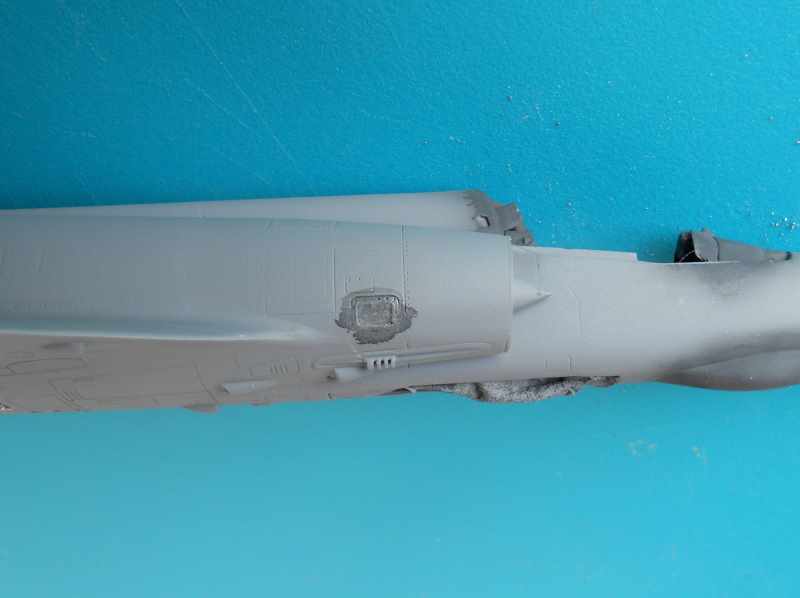
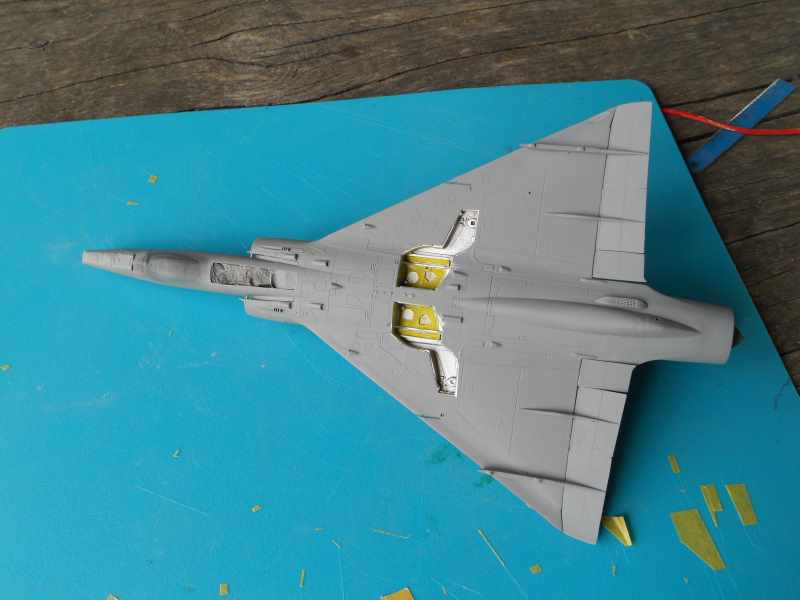
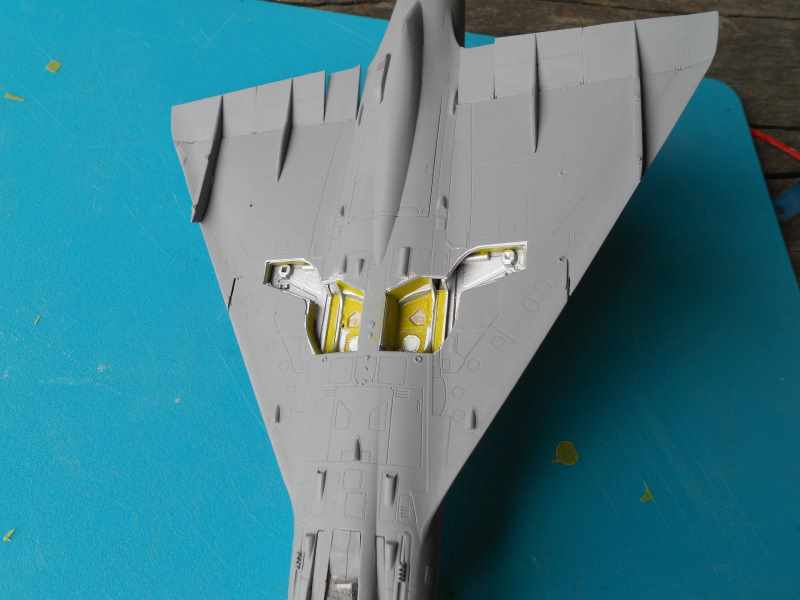
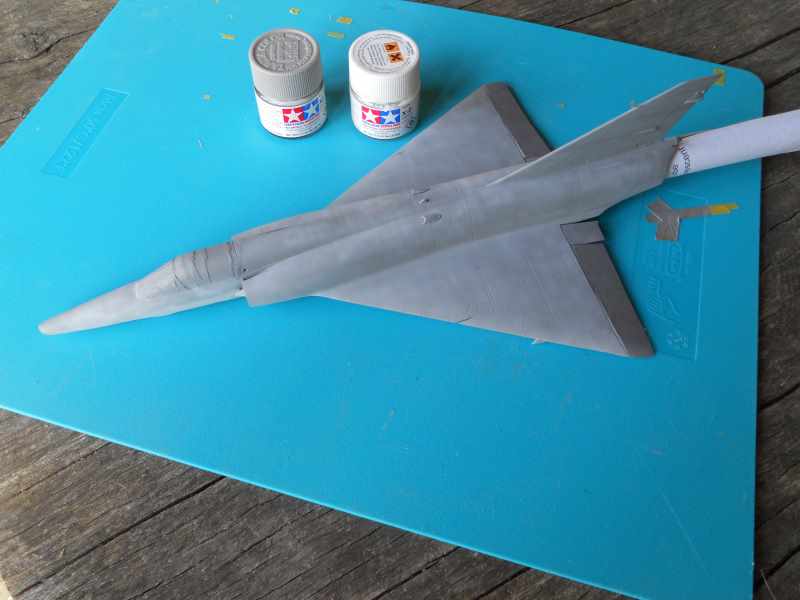
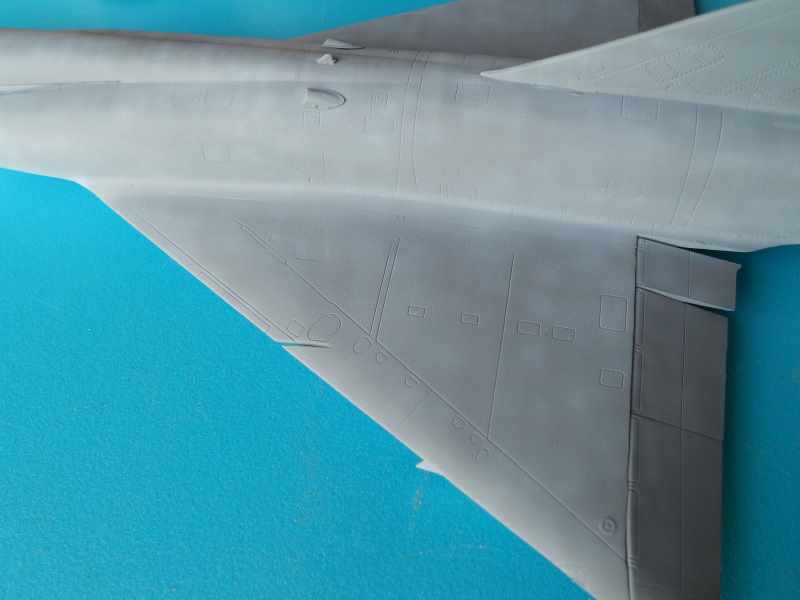
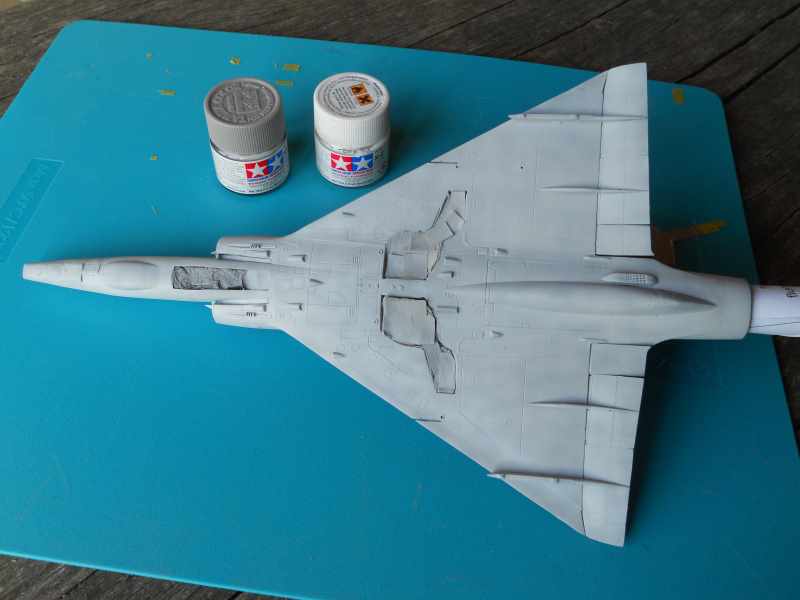
I sprayed a couple of coats of Halford acyrilic primer to see if any seams needed further attention. There are a couple of places including a small area of wing root that require further attention. The main undercarriage bay was painted aluminium. It looks a little bright so I will tone it down later. One thing I did discover was a rectangular hole in the right side of the fuselage. Something is meant to be placed in it, but there are no clues in the instructions. I can’t believe I did not see it before priming. I know the Mirage 2000 has small windows to inspect the air intake, but I cannot find any images showing any such widow on the Mirage III/5. There is a clear plastic part that fits the hole so I have put that in. Any info on this area would be much appreciated.


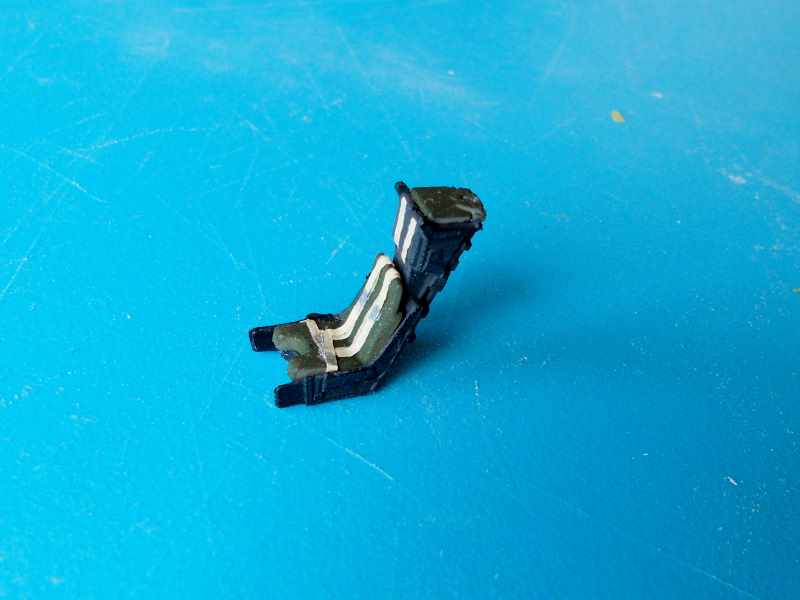
The seat has been built and looks pretty good, but needed some scratch built seat harness. I sprayed a light mist of dark grey over the boxes at the back of the cockpit, as I thought the black I had painted them previously was far too dark.


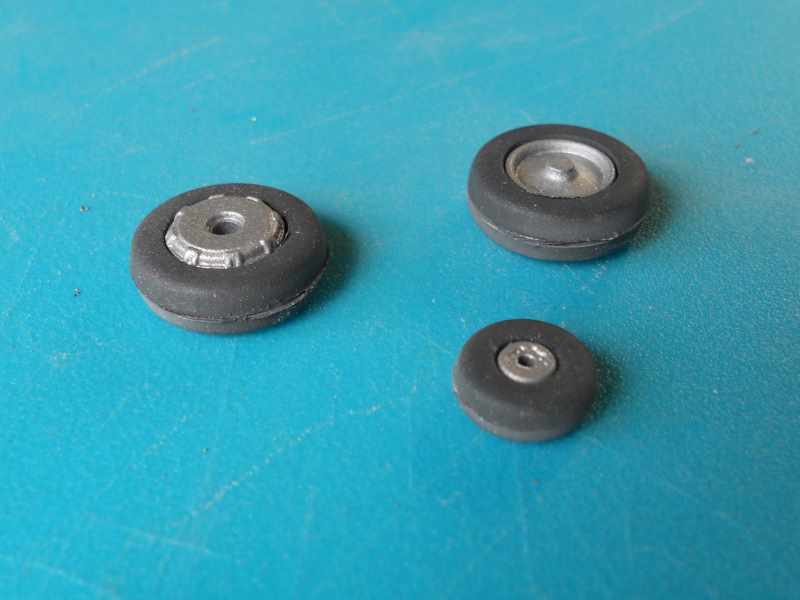
The wheels were painted before assembly, but as you can see from the image, the two halves of the tyre don’t meet. So the gap will need to be filled. I did try to file down the flange on the separate hubs for a better fit, but it’s a very fiddly job because of their size. So it’s easier to fill the gap and repaint the tread of the tyre.


The windscreen and canopy are fitted. There is a slight gap between the sill and the canopy/windscreen so a little filler was needed to blend them into the fuselage. Obviously you can cut down on some filling by displaying the canopy open. Unfortunately my cats love nothing better than rubbing up against a raised canopy so I rarely display a model that way. The canopy and windscreen were then masked and primer was applied.


I also cleaned up a few areas before re applying some primer. The main undercarriage bay on the real thing has some panels painted with something that looks like zinc chromate. So I have tried to replicate these areas.


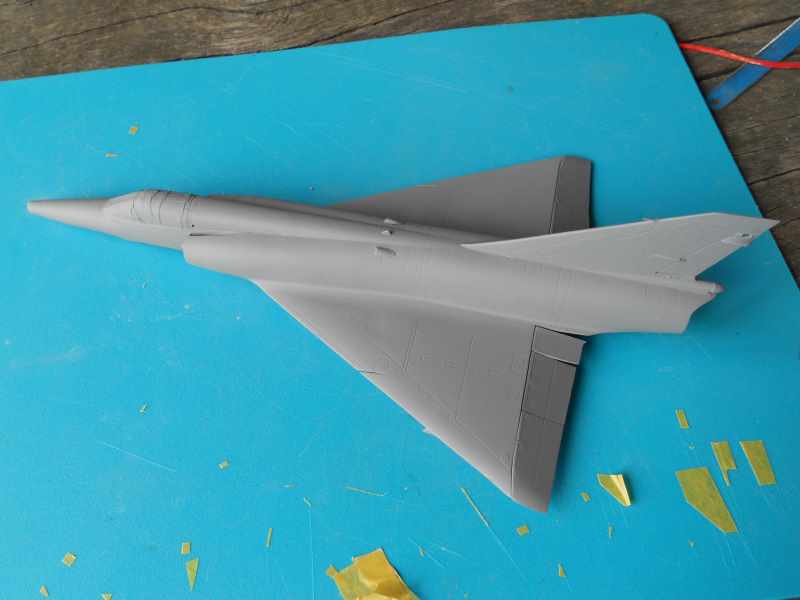
I have sprayed the upper surfaces with various shades of Tamiya sky grey [XF-19]. I have seen a few images of the Mirage III with pretty faded upper colours. So I was trying to replicate the patchy nature of the upper colours. The under surface colour was painted light grey using a mix of sky grey and Tamiya white.


To be continued……….
Tim,
alanpaul
#274
_VISITCOMMUNITY
England - North, United Kingdom
Joined: April 09, 2007
KitMaker: 98 posts
AeroScale: 3 posts
Posted: Wednesday, May 13, 2015 - 04:14 AM UTC
How hot is hot?

I would like to build the 1/72 Dragon Churchill tank with wading gear. I think this has been available in the UK for only 2 or 3 months: it was certainly new at Hannants in March '15. On line, however, I see that it has been available for much longer.

So, is it hot enough?

Alan
MichaelSatin
Staff MemberCampaigns Administrator
AEROSCALE
_VISITCOMMUNITY
Colorado, United States
Joined: January 19, 2008
KitMaker: 3,909 posts
AeroScale: 2,904 posts
Posted: Wednesday, May 13, 2015 - 05:30 AM UTC

Quoted Text

How hot is hot?

I would like to build the 1/72 Dragon Churchill tank with wading gear. I think this has been available in the UK for only 2 or 3 months: it was certainly new at Hannants in March '15. On line, however, I see that it has been available for much longer.

So, is it hot enough?

Alan


Alan,

If you mean the Mk.III Dieppe kit "fitted for wading", I think you're good to go!

Michael