Air Campaigns
Want to start or join a group build? This is where to start.
OFFICIAL:- Airfx III campaign
MichaelSatin
Staff MemberCampaigns Administrator
AEROSCALE
_VISITCOMMUNITY
Colorado, United States
Joined: January 19, 2008
KitMaker: 3,909 posts
AeroScale: 2,904 posts
Posted: Friday, January 16, 2015 - 07:54 PM UTC

Quoted Text

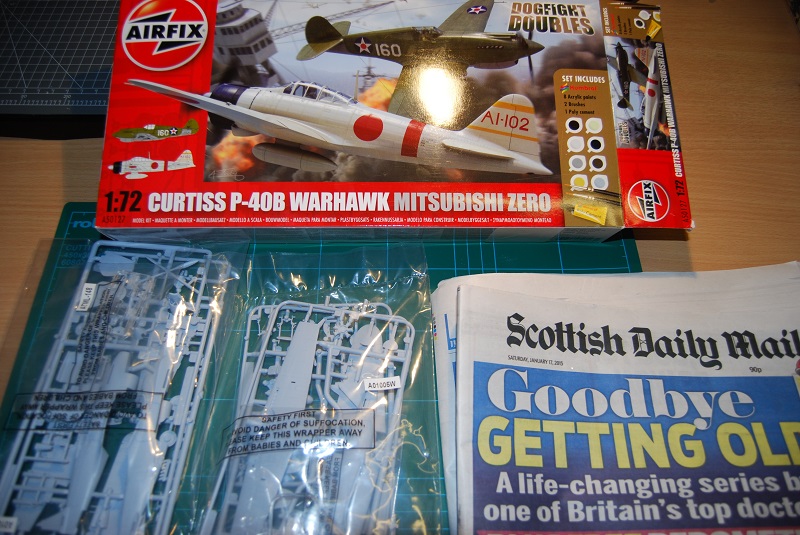
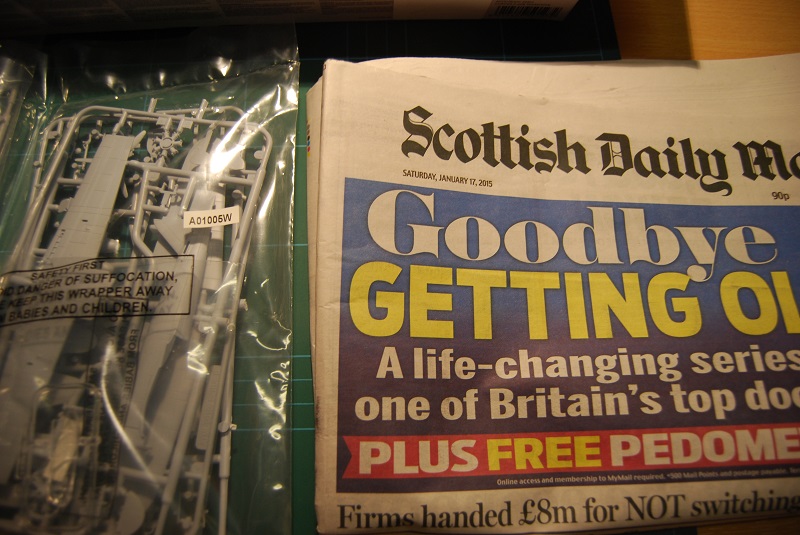
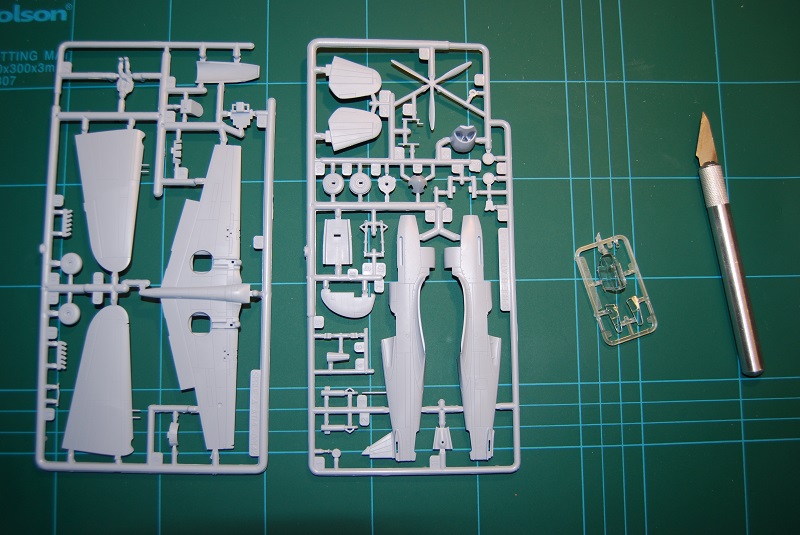
I have thrown my hat into the ring. Last built a model 38 years ago and it was glued together with decals added and that was it. Always been interested but have a lot to learn. Just bought 1:72 Curtiss P-40B Warhawk and a Mitsubishi Zero dogfight double. Please be patient and happy to receive advice. Happy modelling!
Brian


Excellent places to start Brian! Welcome back to the fold!

Michael
Removed by original poster on 01/17/15 - 19:43:30 (GMT).
Removed by original poster on 01/17/15 - 19:47:02 (GMT).
bm4247
_VISITCOMMUNITY
Scotland, United Kingdom
Joined: December 29, 2014
KitMaker: 88 posts
AeroScale: 26 posts
Posted: Saturday, January 17, 2015 - 12:53 AM UTC
raypalmer
_VISITCOMMUNITY
Ontario, Canada
Joined: March 29, 2010
KitMaker: 1,151 posts
AeroScale: 985 posts
Posted: Saturday, January 17, 2015 - 07:06 AM UTC

Quoted Text


There we go. K so posting images off kitmaker's system is rough. You need to open the image (usually click or right click on the picture itself) so it's just the picture, nothing else. Then copy paste the address bar into your img tags.
bm4247
_VISITCOMMUNITY
Scotland, United Kingdom
Joined: December 29, 2014
KitMaker: 88 posts
AeroScale: 26 posts
Posted: Saturday, January 17, 2015 - 02:28 PM UTC
Thanks for that. It was rather frustrating. It got to the stage I thought the photos required to be authorised or something.
bm4247
_VISITCOMMUNITY
Scotland, United Kingdom
Joined: December 29, 2014
KitMaker: 88 posts
AeroScale: 26 posts
Posted: Saturday, January 17, 2015 - 02:34 PM UTC


Proof I did not start early!
bm4247
_VISITCOMMUNITY
Scotland, United Kingdom
Joined: December 29, 2014
KitMaker: 88 posts
AeroScale: 26 posts
Posted: Saturday, January 17, 2015 - 02:36 PM UTC


The Curtiss P-40B Warhawk parts.

Now have to decide the best place to start.
tinbanger
_VISITCOMMUNITY
Ontario, Canada
Joined: February 04, 2008
KitMaker: 2,507 posts
AeroScale: 1,814 posts
Posted: Sunday, January 18, 2015 - 02:48 AM UTC
Cockpit painted and fuselage halfs joined:-


Keep up the good work everyone!
lfetz145
_VISITCOMMUNITY
Colorado, United States
Joined: May 18, 2014
KitMaker: 69 posts
AeroScale: 67 posts
Posted: Sunday, January 18, 2015 - 09:07 AM UTC
Guys, I fudged up. Building the Airfix Dogfight Doubles with the Zero and P-40, I screwed up big time on the Zero. I tore one of the decals, and instead of figuring out a way to fix it, I thought I'd just try to pull it off as weathering. But, I knew I'd have to weather the rest of the plane heavily too, if my hinomarus were going to be all torn up. Long story short, I did way too much weathering, and looks overdone to me. I'll get some photos up tomorrow, to get some other opinions on it.

Gosh I hope I didn't just blow this kit.
lfetz145
_VISITCOMMUNITY
Colorado, United States
Joined: May 18, 2014
KitMaker: 69 posts
AeroScale: 67 posts
Posted: Sunday, January 18, 2015 - 10:48 PM UTC
So, here are the pics- the lighting in the room is weird, and the flash from the camera made some of my colors look weird. I think I'll add an oil wash, and some different powders for some more weathering.


So whats the verdict, do you guys think it's overdone?
Thanks for your input!
raypalmer
_VISITCOMMUNITY
Ontario, Canada
Joined: March 29, 2010
KitMaker: 1,151 posts
AeroScale: 985 posts
Posted: Sunday, January 18, 2015 - 11:23 PM UTC
Unto itself it actually looks pretty good. Especially as an abandoned airframe. As a IJN warplane I have thoughts...

With the exception of very late war examples, Japanese NAVY (important distinction there) aircraft were extremely well painted and maintained. A red oxide primer was used on virtually all Mitsubishi naval aircraft that remains firmly adhered to wrecked airframes found in jungles etc to this day. The myth of the flaking Japanese aircraft is one, true with regards to much of the army's aircraft. Two, derived from pictures of Japanese aircraft taken post war. These aircraft were often field repainted NMF examples, long abandoned and generally had become parts hulks. Wartime photos of zeros indicate no more chipping than their allied counterparts. Also, the undercoat would have shown through at wear points showing the deep rusty red primer underneath. Think the colour of ships at the waterline. finally, the hinomaru was culturally much more significant than the roundels or stars and bars were to other air forces. It was very rarely allowed to deteriorate much, photos of profoundly worn down IJA aircraft show hinomarus spared and repaired the damage the rest of the paintwork suffered.
lfetz145
_VISITCOMMUNITY
Colorado, United States
Joined: May 18, 2014
KitMaker: 69 posts
AeroScale: 67 posts
Posted: Monday, January 19, 2015 - 12:34 AM UTC
Thanks for your input, Richard. The more I looked at it, the more I thought I liked the look. I may take some artistic liberties with the NMF chipping, but I will repaint the Hinomarus, if they were so carefully preserved.
So, while it might not be the most accurate depiction, accuracy isn't what I got into the hobby for. I just have fun with it, and I did indeed have fun with the Zero
RedDuster
_VISITCOMMUNITY
England - South East, United Kingdom
Joined: March 01, 2010
KitMaker: 7,078 posts
AeroScale: 118 posts
Posted: Monday, January 19, 2015 - 02:38 AM UTC
Great builds going on here, love the weathering on the Zero Logan, great job.

On with the Dornier, my least favourite job, masking, the main transparencies done.


and tacked in place with Krystal Kleer. The windows over the Bomb bay have also filled with Kleer.


The Bomb bay / wheel wells / ventral hatch masked with kit parts, the flap bays just need a bit of tape prior to a primer coat going on.


Si
Cbacon84
_VISITCOMMUNITY
California, United States
Joined: October 10, 2012
KitMaker: 204 posts
AeroScale: 52 posts
Posted: Monday, January 19, 2015 - 03:16 AM UTC
small update, got all 300+ holes in the air breaks drilled. Now I'm working on the cockpit.

Mcleod
_VISITCOMMUNITY
Alberta, Canada
Joined: April 07, 2010
KitMaker: 1,028 posts
AeroScale: 939 posts
Posted: Monday, January 19, 2015 - 04:36 AM UTC

Quoted Text

got all 300+ holes in the air breaks drilled.


This is why so many of us modellers end up in Peaceful Meadows Asylum. But, I bet you feel better now that its done.
firstcircle
_VISITCOMMUNITY
England - South East, United Kingdom
Joined: November 19, 2008
KitMaker: 2,249 posts
AeroScale: 34 posts
Posted: Monday, January 19, 2015 - 04:37 AM UTC
Quick update on the SdKfz250...

Taped the hull together with masking tape to get the right position for that tarp thing on top of the seat:


Glued that and other interior details in place and filled various ejector marks:


Underside of the hull top with the details added:


Weapons for the racks, the seats and other interior details all prepped for paint:


phantom_phanatic309
#372
_VISITCOMMUNITY
United Kingdom
Joined: March 10, 2010
KitMaker: 2,568 posts
AeroScale: 1,619 posts
Posted: Monday, January 19, 2015 - 04:45 AM UTC
Half Tracks coming along nicely Matthew. I picked up the recent reissue last year along with the Humber staff car. I was surprised at how well detailed the Half Track is considering its age. Unfortunately Airfix still include the vinyl wheels and tracks but I suppose it would have been too costly to retool those.
firstcircle
_VISITCOMMUNITY
England - South East, United Kingdom
Joined: November 19, 2008
KitMaker: 2,249 posts
AeroScale: 34 posts
Posted: Monday, January 19, 2015 - 04:58 AM UTC
Hi Stephen, yes, it would be nice if they offered new tracks and tyres as an aftermarket set for those who want something better, a bit like they did with the brass detail sets on the Jackal.
I have a cunning plan anyway...
Mcleod
_VISITCOMMUNITY
Alberta, Canada
Joined: April 07, 2010
KitMaker: 1,028 posts
AeroScale: 939 posts
Posted: Monday, January 19, 2015 - 08:54 AM UTC
Ah! The old Airfix 737. I'm sure it's 70's vintage.
None of it fits very well, about as good as this:

I'm using lots of Tamiya putty and Mr Surfacer throughout this build.
Originally, I wanted to sheet the inside of the cockpit windows to accept the ill fitting clear part; a base to spread the part properly. But, I forgot before gluing the fuse halves together.
So I had to add a spreader bar to the inside of the clear part.


I wish I could have taken a photo of the clear part when first glued in. It was more important to sand it out quickly, though, because I used considerable CA to do it. If you don't sand out CA right away, it becomes difficult.
As you can see, there is some filling required:

I'm still happy with the fit. The rear edges of the part are not pushed in, as they were before the spreader bar was added.
Now I have some parts that have all the raised detail removed, and can enter into final filling, sanding, scribing, and polishing.
beefy66
_VISITCOMMUNITY
England - North East, United Kingdom
Joined: October 22, 2007
KitMaker: 971 posts
AeroScale: 11 posts
Posted: Tuesday, January 20, 2015 - 04:41 PM UTC
Well it looks like everyone's build is flying along ( Pun )
My progress has been slow so far I,am trying to train my pet spider Sid to do the rigging for me but he is a slow learner


Some of you guys should know what the rigging is as it is normally used for Biplane rigging

Keith
Cbacon84
_VISITCOMMUNITY
California, United States
Joined: October 10, 2012
KitMaker: 204 posts
AeroScale: 52 posts
Posted: Wednesday, January 21, 2015 - 01:01 PM UTC
another small update, got the very basic cockpit done added a round bit of scrap sprue for the head cushion cant really see it in the picture. also made a small mistake the console was supposed to be black not green. lets just say the color guide on the instructions leaves a lot to be desired for some of the small part.
Mcleod
_VISITCOMMUNITY
Alberta, Canada
Joined: April 07, 2010
KitMaker: 1,028 posts
AeroScale: 939 posts
Posted: Friday, January 23, 2015 - 08:03 AM UTC
Very small update;
Filling larger holes with styrene.

The mud job:

One putty + one Surfacer 500 + two Surfacer 1000, and all is well. Ready for scribing.

Later
thueser
_VISITCOMMUNITY
European Union
Joined: October 10, 2012
KitMaker: 45 posts
AeroScale: 5 posts
Posted: Friday, January 23, 2015 - 06:07 PM UTC
Hi all,

that will be my contribution to this GB.


I've switched back to 1/72 from quarterscale, because RL commitment and shift work left me with only small spare time slots to build something. With this step, my hope is to get more builds completed.
tinbanger
_VISITCOMMUNITY
Ontario, Canada
Joined: February 04, 2008
KitMaker: 2,507 posts
AeroScale: 1,814 posts
Posted: Saturday, January 24, 2015 - 12:05 AM UTC
Good work every one!
Welcome Torsten