OFFICIAL: Fleet Air Arm Campaign
England - South East, United Kingdom
Joined: August 15, 2012
KitMaker: 408 posts
AeroScale: 365 posts
Posted: Wednesday, May 07, 2014 - 04:29 AM UTC
I've changed my mind again! As there now seems to be a plethora of Gannets in this campaign, I have reverted back to my original plan of building Revell's reissue of the Matchbox 1/32 De Havilland Sea Venom, in Suez Crisis markings.


This will be largely OOB, save for a set of Berna decals, as the kit was missing the original decals(got it pretty cheap from Evil Bay). Other than that, it appears that no one has produced any other aftermarket for this kit. I am planning on adding a fair amount of scratch built detail, as several areas are lacking the basics. As it happens, I am paying a visit to the De Havilland Heritage Museum on Friday to do a bit of research before I get started. Best of luck everyone!
On the workbench
National Pride - 1/72 BAe Nimrod MR2.P
Tiger Meet! - 1/72 Panavia Tornado ECR (Luftwaffe)
Airfix III - 1/72 Hawker Hunter FGA.9
Hairy Brush - 1/72 P-51D Mustang
Mustang 75 - 1/72 P-51D "Ferocious Frankie"

#275
Alberta, Canada
Joined: March 01, 2006
KitMaker: 174 posts
AeroScale: 19 posts
Posted: Friday, May 09, 2014 - 07:21 AM UTC
My entry will be an out of the box Italeri Sea Hurricane in 1/48.

It should make a good match for the Seafire I did for the Mediterranean Campaign.
England - East Midlands, United Kingdom
Joined: April 27, 2013
KitMaker: 450 posts
AeroScale: 387 posts
Posted: Friday, May 09, 2014 - 11:04 AM UTC
Having looked further at my Airfix Buccaneer kit there are a few more items to resolve.
1 The airbrake is moulded in 2 halves, the actual airbrake has 2 moving parts per side, the larger pointy bit and smaller but substantial hinge. The latter is clearly marked as a panel line. I think I may use this panel from the Matchbox kit if the profile is correct.
2 The all moving tailplane rear does not have this purported ledge as the resin manufacturers thought. As it is a better moulding I think some scraping and filling is in order.
3 The wingfold is fine but the rear part where the Flap/Ailerons are has a kink at the front, again, this is not shown in the Airfix kit but is in the Matchbox one. This will involve surgery, cutting into the inner flap and adding to the aileron.
4 As usual there is no detail in the wheelwells and there is a significant pipe in the mainwheel bay which I feel must be added.
Other minor issues are there like filling in the chaff dispenser holes and drilling out small intakes.
I have made a start but not in the usual place the cockpit, no, I stuck in the bomb bay door to add stiffness to the lower fuselage, stuck the 2 halves of the tail together and begun work on the wings by removing the outer wing tabs and removing the supporting web. I am worried the brass will not have sufficient strength to support the folded wings so I might back it up with Plasticard.
It's beginning to take shape
Lisboa, Portugal
Joined: August 27, 2010
KitMaker: 679 posts
AeroScale: 669 posts
Posted: Saturday, May 10, 2014 - 06:24 AM UTC
Hi there,
Not that I'm about to start the build right now but here's what I chose to built for the Fleet campaign

this kit has very decent detail, including some nice resin and PE


The kit come with 4 decal options, one being an overall aluminum..hummm
Anyone knows the interior colour for the wheel wells? no mention of it in the instructions, so any help is most welcomed
As soon as i managed to finish my ongoing project for another campaign the Roc will have my full attention
Cheers
Pedro
MichaelSatin
 Campaigns Administrator
Colorado, United States
Joined: January 19, 2008
KitMaker: 3,909 posts
AeroScale: 2,904 posts
Posted: Sunday, May 11, 2014 - 04:35 AM UTC
Like Pedro said, not starting right now. But, if I can get to it, this is my plan:


I'm planning on doing Carmichael's MiG killer from HMS Ocean. I know, not very original, but I really like that Extra Dark Sea Grey over Sky camo and, well, that's the one I want to do. So there.
Michael

On the bench:
Sorta depends on your definition of "on the bench"...
England - South East, United Kingdom
Joined: March 01, 2010
KitMaker: 7,078 posts
AeroScale: 118 posts
Posted: Monday, May 12, 2014 - 08:22 AM UTC
Nice choice Pedro,
Built that kit, the wheel wells would most likely be interior grey green, same colour as the cockpit interior. I could find nothing definitive when I built it.
Si
Ontario, Canada
Joined: March 29, 2010
KitMaker: 1,151 posts
AeroScale: 985 posts
Posted: Friday, May 16, 2014 - 01:36 PM UTC
OK. I've had issues with the Gannet kit and perhaps strayed too long from mother quarterscale.
So buggeration. Had to buy a new FAA kit. Will be doing an Airfix Seafire FR.46/47.
Lisboa, Portugal
Joined: August 27, 2010
KitMaker: 679 posts
AeroScale: 669 posts
Posted: Saturday, May 17, 2014 - 05:16 AM UTC
Thanks a lot Simon, appreciate your help.
int grey green seems logical, but i know nothing about FAA practices on painting regulations so I would never dare going down that road without some guidance.
Just curious if you recall any issue during assembly? Read some about the wing joint, thou nothing that can't be dealt easily.
@Richard, a Seafire is a great choice of subject also
Cheers
Pedro
England - South East, United Kingdom
Joined: March 01, 2010
KitMaker: 7,078 posts
AeroScale: 118 posts
Posted: Saturday, May 17, 2014 - 08:39 AM UTC
Hi Pedro,
No real problems, no real positive location for the lower sections of the instrument panel. The centre section of the wing was a bit was a bit tight and it sit slightly proud at the back, nothing difficult to cure. Also would recommend replacing the turret guns with resin or brass.
Other than that a great build with a bit of love.
Si
Ontario, Canada
Joined: March 29, 2010
KitMaker: 1,151 posts
AeroScale: 985 posts
Posted: Saturday, May 17, 2014 - 04:00 PM UTC
Airfix claims that the wheel bays andd insides of the split flaps are the same colour as the undersides. Any thoughts? Doesn't seem right to me.
Malta
Joined: October 22, 2012
KitMaker: 23 posts
AeroScale: 23 posts
Posted: Sunday, May 18, 2014 - 05:46 AM UTC
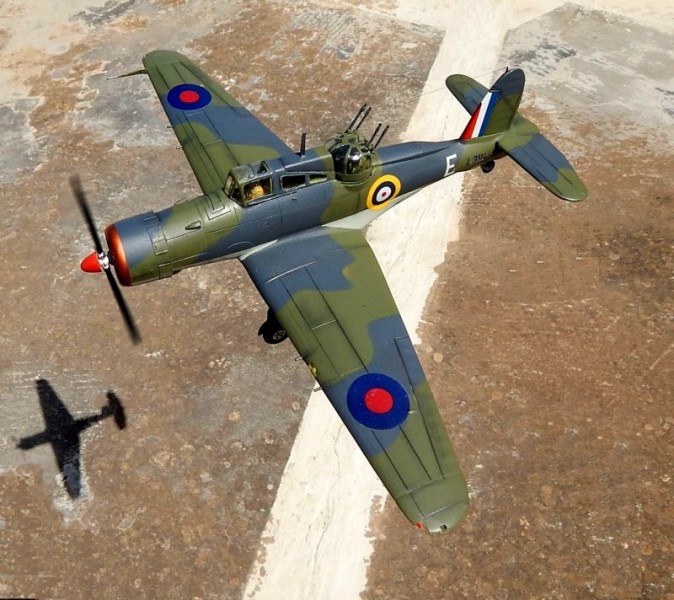
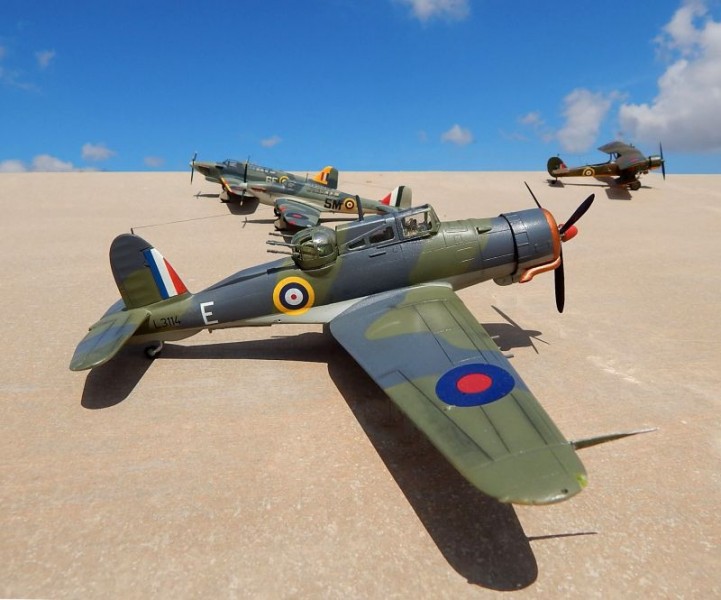
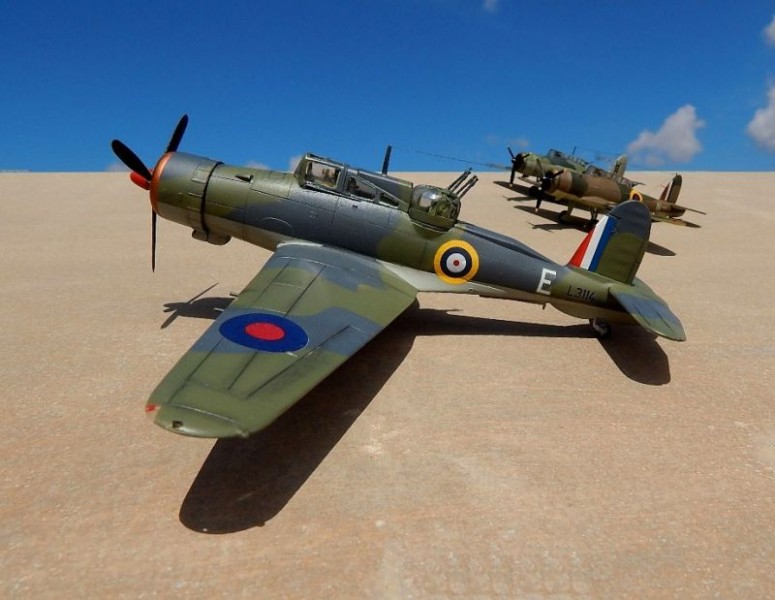
I have just completed the Roc, only last week, a resin Warrior Models 48 scale kit, here is the final result.. sent photo to Jessica as I lost count how to attach pictures!
England - South East, United Kingdom
Joined: March 01, 2010
KitMaker: 7,078 posts
AeroScale: 118 posts
Posted: Sunday, May 18, 2014 - 06:06 AM UTC
Hi Richard,
For a late war / early post war Seafire that may well be right. For early war I would reckon interior grey/green, which is in effect a primer is most likely.
On with the Pup,
The front section of the floor has been sprayed aluminium, the control column and it's mount added, also shown the completed side frames.

The rudder bar and control linkage added, along with some more internal rigging.

Heel boards fitted, and dry brushed with yellow ochre oil paint to give a grain effect.

another week for that to dry.
more soon.
Si
Removed by original poster on 05/18/14 - 18:36:05 (GMT).
British Columbia, Canada
Joined: September 03, 2009
KitMaker: 6,965 posts
AeroScale: 6,247 posts
Posted: Sunday, May 18, 2014 - 06:32 AM UTC
When once you have tasted flight you will walk the Earth with your eyes turned skyward.
For there you have been, and there you will always long to return.
-Leonardo Da Vinci
England - South East, United Kingdom
Joined: February 09, 2006
KitMaker: 28 posts
AeroScale: 9 posts
Posted: Sunday, May 18, 2014 - 06:37 AM UTC
Here goes my first campaign and post of work in progress. Tamiya's 1/48th Swordfish.
England - South East, United Kingdom
Joined: February 09, 2006
KitMaker: 28 posts
AeroScale: 9 posts
Posted: Sunday, May 18, 2014 - 06:40 AM UTC
Keep getting a message saying posting of photographs is not allowed. What gives?
British Columbia, Canada
Joined: September 03, 2009
KitMaker: 6,965 posts
AeroScale: 6,247 posts
Posted: Sunday, May 18, 2014 - 06:44 AM UTC
Quoted Text
Keep getting a message saying posting of photographs is not allowed. What gives?
Can you send me a screenshot of the message, along with a description of what you're trying to do please? You'll find my e-mail address on the
About Us page.
When once you have tasted flight you will walk the Earth with your eyes turned skyward.
For there you have been, and there you will always long to return.
-Leonardo Da Vinci
Nevada, United States
Joined: August 28, 2013
KitMaker: 159 posts
AeroScale: 116 posts
Posted: Tuesday, May 20, 2014 - 11:41 AM UTC
A little more modern perhaps? Airfix FRS.1 Sea Harrier

A man's GOT to know his limitations
Surely you can't be serious.
- I am serious. And don't call me Shirley
This isn't the state of California, it's a state of insanity!
England - South East, United Kingdom
Joined: March 01, 2010
KitMaker: 7,078 posts
AeroScale: 118 posts
Posted: Sunday, May 25, 2014 - 06:32 AM UTC
A bit more progress on the Pup,
The "Shipboard variant" as it is described in the instructions is armed with a Lewis Gun, and the kit includes eight spare drums to be mounted on cockpit sidewalls, Sprayed with Tamiya Gunmetal, which looked too dark, so a mist of light gunmetal was shot at them.

The detail on the drums painted, and fitted to the sidewalls.

Detail painted on to the instrument panel.

Control wires fitted to the cockpit floor.

The instrument panel decaled and the cockpit brought together.

I does fit neatly inbetween the fuselage halves, so tailskid next then the joining.
Si
Ontario, Canada
Joined: March 29, 2010
KitMaker: 1,151 posts
AeroScale: 985 posts
Posted: Sunday, May 25, 2014 - 12:44 PM UTC
How would the pilot manage to get one of those drums free with his body filling nearly the whole pit?
I gathered from a previous conversation between rowan and Edgar that the fr47 seat is likely green metal. And the pit all black. But the crowbar... Black as well?
England - South East, United Kingdom
Joined: March 01, 2010
KitMaker: 7,078 posts
AeroScale: 118 posts
Posted: Sunday, May 25, 2014 - 09:37 PM UTC
Good question Richard, especially without nudging the stick or the pedals, and as the gun was on a fixed mount, not a foster type. I have a feeling maybe only the forward pair of drums on each side would normally be carried, thinking about weight as well.
Seafire 47 cockpits, this is more deduction and based on good evidence on the 47's predecesors the 15&17, at least one restored aircraft has a grey/green cockpit, which may just confuse the issue. I would reckon black down to below the level of the instrument panel (how low is open to debate) and grey green below that, although the seafire had no solid floor it is unlikely below the heel boards would be any other than the primer colour (grey / green)> The seat, if metal would be black. the crowbar remained red, there are enough pics to give good evidence of that.
Hope that hasn't confused the issue too much.
England - South East, United Kingdom
Joined: March 01, 2010
KitMaker: 7,078 posts
AeroScale: 118 posts
Posted: Monday, May 26, 2014 - 06:39 AM UTC
Decided to crack on with the engine, the Le Rhone is nice little kit in itself.

for ease of painting I did not attach the exhaust or push rods.

basic spray job done. detail painting next.

Si
Alberta, Canada
Joined: April 07, 2010
KitMaker: 1,028 posts
AeroScale: 939 posts
Posted: Monday, May 26, 2014 - 07:34 AM UTC
I just can't get the mojo in order to work on my many years stashed Hasegawa Sea Hurricane, so after revisiting the rules:
The Rules and Regs
1) Entry must be an aircraft from the RNAS, FAA, Merchant Navy, Commonwealth navy or RN operated aircraft from any time period, 1910-date.
I've decided to work on the CP-140 Aurora, 1/72 Hasegawa and WinterValley decals; Canadian Armed Forces, symmetrical markings. I also have the Eduard Big Ed set for this kit.


To prevent being called an 'expert', screw something up good every now and again.
Ontario, Canada
Joined: March 29, 2010
KitMaker: 1,151 posts
AeroScale: 985 posts
Posted: Monday, May 26, 2014 - 03:45 PM UTC
Basic fit test shows no real issues with wings or fuse.

Because it's a floorless cockpit I opted to try attaching the ip to one half of the fuse and the rear bulkhead to the other. I think it will make everything go more smoothly.
So under-flap and gear bays are clear to be painted the same colour as the airframe? Unless there are objections now I'll go ahead with that.
Gear struts and wheels were done with aluminium primer I gather.
Ben I believe the Aurora entered service post-unification so wasn't operated by the navy but the RCAF. Coastal patrol was traditionally the arena of RCAF pre-unification anyway though. But it is maritime aviation of a commonwealth nation so I'd say it's within the spirit of the rules. But I'm not running this campaign so....
MichaelSatin
Campaigns Administrator Colorado, United States
Joined: January 19, 2008
KitMaker: 3,909 posts
AeroScale: 2,904 posts
Posted: Tuesday, May 27, 2014 - 12:49 AM UTC
Quoted Text
I just can't get the mojo in order to work on my many years stashed Hasegawa Sea Hurricane, so after revisiting the rules:
The Rules and Regs
1) Entry must be an aircraft from the RNAS, FAA, Merchant Navy, Commonwealth navy or RN operated aircraft from any time period, 1910-date.
I've decided to work on the CP-140 Aurora, 1/72 Hasegawa and WinterValley decals; Canadian Armed Forces, symmetrical markings. I also have the Eduard Big Ed set for this kit.
Ben,
I guess the question for me is, does it say "Navy" on it anywhere?
Michael
On the bench:
Sorta depends on your definition of "on the bench"...


