


Air Campaigns
Want to start or join a group build? This is where to start.
Want to start or join a group build? This is where to start.
Hosted by Frederick Boucher, Michael Satin
OFFICIAL: Show Time!
BoiseBlade

#523

Joined: February 28, 2014
KitMaker: 342 posts
AeroScale: 250 posts

Posted: Sunday, July 06, 2014 - 05:02 AM UTC

Mcleod

Joined: April 07, 2010
KitMaker: 1,028 posts
AeroScale: 939 posts
Posted: Sunday, July 06, 2014 - 06:19 AM UTC
Cool, Jeff. That's a 'Dragonfly' isn't it? I didn't realize those were used in display teams. Well done.

Nito74

Joined: March 04, 2008
KitMaker: 5,386 posts
AeroScale: 635 posts
Posted: Sunday, July 06, 2014 - 06:29 AM UTC
Very happy today... I found the cockpit part that was missing:

Still need to paint it and the cockpit floor. I noticed that some PE parts are provided so I'll need to add and paint it too.

Still need to paint it and the cockpit floor. I noticed that some PE parts are provided so I'll need to add and paint it too.
noddy927

Joined: February 15, 2013
KitMaker: 1,273 posts
AeroScale: 200 posts
Posted: Monday, July 07, 2014 - 12:09 AM UTC
John the carpet monster eating your sprues?
I have done some work on my Russian Knight SU-27 too.


Pete
I have done some work on my Russian Knight SU-27 too.


Pete

ljames0874

Joined: August 15, 2012
KitMaker: 408 posts
AeroScale: 365 posts

Posted: Sunday, July 13, 2014 - 09:03 PM UTC
Some really nice builds happening people!
A little progress to report on my Tornado. I have rescribed as much of the upper and lower fuselage as I could (before joining the two halves), as well as rescribing the wings and tail surfaces.

Now that the fuselage is assembled, there is a pretty bad seam that needs filling and sanding, before rescribing around the join. This will have to be canopy closed, as the clear parts are separate from the canopy frame (which is moulded into the fuselage).

Cheers Everybody!
A little progress to report on my Tornado. I have rescribed as much of the upper and lower fuselage as I could (before joining the two halves), as well as rescribing the wings and tail surfaces.
Now that the fuselage is assembled, there is a pretty bad seam that needs filling and sanding, before rescribing around the join. This will have to be canopy closed, as the clear parts are separate from the canopy frame (which is moulded into the fuselage).
Cheers Everybody!
noddy927
Joined: February 15, 2013
KitMaker: 1,273 posts
AeroScale: 200 posts
Posted: Wednesday, July 16, 2014 - 12:49 AM UTC
Some more work done on my build


Still a bit to go but hope to have it done by end of month.
Pete


Still a bit to go but hope to have it done by end of month.
Pete

tinbanger
Joined: February 04, 2008
KitMaker: 2,507 posts
AeroScale: 1,814 posts

Posted: Saturday, July 19, 2014 - 07:41 AM UTC
Ready to prime and mask,I will photocopy decals and use to make masks for the white strips and vee on under side.:-


noddy927
Joined: February 15, 2013
KitMaker: 1,273 posts
AeroScale: 200 posts
Posted: Sunday, July 20, 2014 - 05:48 AM UTC
Some more work, slow going as I am masking the red and blue markings as the decals were very poor, and didn't fit then broke. Patients was by then none existent so took them off.


Pete


Pete
tinbanger
Joined: February 04, 2008
KitMaker: 2,507 posts
AeroScale: 1,814 posts
Posted: Sunday, July 20, 2014 - 09:12 AM UTC
Nice work Pete!
Dragon164

#226
Joined: February 20, 2012
KitMaker: 1,909 posts
AeroScale: 508 posts

Posted: Sunday, July 20, 2014 - 02:47 PM UTC
I'll second that! nice painting! 
Cheers Rob.
Cheers Rob.

noddy927
Joined: February 15, 2013
KitMaker: 1,273 posts
AeroScale: 200 posts
Posted: Monday, July 21, 2014 - 01:03 AM UTC
Thanks guys a little touch up work and the blue will cover the red on the rest. Hopefully will look the part.
Pete
Pete
ljames0874
Joined: August 15, 2012
KitMaker: 408 posts
AeroScale: 365 posts
Posted: Saturday, July 26, 2014 - 03:24 AM UTC
Pete - lovely masking job and paintwork, it's great when your efforts are rewarded with results like that!
So, back to the Tornado. I have primed the beast, and you can see the new scribing quite clearly.

Now I'm cracking on with the underwing stores. No armament to worry about, as the two GR4's that carried the special 617 sqn artwork were never armed, so just the tanks and the two ECM pods to contend with. The BOZ-107 pod is acceptably accurate, but the Skyshadow pod is woeful. Compared to my GR-1 (Revell), Airfix's attempt is around 1/3rd too big (in length and breadth) and is missing the lateral bulges, even though the decal instructions show the bulges present! So, I have fashioned a pair of "bulges" from a pair of 1000lb bombs that came with the kit, and then faired them in with plenty of filler.

You can also see the 1500ltr tanks, with the slots for the upper fins filled in and sanded.
Cheers Everybody!
So, back to the Tornado. I have primed the beast, and you can see the new scribing quite clearly.
Now I'm cracking on with the underwing stores. No armament to worry about, as the two GR4's that carried the special 617 sqn artwork were never armed, so just the tanks and the two ECM pods to contend with. The BOZ-107 pod is acceptably accurate, but the Skyshadow pod is woeful. Compared to my GR-1 (Revell), Airfix's attempt is around 1/3rd too big (in length and breadth) and is missing the lateral bulges, even though the decal instructions show the bulges present! So, I have fashioned a pair of "bulges" from a pair of 1000lb bombs that came with the kit, and then faired them in with plenty of filler.
You can also see the 1500ltr tanks, with the slots for the upper fins filled in and sanded.
Cheers Everybody!

PrickleHead

Joined: December 31, 2013
KitMaker: 338 posts
AeroScale: 190 posts

Posted: Sunday, July 27, 2014 - 09:58 PM UTC
Hi all
I am starting this:
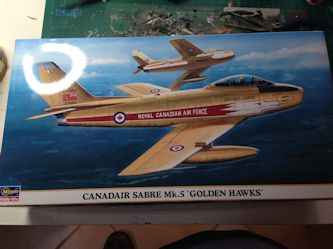
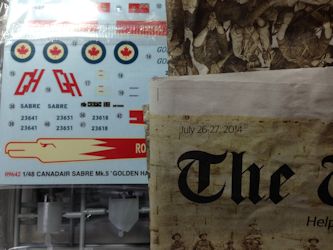
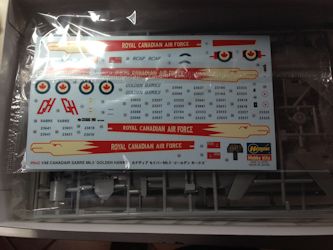
I am starting this:

noddy927
Joined: February 15, 2013
KitMaker: 1,273 posts
AeroScale: 200 posts
Posted: Tuesday, July 29, 2014 - 12:44 PM UTC
Lee- The Tonka is looking good.
Priclehead- Nice kit and the gold will be a pleasant addition to all the bright coloured ones
Pete
Priclehead- Nice kit and the gold will be a pleasant addition to all the bright coloured ones
Pete

Keeperofsouls2099
Joined: January 14, 2009
KitMaker: 2,798 posts
AeroScale: 2,443 posts
Posted: Thursday, July 31, 2014 - 09:41 AM UTC
Some really good builds going on here guys great paint jobs!!

noddy927
Joined: February 15, 2013
KitMaker: 1,273 posts
AeroScale: 200 posts
Posted: Friday, August 01, 2014 - 12:34 AM UTC
All the stencil work done and it has had a coat of Klear, now for the decals.


Landing gear to do also then that will be it.
Pete


Landing gear to do also then that will be it.
Pete

Buckeye198
Joined: May 02, 2010
KitMaker: 596 posts
AeroScale: 197 posts

Posted: Friday, August 01, 2014 - 03:42 AM UTC
Excellent builds so far! I'll be entering with Academy's 1:72 F/A-18C as Blue Angels #3, using decals from Jasmine Models.

Cockpit didn't go together too easily. Thankfully the ejector seat was straightforward. Control panels were simply drybrushed.


The body went by quickly, though not well. There are a lot of fit issues with this kit. Not enough to go looking for a new kit, but just be aware that you'll do a lot of filling/sanding if you get this plane.


Intakes were another big pain. No locator pins, just move it around until it seems like you'll do the least amount of fill/sand.


I'm stuck at this point now. The wing roots needed a bunch of filler, but there's a major gap between the fuselage and the control surfaces (ie, the tall black "T" under my white line of filler). I didn't fill in those gaps figuring that the flaps have to move, so they shouldn't look attached and immovable. Still, I can't seem to find a picture of a Hornet that will show how noticeable the gap is, if indeed there is a gap at all. What do you guys think? Fill it in, or leave it open??

End of this week's progress.

Cockpit didn't go together too easily. Thankfully the ejector seat was straightforward. Control panels were simply drybrushed.
The body went by quickly, though not well. There are a lot of fit issues with this kit. Not enough to go looking for a new kit, but just be aware that you'll do a lot of filling/sanding if you get this plane.
Intakes were another big pain. No locator pins, just move it around until it seems like you'll do the least amount of fill/sand.
I'm stuck at this point now. The wing roots needed a bunch of filler, but there's a major gap between the fuselage and the control surfaces (ie, the tall black "T" under my white line of filler). I didn't fill in those gaps figuring that the flaps have to move, so they shouldn't look attached and immovable. Still, I can't seem to find a picture of a Hornet that will show how noticeable the gap is, if indeed there is a gap at all. What do you guys think? Fill it in, or leave it open??
End of this week's progress.
noddy927
Joined: February 15, 2013
KitMaker: 1,273 posts
AeroScale: 200 posts
Posted: Friday, August 01, 2014 - 08:25 PM UTC
Hi Robby
No expert on the Hornet so not sure if there should be a gap. Would have thought the one you have is quite a big gap. Could you not cut the flaps and have them in the down position? You wouldn't notice the gap as much.
Pete
No expert on the Hornet so not sure if there should be a gap. Would have thought the one you have is quite a big gap. Could you not cut the flaps and have them in the down position? You wouldn't notice the gap as much.
Pete

Jessie_C

Joined: September 03, 2009
KitMaker: 6,965 posts
AeroScale: 6,247 posts

Posted: Saturday, August 02, 2014 - 05:48 AM UTC
There is a gap, and also one at the inboard edge of the leading edge flaps. They're both fairly noticeable on the real thing. if you think it's too prominent, try slipping in a sliver of plastic card to narrow it down a bit.
noddy927
Joined: February 15, 2013
KitMaker: 1,273 posts
AeroScale: 200 posts
Posted: Saturday, August 02, 2014 - 10:45 AM UTC
Some decals on the Ruski


Started the landing gear....got the front done, have the rear to do the rest of the decals and the office glazing.
Pete


Started the landing gear....got the front done, have the rear to do the rest of the decals and the office glazing.
Pete
tinbanger
Joined: February 04, 2008
KitMaker: 2,507 posts
AeroScale: 1,814 posts
Posted: Saturday, August 02, 2014 - 11:16 PM UTC
Gloss white is now on and now ready to mask the white strips and blue tail marking, the only part of the decal sheet that I will be using are the roundels and lettering.:-

noddy927
Joined: February 15, 2013
KitMaker: 1,273 posts
AeroScale: 200 posts
Posted: Sunday, August 03, 2014 - 06:51 AM UTC
Sweet, just love the Hawk. Superb shaped aircraft. Looking good
Richard.
Pete
Richard.
Pete
Nito74
Joined: March 04, 2008
KitMaker: 5,386 posts
AeroScale: 635 posts
Posted: Sunday, August 03, 2014 - 02:40 PM UTC
Peter, that Flanker is looking great !
I'm still fighting with the small PE in the cockpit...
What did you use for the masking ?
Was that Thierry Henry's photo on your wall ?
I'm still fighting with the small PE in the cockpit...
What did you use for the masking ?
Was that Thierry Henry's photo on your wall ?
PrickleHead
Joined: December 31, 2013
KitMaker: 338 posts
AeroScale: 190 posts
Posted: Sunday, August 03, 2014 - 02:55 PM UTC
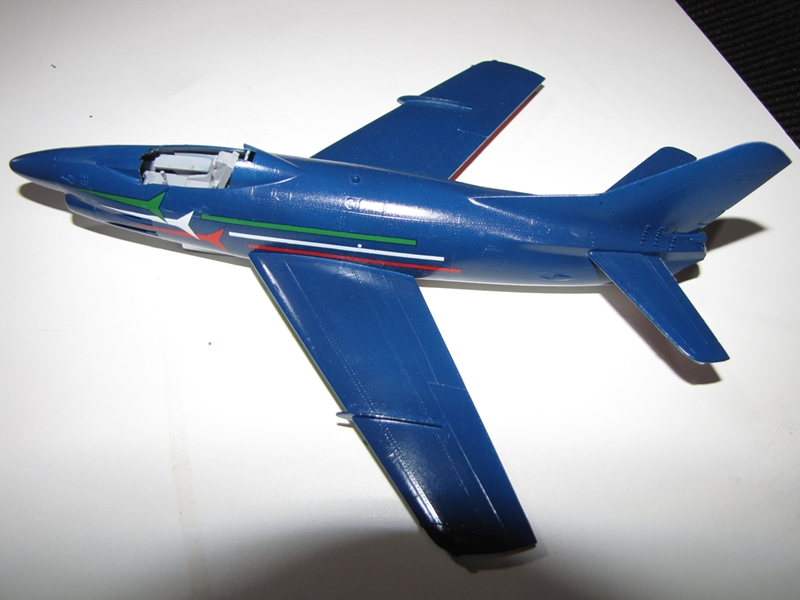
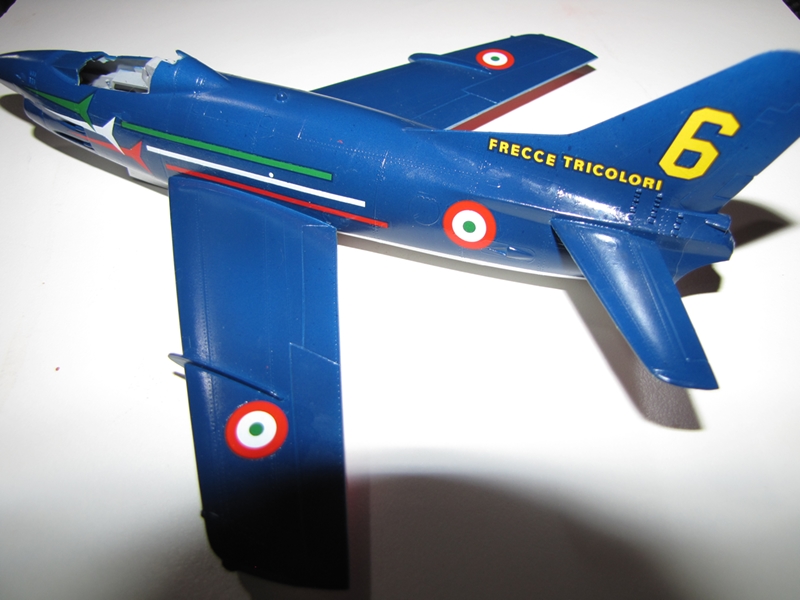
My Sabre to date:

Dragon164
#226
Joined: February 20, 2012
KitMaker: 1,909 posts
AeroScale: 508 posts
Posted: Sunday, August 03, 2014 - 10:18 PM UTC
Some more decals on. 
Cheers Rob.
Cheers Rob.
 |

WEB HOSTING BY


Copyright ©2021 AeroScale and Kitmaker Network, a subsidiary of Silver Star Enterprises
All Rights Reserved. Please read our Conditions of Use and Privacy Policy.
All Rights Reserved. Please read our Conditions of Use and Privacy Policy.