Official: Russell Anderson Memorial Campaign
England - East Midlands, United Kingdom
Joined: March 23, 2003
KitMaker: 2,124 posts
AeroScale: 788 posts
Posted: Sunday, March 16, 2014 - 12:07 AM UTC
and we're off!-


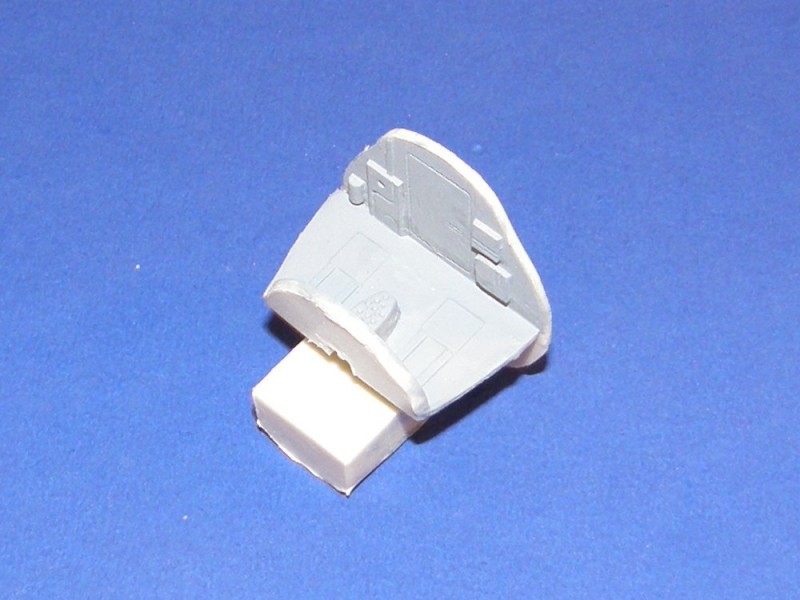
this is the kit cockpit with the addition of two scratchbuilt side consoles with entirely fictitious details to busy it up, and a pair of eduard seatbelts that are meant for either the me 262 or ar 234, so i thought it was appropriate to use them on this build.
also being a nose wheel aircraft, i filled the nose with lead, theres no way this will be a tailsitter now!

in fact after taking this pic i added even more just to be sure!

p.s. the white plasticard underneath the rear of the cockpit is to make sure that if any of the lead comes loose it can't find its way to the rear of the model! i have an airfix vampire T11 that now rattles due to noseweight coming loose, but at least it can't get past the cockpit!
ipms member 10318, click the IPMS-UK link under the avatar to see!
ACCIDENT PRONE? ME? NAAAAH!
SCREW YOU PHOTOBUCKET! ------------------------------------------------>>>>
England - South East, United Kingdom
Joined: February 05, 2008
KitMaker: 1,381 posts
AeroScale: 1,110 posts
Posted: Sunday, March 16, 2014 - 01:50 AM UTC

after i close it up, primer and paint

got to say i like this 1/200 scale, the fit on this kit is brilliant.
paul

#243
England - North East, United Kingdom
Joined: March 21, 2008
KitMaker: 996 posts
AeroScale: 915 posts
Posted: Sunday, March 16, 2014 - 11:28 AM UTC
Starting photos for Russells Victor K.2
Progress might be a bit slow initially as Life is a bit complicated right now
Andrew
Pfalz DIIIa, Eduard 1/48 Uffz Max Hitschler Jasta 18 Late 1917
#123
New Mexico, United States
Joined: November 17, 2008
KitMaker: 1,202 posts
AeroScale: 292 posts
Posted: Sunday, March 16, 2014 - 11:59 AM UTC
Howdy Y'all

I'm enjoying the builds. Your cockpits are more detailed than I can do so it's a good learning experience.
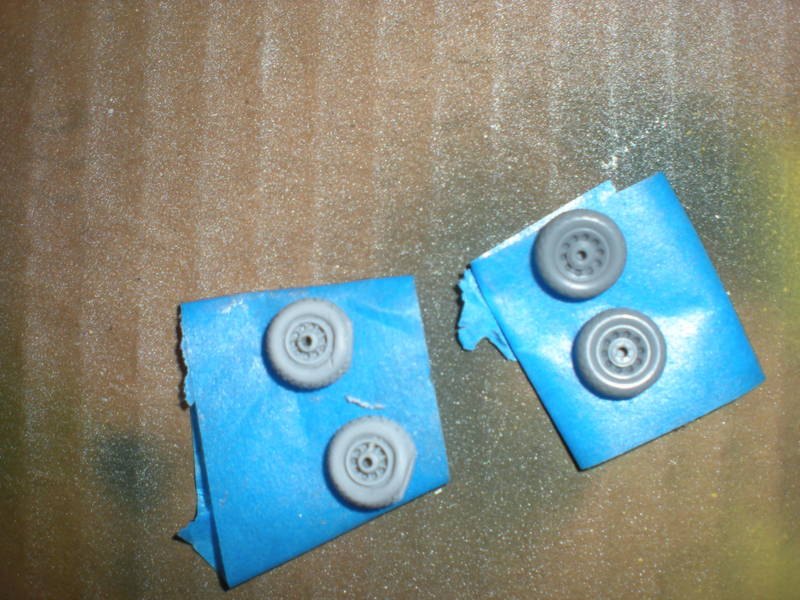
I was going to spruce my model (Tamiya P-51D) up with some resin wheels. The "weighted" tires look more like "flat" tires. I will probably stick with the kit wheels, they're on the RHS in this photo.
Y'all Take Care,
Don "Lakota"
Working on Campaigns:
1/72 Hasegawa Ki-84 Frank
1/144 Dragon Armor
Taipei, Taiwan / 台灣
Joined: February 23, 2014
KitMaker: 44 posts
AeroScale: 38 posts
Posted: Tuesday, March 18, 2014 - 02:57 AM UTC
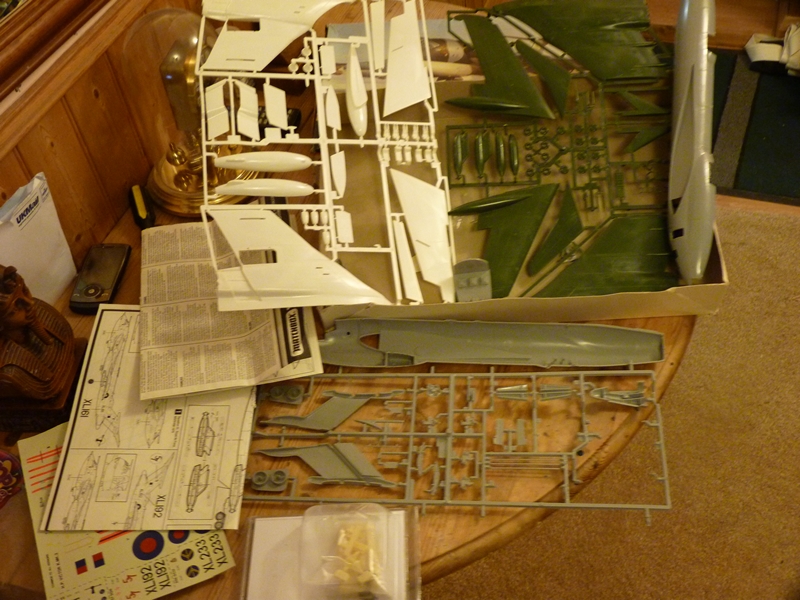
Change of plan from doing the Vampire for this campaign. Going to make the Airfix starter kit Red Arrows, Folland Gnat instead.
Here is the parts and my modelling stuff

England - South East, United Kingdom
Joined: February 05, 2008
KitMaker: 1,381 posts
AeroScale: 1,110 posts
Posted: Tuesday, March 18, 2014 - 04:19 AM UTC
primer on...

Alberta, Canada
Joined: April 07, 2010
KitMaker: 1,028 posts
AeroScale: 939 posts
Posted: Tuesday, March 18, 2014 - 07:26 AM UTC
Paul, what a wonderful job.
Phil, your cockpit looks superb.
All others, your doing great; keep up the wonderful work.
My CF-100 is also started. Unfortunately, I don't have time to photograph and prepare photos for inclusion here; I'm even typying ths as fast as I can. But I do check in every day and take the time to read your progress.
And thankyou Jessica for the back-up in the messages you offer. I need that for now.
See you very soon. Ben
To prevent being called an 'expert', screw something up good every now and again.
British Columbia, Canada
Joined: September 03, 2009
KitMaker: 6,965 posts
AeroScale: 6,247 posts
Posted: Tuesday, March 18, 2014 - 03:23 PM UTC
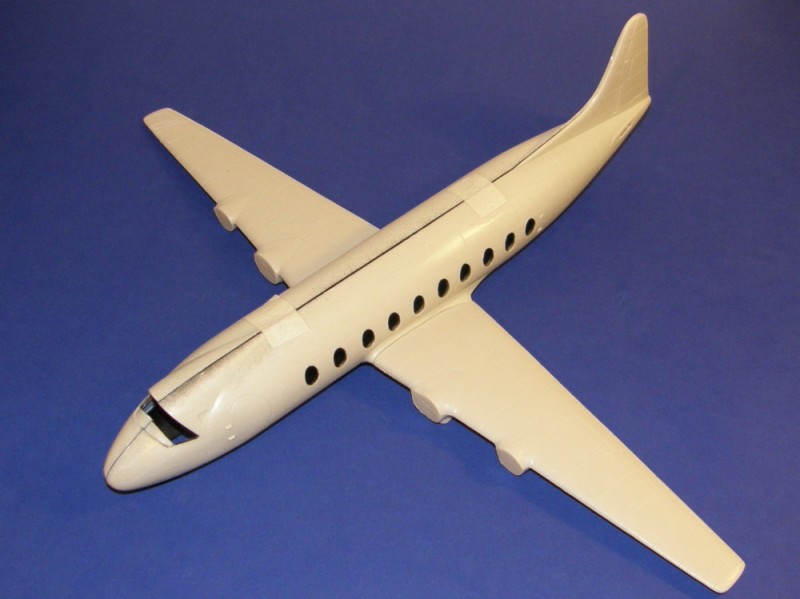
Basic dry fit of the Viscount reveals few problems. The wings and tailplanes were glued together after sanding them down the same way a vacuform kit gets sanded; they were that messy inside. I had to chisel out a dozen or so injector pin towers. The edges of the fuselage benefited from a little sanding as well.
The cockpit parts fit fairly well after getting cleaned up
Not much of this will be seen after the canopy/windscreen is glued on, but at least I know it's there.
When once you have tasted flight you will walk the Earth with your eyes turned skyward.
For there you have been, and there you will always long to return.
-Leonardo Da Vinci
Ontario, Canada
Joined: March 29, 2010
KitMaker: 1,151 posts
AeroScale: 985 posts
Posted: Wednesday, March 19, 2014 - 02:15 PM UTC
Great stuff in here so far. I was able to close up the fuselage on the p47. Annoyingly this is one of my best cockpits yet. I may need to reevaluate my policy on 1/72...
Really been reading a lot of threads of builders that use the so-called Spanish school. Also embracing coloured pencils has really paid dividends. I will post pics when time permits. It's certainly no showpiece but I'm pleased to finally get some traction with my technique.
Alberta, Canada
Joined: April 07, 2010
KitMaker: 1,028 posts
AeroScale: 939 posts
Posted: Wednesday, March 19, 2014 - 03:55 PM UTC
It's really great to hear your doing so well, Richard. I am looking forward to your update with photos.
And Jessica, I know your a great modeller, and that you are successful in giving your everything. But, I will say, your Viscount looks so extremely interesting. I'm somewhat jealous.

To prevent being called an 'expert', screw something up good every now and again.
British Columbia, Canada
Joined: September 03, 2009
KitMaker: 6,965 posts
AeroScale: 6,247 posts
Posted: Wednesday, March 19, 2014 - 04:22 PM UTC
You're jealous of a Mach 2 kit!!?!? Somebody call an ambulance!
When once you have tasted flight you will walk the Earth with your eyes turned skyward.
For there you have been, and there you will always long to return.
-Leonardo Da Vinci
England - South East, United Kingdom
Joined: August 15, 2012
KitMaker: 408 posts
AeroScale: 365 posts
Posted: Thursday, March 20, 2014 - 06:35 AM UTC
The Javelin is all together, filled and primed. Due to the age of the kit, and the fact it was based on a prototype, I am not knocking myself out over the inaccuracies. I will finish this one in short order, and then pick out something else from the stash to build for Russell.

On the workbench
National Pride - 1/72 BAe Nimrod MR2.P
Tiger Meet! - 1/72 Panavia Tornado ECR (Luftwaffe)
Airfix III - 1/72 Hawker Hunter FGA.9
Hairy Brush - 1/72 P-51D Mustang
Mustang 75 - 1/72 P-51D "Ferocious Frankie"
Ontario, Canada
Joined: March 29, 2010
KitMaker: 1,151 posts
AeroScale: 985 posts
Posted: Thursday, March 20, 2014 - 08:55 AM UTC
Fred, t kits arrived today. Thanks muchly. The ARII has moulded hinomarus! Haven't seen that in forever.
Here's are the progress shots for the 47.


Alberta, Canada
Joined: January 19, 2008
KitMaker: 6,743 posts
AeroScale: 6,151 posts
Posted: Thursday, March 20, 2014 - 01:12 PM UTC
I'm off and running on this build . With the cobra out of the way I made pretty good progress .
Here is Russell's kit of the Hasegawa dual combo limited edition .

Over all it isn't bad kit . Detail is soft in the pit and the instrument decal I would rather have raised detail and dry this . One let down is the depth of the wheel wells which are far better detailed than the cockpit . Other than that the fit is pretty good . Still need to clean up the glue joins but this needs to dry first .


I have added another wash to the floor before closing her up .
I will be doing this one up as Old Crow , markings are from the spare box . Let over ones from Tamiya's 72 scale series Mustangs .
Terri
Alberta, Canada
Joined: April 07, 2010
KitMaker: 1,028 posts
AeroScale: 939 posts
Posted: Thursday, March 20, 2014 - 09:20 PM UTC
I certainly like your interior, Terri; I understand your reference to the IP decal issue compared with raised relief. IP decals often have that comic look.
Your moving right along, though, and its great to see. Well done!
To prevent being called an 'expert', screw something up good every now and again.
Alberta, Canada
Joined: January 19, 2008
KitMaker: 6,743 posts
AeroScale: 6,151 posts
Posted: Friday, March 21, 2014 - 02:13 AM UTC
Quoted Text
I certainly like your interior, Terri; I understand your reference to the IP decal issue compared with raised relief. IP decals often have that comic look.
Your moving right along, though, and its great to see. Well done!
Hey Ben

Agreed most IP decals have that cartoon feel to them . This one wouldn't be so bad if it didn't have all that yellow for the bezels . I did check the spare box hoping for a better alterative , lady luck wasn't on my side . Funny though that the interior green turned out well . The paint is starting to dry out leaving it a glob of thick goop , little lacquer thinner in a cap and some of the paint work out well for brush painting , only one coat ! Canopy got it's future bath last night and is ready to mask up and she is ready for paint .
Terri
England - East Midlands, United Kingdom
Joined: March 23, 2003
KitMaker: 2,124 posts
AeroScale: 788 posts
Posted: Friday, March 21, 2014 - 07:16 AM UTC
well courtesy of fred, russell's He 219 arrived today and i was about to drop everything and start it.

(hey! thats my feet!)
however, with it being a kit that russell started, and to be honest not that far from finished, i'm in a bit of a quandary because i want it to be the best that i can make it. thing is though that may involve filling and sanding and possibly repainting some of the work already done if i can't match up the paint already used.

also the tail seems a little skew whif, and i could maybe get the wings to fit a little better but this will mean disassembling them, i could just fill the gaps but again this will mean the paintwork will be damaged.
this is by no means me complaining, i'm just wondering how far to go finishing this kit, sympathetic restoration or partial rebuild?
what do you guys think?
ipms member 10318, click the IPMS-UK link under the avatar to see!
ACCIDENT PRONE? ME? NAAAAH!
SCREW YOU PHOTOBUCKET! ------------------------------------------------>>>>
British Columbia, Canada
Joined: September 03, 2009
KitMaker: 6,965 posts
AeroScale: 6,247 posts
Posted: Friday, March 21, 2014 - 07:32 AM UTC
Build it the way which will be most fun to you. Fun is what Russell's approach to our hobby was all about
When once you have tasted flight you will walk the Earth with your eyes turned skyward.
For there you have been, and there you will always long to return.
-Leonardo Da Vinci
England - East Midlands, United Kingdom
Joined: March 23, 2003
KitMaker: 2,124 posts
AeroScale: 788 posts
Posted: Friday, March 21, 2014 - 07:56 PM UTC
Quoted Text
Build it the way which will be most fun to you. Fun is what Russell's approach to our hobby was all about
yeah,thats the way i'll finish this Jessica.
to that end i've gone and taken the wings and tail apart, but thats as far as i'll go, also the canopy was seemingly temporarily fixed as the masking went around the edge onto the inside, a neat trick on russells part as that means no awkward masking of interior details.
late last night i had a look through russell's photo gallery to try to see how he finished his models, there was some talk of how he liked to put his stuff on little bases, which is what i will do with this, hopefully when finished, it will look something like how it was meant to be when completed.
ipms member 10318, click the IPMS-UK link under the avatar to see!
ACCIDENT PRONE? ME? NAAAAH!
SCREW YOU PHOTOBUCKET! ------------------------------------------------>>>>
Alberta, Canada
Joined: April 07, 2010
KitMaker: 1,028 posts
AeroScale: 939 posts
Posted: Saturday, March 22, 2014 - 01:52 AM UTC
Quoted Text
also the canopy was seemingly temporarily fixed as the masking went around the edge onto the inside, a neat trick on russells part as that means no awkward masking of interior details.
Hi Phil. I can't locate it, but, I distinctly remember Russell posting in a thread that he prefered to hand paint his canopy frames, and offered explanation of that. In the case of the model you have, I wonder if he was experimenting with mask, or if he was using mask to correct the errors from hand painting. It is interesting.
I also have one of his started models(a mosquito), and when studying it, I find myself wondering. Why did he choose the colors he did? Why did he choose to build in the sequence he did? I don't know the answers, but, its fun trying to figure it all out.
I just know Russell seemed to build solely for pure enjoyment, and didn't seem to get excited over AM parts and pieces. I truly believe he was satisfied and happy with all his efforts.
Ben
To prevent being called an 'expert', screw something up good every now and again.
Alberta, Canada
Joined: January 19, 2008
KitMaker: 6,743 posts
AeroScale: 6,151 posts
Posted: Saturday, March 22, 2014 - 11:38 AM UTC
So far I'm having a blast on this build and motoring right along . Painting is done and clear coat is on and ready for decals !


Terri
Alberta, Canada
Joined: April 07, 2010
KitMaker: 1,028 posts
AeroScale: 939 posts
Posted: Saturday, March 22, 2014 - 12:47 PM UTC
Wow, Terri. That's what I call in 4th gear. You'll be done before I can get in the first photos.
Wonderful!!
To prevent being called an 'expert', screw something up good every now and again.
England - East Midlands, United Kingdom
Joined: March 23, 2003
KitMaker: 2,124 posts
AeroScale: 788 posts
Posted: Saturday, March 22, 2014 - 07:45 PM UTC
Quoted Text
Quoted Text
also the canopy was seemingly temporarily fixed as the masking went around the edge onto the inside, a neat trick on russells part as that means no awkward masking of interior details.
Hi Phil. I can't locate it, but, I distinctly remember Russell posting in a thread that he prefered to hand paint his canopy frames, and offered explanation of that. In the case of the model you have, I wonder if he was experimenting with mask, or if he was using mask to correct the errors from hand painting. It is interesting.
I also have one of his started models(a mosquito), and when studying it, I find myself wondering. Why did he choose the colors he did? Why did he choose to build in the sequence he did? I don't know the answers, but, its fun trying to figure it all out.
I just know Russell seemed to build solely for pure enjoyment, and didn't seem to get excited over AM parts and pieces. I truly believe he was satisfied and happy with all his efforts.
Ben
Ben it wasn't masked for painting as such, it was completely covered, i think my first photo shows what i'm talking about.
the canopy was unpainted underneath. i also hand paint canopies after all i am an actual painter in real life! and i can usually paint an uncomplicated canopy as quick as i could mask it down.
ipms member 10318, click the IPMS-UK link under the avatar to see!
ACCIDENT PRONE? ME? NAAAAH!
SCREW YOU PHOTOBUCKET! ------------------------------------------------>>>>
Taipei, Taiwan / 台灣
Joined: February 23, 2014
KitMaker: 44 posts
AeroScale: 38 posts
Posted: Saturday, March 22, 2014 - 10:14 PM UTC
Painting of the bodywork of my Red Arrows Gnat is done.

This starter kit had very bad paint that was a struggle to get it to stick to the plastic. Even after the plastic had been fully scrubbed clean it was still difficult.
Alberta, Canada
Joined: April 07, 2010
KitMaker: 1,028 posts
AeroScale: 939 posts
Posted: Sunday, March 23, 2014 - 12:46 AM UTC
That is a very attractive color scheme indeed, Jack.
Frankly, I don't often see the paint work completed before the main-frame of the kit is assembled and seams tended to. This is a fun build, though, and I'm sure you have a fun plan in mind.
Well done!!
To prevent being called an 'expert', screw something up good every now and again.


