

Cheers Dave. Nice looking E-2 thats going on there. Those props were a mare I bet.
Pete
Air Campaigns
Want to start or join a group build? This is where to start.
Want to start or join a group build? This is where to start.
Hosted by Frederick Boucher, Michael Satin
OFFICIAL: Birds of Prey Campaign
noddy927

Joined: February 15, 2013
KitMaker: 1,273 posts
AeroScale: 200 posts
Posted: Friday, August 09, 2013 - 02:17 AM UTC
epshifty

Joined: August 05, 2011
KitMaker: 376 posts
AeroScale: 348 posts

Posted: Friday, August 09, 2013 - 09:46 AM UTC
Thanks Pete .. actually they arnt that bad they come in two halves each having four blades and you just sandwich them together then add the spinner...


Jessie_C


Joined: September 03, 2009
KitMaker: 6,965 posts
AeroScale: 6,247 posts

Posted: Friday, August 09, 2013 - 11:52 AM UTC
I suppose it's time I got myself together and started getting my Hawk together.
So far I haven't got much done, just splashed a little Neutral Grey about over the cockpit bits. The paint is still wet in the pictures. Once it's dry I'll get on to painting the details.

So far I haven't got much done, just splashed a little Neutral Grey about over the cockpit bits. The paint is still wet in the pictures. Once it's dry I'll get on to painting the details.
Jessie_C
Joined: September 03, 2009
KitMaker: 6,965 posts
AeroScale: 6,247 posts
Posted: Friday, August 09, 2013 - 02:08 PM UTC
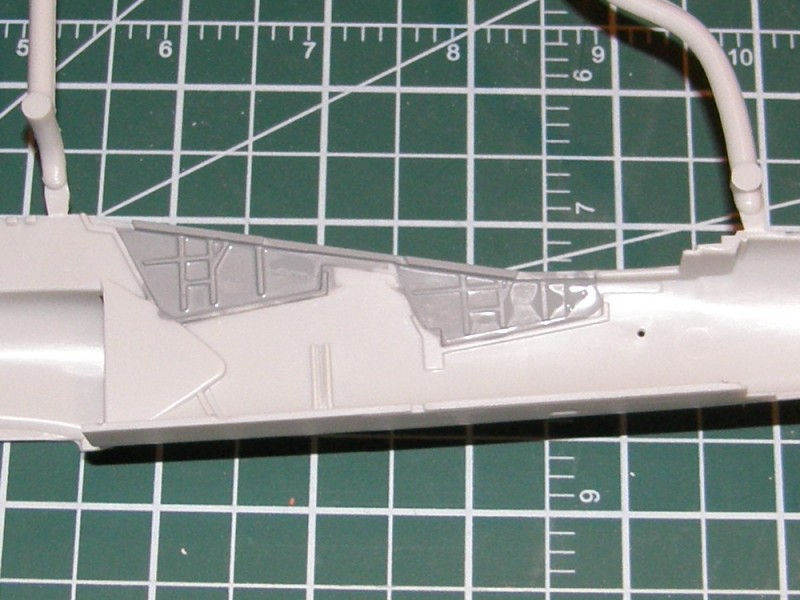
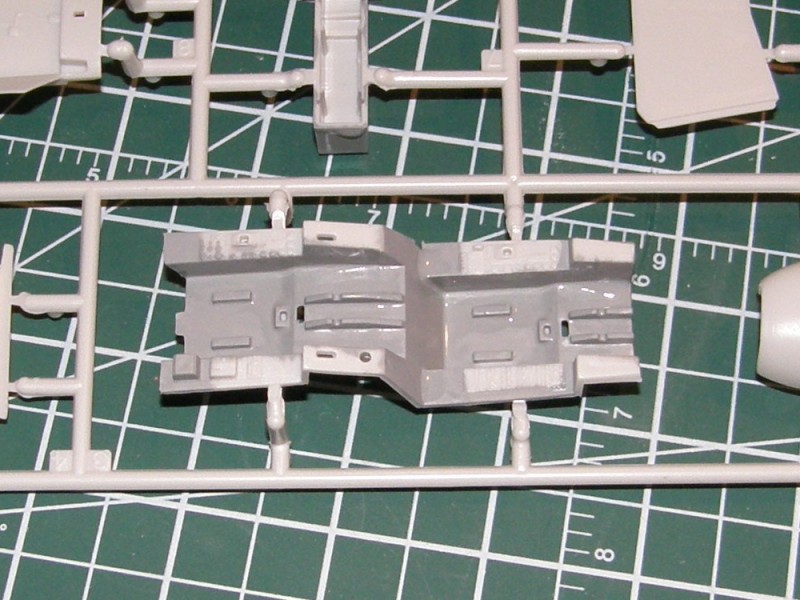
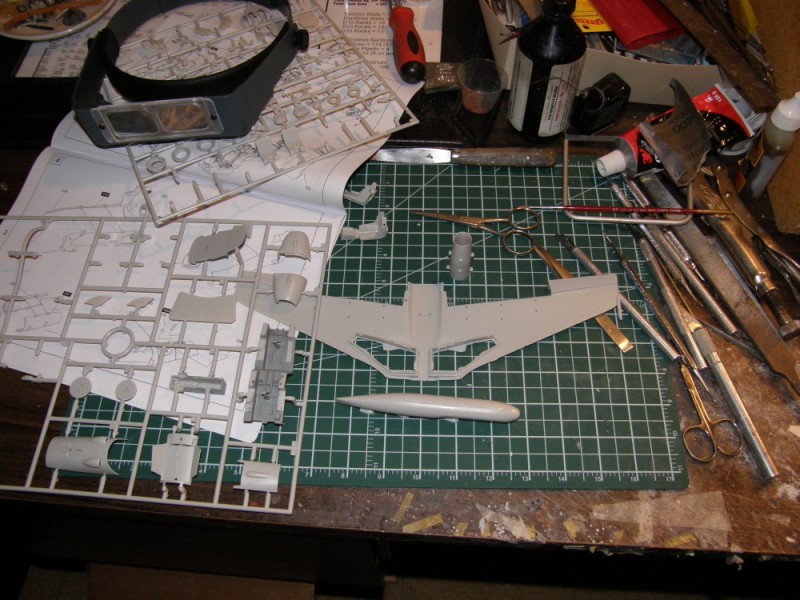
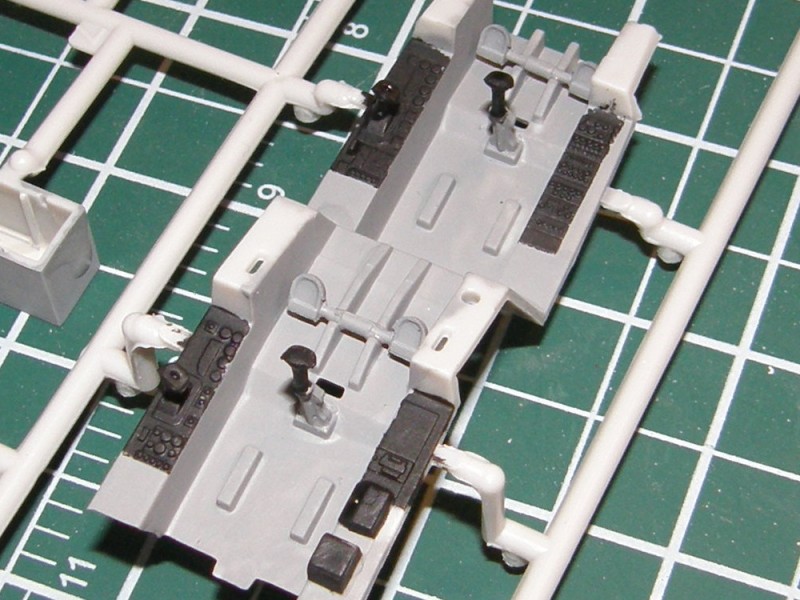
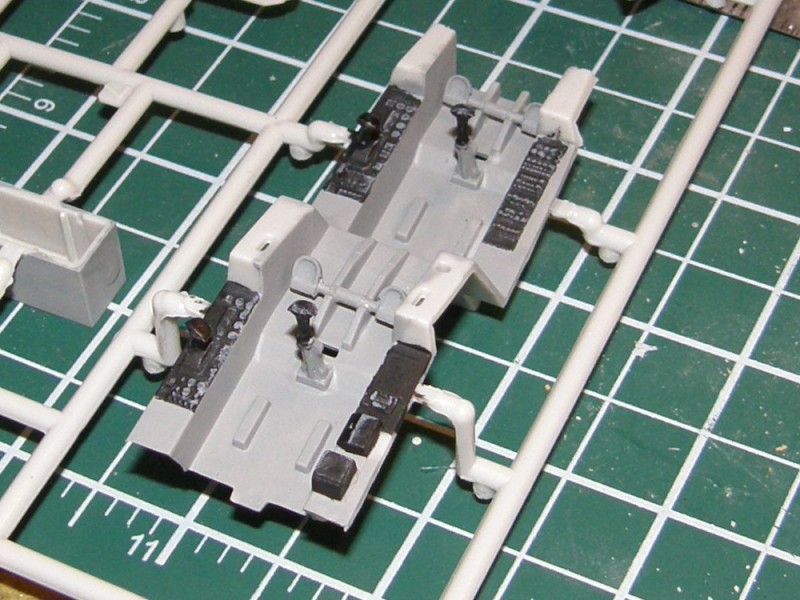
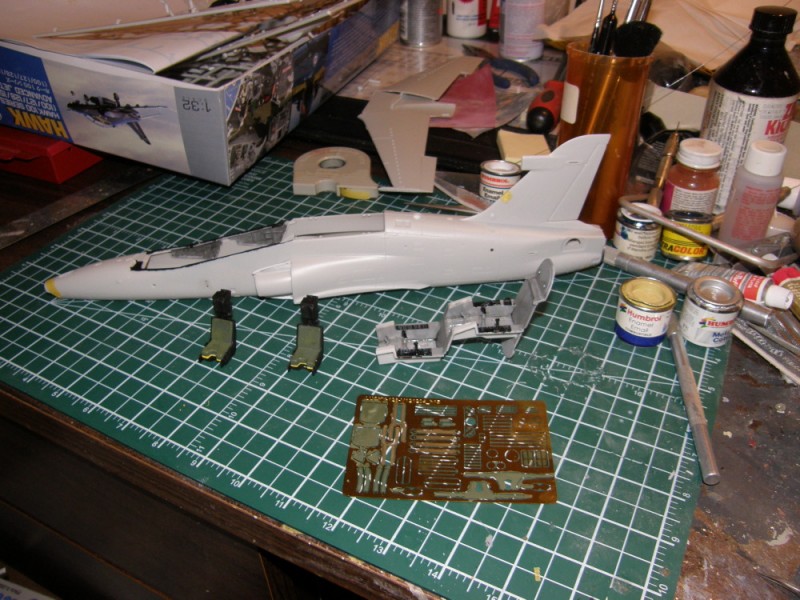
While waiting for the paint to dry I indulged myself in subassemblies.
The sprue gates on the bang seats are very inconveniently placed.
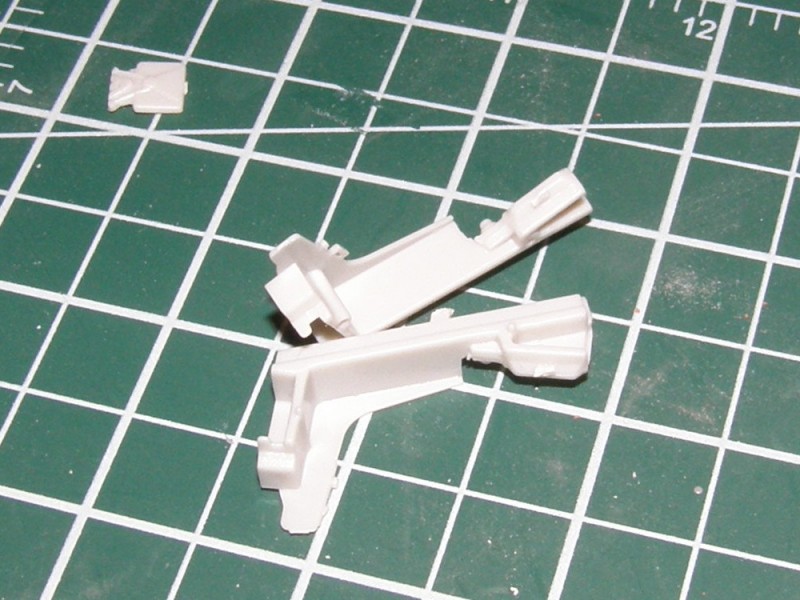
They need very careful cleanup.
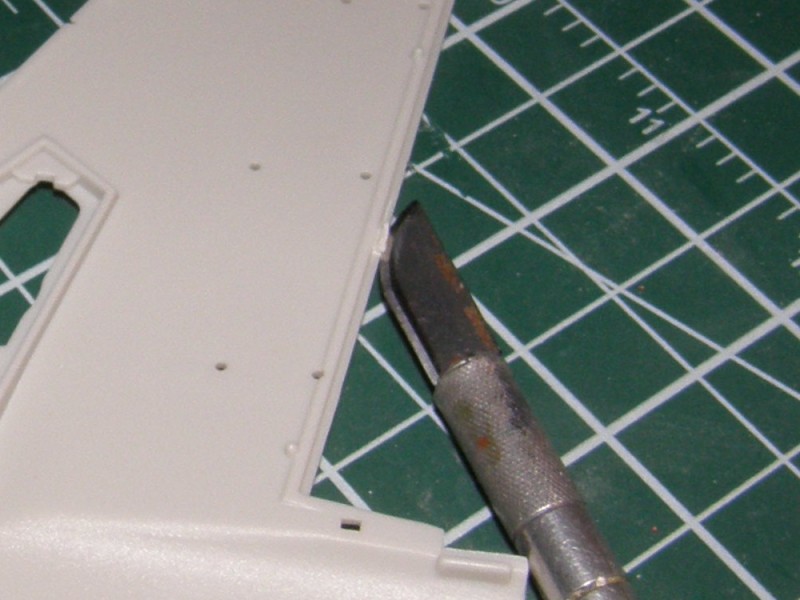
Another poor sprue gate is the one in the flap recess. Once more, cleanup must be done with extreme caution.
There, subassemblies galore
The sprue gates on the bang seats are very inconveniently placed.
They need very careful cleanup.
Another poor sprue gate is the one in the flap recess. Once more, cleanup must be done with extreme caution.
There, subassemblies galore

anselneo

Joined: January 23, 2013
KitMaker: 20 posts
AeroScale: 13 posts
Posted: Saturday, August 10, 2013 - 07:31 AM UTC

epshifty
Joined: August 05, 2011
KitMaker: 376 posts
AeroScale: 348 posts
Posted: Saturday, August 10, 2013 - 09:46 AM UTC
Welcome to our campaign Ansel  good luck with your build
good luck with your build 
warreni

Joined: August 14, 2007
KitMaker: 5,926 posts
AeroScale: 2,201 posts
Posted: Saturday, August 10, 2013 - 02:37 PM UTC
Hi everyone.
Here is the subject of my build for this campaign, Special Hobby's 1/72 Blackburn Skua, probably one of the worst fighters ever oput into service, only one worse was the Roc..
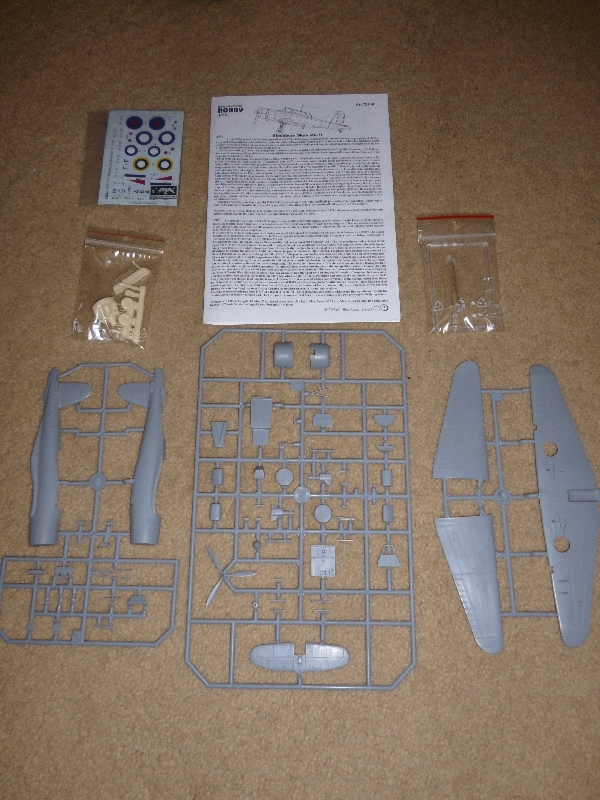
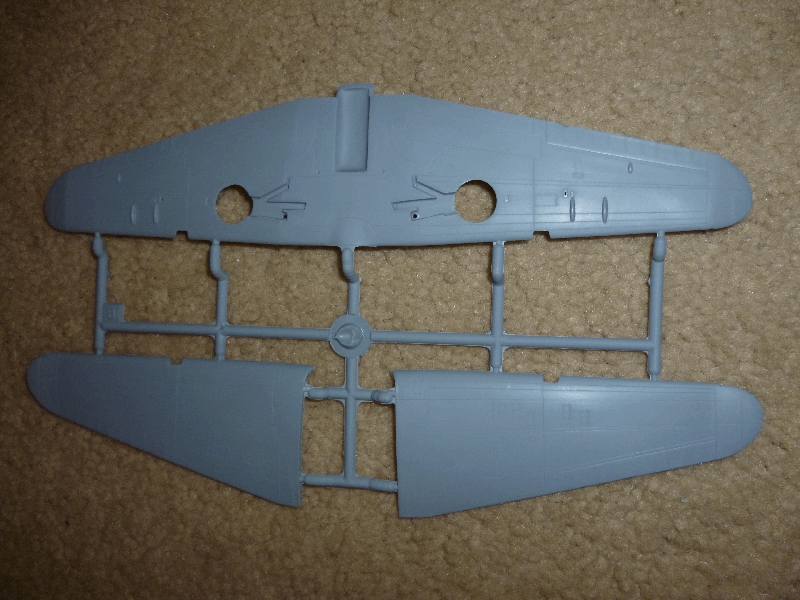
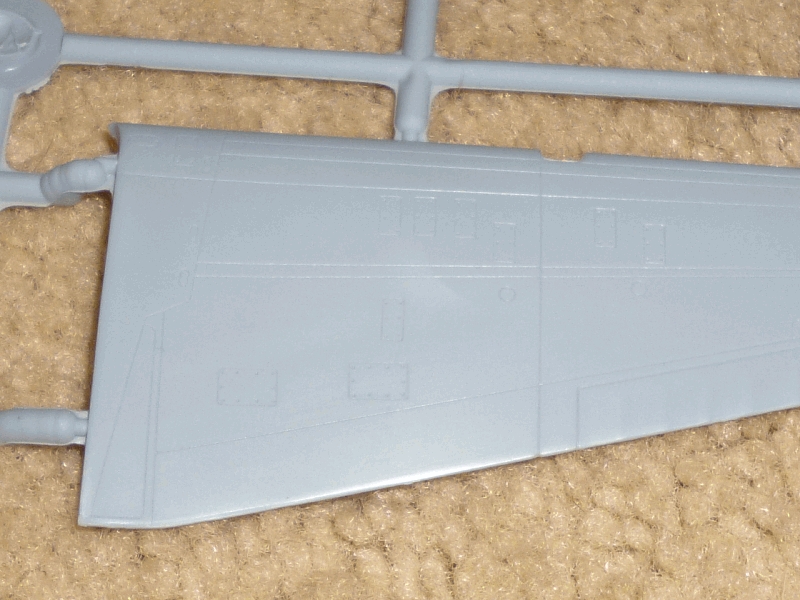
Here's hoping the rest of the kit lives up to the quality of its surface detailing.
Last Skua I built was a Frog one many many moons ago. I am not sure if I still have it out in the shed or not. May have to go and check one day.
Cheers all
Warren
Here is the subject of my build for this campaign, Special Hobby's 1/72 Blackburn Skua, probably one of the worst fighters ever oput into service, only one worse was the Roc..
Here's hoping the rest of the kit lives up to the quality of its surface detailing.
Last Skua I built was a Frog one many many moons ago. I am not sure if I still have it out in the shed or not. May have to go and check one day.
Cheers all
Warren
Jessie_C
Joined: September 03, 2009
KitMaker: 6,965 posts
AeroScale: 6,247 posts
Posted: Saturday, August 10, 2013 - 02:38 PM UTC
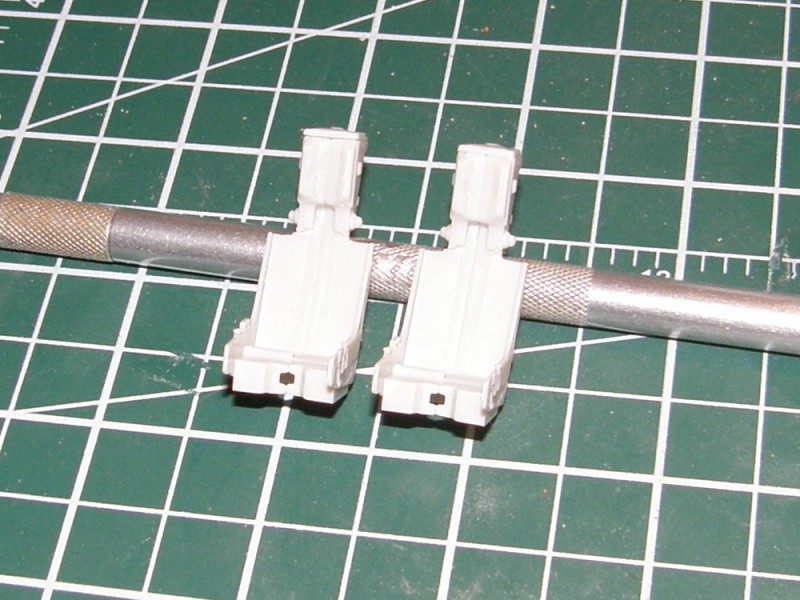
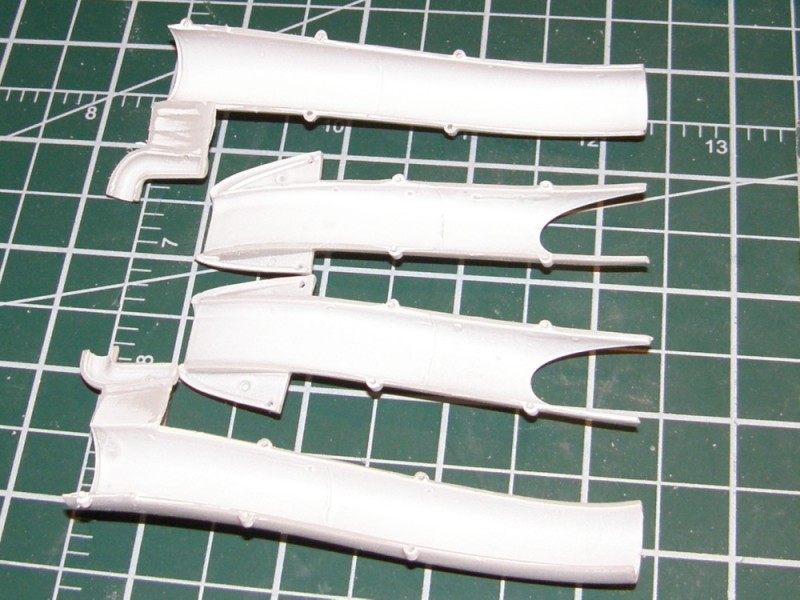
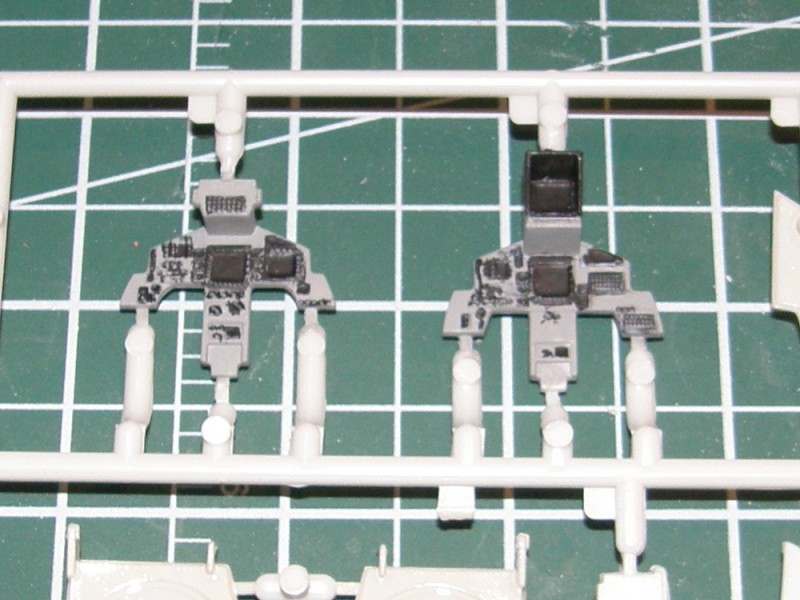
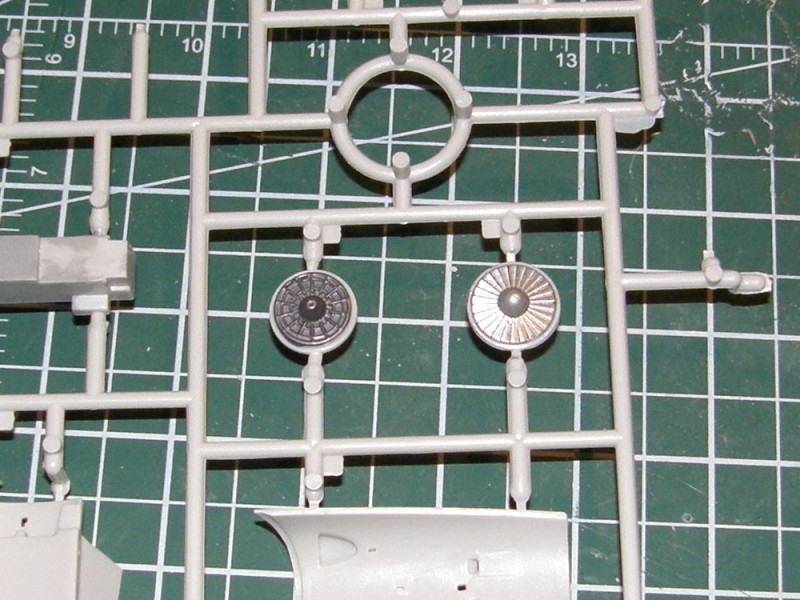
More subassemblies. The intakes in white primer
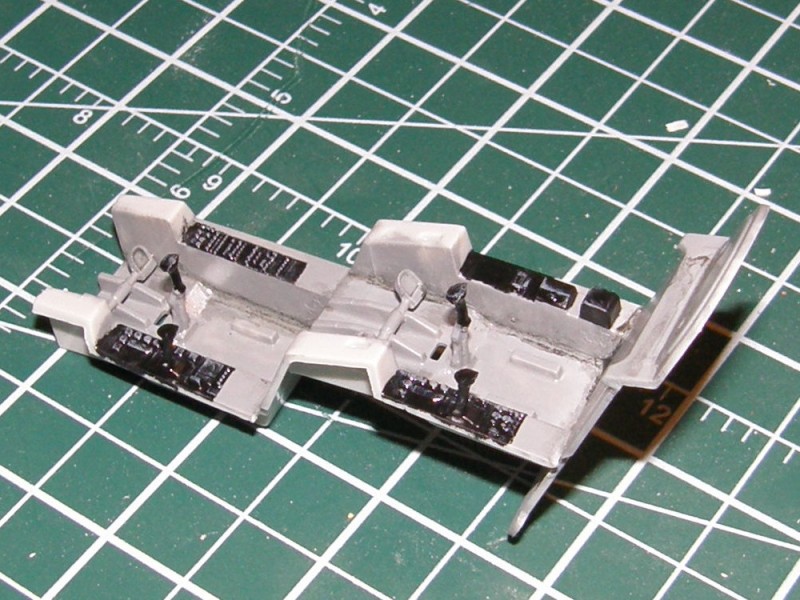
Instrument panels with the first bits of black on them
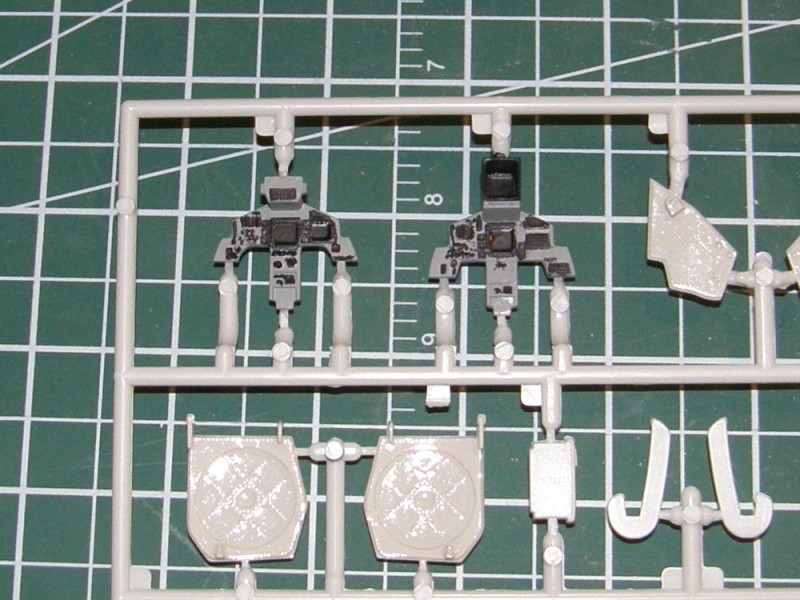
And the cockpit tub with its black
Instrument panels with the first bits of black on them
And the cockpit tub with its black
Jessie_C
Joined: September 03, 2009
KitMaker: 6,965 posts
AeroScale: 6,247 posts
Posted: Saturday, August 10, 2013 - 06:06 PM UTC
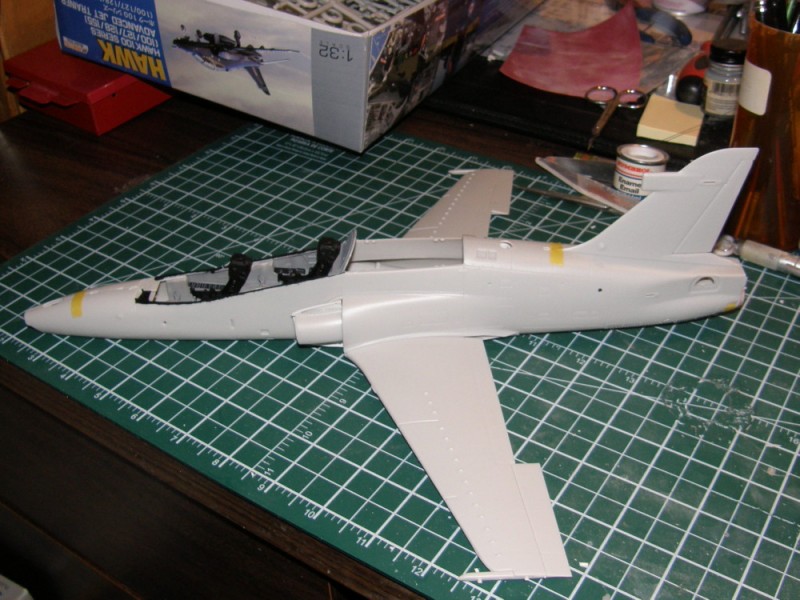
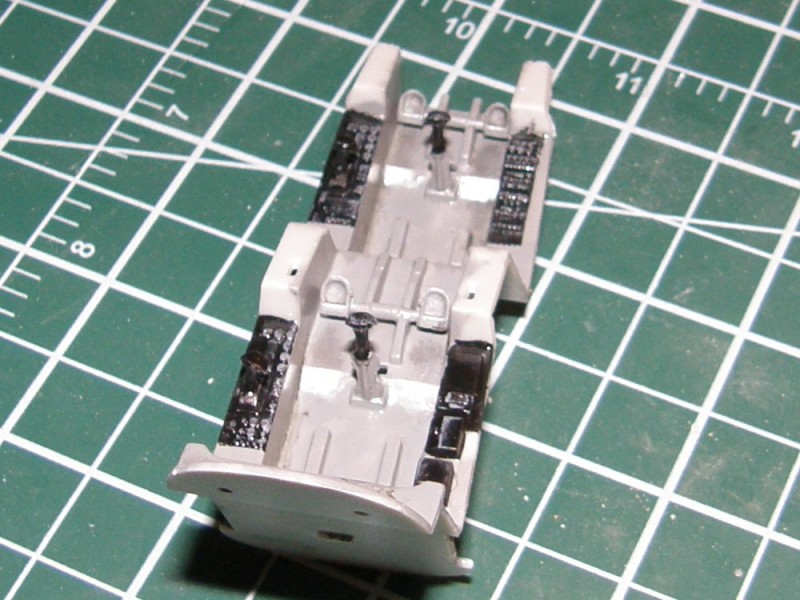
I've done some drybrushing in the cockpit
And a quick test fit
And a quick test fit

RedwingNev

Joined: February 07, 2004
KitMaker: 911 posts
AeroScale: 415 posts

Posted: Saturday, August 10, 2013 - 07:27 PM UTC
The Hawk is surprisingly big in 1/32 isn't it?
Jessie_C
Joined: September 03, 2009
KitMaker: 6,965 posts
AeroScale: 6,247 posts
Posted: Sunday, August 11, 2013 - 03:17 AM UTC
Almost everything is surprisingly big in 1/32, which is one of the reasons my Phantom is still in its box 
Jessie_C
Joined: September 03, 2009
KitMaker: 6,965 posts
AeroScale: 6,247 posts
Posted: Monday, August 12, 2013 - 09:31 AM UTC
I've been doing more cockpit work in the Hawk, plus a few other things.
The bang seats have their preliminary paint and drybrushing done
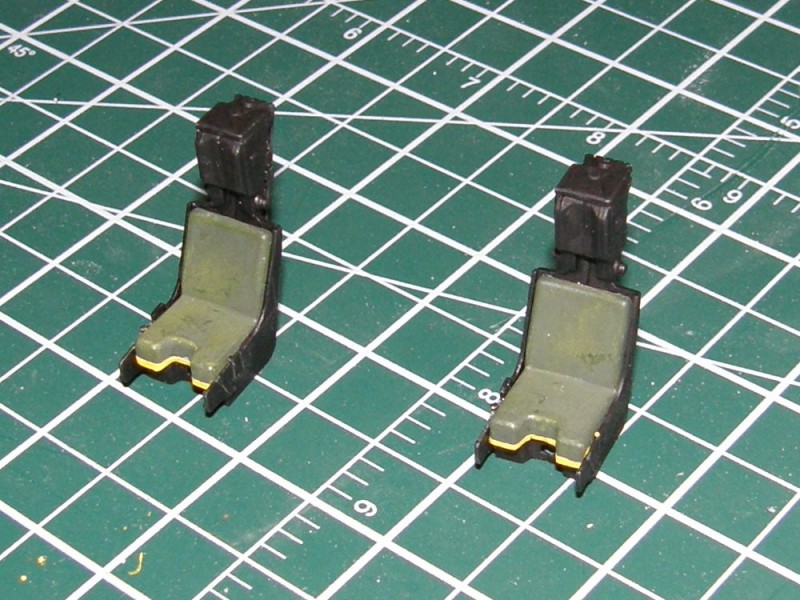
I tried to portray a slight amount of wear on the edges
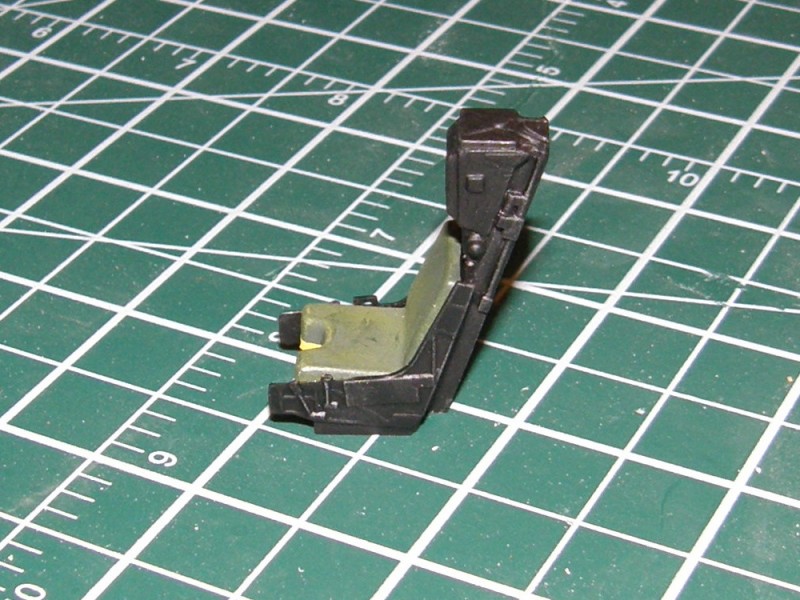
The seat belts have their base colours on
A bit of a wash and brush-up in the cockpit. The flash washed out most of the wear I drybrushed onto the floor
Now on to other parts of the Hawk's anatomy. The intake and turbine fans with a dark wash and polish respectively
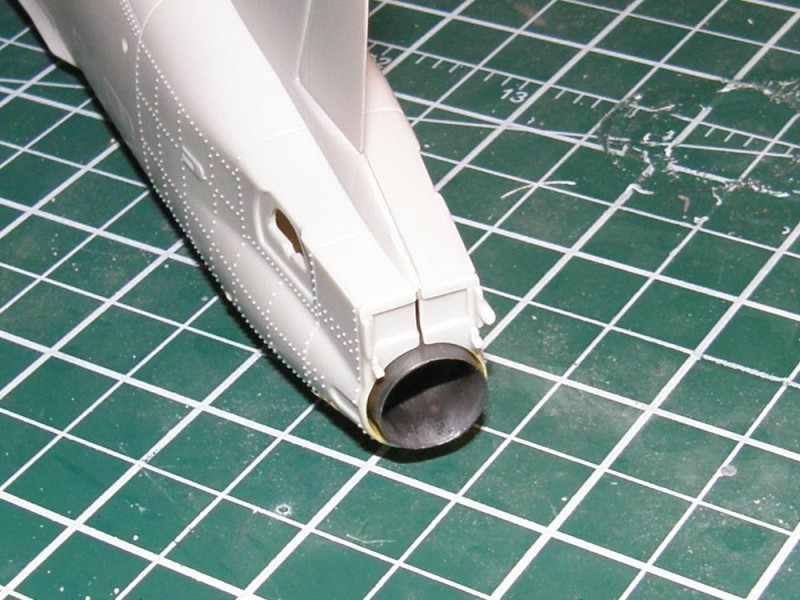
The business end of the jet pipe, plus just a sliver of the zinc chromate painted on the interior of the fuselage showing which is exactly what I wanted to happen here.
The bang seats have their preliminary paint and drybrushing done
I tried to portray a slight amount of wear on the edges
The seat belts have their base colours on
A bit of a wash and brush-up in the cockpit. The flash washed out most of the wear I drybrushed onto the floor
Now on to other parts of the Hawk's anatomy. The intake and turbine fans with a dark wash and polish respectively
The business end of the jet pipe, plus just a sliver of the zinc chromate painted on the interior of the fuselage showing which is exactly what I wanted to happen here.
epshifty
Joined: August 05, 2011
KitMaker: 376 posts
AeroScale: 348 posts
Posted: Monday, August 12, 2013 - 10:44 AM UTC
looking good so far Jess
do335b6

Joined: October 30, 2011
KitMaker: 84 posts
AeroScale: 81 posts
Posted: Monday, August 12, 2013 - 06:38 PM UTC
I know I'm getting here late but here is what I am working on, 1/32 He 219 by ZM.
Just started the beast and I've made good progress on the engines so far.
AriCamp2013011_zps990800cf.jpg
AriCamp2013012_zps0c01311f.jpg
AriCamp2013013_zps2ce80dfa.jpg
AriCamp2013014_zpsca1d4a7b.jpg
AriCamp2013015_zps362115be.jpg
Just started the beast and I've made good progress on the engines so far.
AriCamp2013011_zps990800cf.jpg
AriCamp2013012_zps0c01311f.jpg
AriCamp2013013_zps2ce80dfa.jpg
AriCamp2013014_zpsca1d4a7b.jpg
AriCamp2013015_zps362115be.jpg
do335b6
Joined: October 30, 2011
KitMaker: 84 posts
AeroScale: 81 posts
Posted: Monday, August 12, 2013 - 06:41 PM UTC
ok why are the pics not showing up?
try again


try again


do335b6
Joined: October 30, 2011
KitMaker: 84 posts
AeroScale: 81 posts
Posted: Monday, August 12, 2013 - 06:44 PM UTC
some more pics


do335b6
Joined: October 30, 2011
KitMaker: 84 posts
AeroScale: 81 posts
Posted: Monday, August 12, 2013 - 06:45 PM UTC


noddy927
Joined: February 15, 2013
KitMaker: 1,273 posts
AeroScale: 200 posts
Posted: Tuesday, August 13, 2013 - 02:16 AM UTC
Nice work on the Hawk Jess. I have built a few over the last couple of years, and the 1/32 scale is my fav. You can play about with the detail a bit more. What markings are you going for?
Winston.....superb detail in that HE-219 office buddy.
Pete
Winston.....superb detail in that HE-219 office buddy.
Pete
RedwingNev
Joined: February 07, 2004
KitMaker: 911 posts
AeroScale: 415 posts
Posted: Tuesday, August 13, 2013 - 05:35 AM UTC
Quoted Text
Almost everything is surprisingly big in 1/32, which is one of the reasons my Phantom is still in its box
Ha, true! I remember when I built my 1/32 Tornado, the drop tanks were as big as a 1/72 fighter

Winston - amazing looking cockpit and engines!

noddy927
Joined: February 15, 2013
KitMaker: 1,273 posts
AeroScale: 200 posts
Posted: Tuesday, August 13, 2013 - 08:36 AM UTC
Well guys nearly finished, all the decals on, and fully built.....just a little weathering, and then another good coat of future to make it shine.


Pete
oops nearly forgot.....canopy is not blacked out, just not taken masks off. Once the last coat of Future is on I will remove them.


Pete
oops nearly forgot.....canopy is not blacked out, just not taken masks off. Once the last coat of Future is on I will remove them.
Jessie_C
Joined: September 03, 2009
KitMaker: 6,965 posts
AeroScale: 6,247 posts
Posted: Tuesday, August 13, 2013 - 09:12 AM UTC
Quoted Text
What markings are you going for?
I'm going to do the RCAF option right out of the box. Your Hawk is fantastic. That scheme is much more elaborate than I had thought.
noddy927
Joined: February 15, 2013
KitMaker: 1,273 posts
AeroScale: 200 posts
Posted: Tuesday, August 13, 2013 - 09:23 AM UTC
Thanks Jess I am looking forward to seeing yours complete. i've built more Hawks than any other kite, and I was never a fan before really. The last one I did was 1/32 from RAF Chivenor a nice grey colour lol.
Pete
Pete
warreni
Joined: August 14, 2007
KitMaker: 5,926 posts
AeroScale: 2,201 posts
Posted: Tuesday, August 13, 2013 - 09:48 AM UTC
I see you worked out your picture problems Winston. Looking very nice so far.
Jess, persistence will win in the end.
Peter, those decals came up well. Should it be too shiny as it sits out in the weather 24/7?..
Cheers all
Warren
Jess, persistence will win in the end.
Peter, those decals came up well. Should it be too shiny as it sits out in the weather 24/7?..
Cheers all
Warren
noddy927
Joined: February 15, 2013
KitMaker: 1,273 posts
AeroScale: 200 posts
Posted: Tuesday, August 13, 2013 - 03:25 PM UTC
Yuuuuup a very shiny aircraft buddy, as it is a display aircraft and attends shows etc. so gloss is order of the day. Understand where you are coming from tho.
Pete
Pete
Jessie_C
Joined: September 03, 2009
KitMaker: 6,965 posts
AeroScale: 6,247 posts
Posted: Tuesday, August 13, 2013 - 04:32 PM UTC
I'm not very thrilled about the bang seats' firing handles and I really hate trying to paint the yellow and black spirals.
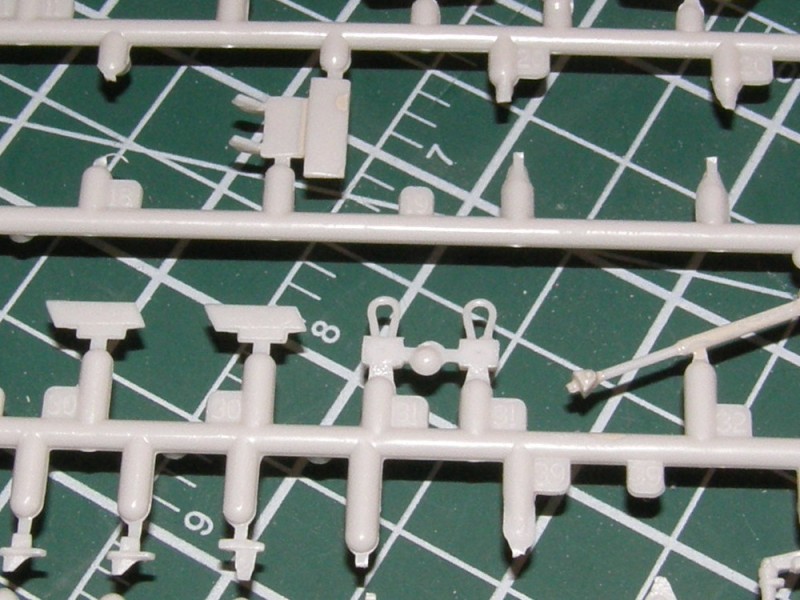
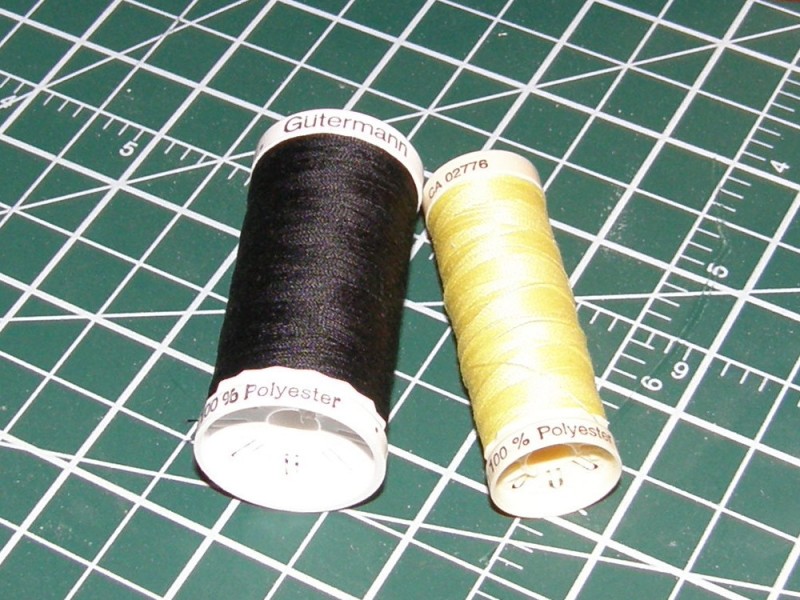
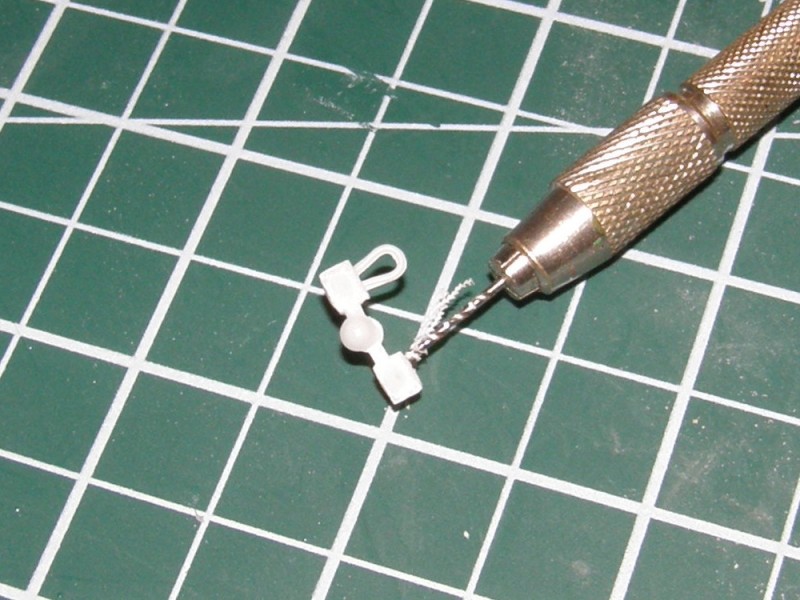
I'm going to solve this little problem by borrowing Drabslab's thread technique and modify it a little bit. Since I haven't got a button, I'll need something else. First, the thread
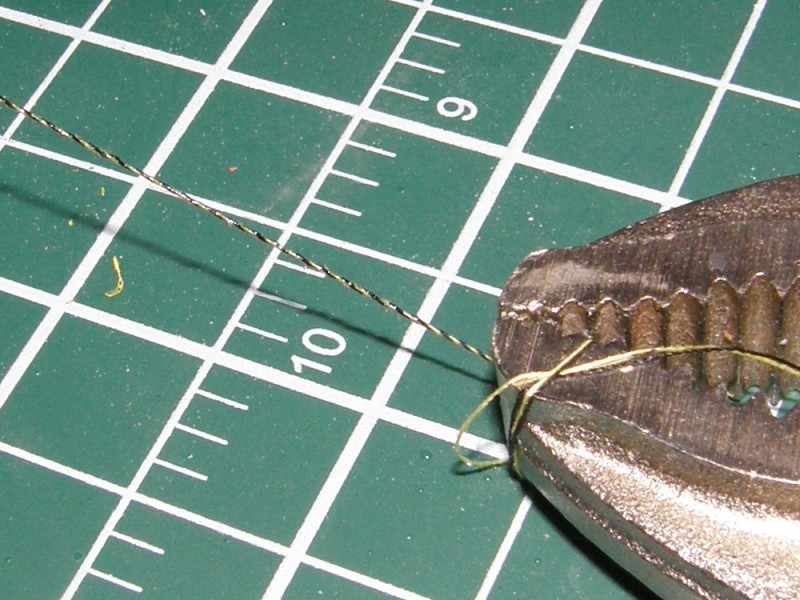
Then instead of a button, I used my Vice-grips, dangled them from the thread and spun them for a few minutes while the threads wrapped together.
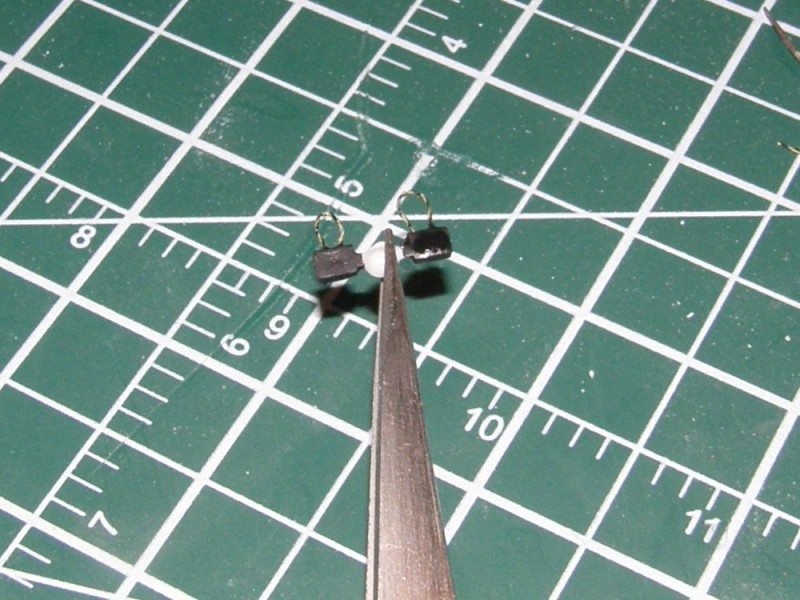
I clipped the plastic firing hoops off
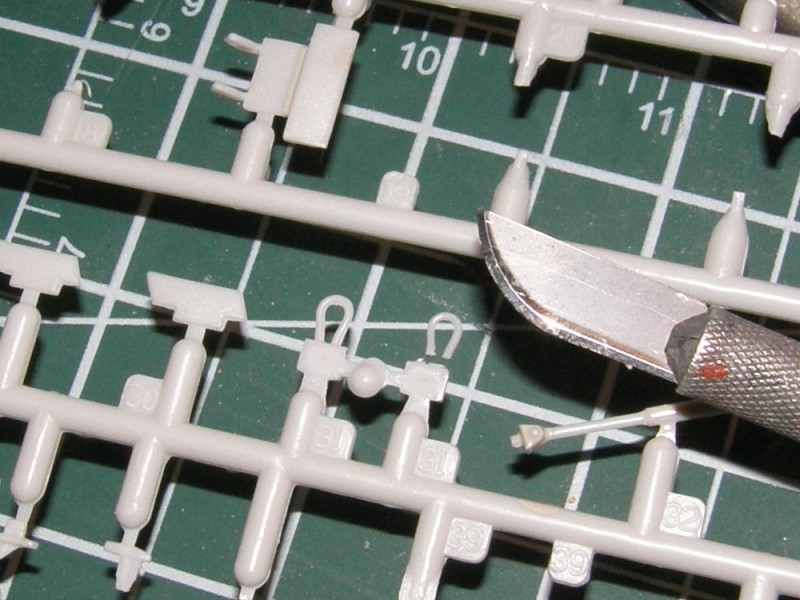
Drilled a pair of holes
Superglued in a loop of the twisted thread, et voilà! Instant bang seat firing handles, no fussy painting required!
I'm going to solve this little problem by borrowing Drabslab's thread technique and modify it a little bit. Since I haven't got a button, I'll need something else. First, the thread
Then instead of a button, I used my Vice-grips, dangled them from the thread and spun them for a few minutes while the threads wrapped together.
I clipped the plastic firing hoops off
Drilled a pair of holes
Superglued in a loop of the twisted thread, et voilà! Instant bang seat firing handles, no fussy painting required!
 |

WEB HOSTING BY


Copyright ©2021 AeroScale and Kitmaker Network, a subsidiary of Silver Star Enterprises
All Rights Reserved. Please read our Conditions of Use and Privacy Policy.
All Rights Reserved. Please read our Conditions of Use and Privacy Policy.