Air Campaigns
Want to start or join a group build? This is where to start.
OFFICIAL: Anything Goes Campaign
olivato
_VISITCOMMUNITY
Distrito Federal, Argentina
Joined: August 16, 2005
KitMaker: 127 posts
AeroScale: 12 posts
Posted: Saturday, March 09, 2013 - 10:56 AM UTC
Hi!

I've been following this campaign since it started and with the good works you are doing, it inspired me to join in and try with this one, a Russian Yak-38.
I've cut some parts, but nothing is glued yet.
Cheers!
Dragon164
#226
_VISITCOMMUNITY
British Columbia, Canada
Joined: February 20, 2012
KitMaker: 1,909 posts
AeroScale: 508 posts
Posted: Saturday, March 09, 2013 - 01:53 PM UTC

Quoted Text


Quoted Text

Hi,
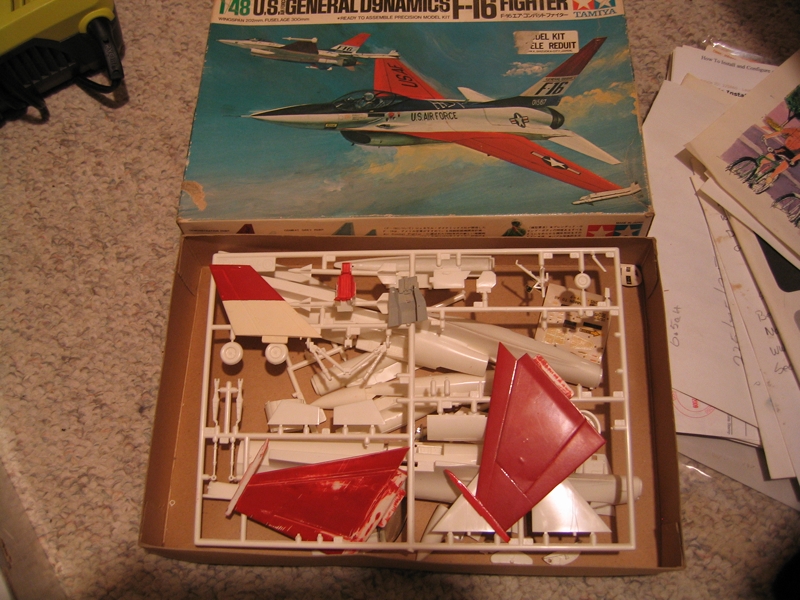
Would this work for this campaign? I know it's been started but that was a long time ago and not much is done and what is done will now have to be stripped and re-done.

Cheers Rob.


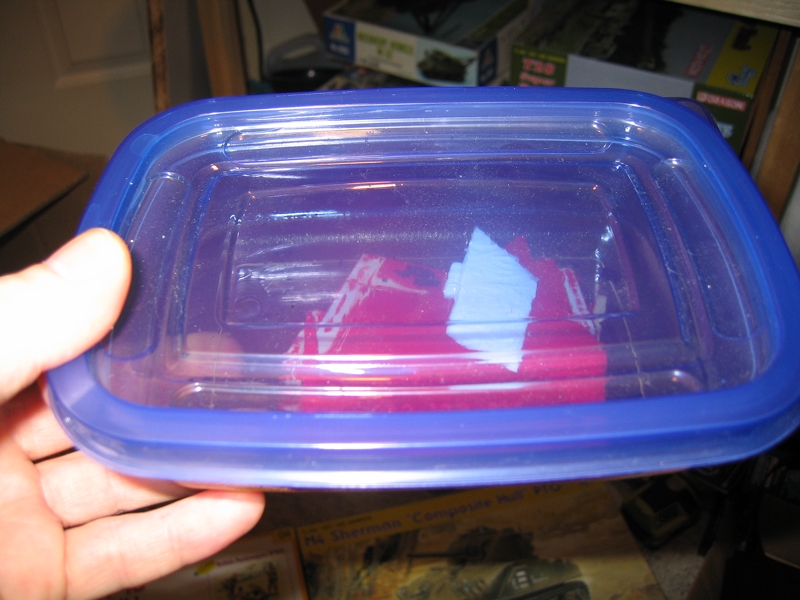
PS If this is alright I'll put the pieces in some Pine-Sol to strip the paint.

I can't see why not as it look s like only the wings have been built and attempted to be painted


Great ,
Now I just have to undo what's been done.

Cheers Rob.
AussieReg
Staff MemberAssociate Editor
AUTOMODELER
#007
_VISITCOMMUNITY
Victoria, Australia
Joined: June 09, 2009
KitMaker: 8,156 posts
AeroScale: 3,756 posts
Posted: Saturday, March 09, 2013 - 05:19 PM UTC

Quoted Text

I suppose that the Insurance people would call that an Act of Dog.


Was that the insomniac dyslexic agnostic insurance agent?

He lay awake all night wondering if there really is a dog

Jessie_C
_VISITCOMMUNITY
British Columbia, Canada
Joined: September 03, 2009
KitMaker: 6,965 posts
AeroScale: 6,247 posts
Posted: Saturday, March 09, 2013 - 06:28 PM UTC
I think we need to cur tail these puns.
AussieReg
Staff MemberAssociate Editor
AUTOMODELER
#007
_VISITCOMMUNITY
Victoria, Australia
Joined: June 09, 2009
KitMaker: 8,156 posts
AeroScale: 3,756 posts
Posted: Saturday, March 09, 2013 - 10:26 PM UTC

Quoted Text

I think we need to cur tail these puns.


Puns? What puns? I think you must be barking up the wrong tree Jessica!
SuperSandaas
_VISITCOMMUNITY
Sør-Trøndelag, Norway
Joined: October 23, 2012
KitMaker: 189 posts
AeroScale: 142 posts
Posted: Monday, March 11, 2013 - 07:45 AM UTC
My build will be part one of my own Battle of Britain-project.
Airfix 1:72 Spitfire Mk Ia. It also means I'll try out the paint range from Agama.

Picture to prove I didn't start early:

Looks like a nice little kit to start now that I'm down with the flu.
Mcleod
_VISITCOMMUNITY
Alberta, Canada
Joined: April 07, 2010
KitMaker: 1,028 posts
AeroScale: 939 posts
Posted: Friday, March 15, 2013 - 08:00 AM UTC
Hi. I had originally wanted to build a Minicraft Skyrocket for this campaign. However, I have good reasons for changing my mind, which I won't bother you with.

Anyway, I've decided to go with a 1/48 Spitfire IX instead, and thought I'd better post that I'm beginning. Here's the date stamp:


The Revell kit is an identical repop of the Hasegawa offering, other than markings. I will not be using the kit markings, though, as this is the example I hope to model:

This is a 401Sqn., RCAF Spitfire, which was known as the 'Blue Spitfire' due to its blueish appearance resultant from a camo pattern in greys.

I have begun modeling, barely. My first goal was to select the best seat and get to work:


The seat on the right is an Eduard offering that I soldered up. Next two are Ultracast seats, one with harness and one without. Last one is the kit seat.
I've chosen to install the unharnessed Ultracast seat, as the best one. They're brushed with black enamel, because I'm experimenting with an alternate weathering technique.

I've also begun to work with a Eduard assisted IP:


I'm going to spray silver enamel over the entire interior first, let it set, and then apply interior green acrylic. Then I'll swab a little alcohol to weather it up abit.
I've used this technique on my Lysander. It takes longer, but, the results are quite nice.

See you next post
epshifty
_VISITCOMMUNITY
England - North West, United Kingdom
Joined: August 05, 2011
KitMaker: 376 posts
AeroScale: 348 posts
Posted: Friday, March 15, 2013 - 09:34 AM UTC
Well after i finished the instrument panel of the Intruder i decided i wasnt happy with it so iv gone and ordered the PE set from eduard .. While im wait for that to arrive iv done some of the bombs

 photo 2013-03-15150145_zps947f8366.jpg
SuperSandaas
_VISITCOMMUNITY
Sør-Trøndelag, Norway
Joined: October 23, 2012
KitMaker: 189 posts
AeroScale: 142 posts
Posted: Saturday, March 16, 2013 - 09:20 AM UTC
I've finished the cockpit, and scratchbuilt a harness from masking tape. A bit rought, but they won't be that visible through the closed canopy.


Closed up the fuselage. The joint along the nose was a bit prominent so I gave it a once-over with Tamiya putty. Normally I would have left it and just used some abrasive paper to make it flush, since citadel paints are pretty good at covering small blemishes. But this time I'm using the Agama paints I orderd from the Czech webshop which is my "royal supplier", and they are more viscous.
Mcleod
_VISITCOMMUNITY
Alberta, Canada
Joined: April 07, 2010
KitMaker: 1,028 posts
AeroScale: 939 posts
Posted: Saturday, March 16, 2013 - 10:04 AM UTC
Your pit job looks very nice sitting in the closed-up fuselage,Eirik. Perhaps the scratch built harness is slightly robust, but, thats ok. It still looks good. Well done!
mykroft
_VISITCOMMUNITY
Ontario, Canada
Joined: November 14, 2009
KitMaker: 270 posts
AeroScale: 264 posts
Posted: Sunday, March 17, 2013 - 04:33 AM UTC
Some great work, loving those Spitfire cockpits in particular.

Here's the current status of the AZ IXc:


AZModel Spitfire IXc 1/72 by mawz_models, on Flickr

The gaps are a lot smaller than the slathered-on Mr. Surfacer 500, I'll be removing most of that with acetone-based Nail Polish Remover.
Mcleod
_VISITCOMMUNITY
Alberta, Canada
Joined: April 07, 2010
KitMaker: 1,028 posts
AeroScale: 939 posts
Posted: Sunday, March 17, 2013 - 04:40 AM UTC

Quoted Text

slathered-on Mr. Surfacer 500, I'll be removing most of that with acetone-based Nail Polish Remover.


There's a real neat modeling tip, that I never knew. That's why this is my primary forum.
thewrongguy
_VISITCOMMUNITY
Ontario, Canada
Joined: October 17, 2002
KitMaker: 448 posts
AeroScale: 34 posts
Posted: Monday, March 18, 2013 - 12:08 PM UTC
Well here goes nothing. 1st aircraft model I've built in 21 years. Christ now I feel old.


Returned to the hobby about 3 years ago and focused on armour. Father in law is a big aircraft buff and after seeing shelf upon shelf of aircraft models I've finally got the bug to build one myself.

Hopefully I can make it look half as nice as some of the great work I've seen on this site.

Cheers

Jeff
SaxonTheShiba
_VISITCOMMUNITY
United States
Joined: February 01, 2009
KitMaker: 1,233 posts
AeroScale: 663 posts
Posted: Monday, March 18, 2013 - 12:14 PM UTC
Well Jeff, welcome back to the world of aircraft modeling. You could not have picked a better kit to start off with. Most importantly...have fun and enjoy the build!!!


Regards,

Ian
Mcleod
_VISITCOMMUNITY
Alberta, Canada
Joined: April 07, 2010
KitMaker: 1,028 posts
AeroScale: 939 posts
Posted: Monday, March 18, 2013 - 12:19 PM UTC
Welcome, Jeff. And you've picked a wonderful model to start with.

Still slowly moving along with the Spitfire. Shot it with Humbrol silver enamel first. Needs to set for awhile before I apply the acrylic interior colors and weather it.


The dots on the T-pins are a few compasses I'm scratching up.
Dragon164
#226
_VISITCOMMUNITY
British Columbia, Canada
Joined: February 20, 2012
KitMaker: 1,909 posts
AeroScale: 508 posts
Posted: Monday, March 18, 2013 - 10:44 PM UTC
Lots of fine work going on here!

I don`t know if it was the paint I originally used or that I had to soak it for so long to remove the paint but there is some damage to the wings and tail. Nothing that will keep me from building it though. I can now start this kit again!

Cheers Rob.
epshifty
_VISITCOMMUNITY
England - North West, United Kingdom
Joined: August 05, 2011
KitMaker: 376 posts
AeroScale: 348 posts
Posted: Friday, March 22, 2013 - 09:56 AM UTC
A quick Intruder update .. My Eduard PE set arrived on Tuesday and iv been busy with the cockpit area i had to make a few alterations so things would fit ok but im much happier with it now

 photo 2013-03-18102511_zps78ef1df0.jpg

 photo 2013-03-19153726_zps385a9de5.jpg
SuperSandaas
_VISITCOMMUNITY
Sør-Trøndelag, Norway
Joined: October 23, 2012
KitMaker: 189 posts
AeroScale: 142 posts
Posted: Sunday, March 24, 2013 - 12:13 PM UTC
Finished the Spit today. Chose the kits single decal-option: D-WK (P9495), No 610 Squadron, 13 Air Group RAF - Biggin Hill England, July 1940.

The only issue with kit was the fit of the cockpit-hood. I had to do a lot for filing and dry-fitting. In the end i had to resort to the good old trick with white glue, but it worked out.

Agama paints was a pleasant acquaintance.They give a good finish, but needs plenty of stirring, or you get a wavy discoloration. I love their version of "Sky"! And thanks to the nice finish and Airfix liberal panel-lines I just gave the model a very light wash.

The decals was stiff, but most snuggled down with a setting solution. The only problem here was the patches over the machine guns. In the end I used diluted glue, and it was a pretty though "sol", but after all the patches would look a bit ragged on the plane after a flight anyway.

The arial is stretched sprue, and the seat harness looks great even through the thick (but crystal clear) hood.

Posted some more pictures in the campaign gallery. And the Spit takes it's place in my glass-cabinet.
thewrongguy
_VISITCOMMUNITY
Ontario, Canada
Joined: October 17, 2002
KitMaker: 448 posts
AeroScale: 34 posts
Posted: Sunday, March 24, 2013 - 03:25 PM UTC
Started work on the cockpit (sorry for the quality of the pictures, good camera was out on loan with the Mrs)


Fit was as good as I had expected it to be. Cockpit colours aren't 100% accurate, but this is just a fun build to see if I want to get hooked on another branch of scale modelling. My wallet is kind of hoping I don't. Next up if the step that worries me most, dealing with the seam on the top and bottom of the fuselage.


Great work all around,

Jeff
epshifty
_VISITCOMMUNITY
England - North West, United Kingdom
Joined: August 05, 2011
KitMaker: 376 posts
AeroScale: 348 posts
Posted: Monday, March 25, 2013 - 11:45 AM UTC
Intruder update .. iv done some of the cockpit tub and finished one of the ejector seats .. on to the next one

 photo 2013-03-25205444_zpsf16628a8.jpg
strongarden
_VISITCOMMUNITY
Florida, United States
Joined: May 14, 2012
KitMaker: 730 posts
AeroScale: 15 posts
Posted: Tuesday, March 26, 2013 - 05:10 AM UTC
Hello All

I've also been following along and have enlisted after being greatly impressed by the progress and quality goin' on here.
Nice job Eirick, looks to have been a fun and relaxing build.

Nice job on all those cockpit tubs, I can only dream of achieving something similar.
I have not completed an aircraft kit in well close to 25yrs or so! Just recently got back into the hobby a yr ago on this site (at my age, a yr ago is recent)

Will post an image tonite of my choice from the stash. Warning: It's gonna be an old one!

Cheers Dave
strongarden
_VISITCOMMUNITY
Florida, United States
Joined: May 14, 2012
KitMaker: 730 posts
AeroScale: 15 posts
Posted: Tuesday, March 26, 2013 - 11:09 AM UTC
Ok here goes, I've pulled this out of the stash, I hope to build this OOB.


It's a real old kit, but it's great for me to do. I've noticed a lot of modern props and jets here so it's anything goes with an old Bi-Plane...
G'd Luck w/ the rigging Dave... huh, what? Oh well like I said here goes

Cheers Dave
emroglan
_VISITCOMMUNITY
Istanbul, Turkey / Türkçe
Joined: December 16, 2004
KitMaker: 1,163 posts
AeroScale: 255 posts
Posted: Wednesday, March 27, 2013 - 08:58 AM UTC
Hello all,

If anything goes, I will be jumping in with Trumpeter's 1/72 F-105G kit. It is one of the few aircraft I personally like a lot and because of that a friend passed a lost and abused kit to me. I receieved it without a proper box, some of the instructions lost and the cockpit half assembled.

There was no detail provided for the cockpit, so I tore the assembled parts apart and decided to replace it with an Eduard set. Luckly, Eduard makes a pre-colored set that is also self-adhesive... What more could I want?


A dry-fit of the fuselage revealed that it was going to go together without much pain... Well, I was wrong 
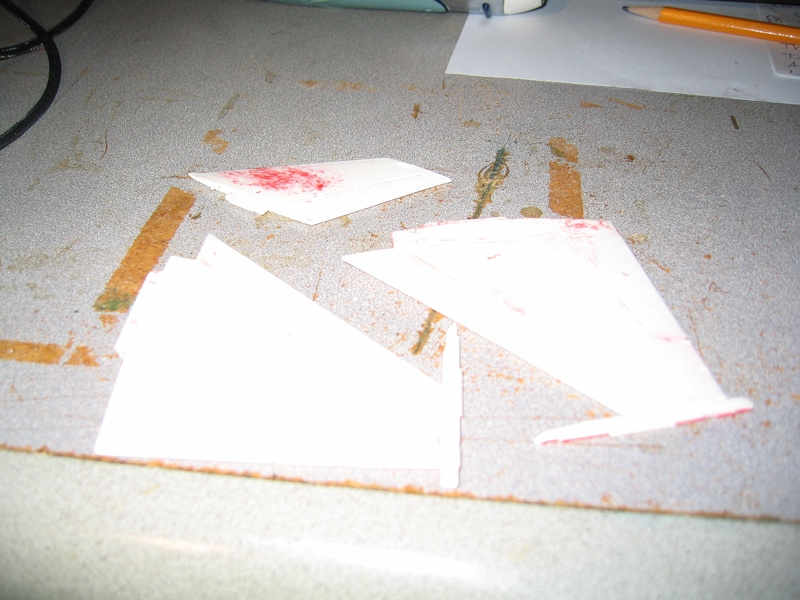
As visible in the photo, the upper back tends to split up. I had to use clamps, but the round shape of the fuselage meant that it would still crack and separate. I had to press it with my hands and wait half an hour with the kit in my hand to make sure everything stuck together!

I'm currently working on the wings and the canopy details. More photos soon.
epshifty
_VISITCOMMUNITY
England - North West, United Kingdom
Joined: August 05, 2011
KitMaker: 376 posts
AeroScale: 348 posts
Posted: Thursday, March 28, 2013 - 09:38 AM UTC
Well iv now got some time off work for easter so iv been in the hobby shed . I finished of the cockpit area and installed the nose wieghts into the two fuselage halfs . After the glue had dried i fitted the cockpit tub and glued it all together , the fit its quite good for an old kit and only a small amount of filling and sanding will be needed .. while i set it to one side to dry i cleaned up the wings and got the starboard side glues together ...


 photo 2013-03-28143806_zpscc37fc3b.jpg

 photo 2013-03-28152309_zps5d8eeced.jpg

 photo 2013-03-28152258_zps38e8333a.jpg

 photo 2013-03-28152327_zps48f4e91d.jpg

 photo 2013-03-28171643_zps651137d9.jpg

SaxonTheShiba
_VISITCOMMUNITY
United States
Joined: February 01, 2009
KitMaker: 1,233 posts
AeroScale: 663 posts
Posted: Thursday, March 28, 2013 - 11:10 AM UTC
Dave, great work on your A-6 cockpit. Great thing about the Prowlers and Intruders is that the cockpit is so spacious and you can really appreciate the detail.


Regards, Ian