Air Campaigns
Want to start or join a group build? This is where to start.
Air Pioneers & Record Breakers Campaign
MLD
_VISITCOMMUNITY
Vermont, United States
Joined: July 21, 2002
KitMaker: 3,569 posts
AeroScale: 419 posts
Posted: Saturday, February 23, 2013 - 02:15 AM UTC

Quoted Text


Quoted Text

It's a little disheartening, it looks like the bare parts out of the box again..


...except without all the gaping caverns that used to be there. What colour are you going to use for the purple?


My son and I have a bunch of Vallejo/Reaper/Games Workshop paints for his Warhammer 40K habit. Probably cobble something together from there. It's a pretty dark blue with a purple hue depending on the light.


As for the fuselage halves of the Explorer, for all the flash and crummy molding, the engineering of the fit of the wings to the fuselage was not a problem I remember having with that kit. Even this one seems to dryfit together pretty well.

Mike
SuperSandaas
_VISITCOMMUNITY
Sør-Trøndelag, Norway
Joined: October 23, 2012
KitMaker: 189 posts
AeroScale: 142 posts
Posted: Saturday, February 23, 2013 - 02:58 AM UTC
The RWD is coming along nicely. Should be able to finish it over the weekend as long as I'm not distracted with other, less important, projects. (Like washing the kitchen floor or doing the laundry... )

There was few references for the internal colors of the plane. Plastyk suggests "natural wood" and "black" but I opted for a dark grey, with a tan seat. The extra fueltank I painted a copper-colour, (In one forum I had to google-translate it was suggested it was made of a copper or brass alloy.) It doesn't matter much as I don't expect it to be very visible in the end, and it brings a bit of colour compared with the silver outside of the plane.


As we speak the two parts of the fuselage is glued and the fit was surprisingly good.
MLD
_VISITCOMMUNITY
Vermont, United States
Joined: July 21, 2002
KitMaker: 3,569 posts
AeroScale: 419 posts
Posted: Saturday, February 23, 2013 - 04:09 AM UTC
for what its worth the Starship one White Knight is on sale at Squadron today. Sat Feb 23

http://www.squadron.com/product-p/iba72201.htm
tinbanger
_VISITCOMMUNITY
Ontario, Canada
Joined: February 04, 2008
KitMaker: 2,507 posts
AeroScale: 1,814 posts
Posted: Saturday, February 23, 2013 - 12:54 PM UTC
Still working on entry #2

Jessie_C
_VISITCOMMUNITY
British Columbia, Canada
Joined: September 03, 2009
KitMaker: 6,965 posts
AeroScale: 6,247 posts
Posted: Saturday, February 23, 2013 - 03:32 PM UTC
3 major subassemblies, awaiting putty. There's not a great deal of room for nose weight in this little beast. I hope I got enough in.
Jessie_C
_VISITCOMMUNITY
British Columbia, Canada
Joined: September 03, 2009
KitMaker: 6,965 posts
AeroScale: 6,247 posts
Posted: Saturday, February 23, 2013 - 07:39 PM UTC
Now the outer wing panels are on, and the first coat of putty is drying. I'm making an attempt at getting it a little more accurate. The rear engine exhausts were located on top of the aircraft rather than underneath and the winglets got sanded off by the runway during takeoff so I've attacked the wings and made a start at portraying the ragged fibreglas skin that was left when they tore off. There's a fair bit of shaping I could be doing to the nose engine inlets to make them more accurate. This is by far the widest and shortest model I think I've ever built.

amegan
#243
_VISITCOMMUNITY
England - North East, United Kingdom
Joined: March 21, 2008
KitMaker: 996 posts
AeroScale: 915 posts
Posted: Saturday, February 23, 2013 - 09:02 PM UTC
....and probably the one with the most putty, good job it is a composite structure with very little surface detail. Jessie you must like a challenge.
MLD
_VISITCOMMUNITY
Vermont, United States
Joined: July 21, 2002
KitMaker: 3,569 posts
AeroScale: 419 posts
Posted: Sunday, February 24, 2013 - 07:41 AM UTC
Keep plugging Jesse, keep plugging away.
It's an uphill slog, but the results are worth it in the end.
SuperSandaas
_VISITCOMMUNITY
Sør-Trøndelag, Norway
Joined: October 23, 2012
KitMaker: 189 posts
AeroScale: 142 posts
Posted: Sunday, February 24, 2013 - 07:43 AM UTC
The RWD-5bis is comming along nicely.
status last night:


Today I've finished up the wing assembly and the smaller detail.
Tomorrow I'll finish the paint job and the decals.
All in all quite an easy build with remarkably good fit, even though it needed a bit of putty and plenty of sandpaper on the spine of the fuselage. The pitot-tube on the wing was gobbled up by the carpet monster (I thought), so I made a replacement. Later I found the missing part on the seat of my work chair, but I thought the replacement looked good so I left it as it was. Will post in the gallery tomorrow when the paint and decals is done
vdejarnette
_VISITCOMMUNITY
Maryland, United States
Joined: February 25, 2013
KitMaker: 209 posts
AeroScale: 138 posts
Posted: Monday, March 04, 2013 - 03:11 AM UTC
As luck would have it, I'm currently working on a quick build (as in it will only take a couple weeks) of the Testors 1/72 Spirit of St Louis (ex-Hawk mold).


Obviously it is an airplane that needs no introduction as to it's spot in the pantheon of air pioneers, but here is the wikilink anyway for those who are interested.

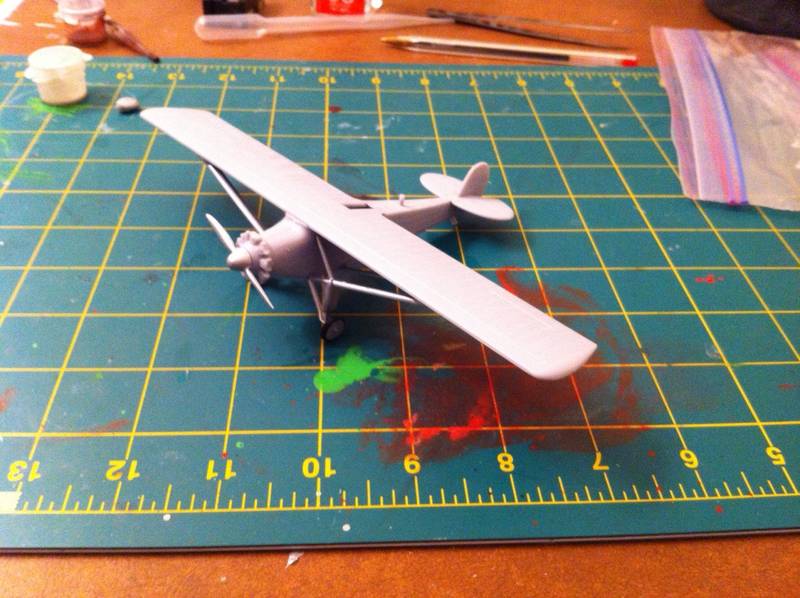
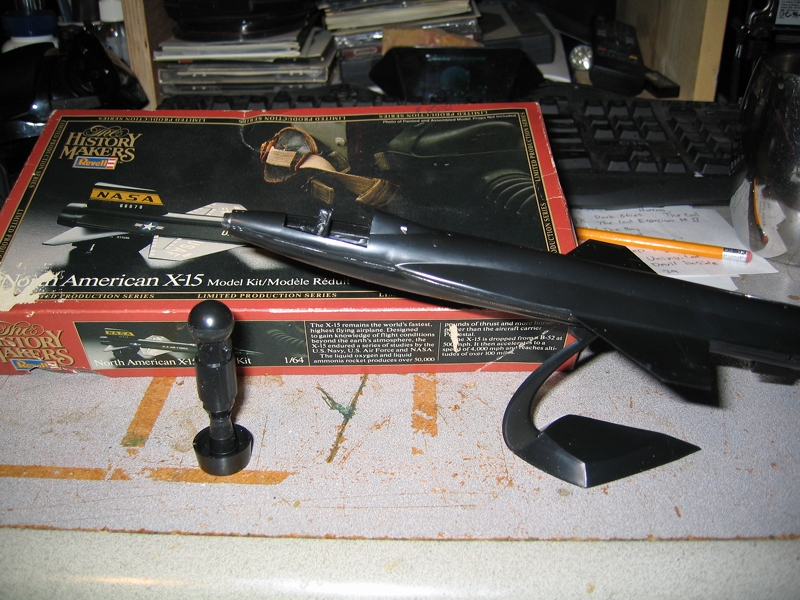
http://en.wikipedia.org/wiki/Spirit_of_St._Louis

Anyway, next photo up is my proof of purchase for eligibility since I did not take any photos before I started and I just joined the site recently.


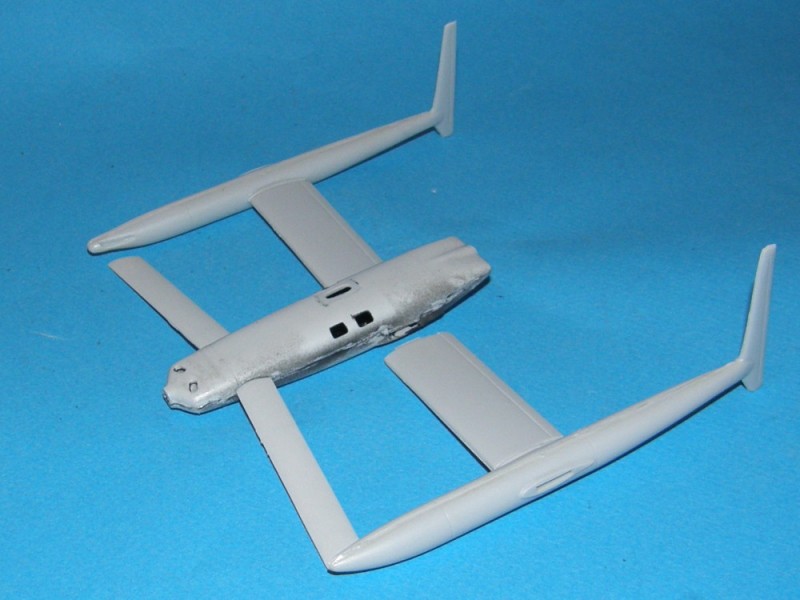
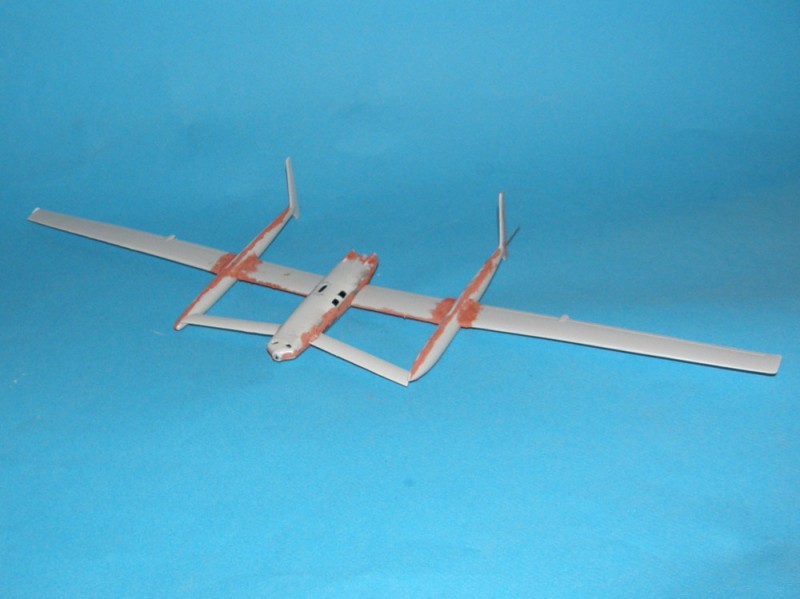
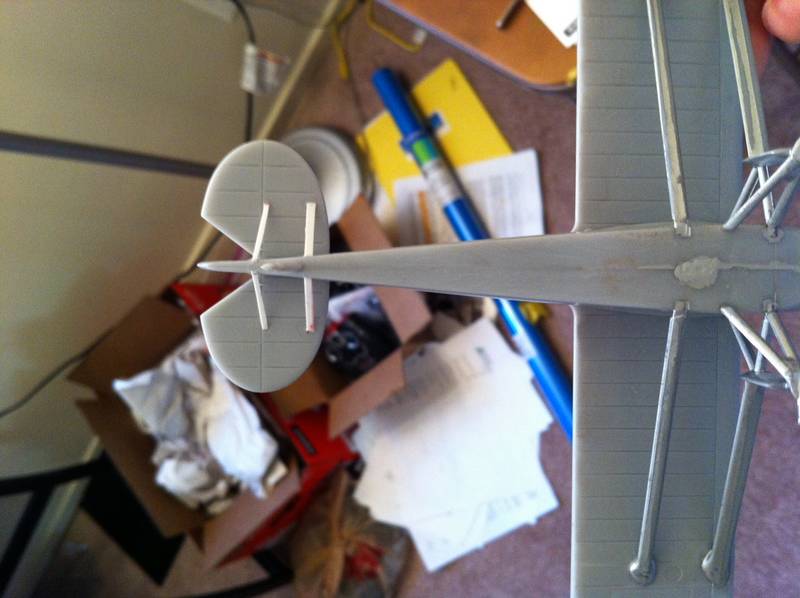
The kit is very very basic. One piece wing, two fuselage halves, propeller, struts, one piece tail (which turned into a two piece tail during construction). The decal locations are embedded in the plastic, something I had never seen before but have heard occured was done on some very old kit moulds. Decent amount of flash overall but not much on the main elements (wing, tail, or fuselage).

It was bought in January as a quick build to allow me to work on my exterior finishing skills (airbrushing, sanding, etc) since I just got into the hobby seriously a few months ago... but after realizing that there was absolutely no cockpit, my OCD took over and I just had to put something together even though little of it will be seen.

I used plasticcard, a spare seat from a Heller BF108 kit, and a couple other spare pieces from the scrap bag to fashion a rough cockpit to match existing interior photos. I also used the instructions I found online for the Revell 1/48 scale kit as a basis for scratchbuilding.


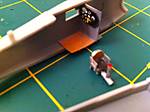
Painted by hand, including the representation of the instrument panel which I tried to do with toothpicks. I realize the paint work, particularly on the black seat cushion and edges of the plywood board floor are very rough but you cannot tell once the cockpit is closed up. I also realize that the control stick is badly overscale but again it won't be seen except through the tiny window at the top (the wings obscure the seat and stick when looking in from the side).

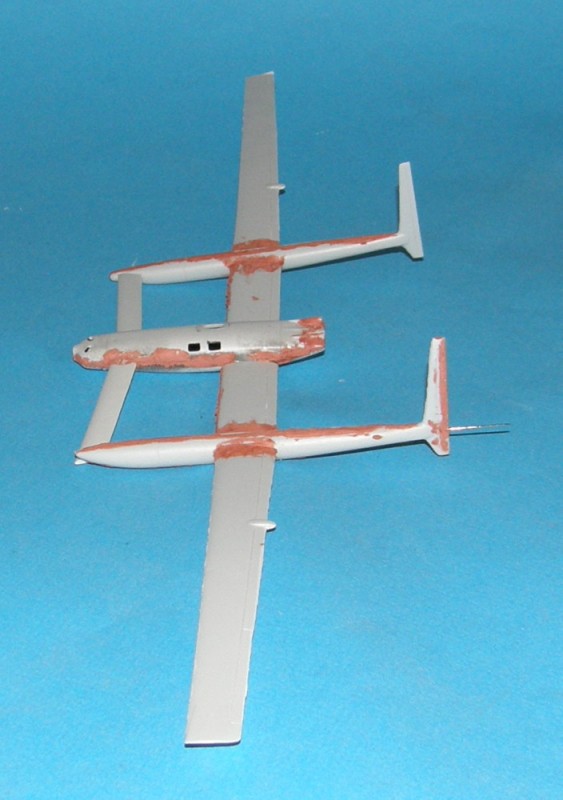
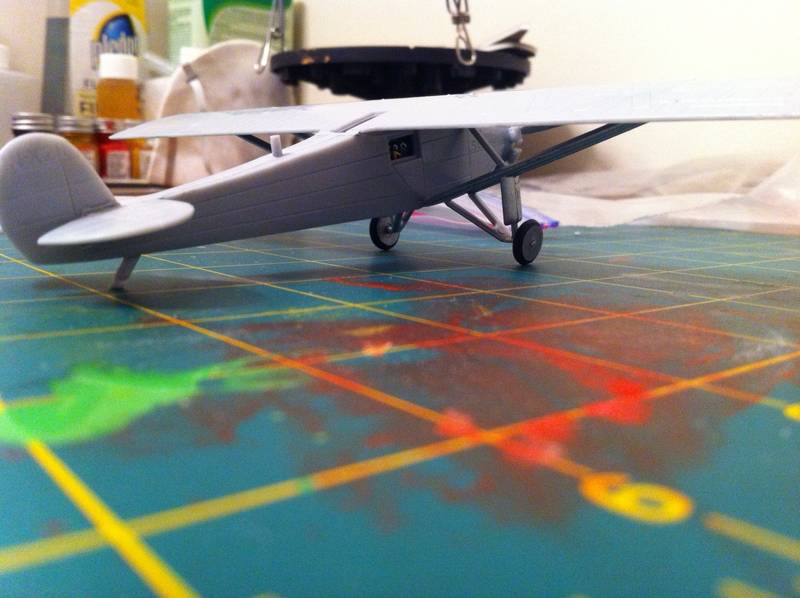
I got much further along this weekend, getting the airframe all put together, seams filled with Mr surfacer and med viscosity CA glue, as well as doing the majority of the sanding. Currently it is waiting to have the windows go on (going to try using future as glue since they are tiny and I don't want smudges) and then it is ready for painting/finishing.
tinbanger
_VISITCOMMUNITY
Ontario, Canada
Joined: February 04, 2008
KitMaker: 2,507 posts
AeroScale: 1,814 posts
Posted: Monday, March 04, 2013 - 04:57 AM UTC
Hi Van
Nice aircraft,one on my wish list.
vdejarnette
_VISITCOMMUNITY
Maryland, United States
Joined: February 25, 2013
KitMaker: 209 posts
AeroScale: 138 posts
Posted: Tuesday, March 05, 2013 - 03:00 AM UTC
Sat down to attach the clear window pieces with future last night but decided to take a couple photos before I did.


The photo is a little blurry (going to start using my camera instead of my phone). The wheels and propeller are not glued on yet, but it gives a good idea of what the finished product will look like prior to painting/finishing. Some Mr Surfacer 500 was required on the seams, particularly at the trailing edge of the wing at the fuselage and on the underside where there is a slot for a clear stand to display it airborne.


Each whole wheel was airbrushed black and then I used a silver paint pen to draw the silver hubcap. I think it came out very well and I will be doing this method whenever possible in the future.


Last one for the day, here you can see the scratchbuilt instrument panel through the door window. I am considering leaving one of the two side windows off the finished model to better show off the inside of the canopy. I originally got the motivation to do this kit after watching the Jimmy Stewart Spirit of St Louis film, and noticed that there was no window glass while he was flying (he yelled out to a fisherman from the plane at one point in the film). A little research seemed to indicate the window panes were removeable.

You can also see that I painted the struts already. It also shows off a seam line down the side of the strut that I still need to sand off. I am planning to use silver testors spray enamel from a can rather than the airbrush because the panel lines are so heavy I wouldn't mind if they are made significantly less prominent.
North4003
_VISITCOMMUNITY
England - West Midlands, United Kingdom
Joined: August 01, 2012
KitMaker: 960 posts
AeroScale: 391 posts
Posted: Tuesday, March 05, 2013 - 04:05 PM UTC
My build for the Air Pioneers Campaign is the B2 Stealth Bomber. On 21 March 2011, three B2's flew 11,500 miles from Whitman AFB, MO to Libya and back in epic 25 hour bombing mission.


http://www.dailymail.co.uk/news/article-1368337/Libya-crisis-B2-stealth-bombers-25-hour-flight-Missouri-Tripoli.html
tinbanger
_VISITCOMMUNITY
Ontario, Canada
Joined: February 04, 2008
KitMaker: 2,507 posts
AeroScale: 1,814 posts
Posted: Tuesday, March 05, 2013 - 11:40 PM UTC
Welcome Brent!
Nice choice.
North4003
_VISITCOMMUNITY
England - West Midlands, United Kingdom
Joined: August 01, 2012
KitMaker: 960 posts
AeroScale: 391 posts
Posted: Wednesday, March 06, 2013 - 10:57 AM UTC
Well, I got right to the B2 last night while the putty was drying on the S6B. I discovered that the kit though boxed by Italeri was made by Dragon. Assembly was nearly completed after a few hours of work. In my haste I forgot to add weight to the nose and it is a tail sitter now. I can go through the none existent cockpit and add weight at the same time I add some seats and controls from plastic shapes. This is ship scale, 1/200. A 1/72 scale version must be a monster considering the size of this kit is similar to a 1/72 fighter. Paint is gunship gray, black and white.


vdejarnette
_VISITCOMMUNITY
Maryland, United States
Joined: February 25, 2013
KitMaker: 209 posts
AeroScale: 138 posts
Posted: Thursday, March 07, 2013 - 02:21 AM UTC
A small update. Got the windows glued on with future (you can still see the scratchbuilt cockpit through the glass) but did not get much else done except a little bit more sanding... for fear of destroying the scratchbuilt stabilizer struts I just glued on.


I found a 1/16 scale planset for a balsa wood flying model and then scaled down the measurements down to 1/72. They were approximately 0.4"L x 0.04"W x 0.01"thick (the rear strut stabilizers were slightly thinner than that!) so I used 0.01 plasticard and some careful cutting with an exacto.


I had a minor disaster while sanding where I noticed one of the stabilizer struts I attached got pressed down and stuck against the tail. Some careful prying and you can barely notice. I left it alone after that. I have a bad habit of impatience wating for things to cure sometimes.

I am hoping to finish sanding and masking the windows for painting tonight.

vdejarnette
_VISITCOMMUNITY
Maryland, United States
Joined: February 25, 2013
KitMaker: 209 posts
AeroScale: 138 posts
Posted: Friday, March 15, 2013 - 12:37 AM UTC
No pictures but an update. The Spirit of St Louis has been primed and painted with testors metallic silver enamel to represent the silver dope on fabric. I had to touch up the seam around the port window so I have to go back and fix up the paint job on that side this weekend. I will next add the decals on the wings and rudder and seal the entire aircraft (save for the brushed aluminum nose) with dullcote.

Getting close to being done, but I am running into a dilemma of how to best represent the brushed aluminum around the nose of the plane. My original idea was to take some flat aluminum enamel and try to add the flat dots by hand in an alternating circular pattern. I saw a nice build log online where the guy actually burnished pieces of bare metal foil into the alternating pattern and that sounds downright unpleasant (http://hsfeatures.com/sslrm.htm). I may try my idea out on a spare piece of plastic first because I don't think I have enough leftover bmf at the moment.


Any good ideas?

http://www.atpm.com/7.01/washington-dc/images/spirit-of-st-louis.jpg
Dragon164
#226
_VISITCOMMUNITY
British Columbia, Canada
Joined: February 20, 2012
KitMaker: 1,909 posts
AeroScale: 508 posts
Posted: Monday, March 18, 2013 - 11:07 PM UTC
It`s funny, just before this campaign started I found the instructions for the kit I am building so put them away so I would not lose them(didn't have the kit handy) and I had been holding off starting because... well I can`t find them

Well I decided to start anyways and seeing there are not a lot of parts I did not have too much trouble and came close to finishing it at work Today.

Cheers Rob.
tinbanger
_VISITCOMMUNITY
Ontario, Canada
Joined: February 04, 2008
KitMaker: 2,507 posts
AeroScale: 1,814 posts
Posted: Monday, March 18, 2013 - 11:19 PM UTC
Well done Rob!
We should run a campaign:- In a Safe Place and Missing!
Dragon164
#226
_VISITCOMMUNITY
British Columbia, Canada
Joined: February 20, 2012
KitMaker: 1,909 posts
AeroScale: 508 posts
Posted: Thursday, March 21, 2013 - 01:18 AM UTC
Thanks Richard!

Well I have about an hour and a half into this and there is just a little sanding left before paint.

Cheers Rob.
amegan
#243
_VISITCOMMUNITY
England - North East, United Kingdom
Joined: March 21, 2008
KitMaker: 996 posts
AeroScale: 915 posts
Posted: Tuesday, March 26, 2013 - 09:30 PM UTC
Some good work happening here, I do like the Ryan, though the kit doesn't look much better than the Comet. Comet update, I'm calling it finished even tho the photos show more touching up required and the right outer undercarriage leg is bent, I'll straighten that. Photos in the Gallery where I found only six others. Come on people get your work in the Campaign gallery

Finally with friends

Not one of my finest, in retrospect I should have primed it as there was a lot of correction work. Heigh ho, move on.

tinbanger
_VISITCOMMUNITY
Ontario, Canada
Joined: February 04, 2008
KitMaker: 2,507 posts
AeroScale: 1,814 posts
Posted: Tuesday, March 26, 2013 - 10:48 PM UTC
Good job!
I have this kit in my stash and molded parts look like they need a lot of work done on them,again yours came out looking good.
We had 19 sign up for this campaign and about 6 completed, seems about the norm for limited appeal campaigns, if we had fun a German/WWII/Record Breakers Campaign we would have had a lot more enter

vdejarnette
_VISITCOMMUNITY
Maryland, United States
Joined: February 25, 2013
KitMaker: 209 posts
AeroScale: 138 posts
Posted: Wednesday, March 27, 2013 - 02:58 AM UTC
Still have til the end of April to get it done right? The Ryan Spirit is painted (except for the whirlwind radial engine cylinder heads) and I am in the process (slowly) of putting the decals on. It will be finished before the end date no problem.
tinbanger
_VISITCOMMUNITY
Ontario, Canada
Joined: February 04, 2008
KitMaker: 2,507 posts
AeroScale: 1,814 posts
Posted: Wednesday, March 27, 2013 - 04:11 AM UTC
Hi van
Still over a month befor campaign ends!
amegan
#243
_VISITCOMMUNITY
England - North East, United Kingdom
Joined: March 21, 2008
KitMaker: 996 posts
AeroScale: 915 posts
Posted: Wednesday, March 27, 2013 - 04:39 AM UTC
Yes, end of April so no hurry, I like what you did with the cockpit, out of interest I never understood how Lindberg landed the Spirit with no forward visability until I flew a Stearman a couple of years ago, then I understood how a curving approach and peripheral vision work to make such a landing possible.
Rob X-15 looks good but I should remind you that it hasn't got guns. You would have to be some marksman to hit tho:-)