Background:
The F6F Hellcat was designed to enhance the favourable aspects of the Grumman F4F Wildcat while having a much higher top speed and greater range, allowing it to outperform the Zero. The F6F-5 featured several improvements including a more powerful R-2800-10W engine, embodying a water-injection system. It was housed in a slightly more streamlined engine cowling. Other improvements included spring-loaded control tabs on the ailerons and an improved, clear view windscreen, with a flat armoured-glass front panel. This replaced the curved plexiglass panel and internal armour glass screen of the F6F-3's. In addition the rear fuselage and tail units were strengthened, and the colour scheme was changed to an overall gloss sea blue finish. After the first few F6F-5s were built the small windows behind the main canopy were deleted. Fitting AN/APS-6 radar to F6F-5s resulted in the night fighter F6F-5N, recognizable with a radar fairing mounted on the outer-starboard wing. A small number of standard F6F-5s were also fitted with camera equipment for reconnaissance duties as the F6F-5P. While all F6F-5s were capable of carrying an armament mix of one 20 mm (.79 in) M2 cannon in each of the inboard gun bays, along with two pairs of .50 in machine guns, this configuration was only used on many later F6F-5N night fighters. The F6F-5 was the most common variant of the Hellcat with 7,870 being built. The total amount of Hellcats built numbered 12,275. In Royal Navy service the F6F-5 was known as the Hellcat F II.
Contents:
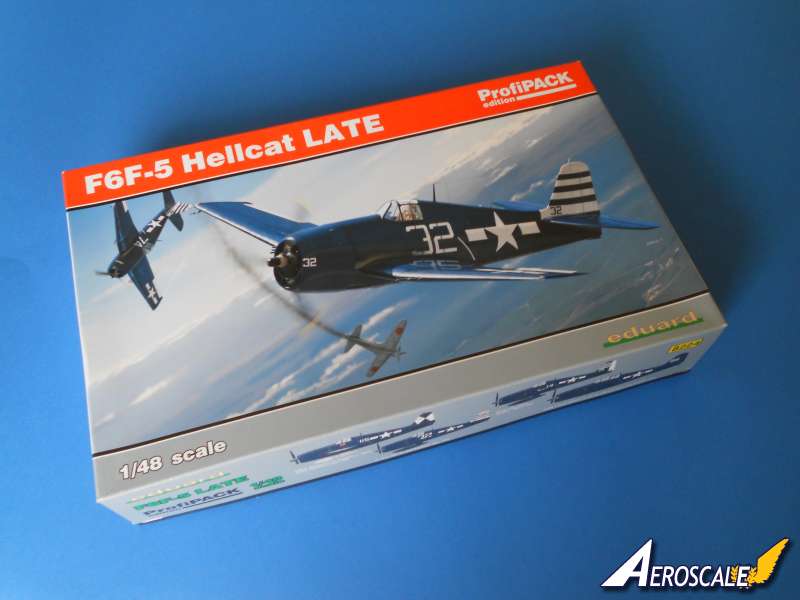
The contents are contained in a top opening box; the lid has a fine illustration featuring one of the marking options in the foreground. All the contents are bagged, the resin, photo etched parts and masks are bagged separately. The plastic is fairly soft, there are a few scuff marks on the surface, where the spruces have rubbed together in transit. Included is:
-5 x pale green plastic sprues.
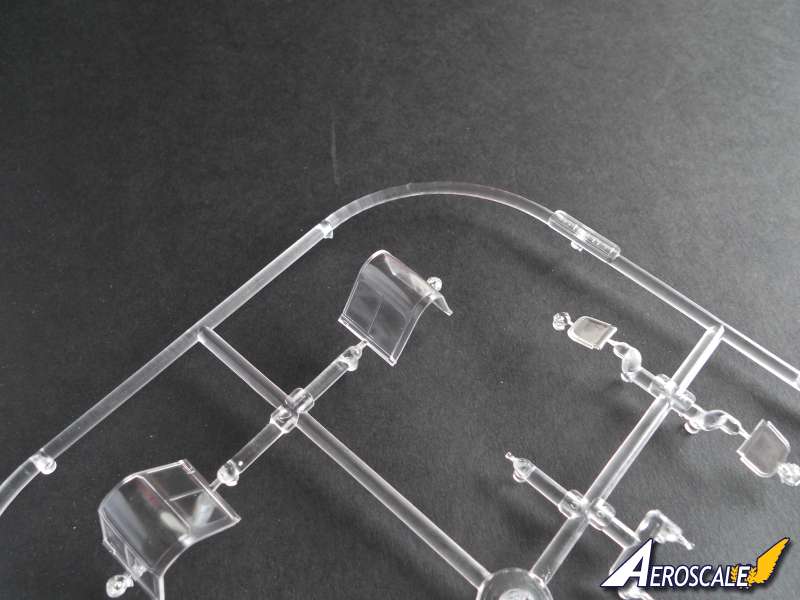
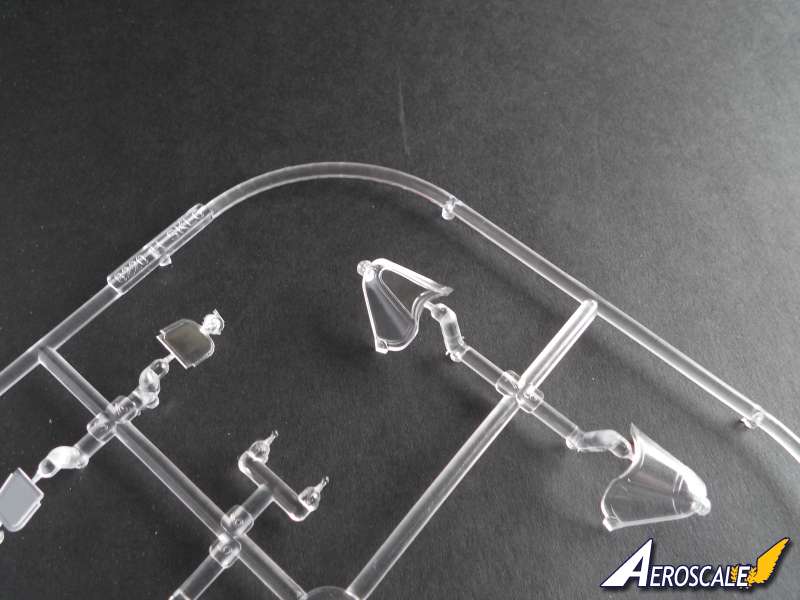
-1 x clear plastic sprue.
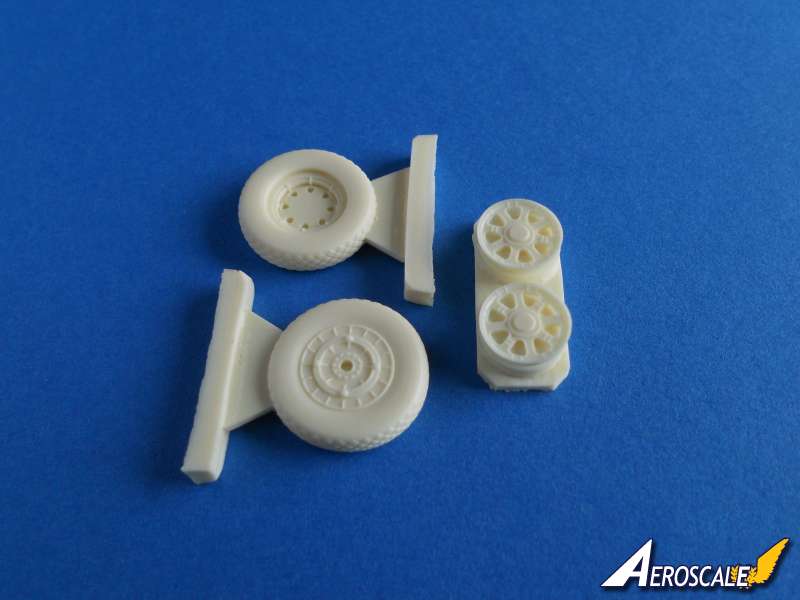
-1 x set of resin main wheels and hubs.
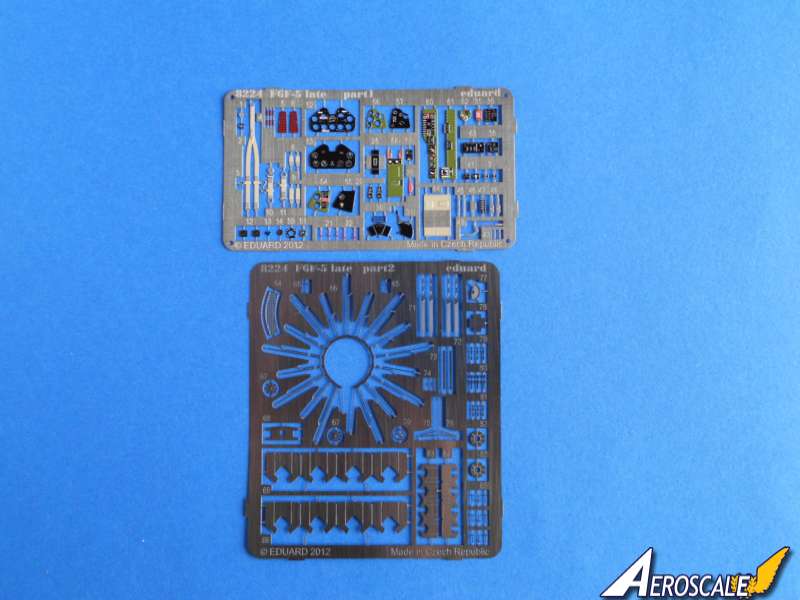
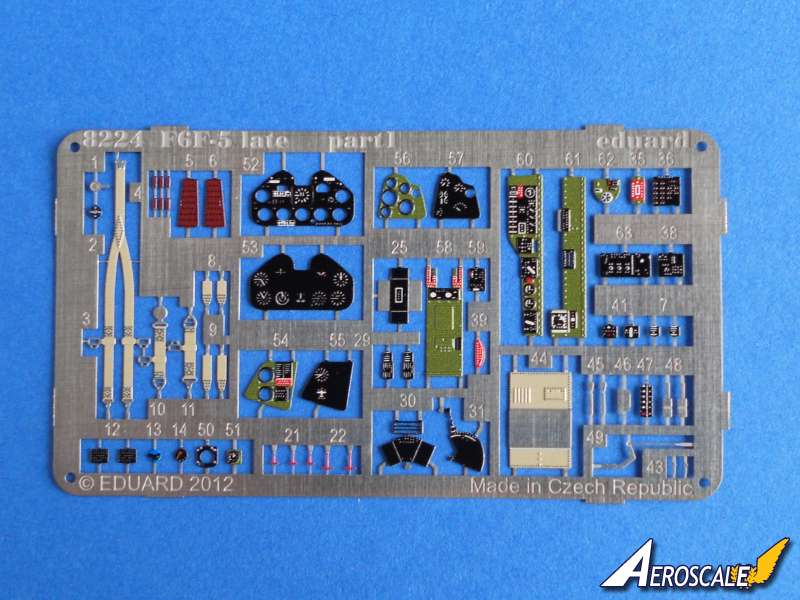
-1 x precoloured photo etched fret.
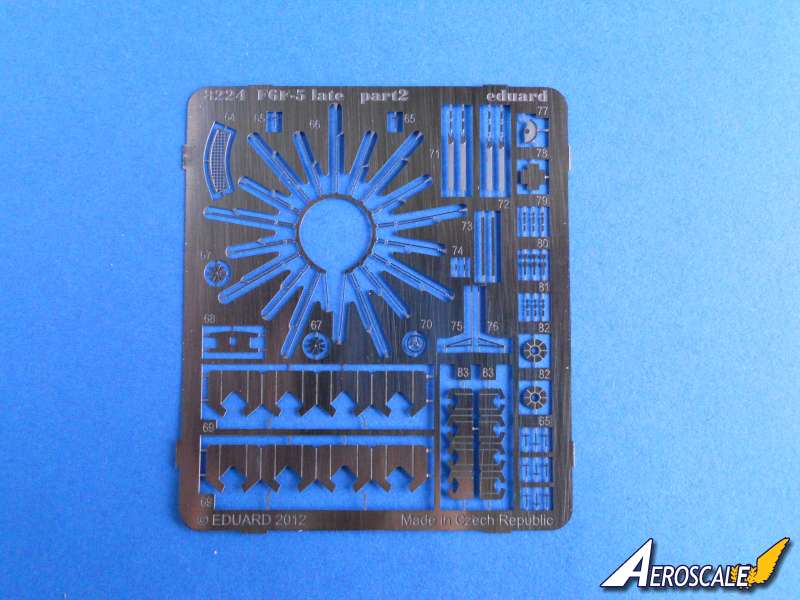
-1 x plain photo etched fret.
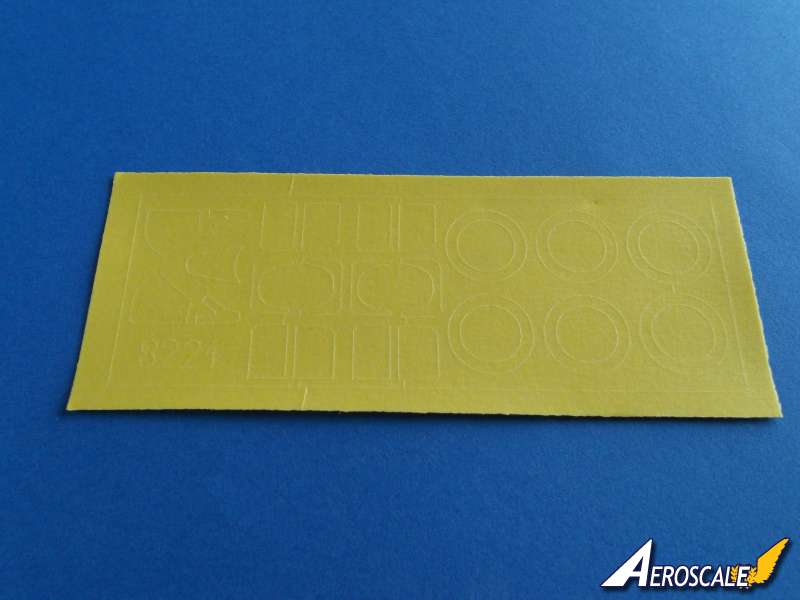
-1 x sheet of Kabuki paint masks for the canopy and wheels.
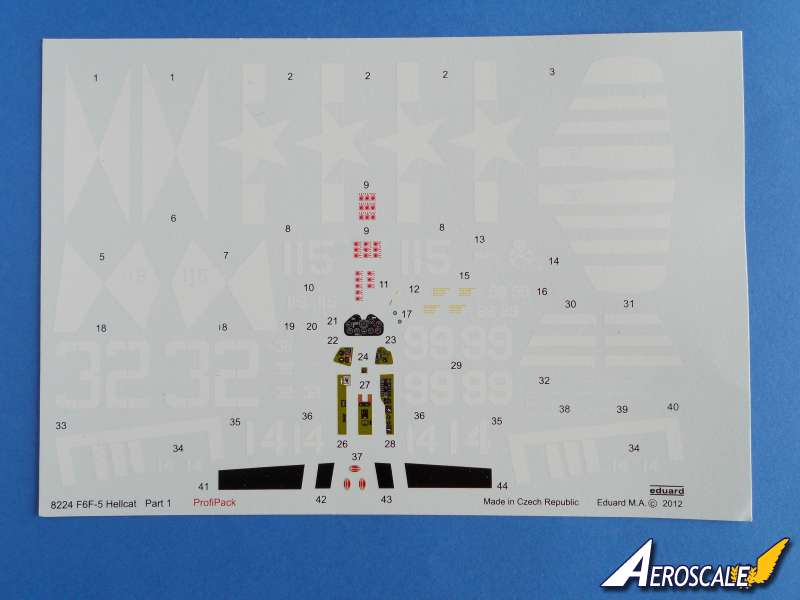
-2 x decal sheets.
-16 x page A4 instruction and painting guide.
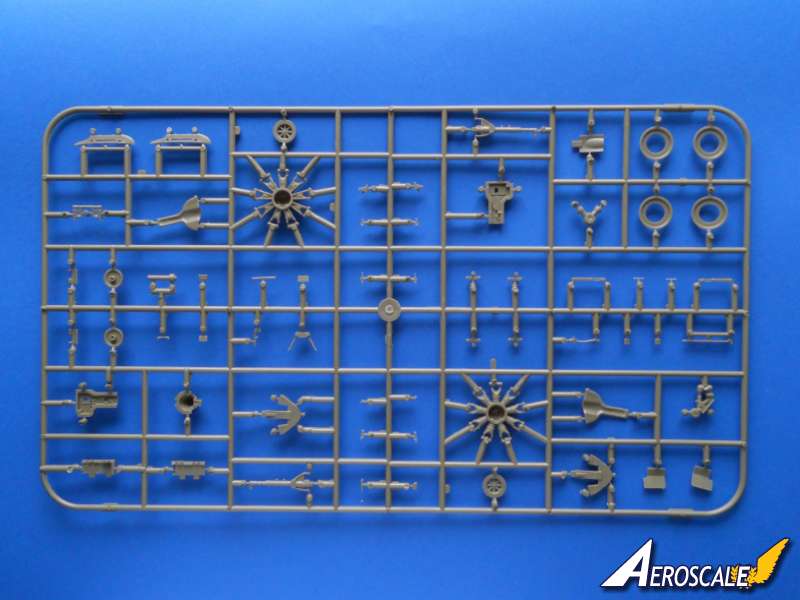
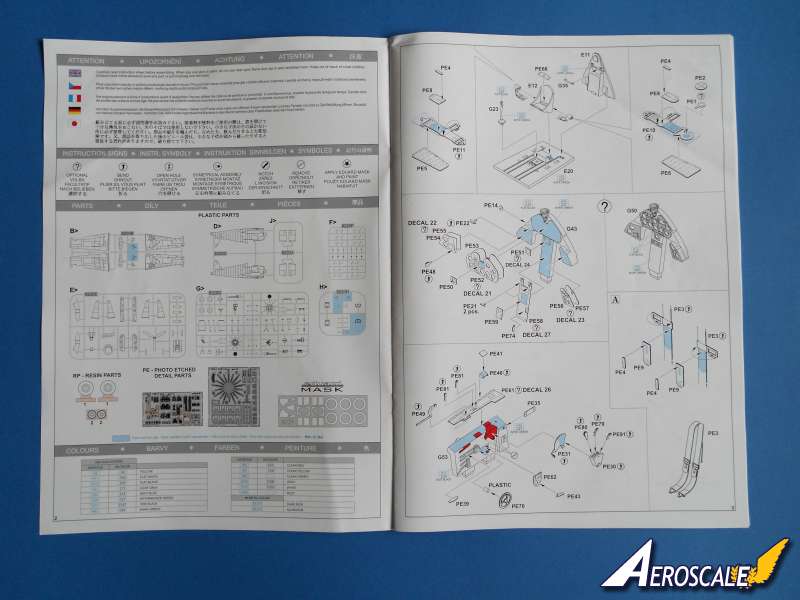
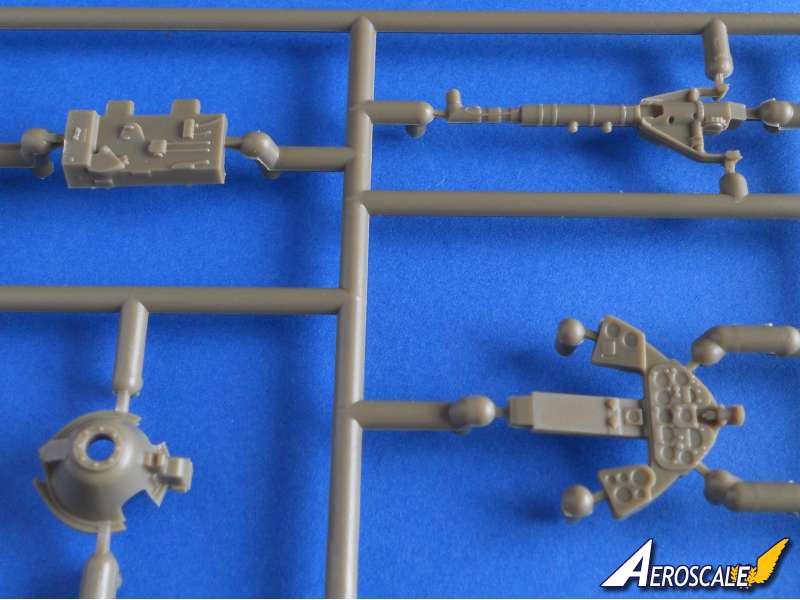
The Cockpit the plastic parts that make up the cockpit is pretty well detailed in their own right. Parts include separate floor, rear bulkhead, seat, control stick, rudder pedals, side consoles and two choices of instrument panel. The only part that needs any modifying is the seat, which would look better if the seat sides were thinned down a bit.
There are numerous highly detailed pre coloured photo etched [PE] parts to further detail the cockpit. PE items include seat harness; made up from sixteen parts, throttle and mixture levers, trim wheel, radio equipment, and much more. The instrument panel is built up from thirteen pre coloured PE parts that are added to a plastic instrument panel. The plastic part has no detail on it so the PE parts can be attached without any modification. The printed instruments look very good indeed. If you use PE parts you will end up with one of the best looking cockpits straight out of the box I have ever seen. With one eye on the Weekend releases Eduard have also included a second instrument panel with some nice low relief detail and recessed dials.
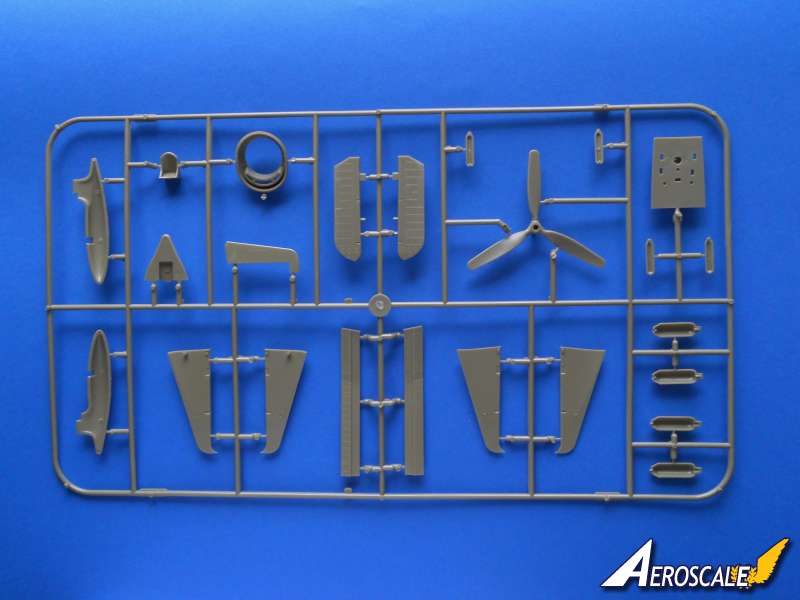
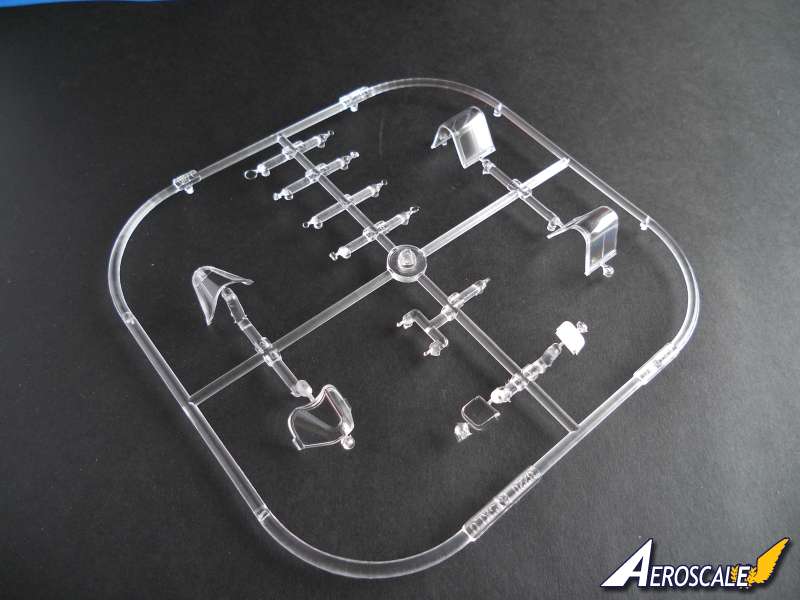
The canopy is two pieces with separate windscreen and canopy. The plastic is very clear and thin; the framework is raised and well defined. There are two canopies on the sprue: one is for the closed canopy and the other is a tad wider and is used if you want to display it in the canopy in an open position.
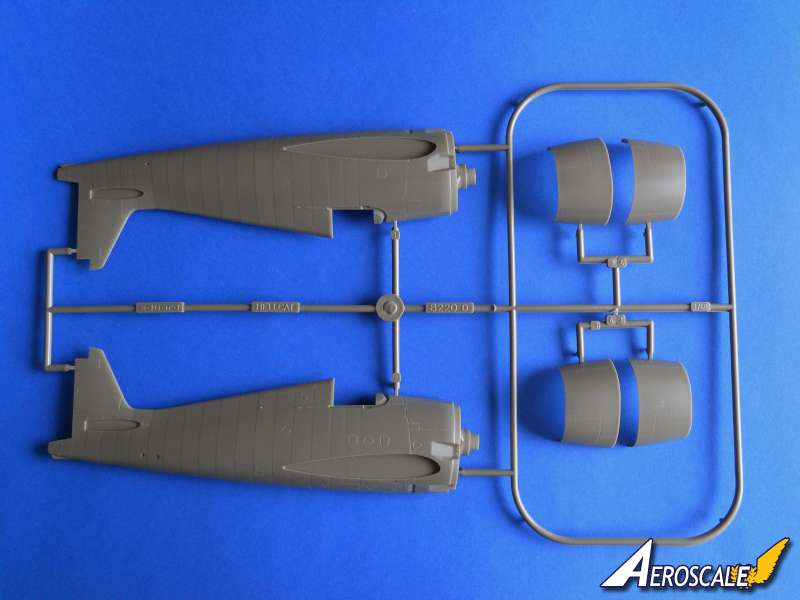
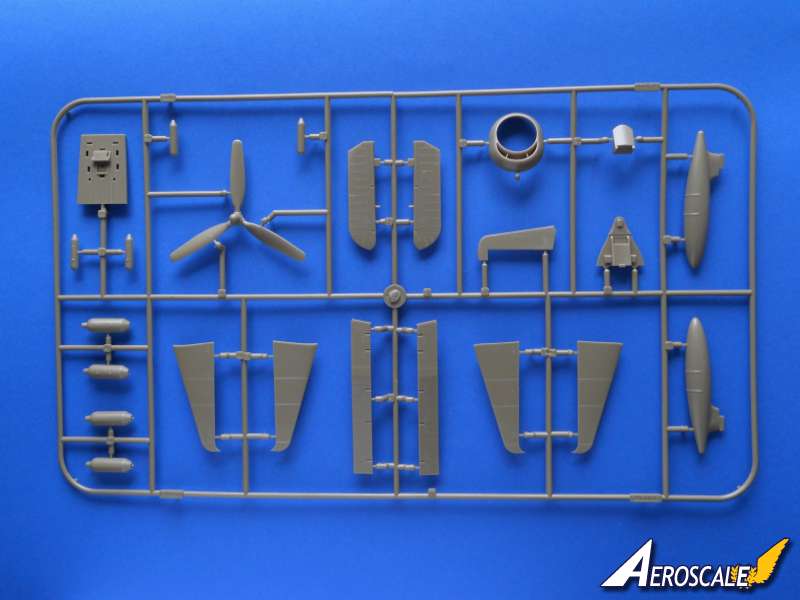
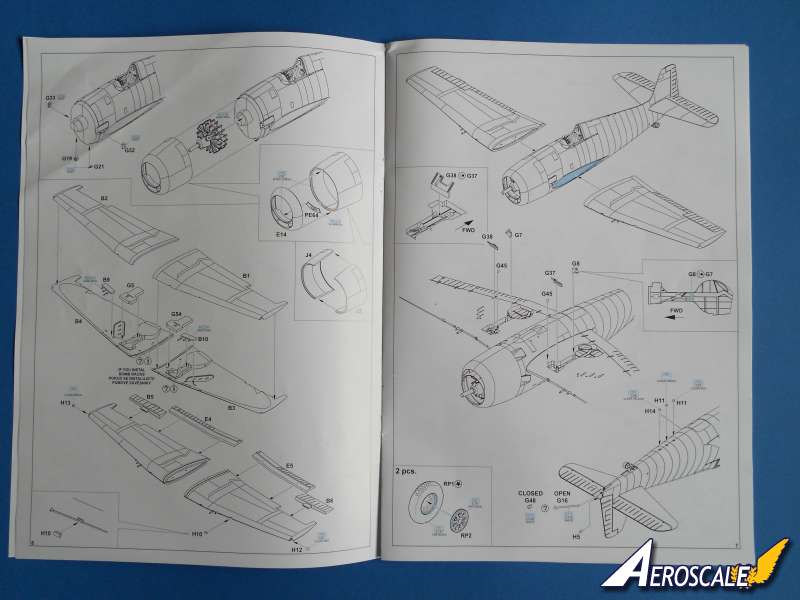
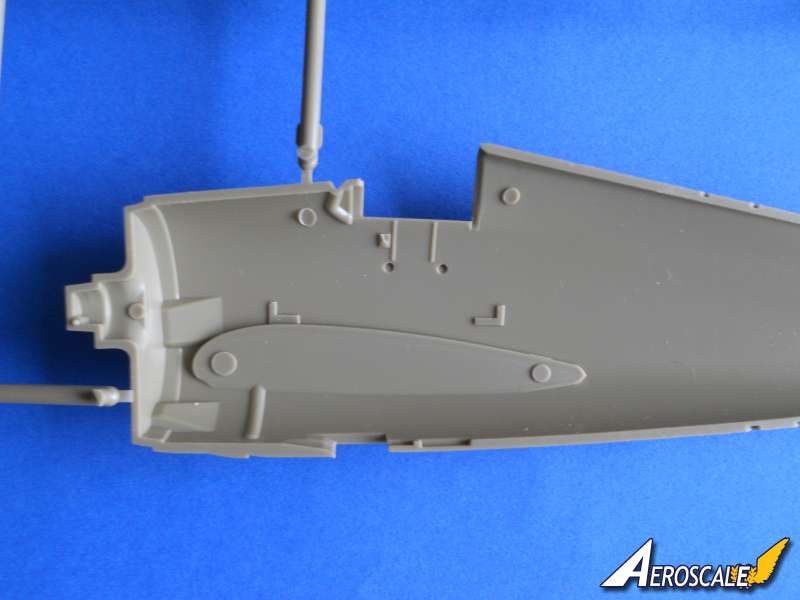
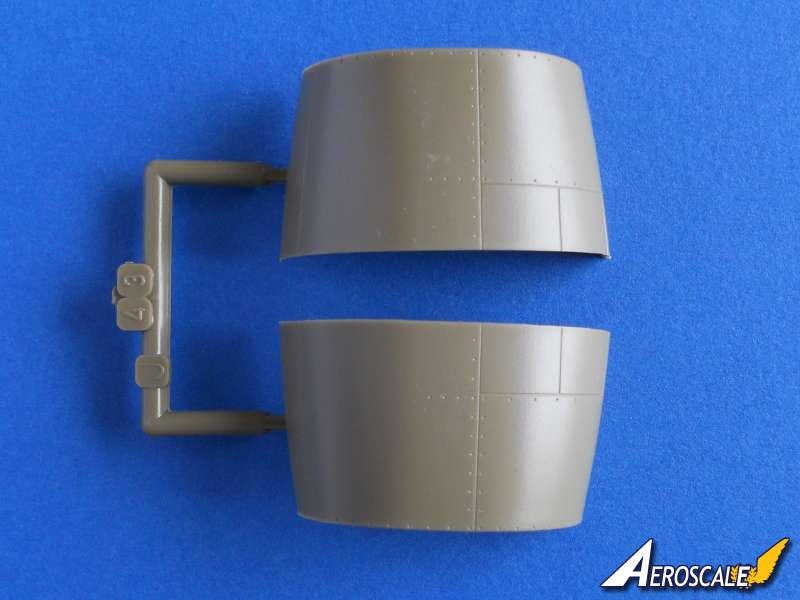
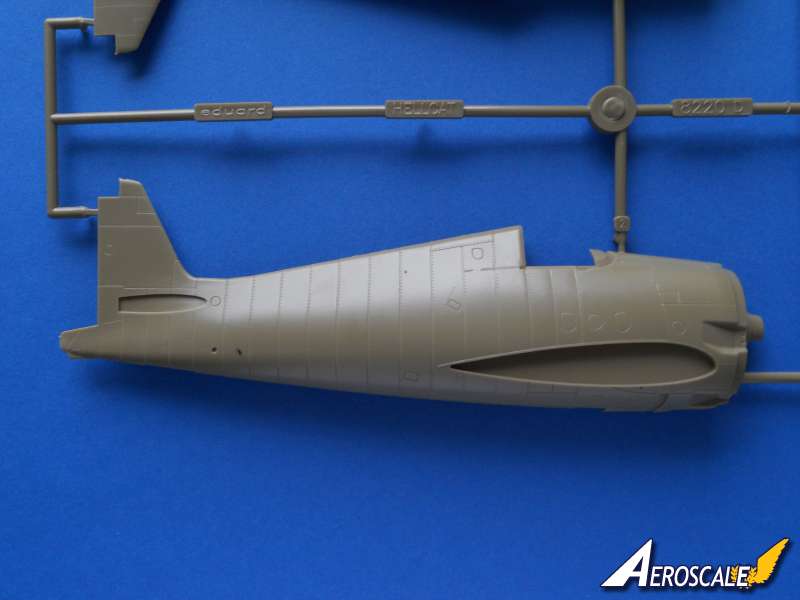
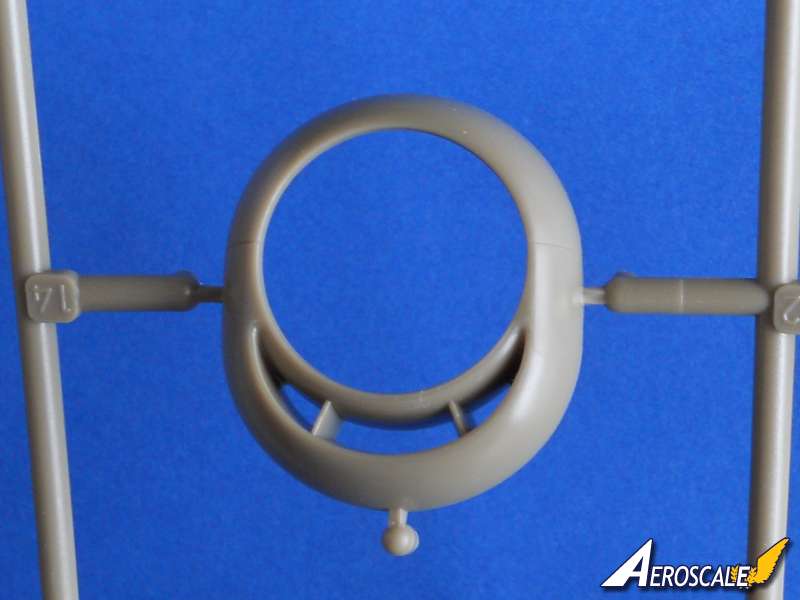
The fuselage is split vertically and extends from the exhaust outlets to the tip of the tail. The one piece rudder and three piece cowling are separate. The fuselage features beautifully recessed panel lines and rivet detail. There is a cut out just below the cockpit floor where the flap for the oil cooler Vent is located. The separate flap is fixed in the closed position. The three ID lights under the fuselage are recessed; there are clear plastic parts for the light covers. The inside of the fuselage has some raised detail on the cockpit walls and the location points for the cockpit floor. The inside halves of the engine cowl have a noticeable single raised ejector mark that needs removing. The lip and intakes of the separate one piece cowl front has to be one of the most accurate representations of this area of any 1/48 kits I have seen. Eduard has captured the Hellcat grin very well indeed. A nice touch is the inclusion of a one piece PE radiator grill that spans the inside of all three of the small inlets on the lower lip of the cowl front.
I always like to see a separate rudder so that it can be offset slightly to create a better look. The rudder is one piece and features slightly raised detail representing the tape on the fabric covering. Thankfully Edward have chosen to show the fabric as drum tight rather than the scalloped effect that some manufactures go for when representing fabric covered flying surfaces. The location points for the centre line fuel tank are flashed over, so if you want the tank displayed on your Hellcat, they do need cutting out.
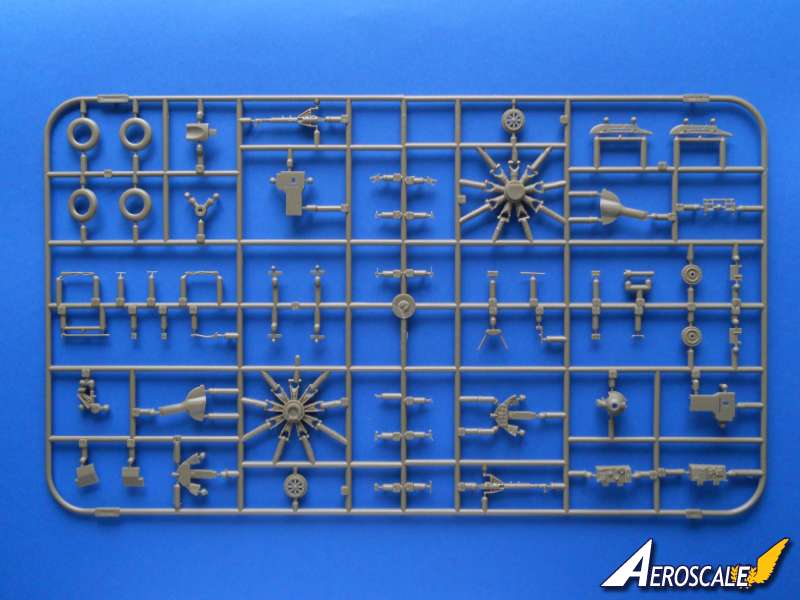
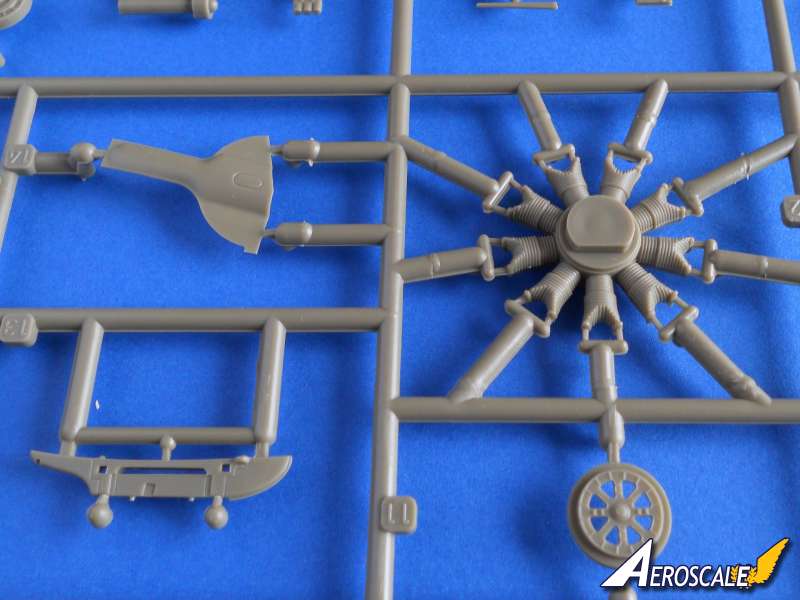
The R-2800-10W engine looks a real beauty. Each bank of cylinders is one piece. The push rods and cooling fins on both forward and rear banks are very well done. There is a PE ignition harness to provide even more detail. The crank case is separate and houses the separate spindle that the propeller fits on.
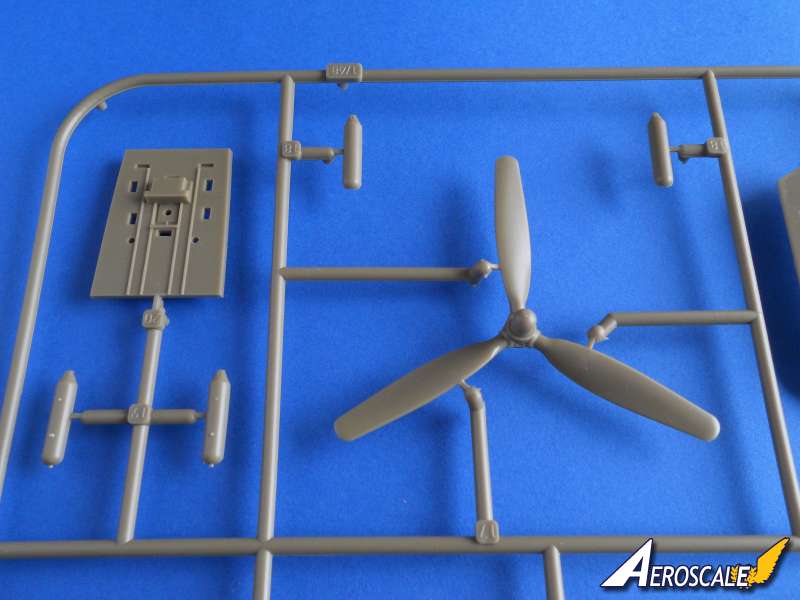
The propeller is one piece and has some fine raised detail around the boss. The edges of the blades will benefit from some thinning.
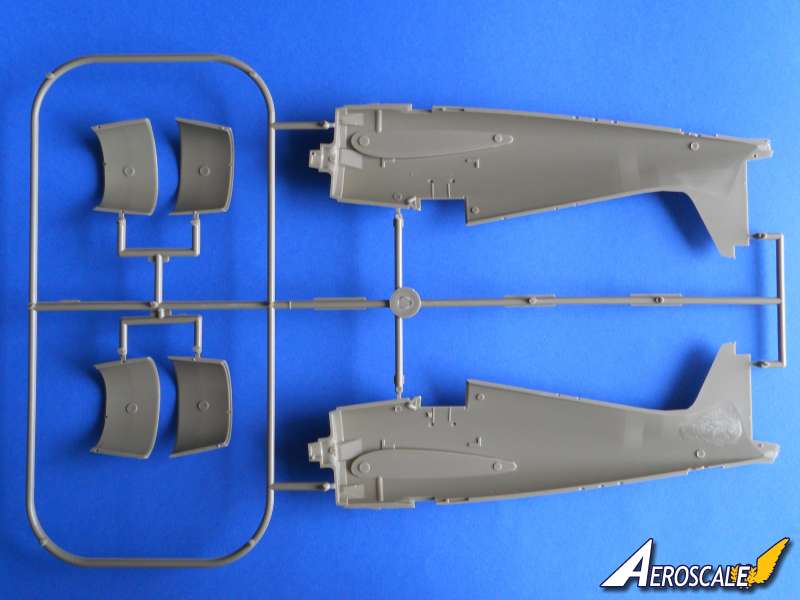
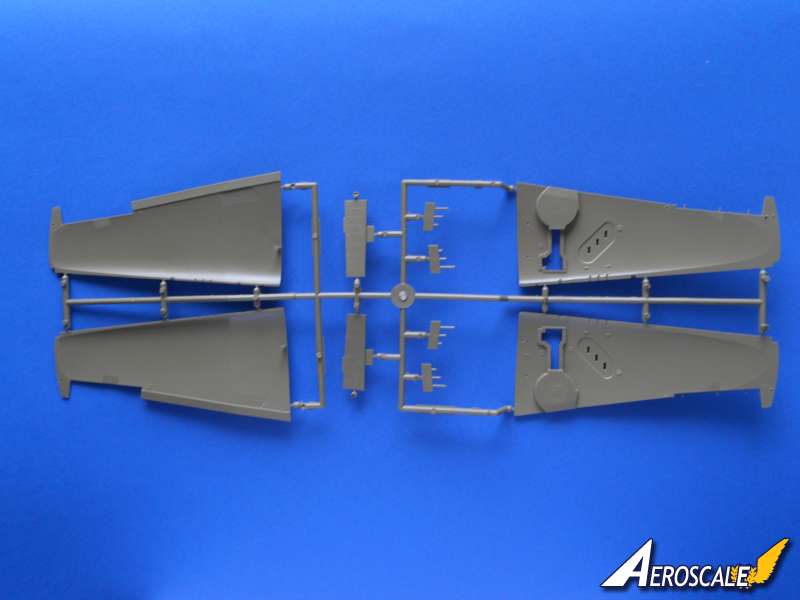
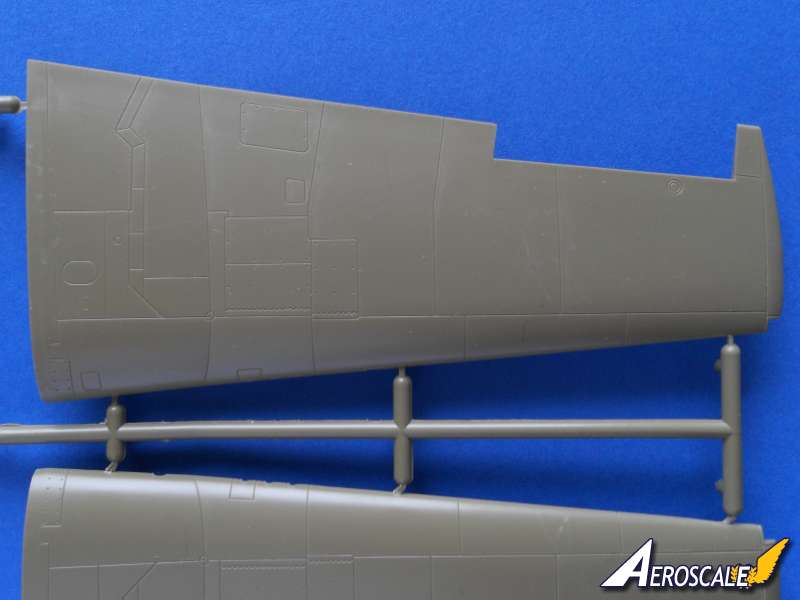
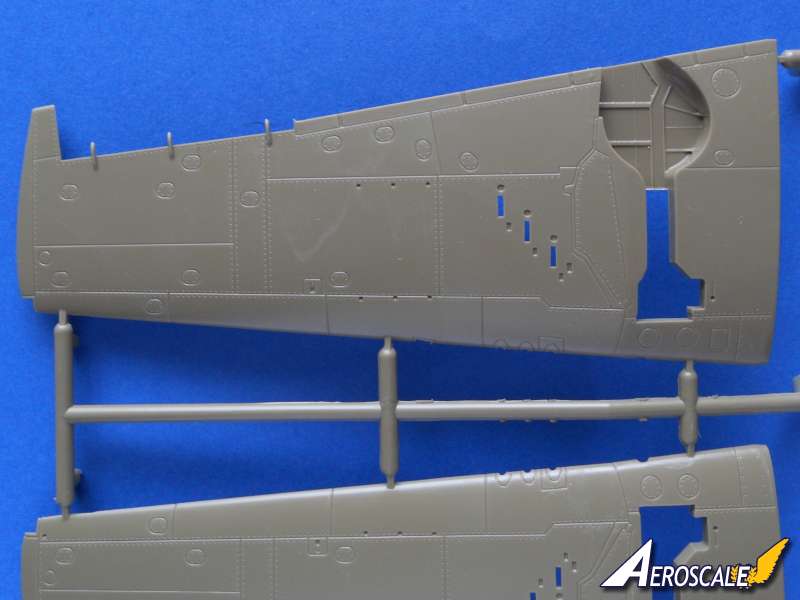
The wings are made up from four pieces and similarly to the fuselage they have some lovely recessed panel lines and rivets. There are small indents in the lower wing surface where the rocket pylons are attached.The ailerons and flaps are separate items, each being one piece. The flaps have a small part of the upper surface moulded along its length. The trailing edge is pretty sharp as a result. There is no facility to display the wings folded, unless you do some drastic surgery and some scratch building. There is a good looking resin wing fold set from
Wolfpack Design that's worth looking at. The deep wing has some support at the wing root in the form of a single pillar. At first glance the way that the wing butt joins into the slight recess in the fuselage suggests it might cause some problems when mating the wings and fuselage. Having already built an Eduard Hellcat I found a good if unconventional way of ensuring a good fit and achieving the correct dihedral, is to fit the wings before joining the fuselage halves together.
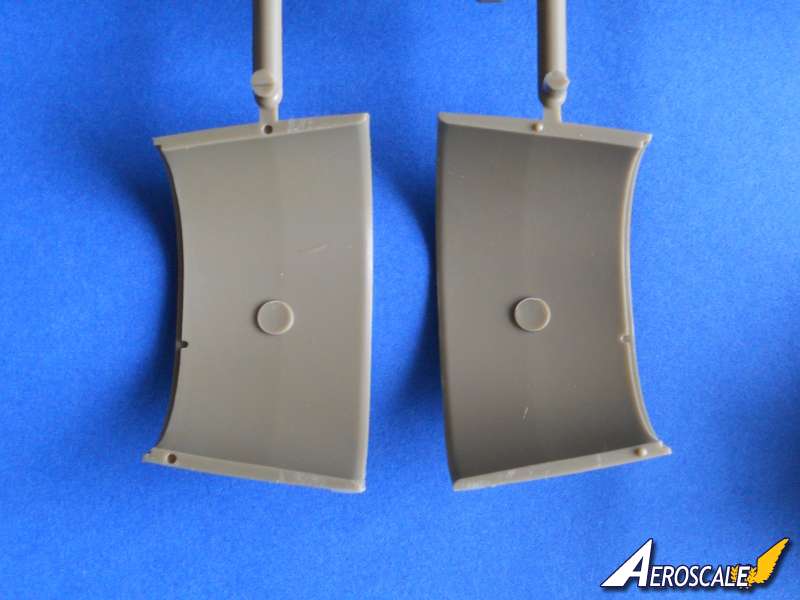
The undercarriage bays are well detailed; there is a separate part that forms the roof of the bay over the retracted oleo. The machine guns for the wings come in two blocks of three. And they have some recessed detail. There are slots under the wings depicting the cartridge ejection chutes. To finish the wings there are landing and wingtip navigation lights made from clear plastic to fit.
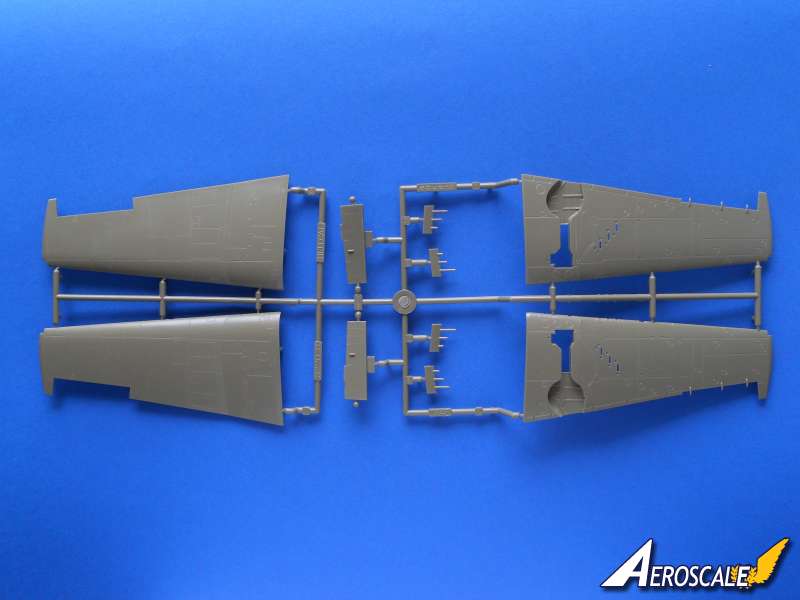
The stabilisers are made up from four pieces with separate one piece elevators. Again the detail is very well done.
The undercarriage The main gear has some chunky and well detailed oleos, just like the real thing. The attachment points to the wing are very positive. The separate two part torsional links and the retracting arm also look very good. There are a lot of separate parts both plastic and PE and the instructions are very good guiding you through building up this area. One highlight of this excellent looking kit is the inclusion of resin main wheels and hubs. The detail is superb as you would expect. The wheels have a casting block attached along part of the circumference of the tyre. Unfortunately removing the block will inevitably mean that some of the tyre tread will be destroyed, although the damage area could be hidden if you have this part of the tyre resting on the ground. The separate outer hubs look very good, particularly the cut outs between the spokes. They will need to be carefully removed from their casting blocks. If you dont fancy taking on the resin wheels there are some very decent plastic wheels included. The plastic tyres are split into two halves with separate outer hubs. The spoke detail is good and there are spaces between them. Other than the slightly superior detail of the resin wheels, the plastic tyres lack any tread. Tail wheel and doors are one piece and do look very convincing. Some careful painting will really pay dividends here. Eduard has provided the option to display the tail hook extended or retracted.
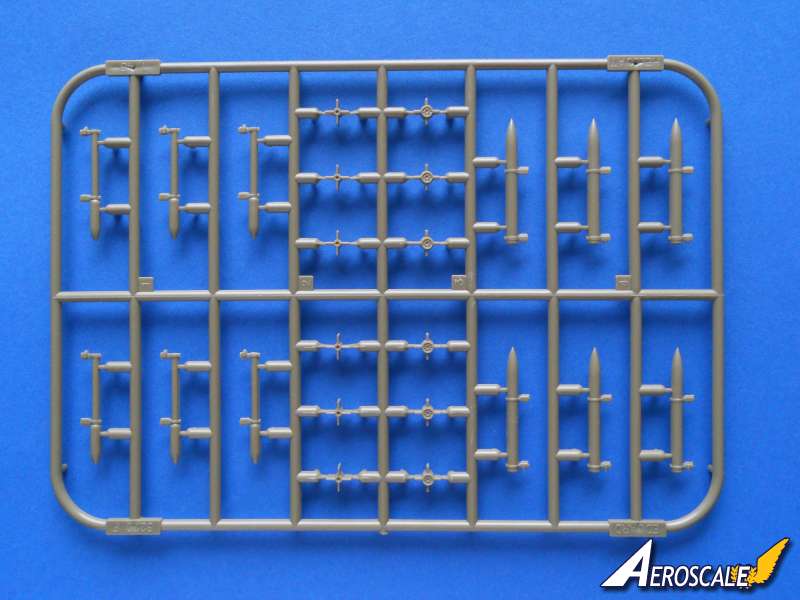
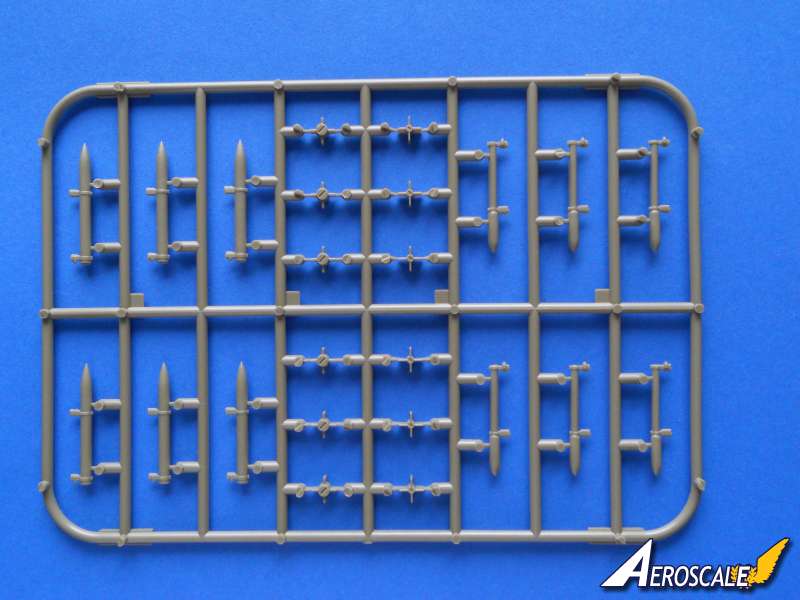
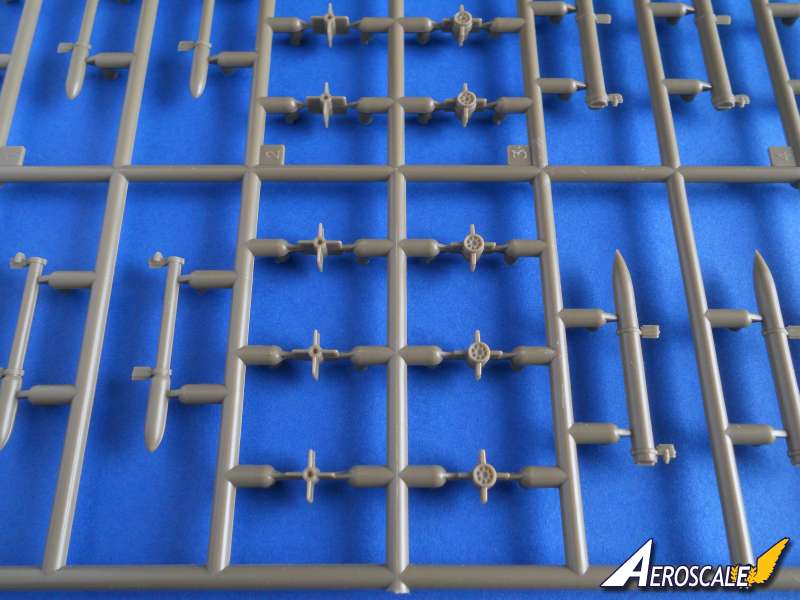
The ordinance Eduard has been generous with the weapons fit for this release. Ordinance includes:
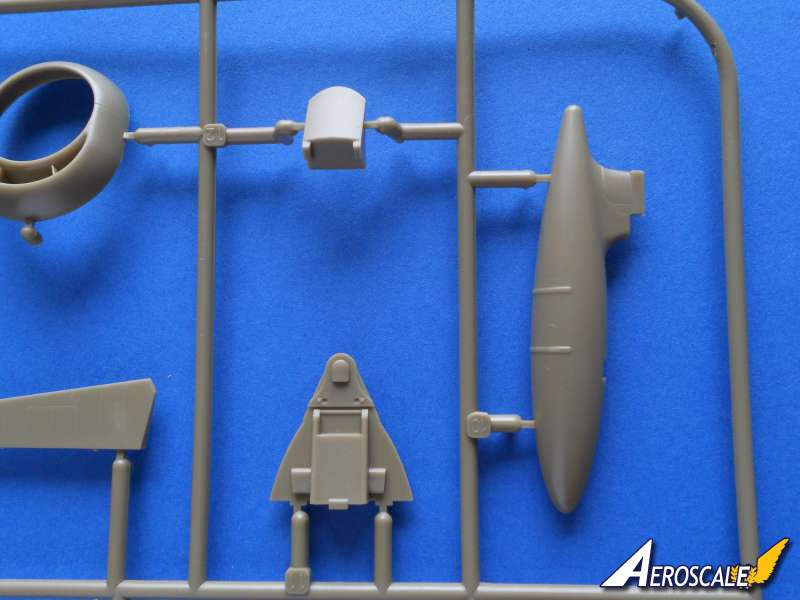
-1 x centre under fuselage fuel tank.
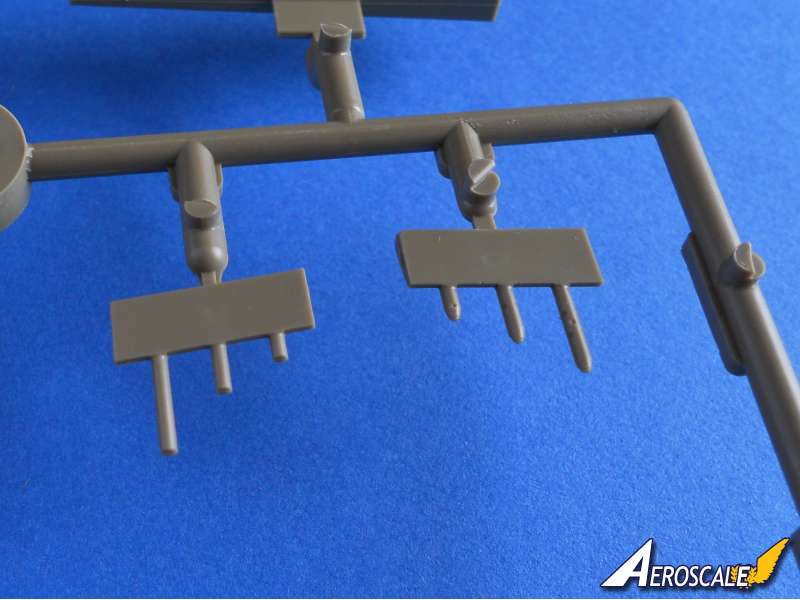
-6 x High Velocity Aircraft Rockets [HVAR].
-6 x Shaped HVARs.
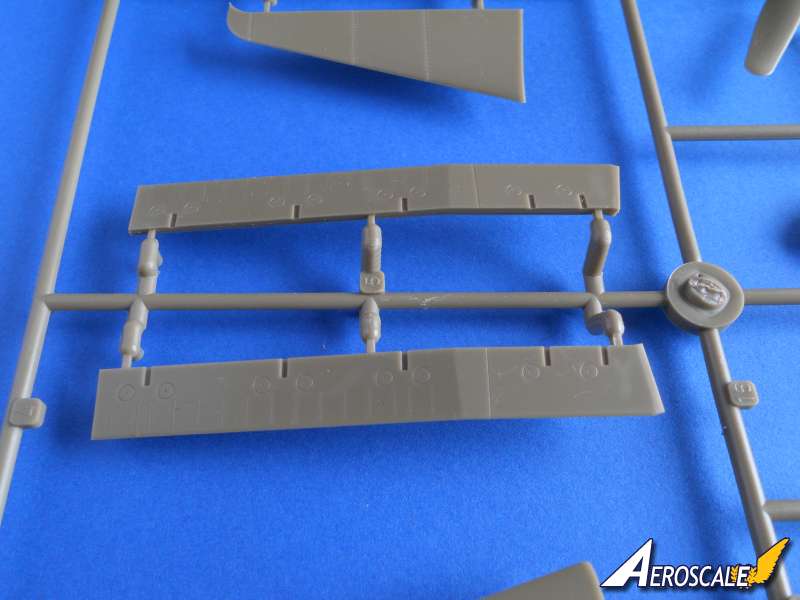
-2 x 1000lb [?] bombs.
-2 x 250lb [?] bombs.
The fuel tank is split vertically and each half includes the large fairing on the attachment point to the rear. A slot towards the front of the tank is where the one piece sway brace is fitted. Extra detailing is provided with additional PE sway braces. The body of the HVARs are one piece and look very good indeed. The attachment points for the wing are moulded on. The separate one piece tail section has the fins moulded on it, although the fins are a little thick. I do like the multi holed exhaust of the HVARs, the shaped ones have a single exhaust vent. The two types of bombs have plastic bodies that are split in half lengthways. The bomb fins are made from one piece PE parts that need to be carefully folded. The bomb racks are one piece and are very nicely detailed. There are even the PE windmill fuses for the larger bombs.
Photo etched parts the pre coloured fret has some superb detailed parts for the cockpit. It is well worth applying a coat or two of your favourite matt varnish just to fix the paint. If you are really keen once the instrument panels are assembled drop a small amount of Kleer onto the dials to replicate the glass. The contents of the non coloured PE fret will certainly add detail and a level of finesse to the Pratt & Whitney engine, bomb fins and the cockpit.
Markings there are four marking options with this Profipack release and they include:
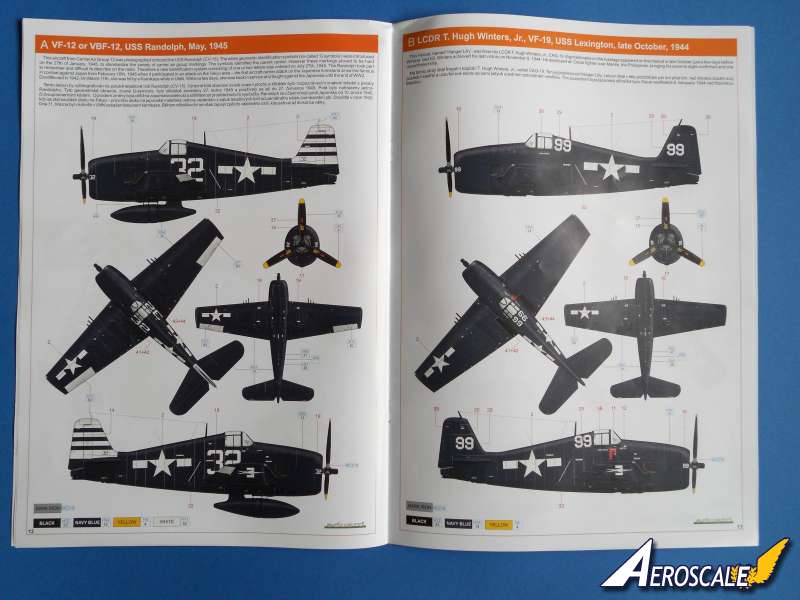
White 32, VF-12 or VBF-12, USS Randolph, May, 1945
White 99, LCDR T. Hugh Winters, Jr., VF-19, USS Lexington, late October, 1944
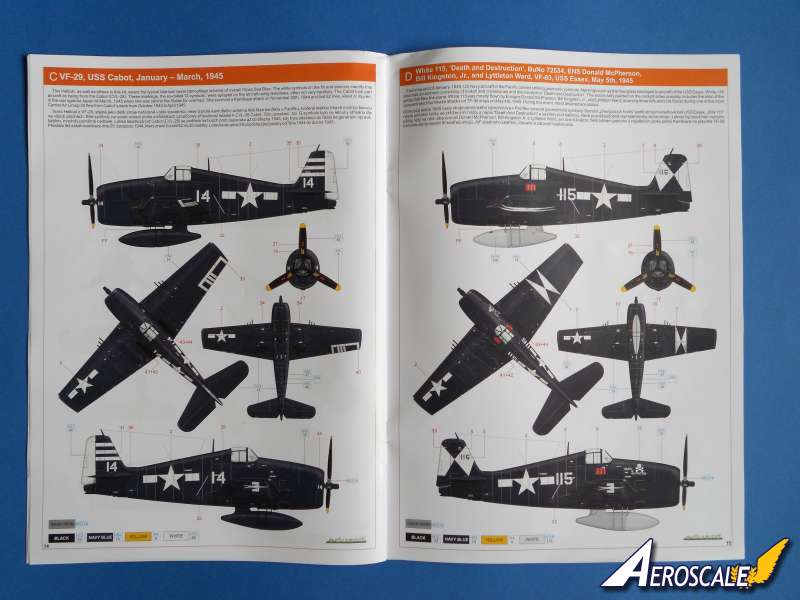
White 14, VF-29, USS Cabot, January March, 1945
White 115, Death and Destruction, BuNo 72534, ENS Donald McPherson, Bill Kingston, Jr., and Lyttleton Ward, VF-83, USS Essex, May 5th, 1945.
All aircraft are painted overall gloss sea blue.
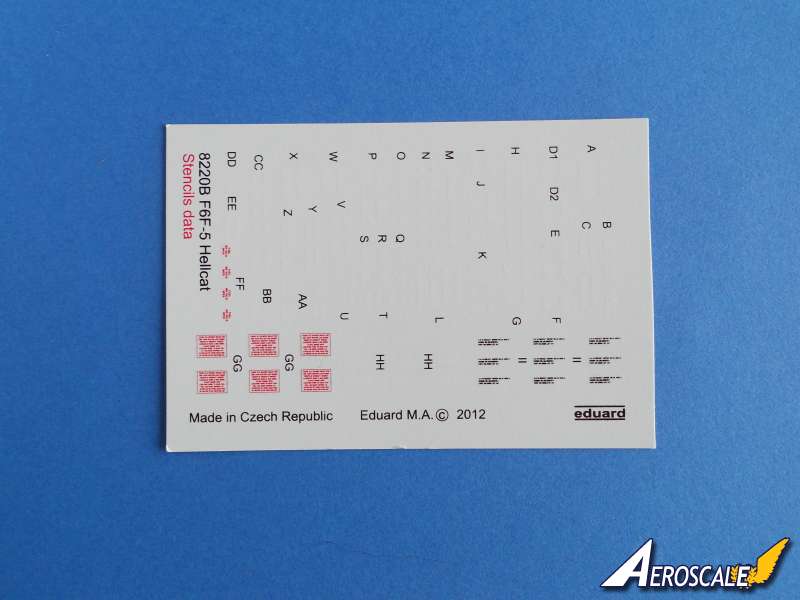
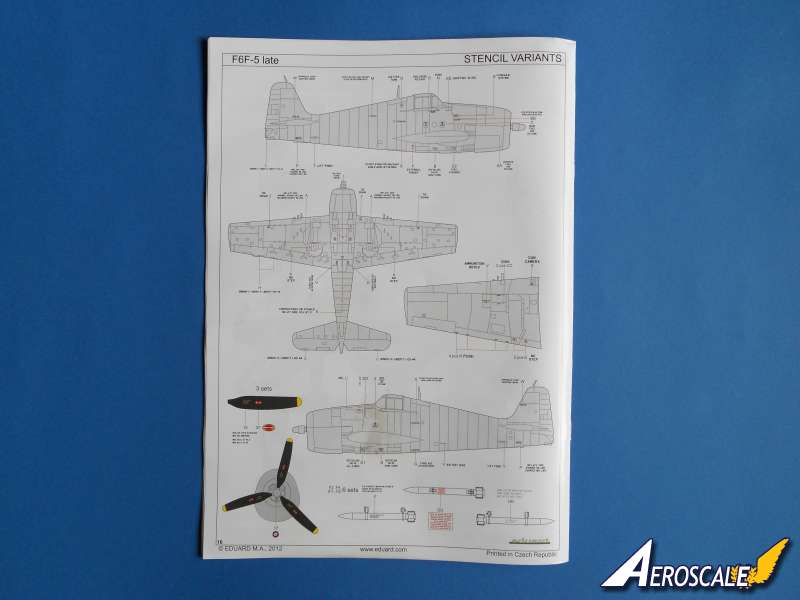
Decals are printed on two sheets created by Eduard themselves and they look very good. The colour is just right and registration and the depth of colour is spot on. The carrier film has been kept to the very minimum. Good news for those that hate masking, many of the white ID markings on the tail and wings are included on the decals sheet. Also included are the black wing root walkways. There's also a set of decals with details of the instrument panel and side console. There are quite a few stencils to apply, not only to the airframe, but also to the propeller and the HVAR's. I have used Eduard decals before they respond very well to Microsol and usually conform to the surface with great results.
Paint masks are for the two choices of canopy, windscreen and main wheels. They are made from flexible Kabuki tape.
Conclusions:
This is an outstanding release from Eduard and has just about everything contained in the box to make an accurate model of a late Hellcat with loads of detail. Eduard has supplied all the bits and all you have to do is put it together. Having built an Eduard Hellcat before there are no real issues with fit and construction. This is an outstanding product and Eduard, with their Profipack range has set a bench mark that others would do well to follow. Its a great price too.
Now Eduard, how about releasing options for those bright orange F6F-5K target drones that is provided in the Royal Class release.


Comments