History
A highly modified derivative of the Pilatus PC-9 intermediate trainer, the Raytheon(Beechcraft) T-6 is used for intermediate/advanced training in several Air Forces around the world. Its electronic fuel control system allows the T-6 to respond to power lever inputs in exactly the same manner a pure jet does, allowing its pilots to learn to fly the way they would in a jet much more quickly and inexpensively, a good thing in the days of shrinking Defence budgets. The T-6 first entered USAF and RCAF service in 2000 replacing the jet-powered Cessna T-37 and Canadair Tutor respectively. Since then, the T-6 has gone into service with the US Navy/Marine Corps, Luftwaffe, Israeli Air Force, Iraqi Air Force, Hellenic Air Force, Mexican Air Force and Royal Moroccan Air Force. The aircraft is named Texan II in homage to the original T-6, the North American Texan. In Canada the aircraft is known as the CT-156 Harvard II, reviving the traditional name of the Commonwealth T-6.
First Impressions
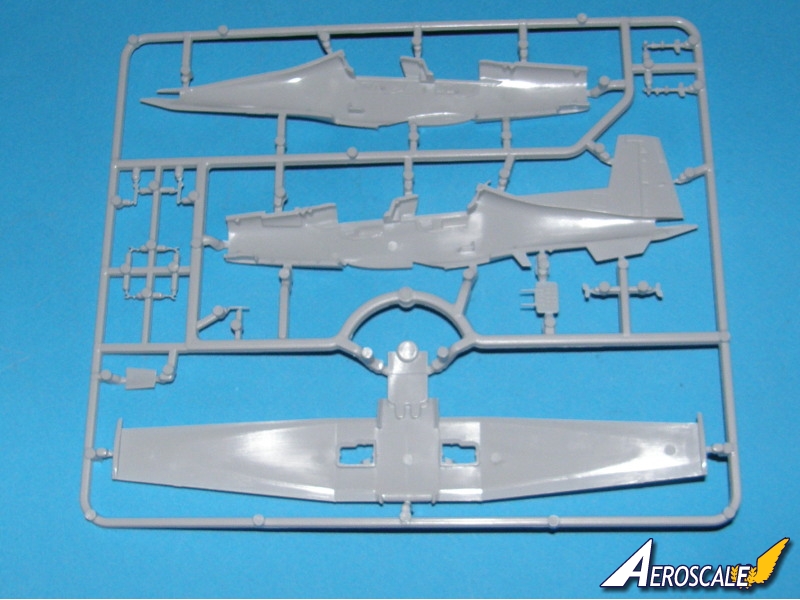
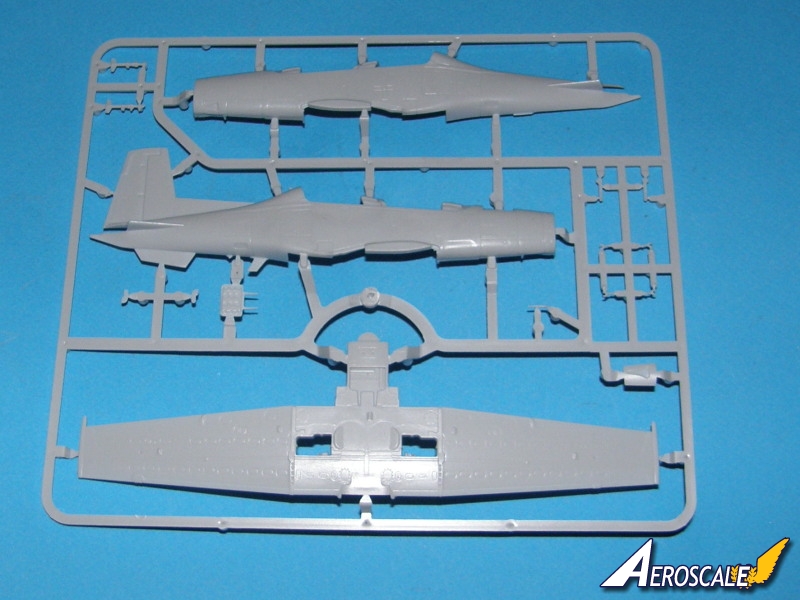
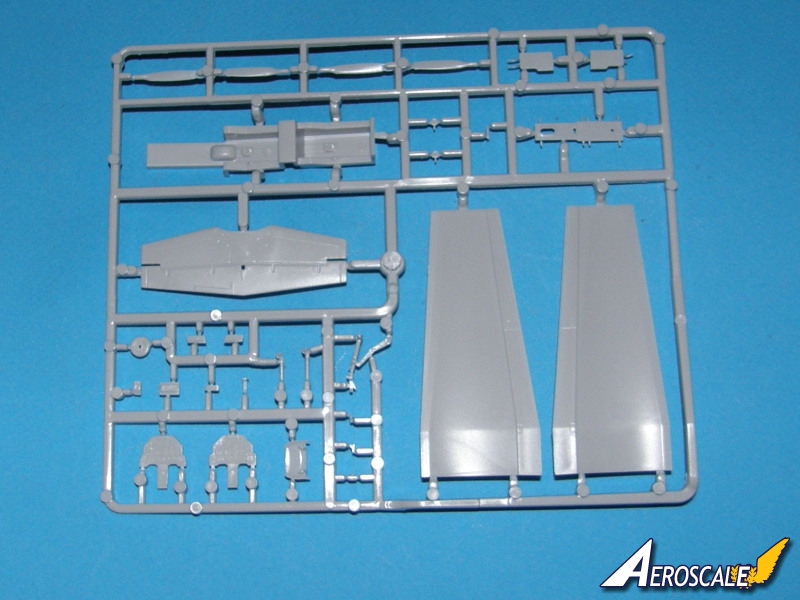
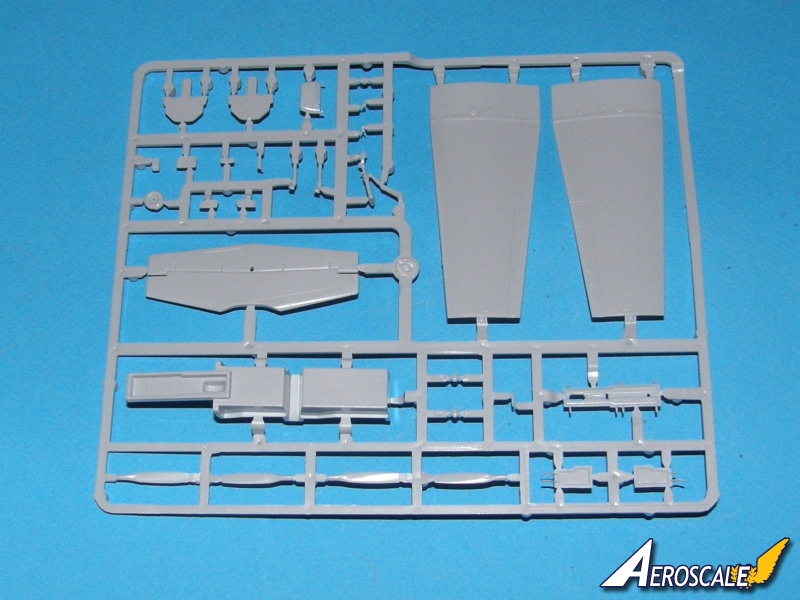
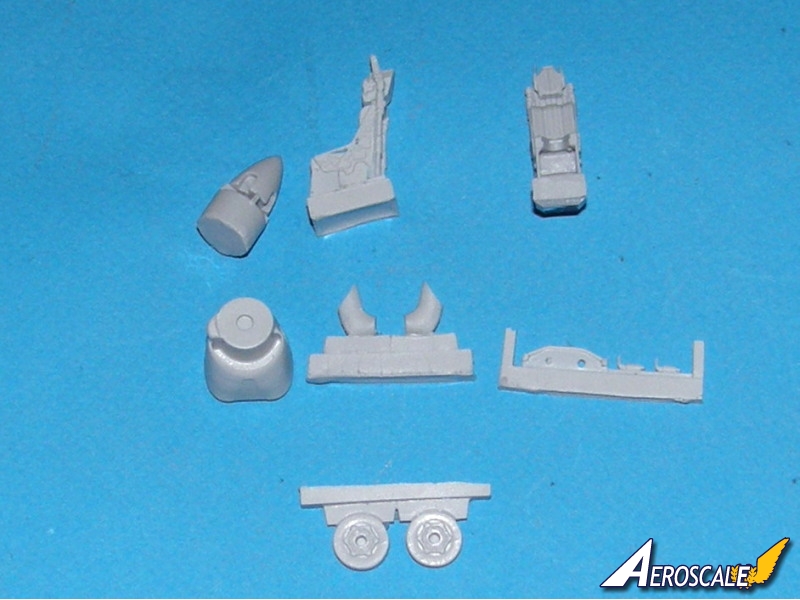
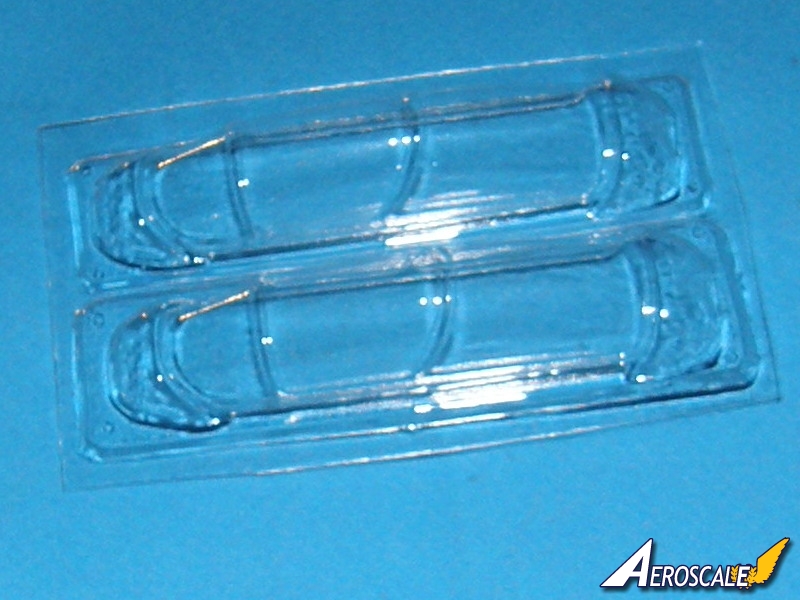
This kit is very reminiscent of a Czech Model, Classic Airframes or Special Hobby kit. The plastic parts are nicely shaped and have a decent amount of slightly soft engraved panel lines. The plastic has a soft satin texture, and is hard and easy to work with. The plastic parts are provided on two sprues. One of the very fine main landing gear door attachments in my kit has broken off at some point. It should not be difficult to replace it with a piece of piano wire. The vacuform canopy (and spare) is crystal clear, and comes in its own zip-lock bag to prevent it from being scratched. The canopy framing could stand to be a trifle lower and sharper, but it's clearly moulded and easy to distinguish. The distinctive canopy breaker detonation cord is not included in the kit (are you listening, Eduard?). Resin parts include the extreme nose/intake, spinner, exhaust pipes, main wheels, pitot tubes, canopy brace and ejection seats. The canopy breakers on the ejection seats are moulded asymmetrically, the right taller than the left. This is correct, so do not spend time trying to correct it. The front seat breakers should have a thin bar connecting the tops, as seen in
this photo.
Fuselage
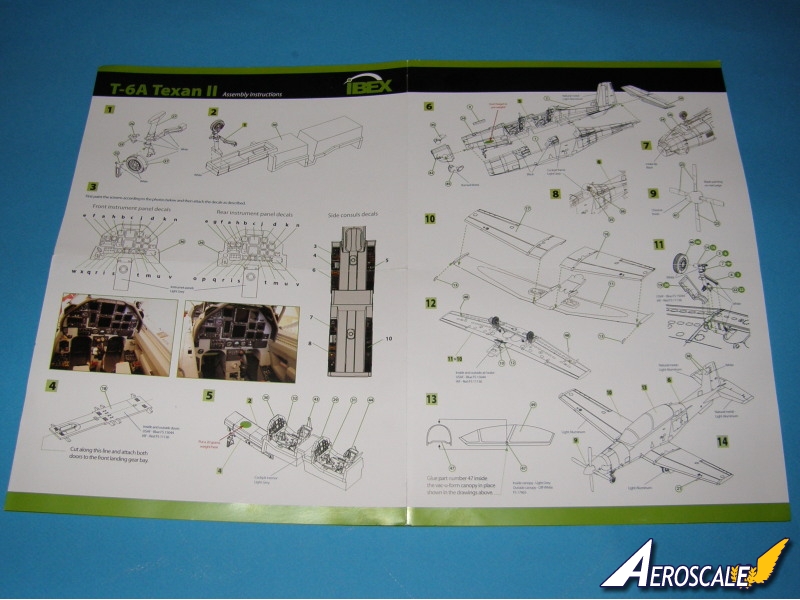
The fuselage is two halves from behind the intake to the tail. The vertical fin is moulded into the right fuselage half. The cockpit depends on decals for much of its detail; side console detail is nonexistent and the instrument panels have merely fine rectangular outlines for the individual instrument decals to fit into. Applying them is going to be a slightly tedious job. I don't know whether anyone will do an aftermarket cockpit for this kit, but the opportunity is definitely there to make it look better, especially if the canopy is to be left open (are you listening, Eduard?). The nose wheel well is an extension of the cockpit floor. The instruction sheet calls for 20 grams of nose weight to be installed above the nose gear well. There should be enough room in the nose for it. The instructions show the propeller blades installed without pitch. They should actually be installed in the fully feathered position since the PT-6 engine automatically goes into feather as it is being shut down.
Wings
The wings are in 3 pieces; one lower wing half from wingtip to wingtip with one piece for each upper right and left half. The lower wing sets the T-6's distinctive cranked dihedral. The speed brake is a separate part but its complicated perforated surfaces are merely shallow indentations. This part really cries out for a photo-etch replacement (are you listening, Eduard?). There is little detail inside the wheel wells, but only the strut doors are open when the gear is down, so there's not much opportunity to see inside.
Empennage
The tailplane is a one piece moulding that slots into the rear of the fuselage. Parked aircraft are often seen with the elevator in the nose-down position. It will have to be cut away and repositioned. It would have been nice to see a separate elevator.
Landing gear
The landing gear struts and wheels are finely moulded and nicely detailed. The nose wheel is moulded separately from its strut, with one side of the fork to glue into place. The main wheels are in resin, and quite nicely detailed. I would have liked to see the nose wheel also done in resin. The gear doors have nice detailing on their inside surfaces.
Accuracy
I don't compare models to drawings or published measurements. When assembled it will capture the distinctive look of the T-6.
instructions
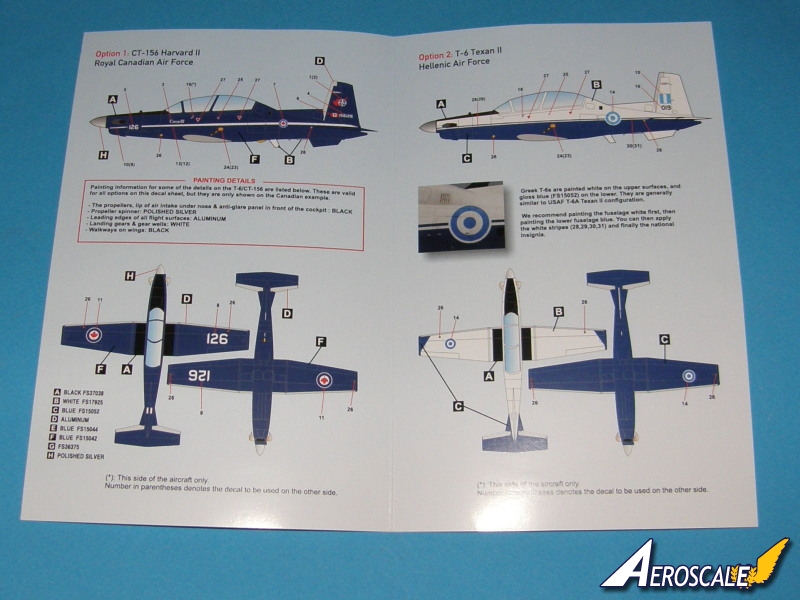
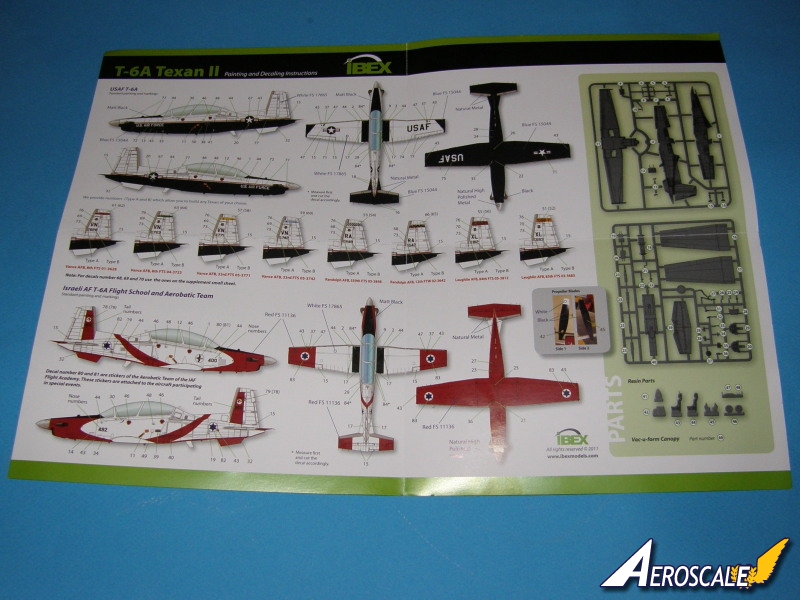
The instruction sheet is printed in full colour on 2 sides of a fairly thick glossy 11½ X 16½ paper. One side shows the assembly sequence, including reference photos of the cockpit, and the other is a painting and decal guide, with a parts map to the right hand side.
Decals and Markings
This kit offers a choice of USAF or Israeli Air Force. Sufficient serial number decals and USAF tail bands are offered to allow you to build any aircraft in service with either Air Force. The USAF scheme is white over dark blue and the Israeli white and red. Either one will be striking in your display cabinet. The decal sheet includes an addendum sheet with 4 of the USAF tailcodes printed in the correct size. Discard the codes on the main sheet.
Aftermarket
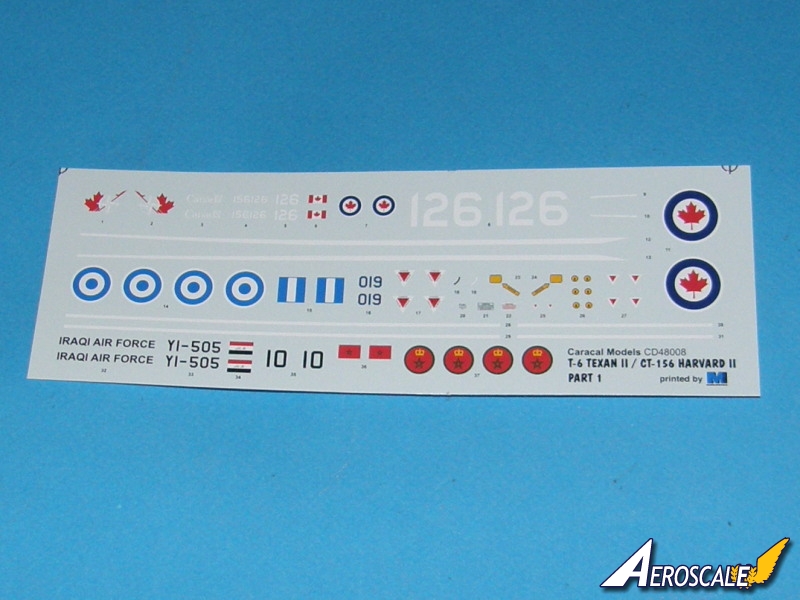
Caracal Models issued a decal sheet allowing modellers to do
RCAF, Hellenic, Iraqi or MoroccanT-6s (photos below). This sheet has now sold out from Caracal, so if there isn't one in stock at your local hobby shop you're out of luck (unless Caracal decides to issue another print run). Partial sheets are still available. Contact Caracal for more information. If you must have an RCAF T-6, you can get a sheet from
CanMilAir. Twobobs decals have recently announced a sheet featuring 3 different schemes for USN/USMC aircraft, but it has not yet been released as of the date this review was published.
the real thing
USAF
Israeli Air Force
RCAF
Hellenic Air Force
USN
Please remember, when contacting retailers or manufacturers, to mention that you saw their products highlighted here - on
AEROSCALE.


Comments