The Douglas (later McDonnell-Douglas) DC-8 was the second of the American first generation jetliners to enter service. It was not as immediately successful as Boeing's 707, with only half as many sold, but it has achieved a much greater longevity due to its legendary Douglas over-engineering and adaptability. A DC-8 freighter survived an incident when its freight door opened in flight. Most other aircraft would be torn apart by the aerodynamic loads, but the DC-8 returned for landing, was repaired and continued to fly. It is not well known that the very first Supersonic airliner was a DC-8. DC8-43 CF-CPG owned by Canadian Pacific Airlines was flown to Mach 1.012 during a pre-delivery test flight on August 21st 1961. Much of the DC-8's longevity resulted from its ability to be stretched, and to have new engines installed, which gave the aircraft the ability to remain competitive when fuel prices increased in the 1980s and noise regulations began to be implemented around the same time.
First impressions Details are very crisp and the execution is clean. There is no flash at all. Ejector pin marks are confined to the interior of the parts where they will not be visible after completion. The fine details are about the thinnest I have ever seen in an injection kit. Some are so fine that they are in danger of breaking in the box as the sprues shift around.
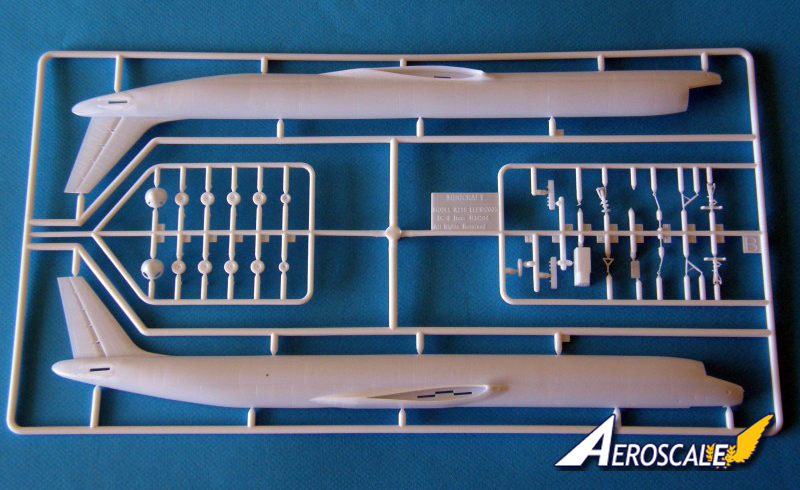
Fuselage The fuselage is in two halves with a separate nose cone to allow for the detail differences between versions. Early -61 and -63 aircraft had air conditioning inlets in the lower nose that were plugged when the aircraft were converted to the -71/-73 configuration. Be sure to use the nose piece that corresponds to the version you wish to build. The inlets should be blanked off with small slivers of plastic card. Be careful not to foul the gluing surface and cause a fit problem. Take your cue from the tab at the lower centre of the nose piece. If you're doing a -61/63, the inlet should be divided into 3 equal width segments by small pieces of plastic card. The long fuselage seam allows for the opportunity to mess up while gluing. Take your time and add some extra tabs made from styrene sheet to ensure the seam is kept even. A little extra time spent at this step will save a lot of sanding and filling later (ask me how I found this out). The cockpit cover includes a large portion of the forward fuselage to allow the part to be blended in without destroying the windows. It needs a little shimming on the right side to ensure that it matches the curve of the fuselage. Minicraft got the characteristic Douglas faceting correct below the centre windscreen, but it is not as sharp as it could be above it. Minicraft cleverly moulded 4 cut lines inside the fuslelage halves to allow easy conversion to either the -62/72 or the original short fuselage length. Clear window lovers will not love Minicraft; they went the route of solid fuselages and decal windows. This offers a bonus to Minicraft, because in these days of highly customised aircraft very often no two window patterns are the same between airlines, and sometimes even between individual aircraft, not to mention the windowless freighter versions. Not moulding windows means that Minicraft can offer the same fuselage for any variant.
Wings Each wing is offered in two pieces with separate tips for either the -61/71 or 63/73. This is the first time in 1/144 that the difference in wingspan has been correctly captured. The wingtips' fit is a little sloppy and it's easy to get them misaligned. The wings have a nice set of interlocking tabs which will ensue they stay where they're supposed to. The fit is so precise that Minicraft advise that the wing tabs and mounting area must be masked during painting to prevent fit difficulties later. The wings may be left off during painting as long as the mating surfaces are masked and may be left unglued if the model is going to be transported anywhere. The entire trailing edge up to the control surface line is moulded into the upper wing half. The fit is good, but a little care and attention will ensure that the lower wing mates without a step. The trailing edge could benefit from a little thinning down.
Empennage The tailplanes are one piece mouldings and fit so well they will not need glue. Given that the majority of airline liveries during the DC-8's time in service included full length cheatlines, they should be left off until painting and decalling are complete to avoid entanglements with the decals.
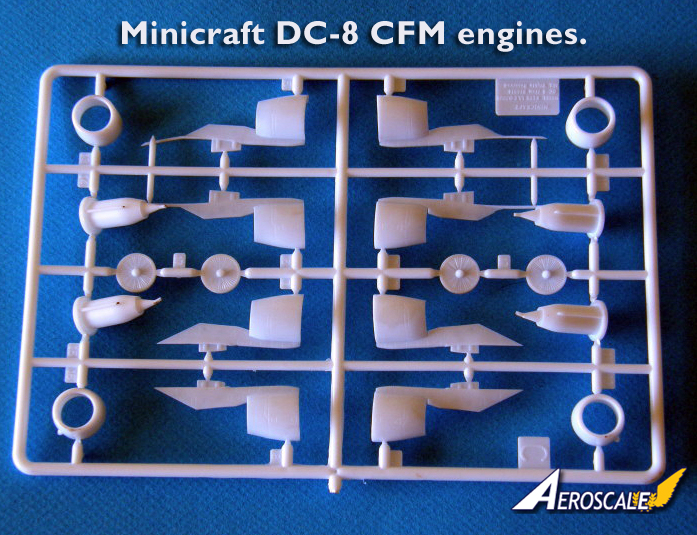
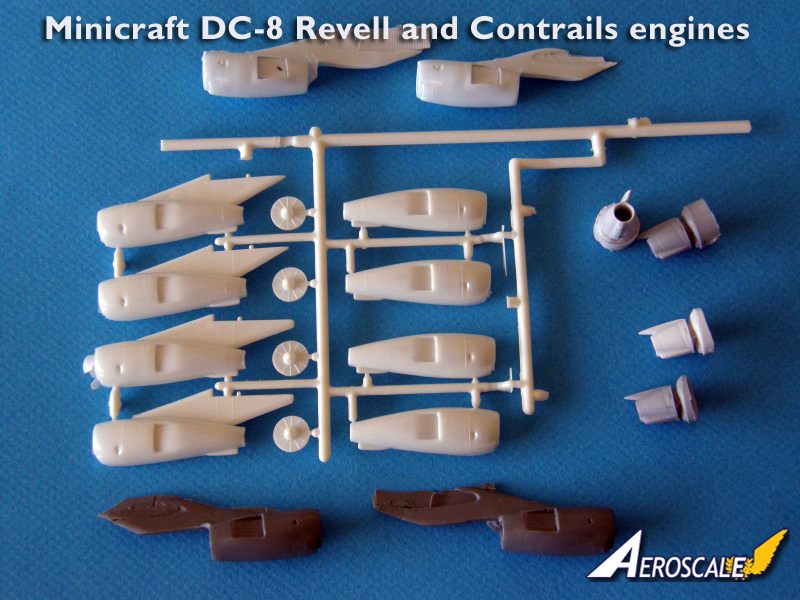
Engines In the early 1980s, General Electric/SNECMA offered a conversion kit which replaced the Pratt & Whitney JT3D engines with CFM-56 high-bypass ratio turbofan engines, allowing for quieter, more fuel efficient operation. 110 DC-8s went through the conversion process and became the quietest 4 engined airliners in service at the time of their introduction. This kit portrays one of the converted aircraft, so the engines are CFM-56s. Each engine comprises 5 parts: intake fan, hot section, cowling halves and intake ring. The intake ring is one seamless piece which has the correct thickness. On the sprue they appear to have injector pin marks on the back, but do not remove them! They are actually cleverly placed locator pins which will ensure that the intakes are properly placed on the cowlings. The CFM-56 has a straight spike which protrudes from the exhaust cone. These are moulded overly thick, but are still thin enough to get bent or break off in the box. They may be replaced with stretched sprue if desired. The inboard pylons have thin strakes that continue aft from the pylon along the wing under surface. These are so thin that mine have bent on the sprue and are near breaking. They are very prone to damage during building so remember to take care. Contrails offers replacement resin JT3D engines and pylons which will allow the kit to be converted to a -61. The Contrails pylons portray the pylon shape of an early DC-8-20 which has been converted to a -50, so the trailing edge of the pylon must be sanded back to the correct -61 profile as shown in the accompanying picture of a set of unused Revell kit engines. Look how far moulding techniques have come in the past 40 years. Since the DC-8-63 is otherwise identical apart from the engines, I have included a picture of the JT3D-7 engine sprue from a -63 kit.
Landing gear The landing gear struts and wheels are very delicate and nicely detailed. They could benefit from a little extra detail, but they'll look good as-is. The gear doors are moulded in one piece each and could be mounted closed although no stand is provided. If the gear is built down, the doors must be cut apart. Note that the nose gear doors are curved at the leading edges to form a vent for the air conditioning system. This shape is correct, so don't try to fill the gap which will result when the doors are glued in place. A sliver of black decal may be placed in the nose gear well to simulate the depth of the air conditioning vent. The forward doors (which remain closed when the nose gear is extended) could benefit from a plastic card tab glued to their inside surfaces to help them stay level with each other. As is common with all 1/144 plastic kits, the gear doors are overly thick, and may be replaced if desired
Accuracy I don't compare models to drawings or published measurements. When assembled it looks like a DC-8.
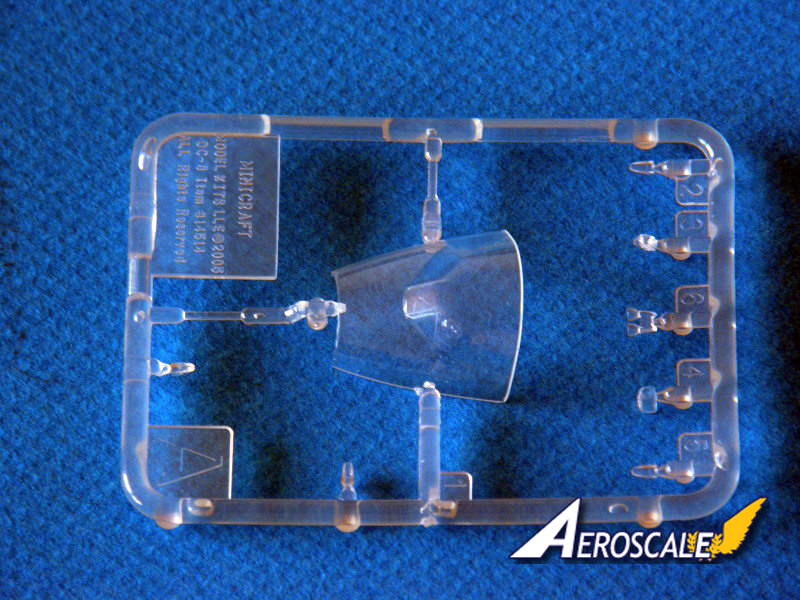
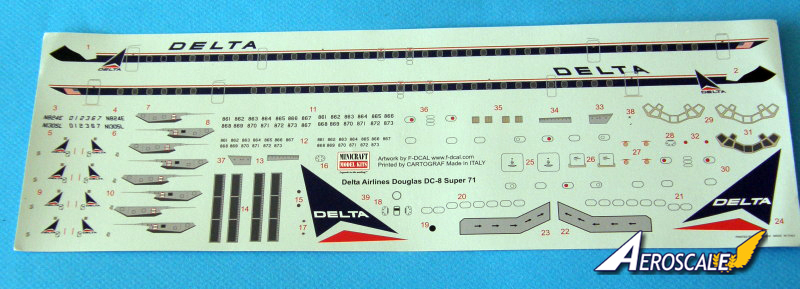
Decals and markings This kit offers Delta's famous Widget scheme. Fleet numbers and registrations are provided for all 13 of Delta's DC-8s. The sheet was drawn by F-DCAL and printed by Cartograf. A full set of stencils, pylon markings and livery is provided, and the sheet even offers a decal to detail the interior of the intakes! A decal windscreen is offered, as well as 2 optional windscreen frames if you prefer a clear windscreen. If you don't like the kit scheme, there is a wide variety of aftermarket schemes available. The kit is also available in United markings, Southern Air Transport (as a -73) and Eastern (as a -63). It is scheduled to be issued again in 2012 as an Air Canada -63.
SUMMARY
Highs: Beautiful mouldings and details. Wide variety of markings available. Very easy to convert to shorter versions.Lows: It's very difficult to find lows, except maybe the lack of open windows for those who like them.Verdict: Simply the best airliner kit to date. It will be an enjoyable and hassle-free build.


Comments