In the box
I saw that the F-105D had just been released on the Luckymodel.com newsletter, and knowing how cheap and fast they usually are, I bought it there and then. As the only other Thud in 1/48th was the old Monogram/Revell offering, which is getting a bit dated now, this new tooled Thud went straight to the front of the build pile.
The 245 parts can be found 8 light grey sprues and 1 clear sprue. There is no sign of flash but there are a few pin marks. Most of these won't be seen but there are a few I found on the inside of the wheel well doors and engine exhaust pipe. They are quite shallow and filling them wasn't too problematic. A inbox review of the kit can be found
HERE
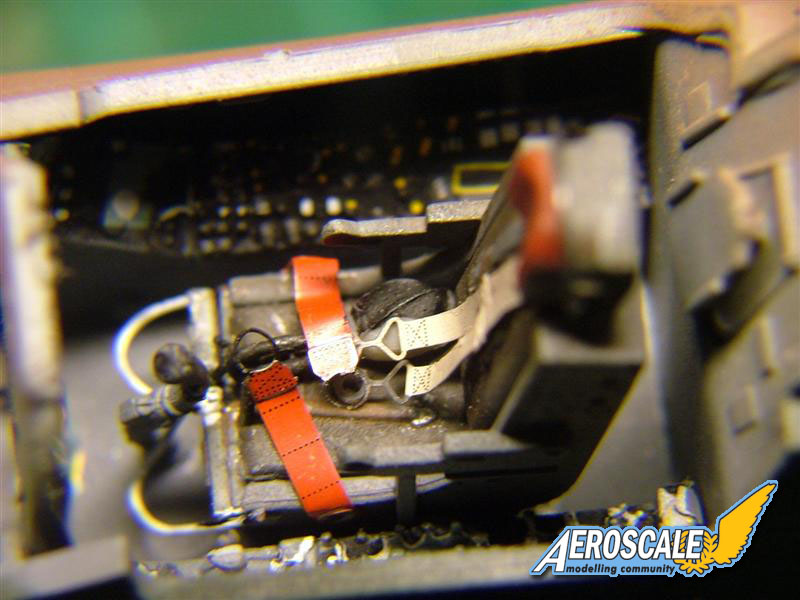
The cockpit
The ejection seat has moulded on harness's and is fairly detailed, but is only about 50% accurate to the real seat. I built up the seat and painted it with a dark grey colour, olive drab cushions and the red head rest. After finding a pic of the real bang seat, and realising how much paraphernalia is on it, I then added some black wiring for the oxygen mask, another set of harness's and a few more wires for the leg restraints and to generally clutter it up a bit. OK its still not perfect but it looks more realistic.
The tub was built up and painted dark grey and a light wash of black was applied to create shadows. The cockpit tub has raised detail for the instrument panels and the supplied decals settled well over them with the help of some Micro Sol/Set. The decals seemed to be a little bright and over powering but once a dull coat went on them they did dull down a bit. Looking at photos of the real instrument panels, the dials are pretty much in the correct places but HB have used a little artistic license regarding some of the colouring.
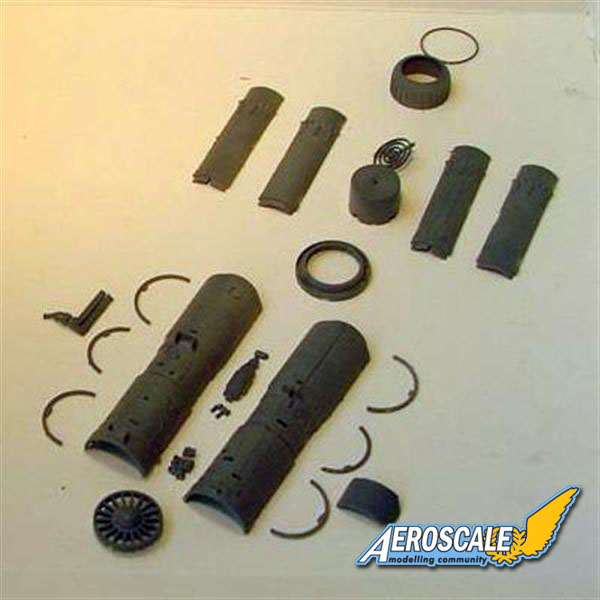
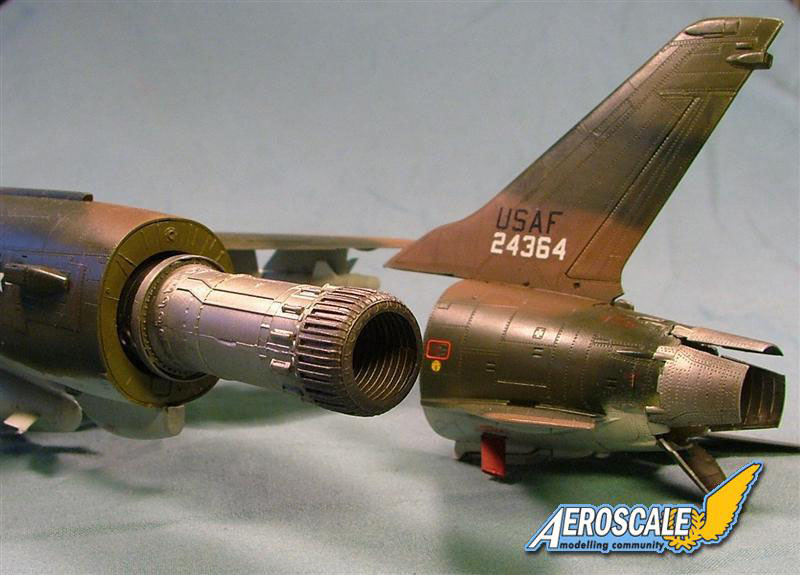
The engine
The engine casing is built up from 23 parts and looks to be fairly detailed. Only the rear half of the engine is visible, if you leave the tail section off the aircraft, so any additional work on the front half is rather wasted. A bit of filler is need on the rear 4 pieces that make up the exhaust tail. The engine was sprayed with Alclad II steel, and then I misted over some Alclad Aluminium. Once dry I then used Alclad jet exhaust and burnt metal on the rear half. Finally a heavy black wash for all the nooks and crannies was applied.
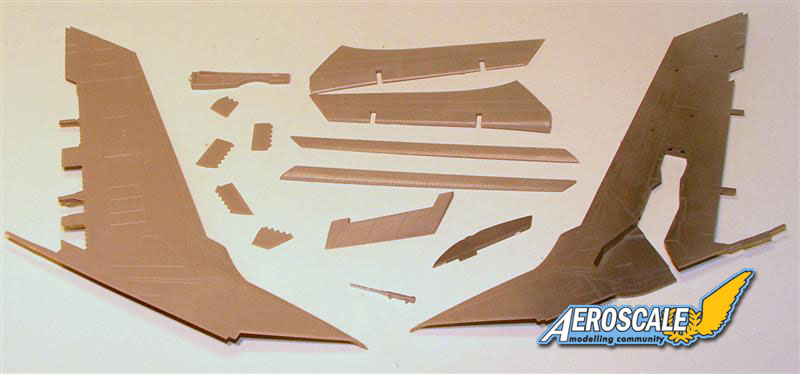
The wings
Each wing is made up of 16 parts and the fit is pretty much spot on. A couple of the 5 roll control spoilers, on each wing, do need a little jimmying and sanding to get into place, but once in fit snugly. With a bit of surgery the spoilers and flaps could be positioned in the open and dropped position. Looking a photos of aircraft sitting on hardstands, the flaps and spoilers are in neutral positions, so I left them as they were. A hydraulic retraction jack is also fitted into each side of the main wheel wells at this stage.
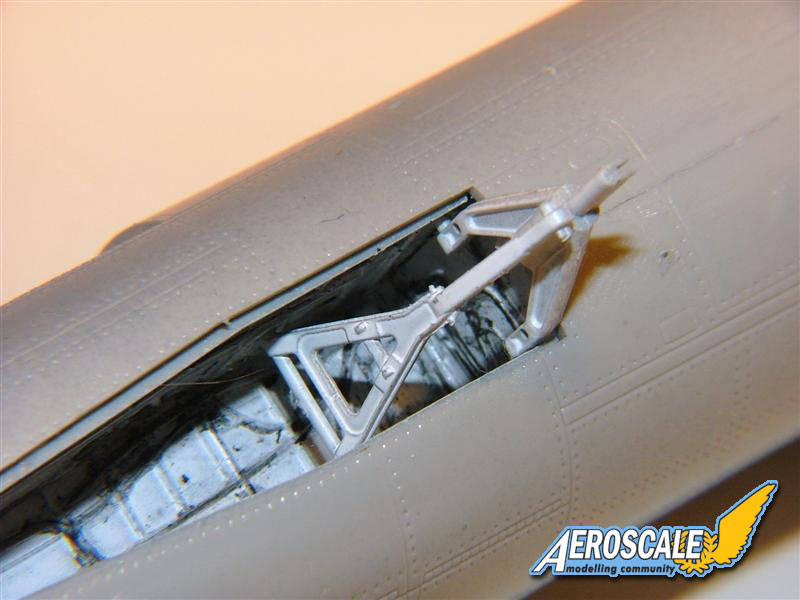
The wheel wells
Before you close up the fuselage, the nose wheel well has to be built up and placed into the nose of the aircraft. The instructions call out for the whole of the nose undercarriage to be built, but knowing how delicate the resulting leg will be, this is asking for trouble. One way out, I found, is to only insert the nose-wheel strut (part F-26) and the main upper leg (part F-1). Both these parts were not glued, as I could then tuck them into the wheel bay, so they wouldn't get damaged. I then checked a couple of references regarding the colour of the wheel wells, and found that they were either aluminium, interior green or painted white. The nose and main wells were then sprayed interior green, with the piping picked out in black. A wash of burnt umber, then a coat of dull-coat finished the wheel wells.
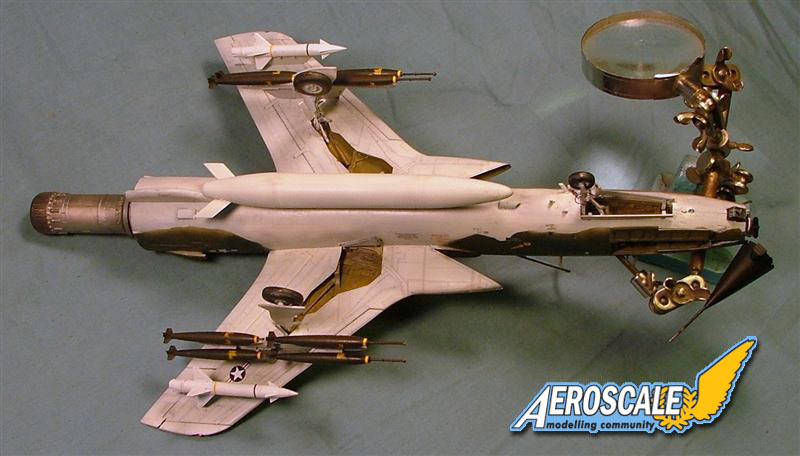
Main parts assembly
With the fuselage assembly, it all depends on if you want to model the aircraft with the tail section removable. If you are showing the engine off, then follow the instructions, building the 4 fuselage halves separate. If you wish to conceal the engine, I feel the best way to get a decent fit is to omit the engine firewalls (parts G-30 and G-31) and glue each rear section onto the main fuselage halves, to insure the correct profile is maintained. This worked dry-fitting, but a little filler may be needed to blend it all in. Once you fit the firewalls into the fuselage there is a pronounced gap around the tail section.
Before the fuselage halves are glued together, the cockpit, front wheel bay, refueling probe housing and the engine are installed. At no point are you told to put any weight in the nose, to stop it becoming a tail sitter, so erring to caution a few screws were attached in front of the cockpit.
Once the fuselage was dry I attached the wings, which do fit well and seem pretty sturdy. A little filler was needed on the fuselage seam, but this only takes minutes to do.
The tail is in 2 separate pieces and is glued to 2 "eyes" on the fuselage. One of the "eyes" is on the forward section of the fuselage, with the other "eye" on the separate rear section. If you are showing the engine then the front "eye" has to be removed, by cutting it off then sanding smooth. The tail section can then be glued to the rear fuselage.
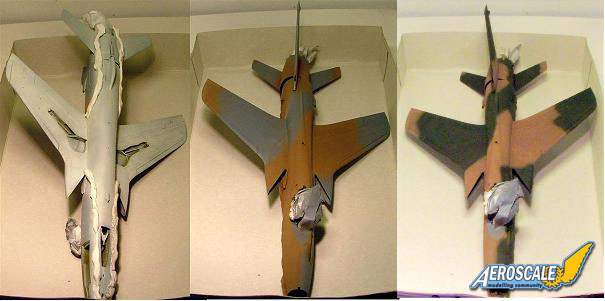
Air intakes, splitter plates and various other fuselage appendages were fitted, then the whole plane was primed in grey.
I then hand painted the inside of the gun well and refueling probe well with Xtracyrilics Interior green and masked off.
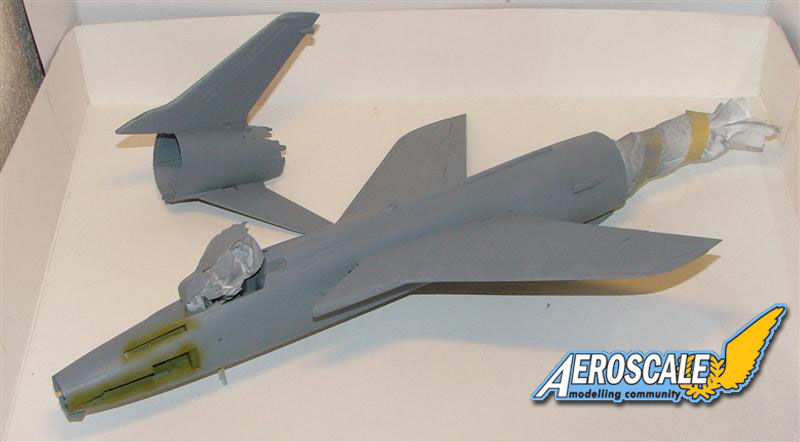
Painting
Before painting can commence the wheel wells and cockpit were masked off using wet tissue and masking tape to hold it down. The engine was also wrapped in tissue and was a help as the engine gave me something to hold while spraying. Usually with jets a large paintbrush handle gets stuck up the exhaust for ease of handling lol.
As the aircraft that I am depicting was in sprayed in the SEA camo scheme, so it has a tri colour upper camo scheme with white lowers. The underside was sprayed with WEM USN non specular white, which is an off white colour. The undercarriage doors were also sprayed at this stage while still on the sprue. I then masked the lower half off with Blu-tak rolled into sausage shapes. This way of masking gives a soft edge to the camo scheme. The upper surfaces were sprayed with Tamiya paints, in the order of XF-52 flat earth, XF- 58 olive green, with the final colour being XF-61 dark green. All the colours were sprayed freehand. As the fuselage is split into 2 parts, every now and then I would join the 2 together so the camo pattern would match up.
It was at this point of the build that I realised that the inside of the rear section of the fuselage would look quite bare. The real aircraft has several bulkheads and some large piping in there and with out ripping the thing in half to scratch some detail I decided to live with the emptiness. Hind sight is a great thing lol.
Once this was all dry, 2 coats of Future (Klear) was sprayed on.
Other parts and weapons
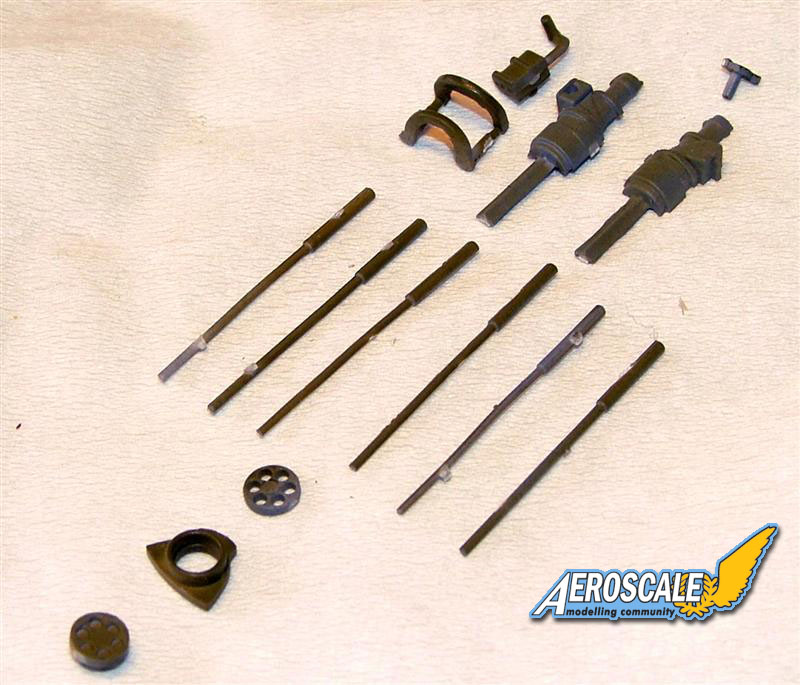
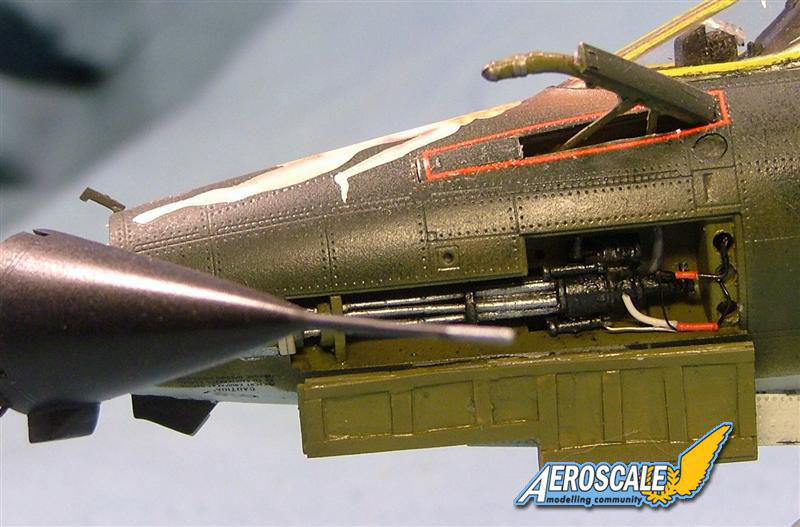
The M-61 Gatling gun is made up of 14 parts and once assembled was sprayed Alclad steel and then dry brushed aluminium. Once installed into the gun bay and checking a couple of photos I decided to add some wiring. Various gauges and colour of wire were used to add a little interest. In the instructions you are told to close up the gun bay, which does seem rather pointless as you have just modelled the gun. With a little scratching on the inside of the gun-bay access panel, you can position it open.
The in-flight air refueling probe was built up painted and installed in the deployed position, along with the doors.
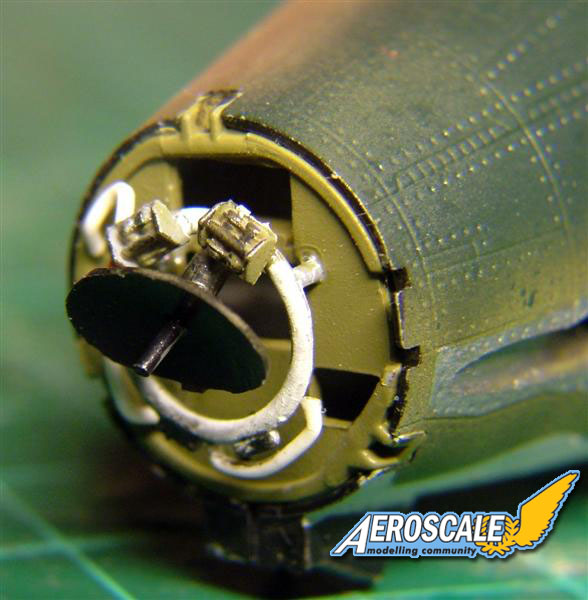
The General Electric AN/ASG-19 Thunderstick fire control system which sits in the radome of the aircraft is quite well depicted in the kit and with some more wiring added really brings some life to the aircraft.
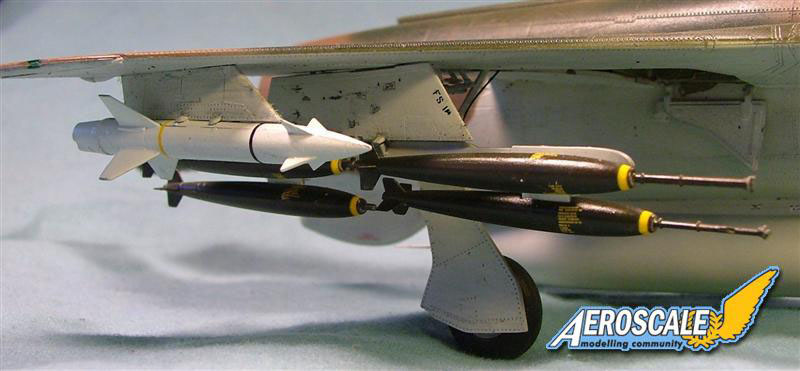
For the ordnance I decided to have the center-line fuel tank, 4 Mk-82 bombs on double ejector racks for each wing, and a single AGM 12C Bullpup missile on the outer wing pylons. These were all built, painted and Futured ready for the decals.
Decaling
The decals are well printed, apart from the stars and bars which are slightly out of register, have little carrier film and respond well to Micro Sol/Set decal solutions. The one bugbear with Hobby Boss kits are the decal instructions. Every kit has some error, whether its not telling you to place a decal or in this case telling you to place 2 identical stencil decals either side of the aircraft but only giving you one decal. Once you have searched the entire sheet for the elusive decal you then realise that there is only one decal for the plane anyway (case in point being a decal for the fuel dump, of which only one is needed ). There are quite a few stencils adorning the aircraft, but adopting my regime of decaling one side a night, after 3 days (top and bottom get done the same day) they are all on. The weapons are also decaled at this stage.
Undercarriage
The undercarriage legs are very delicate on the Thunderchief as they are quite long and skinny so care should be taken when you finally place them unto the model. I built and painted them in Tamiya XF-2 white, and used Tamiya XF-69 NATO black for the tires.. I added some brake cabling to break up the starkness of the legs. Once they were dry they were then attached to the rest of the model. The model was suspended off its legs overnight to cure. The weapon pylons and ordnance were also glued to the wings.
Finishing
Once everything seemed dry and stable I then fixed the rest of the fittings onto the aircraft, such as the various sensors, fuel dump pipe, radome and pitot tube. Once all this was on i then sprayed a coat of Future over the whole aircraft ready for the washes.
The underside was given a Payne's grey wash with the upper surfaces in Burnt Umber and Lamp black for the control surface gaps. Once this had dried a bit it was then wiped off in the direction of the airflow, to give it a streaked effect. After leaving to dry a coat of dull-coat was sprayed on.
Markings are for "Miss Galore" of the 354th TFS, 354th TFW.


Comments