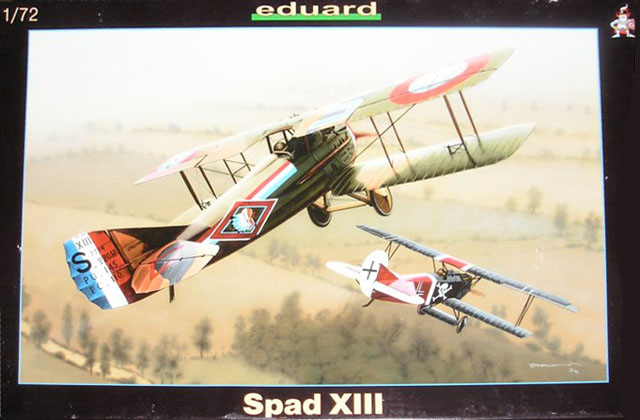
The SPAD XIII was the successor to the SPAD VII. Most notable of the improvements over the previous model were the addition of a second machinegun and more powerful 220 hp Hispano-Suiza engine. While not as maneuverable as the Nieuport fighters, the SPAD XIII was faster and a better diver. It is estimated that between 7,300 and 8,472 were built before the end of the war (Connors, p 38)
The Kit
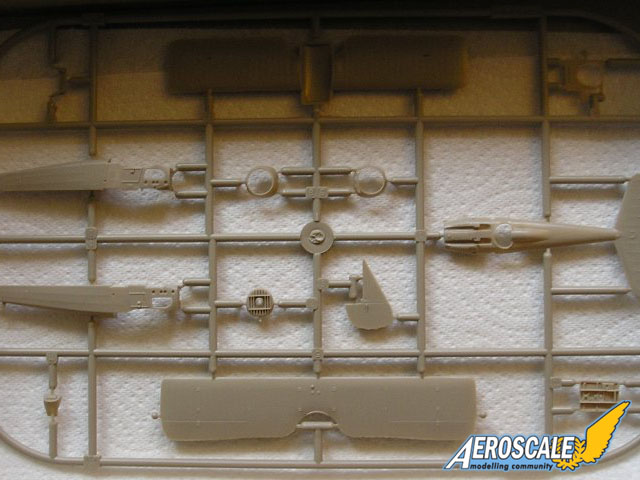
The kit comes on three sprues, two large ones in tan colored plastic and one in clear plastic. Also included are a set of express masks and a large decal sheet of good quality with markings for 4 aircraft. The instructions break down assembly into 7 steps, all in exploded view format. In addition, the painting instructions are printed in full color, a nice touch that allows you to know what color to use without constantly flipping back to the first page.
The trailing edges of the wings are razor sharp, and rib detail is nicely restrained. The fuselage is broken down into three main pieces, two for the bottom half and one for the top. The horizontal stabilizer is molded in one piece with the top part of the fuselage, which greatly simplifies later tail assembly. However, underneath the top section of the fuselage are two ejector pin stubs where the bottom of the machinegun troughs meets the top of the instrument panel. If these are not removed, the top of the fuselage will not be able to mate properly with the bottom part.
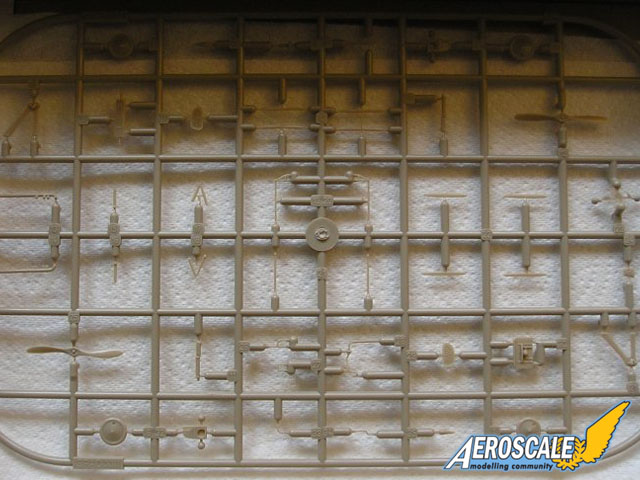
The struts provided with the kit appear to be in scale, which at 1/72 means they are really flimsy. Great care will be required when removing these from the sprue. I do not recommend sprue cutters as when they pinch off the part too much deformation could occur. The best option is to use a fine razor saw, that way the part can be removed without putting too much stress on it. Another option would be to use brass Strutz, which can be found for sale at RollModels.com but it wasnt available to me at the time.
There are some options available to the modeler depending on what aircraft will be built. There are two different cowlings, two propellers, two sets of wheels, and options for faired or unfaired water pipes. There are also two different versions of windscreen, but which to use is not specified in the instructions, so check your references, if possible.
Overall, flash on the parts is nearly nonexistent, and the few mold separation lines will be simple to fix. All ejector pin marks are in places where they wont be seen, and the only ones that will need to be removed are the ones mentioned before beneath the gun troughs. As this is not the profipack version, no photo etch is provided, but with the quality of the molded plastic their absence will not be too noticeable. Right out of the box this can be built into an excellent replica.
Construction
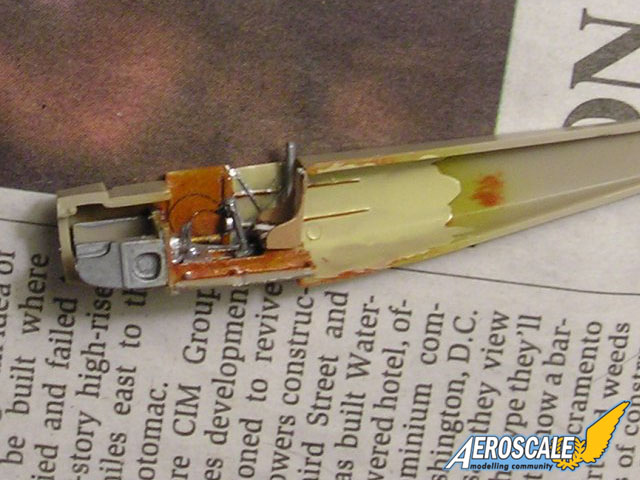
Step 1: As usual, construction begins with the front office. The painting directions for the cockpit are somewhat generalized, and looking at the photographs of the restored SPAD XIII at the Memorial Flight Associations website will really help in fleshing out the details. I wouldnt recommend doing much scratch building though, as when the cockpit is closed up inside the fuselage very little can be seen, even with a flashlight. No seatbelt harness is provided, so I did try to make one from scratch using photographs. As a first attempt it didnt turn out as well as I would have liked, but I can always try again later. Eduard provides decals for the instrument dials, which are pretty decent, but using references I chose to instead paint the casings of the instruments in aluminum rather than wood color. To finish, I used a drop of Future to help seal them in and replicate glass.
Step 2: In this step, all that needs to be done is to join the halves of the fuselage together. This did require some sanding and careful test fitting before joining the parts, as the cockpit is a tight fit. Do not forget to cut out a notch in the holes for the engine access panels, if you are going to be placing parts B9 and B29 there. (Why Eduard included alignment tabs on the engine access panels, when they really arent needed, baffles me.
Step 3: Now is the time to drop the instrument panel and deck into the cockpit. There is a major fit issue here, as the panel and its deck simply cannot fit in the opening of the fuselage. The best option is to use a sharp knife to trim off the back part of the opening until enough room is made for it to fit. Care must be taken that there is enough clearance left so that the seat is not in the way.
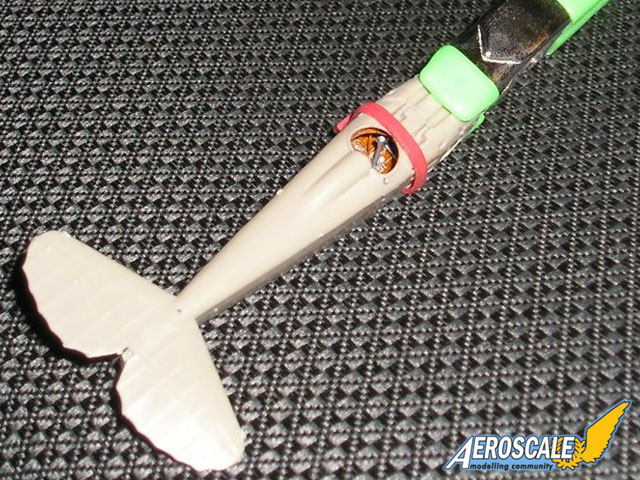
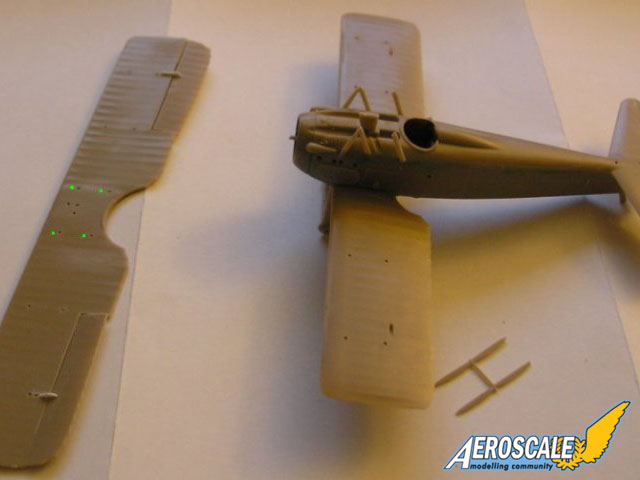
Step 4: One of the most difficult parts of assembly is attaching the top fuselage and lower wings. If care is not taken the lower wings will bow down rather than be straight and the top fuselage will not mate properly. Ensure that the ejector pin marks are removed from the bottom of the upper fuselage, being careful not to go all the way though the paper-thin plastic there. Clamps will almost certainly be needed to hold it in place. Once this is done, test fit the wings and carefully sand the bottom attachment points until the wings go on straight. Here it is best to depart from the instructions and leave off the vertical fin and tail braces until later. The braces interfere with laying down a smooth coat of paint and the vertical fin will be painted with the tricolor before being attached. (I did leave off the fin, but attached the braces, which in hindsight made my job harder.)
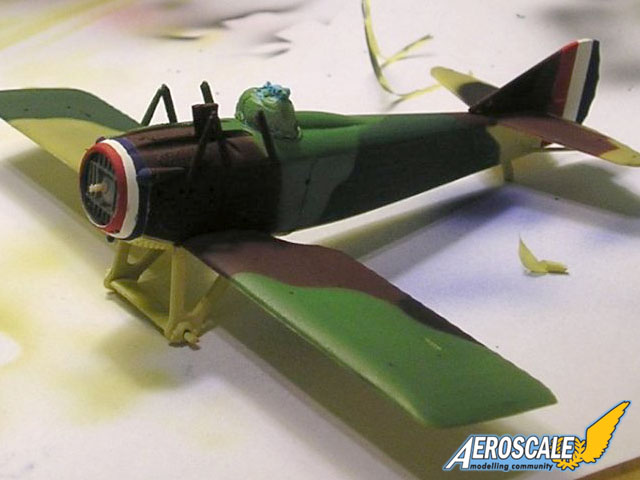
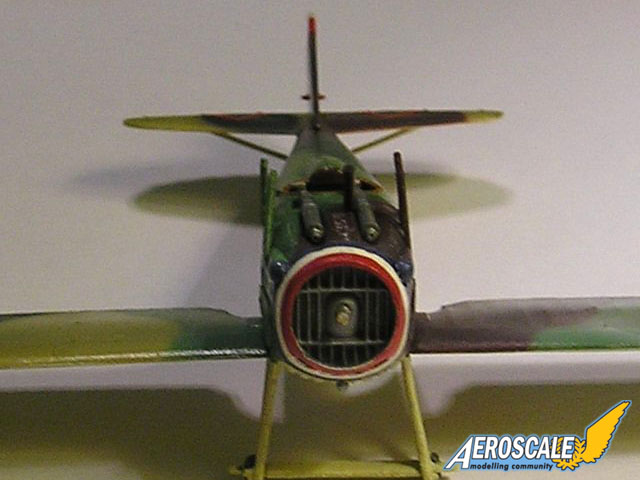
Step 5: Here I attached the radiator, propeller axle, cowling and engine access panels, and cylinder head fairings. I left off the exhausts, guns and windshield. Since I chose the faired water pipes I did choose to attach the fairing, but left the other pipe off for later. I did add on the center struts and undercarriage struts, but I should have done this later, as it interfered with airbrushing later on.
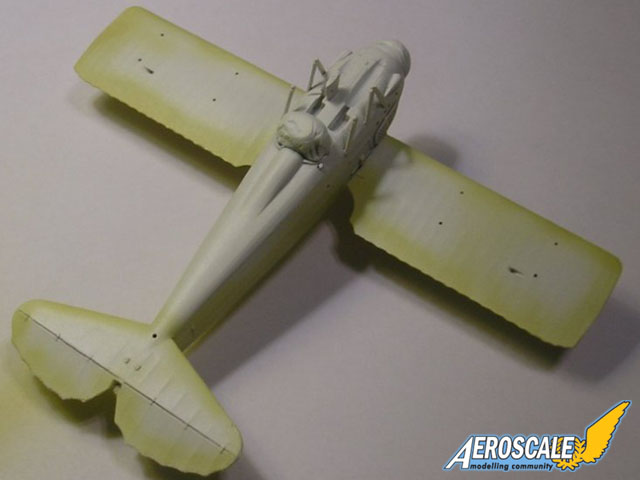
Before painting, I did a final inspection of the model for seams. Along the port side there was a misalignment of the wing and nose, resulting in some large gaps that had to be filled. I also found a large gap on the underside of the fuselage, where the lower wing joins the fuselage. Once all of the cleanup was done I test fit the top wing to the struts, and immediately discovered a problem, the center struts were bent too far forward causing a serious misalignment in the upper wing. I ended up fixing this by moving the holes for the center struts further forward, which while not as accurate as fixing the struts, it did not risk causing any more damage than I had already done. The holes for the water lines were also incorrect, but I fixed this simply by sanding off the alignment pins on the fairing and filling in the holes. Once these problems were corrected I masked off the cockpit and radiator with bluetac and laid down the primer. Being in the middle of a heat wave, the acrylic primer by Tamiya that I used ended up drying a bit before hitting the model, resulting in a rough finish. I had to sand this down and afterwards swore off using Tamiya primers ever again, at least in hot weather.
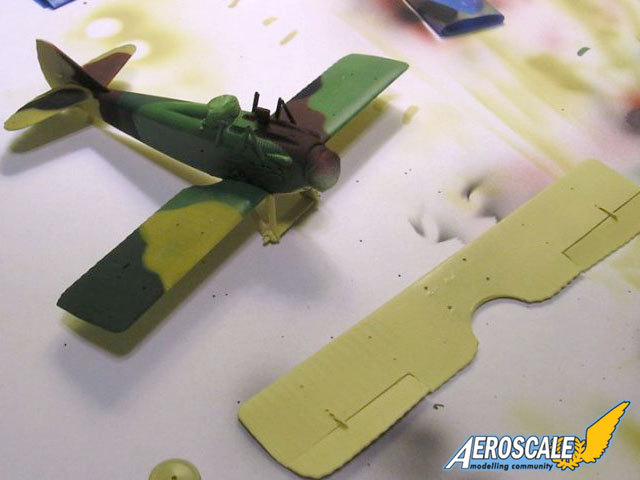
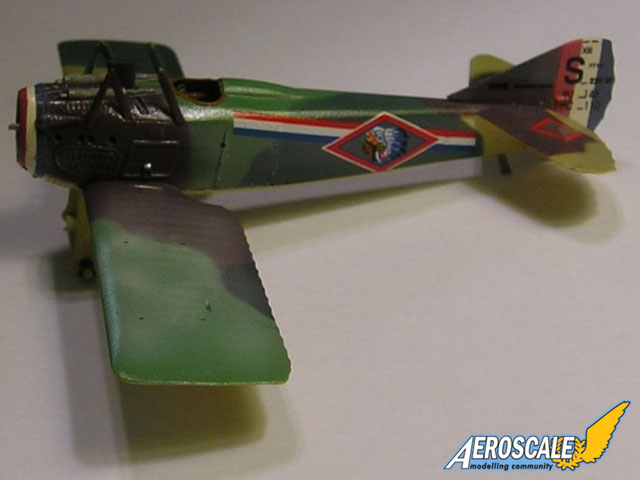
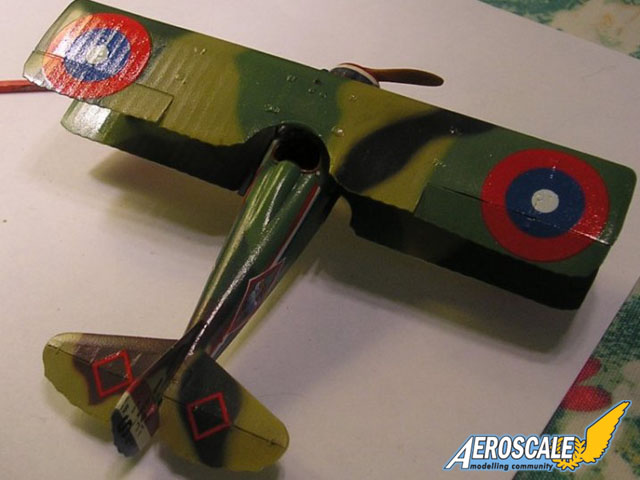
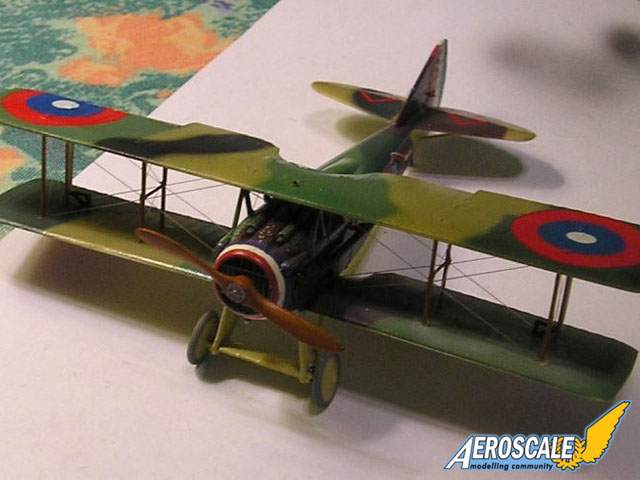
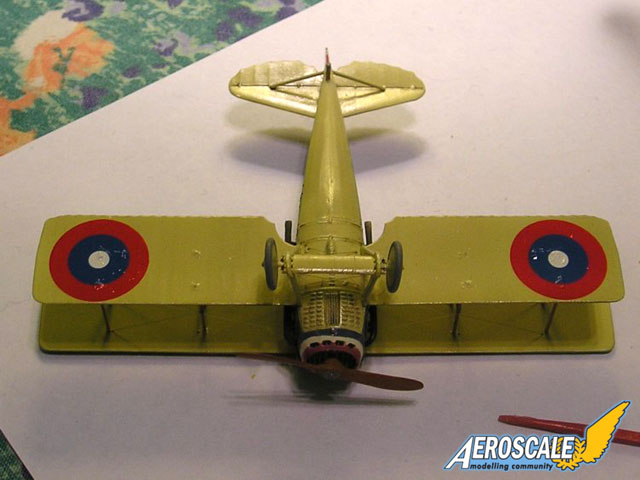
After laying down the primer, I started painting the camouflage on the plane; starting with Humbrol 71, or sail color for the underside, then light green, dark green, brown, and finally black. To mask off the demarcation lines of the camouflage, I used bluetac rolled up like sausages that were then placed on the model and further masked off with blue masking tape. To do the tricolor markings, I first painted the whole area white, then followed up by laying down the red and then the blue stripes. The strips provided on the express mask are nice, but Tamiya masking tape would have done the job just as well. The only masks that were really useful to me were the ones for painting the wheels and windshield. Once this was done I applied a coat of future, applied decals, sealed them with more future, and then applied a wash. In hindsight I should have then applied a semi-gloss coat over the finish because the Future was too glossy, but I will have to save that lesson for next time. After this, I painted and attached the exhausts, which were first painted gunmetal and then misted with rust color, followed by the guns, the windshield and the vertical fin. Finally, I carefully removed the bluetac from the cowling and cockpit.
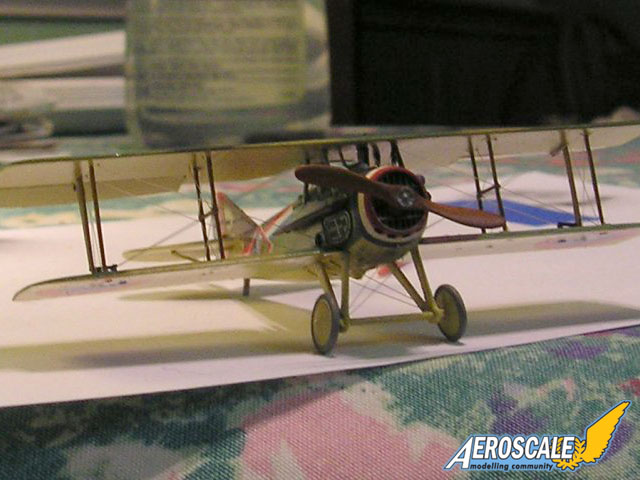
Step 6: I painted all the struts with a mixture of yellow ochre and burnt sienna to simulate a wood grain and let them dry. I also painted the propeller and wheels. Then I attached the upper wing to the center struts with superglue. Once done, I wedged in the rest of the struts one by one, starting from the inside out, until they were all attached. I had predrilled the rigging holes before the wings were attached so I was then able to do the rigging with smoke colored nylon thread. I had left the upper wing unpainted because the cleanup of the rigging would have damaged the camouflage anyways. When rigging was done, I masked off everything but the top of the upper wing and painted that as well. I had tried to simulate faded fabric with a mist of semi transparent white paint, but ended up making a mess of it on the lower wing. Fortunately this isnt as noticeable once the upper wing is attached. After the painting was finished I applied the final decals and added on the wheels.
Step 7: I glued on the propeller, and it was done!
Conclusion
This model was one of the more demanding of the WWI kits I have built so far. The most time consuming part was working on the detailed cockpit, which is far better than the cockpits provided by Toko or Roden in their 1/72 kits. Dont bother with scratch building anything like I did, it wont be seen once closed up inside the plane anyways. All this detail comes at a price of a tight fitting cockpit and careful cleanup of the mating surfaces for the lower wings. For the skilled and patient modeler who wants to build the SPAD XIII, this kit is highly recommended.
References:
SPAD Fighters in Action by John F. Connors, Squadron/Signal Publications, p. 37-39 Memorial Flight Association SPAD XIII Restoration.
Please remember, when contacting retailers or manufacturers, to mention that you saw their products highlighted here - on AeroScale.
SUMMARY
Highs: Accurate and well detailed. Excellent molding with almost no flash at all.Lows: Some fit issues with the cockpit and lower wings. Care must be taken to ensure center struts are properly aligned.Verdict: I would recommend this kit, so long as the builder is at least of intermediate skill. The fit was not as good in places as I had hoped but it can be easily fixed.
About Michael Spitler (goldstandard) FROM: CALIFORNIA, UNITED STATES
I used to build model kits all the time when I was a kid. I stopped for a while after entering high school, but recently became interested in the hobby again. I am mainly interested in aircraft from the two world wars.


Comments