Check out the
In-Box Review for a full description of the kit's contents.
The build
I decided to build both kits at the same time as the only differences between them are the painting and decaling. The Wild Child also has a couple of extra aerials on it which were added just before the painting process.
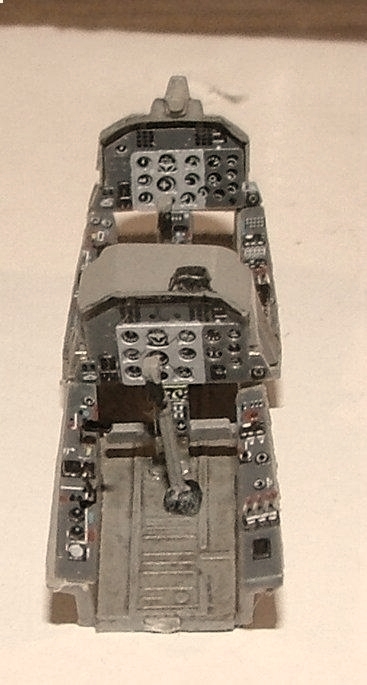
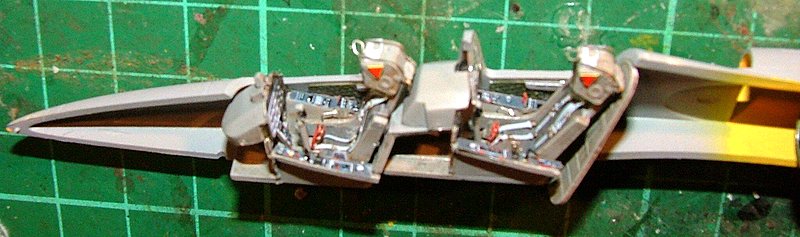
Step 1 - The first step in the building of the L-39 Albatros concerns the cockpits.
The cockpits require a lot of patience and careful handling as some of the pre-painted P.E is tiny.
The kit supplied plastic instrument panels are not used as they are replaced by a 3 part P.E piece. The main part of the console has to be bent into shape along the scribed lines and then dials, which are beautifully rendered, are placed in the middle of the sandwich. On the front attaches the cover which has the dial holes already cut out and fit perfectly over the dials.
The cockpit plastic parts were all painted in the cockpit colour before adding any of the P.E parts as I didnt want to try and paint it after in case I lost any of the detail of the P.E. The side consoles must be sanded flat so the P.E replacements can be added. At this point a magnifying glass is really necessary as adding the tiny, numerous levers is required.
After everything was glued in place and left to dry a light wash of burnt umber was applied to the floor.
Step 2 - deals with the fuselage interior and assembly.
The fuselage halves were sprayed in the cockpit colour and the inside of the engine nacelles were sprayed yellow as per instructions.
More P.E is glued to the side walls of the cockpit area and the rear cockpit wall is installed.
The engine fan and rear exhaust is also painted and added. The instructions now tell you to add the cockpit tub and to close up the fuselage, but you are best to hold off on this, until you have added the ejection seats.
Step 3 - covers the assembly of the 4 ejector seats.
Each seat requires 5 plastic parts and 11 pieces of P.E. 2 plastic parts make up the head rest and 3 parts build the seat and sides.
One thing I wish I had done, but hindsight is a wonderful thing, is to sand down the sides of the seat a fraction to help with putting them in the cockpit tub, as it really is a tight squeeze.
The colour P.E contains the harnesses, ejector seat handles and warning signs. The P.E can be a little fiddly to glue in place but by holding the seat in a crocodile clip and carefully adding superglue to the parts with a toothpick and using a good pair of tweezers the task is not so bad.
The seats took about 4 hours to complete and do look really good once they are finished and are definitely worth the effort.
At this point you should add the seats to the cockpit tub. They are a very tight fit and with some jimmying they will eventually drop into place. This would be nearly impossible to do once the tub is in the closed fuselage, as the amount of pressure you need to apply would most certainly give you some problems, such as the tub falling out of alignment.
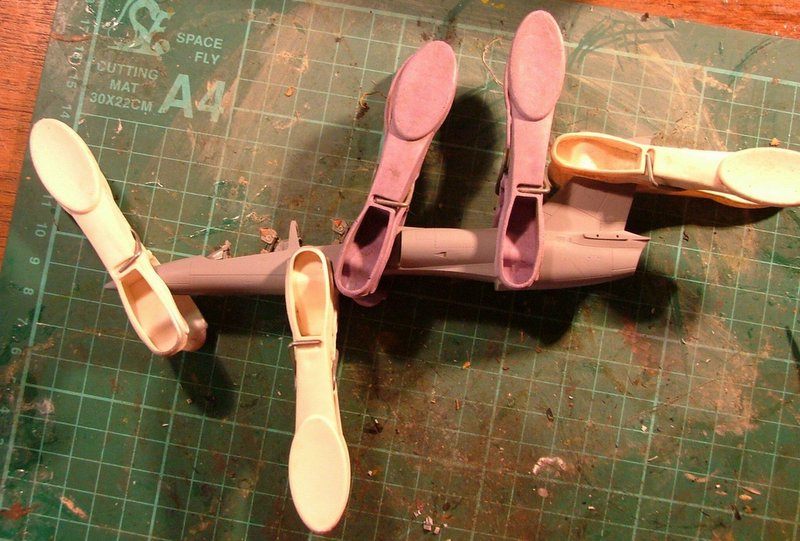
The fuselage halves can now be glued together with the tub, engine fan and exhaust in place. Clamps, pegs and fingers will have to be used to glue it all together as the fit is really tight. There is a gap along the front of the fuselage which will have to be filled, as the cockpit tub is, in my opinion, slightly too wide for the fuselage.
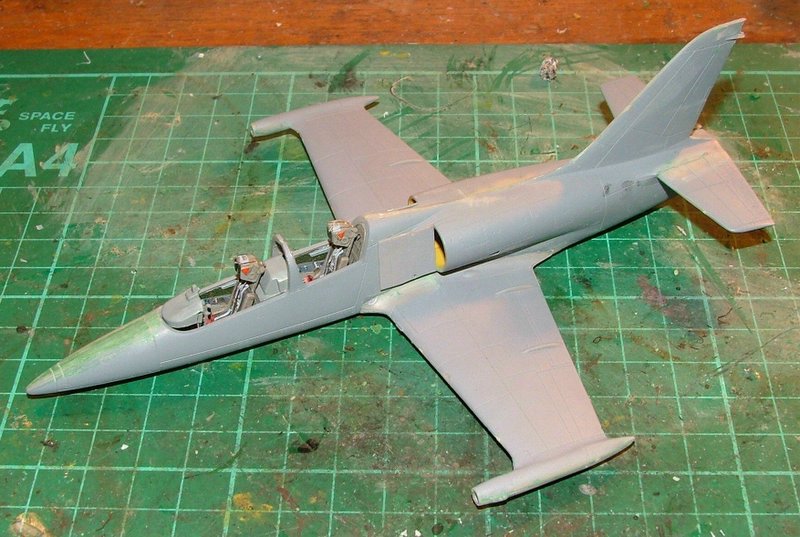
Step 4 - covers the assembly of the major components.
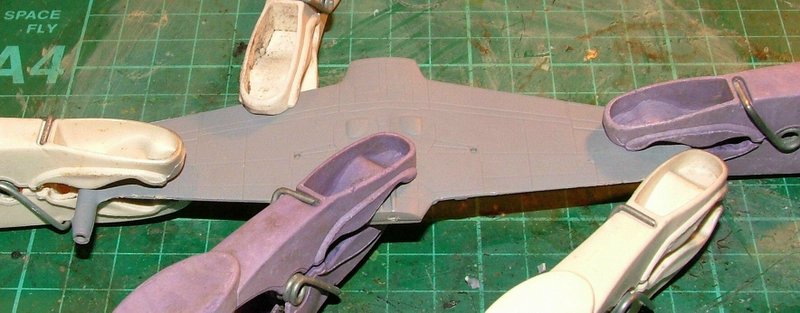
The wing halves are glued together and fitted to the fuselage. The wing roots may need to be sanded a little to ensure a good fit to the fuselage. Filling and sanding is required along the fuselage seams, especially the front. The wings need clamping together but little or no filling is required.
The tail planes are also glued into position. The engine inlets are added. The inlet covers are left off and sprayed separately. The inlets are the same colour as the main plane, and trying to spray paint into a half inch gap is a recipe for disaster.
Step 5 - This is where I deviate from the instructions as step 5 is the assembly of the undercarriage and weapon pylons (which are not needed in this kit). The clear wing lights are also left off until later. The only parts added at this stage are the pitot tubes.
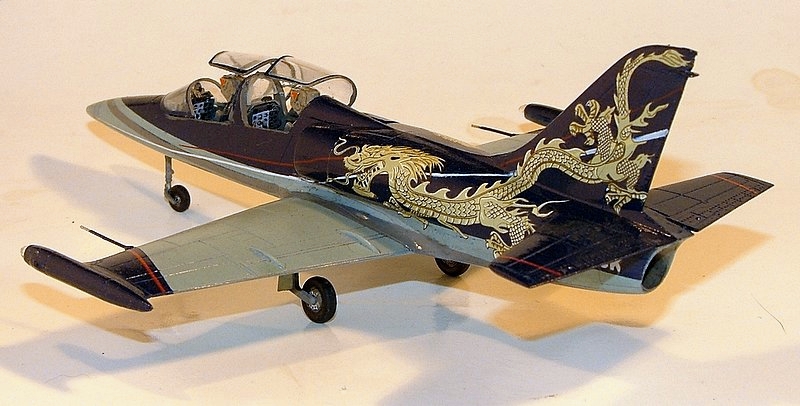
Step 6 - This is where the planes split into separate builds. Some P.E aerials are added to the Wild Child (marking b).
Step 7 - The canopies have the P.E handles and a couple of other bits added to the interior frame.
Paint masks are now applied to the exterior of the canopies and really fit beautifully within the frames. I painted the inside frames at this point. There are no masks for the insides so a little paint, a small brush and a steady hand is required.
After everything was dry, I used white glue to stick the canopies into the closed position. Both aircraft were primed with a plastic primer and left to dry. Any seams which needed further treatment were done and re-primed.
painting
This is the fun bit and the part where all your hard work can go pear-shaped, so make sure that your paint mix and airbrush are correctly set-up.
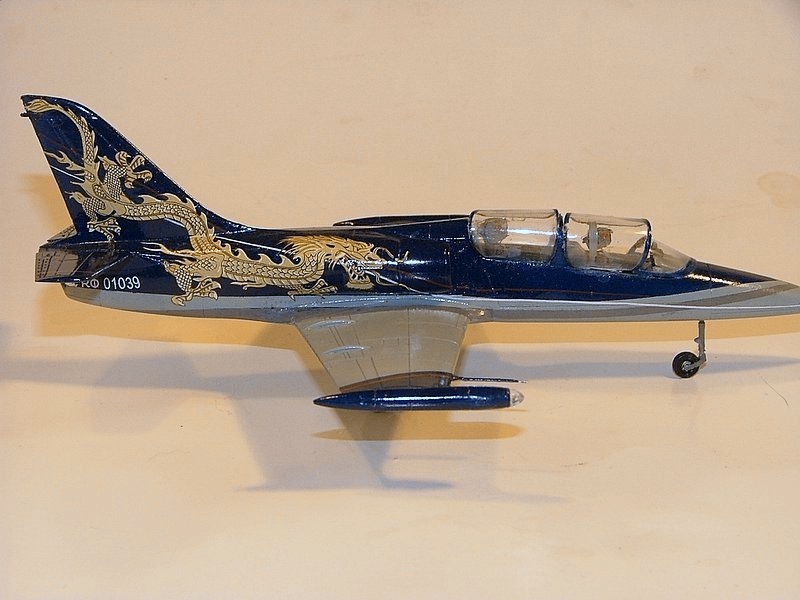
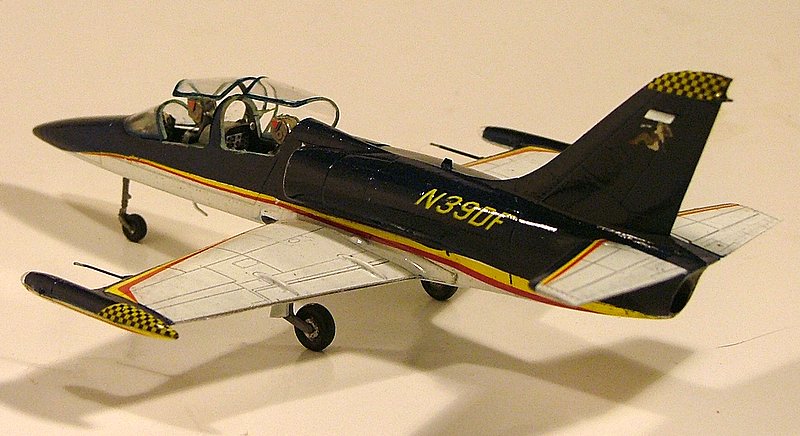
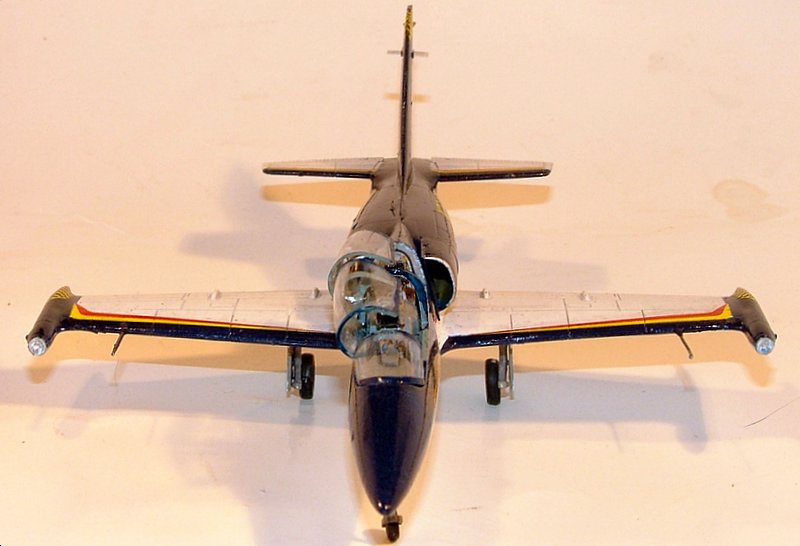
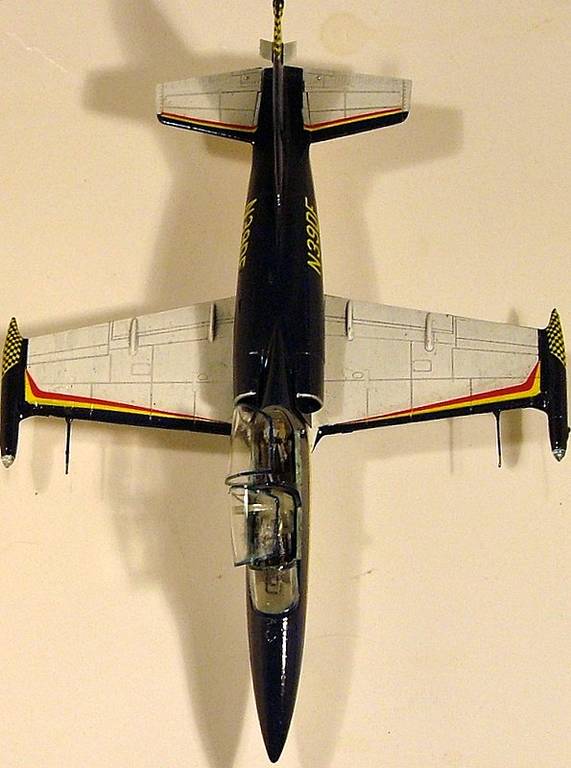
I opted to paint the Wild Child (marking b) first as only 2 colours (blue and white) are used and looked the easier of the 2 planes. Thin multiple coats of Tamiya gloss white was sprayed on to the wings, tail planes and about half way up the fuselage sides.
How wrong was I about this one being easier! There are no paint masks for this plane and masking has to be done manually. Each wing and tail plane needs masks on the leading edges and fuselage sides. There is a little room for error as decals cover the edges of where the paint meets. I did have to re-spray the rear of the plane later as I had a gap of white paint above the decal, which should have been blue. The edges of the decal were masked off and a light coat of blue sprayed over.
After the white parts were masked off Tamiya flat blue was sprayed onto the top of the fuselage and leading edges. The instructions state there is an aluminium strip along the top of the wing, but in all the photos I found of this plane I couldnt see it, so I left this out. After removing the masks the whole plane was given 2 brush coats of Klear, ready for the decaling.
The Dragon(marking a) plane has a 3 colour scheme of dark blue, light blue and grey. You have to work out for yourself which colours go on first as the masks are tailored for 2 of the colours, but with careful examination you can work out the sequence.
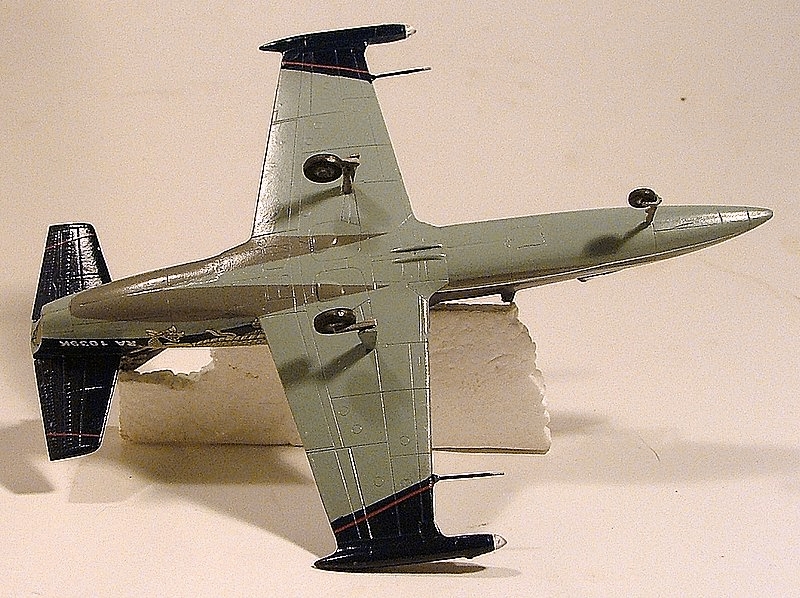
Tamiya dark sea grey was sprayed on the underside and along the sides of the fuselage. The paint masks are then put over the grey areas and a coat of Tamiya light blue is sprayed over the grey areas and on top of the wings. More masks are then added over the light blue areas, creating the grey and light blue lines along the fuselage. Tamiya masking tape is used on the wings, leaving the wingtips uncovered. Tamiya flat blue is then sprayed over the wingtips, the upper surface of the fuselage and the tail planes. Both sets of engine inlet covers are sprayed separately in the dark blue colour, and then added before you Klear the aircraft. 2 brush coats of Klear were applied after the masks were removed.
It seems complicated but is so easy and Eduard should be praised for this ingenious way of painting this design.
The undercarriage from step 5 can now be built, painted and added.
decaling
The Wild Child (marking b) is the less complicated of the 2 to decal, so I started this one first. Eduards decals are really quick to come of the decal paper so dont leave them in the water for long. Also once they come into contact with the surface they dont like to be moved around a lot. If you apply them to the wrong place you have to re- flood the decal to get it off.
Micro set and sol was used to help the decals and the only problems with them are the 2 long decals which go along the fuselage sides. These can be a bit of a pain as they sit underneath the engine covers and after multiple attempts they finally went into the right position.
The Dragon(marking a)is less complicated then it looks. The dragon decals are split into 2 halves and go onto the plane really easy. The decals that are a pain are the 2 red and white lines that go underneath the dragon. As the lines are very thin, with each line split into 3 pieces, placing them can be a nightmare. You might want to leave these off and mask and paint these lines on instead.
weathering
Weathering is kept to a minimum as these aircraft are well looked after and maintained.
2 brush coats of Klear were then applied over the decals and a slight wash of Paynes grey over the light blue and white panel lines were applied. The dark blue portions were similarly treated with a mix of ultramarine blue and black. Any access was wiped off with a cotton bud.
Another coat of brush coated Klear was given to the now finished planes.
summary
This is a really nice build which I enjoyed. The addition of the colour P.E parts greatly improves the looks of these planes, and the colourful markings really make a change from the military colour schemes we usually have in our collections.
So if you are looking for something different, and a learning curve for those who havent tackled P.E yet, you cant go far wrong with this kit.
Please remember, when contacting retailers or manufacturers, to mention that you saw their products highlighted here - on
AeroScale.