History
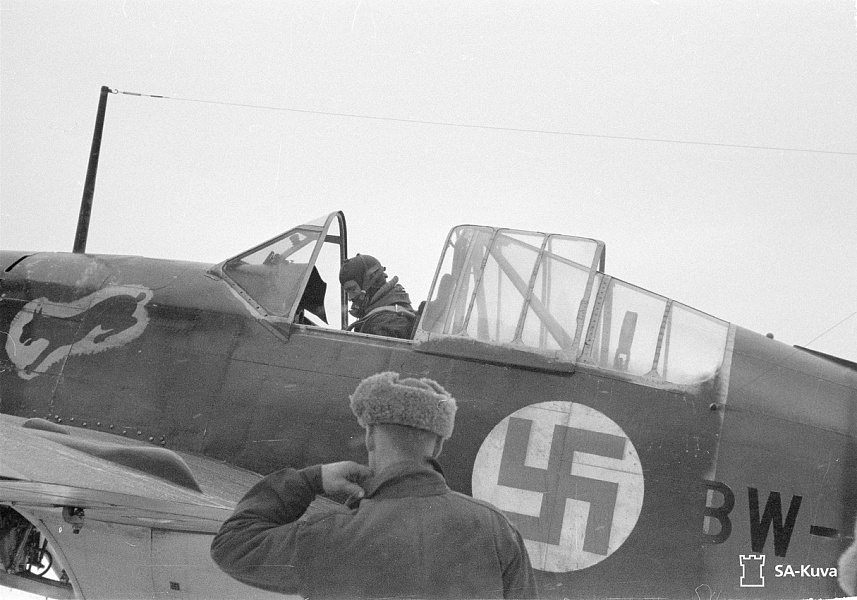
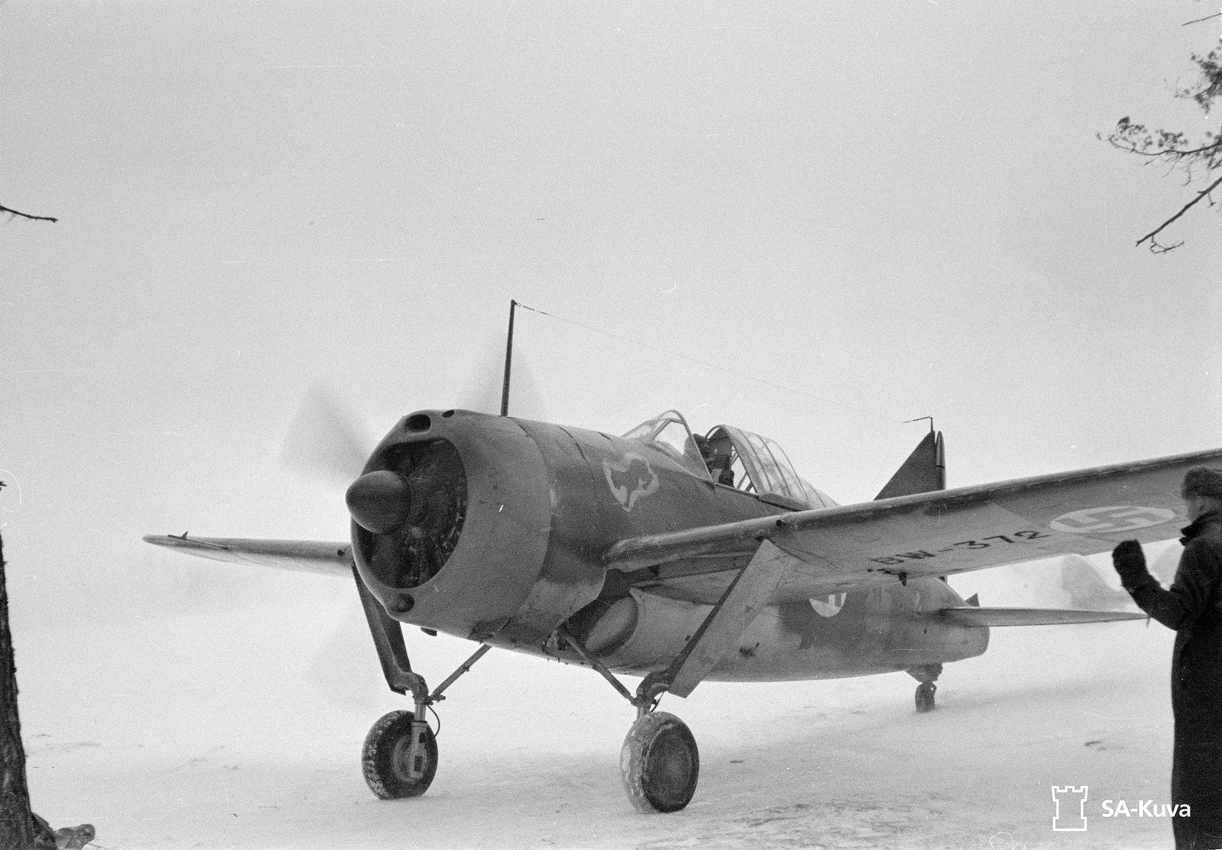
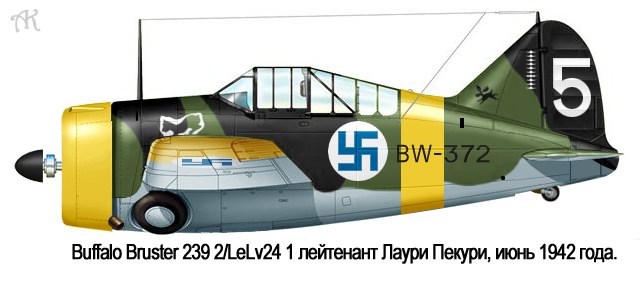
In June 1942, BW-372 was assigned to Lieutenant Lauri Pekuri. At 82 and a retired colonel, he gave this account of his last mission on Finnish television:
"We were engaged in combat next to the Russian airfield.... My wingman was Sergeant Anttila, a young fellow in his first fight. When I gave the order to disengage, Anttila couldn't comply. I looked and saw a Russian aircraft--it was a British-made Hurricane--behind him, firing from a somewhat long distance and scoring hits. Black smoke started to pour out of Anttila's aircraft, his engine stopped and he began to glide down. I managed to shoot down the Russian fighter and thus prevented him from completing the damage he had done."
"After this I disengaged from the fight. I flew on the deck at full power for 40-50 km.... I was awakened by bullets hitting my aircraft-- they made quite a racket--and my left wing tank caught fire. The Russian, I believe it was a Hurricane, overtook me at high speed just a few meters higher, and suddenly I found him right in front of me, practically filling my whole gunsight. Instinctively, I pulled the trigger, and the Russian aircraft caught fire and crashed into the woods."
His Brewster on fire and its Wright Cyclone barely ticking over, Pekuri made a wheels-up landing on the water. The plane flipped over, but righted itself sufficiently that it sank nose-down into the lake. (It was on its belly when Villiard's team found it. At Pensacola recently, an admirer noticed that the propeller blades were bent around the engine, showing that they had been spinning when the plane hit the water.) The young lieutenant evaded capture and made his way back to Finnish lines. He was married a few weeks later, his eyebrows still singed from the flames that had enveloped BW-372's cockpit.
Overall, Pekuri was credited with 10.5 Russian aircraft on Brewsters, making him the ninth-ranking Buffalo ace in Finland--and the world, of course. He later flew a Messerschmitt Bf-109, accumulating an additional 8 kills before he was shot down and captured in June 1944. He was released from prison camp at the end of the year, after Finland signed its second armistice with Russia, and in time became the first Finn to fly faster than Mach 1.0.
After looking at the battle damage shown in photographs of BW-372, Colonel Pekuri decided that some had been inflicted by explosive shells and that his attacker was actually a MiG-3 fighter. He died in 1999, after his airplane was lifted from the chill waters of Big Kolejärvi Lake, but too soon to learn its fate.
Special thanks to
Daniel Ford please visit his website and read the riveting story of what happened during the recovery of the BW-372 and the unbelievable international events that occurred afterwards. https://www.warbirdforum.com/pekuri.htm
INTRODUCTION
Several months ago I sold a completed kit to a man in N.J. and sincerely spent many days hand making the cradle to hold it secure and protected during shipping. He was delighted and we have formed a nice friendship ever since. He's a Lawyer, fellow model maker and Author. His book
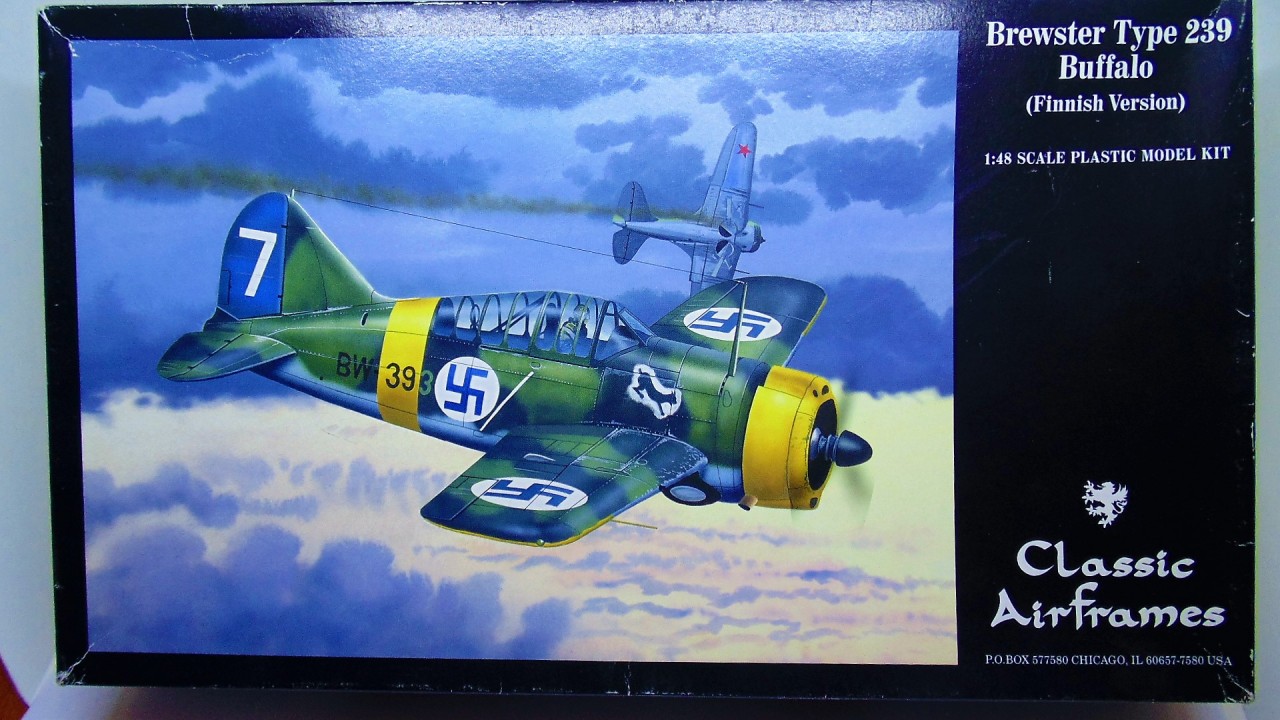
"Half a Wing, Three Engines and a Prayer" reads like a novel but is an account of real life "B-17s over Germany". Plus Brian D. O'Neill is a past contributor to AEROSCALE most notably for his 1/48 B-17 Vicious Virgin. I mentioned I was working on the BW-393 Brewster Buffalo since it hold the Guinness record for number of tallies. Brian briefly mentioned the history of BW-372 and I was instantly hooked after reading the sentence,
"After we pulled it out of the water they began shooting at us!". That got my attention and the more you read the story before the last mission and after you might become as enthralled as I was. This build is dedicated to Brian for all the hard work he's done with helping people legally immigrate to the USA for a better life. It's also dedicated to the fine people at the Finnish Air Force Museum for displaying BW-372 so prominently. This replica will have an excellent home on Brian's shelf for many decades and because of him this incredible piece of history has been resurrected, much like what happened in the late 90's and early 2000's when it was pulled from the waters.
THE NECESSARY COMPONENTS
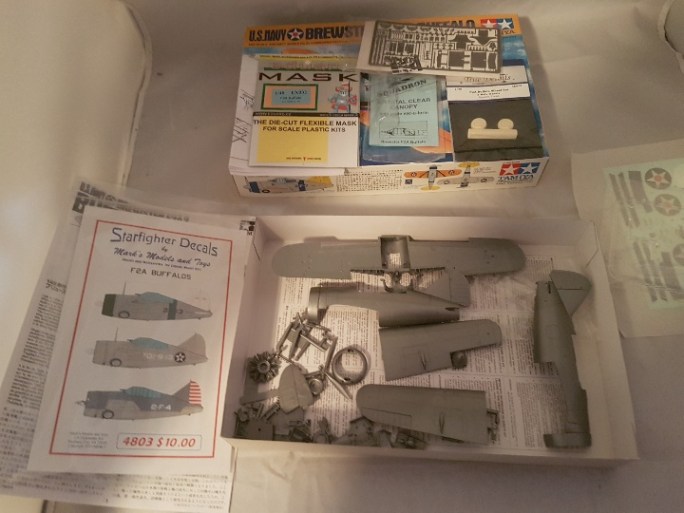
I won't bore you with in-box reviews and parts lay-outs. I will, however, be mentioning why these items were needed as the build progresses. In brief, I needed the Classic Airframes kit, another set of photo-etch for a standard US Brewster Buffalo, a Tamiya kit, two different sets of masks, some aftermarket items, rarely used colors, a couple of hundred scratch built parts, countless hours of research and emails and finally a lobotomy for deciding to do this... kidding, of course.
A fun fact is that the Finnish Air Force during WWII was comprised of Dutch, French, German, American and even Russian aircraft. Thus, they were accustomed to tinkering with different designs to suit their needs. This played a vital role in making the Brewster Buffalo the success it was for them, aptly naming it "Pearl of the north", because the Brewster product was so poorly made that they were the only war-time arms manufacturer to go belly up
during the war!
THE BUILD
The majority of the project is based on the old CLassic Airframes kit from the early 2000's. In the days of the "PE Wars" companies would include Photo-etch, resin, great decals and an interesting subject into their offering. This kit's plastic and fit, however, leave much to be desired yet had enough raw detail to work with. Needless to say, I had go over the instructions and make a plan which has room to evolve as I went along. With this kit, as I discovered MANY times, if one part is out of alignment then it throws the entire thing off. Thus, it became apparent that the lions share had to be built and then disassembled when I was happy with look. Enter
Microscale Micro Liquitape (yes that's the correct spelling). You let this stuff go off/dry and it becomes super tacky allowing me to take the parts apart or reconnect them if I needed to trouble shoot after doing some scratch building. It was a God send! Before anything was cleaned up or cemented test fitting began.
ENGINE AND NOSE COMPONENTS
In the spirit of
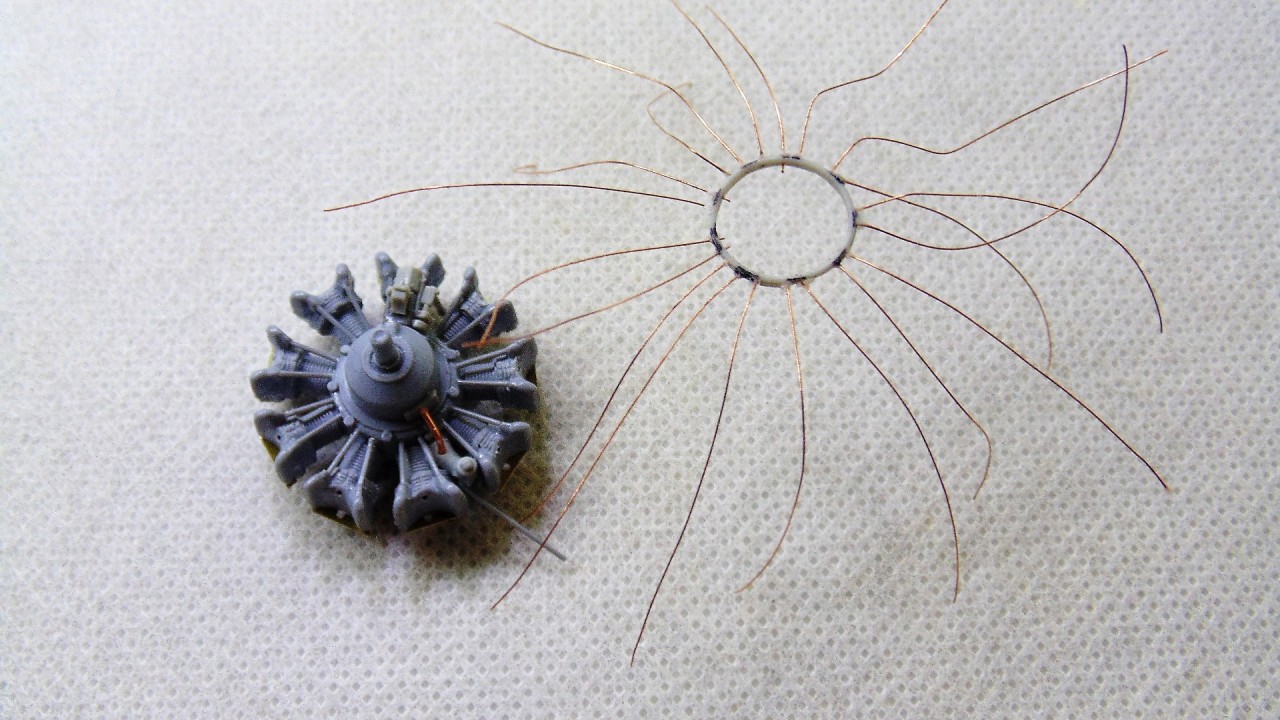
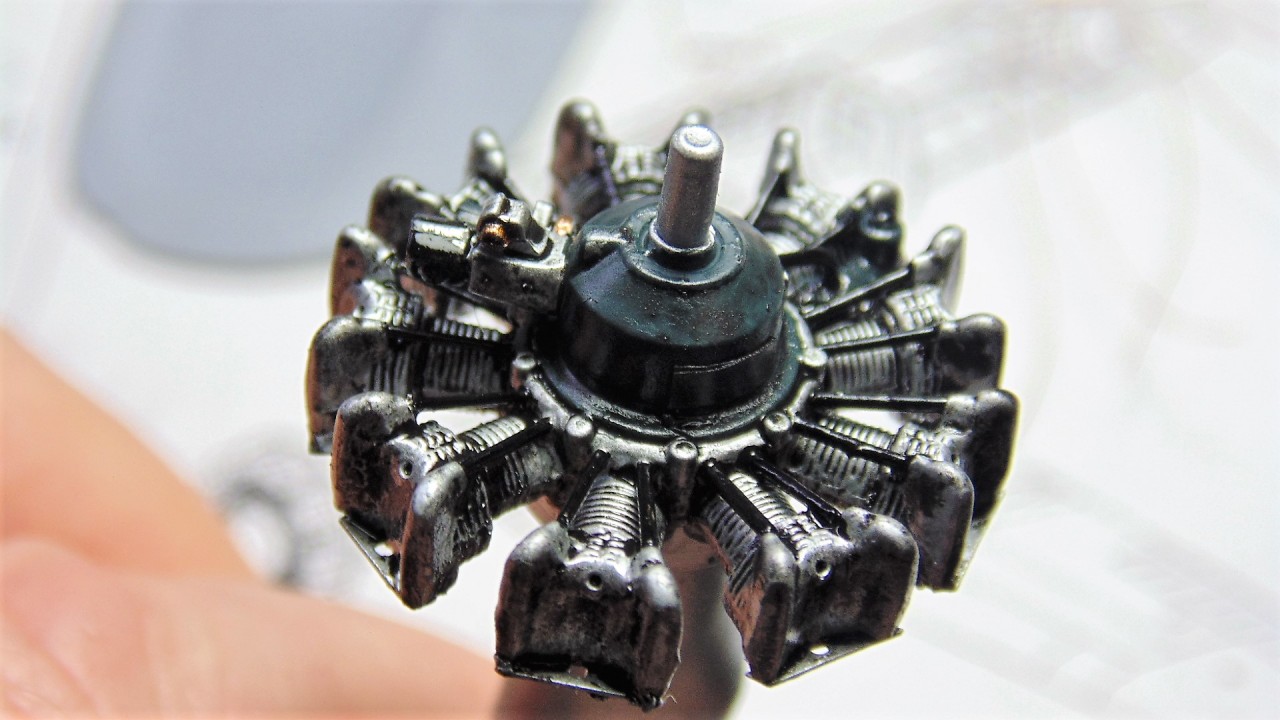
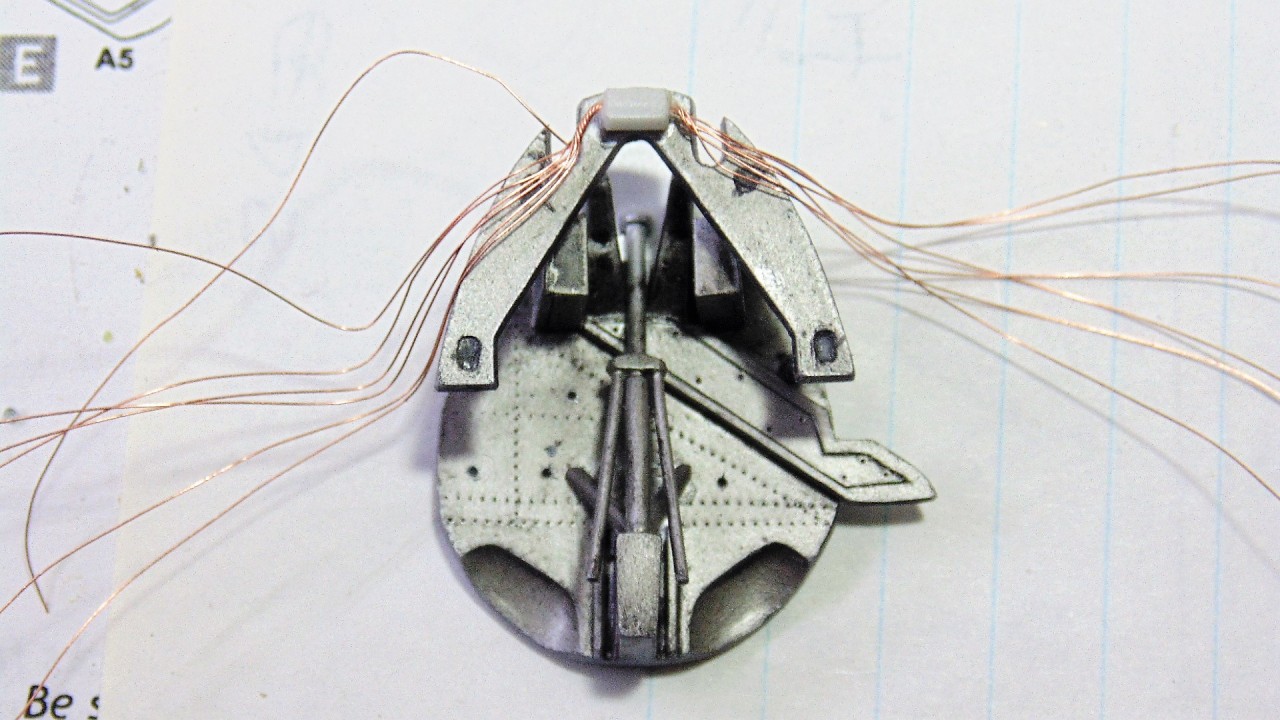
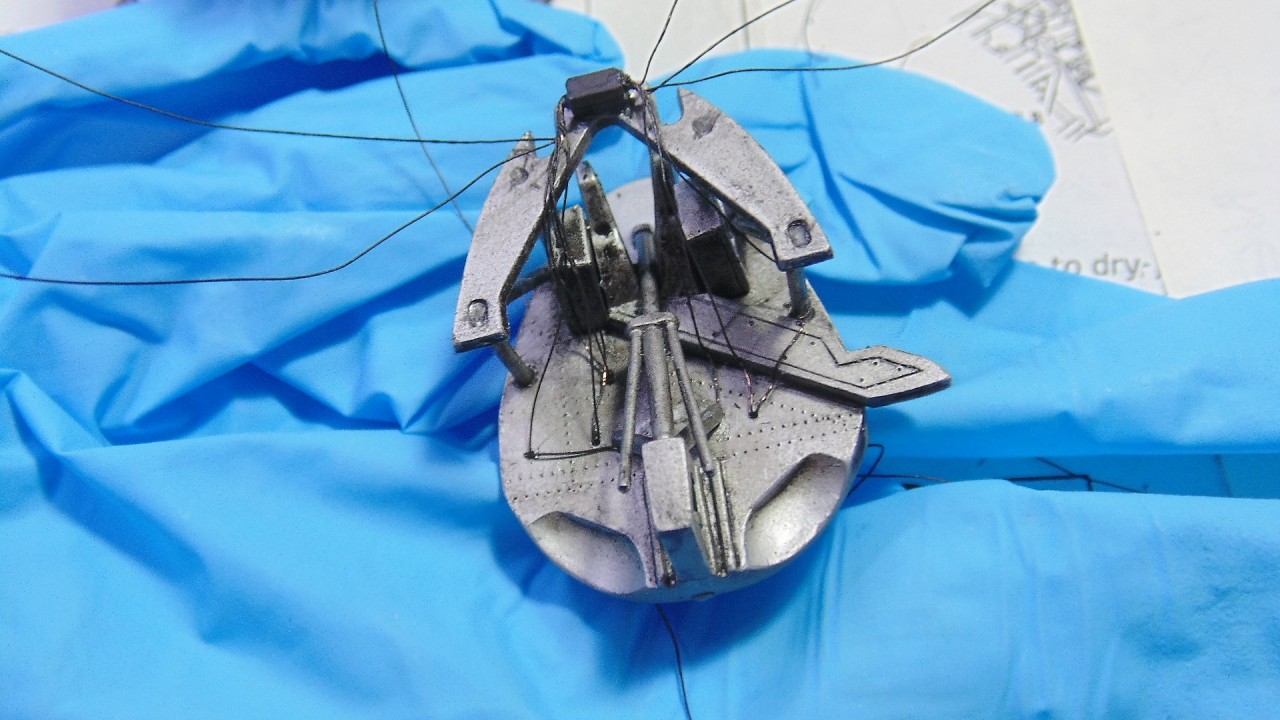
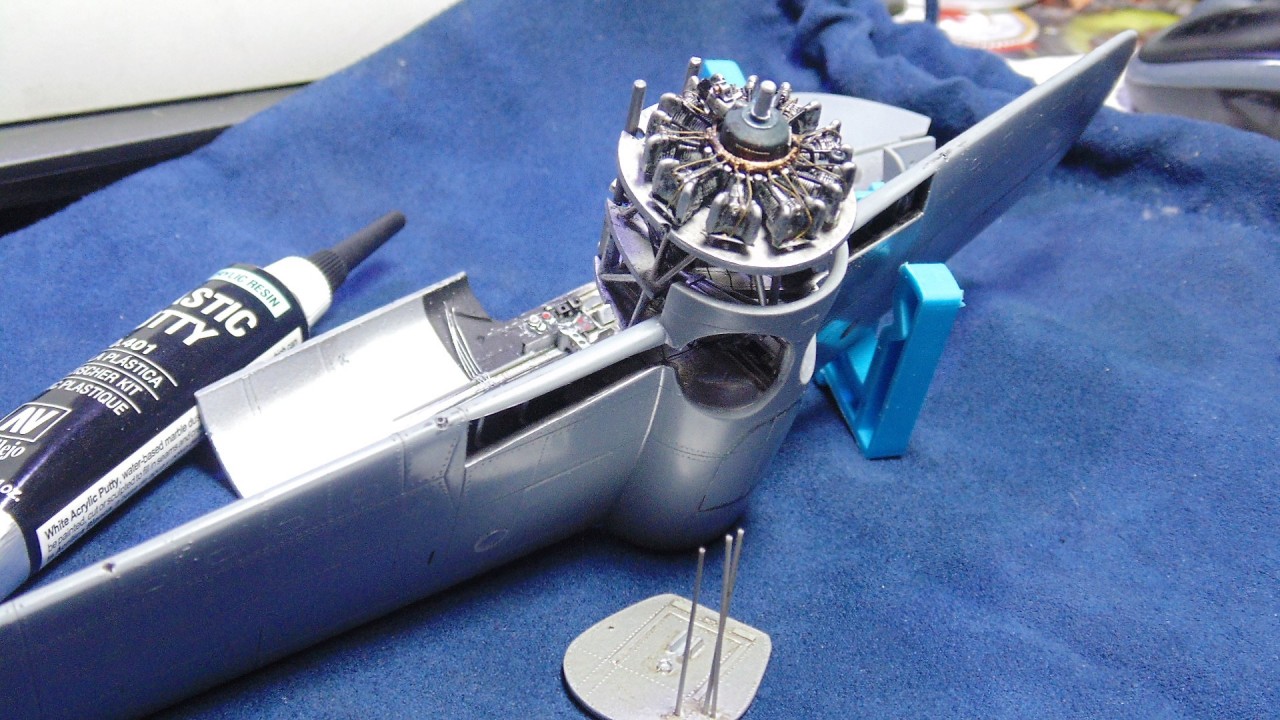
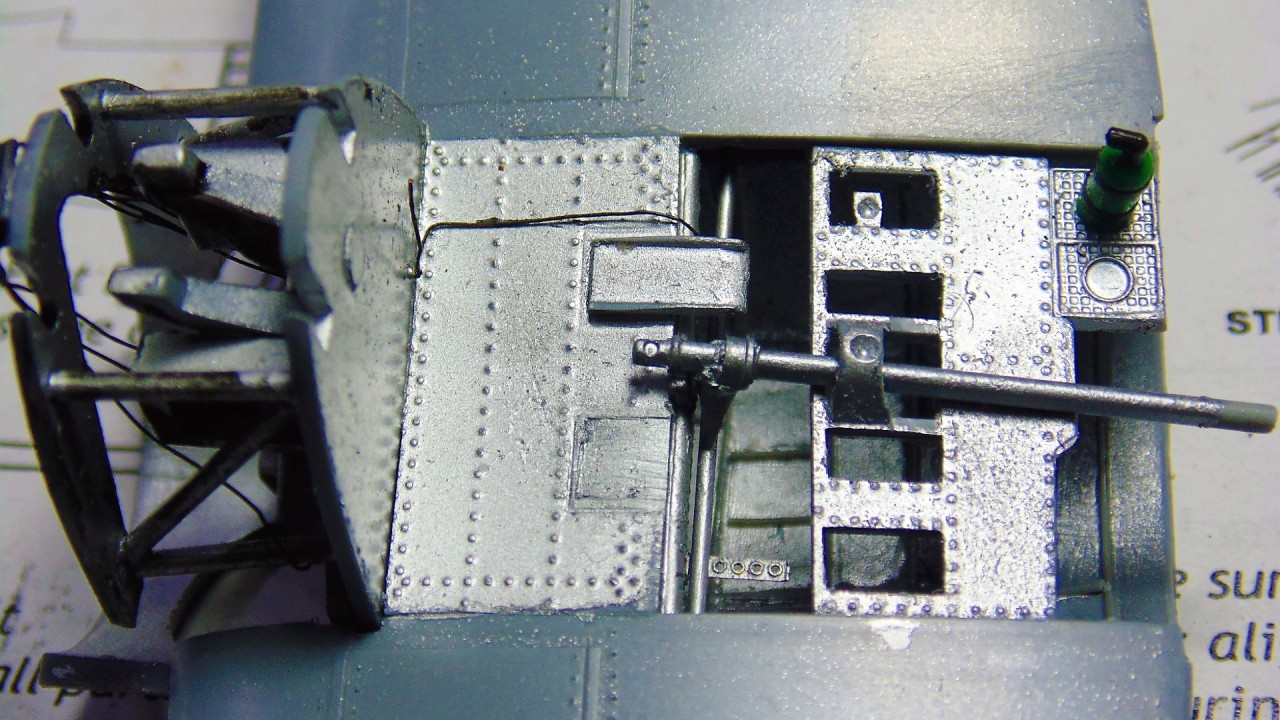
Full disclosure the ignition harness is outside
the engine push-rods. The Wright R1830 came with this component on the outside and later inside. I may swap it out later for a resin, but it was great practice to wire, make PE parts and scratch build tiny bits. Prior to wiring 502 oils were used as a wash over Vallejo steel and aluminum with Tamiya medium blue for the reduction gearbox. The
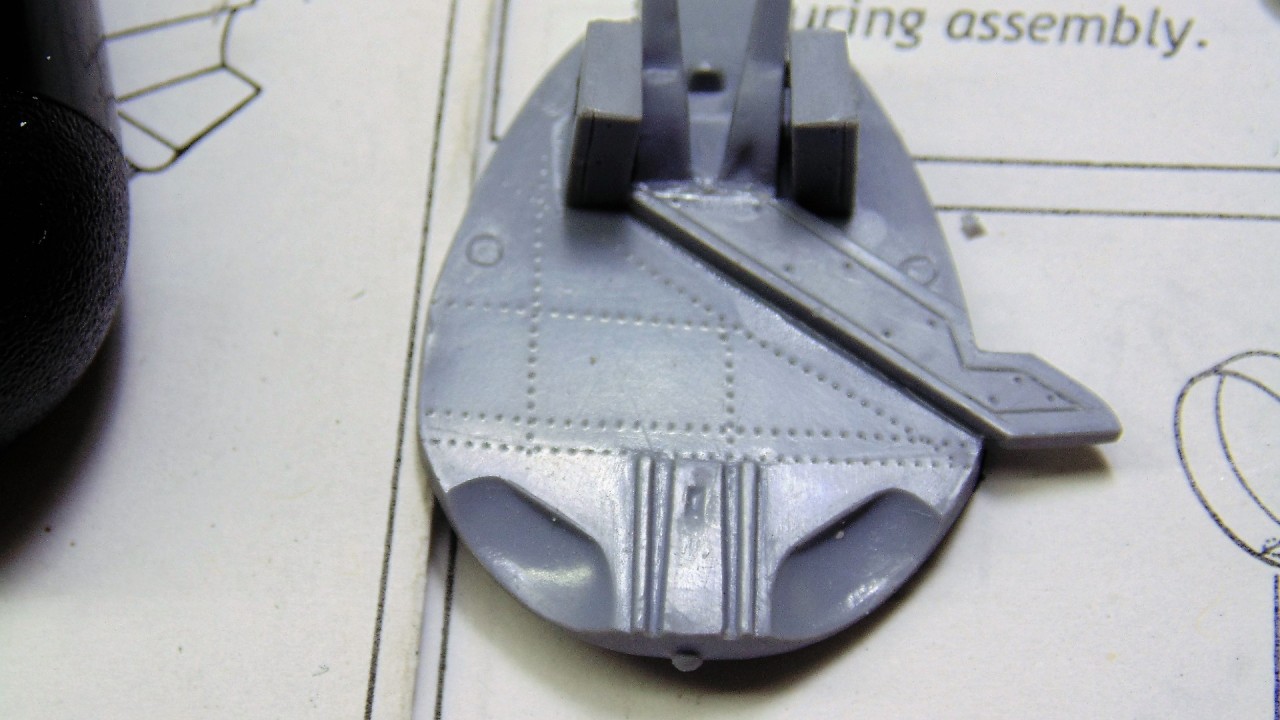
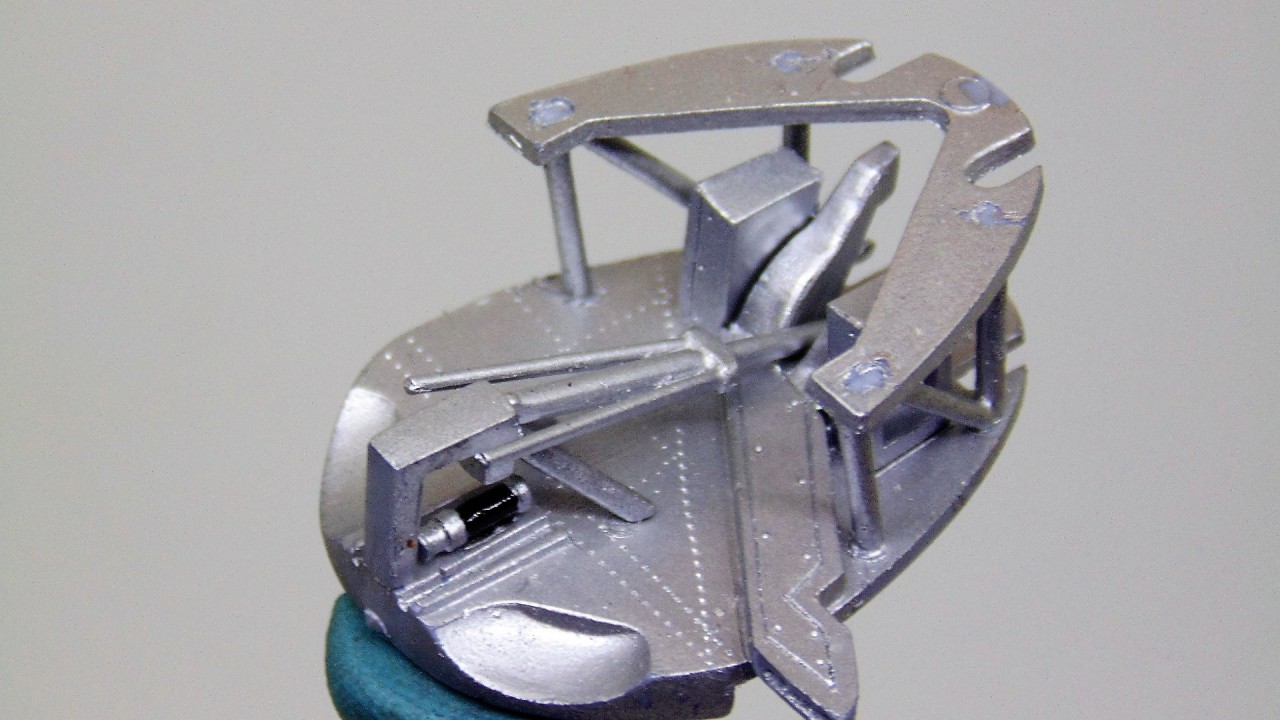
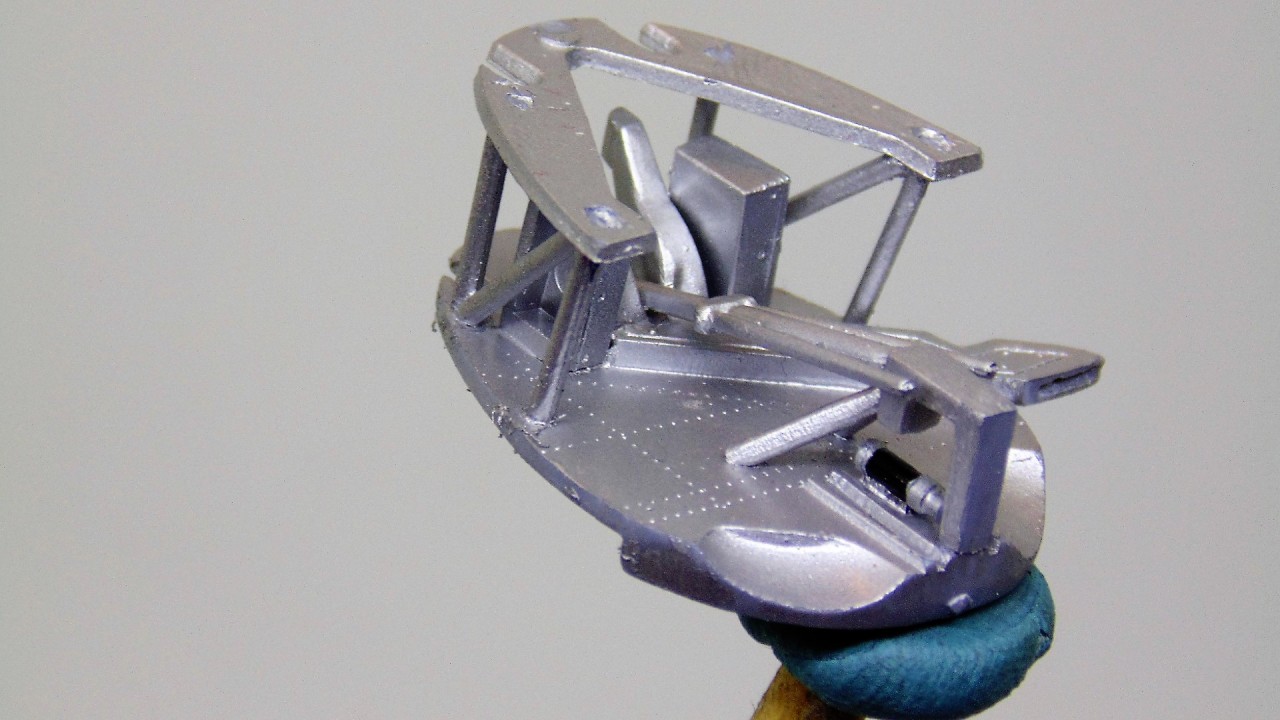
Ammo and spent shell shoot bulkhead are easily seen when the gear is down so I inscribed panel lines, made access screw holes and riveted it to add some life. This as well was sprayed in aluminium and a black wash added. As the research continued the parts being altered moved with each page or image. The
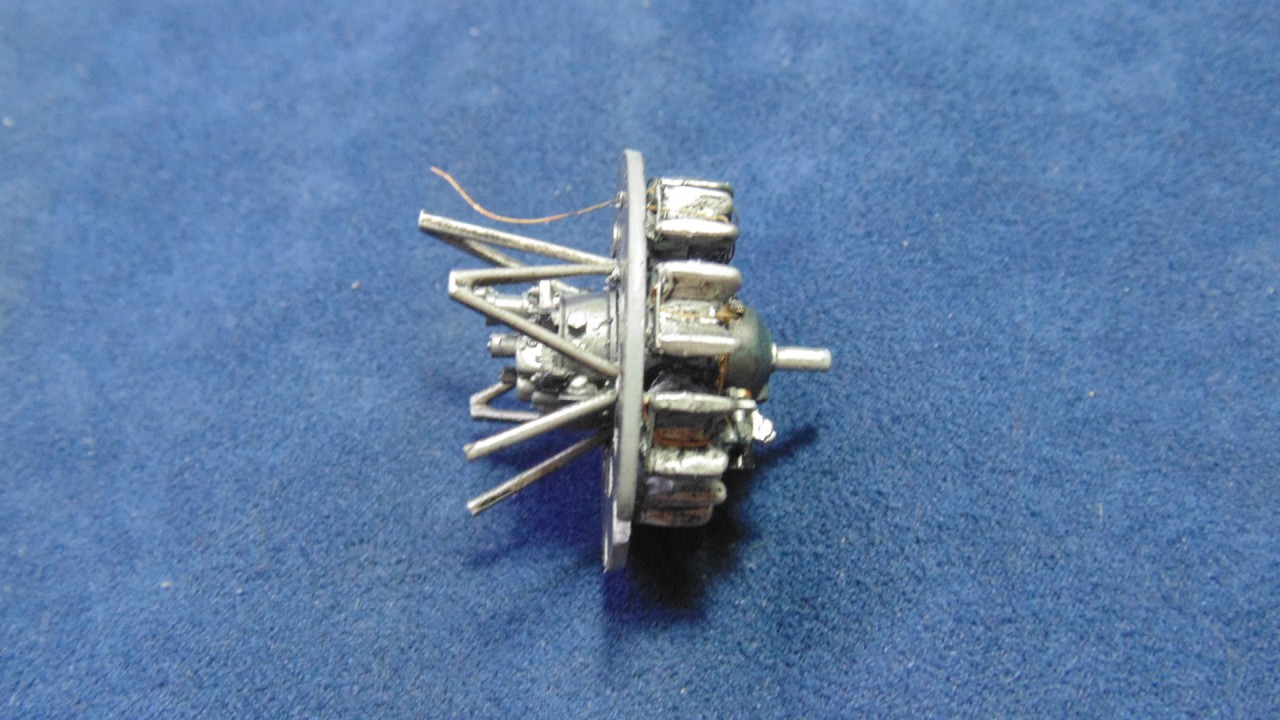
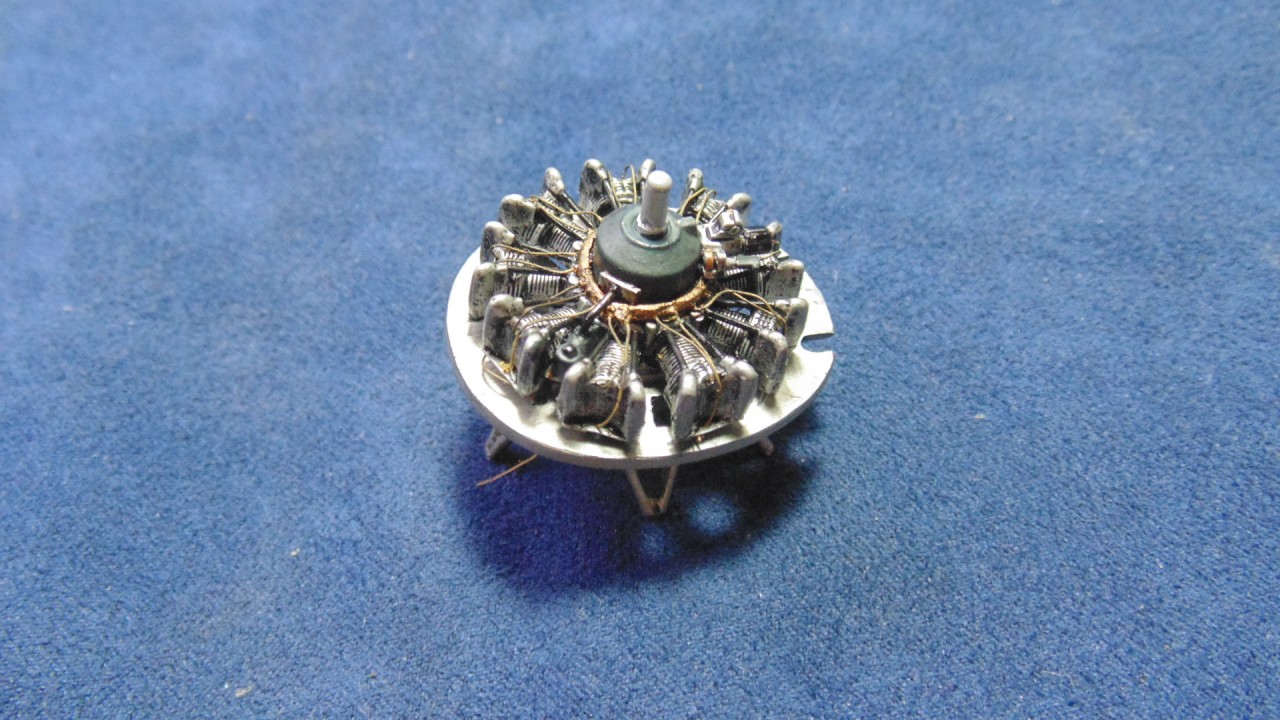
propeller spinner on both kits are awful so I scratched some tiny frames and connecting bolts. It isn't perfect, but I could not find an aftermarket option. The nose machine gun and engine mounting bulkhead has a lot of wiring and piping so I scratched an oil tank and added some wire to hook up to the engine. The engine components cluster is a very nice piece of detailed resin and can easily be seen when you under the model. The mounting frame, though, was very difficult to attach to the model. The close ups are to show the spacers which needed to be added. If you trim the lower mounts then the engine sits back to far. The
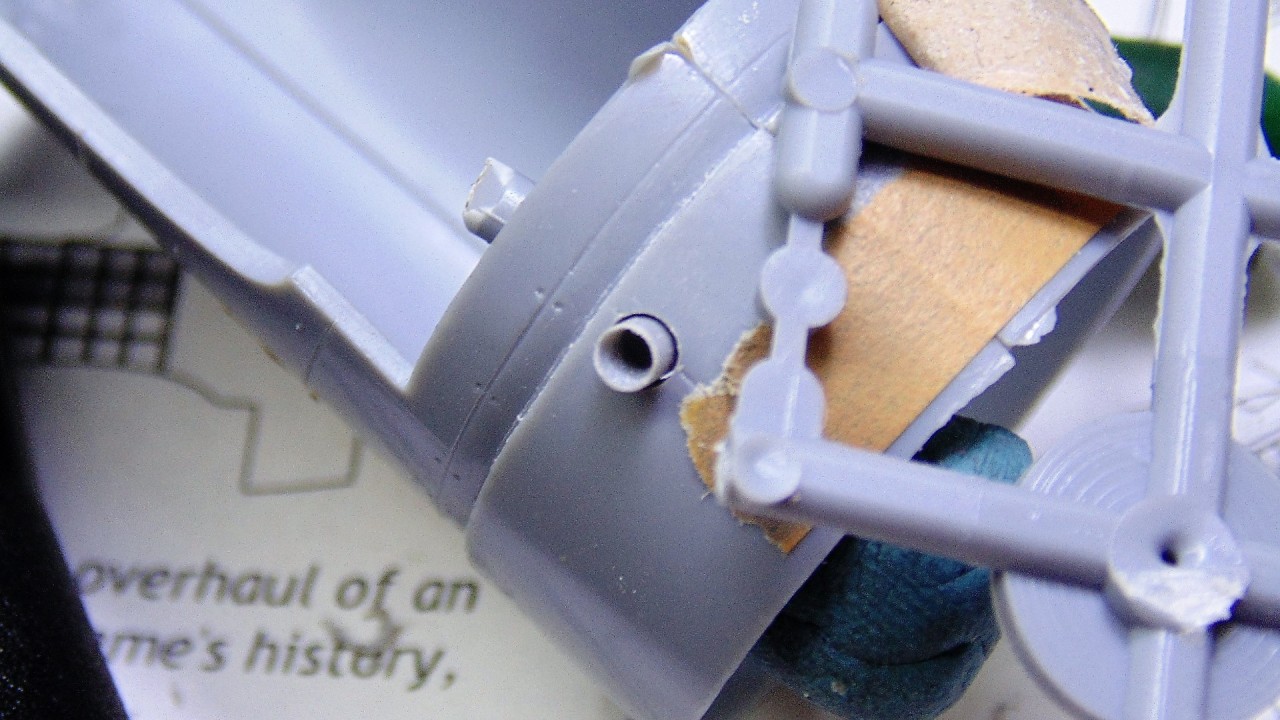
Hand Crank Access is an add-on done with a few sizes of micro drills and will be sanded back later, but I think it's a nice touch.
EXTERIOR COMPONENTS
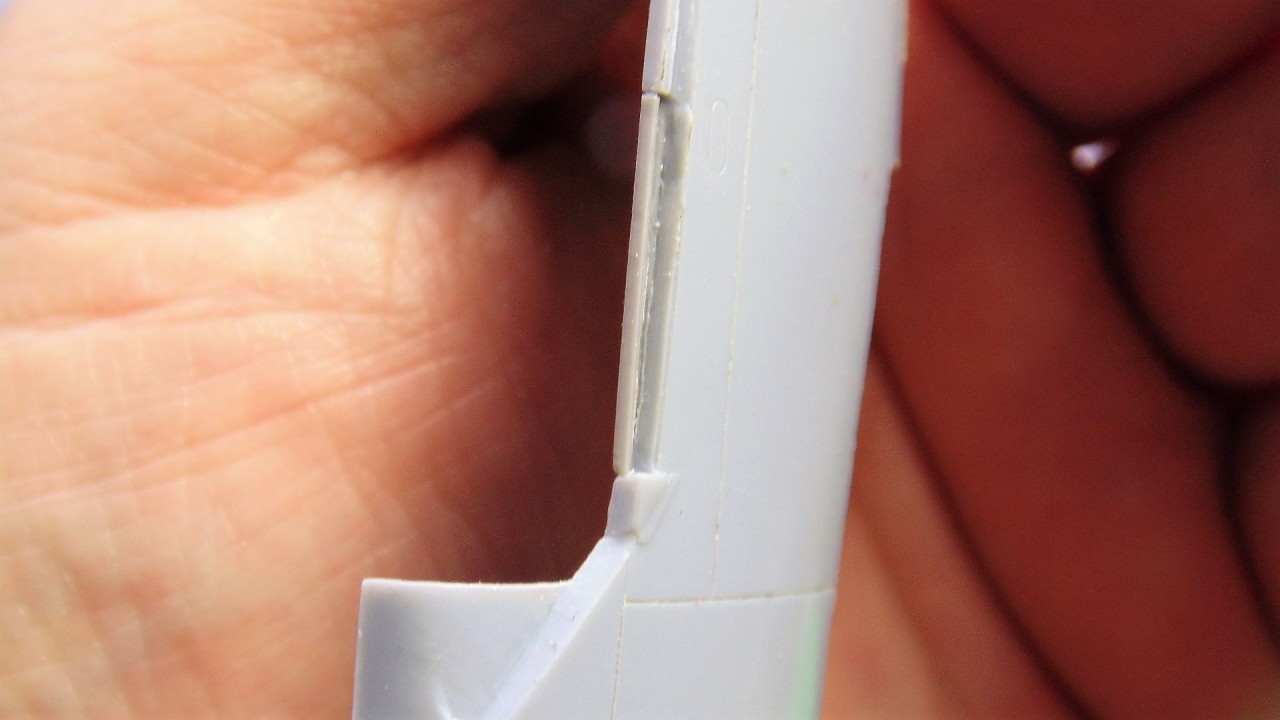
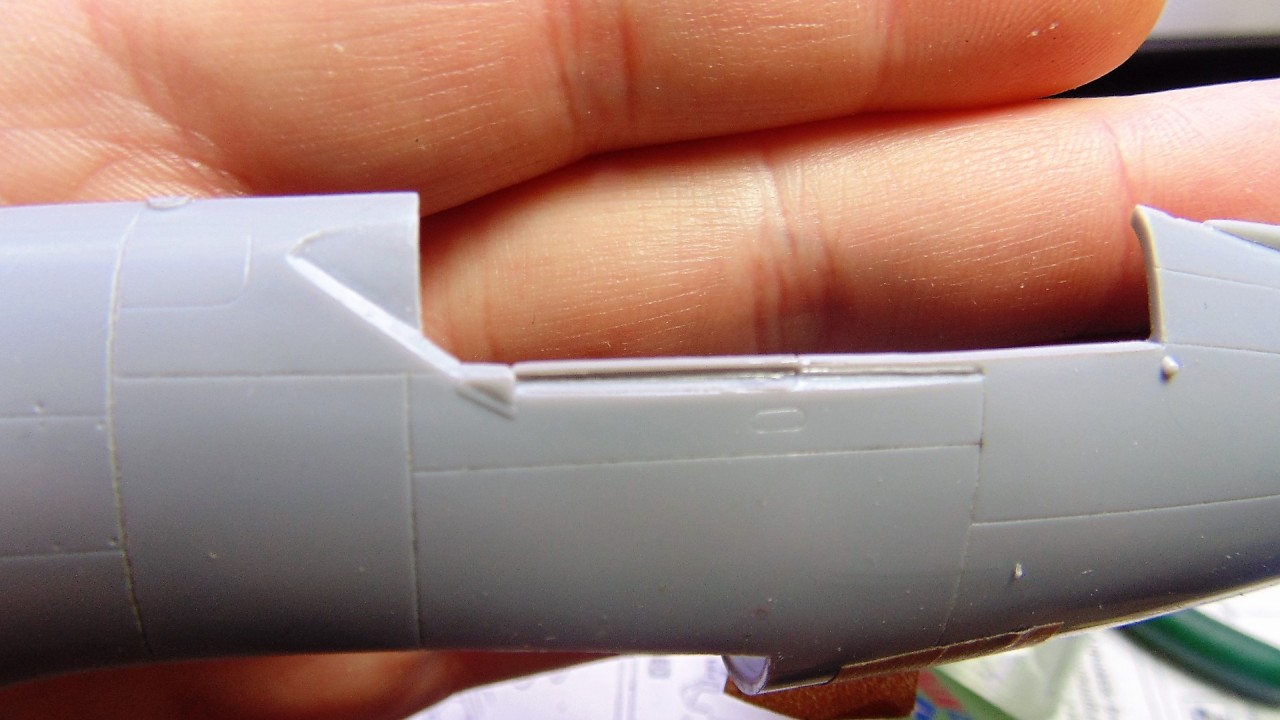
Then I switched to some cosmetic work by adding the
canopy guide rails which are missing from both kits. This took some time with a Tamiya razor saw, my UMM SCR-01 scriber and fine sanders. Since the canopy will be open it made sense to scratch build these parts.
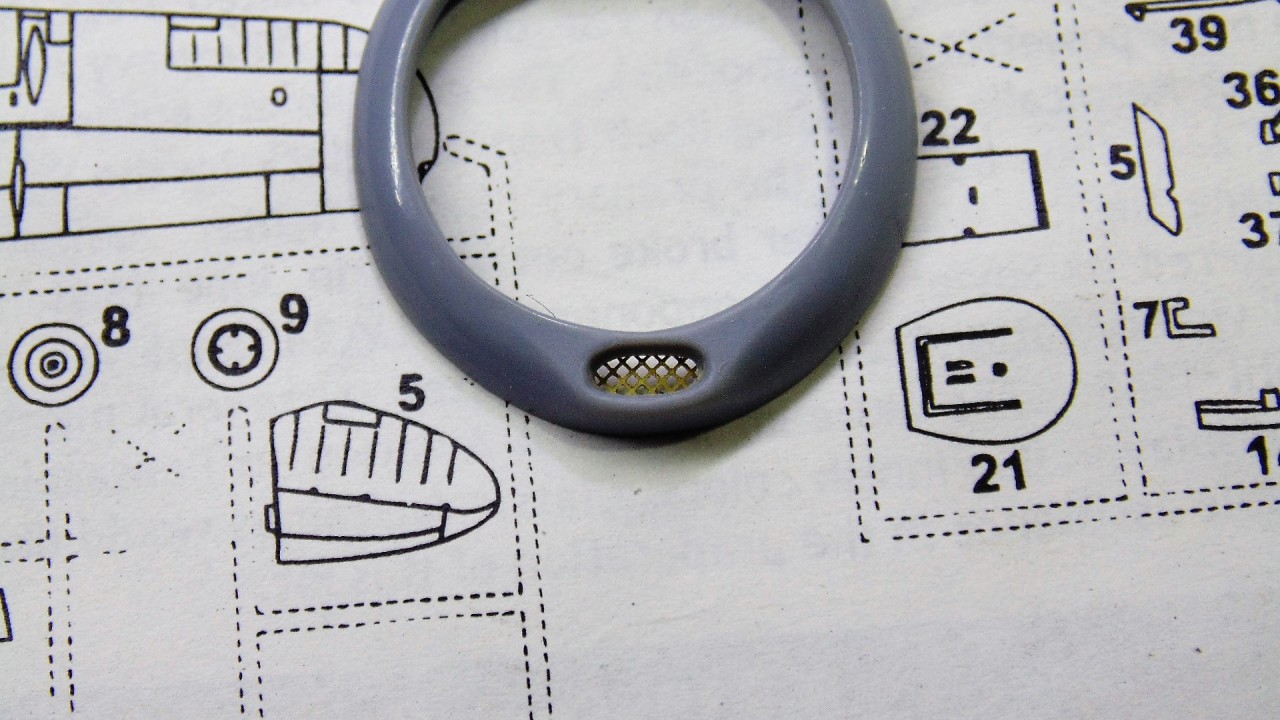
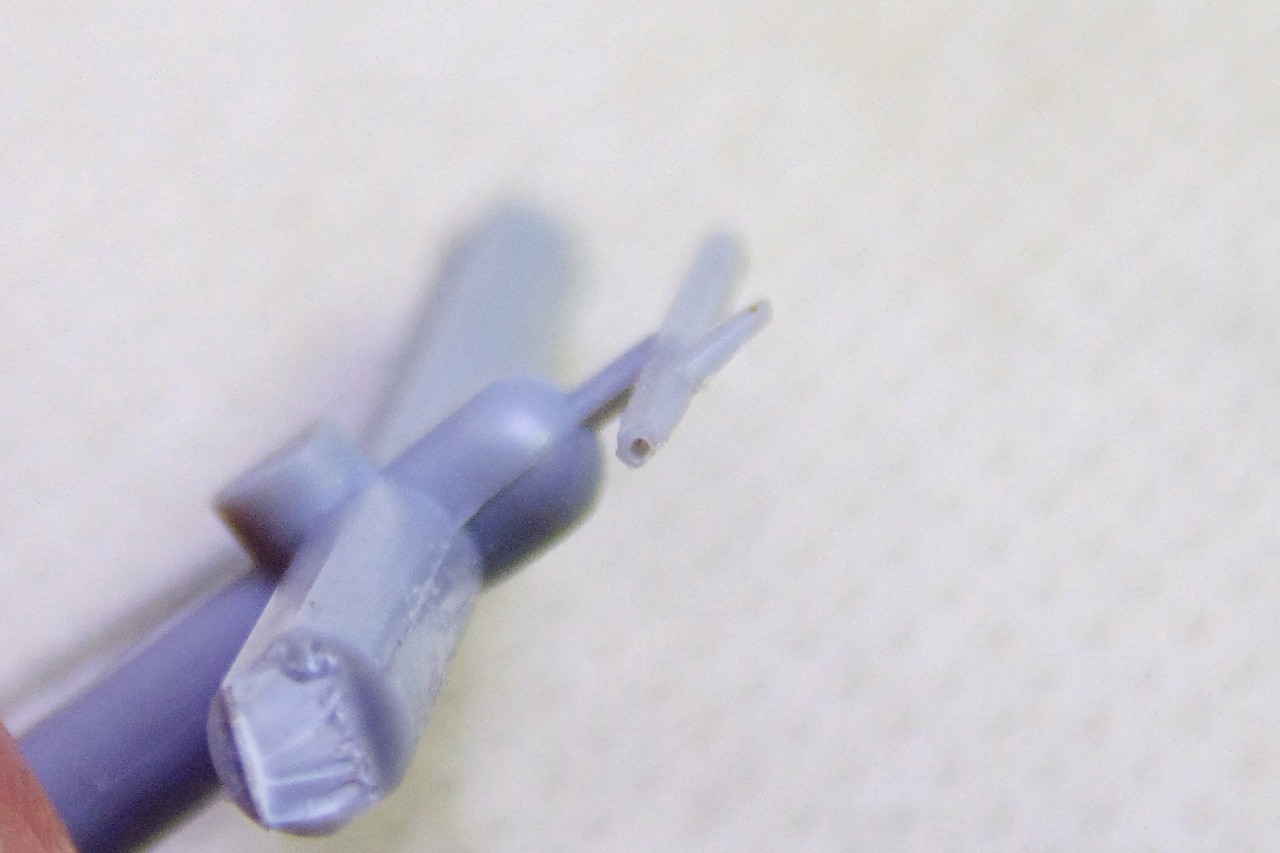
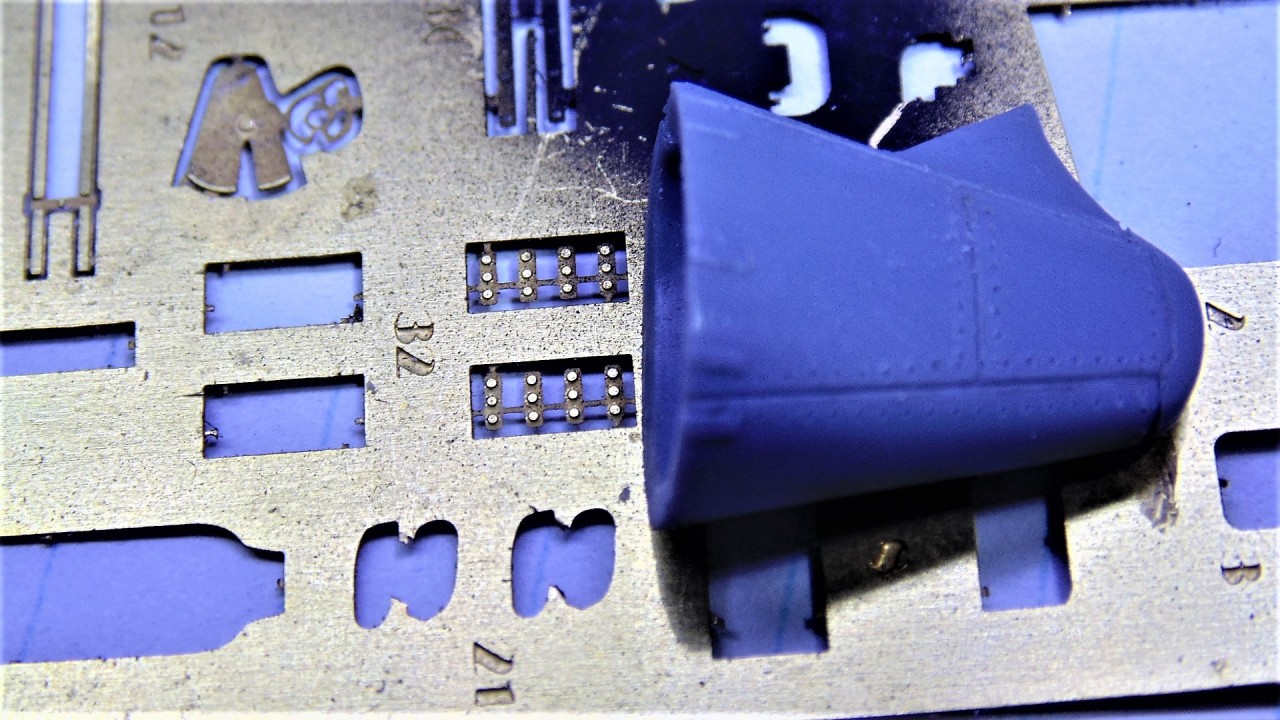
The exhaust pipes on both kits are woeful so I drilled out and sanded some sprue then put a backing inside the cowl after drilling a hole. The
nose intake bezel was needing a lower screen, but the Eduard PE piece was too small, so one had to be made. The 50cal wing machine guns were only bits of plastic so I drilled them out. This would ultimately be the pivot point to align the top and bottom wing halves since there are no connection pins. The rear navigation light hub on the tail is connected, in real life, with 10 small riveted straps of metal. The kits just have rectangular bumps. I used some leftover PE bits to replace them. The
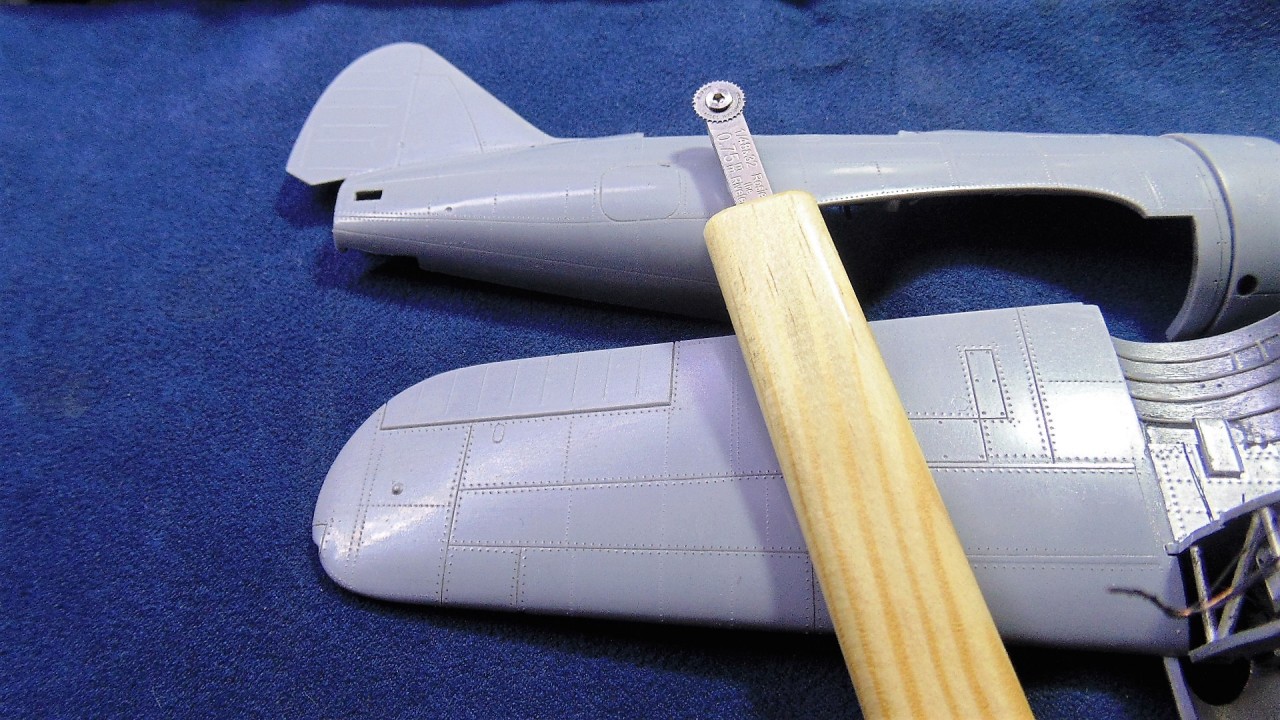
wings and fuselage were riveted prior to assembly and then filled with homemade polystyrene filler to make it easier to touch-up later.
Final riveting and sanding are done once all the filler has completely hardened. The rosie the riveter product is nice, however the holes are NOT round. Sanding the surface as flush as possible makes a huge improvement in the look of them but you have to wash out the dust with some warm soapy water. This also gave me a clean surface to try a new product for me. VMS (Vantage Modelling Solutions) is a Polish company who make a variety of finishing products including a renowned Cyanoacrylate (CA/superglue). It has high sheer strength and claims to vastly reduced parts "pinging" off. Have a look for yourself
https://www.vms-supplies.com/. The
tail service and light hub straps were just raised nubs so I used some spare PE to recreate the identical thing. Now that all the major parts of the exterior are attached it's time to
prep for primer. I did a careful look at what needed to be improved then completed another round of sanding everything flush and washed it down again. The Stynlyrez primer went on nicely and as expected showed some areas to fix. Next came another round of sanding. While the primer is a good product it is NOT smooth enough for my liking and I don't want the surface texture competing with the rivet and seam-line work for the viewers attention. On went the engine
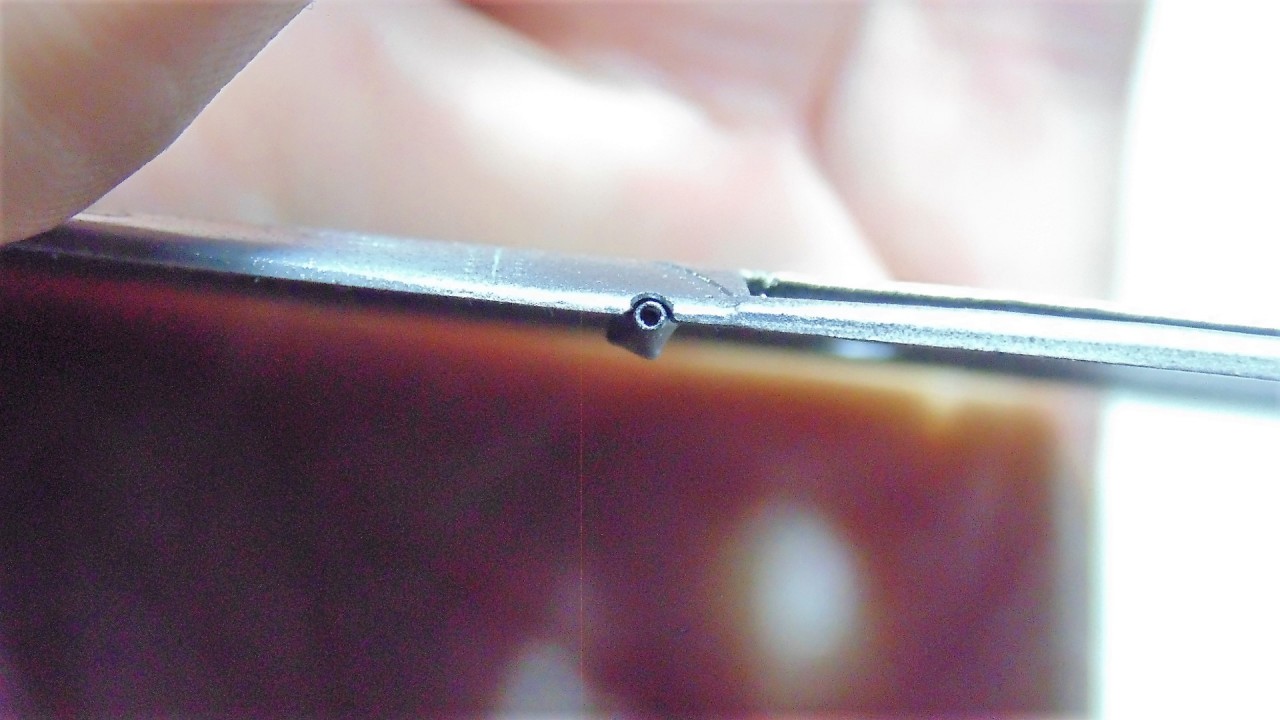
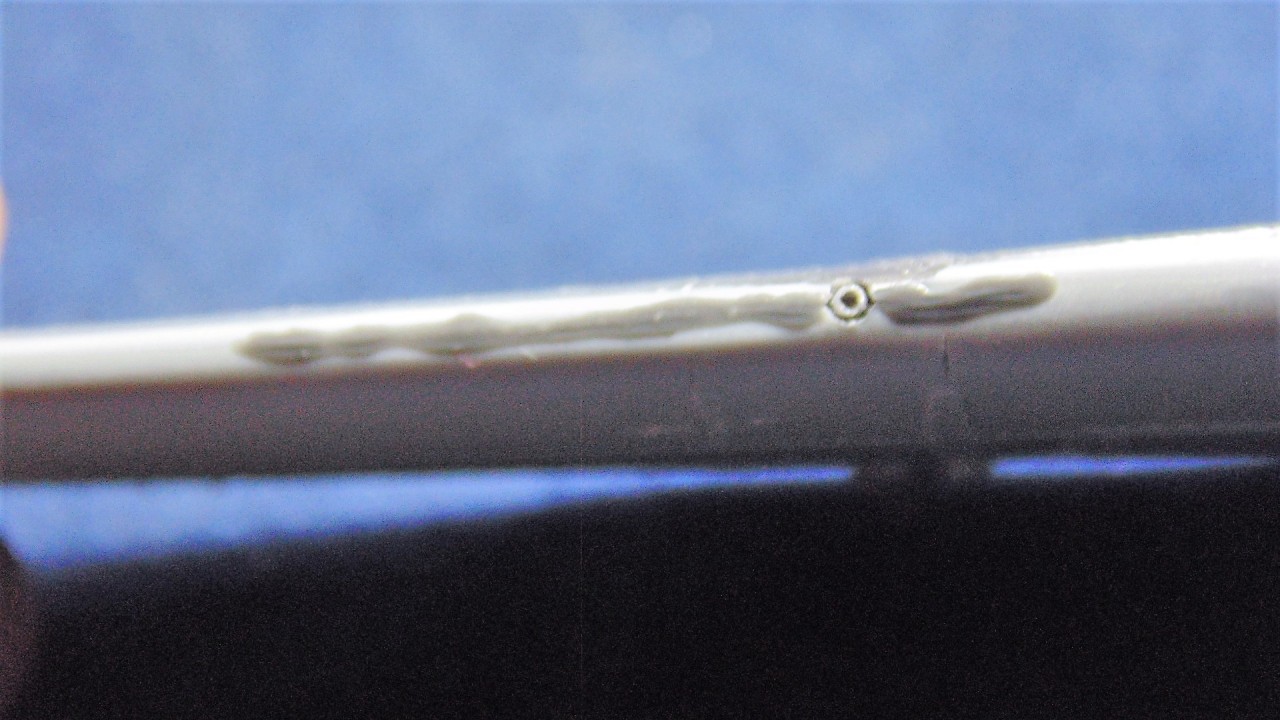
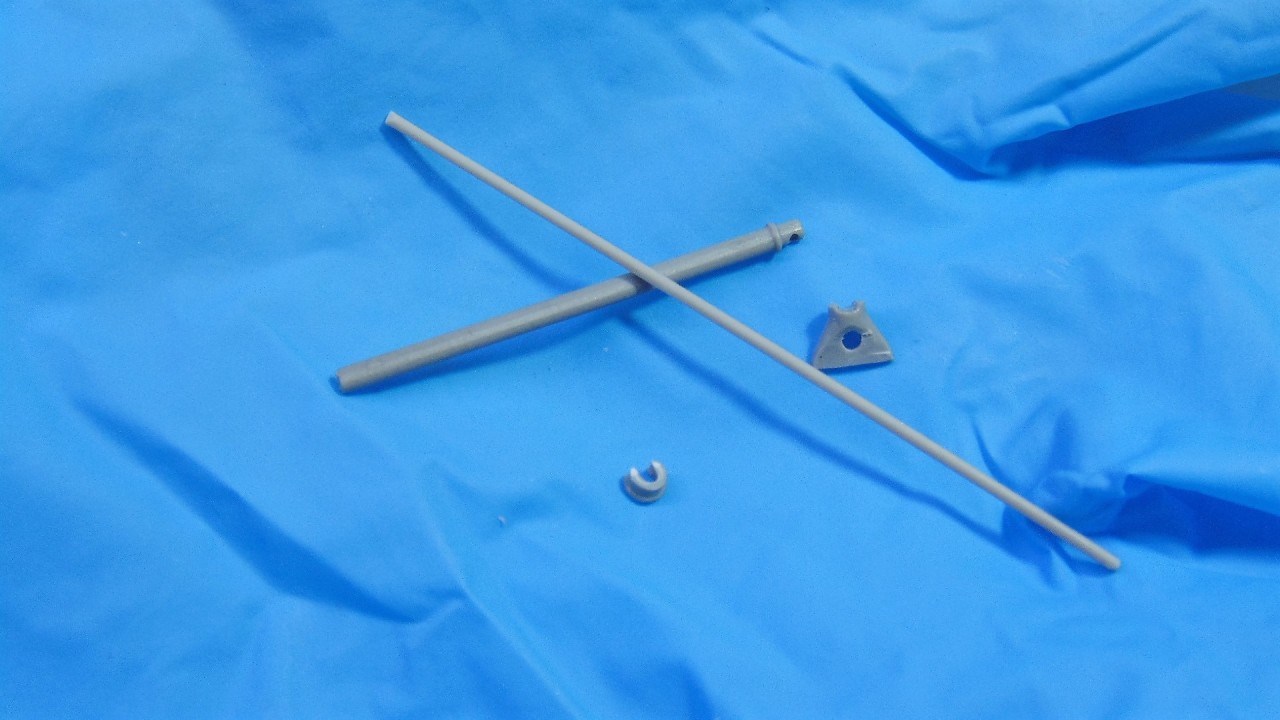
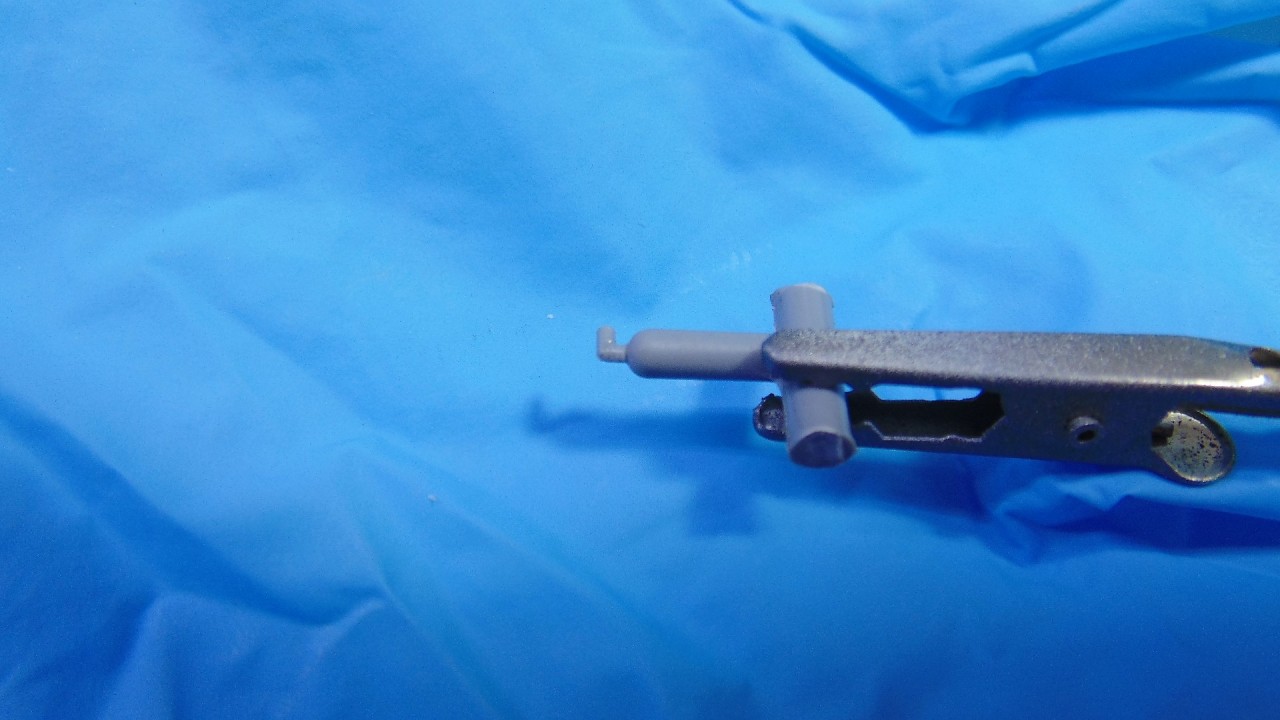
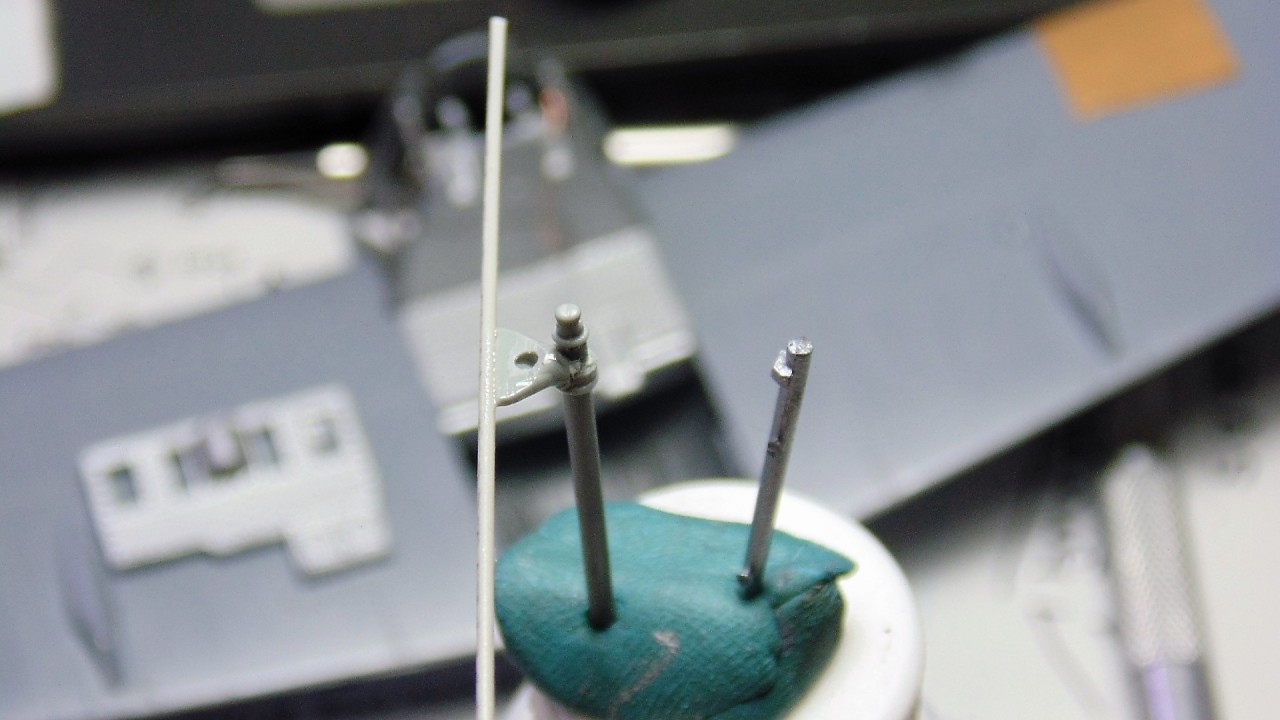
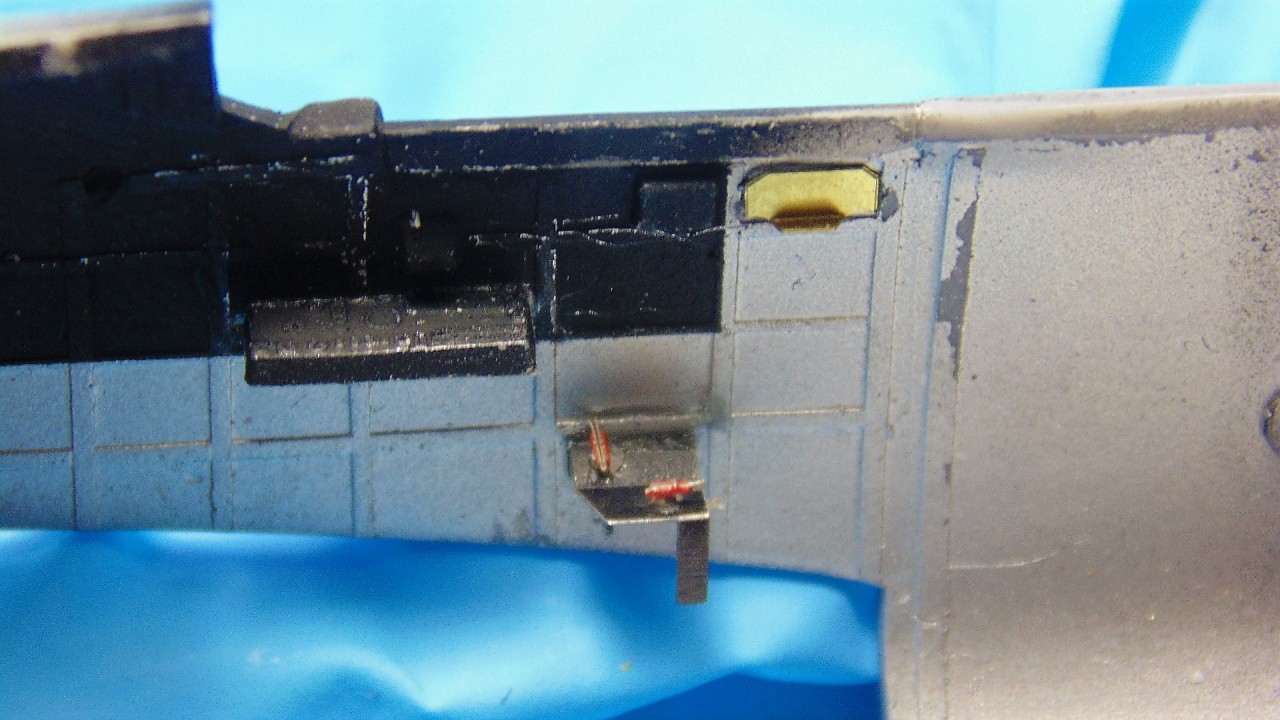
nose bezel and raised parts over the guns. Next was to bore out a notch for the
forward antenna mast.
COCKPIT
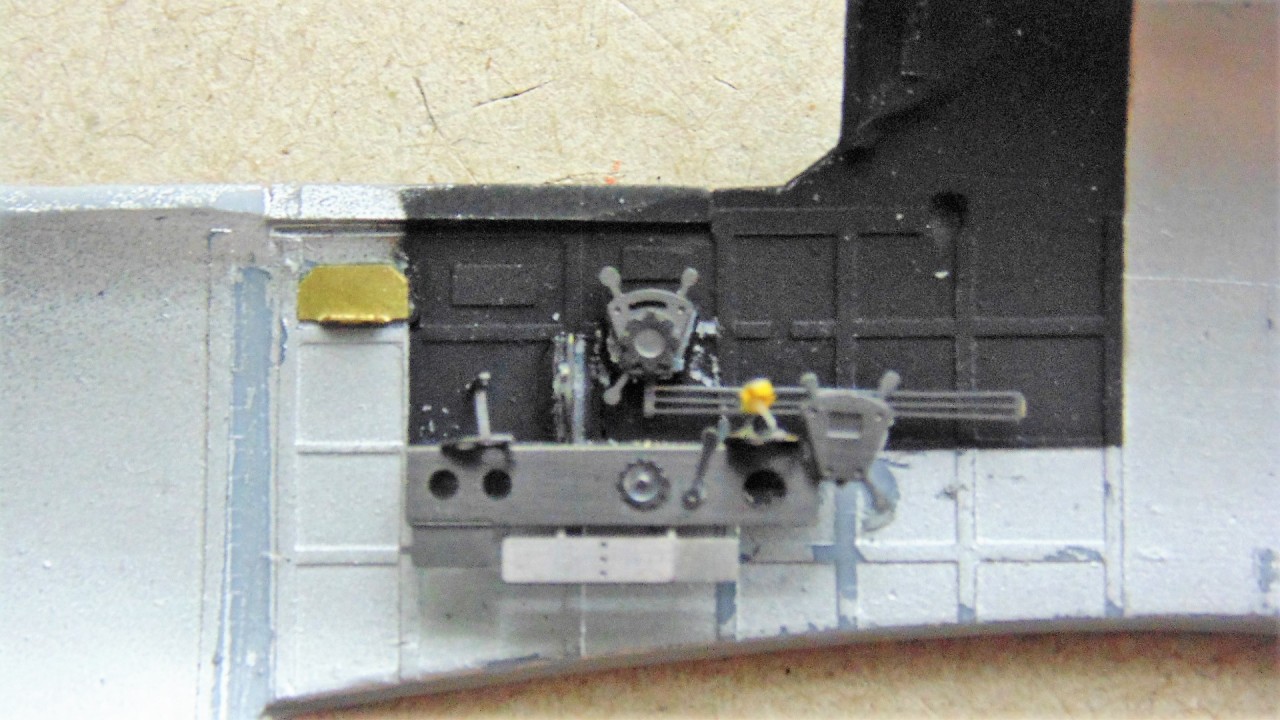
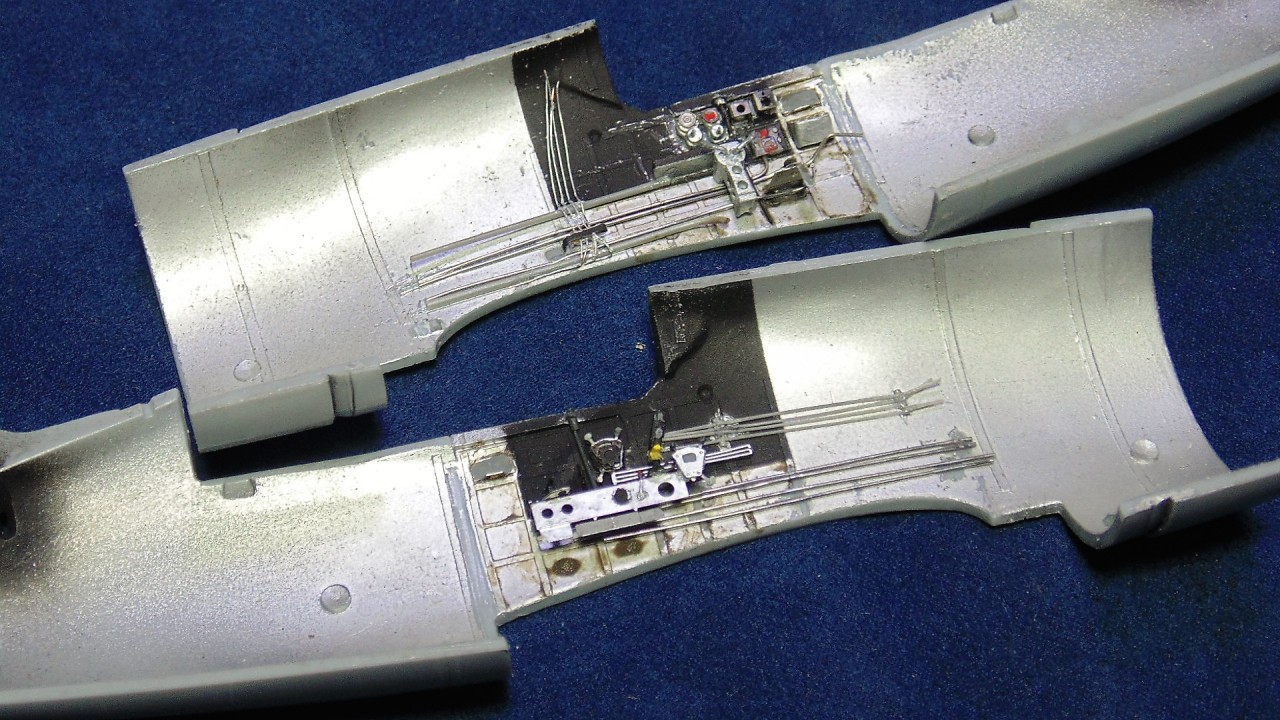
The instructions call for the sides to be aluminum with flat black areas where the instruments, switches and controls are. This is accurate according to the Finnish Air Force Museum's great 360 degree view inside the cockpit. That turned our to be an invaluable resource for scratch building small components. When these aircraft arrived in Finland they were void of weapons and components. The Finns had to install a lot of gear themselves which delayed their entry into "The Winter War" (Nov. 1939- Mar. 1940) with the USSR. The original aluminium
seat was replaced with a tall steel high-backed chair and an additional steel plate behind the pilot's head. This, in fact, saved Lieutenant Lauri Pekuri's life on that very day BW-372 went into the lake. Again, a lot of sanding to make it as close to scale and the references. Reference photos show a unique harness set-up and I used burnt iron paint for the scratches. The seat will be finished and installed at the end of the build. In the museum the
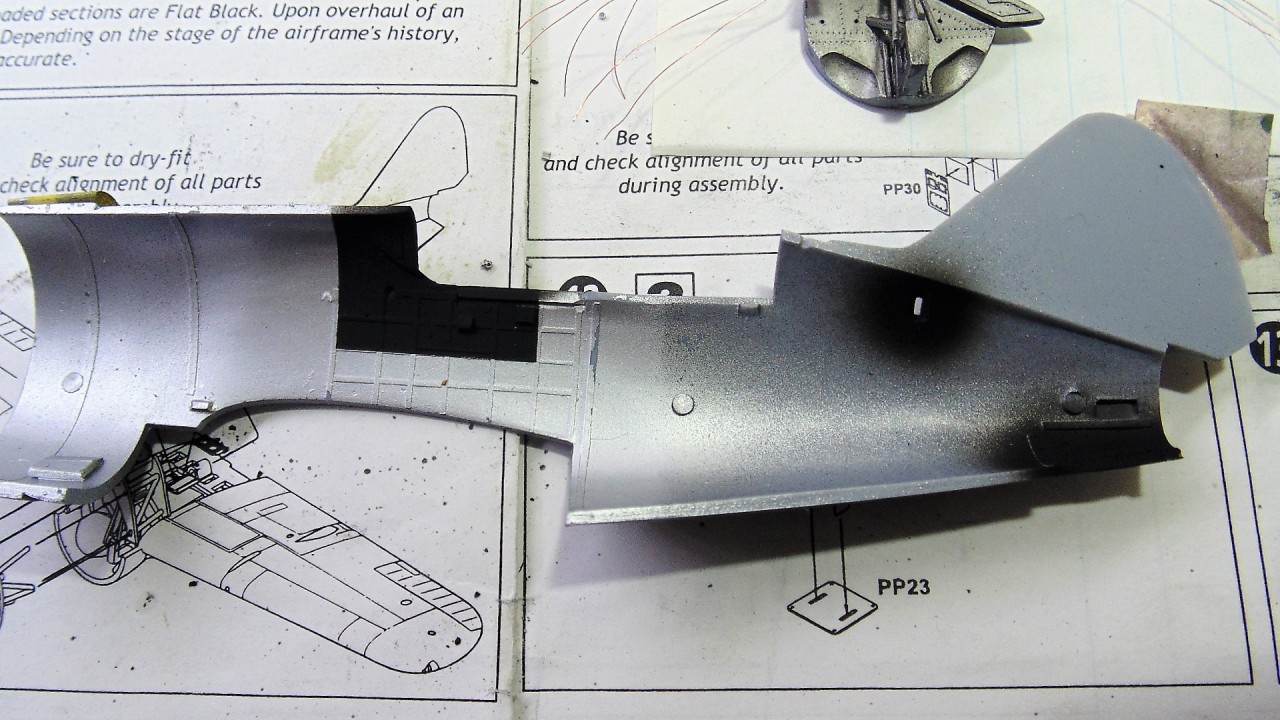
foot reset area has the starboard one missing so it was removed. These kit parts needed trimming to and some work to assemble and fit. The next series of photos show more of the scratch build to look close to the real thing. The
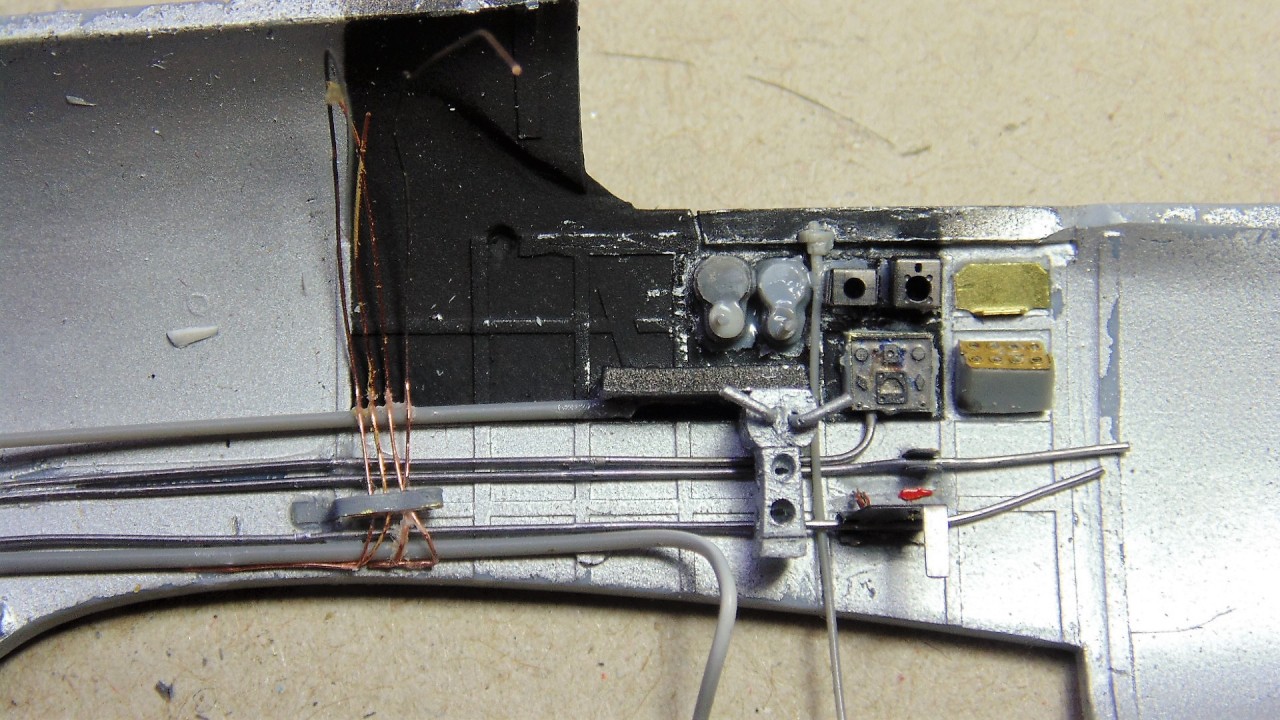
belly ribbing was added because you can see it, all be it very little, and adds more dimension. More spare PE and parts from the aftermarket PE set are used to make the cockpit look authentic. For the
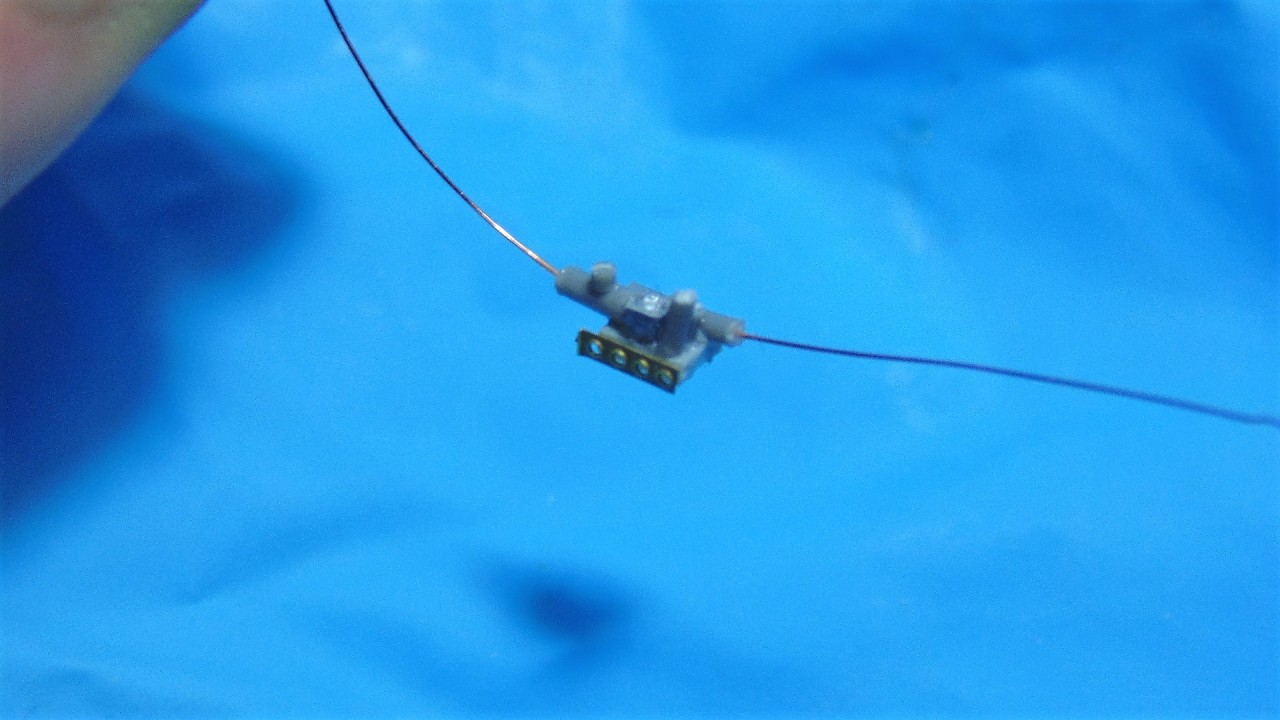
wiring and hoses a combination of 0.3mm led wire, copper wires and stretched sprue gave the effect. The
gas tank was scratch built and the 1st Aid box was photo-etch part. The
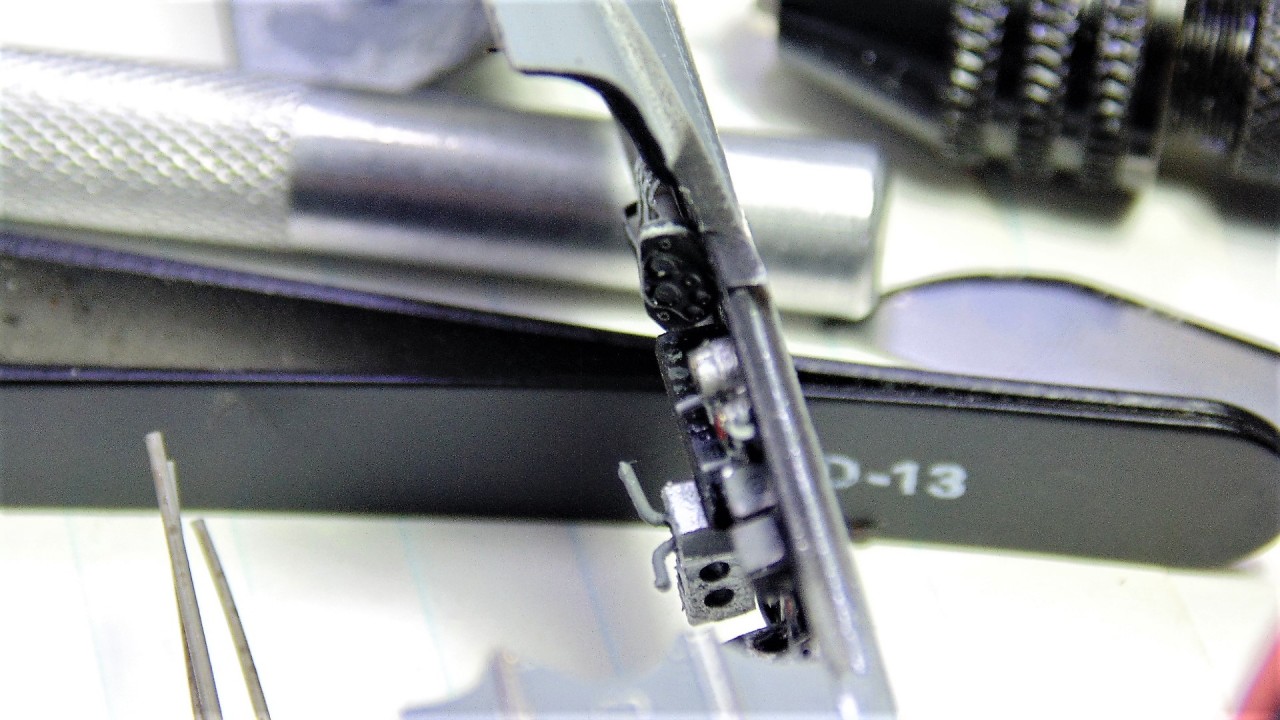
rudder peddles shaft is not wide enough to reach so I drilled a hole one end and added some length to the other side to be able to cement it. It is NOT perfect but will suffice. The
instrument panel was only temporarily tacked on for looks then removed because I have to do more work on the sun visor and gun sight.
BW-372 had an
extended sun-visor with an inset gun-sight. I have some super thin PE left over and made my own. The instrument itself is a very nice resin bit yet needs a clear reflector cut to size. Sadly the sun visor plan had to be abandoned due to lake of space!!!
WHEELS AND UNDERCARRIAGE
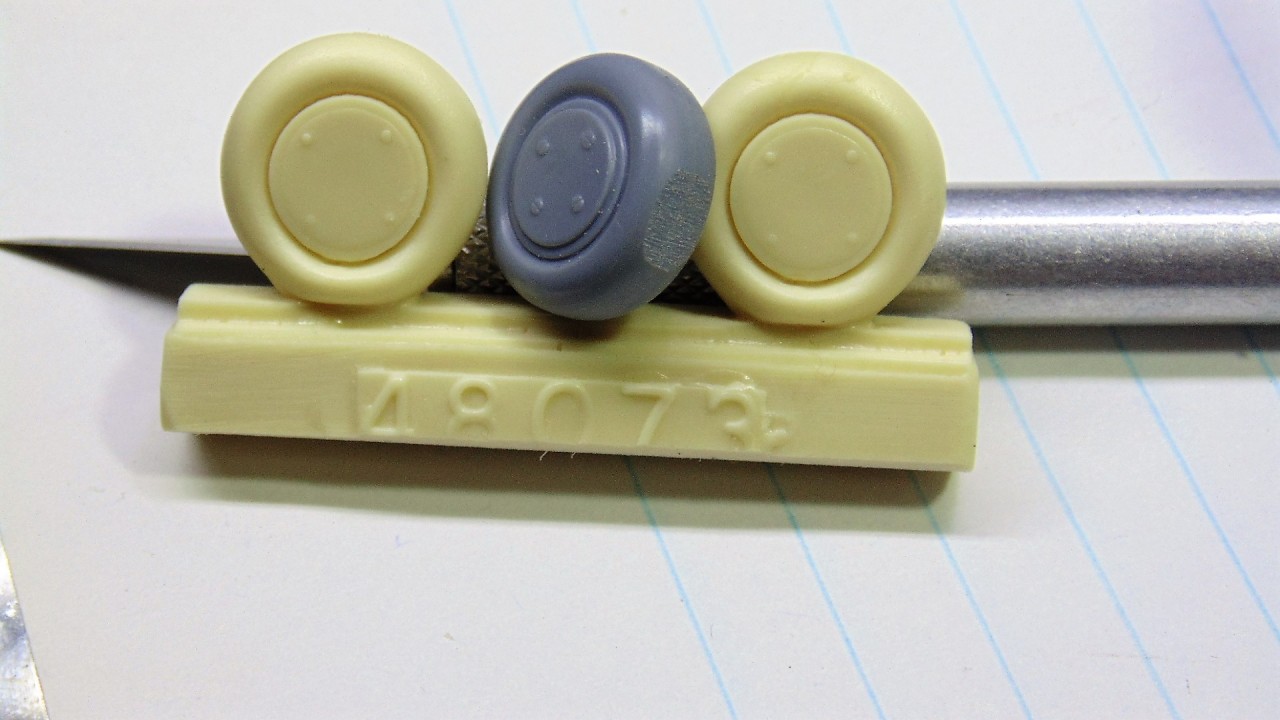
The aftermarket
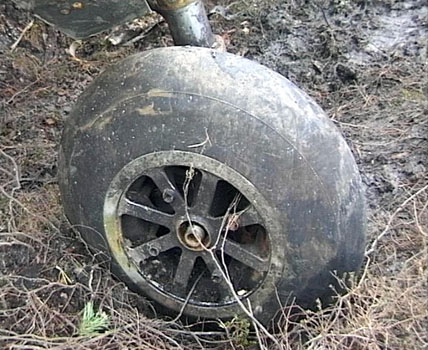
tires look fine, but later this idea would be dropped for more accurate Nokia (yes, same company who made cell phones) rubber which is flush with the rims. The best way to do this and still have some detail remaining was to sand them as flat as possible. Trust me, I monkeyed around with Teflon tape masking and filling, circle cutting photo-etch and even sculpting with clay yet nothing looked good enough (at least at my skill level). Then I made my own
slotted-head screws which aren't perfect, but like I've said since a kid, "if I had better tools... I'd be dangerous!". The
Tail Wheel was painted with a leather color and fits in with some pivoting and the body was shaved down considerably to look more in scale. It will be cleaned up in the final stage. The MONTEX
wheel masks are ok yet the vinyl is a bit to thick. Regardless, there would have been over-spray and touch up painting was needed.
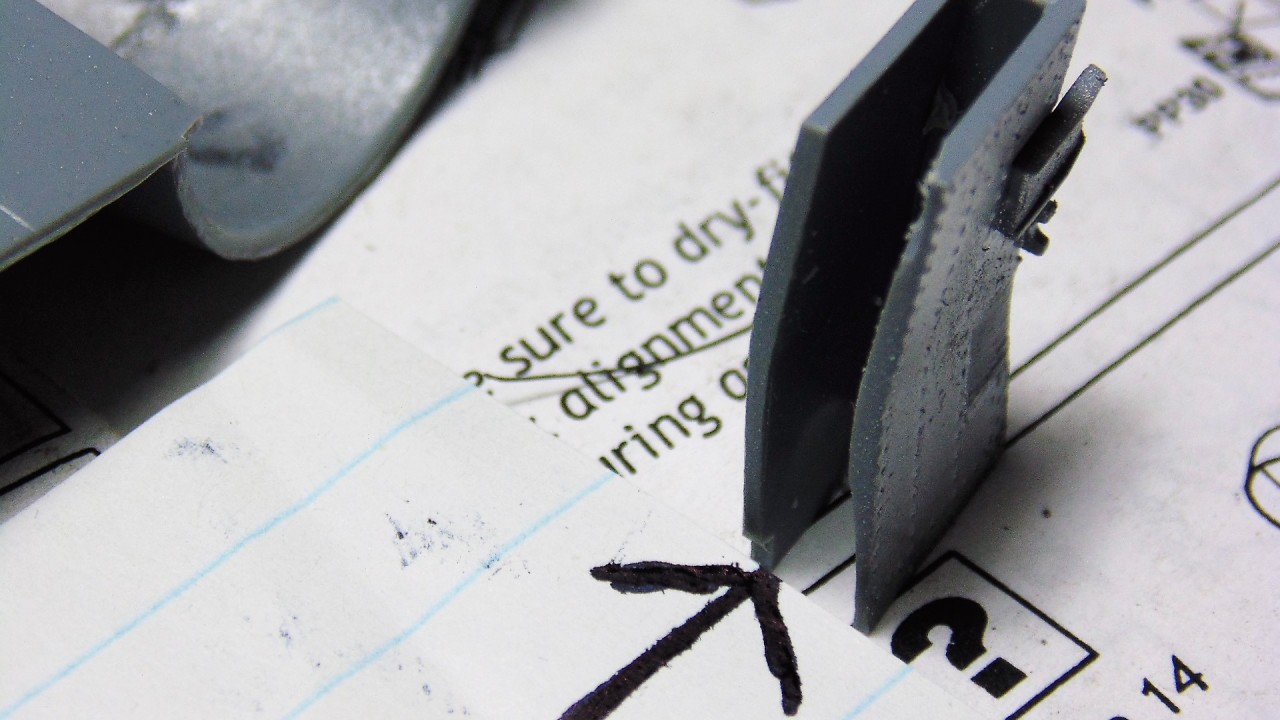
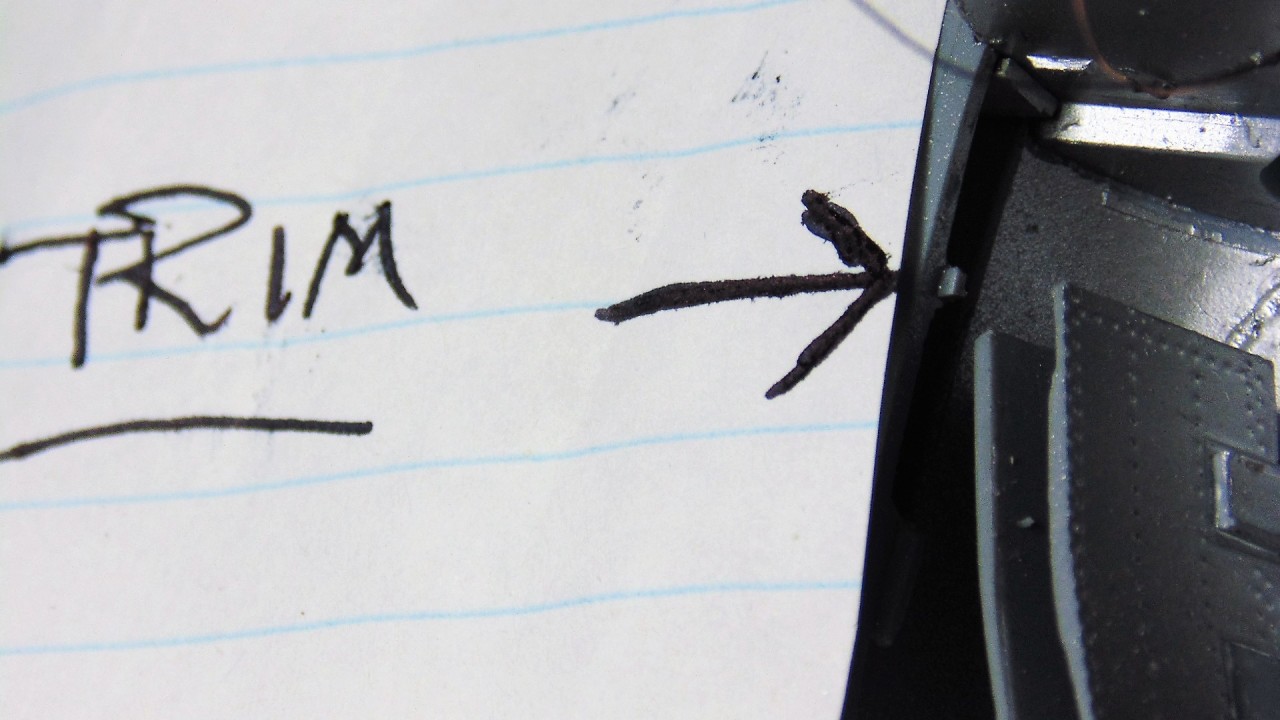
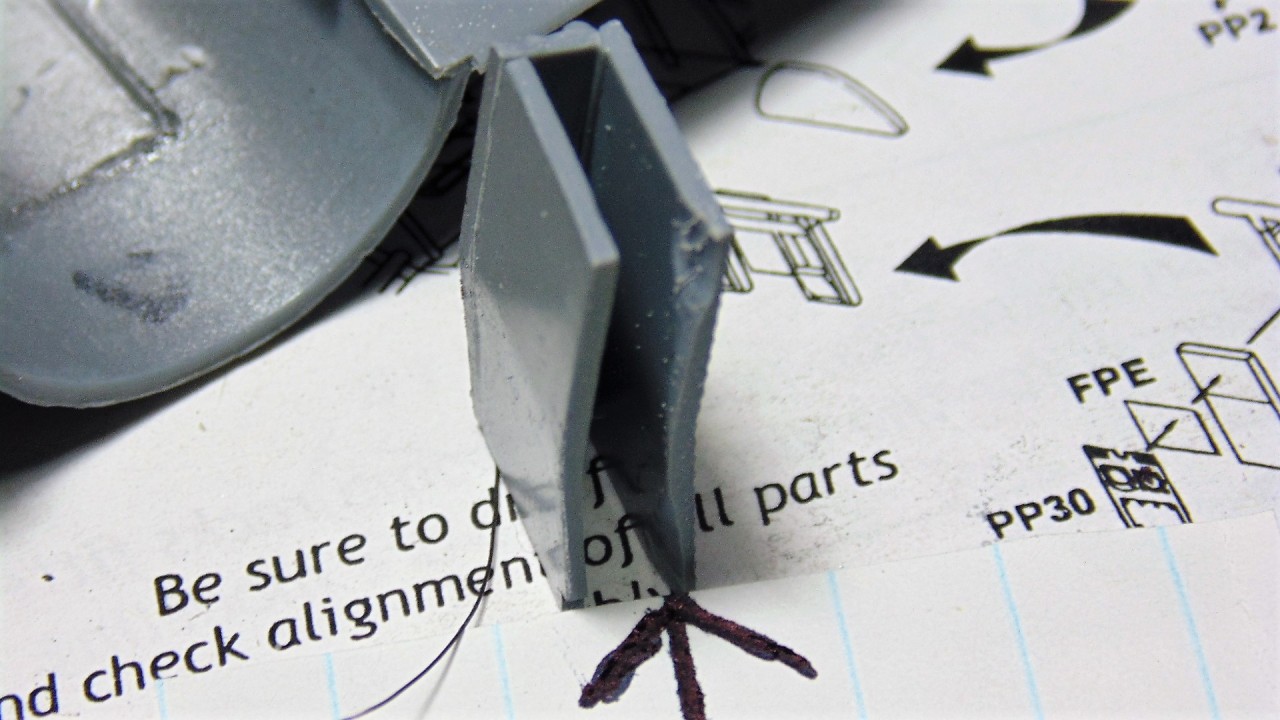
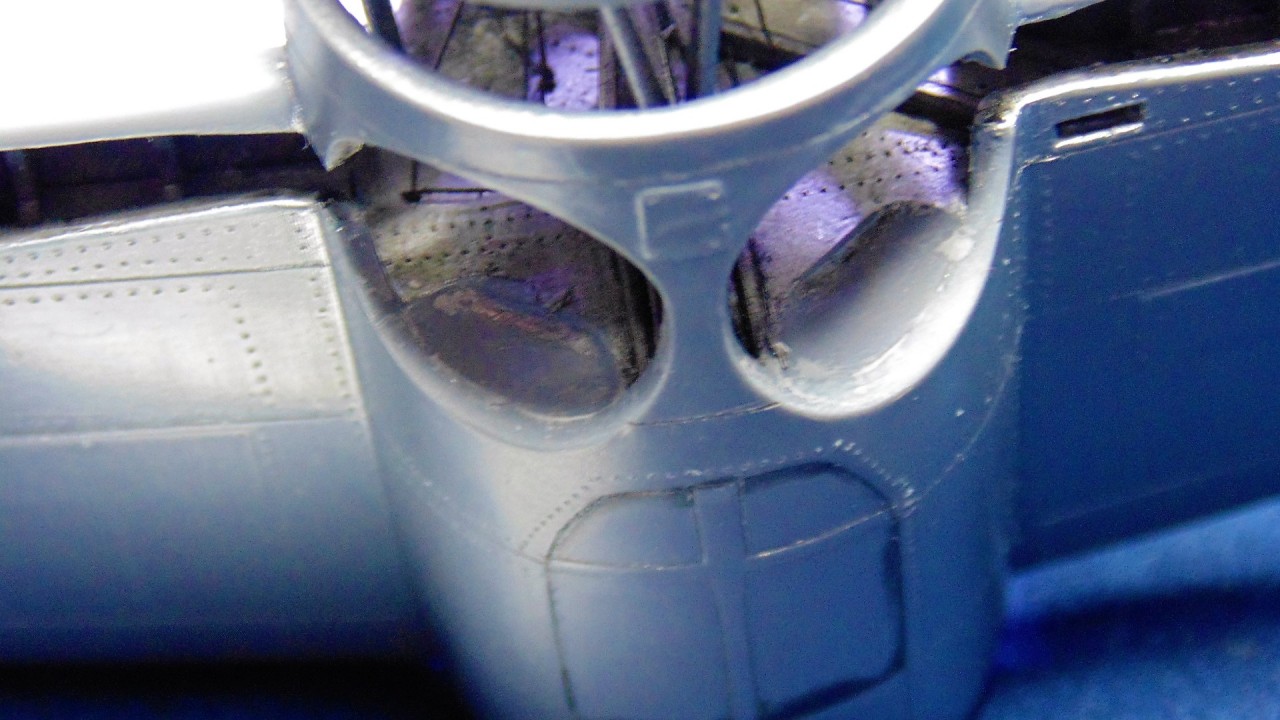
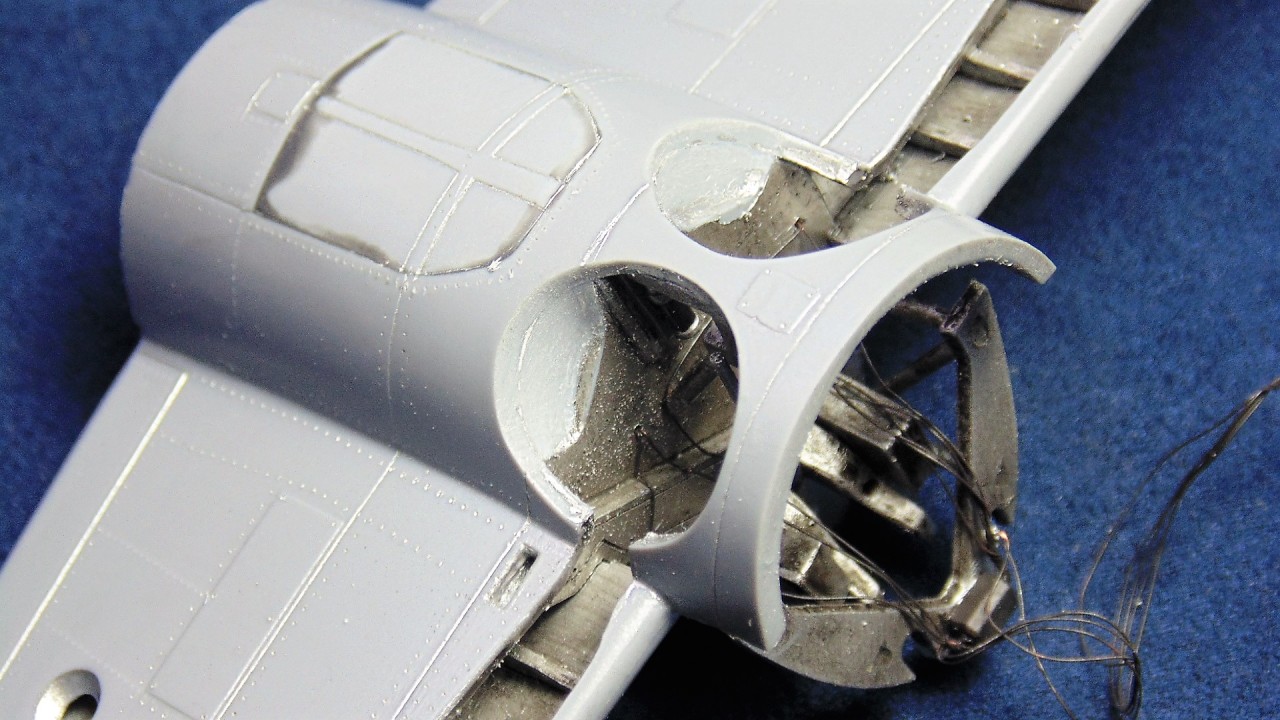
Break Lines are photo-etch and I thought they'd be tricky but thankfully were perfectly shaped. The
Brace Covers are way to thick so I sanded them as thin as possible and look much better. The
Wheel braces need to be trimmed half a millimeter where they connect inside to the bay otherwise the scissor link bar will bow out... thank the Lord for reference photos!!!
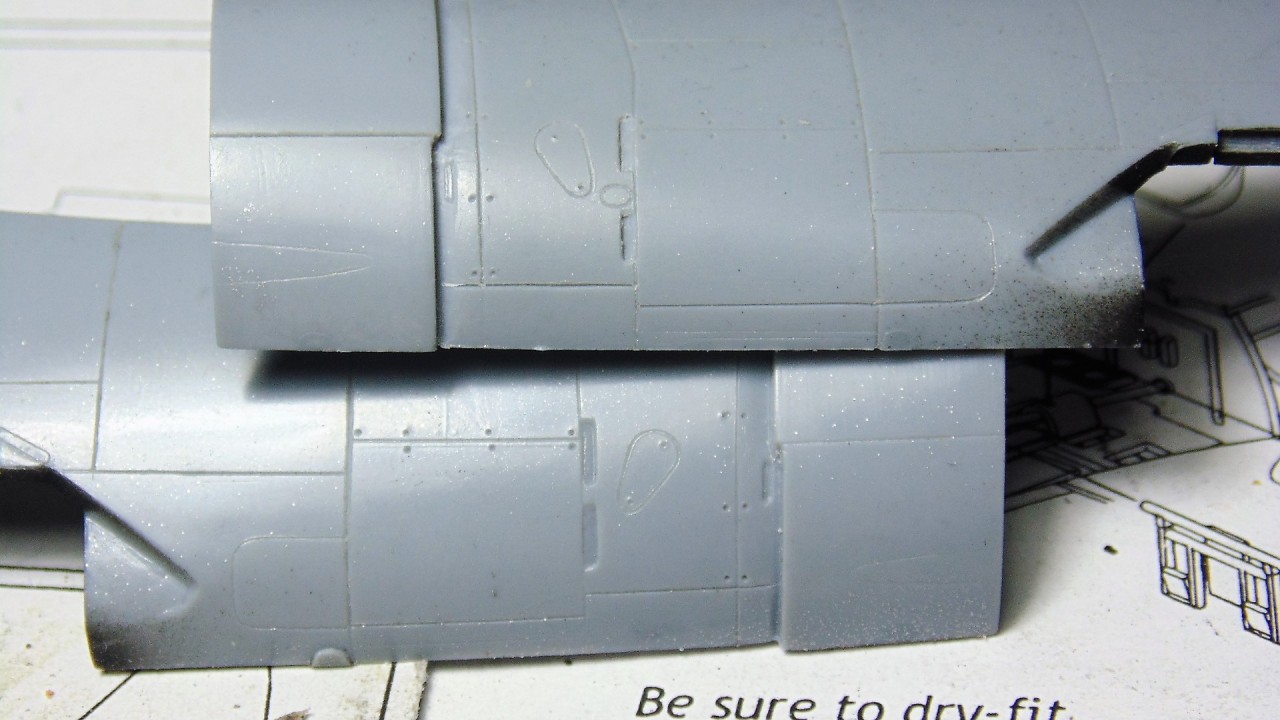
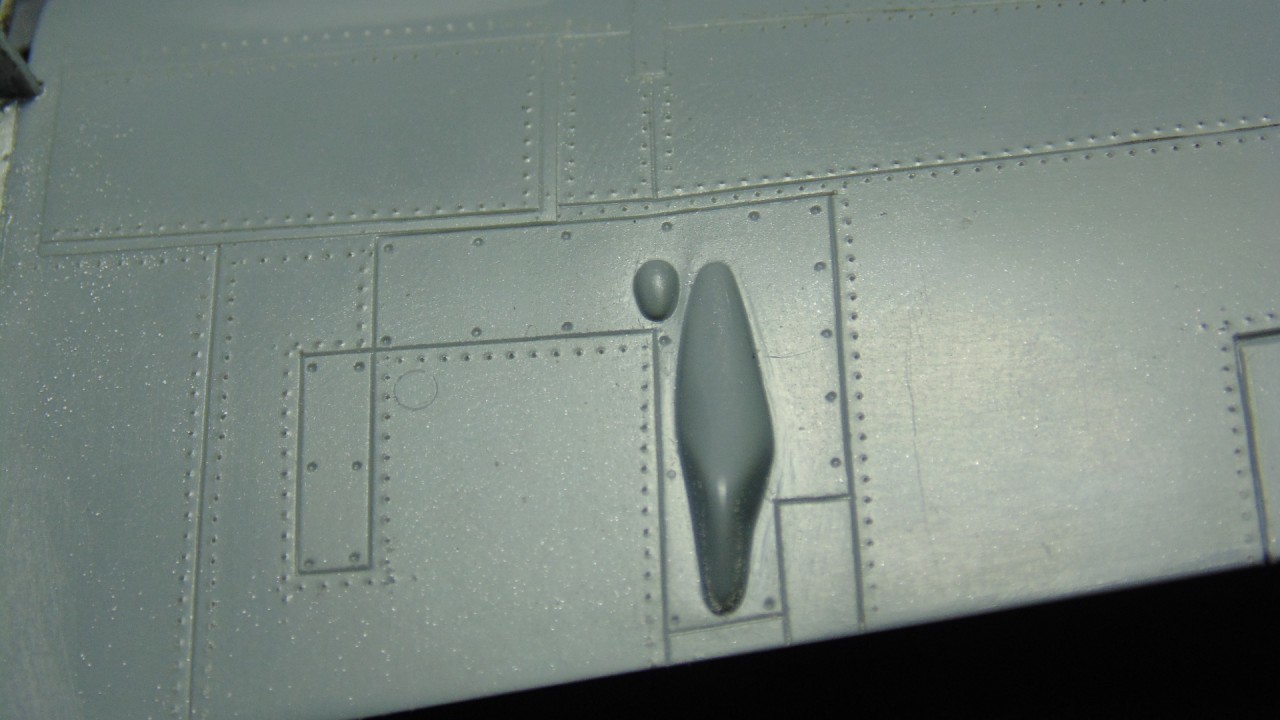
PAINT, DECALS and WEATHERING
Here's some more full disclosure. I have never cheated in a card game, on a test, or on a woman. I did, however, cheat on this kit. Literally on it. The seam-line where the upper and lower halves of the kit join just behind the wing was brutal and what's worse is that there's a major bulge moving forward to the undercarriage. It would have meant gobs of filler and more time sanding than I was ever going to attempt. Simple solution to hide the joins was to scribe a panel line and rivet it. The eyes are completely fooled from all angles due to being drawn in by the panel line and holes (except for all of you who know it's there HA HA!). The Tamiya flat aluminum did not spray the best so another round of sanding was needed to pull out the proper finished look. A small annoyance that I soon won't have to worry about again since I'm building a custom spray booth and will work more with lacquer products. While the paint was drying I set out to recreate the "
5" on the rudder. The font is important and I was unable to find a decal sheet with the right style and size. Solution; resize the image on the monitor to match the kit, place tape on the screen, draw it then cut. Here's the first attempt and only a test. Next was some
Masking for the belly and to keep the yellow vivid and not to lose detail I masked off most of those primed areas. Most of these craft had a similar paint scheme, but there were variations. Going by the numerous museum photos I could get a pretty good idea where to draw my
Demarcation Lines. To paint BW-372 I wanted to have both hands and not have it leaning against something. I made a make-shift
Paint Cradle out of cardboard and a $7 CDN set of "second hands" then glued it to a small base. After it was secured with rubber bands it worked like a charm and super cheep. Then the
dark over light paint began. The
Free Hand Failed and despite making many changes and several capital cleanings of the airbrush I still got "ghosting", thus back to rolling "blutack" and feathering it as best could be done. The make-shift cradle came in handy once more. After unmaking it looked pretty good, needing only a few touch-ups. The
Yellow gave me some grief with a bit of spitting so it was sanded smooth.
THE DECALS were a great joy to put down. And while making the blue swastikas took a lot of time, and solution(s), it was worth the effort and again that cradle was invaluable with keeping the right angle. The number of tallies had to be cut in multiple places, the 372s had to be cut and placed according to camo color and the wild cat emblems are too bright. The
Cartograf decals that came with the kit were much more accurate for the props compared to the
Starfighter ones but I did use some of those. The other challenge was to lighten the black enough to show the black "BW-" on the right side as per the photos. I used 502 buff to give the effect. After everything was wiped down of water marks I used Tamiya Matt coat and then a
dark dirt wash by Flory Models which is perfect for panel lines, details and when sanded preserves the look on raised areas. Give them a look if you wish https://www.florymodels.org/ Phil Flory makes some great products and provides support. The effect of being slightly worn came out well and I know from my research that these craft were very well maintained but little care was put into the paint. In fact sometimes it was downright sloppy. Get it in the air and make sure it brings its pilots home was the idea and they most definitely did with lethal results.
FINAL TOUCHES
After rolling and attaching the internal loop antenna and the frame for the back canopy and head armor it was time to mask. The MONTEX masks, as mentioned, are vinyl and adhere well to a smooth surface. They are a hair too small but are the correct shape compared to the Eduard. That said, I needed the Eduard set because the wind screen is correct where the MONTEX is not. Good thing I have the second Tamiya kit so things don't go to waste. The bonus is you get internal masks as well. Something that came in really handy with the set I bought for a 1/48 TBF-1C Avenger build I'm well into. Naturally the small items came last such as the
Navigation lights, pitot tube, exhausts, gun sight wind screen. The gun sight has to be heavily modified since there is almost no room and the resin was lost and had to be scratch built. Then some more 502 oils were used for the hydraulic over-pressure leaks, exhaust and gun fire smoke. The
Antenna Line was a fun project in that I wanted something close to the hook at each end from the mast to the tail. Some spare PE from gun sights were used. Then the elastic thread was split to be very fine and attached with VMS 5K for PE. At last it was time to make a custom shipping cradle and protective outer walls, which is not in these photos.
SPECIAL THANKS
Special thanks to Sunward Hobbies, Flory Models, Vantage Modeling Solutions, Kit Bunker, Finnish Air Force Museum and Author Daniel Ford. Very special thanks to Brian D. O'Neill for the inspiration and to YOU for following along.


.JPG)
.JPG)
.JPG)
.JPG)
.JPG)
.JPG)
.JPG)


.JPG)


.JPG)
.JPG)

.JPG)
.JPG)
.JPG)
.JPG)
.JPG)
.JPG)
.JPG)
.JPG)
.JPG)
.JPG)
.JPG)
.JPG)
.JPG)
.JPG)
.JPG)
.JPG)
.JPG)
.JPG)
.JPG)
.JPG)
.JPG)
.JPG)


.JPG)
.JPG)


.JPG)
.JPG)

.JPG)
.JPG)
.JPG)
.JPG)
.JPG)
.JPG)
.JPG)
.JPG)
.JPG)
.JPG)
.JPG)
.JPG)

.JPG)
.JPG)
.JPG)
.JPG)
.JPG)
.JPG)
.JPG)
.JPG)
.JPG)
.JPG)
.JPG)
.JPG)
.JPG)
.JPG)
.JPG)
.JPG)
.JPG)
.JPG)
.JPG)
.JPG)
.JPG)
.JPG)
.JPG)
.JPG)
.JPG)
.JPG)
.JPG)
.JPG)
.JPG)
.JPG)
.JPG)
.JPG)
.JPG)
.JPG)
.JPG)
.JPG)
.JPG)
.JPG)
.JPG)
.JPG)
.JPG)
.JPG)
.JPG)
.JPG)
.JPG)
.JPG)
.JPG)
.JPG)
.JPG)
.JPG)
.JPG)
.JPG)
.JPG)
.JPG)
.JPG)
.JPG)
.JPG)
.JPG)
.JPG)
.JPG)
.JPG)
Comments