You could write a book, and many have on the Bf-109, so I will try to look just at the G-6. Like most German aircraft produced in World War II, the Bf 109 G-series was designed to adapt to different operational tasks with greater versatility. With the Bf 109G, a number of special versions were introduced to cope with special mission profiles. Here, long-range fighter-reconnaissance and high-altitude interceptors can be mentioned. The former were capable of carrying two 300 L (80 US gal) drop tanks, one under each wing; and the latter received pressurized cockpits for pilot comfort and GM-1 nitrous oxide "boost" for high altitudes. The latter system, when engaged, was capable of increasing engine output by 223 kW (300 hp) above the rated altitude to increase high-altitude performance. The newly fitted Daimler-Benz DB 605A engine was a development of the DB 601E engine utilised by the preceding Fredriks. From 1944 a new high-altitude propeller with broader blades was introduced. They were fitted to high-altitude variants with the DB 605AS or D-series engines. From the spring of 1943, the G-series saw the appearance of bulges in the cowling when the 7.92 mm (.312 in) MG 17 were replaced with 13 mm (.51 in) MG 131 machine guns (G-5 onwards) due to the latter's much larger breechblock, and on the wings (due to larger tyres), leading to the Bf 109 G-6's nickname "Die Beule" ("The Bulge"). The Bf 109G continued to be improved: new clear-view cockpits, greater firepower in the form of the 30 mm (1.18 in) MK 108 cannon were introduced in late 1943; and a new, enlarged supercharger in the high-altitude DB 605AS engine, a larger vertical stabilizer (G-5 onwards) in 1944.
Erich Hartmann, the World's top scoring fighter ace, claiming 352 victories, flew only the Bf 109G, of which he said: It was very manoeuvrable, and it was easy to handle. It speeded up very fast, if you dived a little. And in the acrobatics manoeuver, you could spin with the 109, and go very easy out of the spin. The only problems occurred during take-off. It had a strong engine, and a small, narrow-tread undercarriage. If you took off too fast it would turn [roll] ninety degrees away. We lost a lot of pilots in take offs.
The Bf 109 G-5 saw the introduction of an enlarged wooden tail unit which was often retro fitted. This tail unit was standardised on G-10s and K-4s. The enlarged tail unit improved handling, especially on the ground. It weighed more than the standard metal tail unit and required the use of a counterweight which was fitted in the nose. The G-6/U4 variant was armed with a 30 mm (1.18 in) MK 108 cannon mounted as a Motorkanone firing through the propeller hub instead of the 20 mm MG 151/20. The G-6 was very often seen during 1943 fitted with assembly sets, used to carry bombs or a drop tank, for use as a night fighter, or to increase firepower by adding rockets or extra gondola-style, underwing gun pod mount ordnance.
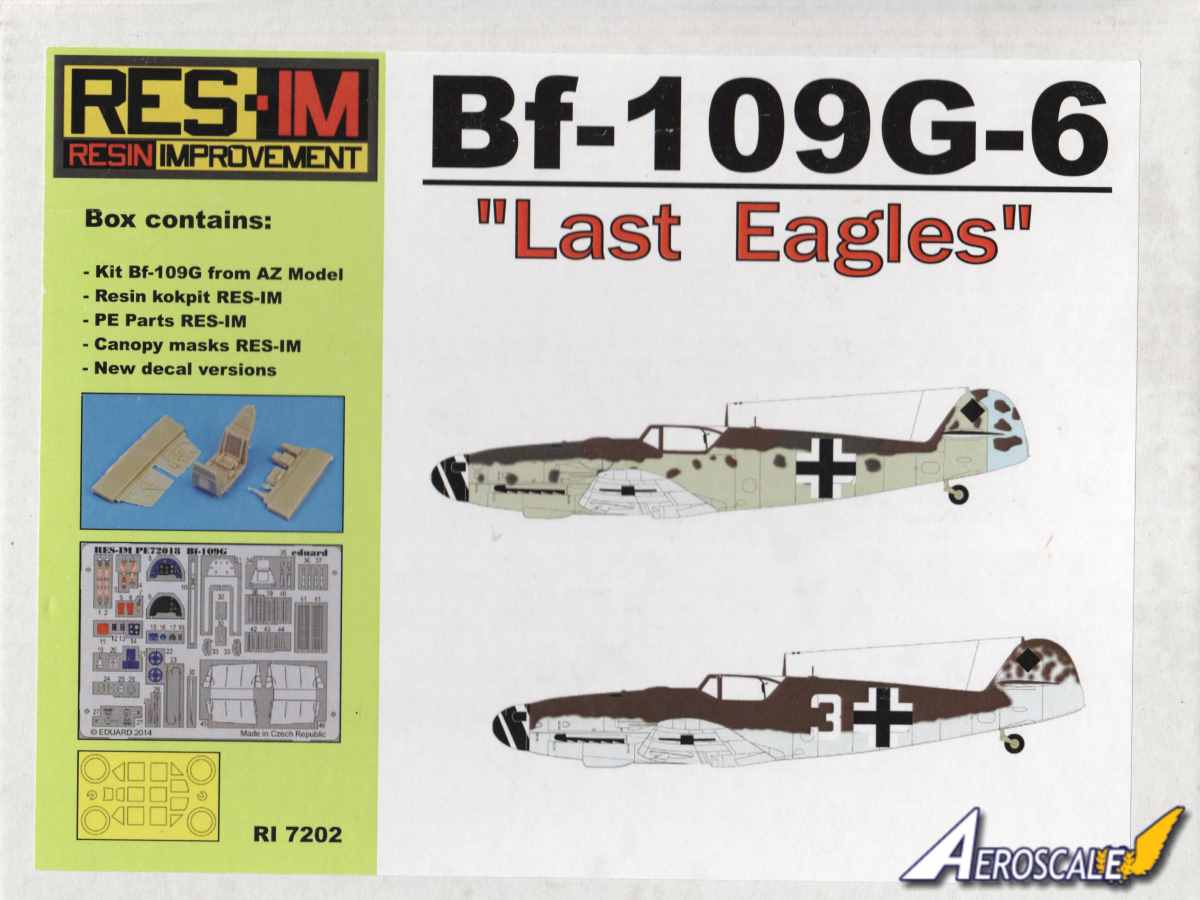
The kit
The kit on review here is a couple of years old now. I cannot see any reviews of it so its well worth having a look. The release brings together the AZ Models Bf 109 G-6 and the resin and pre coloured photo etched parts of RES-IM. The resin and PE parts are available separately and are designed for the AZ Models Bf 109 G. You wont be too surprised to learn that the PE parts are actually made by Eduard. The box is a pretty sturdy affair containing:
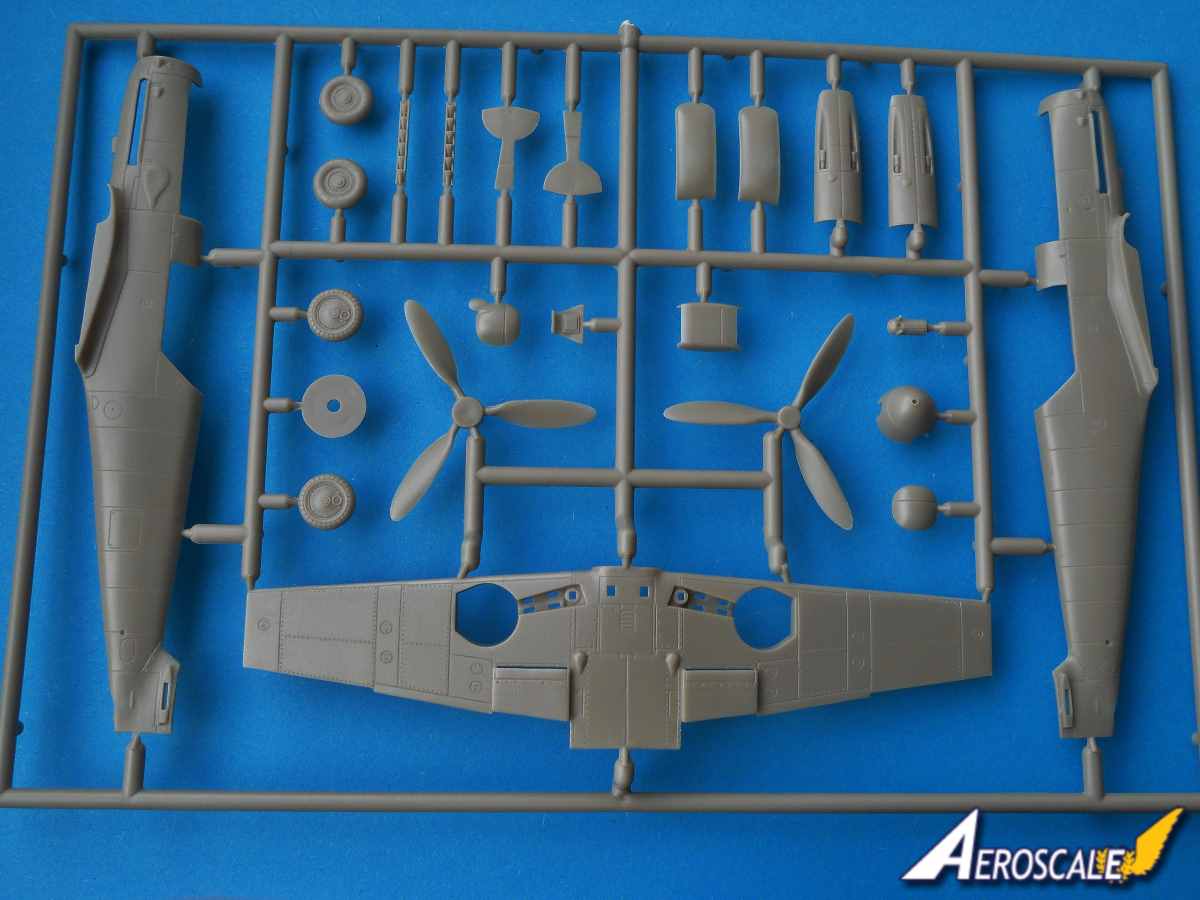
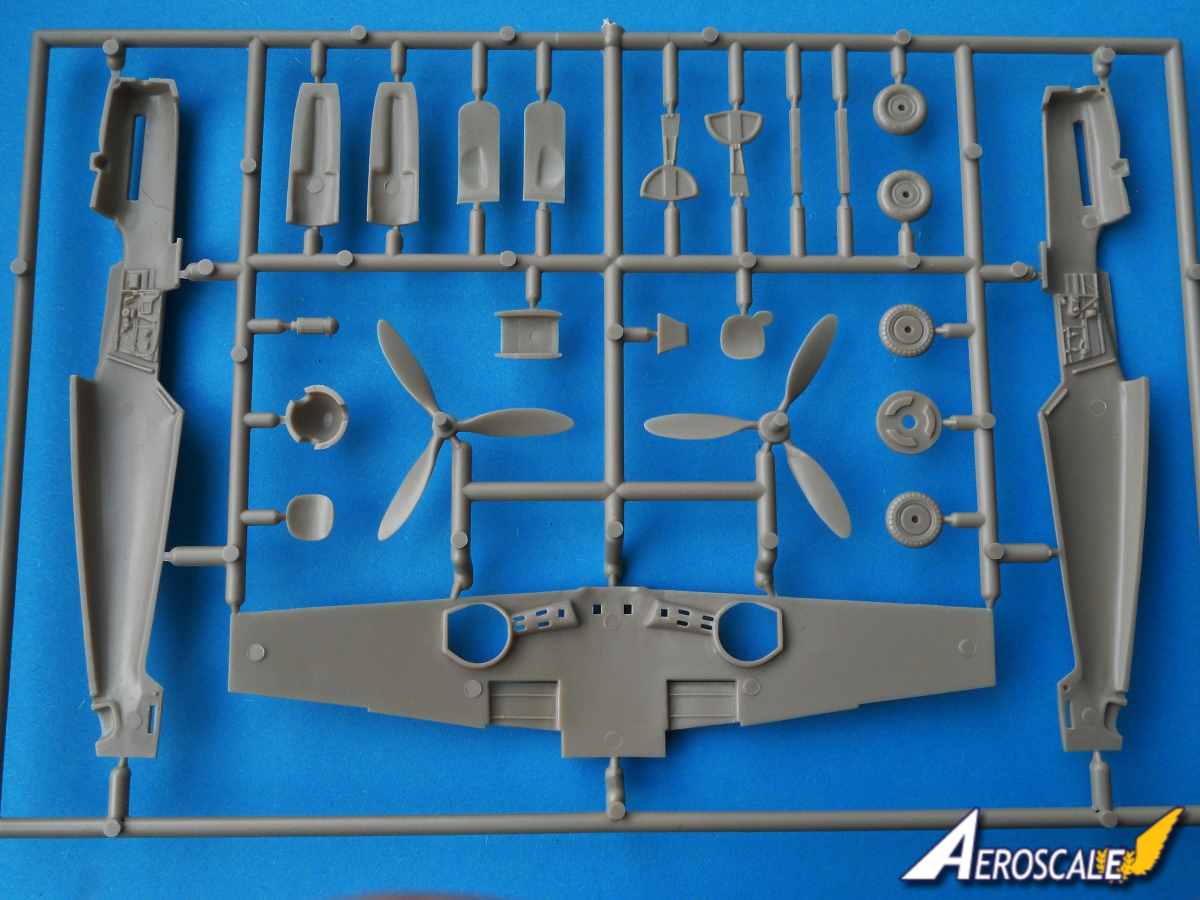
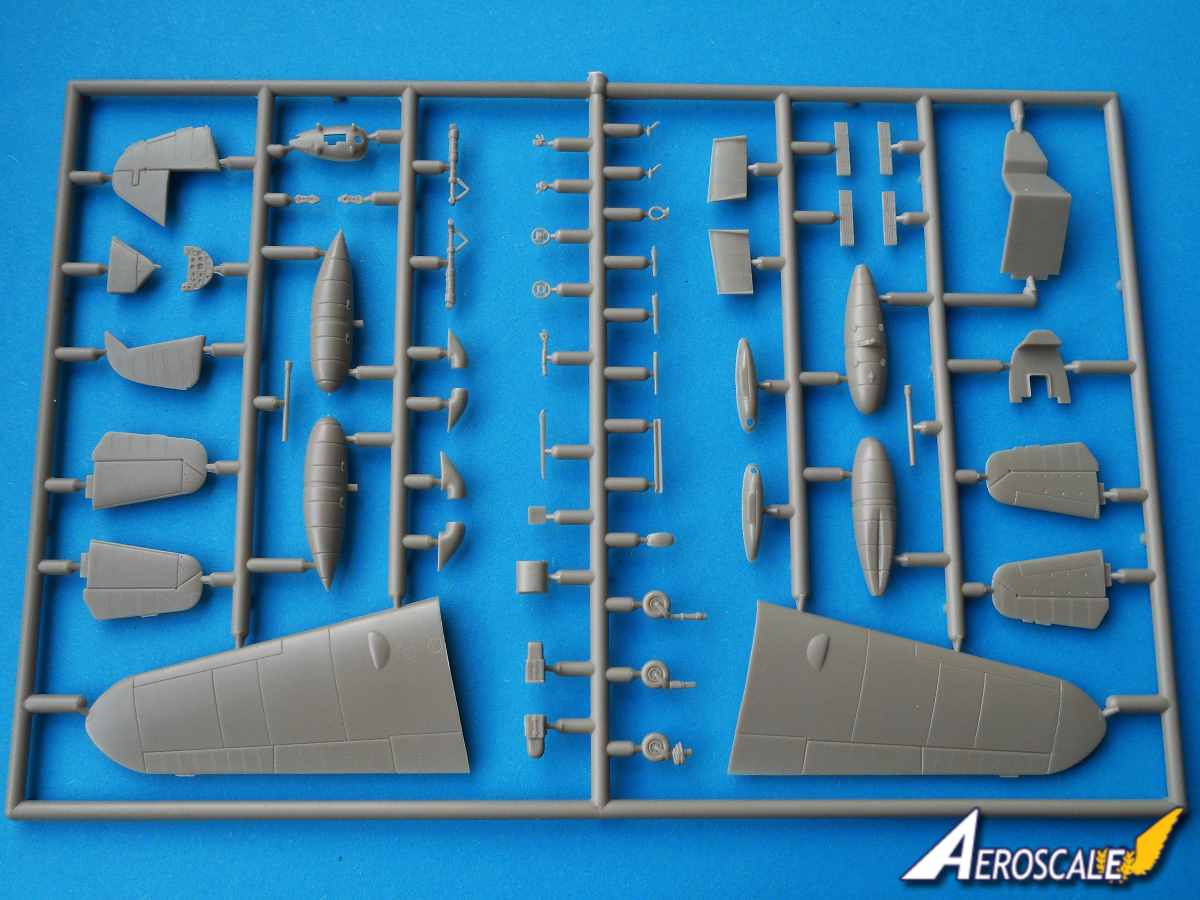
-2 x light brown plastic sprues
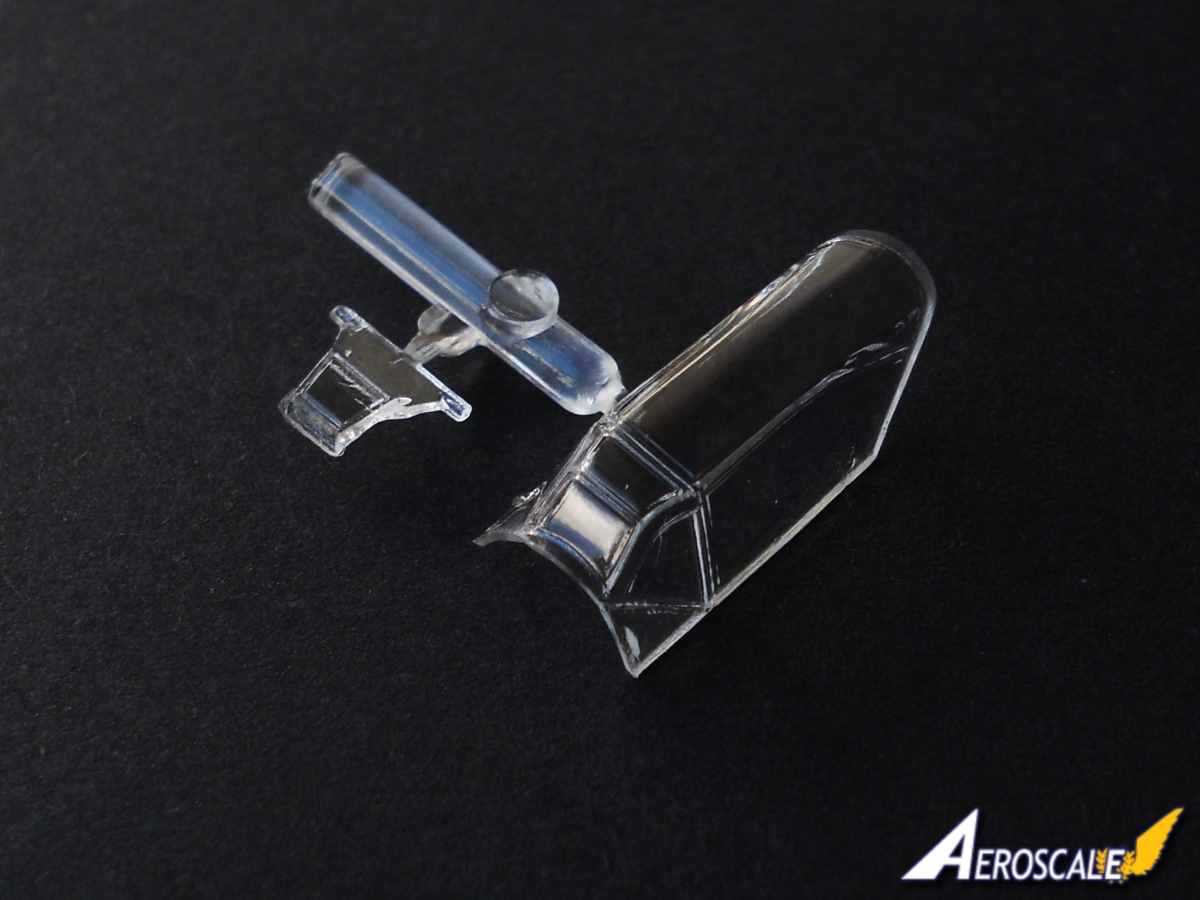
-1 x small clear plastic sprue
-1 x fret of pre-painted photo etched parts produced by Eduard.
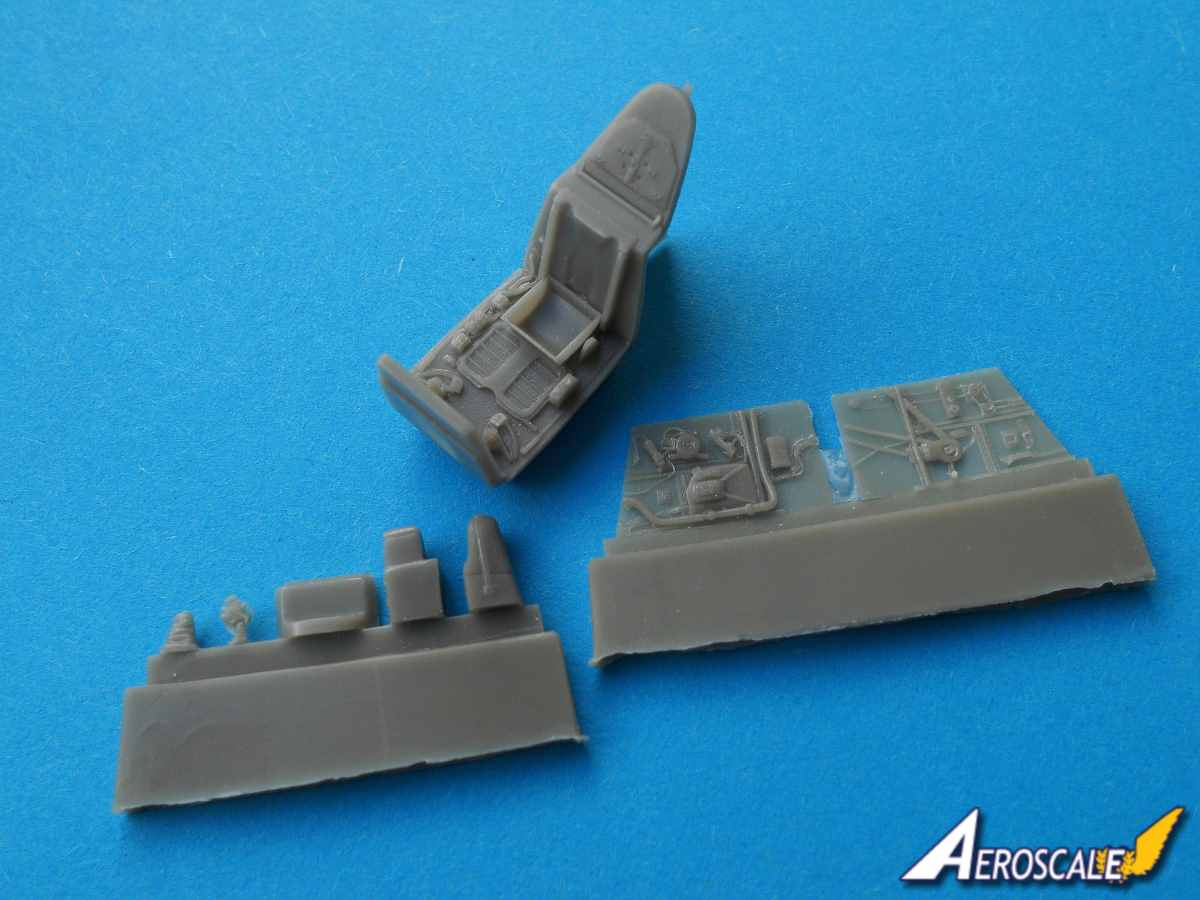
-3 x resin pieces for the cockpit
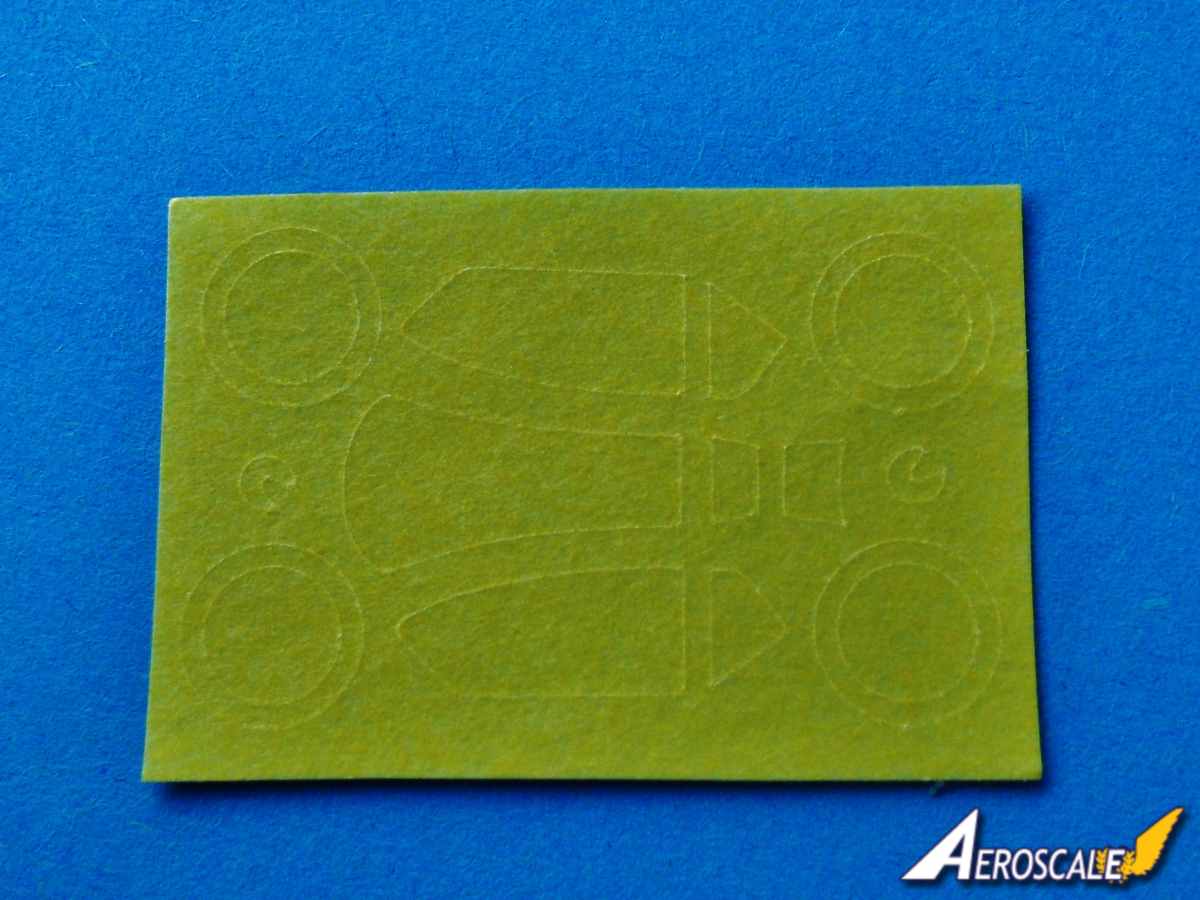
-1 x small sheet of masks for the canopy and wheels.
-3 x sheets of instructions.
First impressions are positive; the parts on the two light brown coloured plastic sprues have pretty good, if slightly overly done recessed panel lines. The recessed fastener details around the access panels are superb. The other thing that grabs your attention is the resin and pre-coloured photo etched parts.
To start of its worth going through the parts map and getting rid of the components you dont need. There are a lot of superfluous plastic parts so do yourself a favour, before putting glue to plastic.
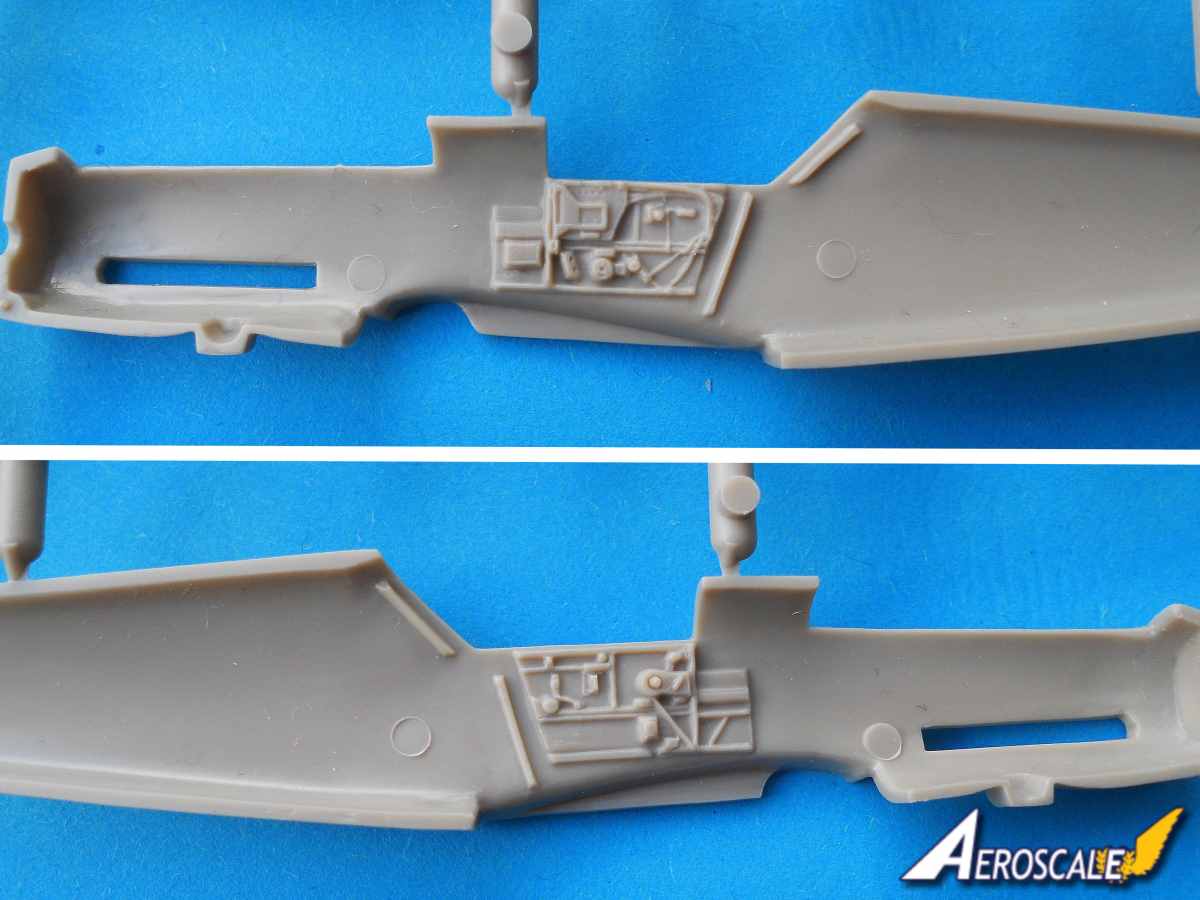
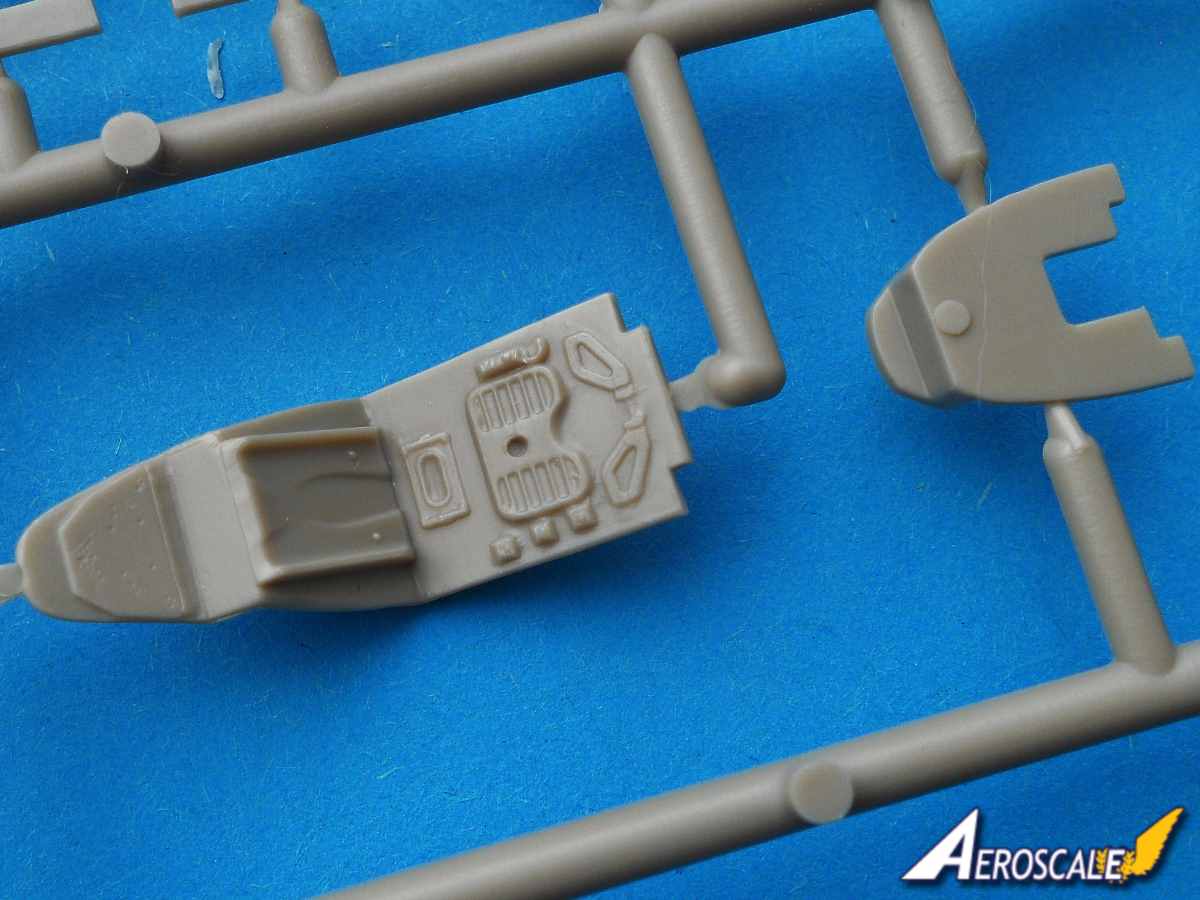
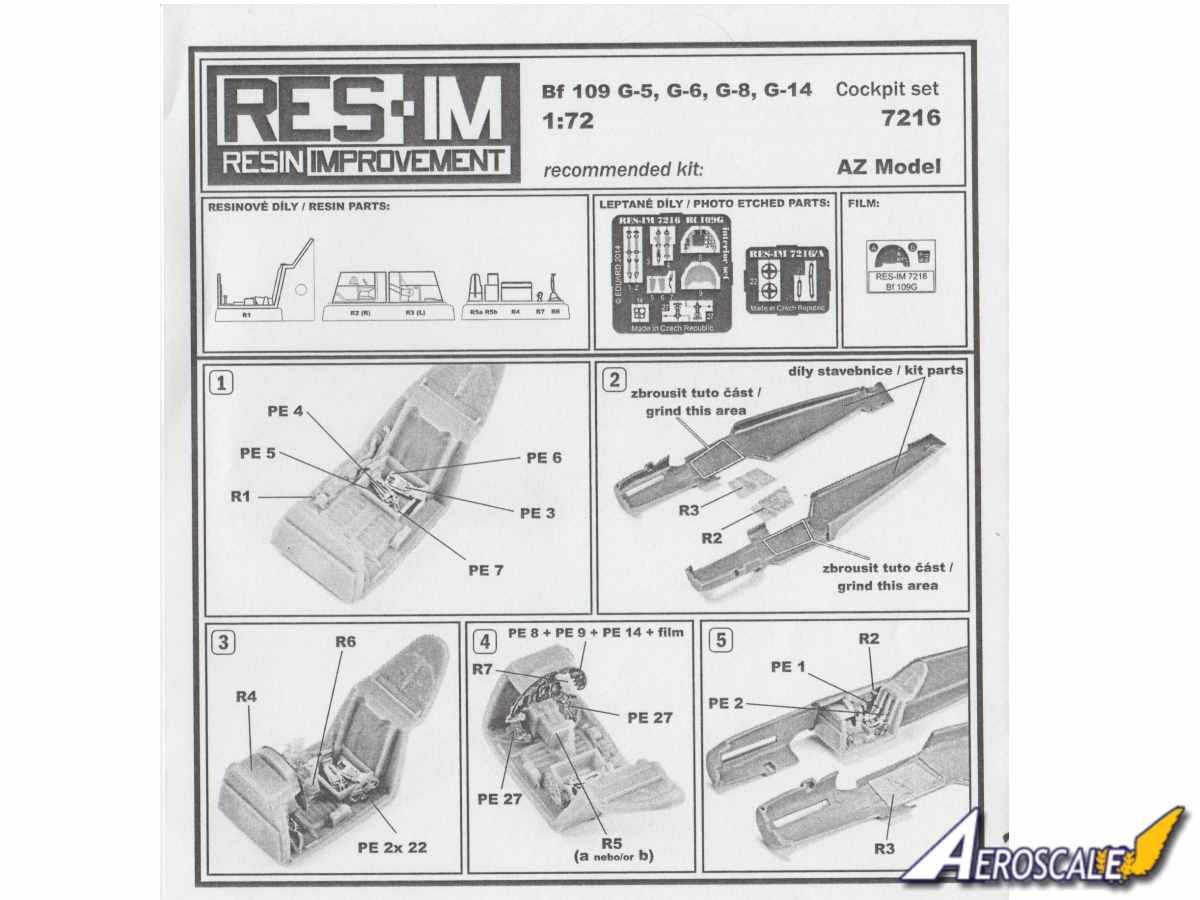
The moulded sidewall detail of the AZ kit is pretty good in its own right. But you did not buy this kit for existing detail, so this must be removed to fit the resin parts. The resin cockpit floor and sidewalls do offer a little more detail than the injected plastic parts. The seat particularly is commendably thin and thankfully already attached to the cockpit floor/rear wall. You do need to be very cautious removing the resin sidewalls from their casting blocks to avoid any damage as they are very thin. The pre coloured photo etched parts will certainly create a very interesting office. The PE pieces are really designed to overlay the existing plastic detail, although there is no reason why you cannot add the PE detail over the resin. Just use the Eduard instruction diagrams as reference. PE detail for the cockpit include seat harnesses, rudder pedals and straps, instruments, trim wheels and chain drive, armoured head rest and cushion, and a bit more that I cannot identify.
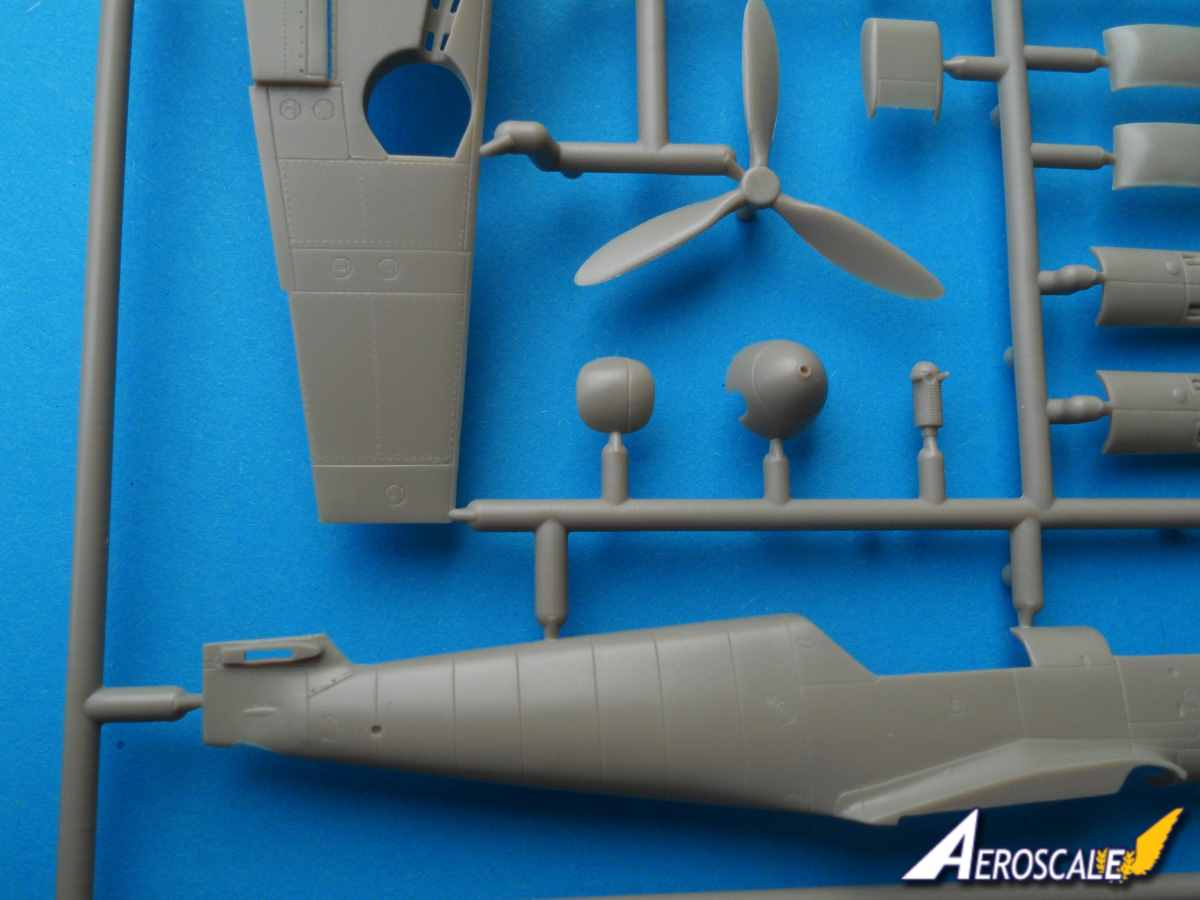
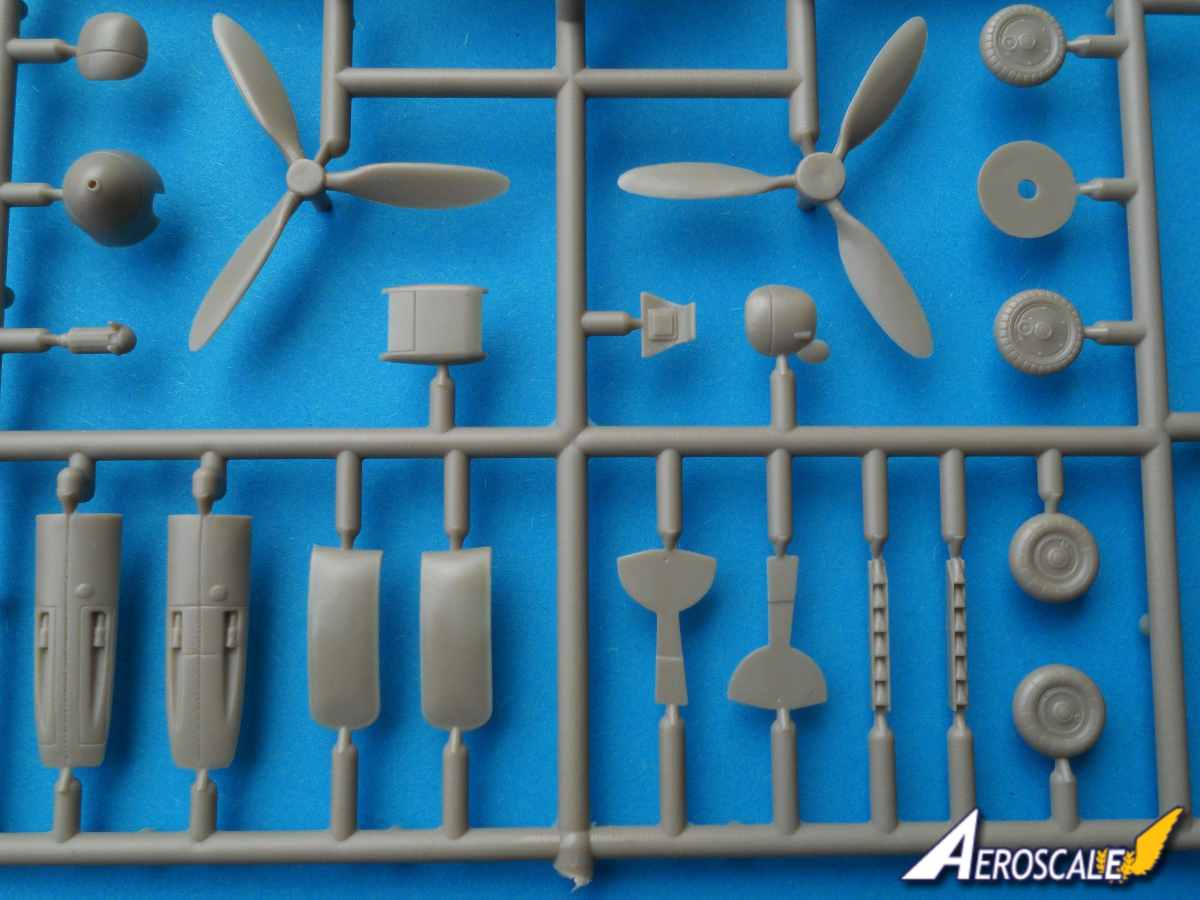
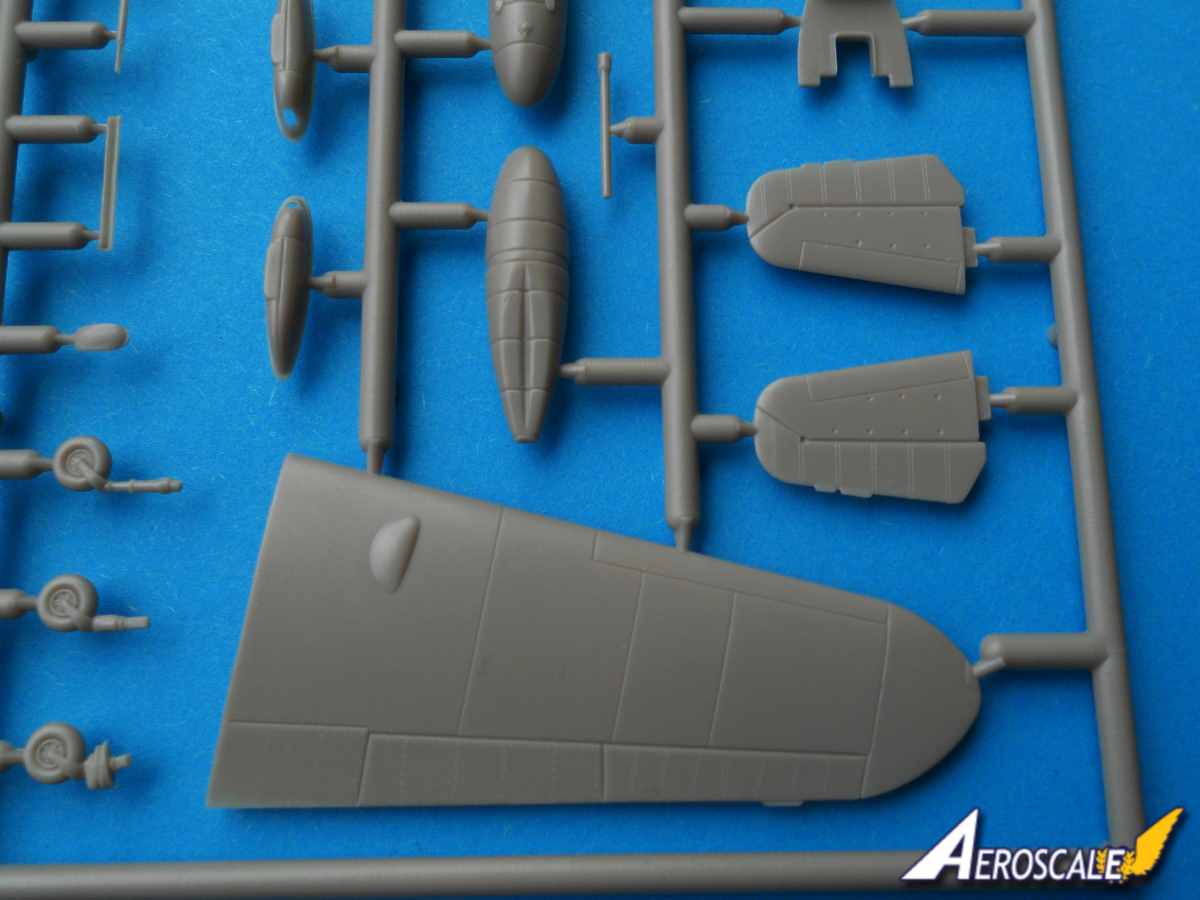
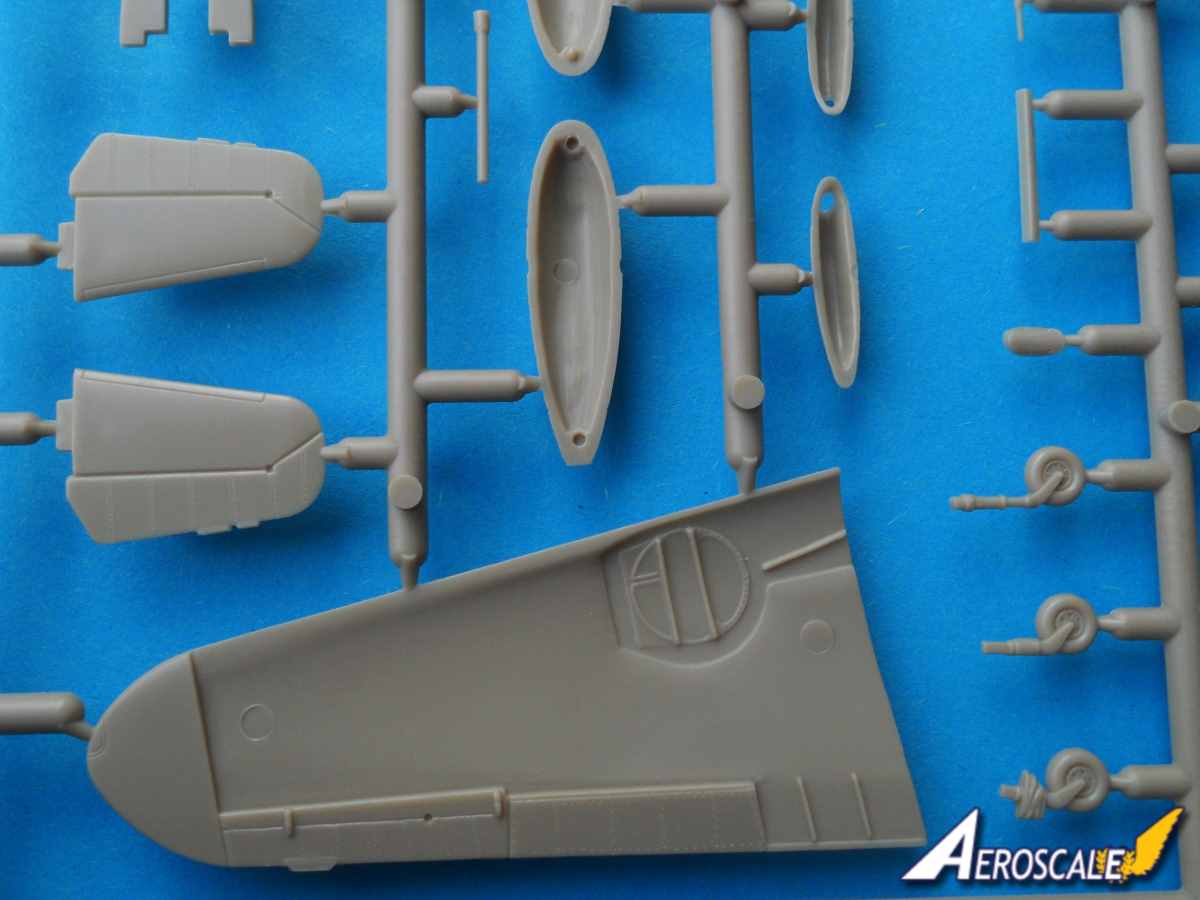
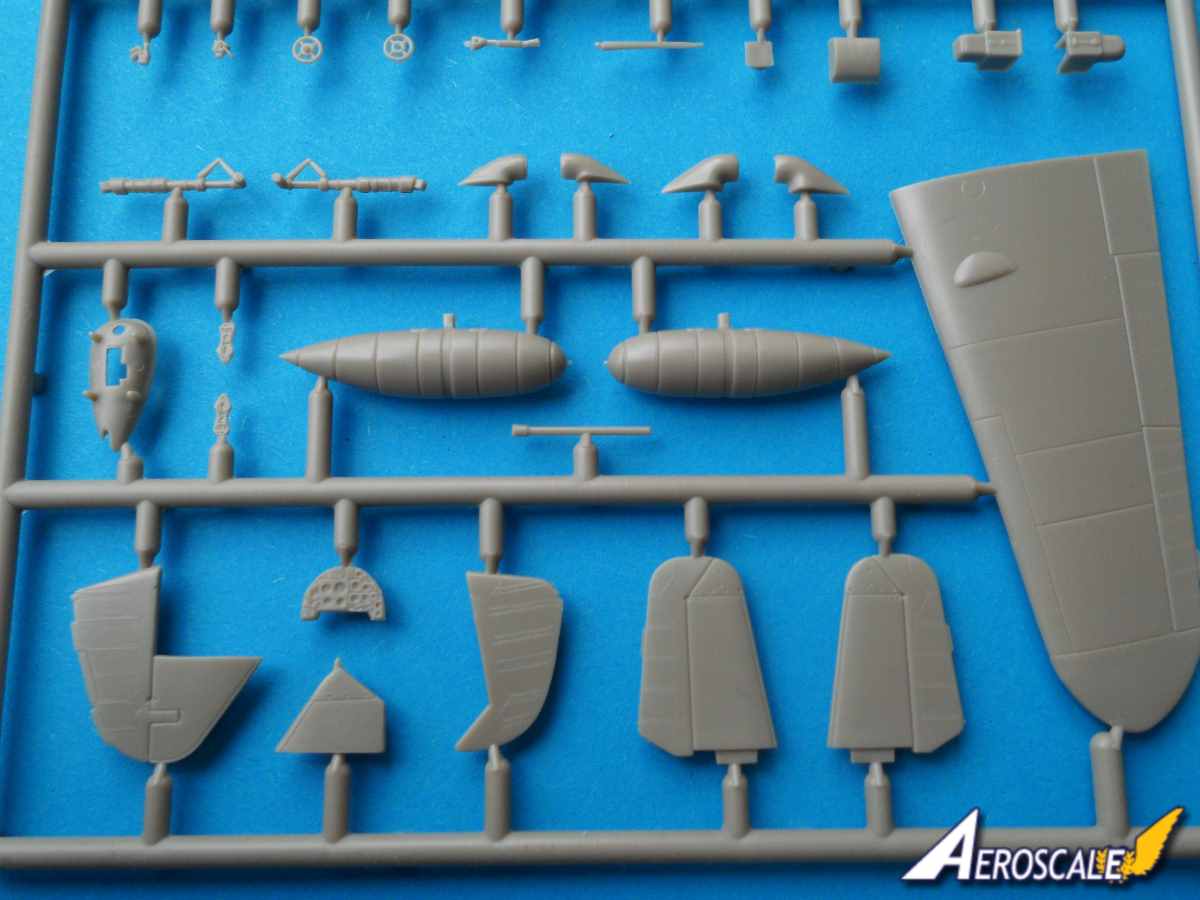
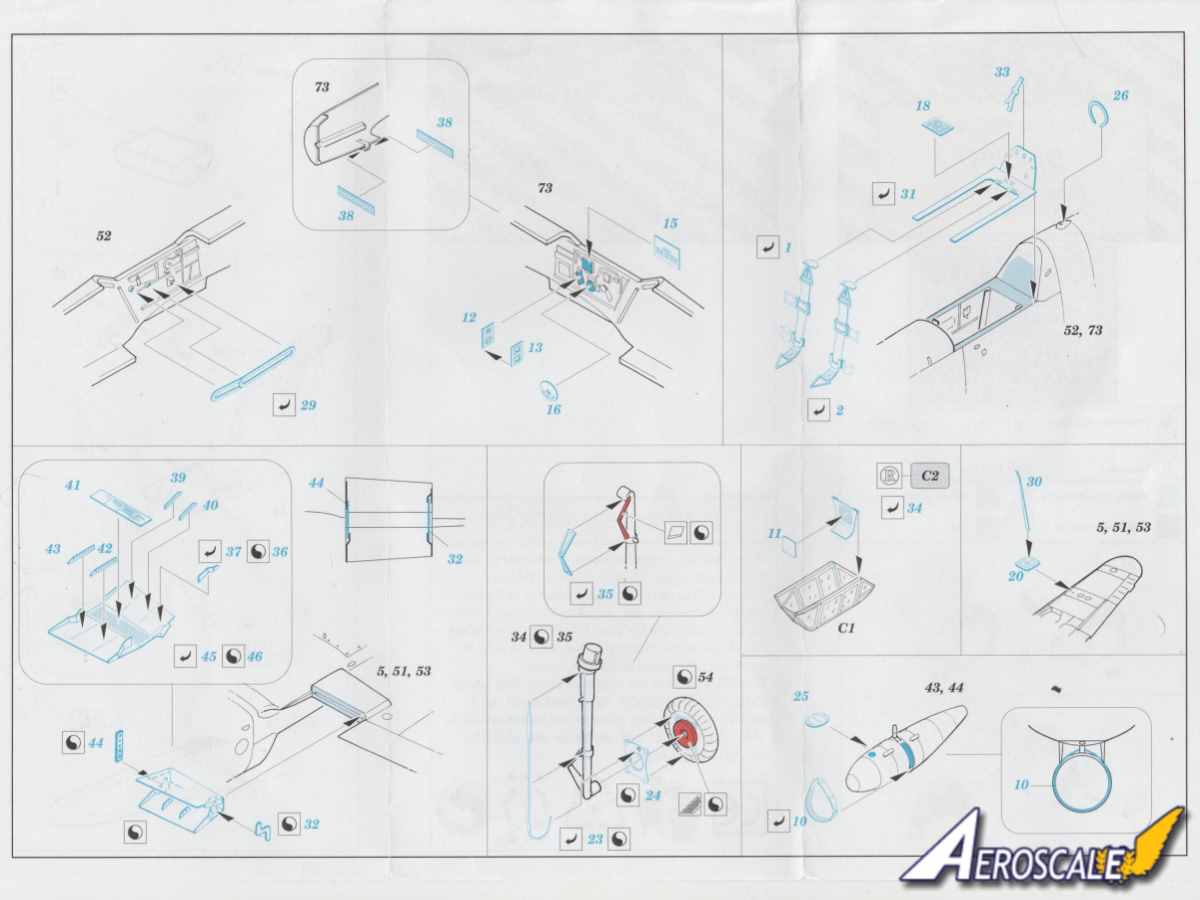
The fuselage is split vertically, there is no vertical tail attached; this is a separate part with a separate rudder. The upper engine panel, exhaust pipes, super charger intake and beule blisters are separate also. The exhaust does look very good. There is a slight sink mark on the outer skin of the fuselage where the cockpit moulded detail is. A little dab of filler should sort that out. The radiator housing under the nose is separate and there are a couple of PE parts to represent the radiator faces. The prop is made up from three parts: the spinner, the one piece props and the back plate. There are no decals or masks for the spiral paint finish on the spinner, so you will have to sort that out. The DF loop comes as a plastic or photo etched part.
The clear injected plastic canopy is one piece and very clear and thin. There are canopy mask included.
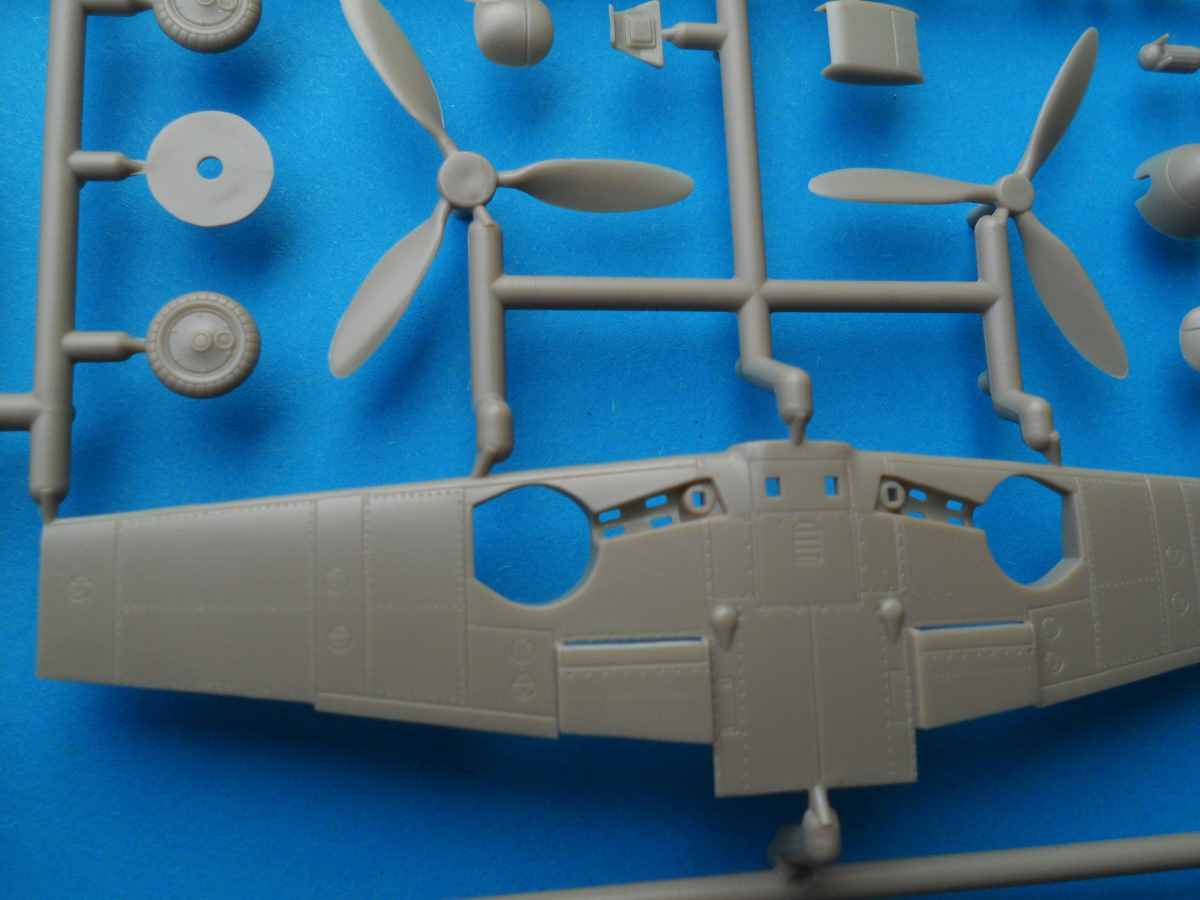
The lower wing is one piece and almost full span. The joint line under the wing falls on a panel line. The radiator fairings are moulded on and they look very good. The modeller has the option of using the injected plastic radiator flaps or they can be built using nine photo etched parts creating much more detail. There are radiators faces moulded in plastic and they have fine detail on the surfaces. But they do need trimming to alter their profile to fit in the fairing. There are photo etched alternatives, but only for the rear of the radiator. The control surfaces are moulded onto the upper wing and there is some fine detail in the roof of the wheel bay. The horizontal tail surfaces are each one piece. The trailing edges of all the control surfaces are commendably sharp. There is the option of using the plastic or PE for the underwing aerial. There are also plastic horn balances for the ailerons.
The wheels of the main undercarriage are each one piece with very good level of detail. There is a PE part for the inner wheel hub if you need some extra detail. Thankfully there are paint mask included. The leg of the undercarriage looks a little long to me. It looks as if is set without any weight on it. The torque links are moulded onto the leg, but there are PE versions if you think they look to thick. The fine looking non retracting tail wheel is one piece.
There are a couple of under fuselage fuel tanks to choose from. One of the tanks has a PE strap and filler cap to attach if you wish.
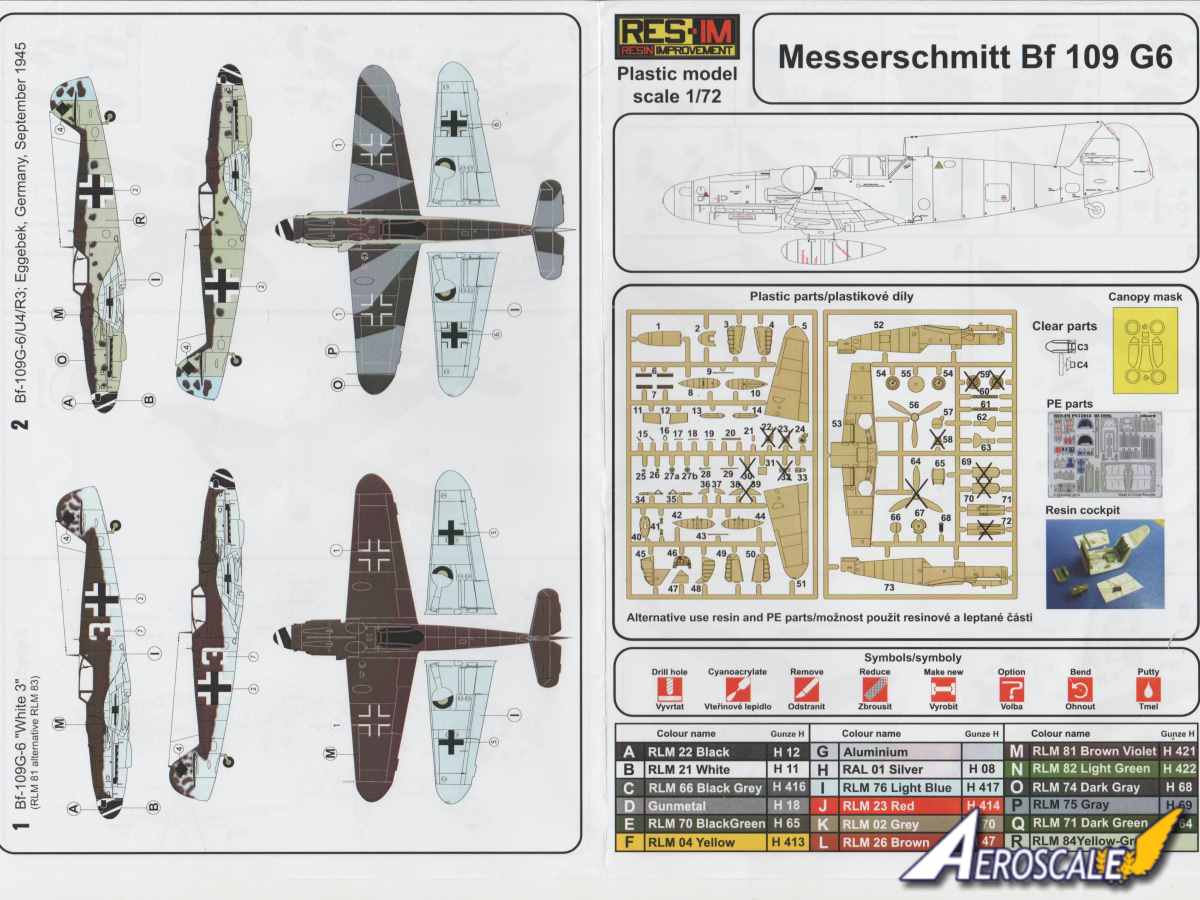
There are two small sheets of decals. One has the national insignia and codes, the other concentrates on the stencils. Swastikas are included and they are in two parts in an effort to disguise them. The decals themselves are sharp with good colour density, with minimum carrier film visible.
Marking options
There are two marking options:
Bf-109 G-6 White 3 Bf-109 G-6/U4/R3 Eggebek, Germany, September 1945
White 3 has RLM 81 or RLM 84 upper surfaces, with mottled tail. Under surfaces is RLM 76. The second option has RLM 74 over RLM 75 on the upper wings and RLM 81 over RLM 74 on the upper fuselage. Under surface and sides of the fuselage is RLM 84. The under surfaces of the wings are RLM 76. RLM paint references are provided as well as the nearest Gunze Sangyo paint number.
Instructions
The three separate instructions sheets are mostly helpful although in part a little confusing. The instructions for the Eduard PE parts for the cockpit are intended to be added to the original plastic parts. What is a little more confusing is the Eduard produced instructions for the PE etched parts is apparently aimed at a Tamiya Bf 109 G. I am not aware Tamiya ever produced such a kit. Feel free to correct me on that one. The PE fret does have RES-IM etched into the metal though. The RES-IM instruction sheet for the cockpit has images of a different PE fret with fewer parts, which was not contained with my sample. This is possibly the result of generic instructions for different models of the Gustav. No big deal as all the necessary parts and more can be found on the larger PE fret.
Conclusions
The AZ Models BF-109G-6 is a very good kit to start off with. The overall shape looks good referenced against images. At least nothing jumps out as being drastically wrong; it looks like a Bf 109 G-6.The amount of internal detail particularly in the cockpit will please the majority of modelers. The resin replacement parts do add a little more finesse to some of the detail such as the cabling and it will be a little easier to pick out with paint. The inclusion of the photo etched parts is a good move particularly around the cockpit. The paint masks for the wheels are certainly an excellent inclusion. You will need to spend a little time looking at the instructions to get the best out of this kit. Despite the slightly confusing nature dont let it put you off. There is a price difference between the basic AZ Models kit and this release from RES-IM. A look at the AZ Models website shows that their price for a Bf 109 G-6 is 13.90 euros and the RES-IM kit is 19.44 euros. Price difference in mind this is still an excellent release from RES-IM.
SUMMARY
Highs: Lots and lots of good thingsLows: Slightly confusing content list in the instructions.
Verdict: Dont let my moaning about the confusion with the PE parts put you off. This is a really good release from RE-IM. Highly recommended.
Our Thanks to RES-IM Resin Improvement! This item was provided by them for the purpose of having it reviewed on this KitMaker Network site. If you would like your kit, book, or product reviewed, please contact us.


Comments