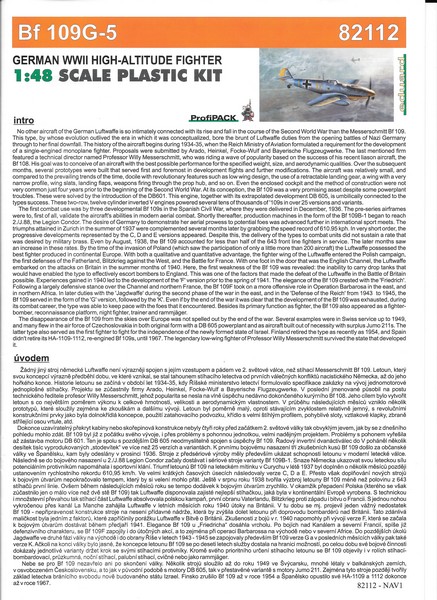
The Bf 109 G-series was developed from the largely identical F-series airframe, although there were detail differences. Modifications included a reinforced wing structure, an internal bullet-proof windscreen, the use of heavier, welded framing for the cockpit transparencies, and additional light-alloy armour for the fuel tank. It was originally intended that the wheel wells would incorporate small doors to cover the outer portion of the wheels when retracted. To incorporate these the outer wheel bays were squared off. Two small inlet scoops for additional cooling of the spark plugs were added on both sides of the forward engine cowlings. A less obvious difference was the omission of the boundary layer bypass outlets, which had been a feature of the F-series, on the upper radiator flaps.
Like most German aircraft produced in World War II, the Bf 109 G-series was designed to adapt to different operational tasks with greater versatility; larger modifications to fulfill a specific mission task, such as long-range reconnaissance or long-range fighter-bomber.
The early versions of the Bf 109G closely resembled the Bf 109 F-4 and carried the same basic armament; however, as the basic airframe was modified to keep pace with different operational requirements, the basically clean design began to change. From the spring of 1943, the G-series saw the appearance of bulges in the cowling when the 7.92 mm (.312 in) MG 17 were replaced with 13 mm (.51 in) MG 131 Machine guns (G-5 on wards).
Erich Hartmann, the World's top scoring fighter ace, claiming 352 victories, flew only the Bf 109G, of which he said: It was very manoeuverable, and it was easy to handle. It speeded up very fast, if you dived a little. And in the acrobatics manoeuver, you could spin with the 109, and go very easy out of the spin. The only problems occurred during takeoff. It had a strong engine, and a small, narrow-tread undercarriage. If you took off too fast it would turn [roll] ninety degrees away. We lost a lot of pilots in takeoffs
The kit
Eduard have this knack of producing some of the best kits at the right time even though sometimes these may not be their own mould, it always seems to pay off for them! This new Bf 109G-5 is in a top opening box with the usual great quality art work. The box is nice and sturdy and should be ok stored in your stash, so long of course that you don't put anything too heavy on top of it. If you are a fan of Eduard you will already know what comes in their Profi Packs.
The kit contents are
4 Dark grey sprue's
1 Clear Sprue
1 Photo etch
1 Set of masks
2 Decal sheet
1 Instruction booklet
Review
The first thing I noticed when I picked the first sprue up was the amount of detail on it.
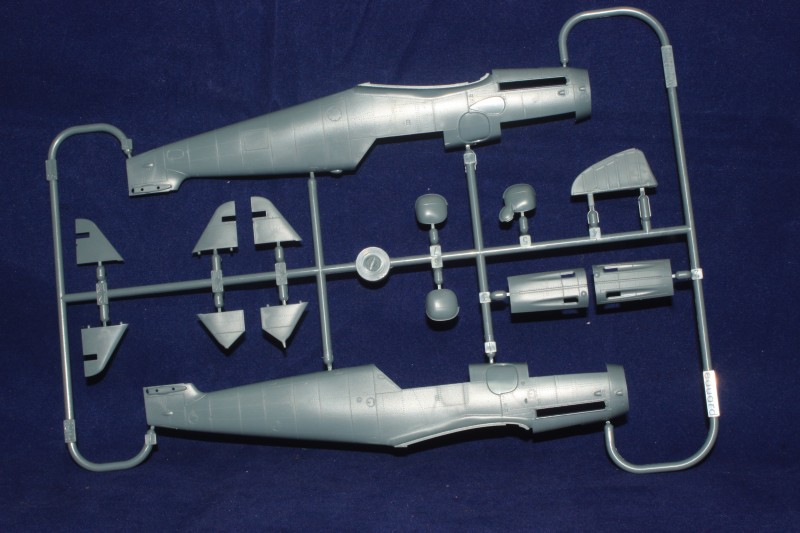
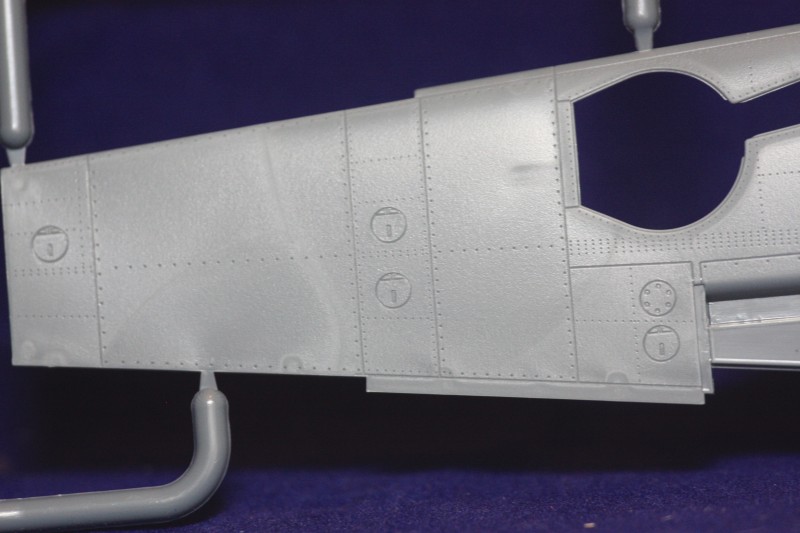
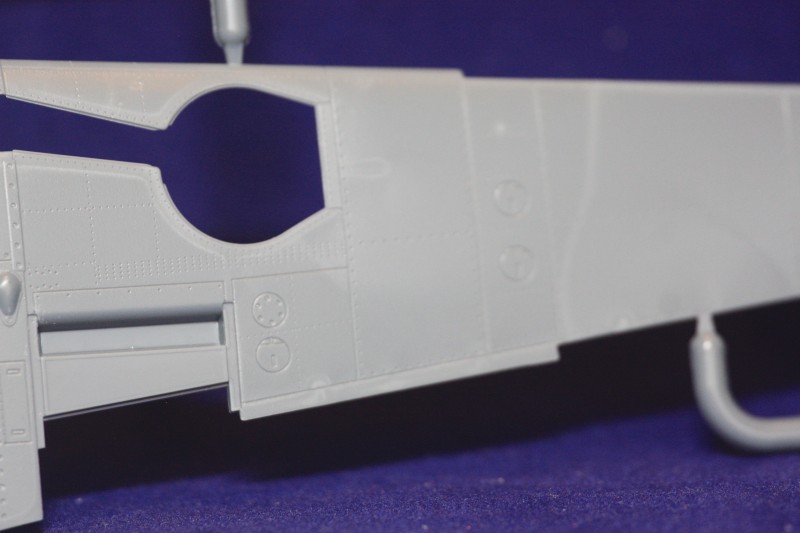
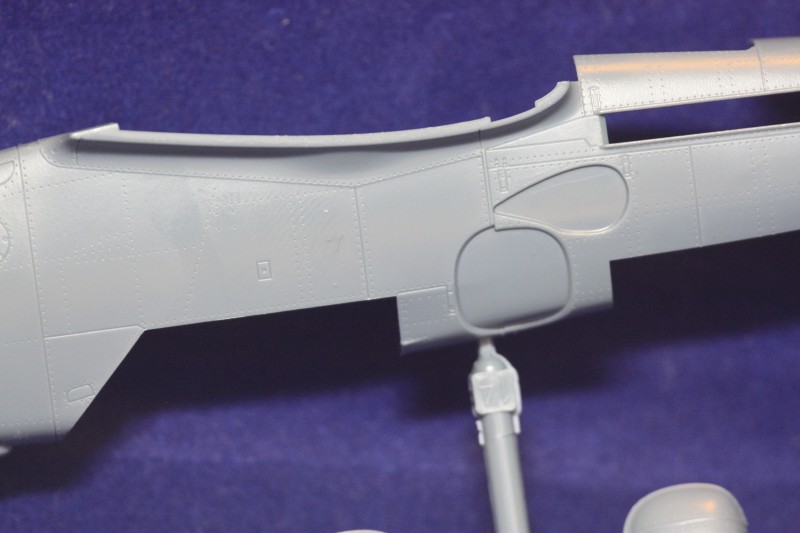
The two halves of the fuselage literally went together in a dry fit test without to many issues, just some cleaning work where you cut it off the sprue. While still holding the fuselage together I took a look at the intricate panel lines, inspection covers and the shape in more detail. I notice the panel lines that follow down the fuselage vertically now going round the fuselage instead of fading out at the bottom.
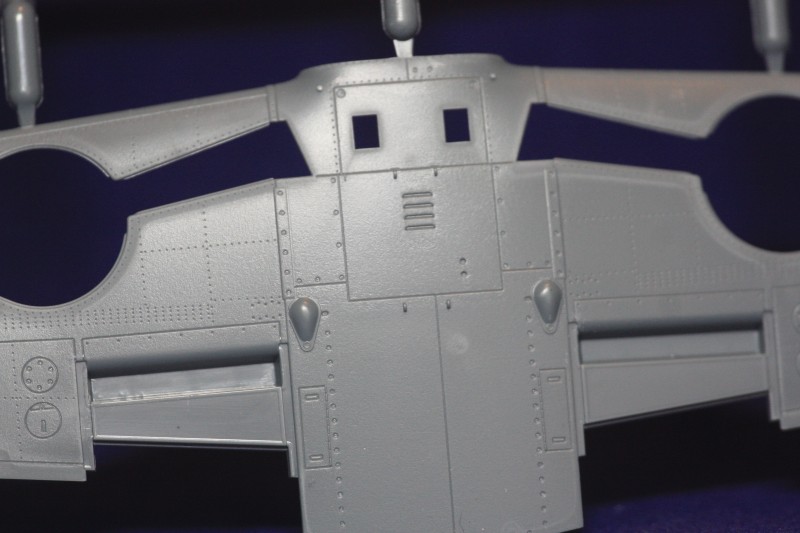
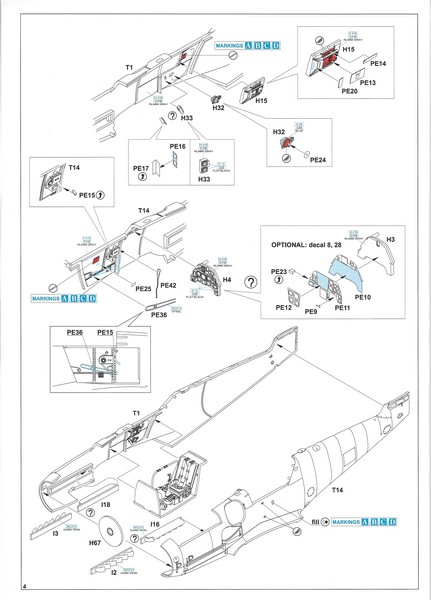
Then to the new cowling bulges looking like a pair of bulbous eyes looking at you from the side of the fuselage. These new additions were added when the old MG 17 7.92mm was replaced with the MG 131 13mm from the G-5 on wards.
There is some small detail internally inside the fuselage which include a pulley and some leavers. There are some options for some photo etch inside the interior here which are more controls and control panels.
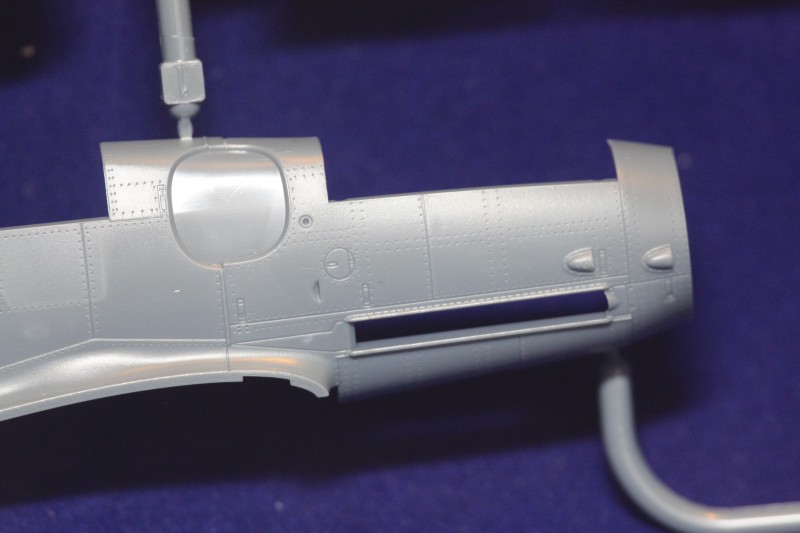
The inspection covers are all where you would hope to find them and are well detailed.
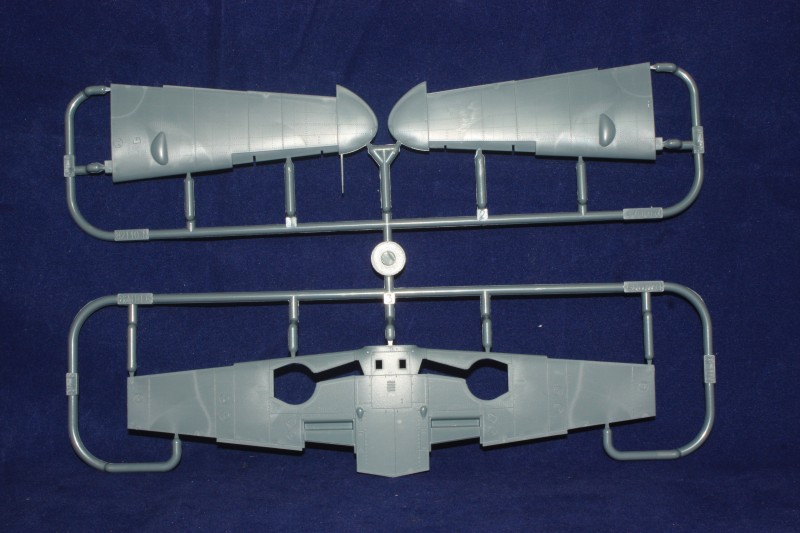
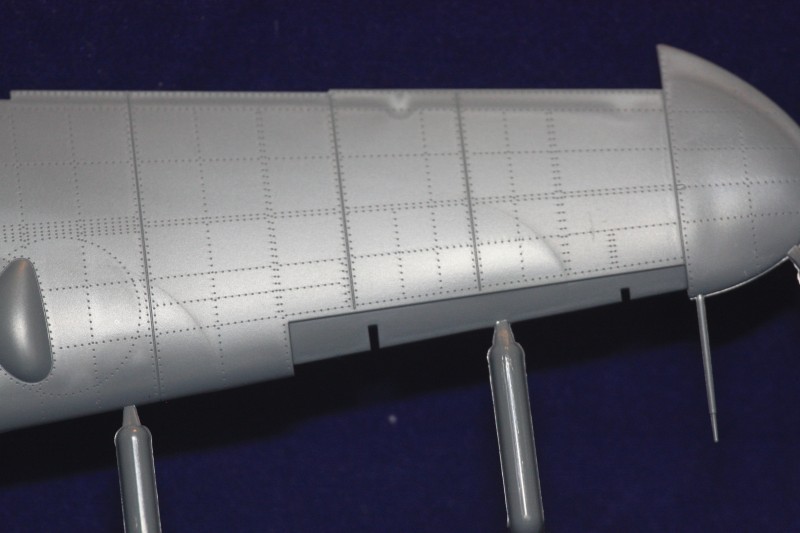
Turning to the wings to carry on with my dry fit they fitted like a glove just a minimal amount of cleaning to do from where you have cut it from the sprue. I love the intricate detail that Eduard have managed to get into this kit. Looking through a book that I did a review on the Bf 109 by Caraktere and looking closely at the pictures of wing sections on the G version, every panel line and inspection covers seem to be in place. On the leading edge of the front wing is the slots which you can have open or closed the same for the flaps on the rear of the wing.
You have to be looking at the wing sections to understand just how far Eduard have really come with their moulds. The detail in them especially the top wing bulges for the machine gun fairing for guiding the ammo that were from the G-6 is wonderfully recreated.
One word of warning the pitot is one piece moulded on the end port wing and is quite fragile especially while removing from the sprue.
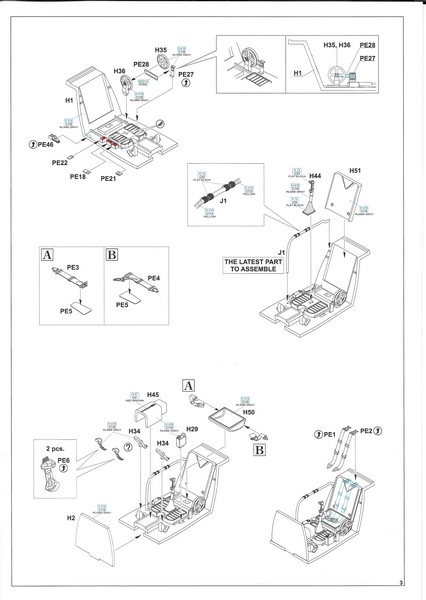
The cockpit floor and back panel are one piece moulding and if doing an out of the box build there is enough detail on this to satisfy most modelers, with some control surfaces and foot pedals for rudder control even has heel rests moulded into the floor.
The display panel with its various control gauges and flying indicators has clear raised areas with identifiable single gauges and dials making it very realistic to the original flying controls. On the same sprue is various other flight controls like the control stick, pedals to stick onto the rudder controls, hand wheel for the tail trim internal control.
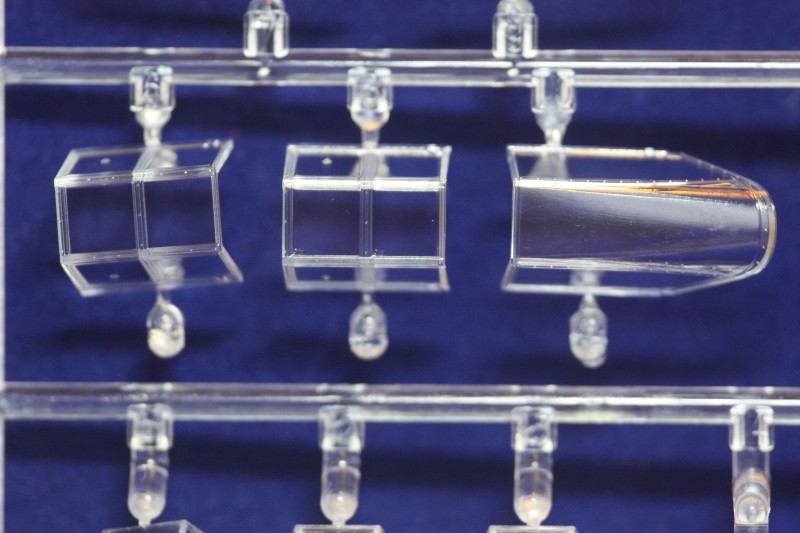
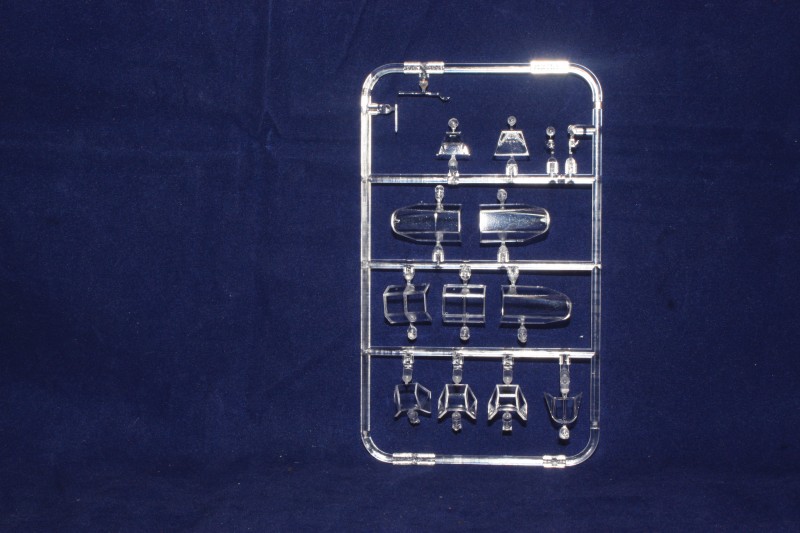
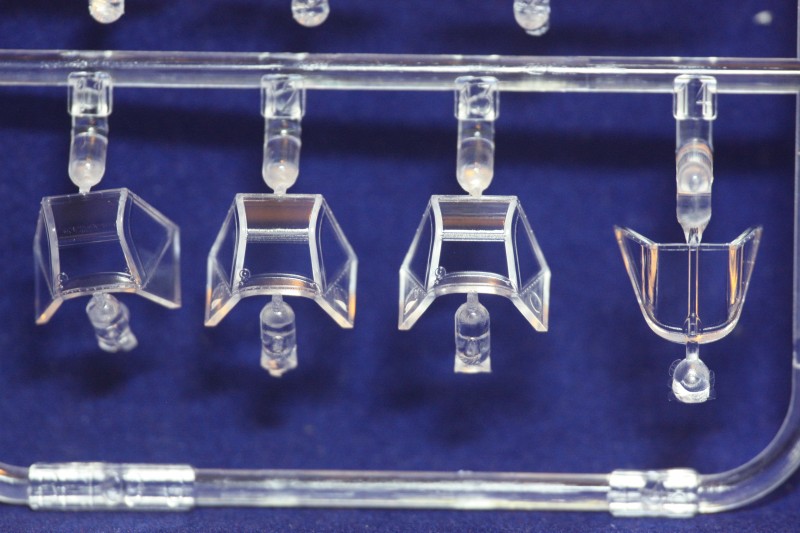
The cockpit glazing is highly polished and very clear with no obvious faults and some nice detail on the frame work.
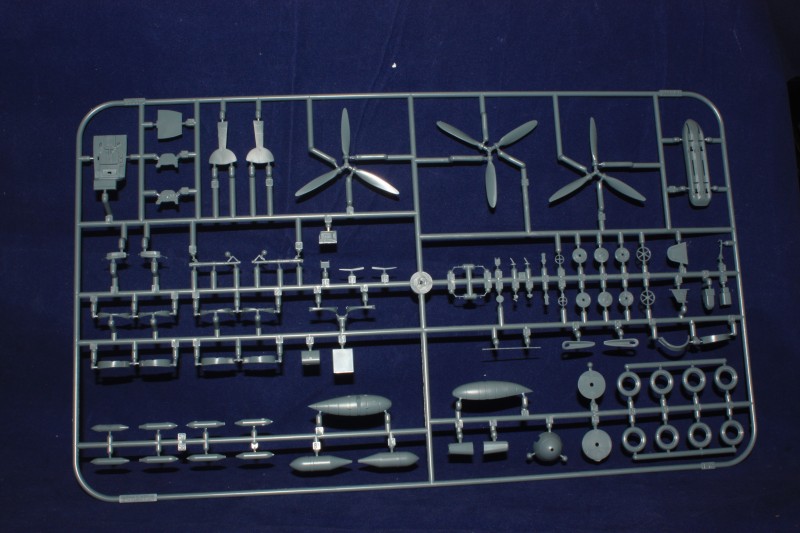
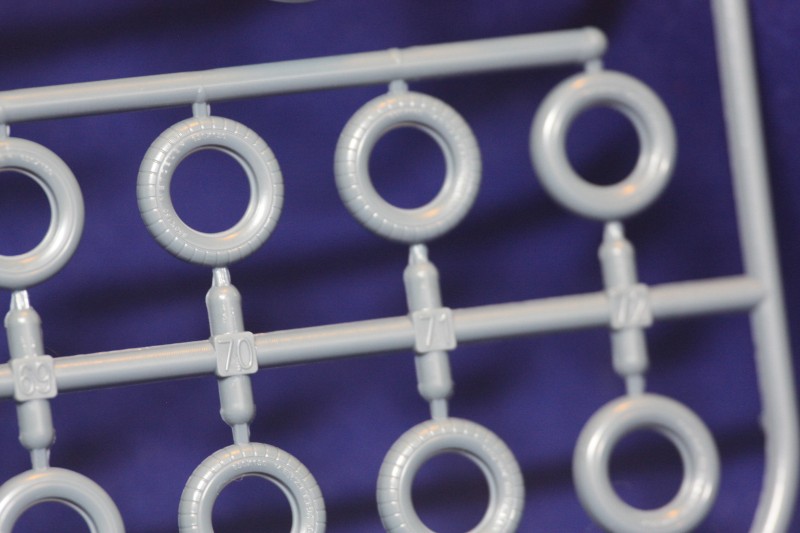
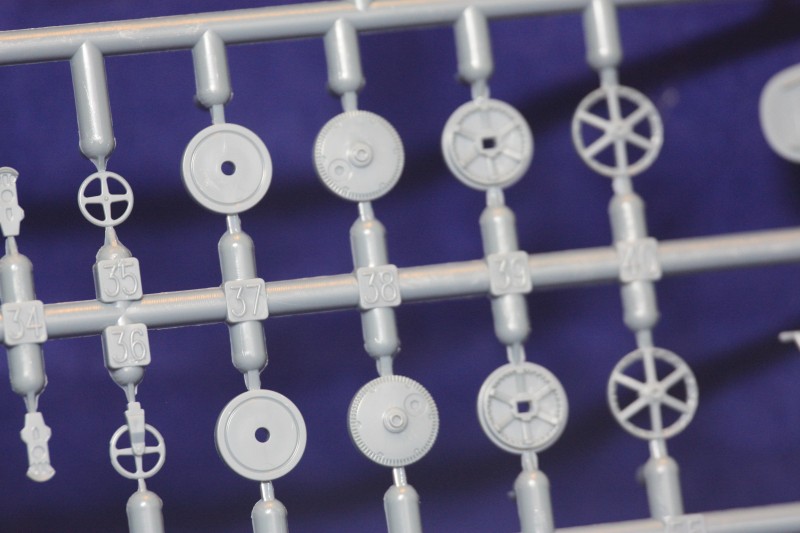
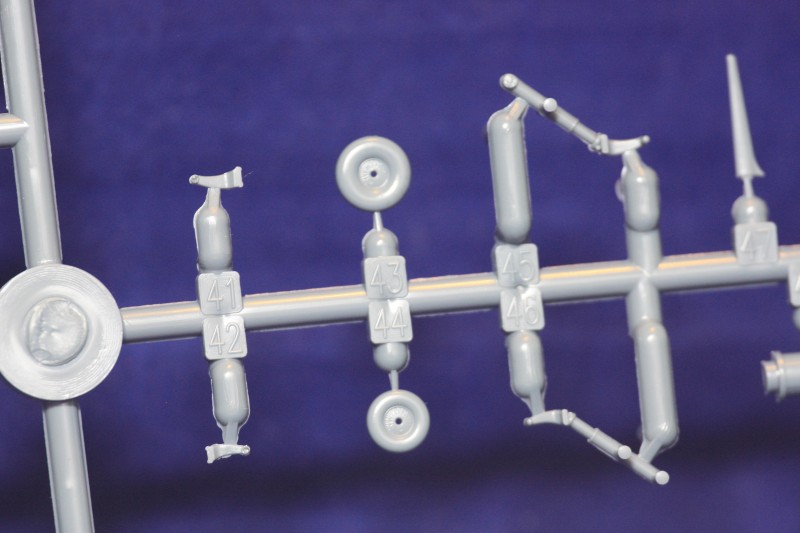
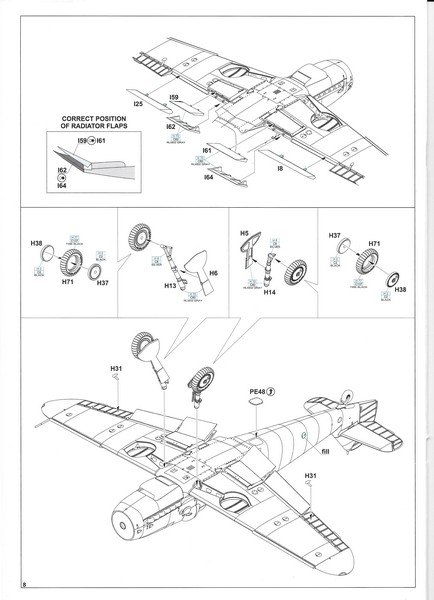
The undercarriage legs are one piece and quite sturdy, the wheels come in separate moulded tyres and wheel hubs the detail on these is glorious and the best that I have ever seen on any Bf 109 kit before.
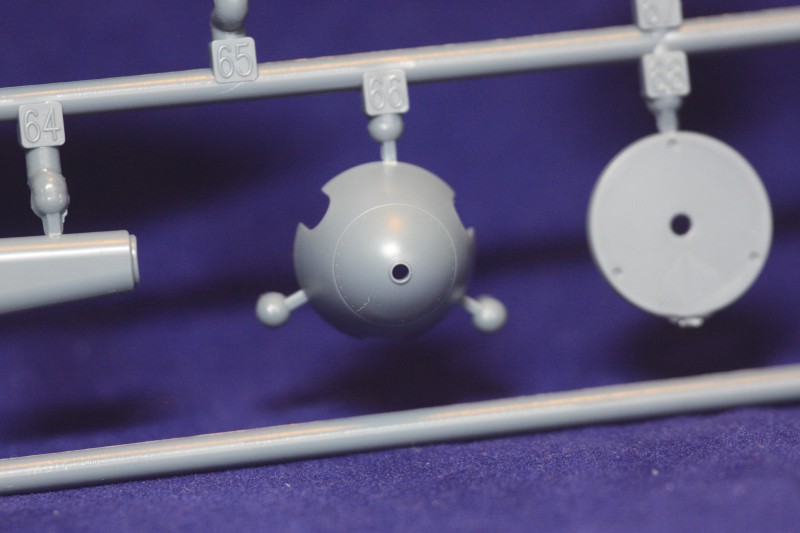
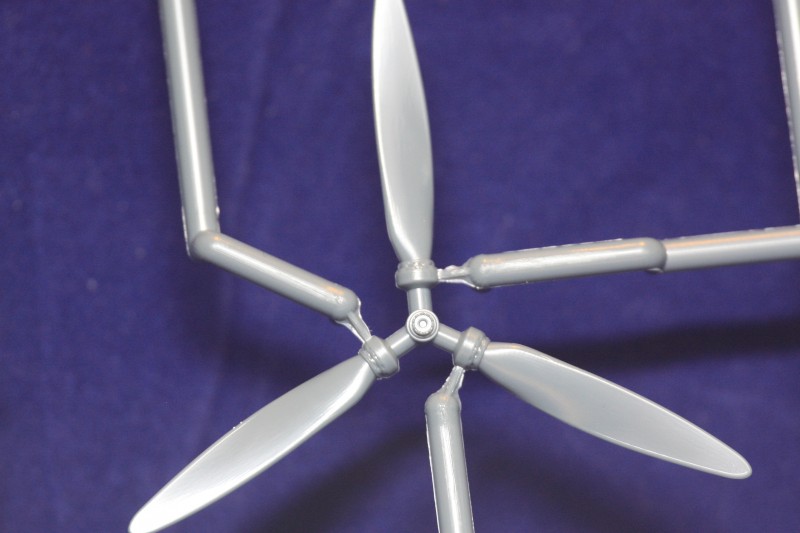
The propeller and spinner are also present on this sprue in nice detail with a one continual circle panel line, to be able to remove the top of the spinner to take the propeller off for maintenance.
There are lots of extras on this sprue that would go to make a different Mk of Bf 109 so plenty of spares for the spares box.
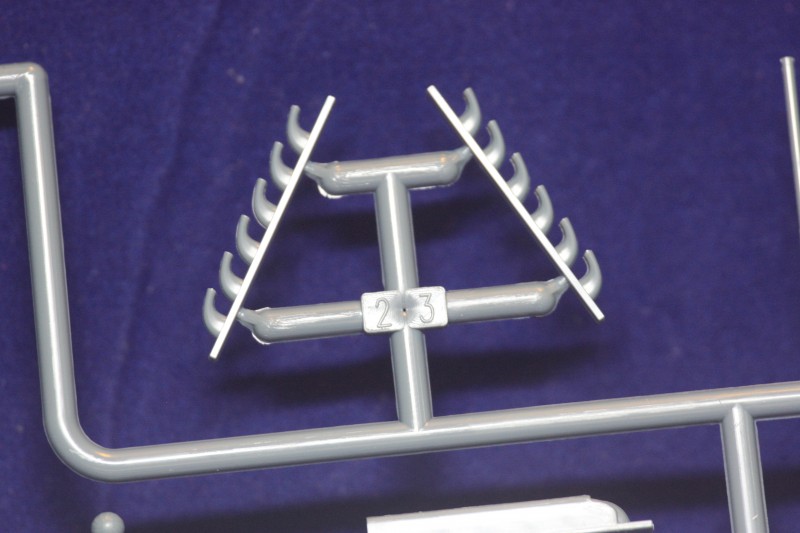
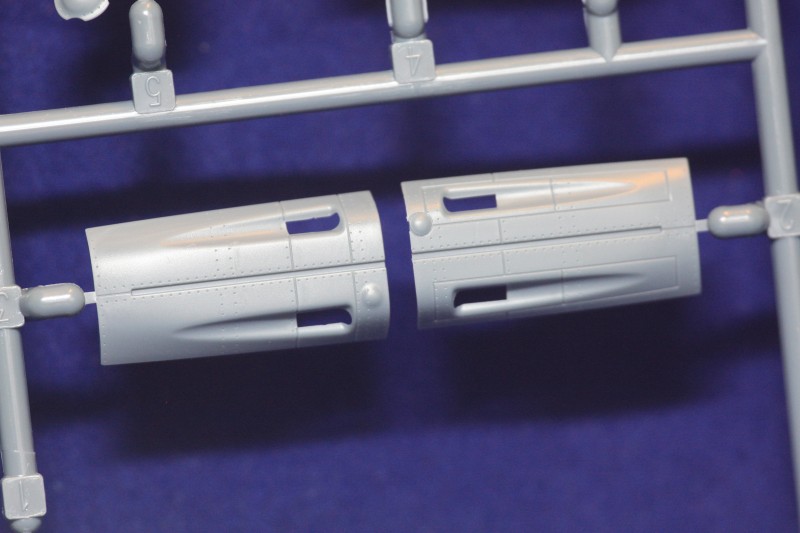
Moving onto the last sprue there are quite a few parts that you will not be using, so onto the parts that you will be using. The exhausts, for so many years now we have been buying after market exhausts to be able to get the right detail. Well I truly believe that Eduard have now managed to make this a thing of the past. The detail on the exhausts the fact that they have actually managed to get the opening of the exhaust outlets into moulded plastic.
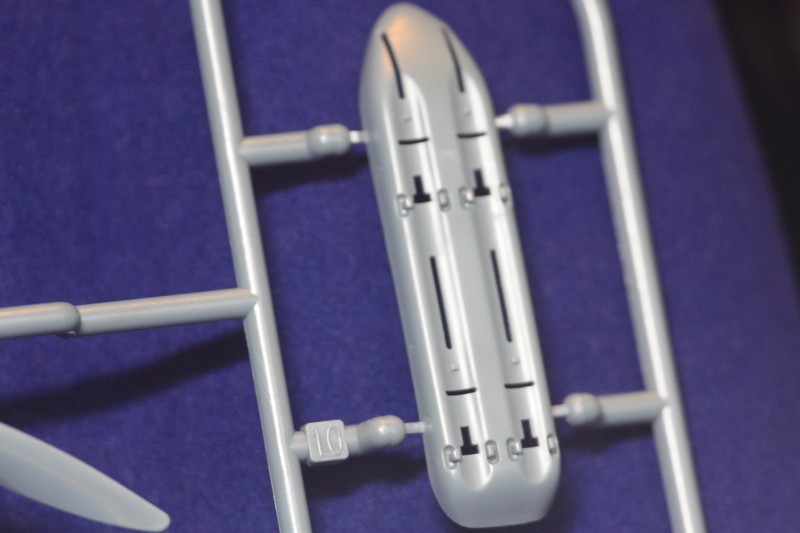
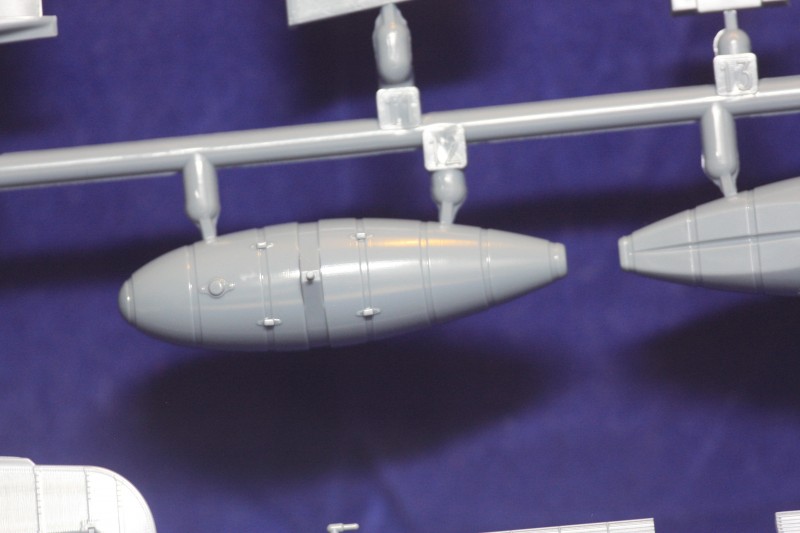
A very well moulded drop tank catches your eye as you take in the detail of it. Tail wheel has a different fitting on the G version and looks good.
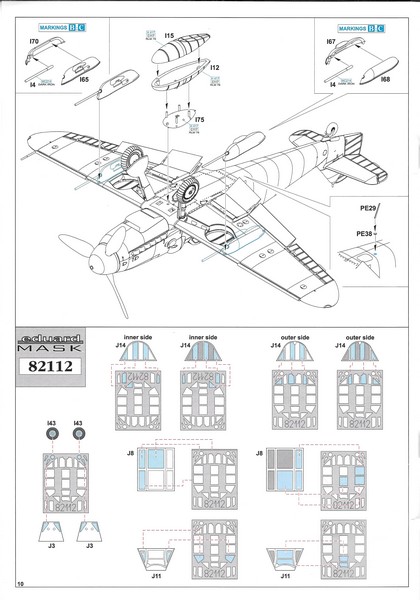
On this sprue there is an optional R6 Rustsatz optional under wing cannon gondola which houses a 20mm Mauser MG 151/20 cannon. This is an option for B or C.
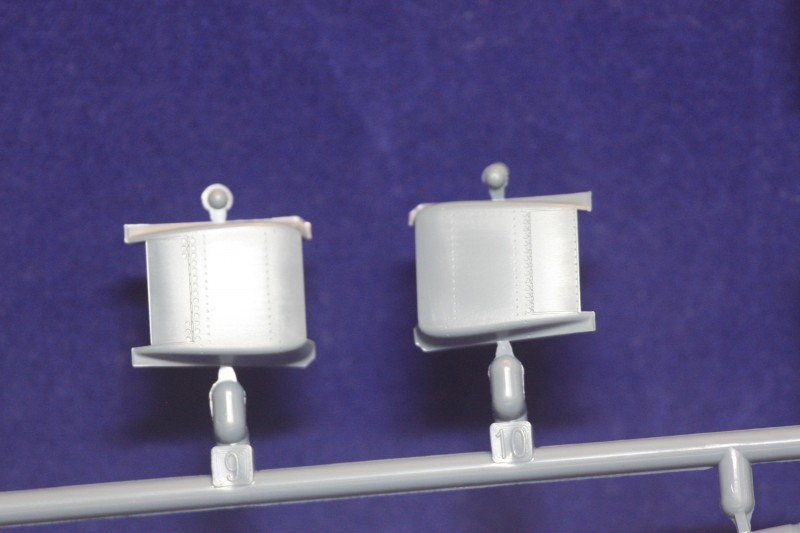
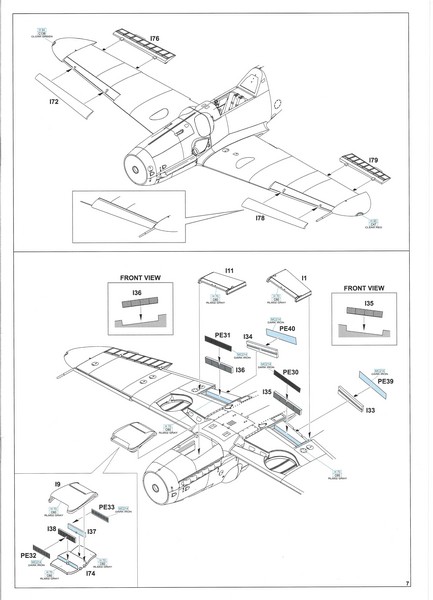
On the underside of the wings is the opening covering the radiators when building these you have some photo etch making to help make this a very realistic looking radiator.
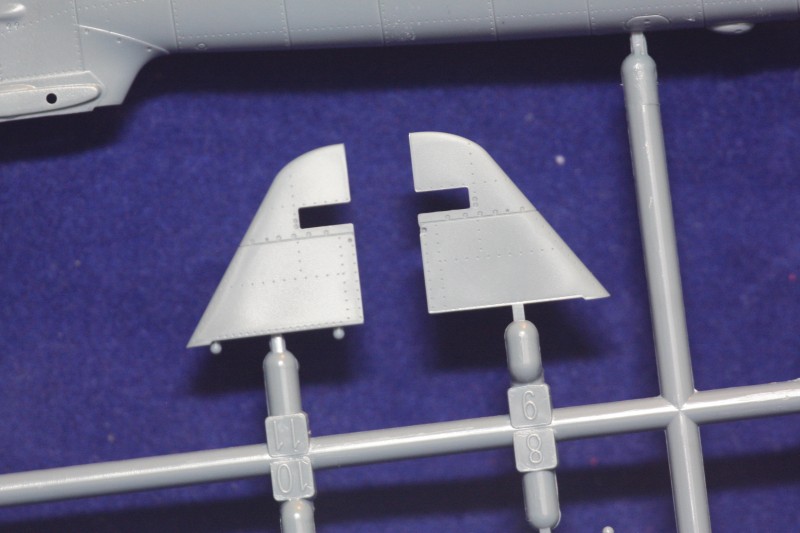
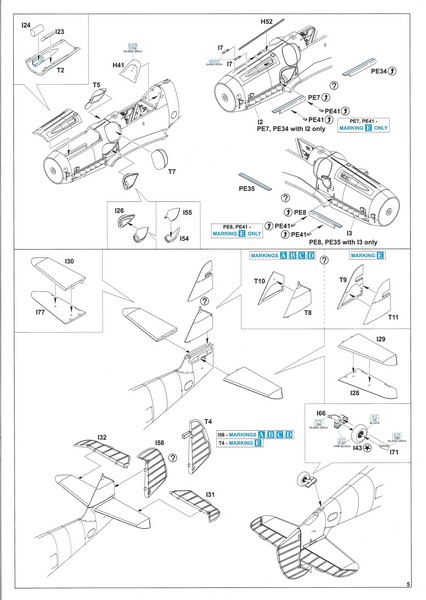
The rear tail has two options one for profiles A.B.C.D and there other is for profile E. This impacts on the rudder too, with two different rudders that you can use again for the same as the tail options just the E version being different.
Instructions and decals
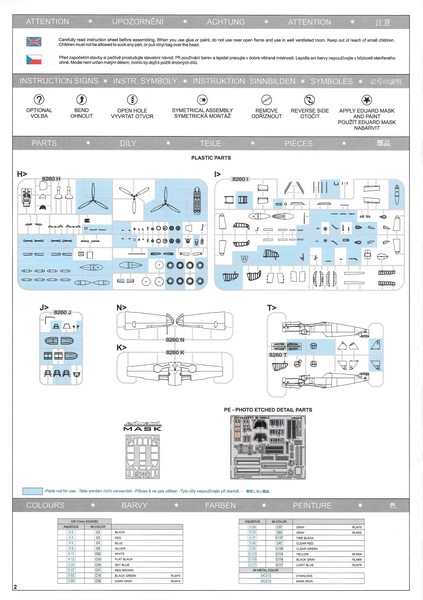
The Eduard instruction booklet is large and by far one of the better ones in the modelling world, albeit a lot of the different companies are starting to also produce similar instructions now.
The first page sets the stage with an intro into the Bf 109G-5 giving details and some history of the Messerschmitt Bf series. This is followed by a plan of the sprue's showing what you will be using and what you will not be using. The colour chart is for Gunze paints Aqueous and Mr Colour.
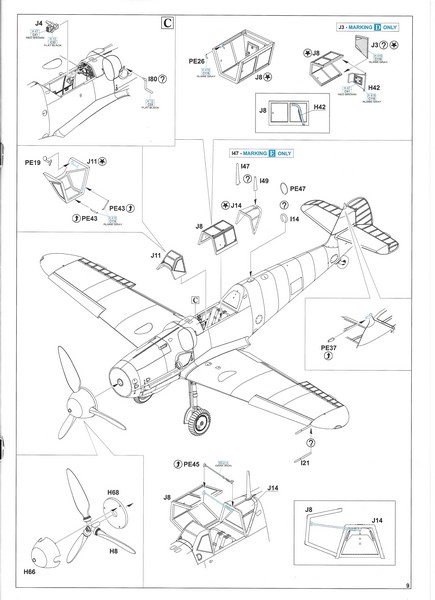
Then following on from the paints is the start of the build which starts with the cockpit. One of the things I really like about Eduard's instruction book is their layout, be it a piece of etch or different options it is all clearly laid out with parts in boxes to denote a change or different option making it easy to follow even for a novice or youngster. Moving on after you have finished the cockpit and placing the two halves of the fuselage around it that is the next task and should not be to tricky to do.
It then runs along the fuselage adding detail as you go, there is a fair bit of etch to place along the way as you work through the pages.
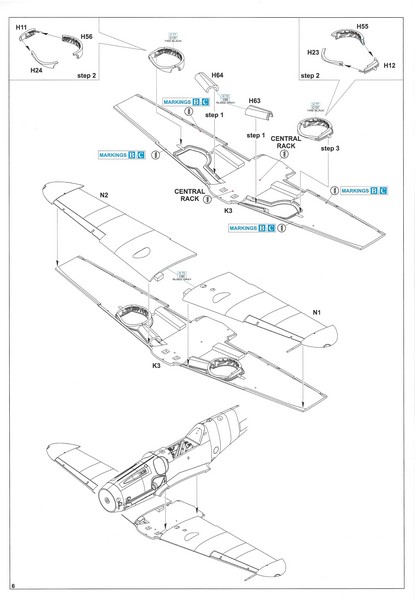
Page six and seven become the start of the wings and the interior for the wheel wells, I don't see any problems with the fitting after the dry fit that I did.
The front wing leading slots and the rear of the wings the ailerons are the next part of the build then moving onto the radiator and etch that will truly bring a better finish to it. The flaps are next and give plenty of scope with the optional up or down positioning. Following this is the construction of the very detailed hubs, tyres to the landing gear, again giving you the option of up or down.
We then pretty much come to the finishing items such as some detailed parts for the gun sights, the cockpit glazing and propeller and spinner.
Finally the option for the extra machine gun pod under the wing and the fuel drop tank.
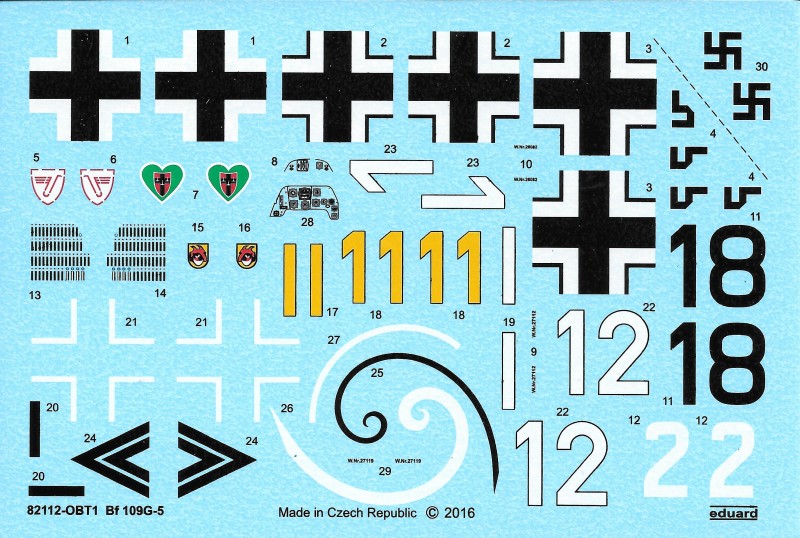
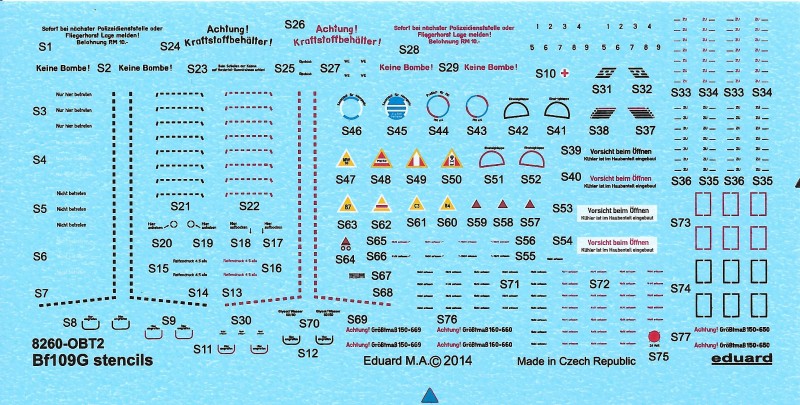
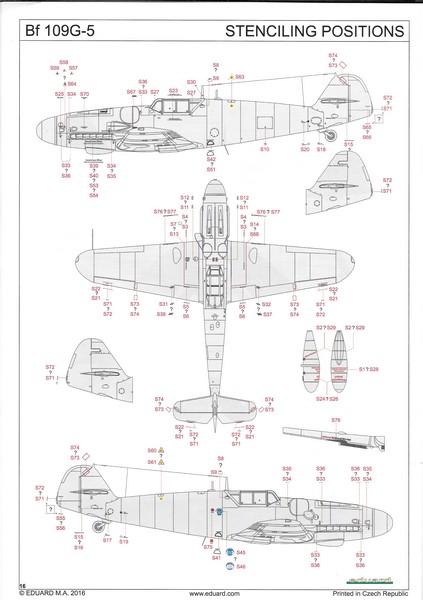
The decals are very good and virtually an invisible carrier film they are very colourful and very clear. The second set of details is for the stencils which again look very good with minimal carrier film.
The decals give you options for five different aircraft
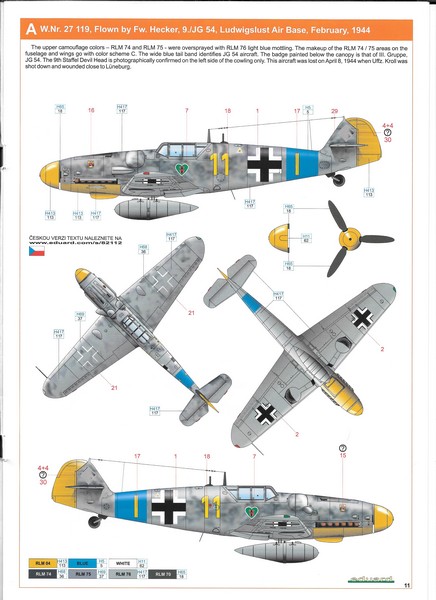
A: W. Nr. 27 119, Flown by Fw. Hecker, 9./JG 54, Ludwigslust Air Base, February, 1944.
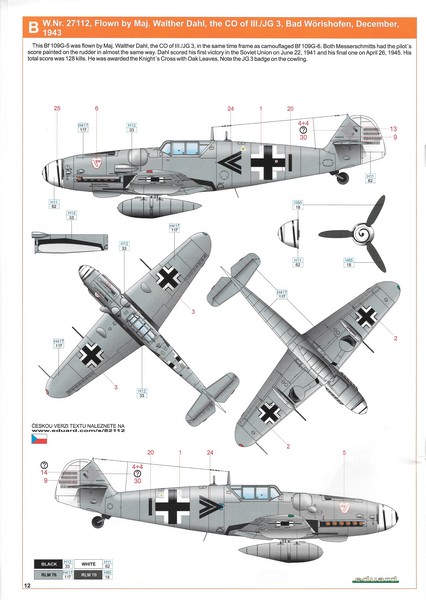
B: W. Nr. 27112, Flown By Maj. Walther Dahl, The CO of III/JG 3, Bad Worishofen, December 1943
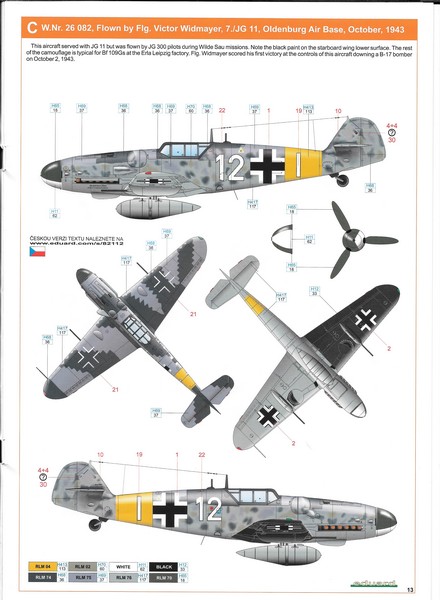
C: W. Nr. 26 082 Flown by Flg. Victor Widmayer, 7 ./JG 11, Oldenburg Air Base, October, 1943
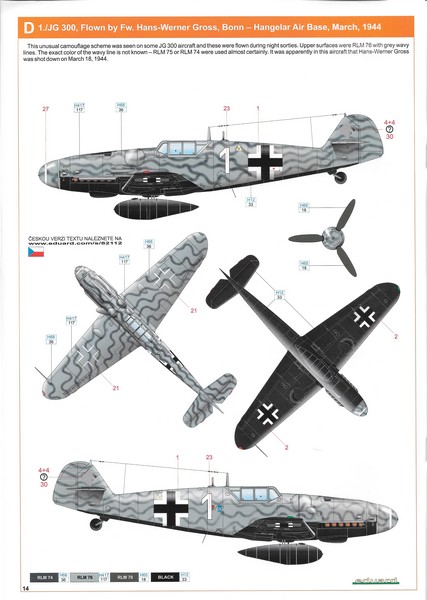
D:1./JG 300, Flown by Fw.Hans-Werner Gross, Bonn - Hangeler Air Base, March 1944
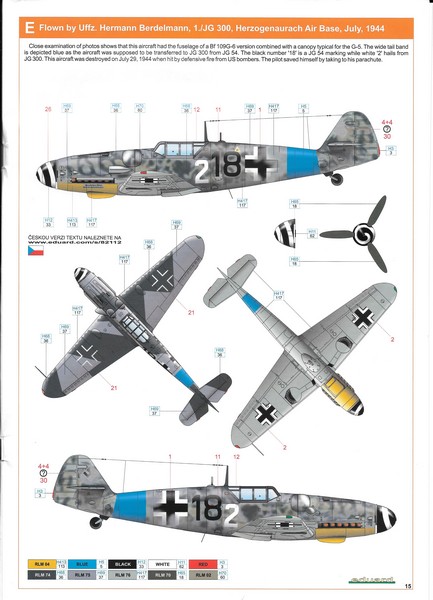
E: Flown by Uffz. Hermann BerdelMann, 1./JG 300, Herzogenaurach Air Base, July, 1944
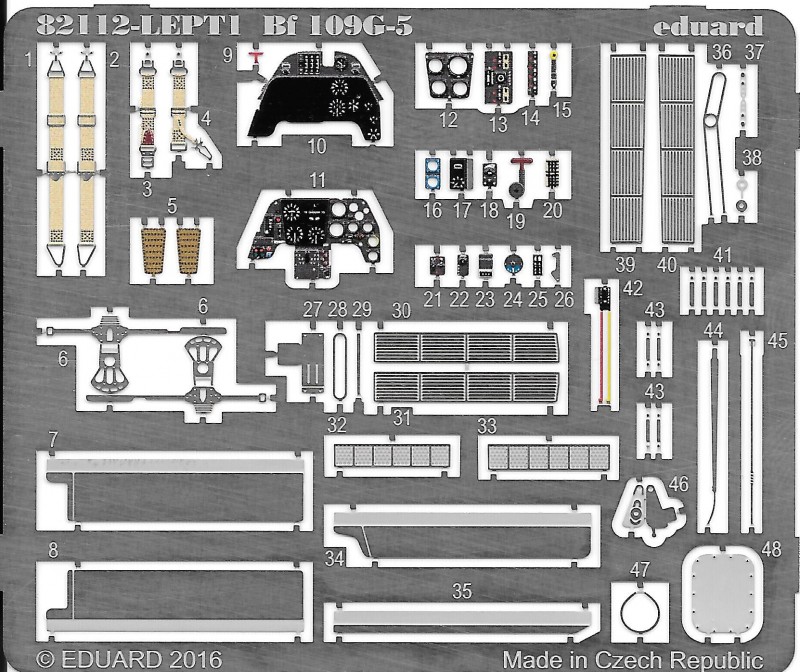
Photo etch sheet has various bits to bring the plane up to a more realistic product. You have to say that the one thing that most people if asked what do Eduard do, 90% I think would tell you Photo etch. The photo etch that comes with the kit is very nicely detailed with seat belts pre-coloured along with the excellent facia for the instrument panel, also the same for some of the controls. Grills for radiators aerial loop and rudder controls. Pretty much all of Eduards etch is very good.
Conclusion
Having tested some of the parts for fitting issues and any discrepancies to which I could not find any, I have to say that yet again Eduard have created yet another masterpiece. The plastic is well done with plenty of recessed lines around the aircraft, inspection panels, rearming panels all being present. It is certainly one I will relish building with the different options a certain winner.
Please remember, when contacting retailers or manufacturers, to mention that you saw their products highlighted here - on AEROSCALE.
SUMMARY
Highs: The new detail in the mould, the ease in which Eduard make their kits for building will attract a lot of attention.Lows: Hard to find any to be honest minor bit of flash on one part! Verdict: If you are into Luftwaffe aircraft, World War 2 then this kit will be a pleasure to build with very little if any extra work.
Our Thanks to Eduard! This item was provided by them for the purpose of having it reviewed on this KitMaker Network site. If you would like your kit, book, or product reviewed, please contact us.
About Adie Roberts (In_War_and_Peace) FROM: ENGLAND - SOUTH WEST, UNITED KINGDOM
I am disabled after a terrorist bomb I have in the past made models for TV and film and work with local museums making new models for display. I also take on commission builds for people


Comments