If you were tasked with designing a new floatplane fighter, basing it closely on an existing two-seat biplane reconnaissance aircraft might not be the most obvious solution. Nevertheless, that is the path that Giovani Gallasso chose in developing his successful IMAM Ro.43 into the Ro.44. Perhaps unsurprisingly, the new fighter could hardly claim to be a stellar performer, with a top speed of around 197 mph (only 8 mph faster than its predecessor) - and this in 1937, when its first 300 mph monoplane opponents of the future were entering service.
With the onset of WW2, the Ro.44 was clearly obsolete, and it was largely relegated to second line duties and patrolling the relatively safe skies of the Aegean, before seeing out its days as a trainer.
The Kit
Special Hobbys new Ro.44 arrives in a very attractive conventional box, with the main sprues and various accessories bagged separately for protection in transit. The kit comprises:
76 x grey styrene parts (plus 16 unused)
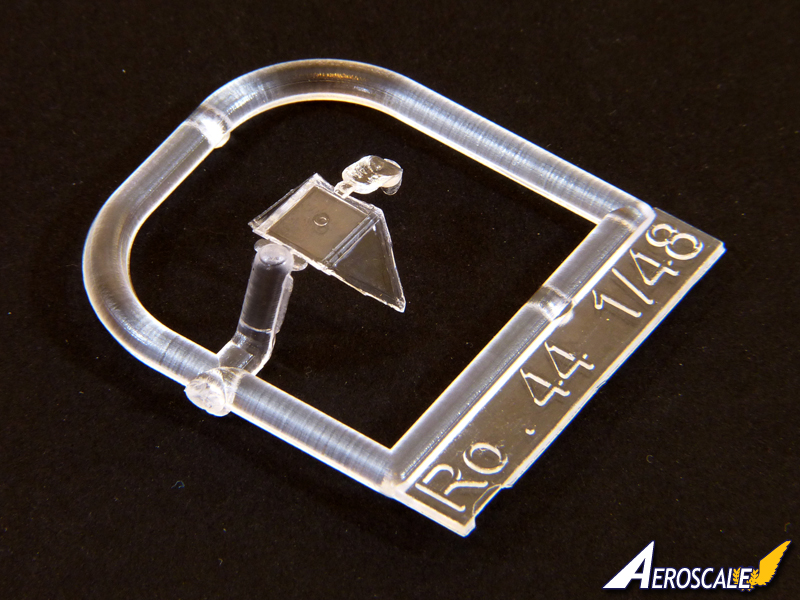
1 x clear styrene part
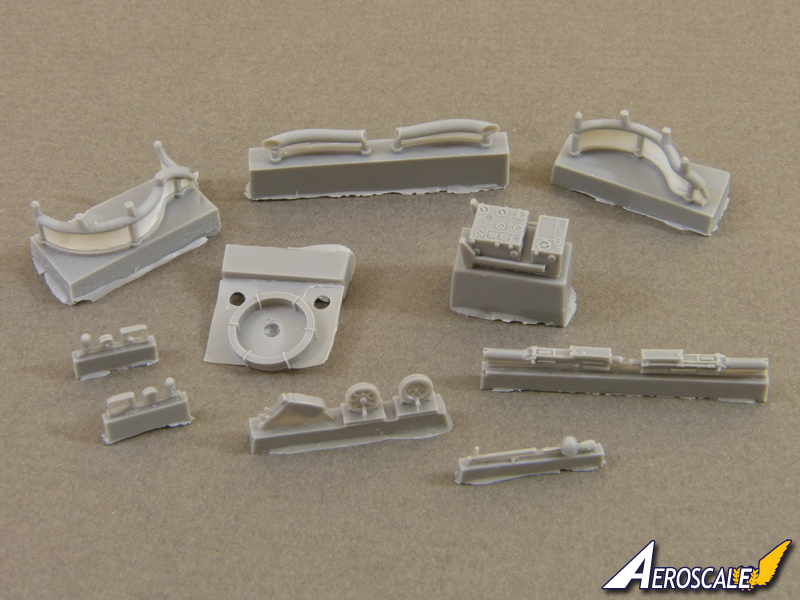
17 x grey resin parts (plus 2 spare)
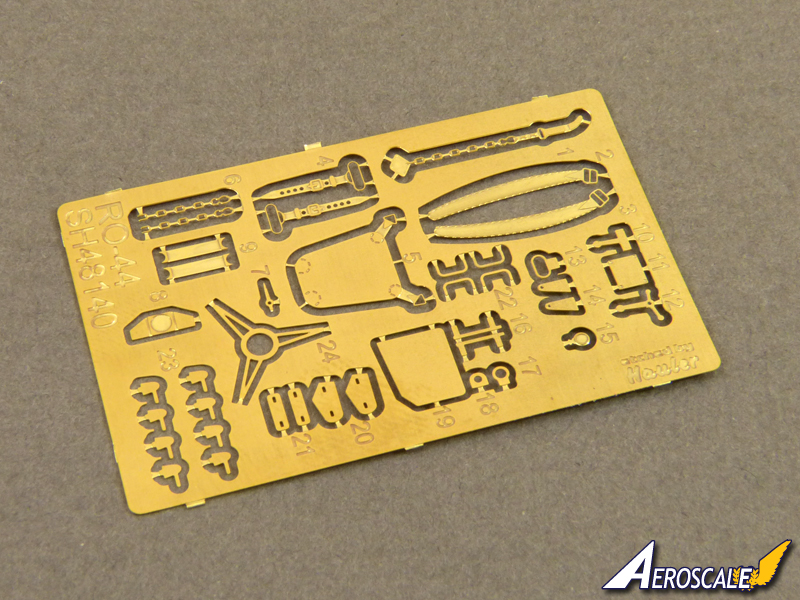
41 x etched brass parts
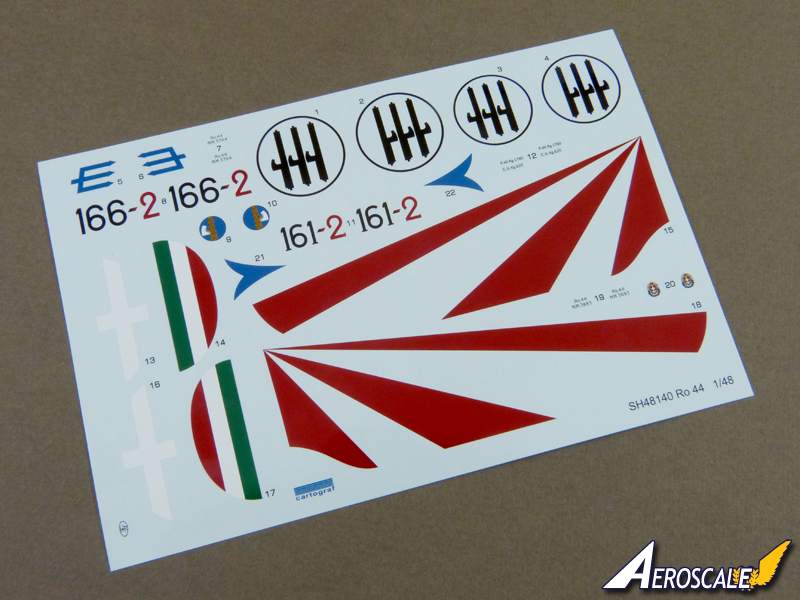
Decals for 2 x colour schemes
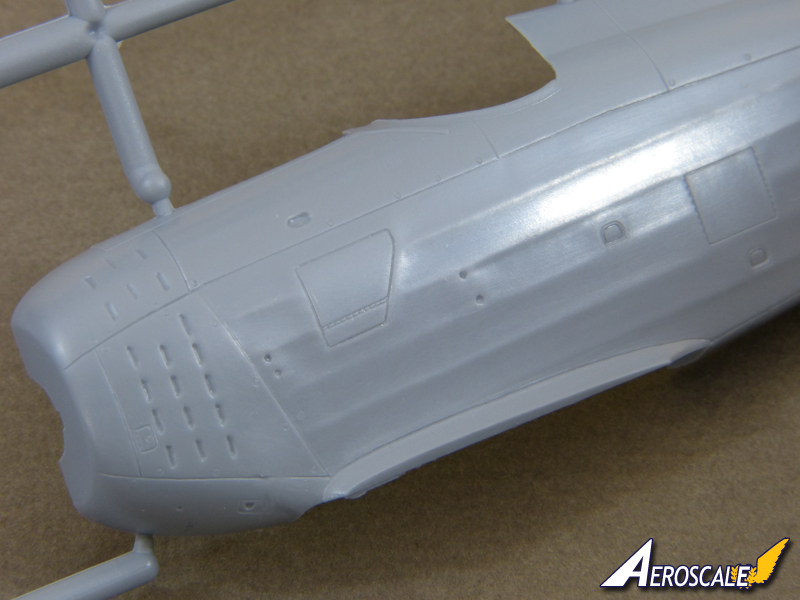
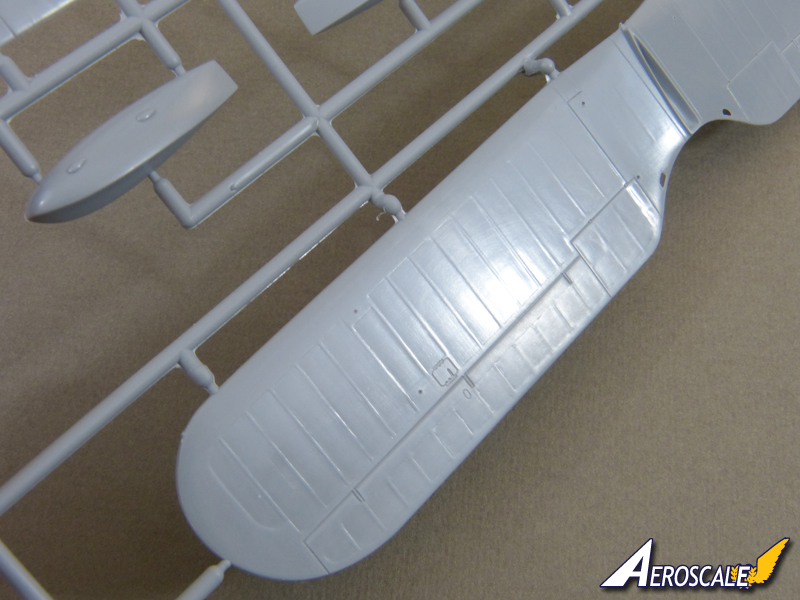
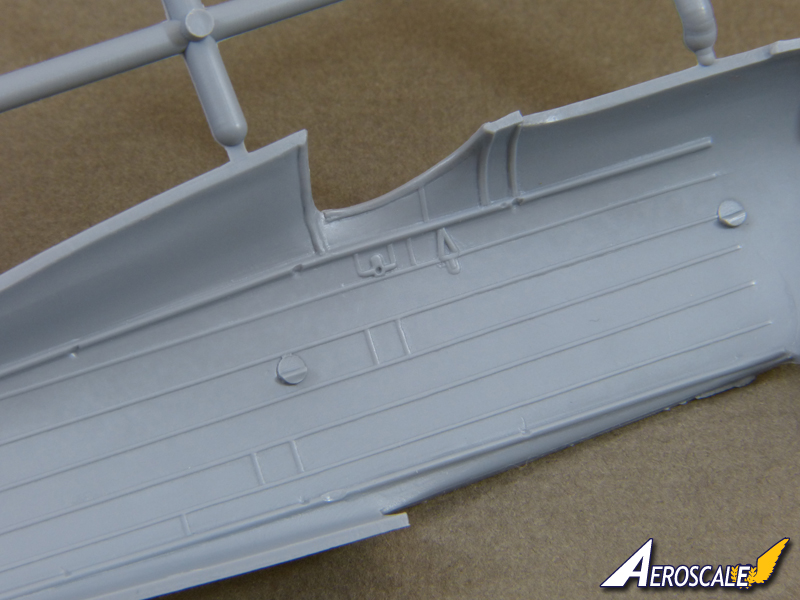
Its important to note at the outset that this kit is produced with limited-run technology, so it would be unrealistic to expect the kind of precision the best of the majors are capable of. That said, its actually more cleanly moulded than some mainstream kits Ive seen, and boasts a delicate fabric-effect finish that CAD-produced models struggle to emulate. The engraved panel lines are neatly done and embossed detail is good and crisp.
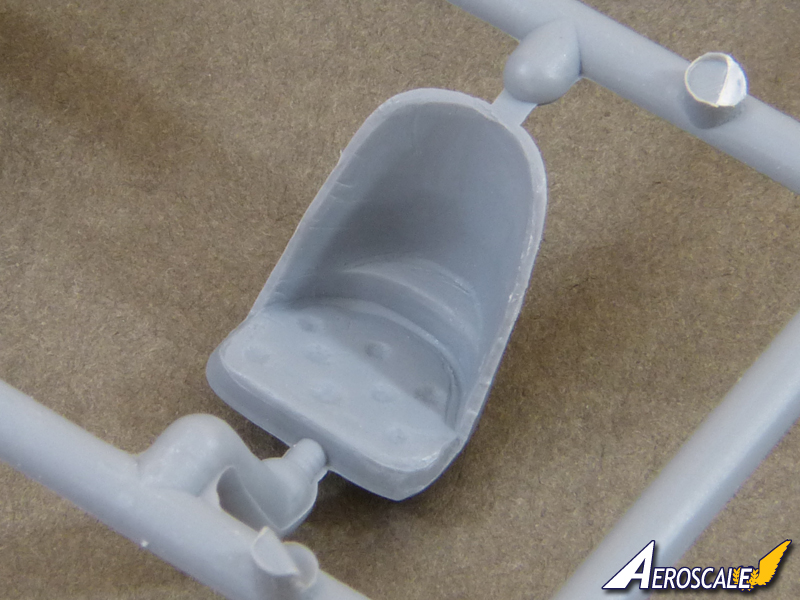
I havent spotted any sink-marks on my kit, while the ejector pins look to have been kept pretty much out of sight (the only potentially nasty ones in the cockpit being (hopefully) hidden by the pilots seat.
Test Fit
The kit clearly shares a number of parts with the Ro.43 released alongside it - hence the number of spare parts - so the following should largely apply to both kits.
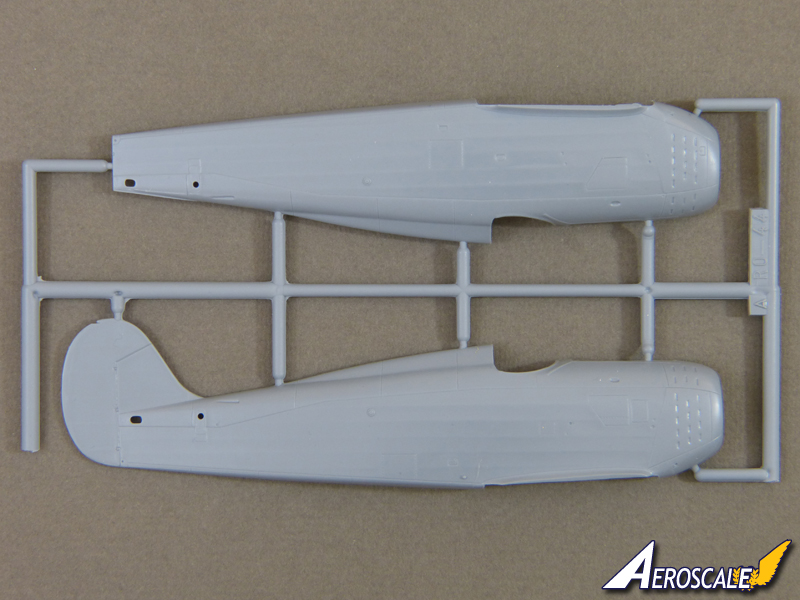
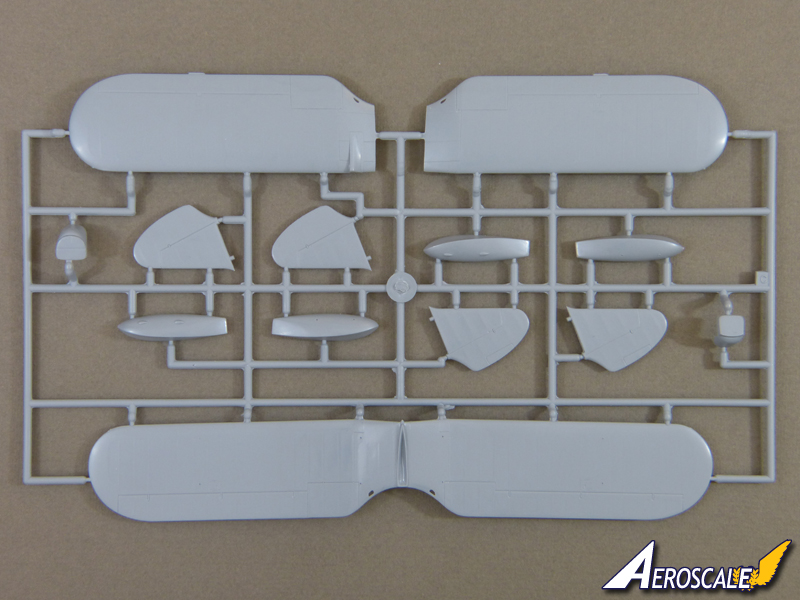
The fuselage halves clip together neatly and the detail lines up perfectly. The wings are perfectly straight in my kit with nicely sharp trailing edges. both the top and bottom wings are moulded as full-span lower surfaces with separate upper panels. The joints to the fuselage are good, promising a sound basis for the rest of the build.
The fin and rudder are integral on the Ro.44 (separate on the 2-seater), while the stabilizers attach with sturdy locating pins.
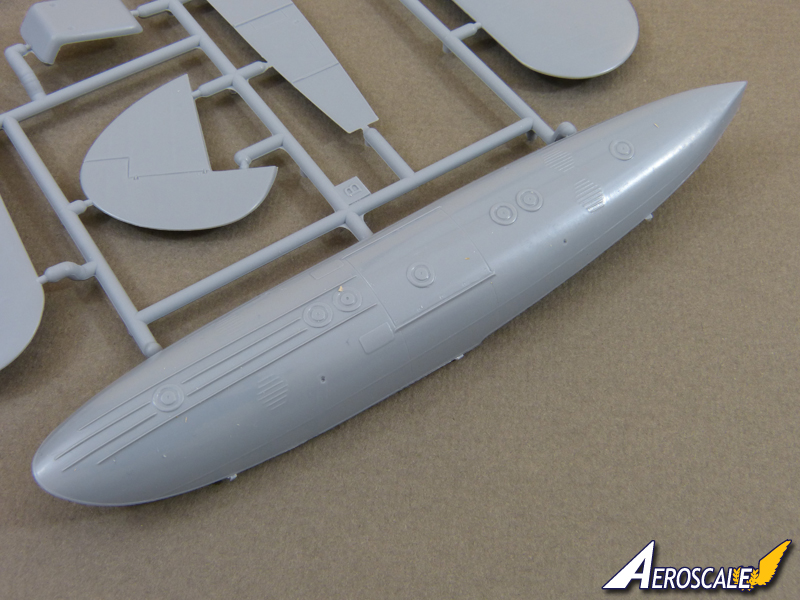
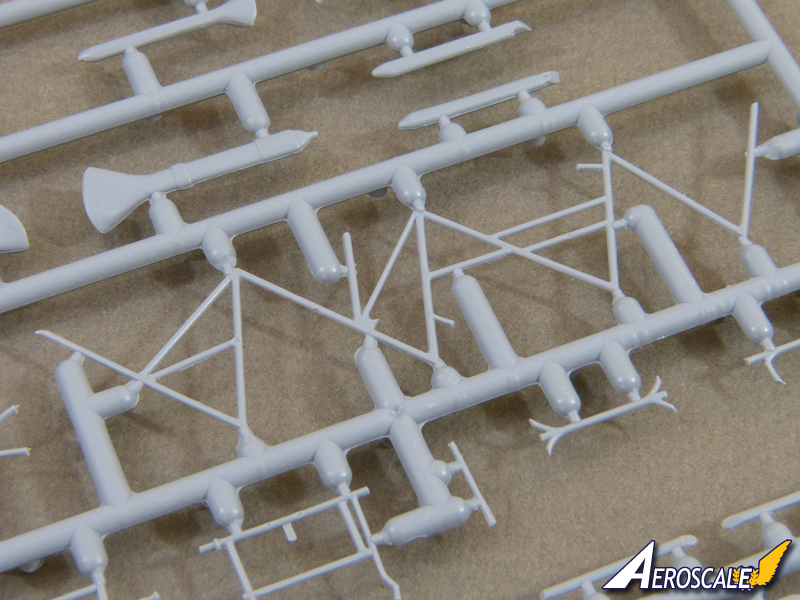
Attaching the large central float is likely to be the trickiest part of the build, so Special Hobby supply a moulded template to help establish the correct position while the struts are put in place. Nevertheless, Id still recommending using an extra jig of some kind to keep the model securely held while tackling this stage, as I expect therell inevitably be some adjustment needed to get everything symmetrical and true. Having tripped up on similar subjects in the past, I will double- (and triple-) check the length of the struts and replace their locating pins with brass rod to ensure a solid assembly.
A Few Details
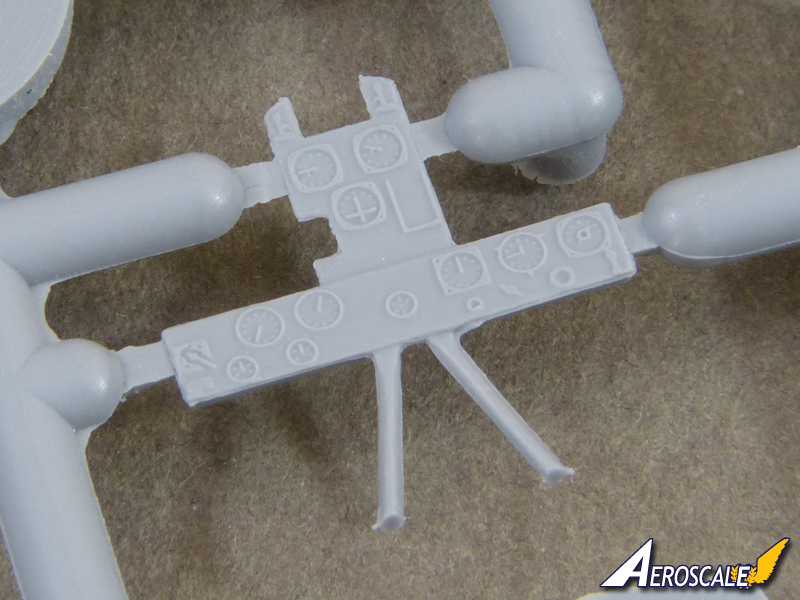
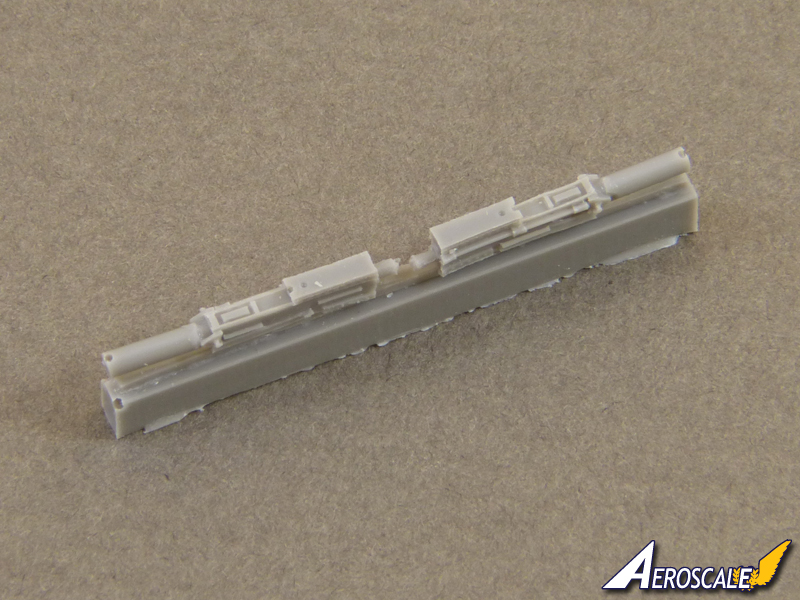
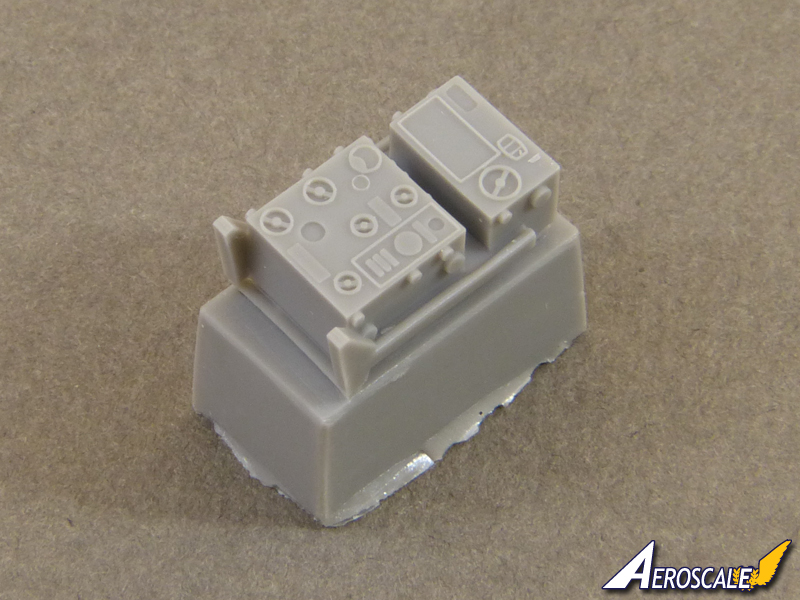
The cockpit is very effectively detailed with a mix of 28 styrene, resin and etched parts, plus an elaborate 8-part etched seat harness. The resin guns and radio equipment look excellent, so its a little disappointing that the instrument panel is styrene and less well detailed. Either resin or etched would have been superior, so its something of a missed opportunity.
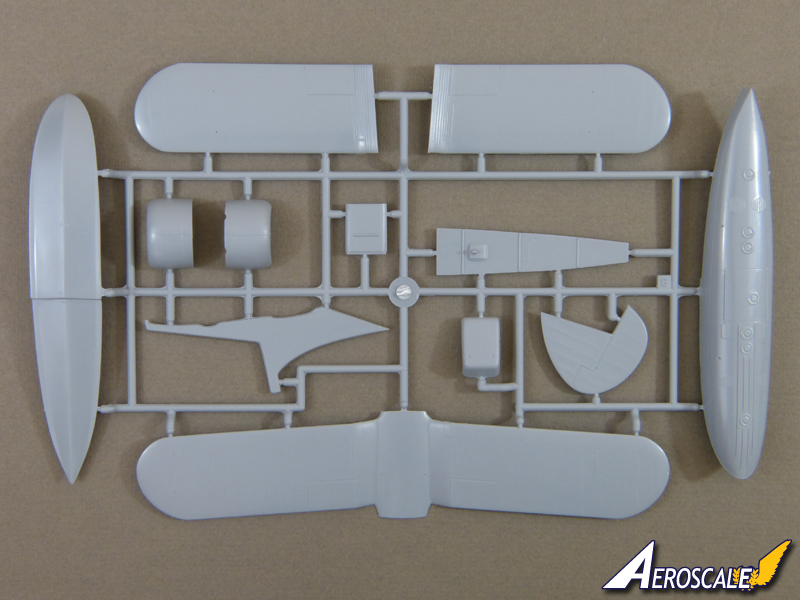
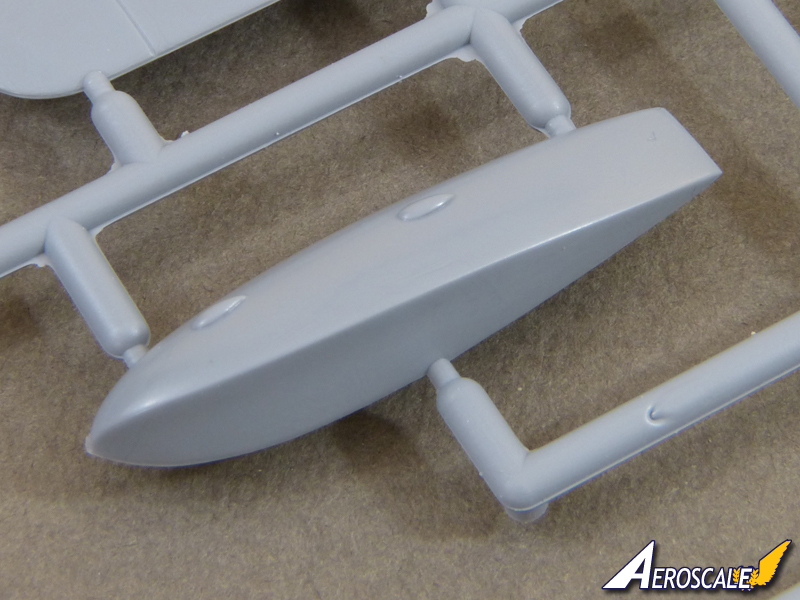
The floats are neatly moulded, and the large central pontoon is enhanced with plenty of etched details. Theres even an etched water-rudder, which will look much more realistic than the clumsy styrene ones usually included in kits.
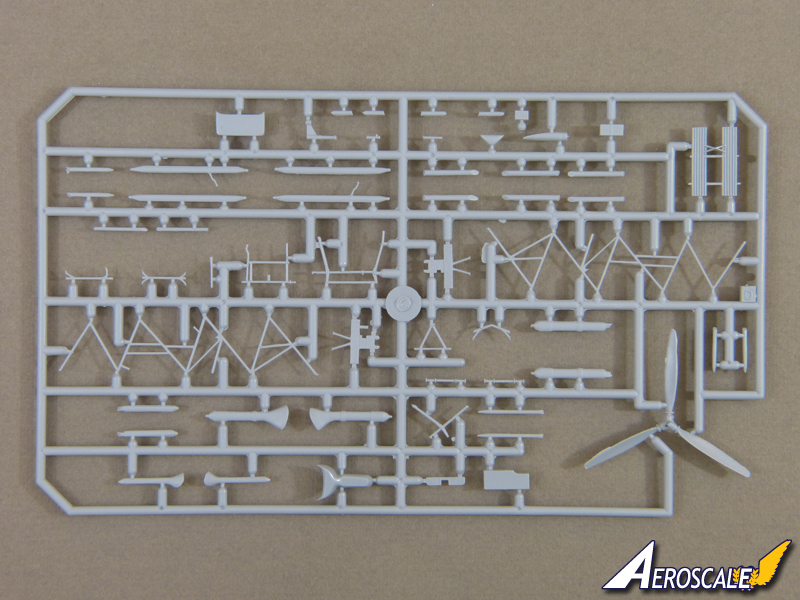
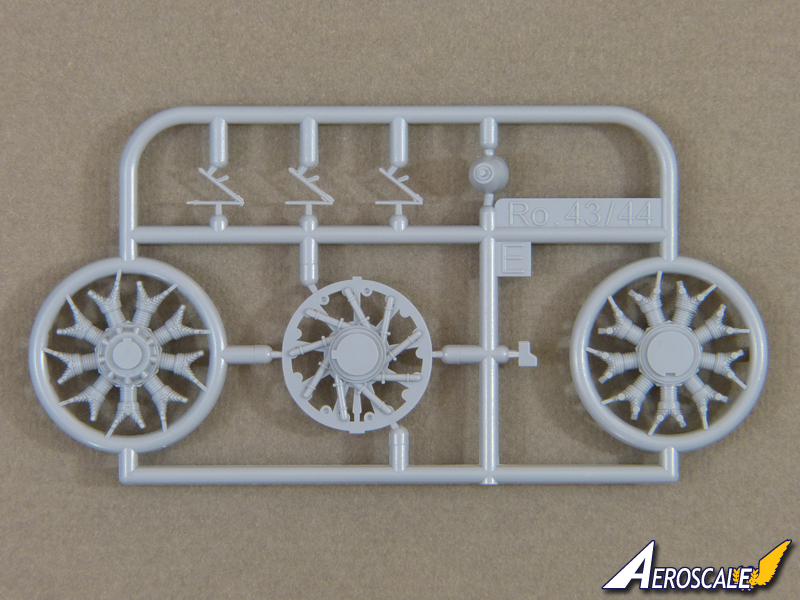
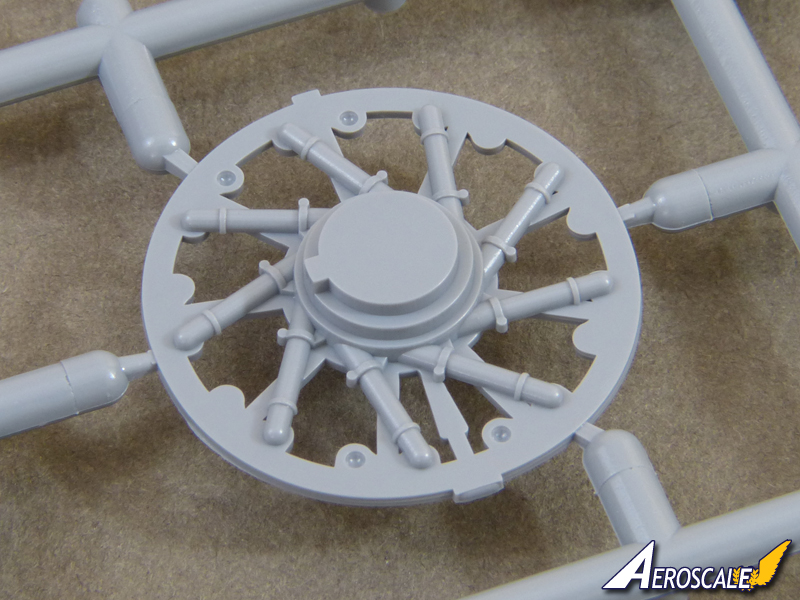
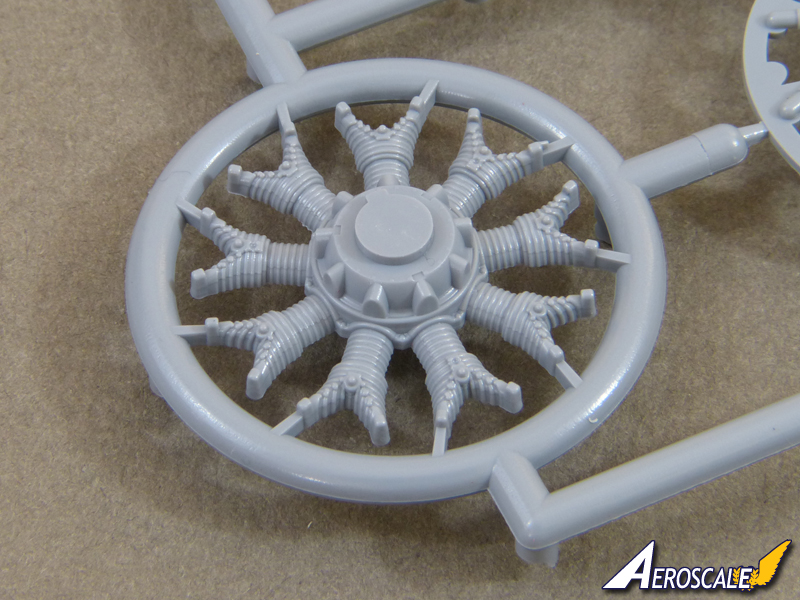
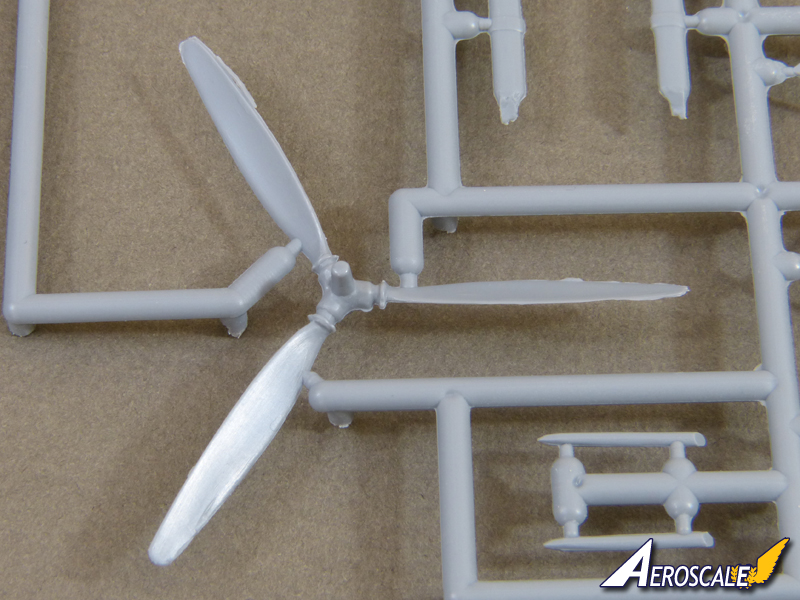
The engine is mostly styrene, but should look excellent as its very crisply moulded. Theres a resin oil cooler and exhausts - the latter featuring hollowed out ends. The propeller is one-piece and is one of the only parts in my kit to show a tad of flash, but it should be quick and simple to clean up, and will look fine.
Instructions & Decals
The assembly guide is nicely printed in colour on glossy stock as a 12-page A-5 booklet. Construction is broken down into 18 logical stages, and the clear diagrams are backed up by a number of info views. Sadly theres no rigging guide, so youre left to figure things out from the excellent boxtop illustration.
Colour matches are provided for Gunze Sangyo paints, and decals are included for a pair of machines:
The decals are beautifully printed by Cartograf to their usual impeccable standard, with perfect registration on the thin, glossy items. To my eyes, though, the colours look a little dark on the sheet (ironically, they look better in the photo here), so Ill mask and spray the rudder and the spectacular red sunburst on the top wing.
Conclusion
With its wonderfully Porco Rosso looks, Special Hobbys Ro.44 should be a very enjoyable build. It may well prove more challenging than its apparent simplicity and low part-count might suggest, so I think beginners could struggle (particularly with aligning the float neatly), so Id say it's most suitable for fairly experienced modellers.
Please remember, when contacting retailers or manufacturers, to mention that you saw their products highlighted here - on AEROSCALE.
SUMMARY
Highs: Neatly designed and moulded, with high quality resin and etched accessories. Custom-printed Cartograf decals.Lows: It'll probably be trickier to build than its apparent simplicity would have you believe. The decal colours may be a tad dark.Verdict: This is a high quality short run kit, but I still wouldn't recommend it to beginners. However, experienced modellers looking for an unusual subject should really enjoy the challenge it offers.
About Rowan Baylis (Merlin) FROM: NO REGIONAL SELECTED, UNITED KINGDOM
I've been modelling for about 40 years, on and off. While I'm happy to build anything, my interests lie primarily in 1/48 scale aircraft. I mostly concentrate on WW2 subjects, although I'm also interested in WW1, Golden Age aviation and the early Jet Age - and have even been known to build the occas...
Hi again
I couldn't resist starting to have a play with this little beauty. I actually did everything in reverse order, starting with the engine while I pondered the best approach to the cockpit.
The engine assembles very neatly, and should look quite decent with the addition of push-rods and wiring. It'll all be tucked away quite deep inside the cowling:
The instructions suggest building the cockpit framework inside each fuselage half and then trusting it all to marry up when you close things up. From experience with other kits of this nature, that seemed a bit optimistic to me, so I've assembled the basic structure first:
Doing it this way, it also looks as though everything will slot in from the bottom, which will make life much easier if it works out that way:
I won't bother installing the nice resin radio gear etc. behind the pilot's seat. It's all hidden, so it'll be a useful addition to the spares box.
More updates when I get a chance.
All the best
Rowan
Hi again
I've continued to have a tinker, spraying the interior with a basic coat of verde anticorrosione:
The instructions show this extending to the fuselage sides, but they are mostly fabric covered, so I masked off the stringers etc. ready for a coat of "linen". I used 0.5mm tape from Jammy Dog - an easy way to ensure all the strips are identical width:
With the masking removed, it does look more interesting - but I hasten to add this is "educated guesswork" and not based on references. Maybe it really was a solid colour, but I've gone by what I've seen on similar airframes:
As you can see, I haven't worried about the ejector pin marks that will be out of sight when the fuselage halves are joined.
I've got the day off work today, so I hope to make a bit more progress.
All the best
Rowan
Rowan,
Like Brain said, a truly odd ball aircraft that would never see the light of day except from a limited run kit maker. While not my cup of tea, as I have dozens and dozens of front line major players yet to model, the kit really looks amazing.
The engine and your detailing really grabbed my eye. Nice job my friend. What did you use for those spark plug wires? Is that stretched sprue?
Looking forward to seeing your next update.
I'm still waiting for Special Hobbies to re-release their 1/48 scale F2A-3 Buffalo, Midway version.
Joel
Cheers Joel
I've always had a soft spot for weird and wonderful, lesser-known aircraft. I hope to have a bit more progress to show soon.
The wiring is knitting elastic. I tried it as an experiment instead of the wire I normally use.
All the best
Rowan
Hi all
After an enforced lay-off through pressure of work, I had one of those wonderful "Dohh!" moments today that make modelling so interesting.
After previous web-searches had failed to pull up any cockpit photos, I idly revisited http://axis.classicwings.com/ and found nice clear colour shots of the Ro 43 two-seater which have made me totally re-think the interior colours! Basically, they are dark grey, not verde anticorrosione - and I can't see why shouldn't apply to my Ro 44 too.
So... despite having got the interior pretty much finished, I'll back-track for a re-paint when time permits.
All the best
Rowan
Hi again
Time to get cracking again. Sadly, the first job for the New Year will be a bit of a chore - having got the cockpit this far, I'll do a repaint in a more accurate grey.
It was tempting to leave it be, but I know it'd only bug me if I did! So, bye-bye verde anticorrosione - even the seat appears to be aluminium in the reference noted above.
All the best
Rowan


Comments